Kitchen3N

Recipes and food fun from Apt 3N

  • About
  • Gallery
  • Recipes

Crepes

January 3, 2017

fullsizeoutput_476b
The first time I had crepes was in Paris in 2006. Kids coming home from school were snacking on this conical things wrapped in paper filled with all kinds of chocolately/fruity goodness. My buddy and I did not hesitate. We got ourselves some crepes filled with nutella and slices of banana and our minds were blown. So delicious and, as I’d soon discover, so easy to make, with such simple ingredients?!

Flash forward to 2017 and I’ve made it 34098734287234 times. I’ve filled them with sautéed mushrooms and swiss cheese to serve to guests. With scrambled eggs and spinach for a savory breakfast. Most often though, with nutella/banana or simply with strawberry jam for my sweet-toothed family. It is the THE most requested breakfast item, surpassing pancakes, waffles, french toast, everything. Which works for me since it’s SO EASY and cooks much faster than all those other options.

fullsizeoutput_476a

I’ve pretty much stuck to Alton Brown’s recipe all these years, tweaking it only by adding whole wheat flour and a pinch of salt (it was the only thing missing). For many years I’ve mixed the batter by hand using a whisk, which was a monumental mistake. You end up with lumps of flour in the batter that only go away after the batter sits for a while, hydrating the lumps away. As soon as I started using a blender, I never looked back.

Enjoy this recipe in any sweet/savory permutation you’d like.

Recipe adapted from Alton Brown.

Ingredients

  • 3/4 cup whole milk
  • 1/2 cup water
  • 1 cup all purpose flour (I use half whole wheat flour)
  • a pinch salt
  • 2 eggs
  • 3 tbsp butter, melted

Directions

  1. Melt butter in a small saucepan or in the non-stick skillet. Set aside.
  2. In a blender, add first five ingredients and blend on low speed, gradually increasing the speed to high. Blend for about 20 seconds. Add melted butter and blend once more for 10 seconds.
  3. Heat a 9 or 10in non stick skillet to medium heat. Pour 1/3 cup of the batter into a liquid measuring cup. Lift the pan up slightly above the flame and pour the batter onto the pan, tilting the pan around gently so the batter swirls and spreads evenly across the surface. Return to flame and cook for about a minute or until the sides start to loosen from the pan. Flip and cook for 30 seconds more. Remove from pan and set on plate. Continue with remaining batter, stacking the crepes on a plate.
  4. Serve with nutella, jam, powdered sugar, ,fruit and/or whipped cream.

Leave a Comment · Labels: American/Mediterranean, Breakfast, Carb, Dessert, Recipes Tagged: breakfast, Crepes, easy, french

Royal Icing

December 29, 2016

fullsizeoutput_4712
I just started decorating with royal icing after all these years. Why have I been torturing myself all these years with confectioner’s sugar/milk concoctions that thin too easily, and pipe too painfully?!
fullsizeoutput_4718
Since royal icing is made with egg whites (I use meringue powder so I don’t have to deal with leftover egg yolks), it has a lot of structure from the protein. Pipes wonderfully for borders and outlines and thins easily for flooding.
img_8357
I have been a fan of Sana Sodawalla of SugarBase_ for a while now. Her gorgeous marbled cookies, whimsical cakes, and informative videos are something to aspire to. Since I’ve started baking and cake decorating more, I’ve been creating more content tailored to Instagram. I like how the platforms caters to creatives, offering a very visual space to share our content, with lots of real estate for pictures, and just enough for explanatory text.
fullsizeoutput_4713
I’ve created these cookies after watching her technique on marbling sugar cookies. I got the idea for gold splatter after taking a wonderful mommy and me art class I took with a talented local artist on paper collages.
fullsizeoutput_4711
I don’t know if I’ve done justice to Sana’s beautiful cookies, but I hope you try your own version at home. My go to recipe for royal frosting below.

Recipe courtesy of Toba Garrett of ICE.

Ingredients

  • 1/4 cup meringue powder
  • 1/2 cup water
  • 1 pound confectioner’s sugar, sifted
  • 1/2 tsp lemon juice or extract*

Directions

  1. In the bowl of a stand mixer, or in a large bowl using a hand held electric mixer, use the paddle attachment to combine meringue powder and water at low speed until combined. Increase speed to medium and beat until soft peaks form, about 3 minutes.
  2. Reduce the speed to low and start to add the sugar, one cup at a time, until all of the sugar has been added. Turn the mixer off, scrape down the paddle and sides of the bowl and turn mixer back on to a low speed. Add the lemon juice/extract and increase speed to medium high. Beat for 5 to 7 minutes until you reached the desired level of stiffness. Keep well covered until ready to use. Can be piped, or thinned with small of amounts of water at a time to use for flooding. Will keep for 1 day at room temperature, or 3 days, covered in the refrigerator.

*I prefer lemon extract since the lemon flavor is a lot more pronounced.

Leave a Comment · Labels: American/Mediterranean, Carb, Dessert, Food Fun, Uncategorized Tagged: cookie decorating, cookies, decorating, frosting, icing, royal icing

Cutout Sugar Cookies

December 9, 2016

img_3224
I’ve learned a lot of things the hard way. Like how filling in eyebrows is not for everyone/every situation. Or that low-rise jeans are super impractical for pretty much every situation, especially picking up your backpack from the ground. Or that frosting should not go on a cake you JUST TOOK OUT OF THE OVEN.
fullsizeoutput_43bf
This extends to cut out sugar cookies. So many ill formed, mutilated cookies from the process of transferring from the rolling out surface to the cookie sheet. WHY OH WHY didn’t someone tell me earlier to just roll them out on a parchment paper and then just remove the scraps from around the shapes?! Would’ve saved so much grief.

So even if you have a great cutout sugar cookie recipe. Even if you already knew to chill the dough before rolling it out. if you take away nothing else from this post, I hope this tip will save you some heartache during this holiday cookie baking season. Happy holidays!!

Recipe from Better Homes & Garden 2010 special issue.

Ingredients

  • 3/4 cup butter at room temperature (that’s 1 1/2 sticks)
  • 1 cup granulated sguar
  • 1 tsp baking powder
  • 1/4 tsp salt
  • 2 eggs
  • 1 tsp vanilla
  • 2 1/2 cups all-purpose flour

Directions

  1. In the bowl of your stand mixer, or in a large bowl using a handheld electric mixer, beat butter on medium speed for 30 seconds. Reduce speed and add the sugar, baking powder and salt. When it’s all combined, turn off the mixer, scrape the sides and bottom of the bowl, and turn the mixer on again, this time to low. Add the eggs, one at a time, then the vanilla. Gradually add the flour, stopping the mixer every once in a while to scrape down the sides.
  2. Once the dough has come together, divide in two, place each half on some plastic wrap on a flat surface. Wrap well with the plastic wrap and flatten into disks. Refrigerate for at least 1 hour, preferably 4 hours to let the gluten relax (this makes the cookies tender).
  3. When ready to bake the cookies, preheat the oven to 350 degree F. Roll out parchment paper to the size of your baking sheet. Lightly flour the surface, your hands, and the rolling pin. Roll out the cookie dough from the center, outwards, not back and forth like bread dough. Roll until the dough is 1/4 in thick. Then using your favorite cutters, cut out shapes about 1 in apart. Use a small offset spatula or butterknife to remove the scraps of dough. Save for next batch.
  4. Bake in preheated oven for 7 to 9 minutes. The bottoms should only be very lightly browned. Let cool on sheet for a few minutes before transferring to wire rack to cool completely.

Leave a Comment · Labels: American/Mediterranean, Dessert, Food Fun, Recipes Tagged: cookie decorating, cookies, cutout cookies, holidays, icing, sugar cookies

Umami Vegetable Soup

December 1, 2016

fullsizeoutput_4378

If you follow my Snap or Instastories, you saw me make pull this soup together last night. I’ve been looking to finish up all the vegetables and herbs that I bought as a part of my Thanksgiving groceries, herbs that I don’t use very much apart from that day (sage, thyme, rosemary). In the version I made last night, I threw in the last of my turkey leftovers, but it didn’t add much to the soup, so the version here is without meat, and it’s delicious!

There is So. Much. Umami aka The 5th Flavor. From the rehydrated porcini mushroom stock, to the mushrooms, to the soy sauce. Hence the name. I didn’t want to just call it mushroom soup! There’s so much more! And then tang from the Ume Plum Vinegar – my FAVORITE ingredient these days to add flavor to pretty much anything. It just gives a nice fresh zip to foods, without overpowering like most vinegars.

fullsizeoutput_4379

My vegetables were on the smaller side: the carrots, celery, even the size of the mushroom package. So 8 cups liquid in total worked for me. Currently the soup can feed 4 adults. If you want to stretch the recipe to feed 6 comfortably, use larger carrots, celery and onion. Add another potato and 2 cups liquid – either stock or water.

Can easily be made vegan by using all oil, no butter, and water instead of chicken or turkey stock.

Ingredients

  • 4 average dried porcini mushrooms
  • 4 cups boiling water
  • 2 tbsp olive oil
  • 2 tbsp butter
  • 2 carrots, diced small
  • 2 celery stalks, diced small
  • 1 small onion, diced small
  • 1 clove garlic, finely minced
  • 8 oz or 1 standard package cremini (baby bella) mushrooms, thinly sliced
  • 4 sprigs fresh thyme
  • 1 bay leaf
  • 1 tsp soy sauce
  • salt and pepper
  • 3 tsp ume plum vinegar
  • 1 large russet potato, cut into cubes
  • 4 cups chicken/turkey stock or water
  • 1/4 cup finely chopped parsley

Directions

  1. In a large glass measuring glass or bowl, place dried porcini mushrooms. Add hot water and allow to hydrate until ready for use.
  2. In a large stock pot, melt butter and oil over medium high heat. Add onion, celery and carrot. Cook 4-5 minutes until soft. Add mushrooms and garlic. Cook together for another 2-3 minutes. Tie the thyme and bay leaf together with kitchen string. Add to the vegetables. Add salt and pepper to taste (I added about 1 tsp salt and half tsp pepper) and stir. Then place a wire mesh sieve over the pot and add the porcini stock, straining out the rehydrated porcinis (their flavor can be strong). Also add the vinegar and stock/water. Stir to combine.
  3. Cover, raise the heat to bring to a boil, then reduce heat so it simmers for 15 minutes. When the potatoes have cooked through the soup is done. Add parsley, adjust seasoning, and serve.

Leave a Comment · Labels: American/Mediterranean, Recipes, Side, Veg Tagged: clean eating, eat clean, healthy, mushroom, recipe, soup, umami, vegan, vegetarian, winter

Thanksgiving Recipe Roundup

November 21, 2016

I wrote up so many drafts of my post election reflections but couldn’t get myself to publish any of them. I’ve just been obsessively consuming news and commentary from my Facebook feed, calling my local representatives for the first time, trying out this thing called civic engagement after getting over all the stages of grief. So many of my peers and associates are disillusioned with our country men. Could not perceive so many would vote for someone with such horrible character. Fearful of the spike in hate crimes. Frustrated that a majority vote in the Popular Vote is not enough to win office.

My father in law put it succinctly this weekend: leaders reflect the societal health of a nation. Until we address the economic, xenophobic, racist and sexist challenges embedded in our culture, we have little hope for a more inclusive, progressive government.

Despite our losses, we have a holiday coming up. And while contemplating the origins is depressing, the opportunity to gather with loved ones is something I cherish. Here’s a roundup of the dishes I plan to include in the spread on Thursday. It’s always a combination of Bengali and American dishes so that there’s a little something for everyone:

Butternut Squash Soup

I adapt this recipe by adding a cup of half and half, and some crumbled sage leaves fried in extra virgin olive oil.

img_1071

Roasted Brussel Sprouts with Pomegranate

img_7559

Mashed Potatoes Two Ways

One with chili and mustard, the other with butter and half and half
IMG_4466

Khichuri or Rice and Mung Bean Pilaf

img_0942-300x200

Cornbread

my-favorite-cornbread-recipe_

Photo courtesy of Sally’s Baking Addiction

Kale Caesar

recipe-lab-kale-caesar-superjumbo
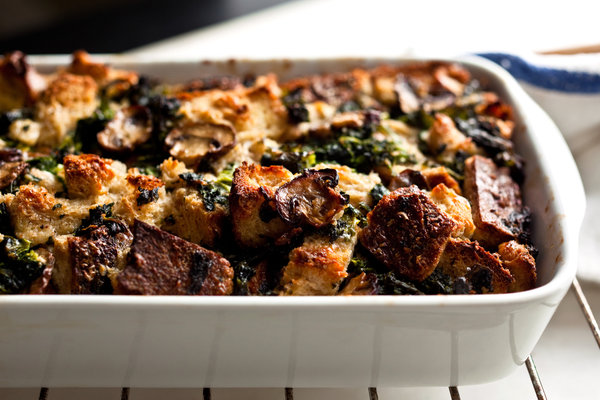
Photo courtesy of Jason Lee and Devon Knight, NY Times

Cranberry Relish

IMG_1740

Swiss Chard and Mushroom Strata or Bread Pudding

An adaptation of the NY Times recipe for Kale & Mushroom Bread Pudding
02recipehealth-articlelarge-v2-1

Two Organic Roasted Turkeys

One with citrus and herbs, one with spices. I will try a dry brine this year and roast at a lower temperature (350) for 2-2 1/2 hours or as long as necessary

IMG_3802

Cranberry Apple Cake

Ina Garten's Easy Cranberry and Apple Cake for Easy Desserts as seen on Food Network's Barefoot Contessa 
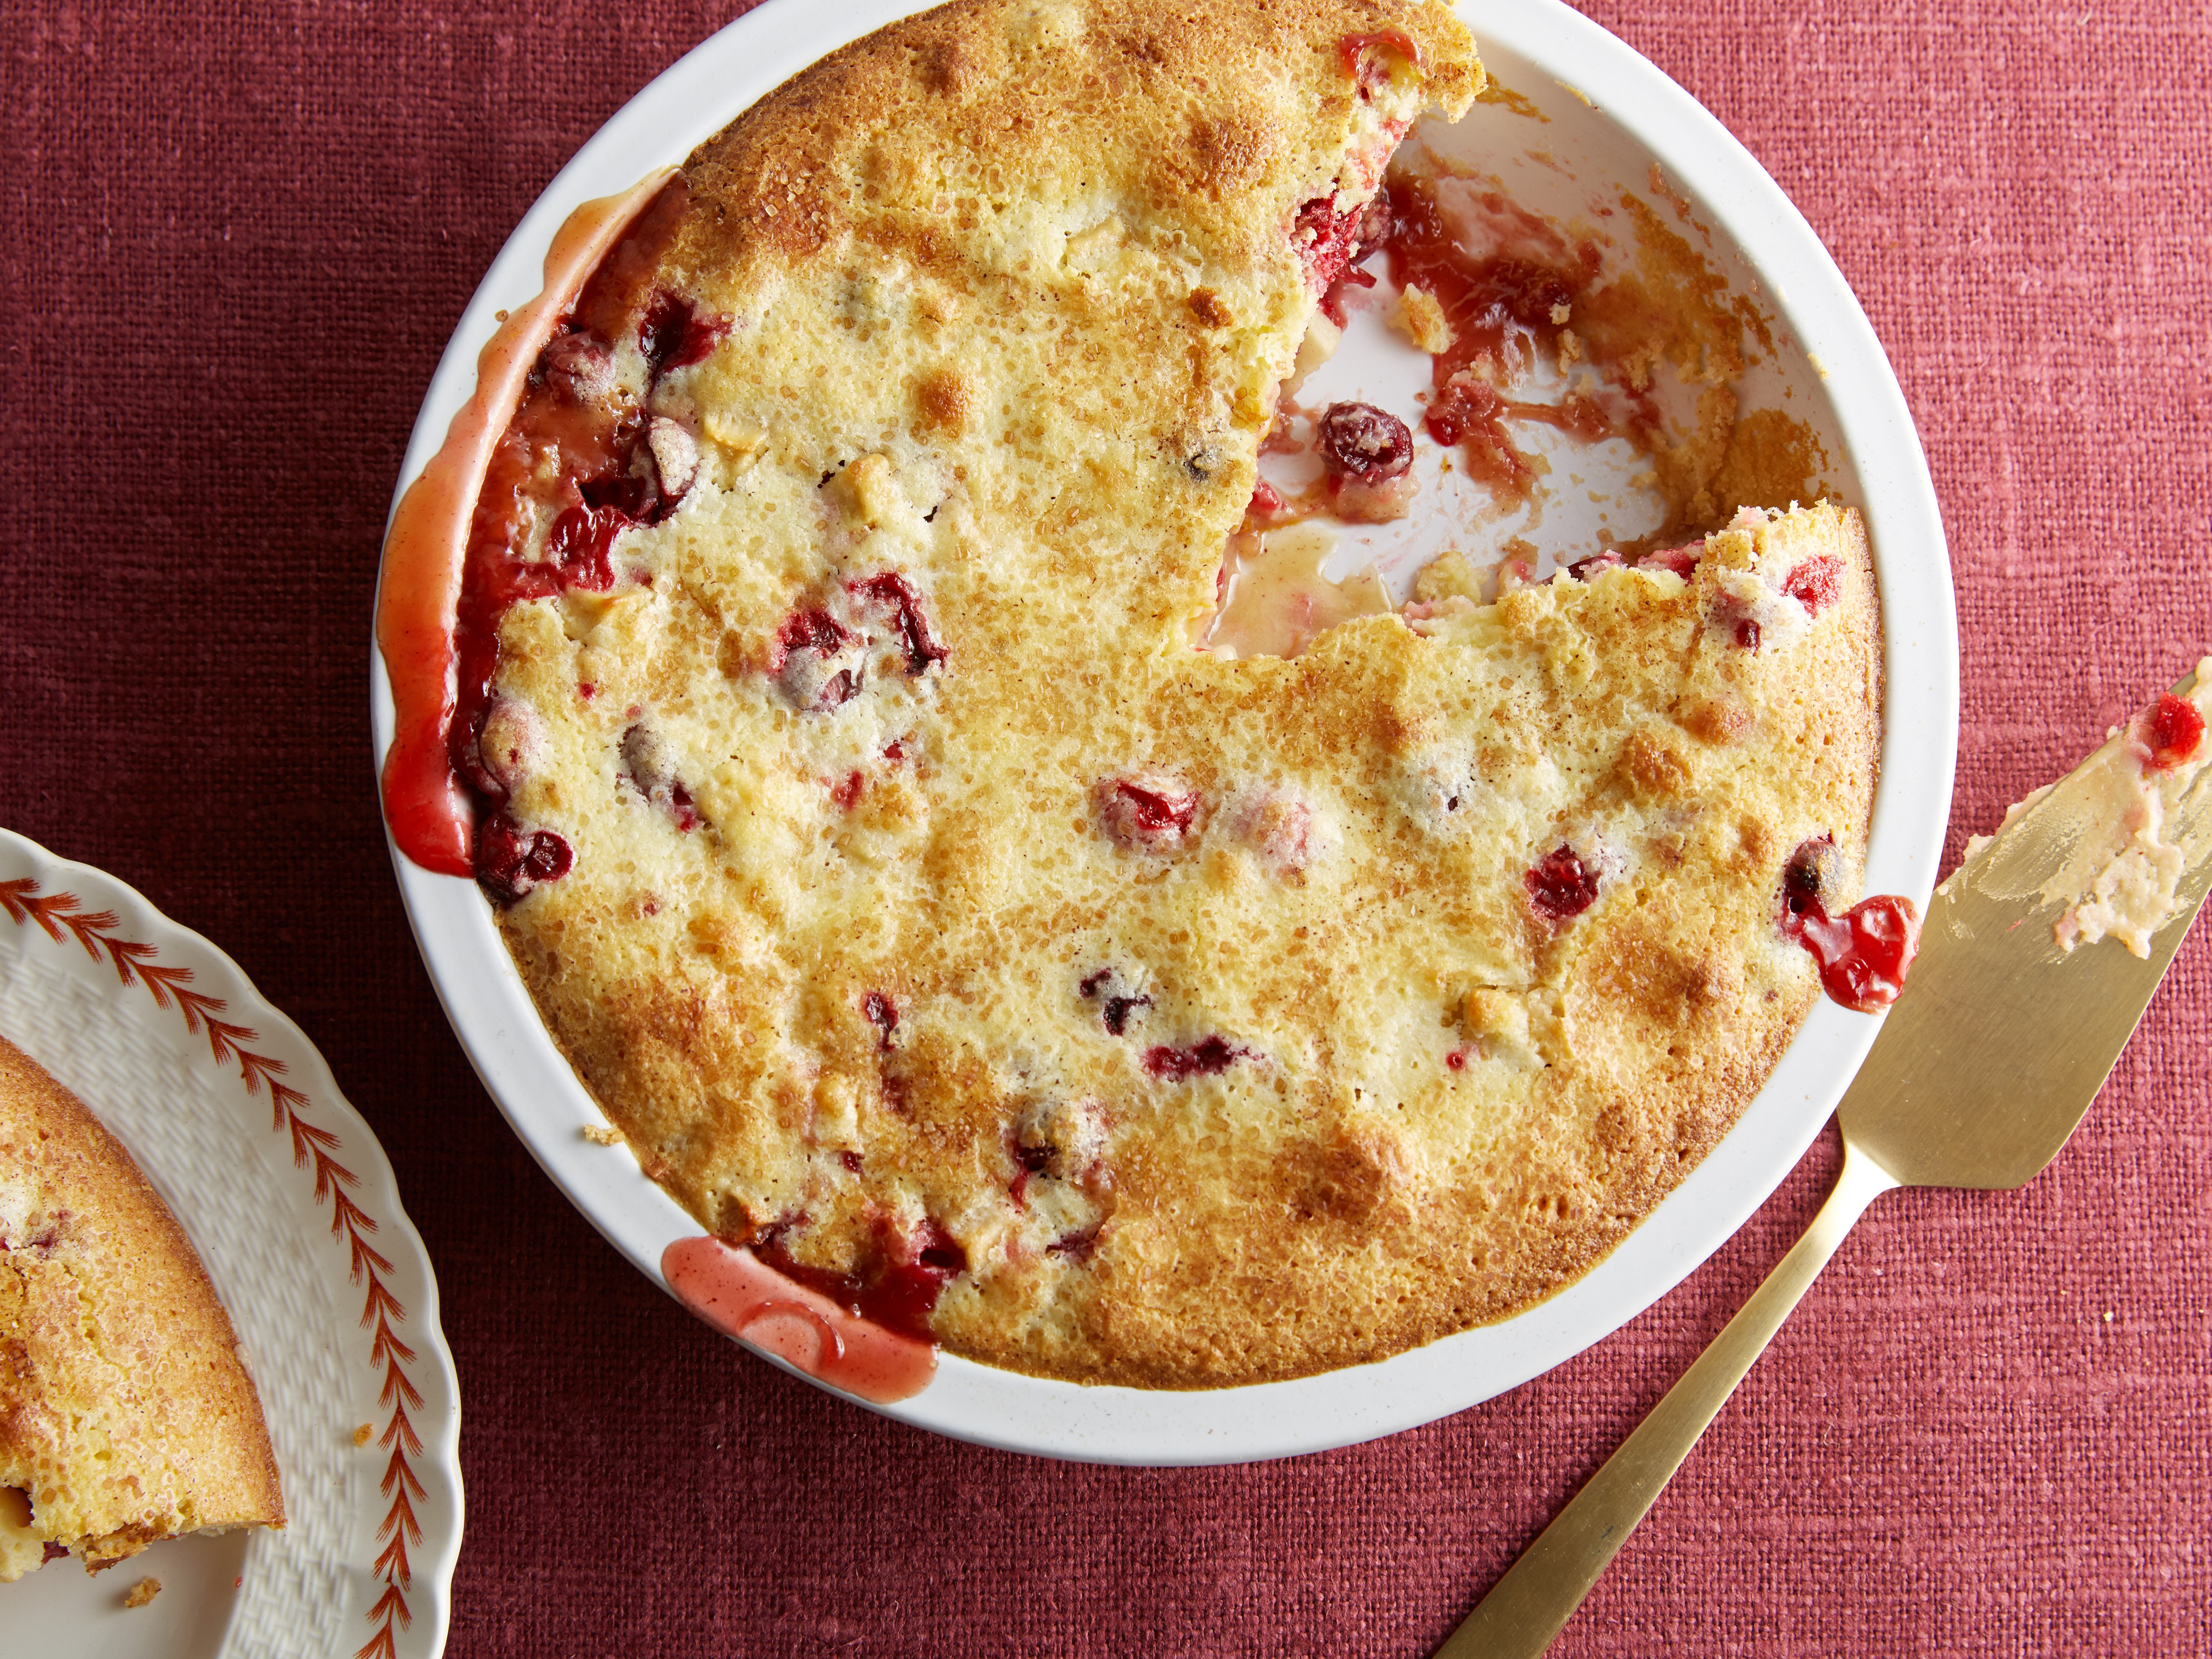
Ina Garten’s Easy Cranberry and Apple Cake for Easy Desserts as seen on Food Network’s Barefoot Contessa.

Sweet Potato Bars

landscape-1476998261-shot-1-189

Photo courtesy of Ethan Calabrese.

Pumpkin Pie – also courtesy of my sweet sister in law

libbys-original-pumpkin-pie-nestle-professional-food-service-recipe-540x400

· Labels: American/Mediterranean, Food Fun

Cinnamon Honey Skillet Cornbread

November 2, 2016

img_7608

What’s the best gift you’ve ever received? Was it jewelry? A nice bag? Maybe those shoes you’ve been eyeing? For me, it was my engagement ring, hands down. BUT apart from the that, the best gift I continue to receive is from my mother. Every few months she gives me a jar of homemade ginger/garlic paste that is quintessential in Bengali cuisine. Sure, you can buy the jarred stuff from the desi grocery, but it’s just not the same. It’s fresh, preservative free, and it’s made with LOVE. Such a life saver on busy weeknights to not have to peel/chop fresh ginger and garlic.

This time though, she outdid herself. She brought me some homemade GHEE. Ghee, or clarified butter, is made exactly how the French make it. Warm up butter in a pot or saucepan until melted. Then let sit for an hour or two, until the milk solids fall to the bottom, while the fat comes to the top. When she brought it, I opened it up and OH MY NUTTYNESS it smelled good.

img_7629

So, when I found the recipe for this cornbread in my Thanksgiving edition of Bon Appetit, I knew I wanted to sub the lard with ghee. It was perfect because I’ve had this coarse ground corn meal in my pantry for months, neglecting it because it was too coarse for muffins, but little did I know, perfect for this skillet cornbread. I added cinnamon and honey because I loved the cornbread croutons in Trader Joe’s Fall Harvest salad and I’m pretty sure they have a hint of both ingredients. I’m fairly certain this will be part of our Thanksgiving spread this year as cornnbread dressing. Mmmm.

Recipe adapted from Bon Appetit.

Ingredients

  • 2 cups coarse ground cornmeal
  • 1 tsp kosher salt
  • 1/2 tsp baking powder
  • 1/2 tsp baking soda
  • 1/2 tsp cinnamon
  • 1 large egg
  • 1 1/2 cups buttermilk
  • 2 tbsp honey
  • 1 tbsp lard, veg oil or ghee
  • 1 stick or 1/2 cup butter room temperature
  • Fine sea salt for sprinkling

Directions

1. Place a rack in the middle of your oven and place a 9 to 10in cast iron skillet to preheat.
2. In a large bowl, combined corn meal, salt, baking powder, baking soda and cinnamon. In a separate bowl or mixing cup, combine buttermilk, egg and honey. Slowly add to dry ingredients, stirring with a wooden spoon to incorporate.
3. Wearing oven mitts, carefully remove the skillet from the oven. Melt the ghee/lard/oil and swirl around the skillet. Pour the batter into prepared pan and bake in the preheated oven for 15-20 minutes.
4. After removing from oven, add butter to the top of cornbread an allow to melt all over the top. Serve with an extra sprinkling of sea salt.

Leave a Comment · Labels: American/Mediterranean, Breakfast, Carb, Dinner Tagged: comfort food, cornbread, dressing, fall, soul food, thanksgiving

Roasted Brussel Sprouts with Pomegranate

October 31, 2016

img_7559

The first time my husband had brussel sprouts, he boiled them, and ate them without any seasoning. This demonstrates the extent of his culinary abilities.

Since then, he’s swore he would never eat them.

Except one Thanksgiving when I roasted them til they were crisp outside, tender inside, and had a salty bite. That year, the brussel sprouts were cleaned up!! There wasn’t a single one left. As with most foods, proper preparation is key. Add some pomegranate arils and reduced pomegranate juice to the mix, and you get a perfect balance of salty/acidic/crispy/creamy.

I love the NY Times recipe, except I found cooking them at such a high temperature burned my tiny brussel sprouts! It may be because I roasted them on a rack placed on the lower third of the oven (I find that level works best for my cakes). I suggest cooking them at 375 degrees, then checking them at 30 minutes. If they look like they could use a bit more char, leave them in for 5 min longer.

img_7578

These taste best when they have a salty bite, but if you’re watching sodium levels, start at 1/2 teaspoon salt and increase to taste.

Recipe adapted from NYT cooking.

Ingredients

  • 1 lb brussel sprouts
  • 1/2 to 3/4 tsp salt
  • 2-3 tbsp extra virgin olive oil
  • 1 cup pomegranate juice
  • 1/3 cup granulated sugar
  • 3 tbsp pomegranate arils

Directions

1. Preheat oven to 375 degrees F. Wash and dry brussel sprouts well. With a small paring knife, trim off the bottom of each brussel sprout and slice them in half. Arrange them all on a large sheet pan lined with parchment paper and dress with the salt and oil. Mix to combine and spread out on sheet so they don’t steam, rather roast in the dry heat of the oven. Bake for 30-35 minutes.
2. In a small to medium sauce pan combined pomegranate juice with sugar. Bring to a boil over medium heat and turn the heat down to low. Simmer for about 25 minutes or until you have 1/4 cup of liquid left. Keep an eye as it might burn in the last few minutes.
3. Transfer roasted brussel sprouts to serving tray and add the pomegranate arils and drizzle some of the pomegranate reduction over the top. Taste for seasoning and adjust as necessary.

Leave a Comment · Labels: American/Mediterranean, Side, Veg Tagged: arils, brussel sprouts, eat your greens, eating clean, healthy, pomegranate, reduction, side dish, thanksgiving, vegetables, vegetarian

Roasted Acorn Squash with Quinoa Pilaf

October 24, 2016

img_7375

When was the last time you embarrassed yourself? Like reeally really embarrassed yourself? Well this recipe is from one such incident.

Let me take it back a few steps – have you ever been to a South Asian wedding? There are kids running around, loud aunties and uncles in technicolor outfits fighting over placement on the buffet line and general disorganization/mayhem.

Now – have you ever been to an American wedding? A Northeastern, Catholic wedding? Civilized, subdued, tasteful. Bride is in white. The events more or less stick to schedule. Not so many kids running around.

As a Bengali, this cultural difference just went over my head when I was invited to a friend’s wedding a couple of years ago. Not only did we show up to the wedding with uninvited kids in tow, we entered the church after the bride made her entrance. Afterwards, at the reception, the mother of the bride said to me, “So, you brought the kids” and then it dawned on me.

Oh. Shit. There weren’t chairs for them, so they sat on our laps until the venue could manage some. The reception was way past their bedtime so they were pretty much on meltdown mode the entire time. By the time we wrapped up dinner at 9 they were SO cranky we had to run out of there before my favorite part of any wedding: the dancing!

img_7356

Lesson learned. My husband and I attended another wedding this past summer, happy to report gaffe free.

What does this story have to do with roasted acorn squash with quinoa pilaf? Just that we had it for dinner at said Northeastern wedding reception and it was surprisingly so good, I’m amazed it took me this long to recreate it.

The recipe for the quinoa pilaf is an adaptation of the America’s Test Kitchen version. It’s tasty on its own with the addition of a tablespoon of lemon juice.

Ingredients

For the roasted acorn squash

1 acorn squash, scrubbed and rinsed clean
1/2 tsp salt
1 tsp dark brown sugar
1/8 tsp nutmeg
1/4 tsp cinnamon
1/8 to 1/4 ground black pepper
olive oil

For the quinoa pilaf

1 cup washed quinoa
1 small onion
2 tbsp butter
3/4 tsp salt
1 3/4 cup water
3 tbsp fresh herbs
1 oz goat cheese (optional)

Directions

1. For the acorn squash: Preheat oven to 400 degrees Fahrenheit. Cut the acorn squash down the middle, scoop out the seeds and fibrous parts with a spoon and discard. Place both halves on a baking sheet cut side up. Season with salt and spices then drizzle with oil. Rub the oil and seasonings all over the flesh. Bake in preheated oven for about 1 hour.
2. For the quinoa pilaf: In a medium saucepan, toast the quinoa over medium high heat, stirring frequently until quinoa is light brown and makes a popping noise. This will take about 5 minutes. Transfer to a bowl and set aside.
3. In the same saucepan, melt butter over medium low heat. Add onion and salt and cook until onions soften, about 5 minutes. Add the quinoa, increase heat to high and add water. Allow to come to a boil, then cover, reduce heat to low and cook for 15 minutes. After 15 minutes, uncover and fluff with a fork. Add herbs and mix together. Put the lid back and allow to continue to steam.
4. To serve, place one of the acorn squash halves on a plate, spoon some quinoa pilaf into the cavity, and top with goat cheese if desired.

Leave a Comment · Labels: American/Mediterranean, Dinner, Veg Tagged: acorn squash, autumn, clean eating, eat clean, fall, healthy eating, pilaf, quinoa, roast, seasonal cooking, spiced squash, vegetarian

American Buttercream vs. Swiss Meringue Buttercream

October 19, 2016

American Buttercream: butter, powdered sugar, milk, flavoring
Swiss Meringue Buttercream: egg whites, granulated sugar, butter, flavoring
ab-vs-smb

When I first start baking and cake decorating seriously, there were so many, “I’d never do that.”

  • I’d never compromise on taste. That means no swiss meringue buttercream. No fondant.
  • I’d never waste time on tacky fondant figurines (somewhat holds – I’ll make figurines but only tasteful ones).
  • I’d never make a bad cake (I once made a chocolate cake and forgot to add the sugar).

But I’ve come around on a lot of things. Example: expanding my frosting repertoire to include Swiss Meringue Buttercream. Hailed for being the King of Stability and frowned upon by many for lack of taste. It is not as sweet as the American Buttercream (AB) we are used to, and gets most of its structure from whipped egg whites rather than beaten butter/sugar, so that it’s airy rather than creamy. But man, it is a cake decorator’s dream. Just look at the picture above: the AB is so much more porous. Honestly, when I first thought up the idea for this post, I thought the difference would be much more pronounced. But I guess after frosting and smoothing dozens of cakes, I got the hang of it with both types!

img_7325

Left: American Buttercream Right: Swiss Meringue Buttercream

To make Swiss Meringue Buttercream, you start with heating egg whites and sugar in a double boiler until the sugar dissolves. You then remove it from the heat and whip it in your stand mixer with the whisk attachment until the mixture cools to room temperature and has the consistency of a soft-peak meringue. You then add the butter, a little bit at a time, until it looks like a curdled slosh. Keep beating until it congeals (see picture). The result is a super smooth buttercream that spreads like a dream. And because it has the protein from the egg whites as a base, it won’t just melt in a warm room like butter would. As long as it’s done right. And boy have I done it wrong:

  • I once overheated the sugar/egg white mixture to the point that after 45 minutes of beating it in my KitchenAid it was not cooling it down. During that time my meringue doubled in volume, only to deflate. I still went ahead and added the butter. When after another 45 minutes it wasn’t coming together, I stuck an ice pack to the side of the bowl. It worked – somewhat. The buttercream came together, but it didn’t have the structural characteristics of a proper SMB. The rosettes that I piped with it melted on the way to the venue. It was 100 degrees. My fridge broke that week. A lot of things went wrong that week. =(
  • Another time I added the butter too soon and it wouldn’t come together no matter what I tried.
  • Another time the butter I added was too soft.

You name it, I messed it up in that way.

img_7328

To correct for the less than desired sweetness, I like to add a syrup of some sort at the very end:

  • For caramel SMB: about half a cup of homemade caramel sauce
  • For strawberry SMB: about one cup strawberry syrup or to taste
  • For vanilla SMB: 2-4 tbsp corn syrup (to taste) and 1 tbsp vanilla extract
  • For chocolate SMB: 1 lb semisweet chocolate, melted and cooled slightly

This is the base recipe (from Smitten Kitchen):

Ingredients

  • 4 egg whites
  • 1 cup granulated sugar
  • 26 tbsp unsalted butter, softened to room temp

Directions

  1. In a small saucepan, bring 1 inch of water to simmer over medium low heat. In the bowl of your stand mixer*, combine egg whites with sugar. Whisk until combined. Place over the sauce pan and stir until sugar dissolves (you can feel it with your fingers – mixture should feel smooth).
  2. Remove from heat and fit into stand mixer. With the whisk attachment, beat on medium speed for a few minutes, until mixture cools to room temperature AND doubles in volume. Then add the butter, 1 tbsp at a time. Allow the mixture to run at medium/high speed past the curdling point to the congealing stage. Once it comes together and resembles billowy clouds (your mixer will start to make a different sound), add flavoring. Continue to beat until all the flavoring is incorporated.

*You can make this with a hand-held mixer. Just be prepared for your arm to get tired from holding it up for 10-15 minutes =)

Leave a Comment · Labels: American/Mediterranean, Dessert, Food Fun, Recipes

Mango Mousse (Eggless)

June 30, 2016

Summa summa summatiiiiiime. I’m keeping the oven off for this one. I’m keeping my fruit bowl stocked up on glorious mangoes. And I’m eating them whole, skin off, just me and the pulp, with the juices running down my elbows. When I’m not eating them whole, I’m whipping up the most divine desserts with them, from ice cream to pudding to this luscious mousse.

Of course I couldn’t leave well enough alone. Yes, I could’ve blended mango pulp with sugar and folded it into whipped cream. But why do that when adding a bump of flavor is so easy and impactful? I add the juice and zest of half a lime and it works so well to cut the sweetness of the mango and the richness of the cream. It’s a balancing act. And I’ve been obsessed with limes lately. I find the aroma absolutely intoxicating. From virgin mojitos to salad dressings – I’ve been putting them in everything. I also add a splash of vanilla to make it extra special – adding a floral dimension to a fruity dessert.

IMG_0074

There are two schools of thought when it comes to mousse. One includes raw whipped eggs whites. The other is a more simple one, made with just whipped cream. While this was a delicious, easy and no fuss method of making mango mousse, my curiosity will not be satisfied until I try a version with the egg whites. Though I’m not too crazy about consuming raw eggs, for the sake of recipe testing, I will! So keep an eye out for a future post with the egg white inclusive version!

IMG_0072

Ingredients

  • 2 1/2 cups heavy cream
  • 2 cups mango pulp (from about 3 large mangos)
  • 1/2 cup sugar plus 2 tbsp
  • juice and zest of half a lime plus more for garnish
  • 1/2 tsp pure vanilla extract

Directions

  1. If possible, freeze the bowl and whisk attachment of your stand mixer (or bowl/beaters) for about 10 minutes. Cream whips up much faster when cooler. When ready to whip, take out bowl and whisk/beaters from fridge, pour cream into bowl and add 2 tbsp sugar. Start whipping at low speed. As the cream gets thicker, gradually increase speed. When it reaches soft peaks (when it looks billowy and the whisk leaves lines in the cream), remove about 1 cup of the cream for the topping. Keep mixing the rest until you reach stiff peaks. Add in the vanilla and give it a final stir by hand. Set aside.
  2. In a food processor or high power blender, blend the mango puree, 1/2 cup sugar, lime juice and zest until well combined.
  3. Gradually add to the whipped cream, 1/3 of the mango puree at a time, folding into the whipped cream gently. When completely incorporated, pour the mousse into a trifle bowl, or similar bowl with high sides. Top with the whipped cream you set aside earlier. Garnish with extra lime zest.

Leave a Comment · Labels: American/Mediterranean, Bengali, Dessert, Recipes

  • Newer Entries
  • 1
  • 2
  • 3
  • 4
  • 5
  • …
  • 11
  • Previous Entries
American, Bangladeshi. Savory, sweet. I don't discriminate and neither should you.

Most recently…

Load More...
Follow on Instagram

Social

Subscribe to Blog via Email

Enter your email address to subscribe to this blog and receive notifications of new posts by email.

Tags

appetizer beef bengali breakfast butter cake caramel chicken chocolate chocolate chips cilantro clean eating coconut comfort food cookies dessert dinner entertaining fall fruit ganache gluten free halal healthy homemade honest chops honest creations iftar italian pasta pastry pistachio quick and easy dinner ramadan recipe side side dish south asian spinach vegan vegetables vegetarian weeknight dinner weeknight meal whipped cream

Theme by 17th Avenue · Powered by WordPress & Genesis