Kitchen3N

Recipes and food fun from Apt 3N

  • About
  • Gallery
  • Recipes

Almond Lace Cookies with Earl Grey Ganache

January 5, 2016

IMG_5460Oh no – I was supposed to kick off the new year with a healthy-ish recipe, right?? Gah – you’ll have to forgive me. Next post, I promise, something green. In the meantime, enjoy Kitchen3N 3.0! Now with creepy side picture so you can imagine I’m watching you as your read (and salivate at) my material. IMG_5465
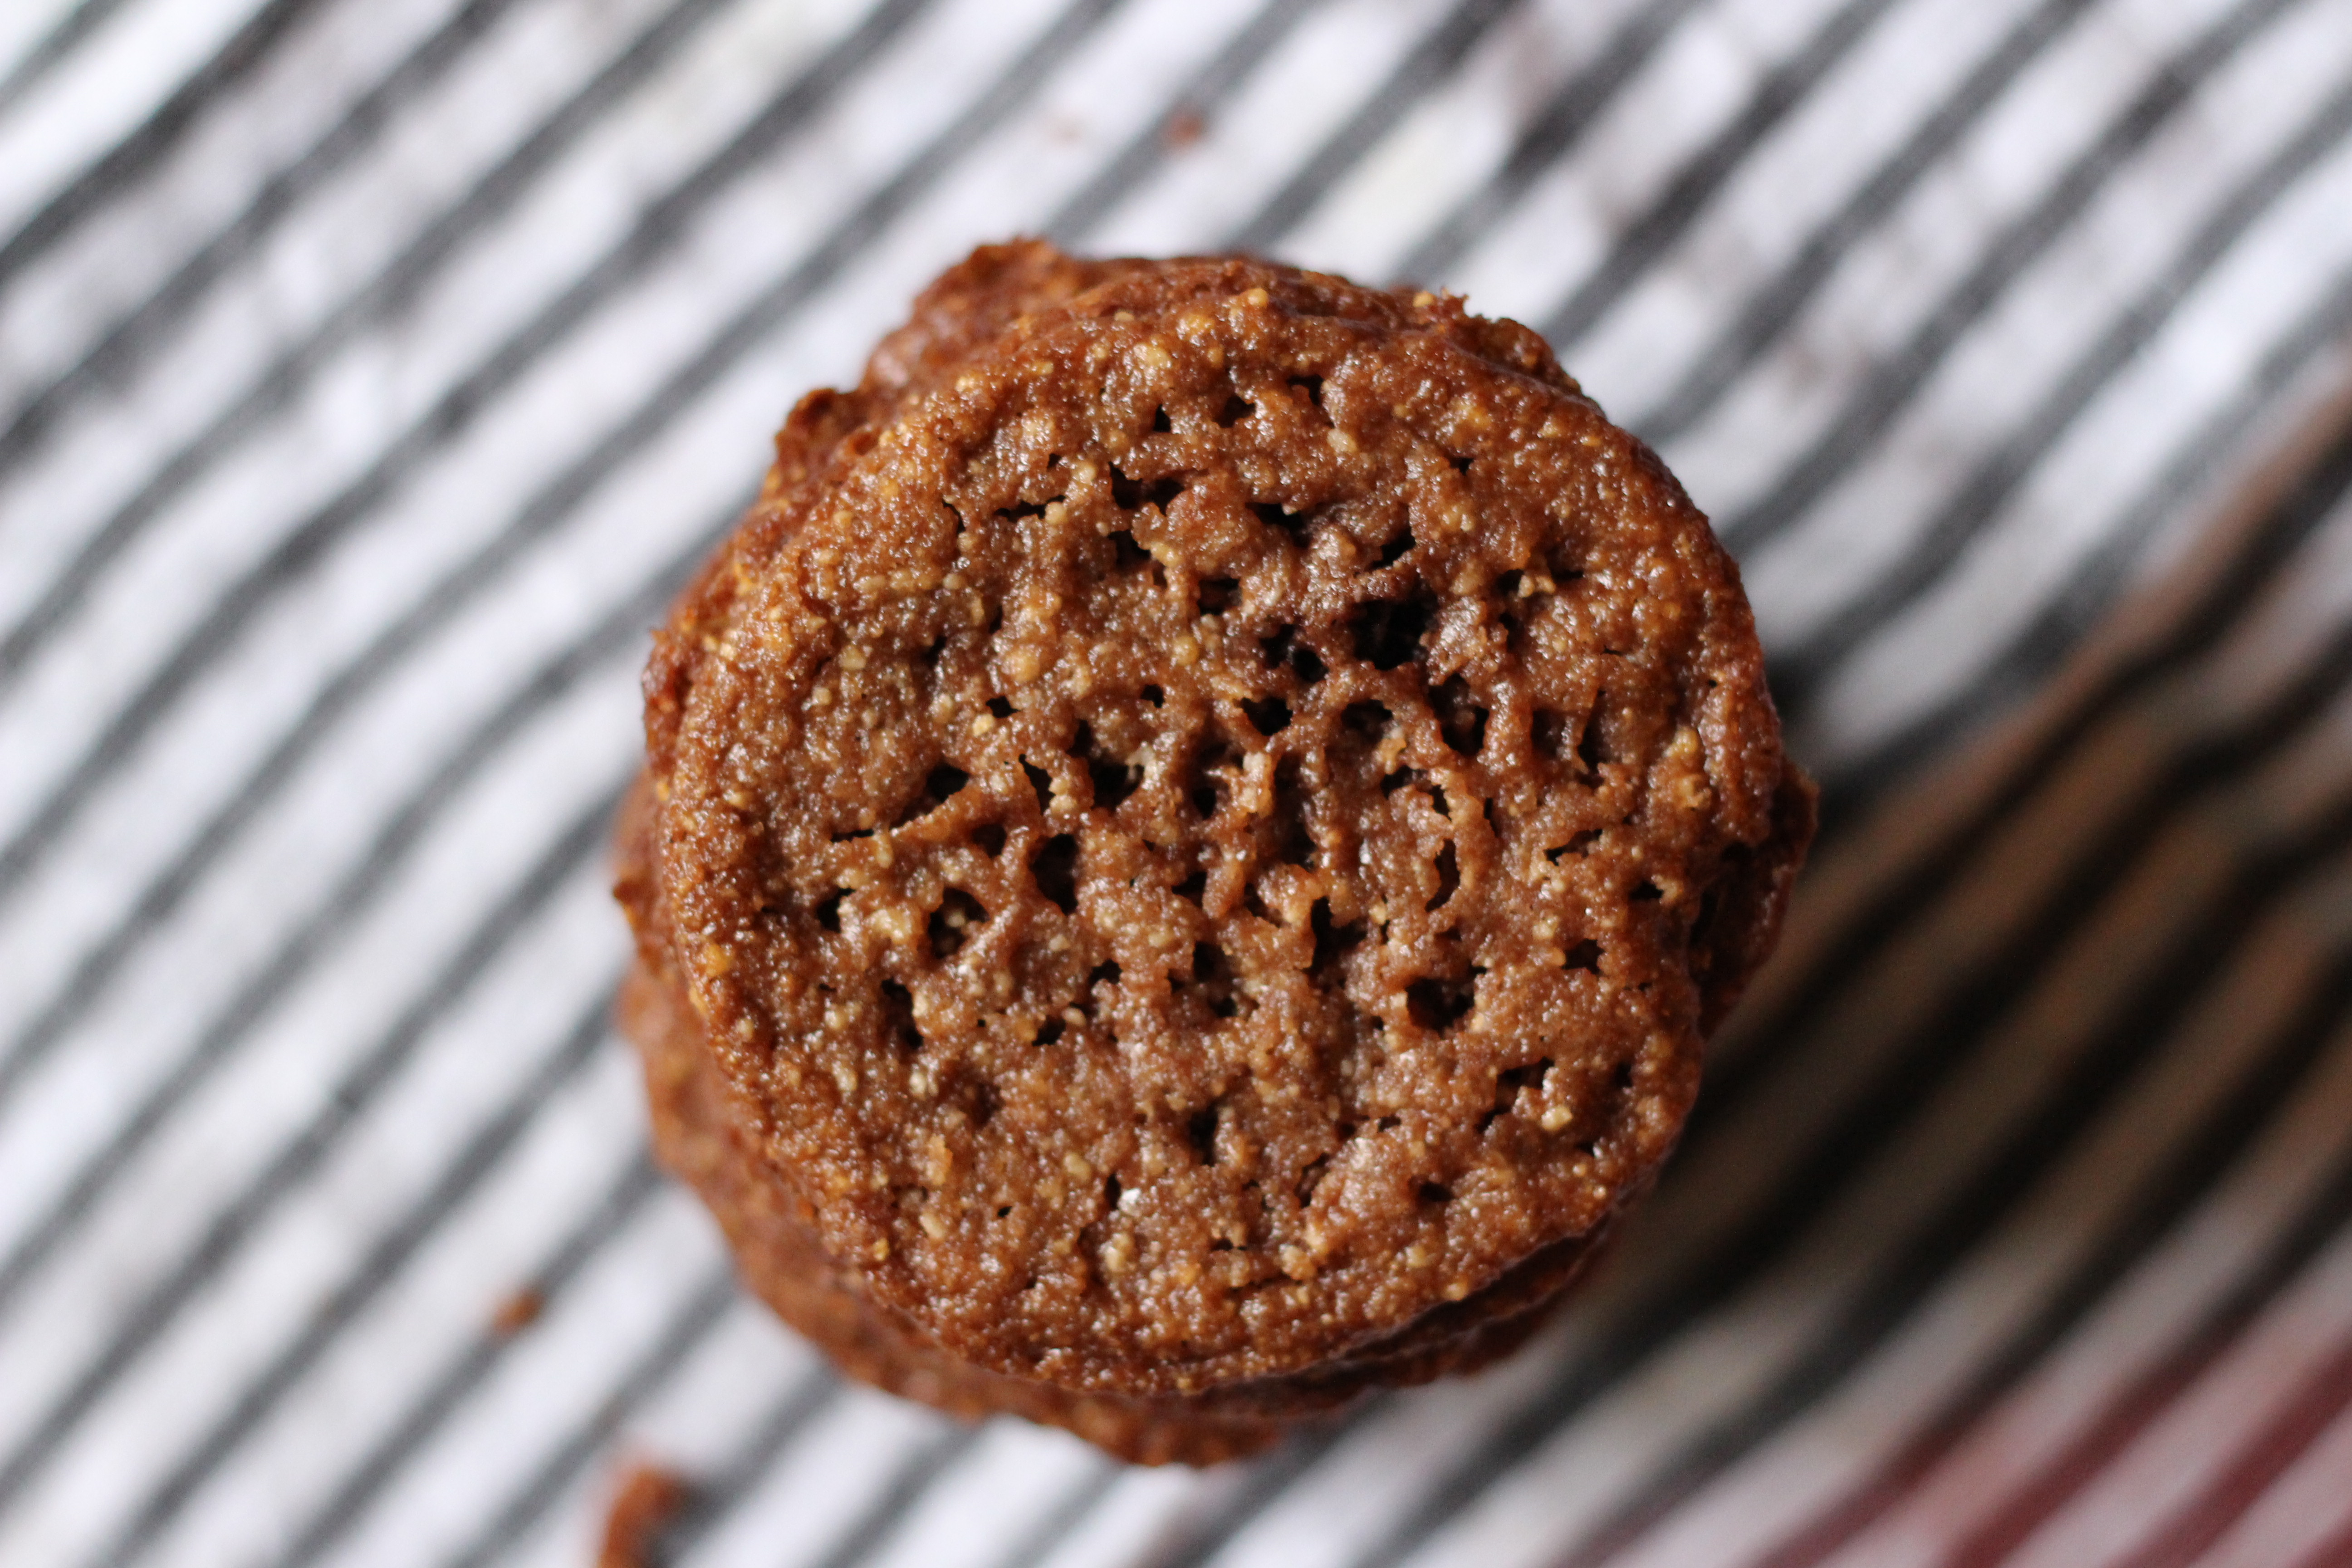
These cookies have many names: almond lace cookies (you can find similar ones at Trader Joe’s, except instead of sandwiching them, you’ll find them as single cookies dipped in chocolate), bocca di nonna (literally, mouth of grandma but I suppose grandma’s kisses sound better), and that’s it really. Sorry. They have wonderfully sweet, caramelly, toasty notes and the earl grey ganache just makes ya go, “hmm what IS that?!”. Throwback to Rachel Ray and every instance of her adding nutmeg to a cream sauce.

Recipe from BH&G Jan 2010

Ingredients

  • 2/3 cup all-purpose flour
  • 2 tbsp unsweetened dutch-processed cocoa powder
  • 3/4 cup butter, softened
  • 1 cup sugar
  • 3/4 teaspoon, vanilla
  • 1 1/2 cups finely ground almonds (I ground up slivered almonds in the food processor)
  • 1/3 cup heavy cream
  • 4 earl grey tea bags
  • 4 oz semi sweet chocolate, chopped

Directions

  1. Combine flour and cocoa powder in a small bowl. Whisk to combine and set aside.
  2. In your stand mixer (or in a bowl using a handheld electric mixer) cream butter at medium speed for 30 seconds. Slowly add sugar and vanilla extract. Beat until light and fluffy (3 to 4 minutes). Scrape down sides of bowl occasionally. Add ground almonds, then flour and cocoa mixture. Using a rubber spatula, scrap down the sides and bottom, give it a final mix, and dump onto a large piece of saran wrap. Wrap tightly and refrigerate for 1 hour.
  3. Preheat oven to 350 degrees F. Line a baking sheet with parchment paper. Using a cookie scoop, scoop out 1 inch balls onto prepared cookie sheet, 2 inches apart. Press down lightly to flatten.
  4. Bake for 12 to 15 minutes or until centers are firm. Let cool a few minutes on baking sheet, then move to wire rack to cool completely. Continue with the remaining dough.
  5. While they cool, make the ganache: bring the cream to just before boiling (you’ll see bubbles around the perimeter). Remove from heat. Add the 4 tea bags, cover and let steep for 15 minutes. After 15 minutes, uncover, squeeze the liquid out of the bags and discard. Heat the cream once again to just barely a boil. Add the chopped chocolate and stir until mixture is homogenous and shiny.
  6. Assemble: Spread half a teaspoon of ganache onto the flat side of one cookie. Place the flat side down of another cookie directly on the ganache. Continue with the rest of the cookies.

2 Comments · Labels: American/Mediterranean, Dessert, Recipes Tagged: almond cookies, almond lace cookies, bocca di nonna, chocolate, cocoa, cookies, dessert, earl grey, ganache, tea biscuits

Menemen (Turkish Scrambled Eggs)

December 22, 2015

IMG_5405I invited my childhood friend, Aileen Olmedo of TheStyleBoro, over for breakfast this past weekend.  Her blog is a fun destination for the unequivocally stylish and youthful city dweller. Youthfulness is a state of mind folks, not a number. Rather than prepare traditional brunch items she could enjoy at a number of NYC spots (e.g. eggs benedict, waffles, french toast) I thought I’d make her a spread reminiscent of my beloved babymoon in Istanbul.IMG_5394BTW, Zeynep if you are reading this please don’t hate me if I butchered an authentic Turkish dish. I know you’re supposed to use Turkish peppers, not jalapeno or Chinese peppers. I know you’re supposed to use onion not scallion. And any other changes I made, I only made to make this wonderful breakfast dish a bit more accessible to the average American home cook!IMG_5395I love how the colors pop in a Turkish breakfast spread. White cheese, green cucumbers, red tomatoes, rich Soujuk (Turkish sausage), black olives, fresh squeezed orange juice. Makes for a dramatic presentation. If you can find apple tea and borek (cheese or meat pastry), those are also wonderful additions. Even if you aren’t looking for an all out breakfast extravaganza, you can enjoy the recipe below for Menemen – eggs scrambled with peppers, tomato and onion until they are just barely set. A wonderful change up from your usual eggs and toast breakfast.

Ingredients

  • 3 tbsp olive oil
  • 2 scallions, thinly sliced
  • 1 long green pepper (I used the Basque Fryer, but feel free to use a deseeded jalapeno), thinly sliced
  • 1 Roma tomato, diced
  • dash of cayenne pepper
  • 1/2 tsp paprika
  • 1/4 tsp salt
  • 6 eggs
  • salt and pepper to taste
  • 2 tbsp chopped parsley

Directions

  1. Heat oil in a large non-stick skillet or wok over medium high heat. Add scallions, tomato, pepper and cook 4-5 minutes, until soft. Add cayenne, paprika and salt and cook for until tomatoes break down and onions get super soft, another 2-3 minutes.
  2. While the veggies cook, crack eggs into a bowl. Season with a pinch each of salt and pepper and whisk with a fork. Whisk well – until the eggs look like a uniform yellow mixture. Pour into skillet and lower the heat to low. Cook, stirring occasionally, until the eggs just start to set. Turn off the heat and add the parsley. Give it a final stir and serve with warm bread.

Leave a Comment · Labels: American/Mediterranean, Breakfast, Main, Protein, Recipes Tagged: eggs, scrambled eggs, turkish, turkish breakfast

Creamy Less Cheesy Mac and Cheese

November 13, 2015

IMG_5206Anyone else find themselves questioning their life choices? First world problems, right? I’ve got a roof over my head, food to eat, a wonderful family – so much to be grateful for. But I’m feeling sorry for myself because I haven’t “made it” yet or didn’t pursue one of the more conventional paths of engineering, medicine, or law (not that I have a litigating bone in my body). Of course this comes at a time when most of my high school and college classmates are receiving their secondary degrees and the grass is looking greener on the other side. But I’ve been trying to embody the saying I’ve read recently, “The grass is greener where you water it”. I love my family and would be so empty without them. But I need to reach my professional goals as well. Would love to grow this blog or my little side hustle (custom cakes) but I feel like I’m lacking some guidance. Is it my content? My outreach? Help me out, guys!! Granted I have two little ones, one who is isn’t in school yet, so my resources are limited.   IMG_5195Speaking of little ones, for years I lamented that despite my efforts to make mac and cheese from scratch, my kids preferred the stuff from the blue box. Relieved, since dinner could be ready in a snap if I had the blue box on hand. Affronted, as well. So I sought a solution. The problem was the traditional mac and cheese recipes I followed were quite cheesy. Resulting in a strongly flavored and thick sauce.IMG_5196So, I thought I’d make a bechamel sauce, add in a little bit of cheese at a time until it had just enough thickness and was mildly flavored enough for my kiddos, and voila! I made something that my 3 1/2 year old would lick clean off the plate.   IMG_5199This comes together so quickly, you’ll be like, blue box, who? Granted you have pre-shredded cheese. I use the Trader Joe’s blend of mozzarella, cheddar and jack cheese. It’s wonderful in omelettes, grilled cheese, etc. IMG_5200Throw in some frozen peas with the pasta during the last minute of cooking to make it a complete meal. Or shredded beef/chicken. The sky’s the limit. I just keep the chicken broth on hand in case it gets too thick. IMG_5205  IMG_5215Make this once and you’ll never go back to Panera’s mac and cheese! Feel free to double the recipe if you have more mouths to feed!

Ingredients

  • 2 tbsp butter
  • 2 tbsp all purpose flour
  • 2 cups whole milk
  • 1/2 cup grated cheese (cheddar or I use a combo of mozzarella, cheddar and pepper jack)
  • 3/4 tsp salt plus more to taste
  • dash black pepper
  • dash cayenne pepper
  • 1/2 pound elbows or small shell pasta

Directions

  1. In a medium to large pot, heat about 4 quarts of water over high heat. Let it come to a boil while you prepare the other ingredients.
  2. When it comes to a boil, add a teaspoon of salt and the pasta to the water. Give it a stir and set the timer to 8 minutes (check the time on the box for shells since I used elbows).
  3. Melt the butter over medium heat. Add the flour and whisk together. Allow to cook for 1-2 minutes. Next, slowly pour in the milk, while whisking. Continue whisking, taking care to get all the bits of flour and butter from the bottom of the pan. Lower the heat to a simmer a let cook for 5 minutes. It won’t thicken fully at this point. Make sure the mixture is not boiling otherwise the cheese will curdle*. Turn off the heat (and the heat of the pasta if the timer is up). Add salt and pepper and stir to combine.** Add cheese and stir – now the sauce should be sufficiently thick to coat the pasta.
  4. Strain pasta and add it to the cheese sauce. Serve immediately.***

*I learned this the hard way after ruining two batches during our suite’s Thanksgiving potluck in college.

**Congratulations, you’ve just made bechamel sauce!

***To reheat, add a bit of chicken broth to a saucepan and warm over medium low heat until heated through.

5 Comments · Labels: American/Mediterranean, Carb, Dinner, Main, Recipes, Side Tagged: bechamel, blue box, comfort food, cream sauce, creamy, elbow macaroni, mac and cheese, pasta, shells, white sauce

Pumpkin Cupcakes

October 29, 2015

img_7429

I usually shy away from pumpkin spice anything. It’s just not my cup of tea. But a few weeks ago our family went to Wightman Farms in New Jersey, where they attempt to ameliorate the hurt inflicted on your wallet from overpriced hay rides with complimentary pumpkins. Thus, I had 4 pumpkins and a whole lotta cooking to do. I made a pumpkin bread which was a bust (recipe said to bake in two 8×4 loaf pans; I brazenly baked it in a single 10×5 in pan and sadly watched through the oven door as it never rose), a pumpkin pasta which was delish, and finally, these fabulous little bites. Important to note that my homemade pumpkin puree is thinner than the canned ones, but I think since this recipe uses vegetable oil and not butter, you should be fine. IMG_5142I whipped these up without a recipe to refer to (hence most of the amounts are 1, 1, 1 [1 cup sugar, 1 cup flour, 1 cup pumpkin, etc.] but hey, it works!) and without even being sure if the end result would be a cupcake or a muffin. Since I wanted to practice my piping, I frosted them with a cream cheese frosting – so I guess they are officially in Camp Cupcake! They are so moist you can serve as a snack without the frosting.

Ingredients

  • 1/2 cup brown sugar
  • 1/2 cup granulated sugar
  • 1/2 cup vegetable oil
  • 1 egg
  • 1 cup pumpkin puree*
  • 1/2 cup all purpose flour
  • 1/2 cup whole wheat flour (could omit this and use all all-purpose flour)
  • 1/4 tsp cinnamon (can increase to 1/2 tsp if you prefer)
  • 1/8 tsp ground clove
  • 1/4 tsp kosher salt
  • 1/2 tsp baking powder (make sure it’s fresh! i.e. not older than 3 months)
  • 1/4 tsp baking soda (same)

Directions

  1. Preheat oven to 325 degrees F. Spray either a mini muffin pan or a standard muffin pan with non-stick spray.
  2. In the bowl of a stand mixer (or in a large bowl using a handheld electric mixer), combine both sugars with vegetable oil and beat for a minute. Add egg and continue beating. Add pumpkin puree and continue beating for another minute.
  3. In a separate bowl, combine flours, spices, salt and leavening. Whisk a few times.
  4. With the mixer on low speed, slowly add the dry ingredients just until combined. Scoop batter into prepared pans to about 3/4 way up. If using the mini muffin pan, bake for 15-17 minutes until a toothpick inserted in the center comes out clean. For a standard muffin pan, bake 18 to 20 minutes.
  5. If you choose to frost them, allow them to cool to room temperature. Frost with a cream cheese frosting.

*To make the pumpkin puree, I peel a pumpkin similar to how you would peel a butternut squash – with a big knife, going from top to bottom, around on all sides. Scoop out seeds, chop, then place in a large wok or pot with 1/2 inch of water. Bring to a boil then reduce heat. Simmer until tender. Blend in a food processor.


Leave a Comment · Labels: American/Mediterranean, Dessert, Recipes, Veg Tagged: autumn, cupcakes, dairy free, dairy free dessert, dessert, easy dessert, fall, pumpkin, seasonal cooking

Coconut Sheet Cake

October 19, 2015

IMG_5099I feel like I just completed a marathon. Not the running kind, though there was a lot of physical activity involved. Running to/from the store. Planning, baking, cleaning, putting away, assembling, decorating on top of the usual taking care of 2 small children and managing a household. Before this past weekend, my cake orders were usually 2-3 layer 9 in cakes. Now I had to prepare 2 full sheet cakes to feed 200 people over two consecutive days. Luckily the other cake was an icebox cake that required lots and lots of chocolate wafers that I was able to store in the fridge. I was pretty much at capacity when I baked the first layer of this cake and froze earlier in the week.       IMG_5057I had previously made this as 3 layered cake. But the recipe needed tweaking in order to make it more sturdy and stand up to the demands of a sheet cake! IMG_5058The customer requested pineapple filling in lieu of the cream cheese frosting, so if you like pina coladas then this cake is for you! I made two batches using the recipe found here. It was just perfect. IMG_5064The groom to be, after taking a bite could only say “wow”. That’s right. I don’t strive to make the most over the top decorative cakes that look like your favorite handbags. I strive to make the best cake you have ever tasted, every time.  IMG_5069I should probably mention this was for a Bengali pre-wedding party called a Gai Holud. The writing on the cake reads “Jamil’s Gai Holud”. It’s a tradition wherein the bride or groom is rubbed all over with turmeric paste and then bathed publicly (with the Bengali equivalent of a bathing suit on).  Here in America, we do a more symbolic version. Bride/groom sits on some decorated platform with an array of sweets in front of him/her. There is a bowl of turmeric paste that is rubbed on a small portion of his or her face, then wiped off. IMG_5070 IMG_5077IMG_5088This is how I prepped the board for my 16×22 in cake. Because apparently they make pans in that size, but not cake boards or cake boxes. Lame.IMG_5091IMG_5092IMG_5093I don’t usually do crumb coatings, but because I made the amount listed in the original recipe, it wasn’t enough to properly frost a cake of this size, so I used it just to cover the surface. This cake is very tender, very moist, so it needed the crumb coating. IMG_5094The real challenge was in getting the second layer onto the first. The first layer was just inverted by placing the cake board on top of the sheet pan and flipping. But the second layer was not as trivial. I stood over the first layer, second layer in hand for like 5 minutes taking deep breaths before going for it. And it didn’t align evenly! Although I held the cake in place by the bits of parchment sticking out of the edges, I couldn’t fully control how it flipped out of the cake pan so it came out slightly rotated down (by like 10 degrees). I sawed off the parts that stuck out on either side and sort of glued it onto the barren sides with frosting. IMG_5098It worked. The guests were none the wiser. Til now, of course.IMG_5103Traditional henna patterns as decoration and toasted coconut flakes all around for that extra oomph.

Coconut Sheet Cake

Recipe adapted from A Taste of Home. Please note I made two batches of the recipe below for my 2 layer sheet cake. I used the frosting from the link above (also 2 batches).

Ingredients

  • 6 eggs, separated, at room temperature
  • 2 1/4 cups sugar
  • 3/4 cup butter, softened
  • 3/4 cup vegetable oil
  • 1 tsp coconut extract
  • 1 tsp vanilla extract
  • 1/2 tsp almond extract
  • 3 cups cake flour
  • 1 1/2 tsp baking powder
  • 1 tsp baking soda
  • 1/2 tsp salt
  • 1 1/3 cup buttermilk at room temperature
  • 2 heaping cups sweetened coconut flakes
  • 1/4 tsp cream of tartar

Directions

  1. Preheat oven to 325 degrees F. Prepare 16x22in sheet pan by lining with parchment paper, spraying with non stick spray or butter, and sprinkling a bit of flour.
  2. Beat butter at low speed, gradually increasing to medium until light and aerated, 1 1/2 to 2 minutes. Gradually add 1 1/2 cups of sugar. Beat until light and fluffy – about another minute. Decrease speed to low and add oil. Gradually add the remaining sugar so as not to deflate the butter. Add the six egg yolks, one at a time, scraping down the bowl halfway through. Add the extracts and beat until combined. Stop mixer.
  3. Sift cake flour, baking powder and baking soda into a medium bowl. Add salt and give a gentle stir with a wooden spoon. Turn the mixer on low and add the dry ingredients in 3 batches, alternating with with buttermilk. Turn off mixer when dry ingredients are just incorporated.
  4. In a large bowl, beat egg whites with cream of tartar with a handheld electric mixer starting at low speed and increasing to high speed. Beat until peaks are stiff, 5 to 7 minutes. Add 1/4 of the egg whites to the batter to loosen it up. Add remaining egg whites by gently folding with a rubber spatula, cutting down the middle of the batter, then turning the bowl 1/4 of the way and bringing the spatula up and over. Repeat until you can just barely see the streaks of egg white.
  5. Pour batter evenly over sheet pan and bake in preheated oven for about 23 minutes. Start checking with a toothpick inserted in the center to make sure it’s done at about 21 min. There should be minimal crumbs on the toothpick.


Leave a Comment · Labels: American/Mediterranean, Dessert, Recipes Tagged: cake, celebration cake, coconut, coconut cake, dessert, full sheet pan, pina colada, pineapple, sheet cake, toasted coconut, tropical

Spice Rubbed Chicken Cutlets

October 8, 2015

IMG_5035My first born starting school has opened up a world of culinary challenges: what can I make and pack for her that a) she’ll eat b) is nutritious (most of the time) and c) not too messy? The top two contenders so far as been a chicken “salad” sandwich made from leftover chicken curry, mayo and provolone cheese. First choice though, banana nutella sandwich. That’s my cop out sandwich. Something I’m sure Park Slope moms would be aghast at finding out was given to a child. You’ve heard about that, right? The parents who wanted to ban the ice cream truck coming ’round the block so they wouldn’t have to deal with their kids ice cream wanting tantrums. IMG_5026While I empathize with the tantrum dealing – I wonder how many parents in my generation reflect on the food they grew up versus the food they feed their kids. Sometimes I get so hung up on, “Are my kids eating enough greens?” “Are they getting enough fiber?” “Is it too late in the evening for chocolate?”. While it’s definitely good to be thinking of these things, some of us go off the deep end when it comes to this stuff. A certain parent comes to mind who flipped out when her daughter was given a rice biscuit or whatever too close to her dinner time.  IMG_5027Do you know what my after-school snacks consisted of? Double chocolate chip muffins laden with all kinds of artificial flavorings and preservatives with a can of pepsi. Or entenmann’s chocolate cake. Or chips ahoy cookies with milk. My gourmet touch was microwaving the chips ahoy cookies to give ’em that just baked quality. Right.IMG_5037So, over the years, I’ve given myself a break. Not all their fruits and veggies are organic anymore. Sometimes they have nutella toast for dinner. And lollipops or ice cream in the evening? One heck of a reward for cleaning up their toys! Not to say I’ve thrown all caution to the wind. I snuck some baby kale leaves into my daughter’s wrap this morning. Usually I make her sandwiches with soft whole wheat bread. Pictured below is Malaysian style paratha which, if you were with me during my semester in Rome, you know it is crazy good. It’s a flaky flatbread that makes anything taste good (not that this chicken needs any help!!). IMG_5043My favorite part of this chicken is the wonderful caramelization from cooking it in the butter. Why didn’t we eat more butter growing up? It is so glorious when treated well. Buttered toast in our household usually meant Country Crock vegetable spread on lightly toasted Wonder Bread.IMG_5036
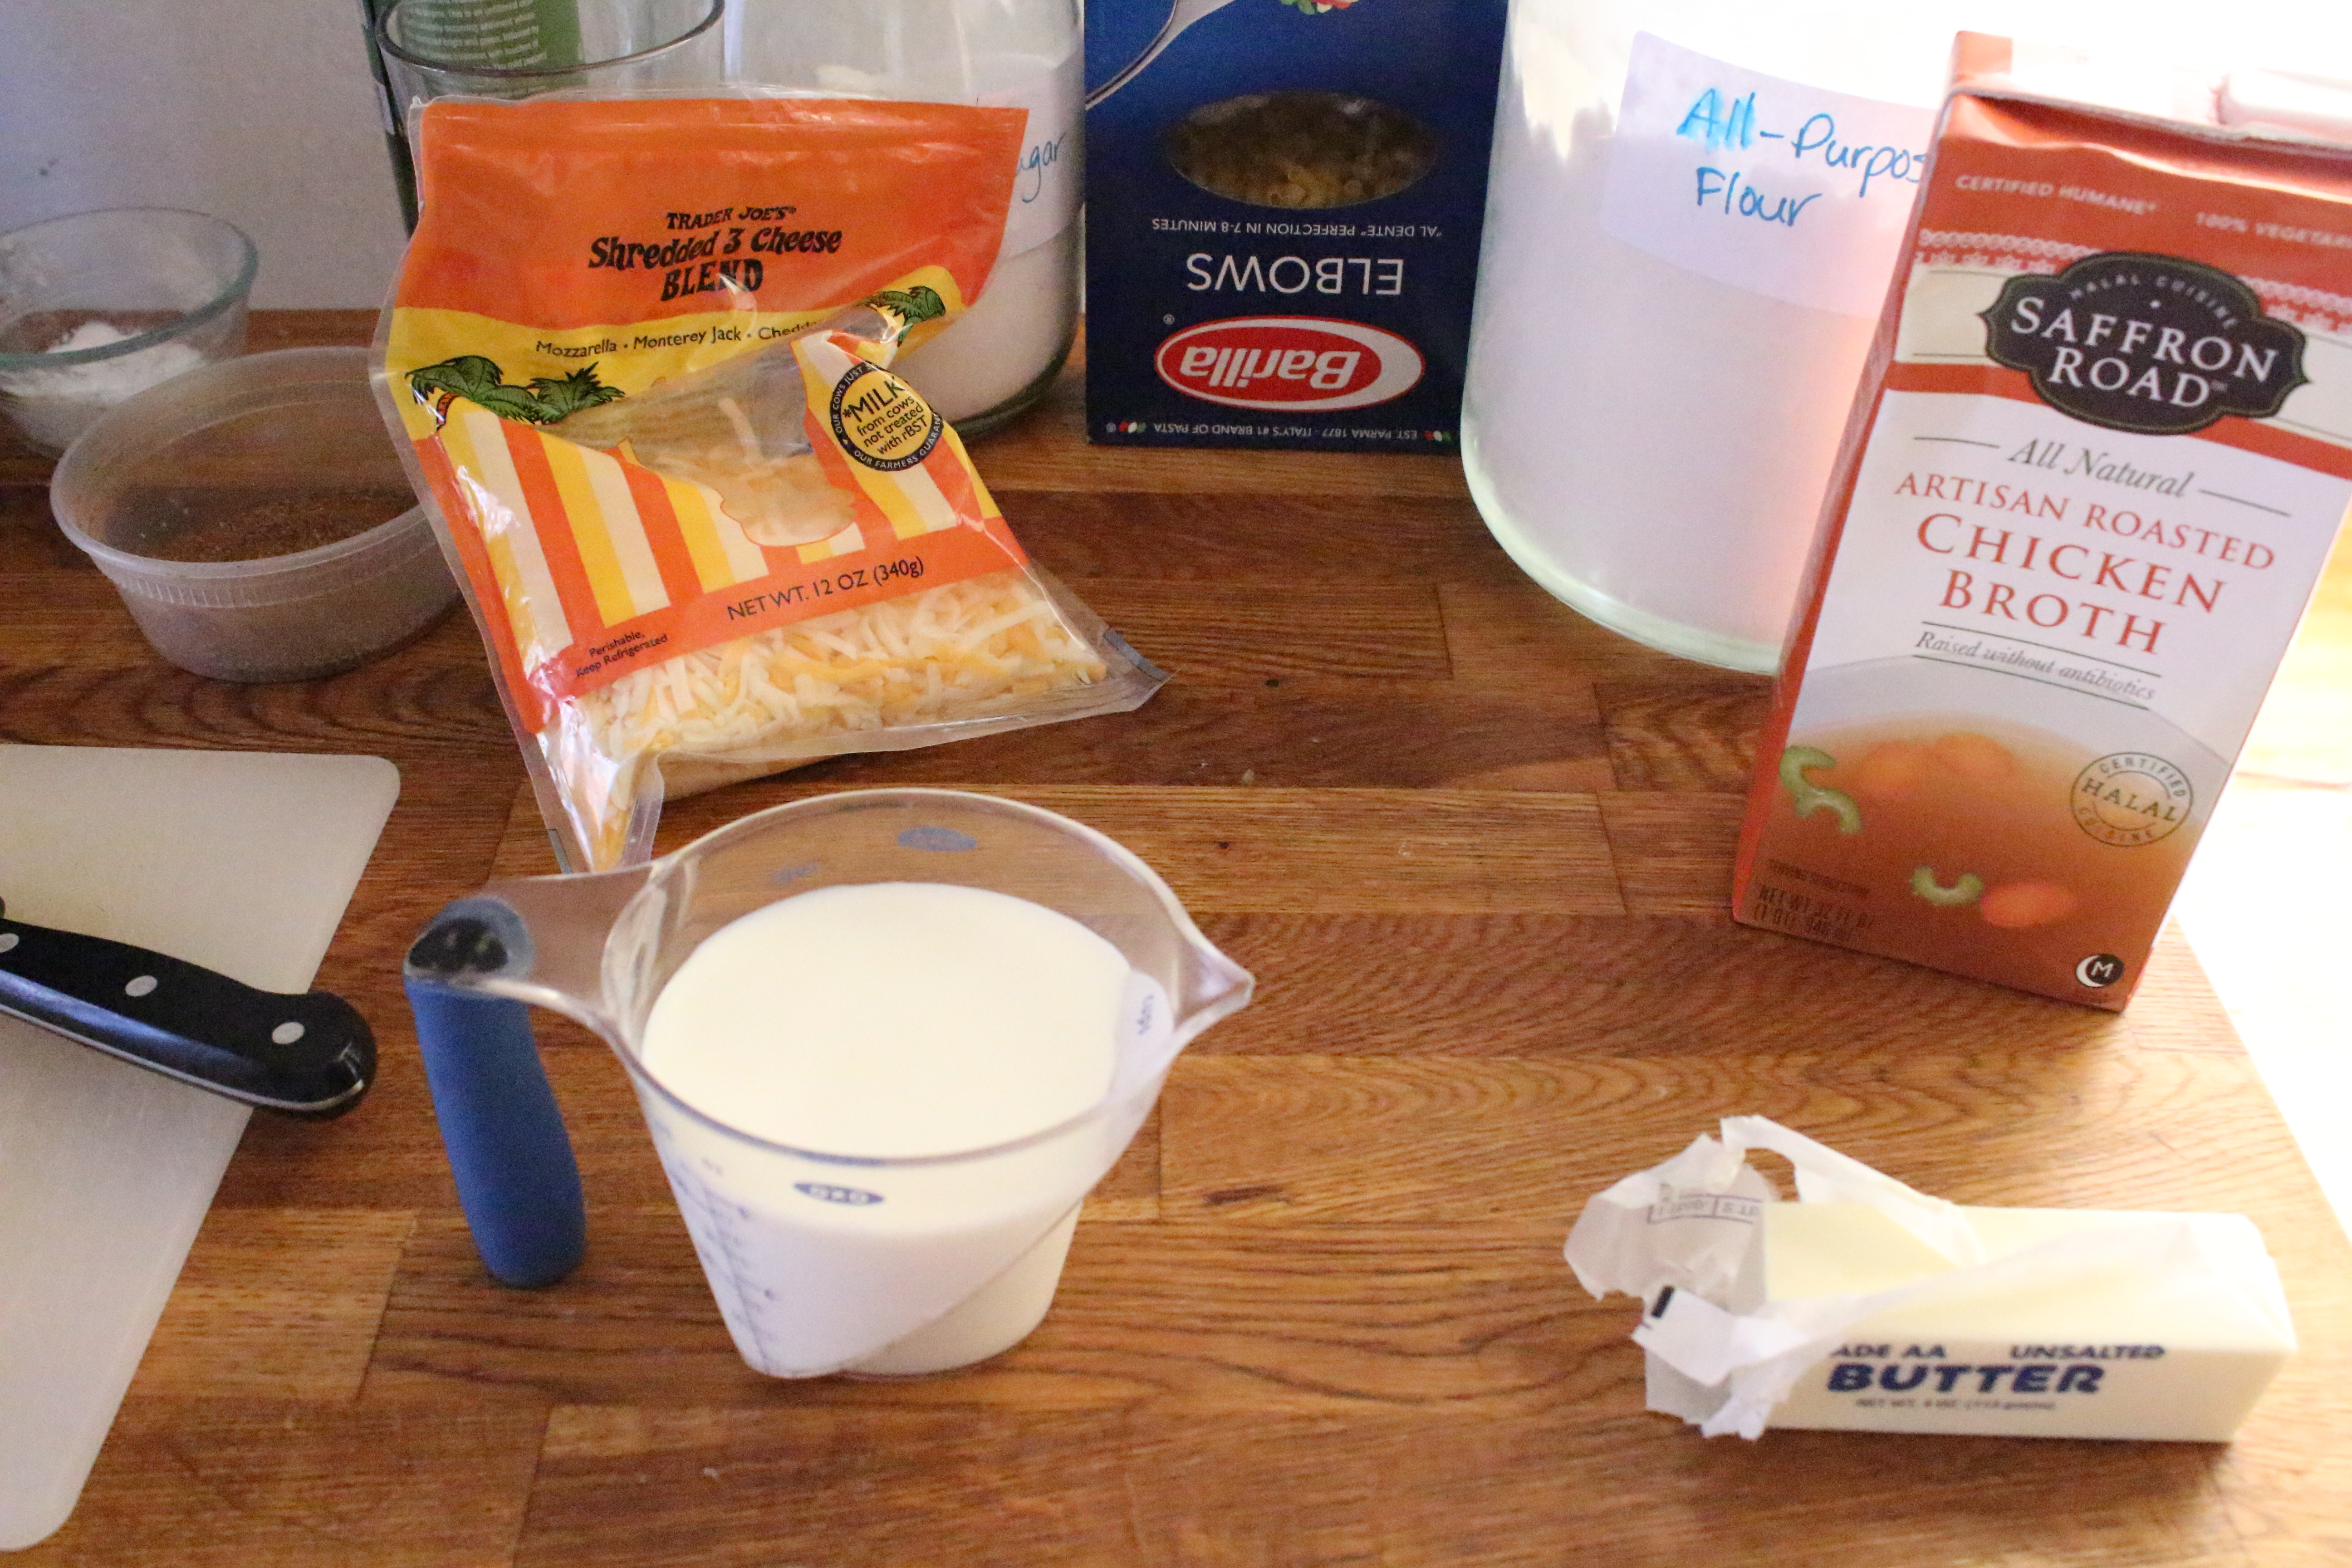
So enjoy these chicken cutlets all throughout the week:

  • Sliced across the grain and over salad
  • Diced and mixed with a mayo dressing for chicken salad sandwiches
  • Sliced and inside wraps with lettuce and tomato
  • Diced and tossed with buttered pasta and peas
  • Or as is, with a side of quinoa and leafy greens!

Ingredients

  • 2 large chicken breasts, each sliced in half widthwise to make 4 cutlets
  • 1/4 tsp cumin
  • 1/4 tsp paprika
  • 1/4 tsp ground black pepper
  • 1/2 tsp garlic powder
  • 1 tsp salt
  • pinch of cayenne pepper
  • 2 tbsp olive oil, divided
  • 1 tbsp butter, divided

Directions

  1. Combine spices in a small bowl and sprinkle all or most of it evenly over both sides of each chicken cutlet.
  2. In a large fry pan over medium high heat, heat 1 tbsp oil and 1/2 tbsp butter. When the bubbling of the butter dies down, add two pieces of the chicken cutlets. Cook for 2-3 minutes on each side. You’ll know when to flip when the bottom side is golden brown and the white (cooked) part of the chicken creeps up to the middle. Flip and cook for an additional 2-3 minutes.
  3. When the first two are done, remove from heat and let them rest on a plate (not a cutting board as the juices will run). Clean the pan with a rubber spatula to get the overly brown bits and oil off and into a ramekin or bowl. Add the remaining tablespoon oil and half tablespoon butter. Cook the remaining two cutlets the same way. Remove to plate and let rest 5 minutes before slicing.

Leave a Comment · Labels: American/Mediterranean, Dinner, Main, Protein, Recipes Tagged: butter, chicken, chicken breast, chicken cutlets, meal planning, olive oil, salads, sandwiches, school lunch, spices, weeknight cooking, wraps

Meyer Lemon Strawberry Lemonade

August 27, 2015

IMG_4823I’ve come a long way from the days of squeezing limes into a tall pitcher of water, and stirring in sugar until it dissolves. And stirring and stirring and stirring…

Lemon/limeades were usually reserved for Ramadan in my household. That meant we whipped up batches of the stuff without being able to taste it (since we were fasting) and without sticking to any sort of recipe (my mother never owned a recipe book). The results ran the gamut from mouth puckeringly tart to gaggingly sweet.

That won’t happen with this recipe. I won’t forget the looks on my guests’ faces when they broke their fast with this drink earlier this summer. Their eyes widened as they could not believe the incredible reward their taste buds received after a long day without food or drink.  IMG_4726This is an adaptation of a pretty straightforward Pioneer Woman recipe. I stuck to her proportions, but jazzed it up with some floral scented Meyer lemons, a simple syrup for easy dissolving, and ice for a quick cool down. I had never thought to puree strawberries in a food processor with sugar to get the strawberry part of a strawberry lemonade but it was so easy and so perfect. I think when you cook it down in a saucepan it has the tendency to thicken. This way it was perfectly smooth and pourable. IMG_4816 If you don’t have Meyer lemons in your grocery store, please proceed with regular lemons! If you do have Meyer lemons handy, you won’t regret it. They have such an amazing bouquet – floral, sweet. I’m not sure if you’ve ever noticed, but when you squeeze citrus, the essential oils mist up and out from the rind like a natural air freshener. When the oils of the Meyer lemons gets into the air, it perfumes the whole kitchen. Almost makes you want to take a bite out of it!

Summer’s not over as long as you’re making this drink! It HAS the power to keep summer going. Also, summer is not over until it’s my birthday. Seriously – last day of summer this year and I turn…twenty…I’ll leave the rest to your imagination.

Adapted from Pioneer Woman.

Ingredients

  • 1 pound strawberries, hulled
  • 3 cups sugar
  • 8 to 10 Meyer lemons
  • 9 cups water
  • 2 heaping cups ice

Directions

  1. In a medium saucepan, dissolve 2 cups sugar with 2 cups of water and the peel of 1 Meyer lemon* over medium heat. Stir occasionally. When dissolved, remove from heat and let cool.
  2. Meanwhile, blend the strawberries in a food processor with 1 cup of sugar until well blended. Set aside.
  3. Using a citrus juicer, or by hand (over a sieve to catch seeds and pulp), juice 8 to 10 Meyer lemons until you have 2 cups of lemon juice. Set aside.
  4. Remove lemon peel from simple syrup. In a large pitcher or drink dispenser combine lemon scented simple syrup, strawberry puree, lemon juice, remaining 7 cups of water and 2 cups of ice. Stir to combine. Add more water/sugar to taste.

*When peeling, take care not to get too much of the white part (pith) as that will make the simple syrup bitter.

2 Comments · Labels: American/Mediterranean, Drinks, Recipes Tagged: drink, lemonade, meyer lemons, non alcoholic beverages, refreshing drink, strawberry, strawberry lemonade, summer

Chocolate Zucchini Cake

August 18, 2015

IMG_4847I was incredulous the first time I heard the words “Zucchini Bread” at my adopted Jewish grandmother’s apartment some 15 years ago. Her name is Sophie and she was my mother’s confidant, advisor, protector and friend for many years. She taught her the value of saving. She raised two children during the Depression. She told my mother, every week she set aside $0.50. She grew such a small sum into stake in a multi-million dollar company and a condo in a luxury apartment building in downtown Manhattan. IMG_4854So when she talked, we listened:

  • “Eat Romaine lettuce, not iceberg. It’s all water.”
  • “Ya ever tried zucchini bread? It’s delicious.”
  • “Take care of ya mother. She works hard.”

Right on all counts. Take it one step further with chocolate zucchini cake. I was skeptical when a mom brought zucchini brownies to a play date. But it had such deep chocolate flavor! And it was moist! And magical! I realize that zucchini’s blandness kind of works in its favor in baked goods. Between that and the water content, it’s the perfect vessel for delivering a rich, moist, chocolate crumb. I was nervous as I folded the 3 cups into the batter, that those eating the cake would see slivers of green running throughout, but it melted right into the cake. And with that much veg content, you don’t feel like the world’s worst parent when your kid (and husband) reaches for it throughout the day.

Adapted barely from King Arthur Flour.

Ingredients

  • 1/2 cup unsalted butter (1 stick) at room temperature
  • 1/2 cup vegetable oil
  • 1 3/4 cups sugar
  • 1 tsp vanilla extract
  • 2 large eggs
  • 1 tsp baking soda
  • 1/2 tsp baking powder
  • 1/2 tsp salt (next time I would try increasing this to 1 tsp!)
  • 1/2 cup buttermilk, sour cream, or yogurt (I used buttermilk)
  • 2 1/2  cups all purpose flour
  • 3/4 cup Dutch process cocoa*
  • 3 cups shredded zucchini
  • 1 cup chocolate chips
  • 1 cup heavy cream

Directions

  1. Preheat oven to 325 degrees F. Grease a 9″x13″ baking pan.
  2. Sift flour, cocoa, baking soda, baking powder and salt into a large bowl. Stir gently to combine.
  3. In a stand mixer or in a large bowl with a handheld electric mixer, beat butter at medium high speed until light and airy – about 1 minute. Lower the speed to medium low and gradually add half the sugar, then oil, then remaining sugar. Add vanilla, then eggs, one at a time, until incorporated fully. Stop to scrape down the bowl. Turn on the mixer briefly once more to incorporate everything.
  4. At low speed, add half of the flour/cocoa mixture. Then slowly pour in the buttermilk (or sour cream or yogurt). Add the rest of the dry ingredients.
  5. Remove bowl from stand mixer and fold in the zucchini with a rubber spatula or wooden spoon. When fully incorporated, pour into greased pan and bake for 40-45 minutes, until a toothpick inserted comes out clean. Let cool.
  6. Heat heavy cream in a saucepan until scalding hot (bubbles appear around the perimeter). Pour over the chocolate chips and stir until it becomes a spreadable ganache. Pour and spread evenly over cooled cake.

*Dutch process cocoa, though harder to find, is essential for that deep chocolate flavor. When you use a quality cocoa powder, it makes all the difference between a standard chocolate cake and a gourmet one. Can be purchased online.

Leave a Comment · Labels: American/Mediterranean, Dessert, Recipes Tagged: chocolate cake, cocoa, dutch process cocoa, ganache, seasonal baking, seasonal cooking, snack cake, squash, summer squash, zucchini

5 Things I’ve Learned About Baking Chocolate Chip Cookies

August 5, 2015

IMG_4839I’ve been baking chocolate chip cookies since I was 10 years old. It was my first culinary endeavor. What does that mean for you? That means I’ve messed them up every which way so here I am to share with you some of my learnings.IMG_48291. Make sure your leaveners are still potent. For years I thought baking powder was just a more potent form of baking soda, just because the first batch of chocolate chip cookies I made came out flat as disks (and I blamed it on the baking soda! Rightfully so, just for the wrong reasons). If your baking soda and/or baking powder has been in your pantry for more than 6 months, toss them. If you’re baking cookies just for yourself or your family, you could take the risk if you fill guilty about tossing them. But if you’re planning to serve them to company or take as a hostess gift, do not take the chance! Use fresh leavener! IMG_48302. Use a cookie scoop! Gone are the days of using two teaspoons to artfully mold the perfect cookie mound. Using a cookie scoop is the only way to ensure each cookie is uniformly sized and shaped. I know it sucks to buy additional kitchen gadgets, but if you love cookies as much as I do, or when you realize how great it is to have frozen cookie dough stocked in your freezer to bake off when the occasion arises, you’ll be glad you have one in your arsenal!IMG_48313. Use parchment paper or silicon baking mat. This might be old news for many of you, but I just cringe thinking of the days I greased cookie sheets and had to deal with the aftermath of scrubbing encrusted cookie dough off of them. They slide off parchment so easily that I’ve never looked back. I always keep my pantry stocked with parchment paper, chocolate chips, and butter so I can make these if I need a last minute hostess gift (or for a sudden attack of PMS).  IMG_48324. Refrigerate your cookie dough. There’s an unmistakeable difference in texture when you bake off cookies that have had time to chill. The flavors blend, the dough rests, and the center attains a heavenly chewiness that’s consistent among the best cookie recipes. Bake times will vary depending on the temperature the recipe dictates and the size of the cookie scoop you use. I like to bake mine until the tops have the slightest blush. It may look underdone, but it will continue cooking once out of the oven and resting on the baking sheet. Be mindful not to remove it from the baking sheet right away, as it will mostly likely bend and break while in the process of transferring. IMG_48345. There is no single greatest chocolate chip cookie recipe. Your palette changes as you get older. Different recipes highlight different characteristics of a marvelous chocolate chip cookie: the nuttiness, the chewiness, the contrasting flavors. Lately I’ve been using Leit’s Consummate Chocolate Chip Cookie recipe. I like the combination of cake flour and bread flour to give it the ultimate texture – chewy while delicate. For years before switching over, I’ve used Alton Brown’s The Chewy recipe with great results. However, chocolate chip cookie recipes, like shampoo, should be switched periodically.

Leave a Comment · Labels: American/Mediterranean, Dessert, Food Fun Tagged: baking, baking 101, baking tips, chocolate, chocolate chip cookies, cookie dough, dessert, hostess gifts

Caprese Salad with Roasted Tomatoes and Burrata

July 26, 2015

IMG_4809When I went to Capri in April of 2008, I trekked up the steep hills to a trattoria for lunch after a morning of taking in the vistas. I was so excited to have a Caprese Salad in the birthplace of Caprese Salads. Imagine my disappointment when the waiter brought us green, far from ripe tomatoes, mozzarella and basil. Then it hit me. The seasons.  IMG_4788Seasonal eating was such a novel concept to me as an American – everything’s available all year round, and the whole conscious foodie thing hadn’t really come into full swing at that time. So, what I had imagined was a plate of luscious, bursting at the seams red tomatoes with buttery mozzarella and verdant basil. What I got was lackluster citrus with less than memorable accompaniments. If I had only come in the summer!IMG_4792Fast forward a few years and now I know that even the most lame tomatoes can be made dynamite by a long, sweet roast in the oven. It’s precisely what’s required of the tomatoes I’ve seen so far this season. Mild summer temperatures means mediocre sweetness and acidity (I think). So I topped regular grocery store tomatoes with sugar, salt, black pepper, olive oil and balsamic vinegar. They reach a flavor complexity that rivals the most pungent pickles. Sweet, tangy and savory, it balances the mild, creamy addition of burrata.  IMG_4798Burrata, if you’ve never had it, is cream filled mozzarella. On top of pizza, it makes for the creamiest cheese topping. I wanted to try it on this salad, but freaked out once I tried picking it up from its solution and found it to be so soft, it immediately started running all over the board. And then when you cut into it, it’s even more of a mess! I grabbed a bunch of paper towels and started wiping up the mess and I thought this dish was doomed for sure. But when I started picking up the squares (or blobs) I had cut from the ball of burrata, I appreciated the rustic appearance. It certainly wouldn’t work with raw slices of tomatoes. The whole aesthetic of the traditional Caprese Salad relies on the symmetry of the tomatoes and mozzarella. But with the warped form of the tomatoes from the heat of the oven, it worked well. IMG_4800I didn’t drizzle additional olive oil atop since I felt the burrata had plenty fat content. A sprinkling of cracked pepper and hand torn basil was the perfect adornment. Hopefully your basil is fresh and not the last scraps you could salvage from your (read: my) week-old bunch.

Ingredients

  • 3-4 beefsteak tomatoes, depending on the size (I used 3 in the pictures above)
  • 1-2 tsps sugar
  • 3-4 tbsps olive oil
  • 2 tbsps balsamic vinegar
  • salt and pepper
  • 1 8 oz ball of burrata
  • 4 to 6 basil leaves, torn

Directions

  1. Preheat oven to 400 degrees F. Line a baking sheet with parchment paper.
  2. Slice 2 tomatoes between 1/4 and 1/2 inch in thickness (see pictures). Arrange slices on baking sheet lined with parchment and season liberally with salt and pepper (about 3/4 tsp salt and 1/4 tsp pepper). Lightly sprinkle tops with 1 tsp sugar, 2 tbsps olive oil and 1 tbsp balsamic vinegar*. Use a pastry brush or your hands to smooth out all the seasonings. Bake in preheated oven for 40-45 minutes.
  3. Remove from oven and let cool for 5 minutes before removing to serving platter. Repeat Step 2 with fresh parchment paper and second batch of tomato(es).
  4. Arrange tomatoes on platter, overlapping them slightly. Remove burrata from solution and place on cutting board. With a SHARP knife, slice the burrata into 1/2 cubes (as shown above). Top the roasted tomato slices with the burrata pieces. Sprinkle the tops with black pepper and torn basil.

*Cook’s note: I ran out of balsamic vinegar and instead used a balsamic reduction that you can see me brushing onto the tomatoes in one of the pictures. If you find yourself in the same conundrum, simply leave out the balsamic in the initial seasoning. Forty minutes in to the cooking process, brush your balsamic reduction onto the tomatoes and stick back in the oven for 5 minutes.

Leave a Comment · Labels: American/Mediterranean, Recipes, Salad, Side Tagged: balsamic vinegar, basil, burrata, caprese, caprese salad, caramelized, cheese, cream, mozzarella, oven roasted, roasted tomatoes, salad, seasonal cooking, seasonal eating, summer salad, tricolore

  • Newer Entries
  • 1
  • …
  • 3
  • 4
  • 5
  • 6
  • 7
  • …
  • 11
  • Previous Entries
American, Bangladeshi. Savory, sweet. I don't discriminate and neither should you.

Most recently…

Load More...
Follow on Instagram

Social

Subscribe to Blog via Email

Enter your email address to subscribe to this blog and receive notifications of new posts by email.

Tags

appetizer beef bengali breakfast butter cake caramel chicken chocolate chocolate chips cilantro clean eating coconut comfort food cookies dessert dinner entertaining fall fruit ganache gluten free halal healthy homemade honest chops honest creations iftar italian pasta pastry pistachio quick and easy dinner ramadan recipe side side dish south asian spinach vegan vegetables vegetarian weeknight dinner weeknight meal whipped cream

Theme by 17th Avenue · Powered by WordPress & Genesis