Kitchen3N

Recipes and food fun from Apt 3N

  • About
  • Gallery
  • Recipes

Double Chocolate Brownies

October 22, 2014

IMG_2802 Apologies for the month of silence from Kitchen3n. The dog ate my computer. More like the Apple store took my malfunctioning iMac for a week and couldn’t reproduce the problem we are CONSISTENTLY having at home. Does anyone else’s mac do this thing where it just randomly starts producing a lot of noise (like the fans are in hyperdrive) even though there are NO CPU intensive programs running? Then just goes berserk and shuts off? Any ideas would be much appreciated. I just barely got to edit these photos before the issue started up again and am finishing up this post from my laptop.

I realize there is pretty much no more room in the food blogosphere for another brownie recipe. I don’t care. I’m sharing my favorite. Also, because, everyone loves looking at pictures of chocolate desserts.

This is the classic Ghirardelli brownie recipe remixed to my liking. The original recipe (rightly so) had chocolate chips. NECESSARY in any brownie recipe. I added a teaspoon of instant coffee to the melted butter/chocolate mixture. A key ingredient in any luscious chocolate dessert. I also use bittersweet chocolate instead of semi-sweet, for a richer, less sweet brownie. IMG_2808I baked these three different ways:

  1. In a parchment paper lined glass baking dish (square). Baked at 350 for 30 minutes. PERFECTLY FUDGEY CENTERS, SLIGHTLY CAKEY OUTSIDES.
  2. In a parchment paper lined glass baking dish (square). Baked at 350 for 25 minutes. TOO FUDGEY.
  3. In a greased glass baking dish (square). Baked at 350 for 30 minutes. TOO DRY.

There is one more option: unlined baking dish for 25 minutes. I’ll save that for the next rainy day experiment. Serve these babies with a scoop of vanilla ice cream and live your life with no regrets.

Adapted from Ghirardelli.

Ingredients

  • 4 oz. bittersweet baking chocolate (you can use semi sweet if you prefer)
  • 1/2 cup (1 stick) unsalted butter
  • 1 tsp instant coffee granules
  • 1 cup firmly packed light brown sugar
  • 1 tsp vanilla extract
  • 2 large eggs
  • 3/4 cup plus 2 tbsp all purpose flour
  • 1/4 tsp baking soda
  • 3/8 tsp salt
  • 1/2 cup semi sweet chocolate chips

Directions

  1. Heat water in a medium saucepan over low heat. Keep to a simmer. Place a large bowl over the simmering water and melt the chocolate and butter. When it’s just about fully melted, take off the heat and stir until completely melted. Add the coffee granules. Let cool for 10 minutes.
  2. While the chocolate mixture cools, preheat oven to 350 degrees Fahrenheit. Line an 8×8 glass baking dish with parchment paper.
  3. Next, add the brown sugar to the chocolate mixture and stir with a wooden spoon. Add vanilla extract and eggs, one at a time. Next, add the flour, baking soda and salt. Stir to combine. Finally, add the chocolate chips. Pour batter into prepared baking dish.
  4. Bake for 25-30 minutes (the top should look dry). I know I said 30 minutes was good for me, but every oven is calibrated differently, so definitely check at 25 min. The toothpick shouldn’t come out clean, but there should be some crumbs (but not too wet).

2 Comments · Labels: American/Mediterranean, Dessert, Recipes Tagged: bittersweet chocolate, brownies, chocolate, chocolate chips, dessert, fudge, fudgey, ghirardelli, semi sweet chocolate

Braised Green Beans

October 22, 2014

IMG_2800 When it comes to vegetables, I find myself oscillating between tradition (oh, hello soggy vegetables swimming in grease and spices) and modernity (steamed, then tossed with garlic infused oil or vinaigrette). Even though I felt pretty good about myself cooking it until just cooked through, and going easy with the fat, I would always second guess myself when I’d go to my mom’s and find myself thoroughly enjoying her sides. Until I recently read about braising vegetables in Julia Child’s Mastering the Art of French Cooking. The idea is, you combine everything in a pot or saute pan: vegetable, fat, cooking liquid, seasonings, and you cook it through until the liquid evaporates and the veggies just finish cooking in the fat. PERFECT. IMG_2793Once you have the technique down, the possibilities are endless! Of course it takes some trial and error with each vegetable. They vary in cooking times, moisture levels, and sizes (of course it’s up to you how big or small to make your pieces). A few tips to recall are:

  1. Root vegetables take longer to cook. Account for that.
  2. I added a few smashed garlic cloves to the pot. You can feel free to add any seasonings you like with your vegetables: soy sauce, ginger, crushed red pepper flakes, garam masala, lemon zest whatever!
  3. When trimming the beans, take a small paring knife, cut just below the woody stem and pull down along the rib of the bean. That way you take off some of the fibrous part that runs along the middle. You can continue this motion when cutting the beans into thirds.IMG_2797

Slivered almonds also go well green beans. The only words of caution I have are stay away from chicken or vegetable stocks for this dish. The flavors concentrate and it just overpowers the vegetable (speaking from experience). Hope this helps for your upcoming holiday (or weeknight!) cooking.

Ingredients

  • 1 lb green beans, trimmed, cut into thirds
  • 1/4 cup water
  • 1 1/2 tbsp butter
  • 2 garlic cloves, smashed
  • 1/2 tsp salt (plus more to taste)
  • 1/4 tsp black pepper (plus more to taste

 Directions

  1. Combine all the ingredients in a large saute pan with a lid. Turn heat up to medium high and cook for about 5 minutes, covered. After 5 minutes, check for seasoning and consistency. If you like your beans with a bite, turn off the heat. If you like them tender (like I do), let it cook for an additional 2 minutes.

Leave a Comment · Labels: American/Mediterranean, Recipes, Veg Tagged: braised, braising, butter, french cooking, green beans, Julia Child, side dish, vegetable

Homemade Ricotta (and a lasagna, too!)

September 22, 2014

IMG_2763Why on earth would you make your own ricotta? Because it’s delicious that’s why! Also, for these reasons:

  • Unlike homemade chicken stock, you don’t need 98765432 ingredients. You need 4.
  • It doesn’t take 3.5 hours. It takes 0.5 (and you don’t even have to stand watch over it for the majority of that time).
  • You don’t need any special ingredients/equipment (screw cheesecloth! I used a papertowel!)
  • It is awesome over toast (or fruit) with a drizzle of honey and slivered almonds (that is, unless almonds trigger your eczema). Breakfast all week!IMG_2739 Use it to kick your lasagna up a notch! The recipe I’ve used all these years advised defrosting frozen spinach, mixing it with some ricotta, eggs, and seasonings and adding it as a single layer. It was my least favorite layer.  IMG_2743So, this time, I heated up minced garlic and oil in a saucepan/wok. I cooked the spinach in it, seasoned it with salt, pepper and nutmeg, then added it to my homemade ricotta, decreasing the ricotta to spinach ratio quite a bit. No egg. It was divine.  IMG_2747 I didn’t think this process through very thoroughly. I boiled all the lasagna sheets. I just kept adding layers while I had stuffing/noodles. The top layer didn’t receive its due (read: I ran out of sauce). I’m sorry top layer. I still loved your nutty, cheesy contribution. And now I have leftover cooked lasagna noodles in my fridge. Roll ups next week? IMG_2752 Another thing to make with your fresh ricotta – lemon (or in my case lime) ricotta cookies! Not pictured: the tangy, sweet glaze that goes atop these lovelies. And hopefully, your baking powder isn’t out of date, like mine was, and yours more resemble fluffy clouds rather than lemon disks. IMG_2753

For the Ricotta (recipe courtesy of Ina Garten – surprise!)

Ingredients:

  • 4 cups whole milk
  • 2 cups cream
  • 1 tsp salt
  • 3 tbsps white wine vinegar

Directions:

  1. Heat milk, cream and salt in a medium saucepan over medium high heat. Bring to a boil.
  2. Turn off the heat, add vinegar, and stir. Let sit 3-4 minutes while mixture curdles.
  3. Place a mesh sieve over a big (preferably deep) and line it with cheesecloth or a paper towel. Carefully pour mixture in and allow the whey to separate from the curds for 20-25 minutes. Voila! You have ricotta cheese.

For the Lasagna (warning: did not measure – approximations below)

Ingredients:

  • 3/4 lb ground beef
  • olive oil
  • 1/2 large onion, diced small
  • 2 carrots, peeled, diced into about 1/4 in pieces
  • 2 celery sticks, chopped small (if you don’t have carrots or celery, don’t let this stop you from making this meat sauce!! use peppers, or more onions if you need to!)
  • 3 garlic cloves, minced
  • 3/4 tsp dried oregano
  • 1/4 tsp chili flakes
  • salt
  • pepper
  • 1 28 oz can crushed tomato
  • 1 bay leaf
  • 1 tsp sugar
  • about 2/3 box lasagna noodles (about 15 sheets)
  • 16 oz frozen spinach
  • 1 clove of garlic
  • 1/4 tsp nutmeg
  • 1 cup of ricotta cheese
  • about 7-8 oz mozzarella cheese
  • 1 1/2 cups freshly grated parmigiano reggiano (sorry, no shortcuts allowed for this step)

Directions:

  1. For the meat sauce: brown meat in lightly greased skillet or wok over high heat, breaking up the meat and cooking until meat is no longer pink and has a nice crusty exterior. Remove from pan using a slotted spoon. Set aside on a plate. Add a bit more oil, then onions, carrots, and celery. Sauté until translucent (about 5 min). Add garlic, oregano, chili flakes, and about 3/4 tsp each of salt and pepper. Mix to combine. Add crushed tomato, bay leaf, sugar. Stir then cover and reduce heat to low. Let simmer for about 20 min, stirring occasionally. At the end of 20 min, turn off heat and check for seasoning (it should taste GOOD – if not, add 1/4 tsp more salt). Set aside.
  2. In a medium skillet/wok, heat 1 tbsp oil or butter over medium high heat. Add 1 clove of garlic, minced. After about 30 seconds, add frozen spinach. Stir to break down clumps of spinach. Add about 1/2 tsp salt and pepper and 1/4 tsp nutmeg. Cook down until spinach is warmed through and flavorful (4-5 min). Set aside.
  3. Bring a large pot of water to boil. Add a tbsp of salt and lasagna noodles and cook according to package directions (6-8 min). Drain, then drizzle with oil to keep from sticking. Set aside.
  4. Assemble the darn thing: preheat oven to 375 degrees Fahrenheit. Add 1/3 of meat sauce to the bottom of a casserole or lasagna dish. Add one layer of lasagna noodles (3 of the traditional barilla noodles). Then add 1/2 of the ricotta/spinach mixture. Top with 3 more noodles. Then add another third of the meat sauce – spreading to distribute evenly.  Top with half of the mozzarella cheese (shredded or sliced). Top with 3 more lasagna noodles. Add remaining spinach/ricotta mixture. Add 3 more noodles. Top with remaining meat sauce. Add 3 final noodles. Top with remaining mozzarella cheese and grated parmesan.
  5. Cover with aluminum foil and bake in preheated oven for 35 minutes. Uncover, then stick back in the oven for 10 more minutes. It should be bubbly and the parmesan should just be starting to brown. Let cool before slicing unless you want messy, gooey pieces like the one pictured here =).


Leave a Comment · Labels: American/Mediterranean, Carb, Dessert, Main, Protein, Recipes Tagged: beef, bolognese, cheesy, comfort food, freezer friendly, ground beef, homemade ricotta, italian, lasagna, lime cookies, meal planning, meat sauce, ricotta, ricotta lemon cookies, spinach

Zesty Grilled Chicken with Cilantro Yogurt Sauce

September 4, 2014

IMG_2670 I’ve lusted after many versions of Tequila Lime chicken for ages but never got around to finding a good substitute for tequila (we don’t imbibe or cook with booze around here – except for teeny tiny amounts of vanilla extract or almond extract). I’ve thought about agave syrup, among other things, and thought some more. All that thinking got me nowhere until I watched Pioneer Woman make her tequila lime chicken the other day. Enough is enough. It’s time to give those chicken breasts in the freezer some cilantro/lime lovin’ (is that weird?). IMG_2675 Now I still haven’t found a good substitute for tequila, but I definitely compensated for the flavor in other ways. Along with super fruity EVOO, lime juice, salt and pepper, I added a touch of garlic and honey to the marinade. These days, I always add a bit of sweetness to chicken marinades. It seems to round out all the flavors. And the sauce just takes it over the top. It’s my go to sauce for dressing up any meat or fish. I don’t exactly measure things out these days, so I will attempt to provide the most accurate measurements I can! You really should taste as you go along though. If the flavor falls flat, add salt. If the tang of the yogurt overpowers, add a little bit more garlic. If it’s too pale green, add some more cilantro. If it’s not spicy enough, well you know what to do.

And since I find chicken breasts to be kind of bland, I cut them pretty thin. In this case, getting 6 cutlets from 2 chicken breasts. More surface area = more flavor. Trust me – I know my stuff. Hah!  IMG_2684I served this alongside another PW inspired dish: perfect potato salad. I swapped out pickles for capers. Reduced the mayo and added some cilantro yogurt sauce. Nixed the mustard. I just loved the idea of hardboiled eggs with my potato. And what’s best – my kids ate it! Sweet, sweet victory. You’d be suprised (or if you’re a parent, not surprised) that despite all the effort I put in the kitchen, their favorite food is mac and cheese from a box.

Sorry the pictures are out of focus – I was warding off two hyperactive toddlers while taking them. Good news though: my gorillapod is in the mail! Hopefully that means crisp pictures from here on out!

Ingredients:

For the marinade:

  • juice from 2 limes
  • 3 tbsp extra virgin olive oil
  • 1 heaping tsp salt
  • 1/2 tsp black pepper
  • 1 garlic clove, peeled and minced or mushed through a microplane
  • 1 tbsp honey or agave syrup
  • 2 chicken breasts, sliced across to form 6 cutlets

For the cilantro  yogurt sauce:

  • 1 cup yogurt
  • 2 cups cilantro (loosely packed)
  • 1 large clove of garlic or 2 small
  • 1 green chili
  • 1/4 tsp salt or taste

Directions:

  1. For the sauce: add all the ingredients into a food processor and blend until smooth.
  2. For the marinade: combine the first 6 ingredients in a bowl or large ziploc bag. Add the chicken and marinade at least 2 hours, or overnight.
  3. Heat a grill pan over high heat. For at least 2 minutes. Make sure it is screaming hot. There will be smoke when the chicken hits – that’s ok. It’s part of the process. Spray the grill pan with non stick cooking spray and grill the cutlets for 3 minutes on each side. Arrange them on a platter and tent with aluminum foil to let the meat rest. Serve with cilantro yogurt sauce.

Leave a Comment · Labels: American/Mediterranean, Bengali, Main, Protein, Recipes Tagged: chicken, chutney, cilantro, garlic, grilled chicken, healthy, lime dressing, marinade, weeknight, yogurt, yogurt sauce, zesty

Lemon Yogurt Cake

August 22, 2014

IMG_2645Is your fridge forever cluttered? If so,  you can empathize when I say I made this cake for the sole purpose of clearing out a container of yogurt. I’ve been using yogurt quite a bit in lieu of buttermilk for our morning pancakes. Just sub it in your favorite buttermilk pancake recipe, thin it out with some water or milk, and it is just as good!  IMG_2625Inaya is my go to person for sifting dry ingredients together. She can almost mix wet batter, but needs a little help reining in her stirring excitement. Kudos to her since I am not easy to work with in the kitchen. Any one of my friends who have attempted to cook or bake with me only to run out screaming and flailing their arms can attest to that. IMG_2632 Sorry for the sofa/printer pictured here. It’s hard to find good lighting in my apartment and it just so happens that smack in the middle of the living room is the best place. IMG_2633 There’s no butter in this cake. And I can’t say that I don’t miss it. I do. Sincerely. But, luckily, I am taking this over to my in-laws tomorrow, where there is a sort of hex on butter (I know, I know how could we be so different, might as well be from another planet). But there is no denying that some of the best cakes are made with vegetable oil. Namely because veg oil is a liquid at room temperature, so cakes made with it tend to be more moist. Take Beatty’s Chocolate Cake from example. And make no mistake – this is yet another Ina recipe, adapted a bit, which she adapted a bit from Dorie Greenspan. IMG_2637 This cake gets a few hits of lemon flavor. First, the lemon zest infuses the batter. Second, it gets drenched in a lemon/sugar syrup while still warm. Third, it gets a pretty little glaze from a powdered sugar/lemon juice concoction. IMG_2638 I used large eggs instead of the extra large eggs she usually calls for. Didn’t miss a thing. I might try a mixture of baking powder/baking soda next time though, just to see how it affects the rise. Also, I omitted the vanilla extract, which I sincerely regret. IMG_2640  I also used 1/3 cup powdered sugar for the icing rather than a full cup (we’re watching our waist lines around here LOL). IMG_2651So, if you know of any butter haters, this is the cake to make for them.

Adapted from Ina Garten.

Ingredients

  • 1 1/2 cups all purpose flour
  • 2 tsp baking powder
  • 1/2 tsp kosher salt
  • 1/2 cup vegetable oil
  • 1 cup full fat plain yogurt
  • 2 tsp lemon zest (from 2 big lemons or 3 small ones)
  • 1/2 tsp vanilla extract
  • 3 large eggs
  • 1 cup sugar
  • 1/3 cup lemon juice
  • another 1/3 cup sugar
  • additional 1 tbsp lemon juice
  • 1/3 cup powdered sugar (more if that’s your thing)

Directions

  1. Preheat oven to 350 degrees Fahrenheit. Line the bottom of a loaf pan with parchment paper and spray with non stick spray.
  2. Sift together the flour, baking powder and salt into a medium bowl. Mix oil, yogurt, lemon zest and vanilla in a large measuring cup or mixing bowl. Add eggs, sugar and stir vigorously until incorporated. Add the wet ingredients to the dry. Don’t over mix – a few lumps are OK. Pour batter into greased pan and bake for 50 minutes.
  3. After the cake is done, let it sit 10 minutes before turning out onto a wire rack. Place the cake and rack over a sheet pan (to catch excess syrup/icing). Dissolve water and sugar in a sauce pan. Poke holes through the top of the cake with a toothpick and drizzle the lemon syrup.
  4. Combine lemon juice and powdered sugar until smooth. Drizzle over the top of the cake. Slice. Serve.

4 Comments · Labels: American/Mediterranean, Dessert, Recipes Tagged: cake, citrus, healthy, lemon, lemon cake, lighter option, loaf cake, oil, snack cake, yogurt

Basil Smoothie

July 22, 2014

IMG_2613I’m pretty sure Kawsar and I are the only ones I know who don’t like smoothies. There’s just something off putting about the texture and consistency, especially when bananas are involved. I wasn’t always this way. He did this to me. It’s funny all the little ways you and your spouse end up influencing one another. IMG_2596 Enter, the basil smoothie. As strange as it sounds, there is only one resounding response to this beverage any time it is served: REFRESHING. SO REFRESHING. No fruits here to muddle with the consistency. Just delicious, tangy, full fat organic yogurt. Fresh basil (a great way to use up that excess basil if your garden is currently overflowing – as basil tends to do). Simple syrup. And ice. Now if you have a quality blender, the consistency would be of a blended ice beverage. Mine is pretty prehistoric so when I hit the power button, it usually just liquifies the ice cubes. It doesn’t bother me too much, since the beverage itself tastes great. But if you are really looking for that shaved ice consistency, pour it into a flat baking dish, stick it in the freezer, and scrape with a fork every few hours to turn this smoothie into a granita type dessert. IMG_2601I saw Giada making this smoothie ages ago and I was hooked. I’ve tweaked it to cut down the sugar (and by omitting the lemon). Since then, pretty much everyone I’ve made it for has duplicated it at home.

I wanted to share this recipe weeks ago so you could enjoy it all Ramadan long. But fear not! We have several more weeks of summer ie lots more basil to be consumed. So if you’ve had it up to here with pesto, or just eaten your last caprese salad (though I don’t know how anyone can have enough caprese salad), then try drinking your basil. You won’t regret it!

Ingredients

  • 1 cup full fat plain yogurt
  • 1/3 cup sugar
  • 1/3 cup water
  • a handful of basil leaves
  • 1 cup of ice

Directions

  1. Make the simple syrup: dissolve the sugar and water in a small saucepan. Let cool.
  2. Add the remaining ingredients to the blender and blend until combined. Garnish with basil leaves.

Leave a Comment · Labels: American/Mediterranean, Dessert, Drinks, Recipes Tagged: amuse bouche, basil, dessert, frozen drinks, granita, smoothie, summer, yogurt

Salsa all’Amatriciana

July 10, 2014

IMG_2587It’s Ramadan. The days are long. Brain cells hardly get enough glucose to function throughout the day. You would think after breaking our fasts in the evening, we get a second wind and can be productive. Not the case here. Usually after iftar, my husband and I try to make the most of the 20 or minutes we have together post-kids-bedtime and pre-taraweeh (nightly prayer). Yet even after he leaves for the masjid, I find myself completely unable to do ANYTHING productive. That includes the dishes. I don’t know why this year’s fasts has left my brain and body completely depleted (any md’s/rn’s/nutrionists feel free to chime in). IMG_2538
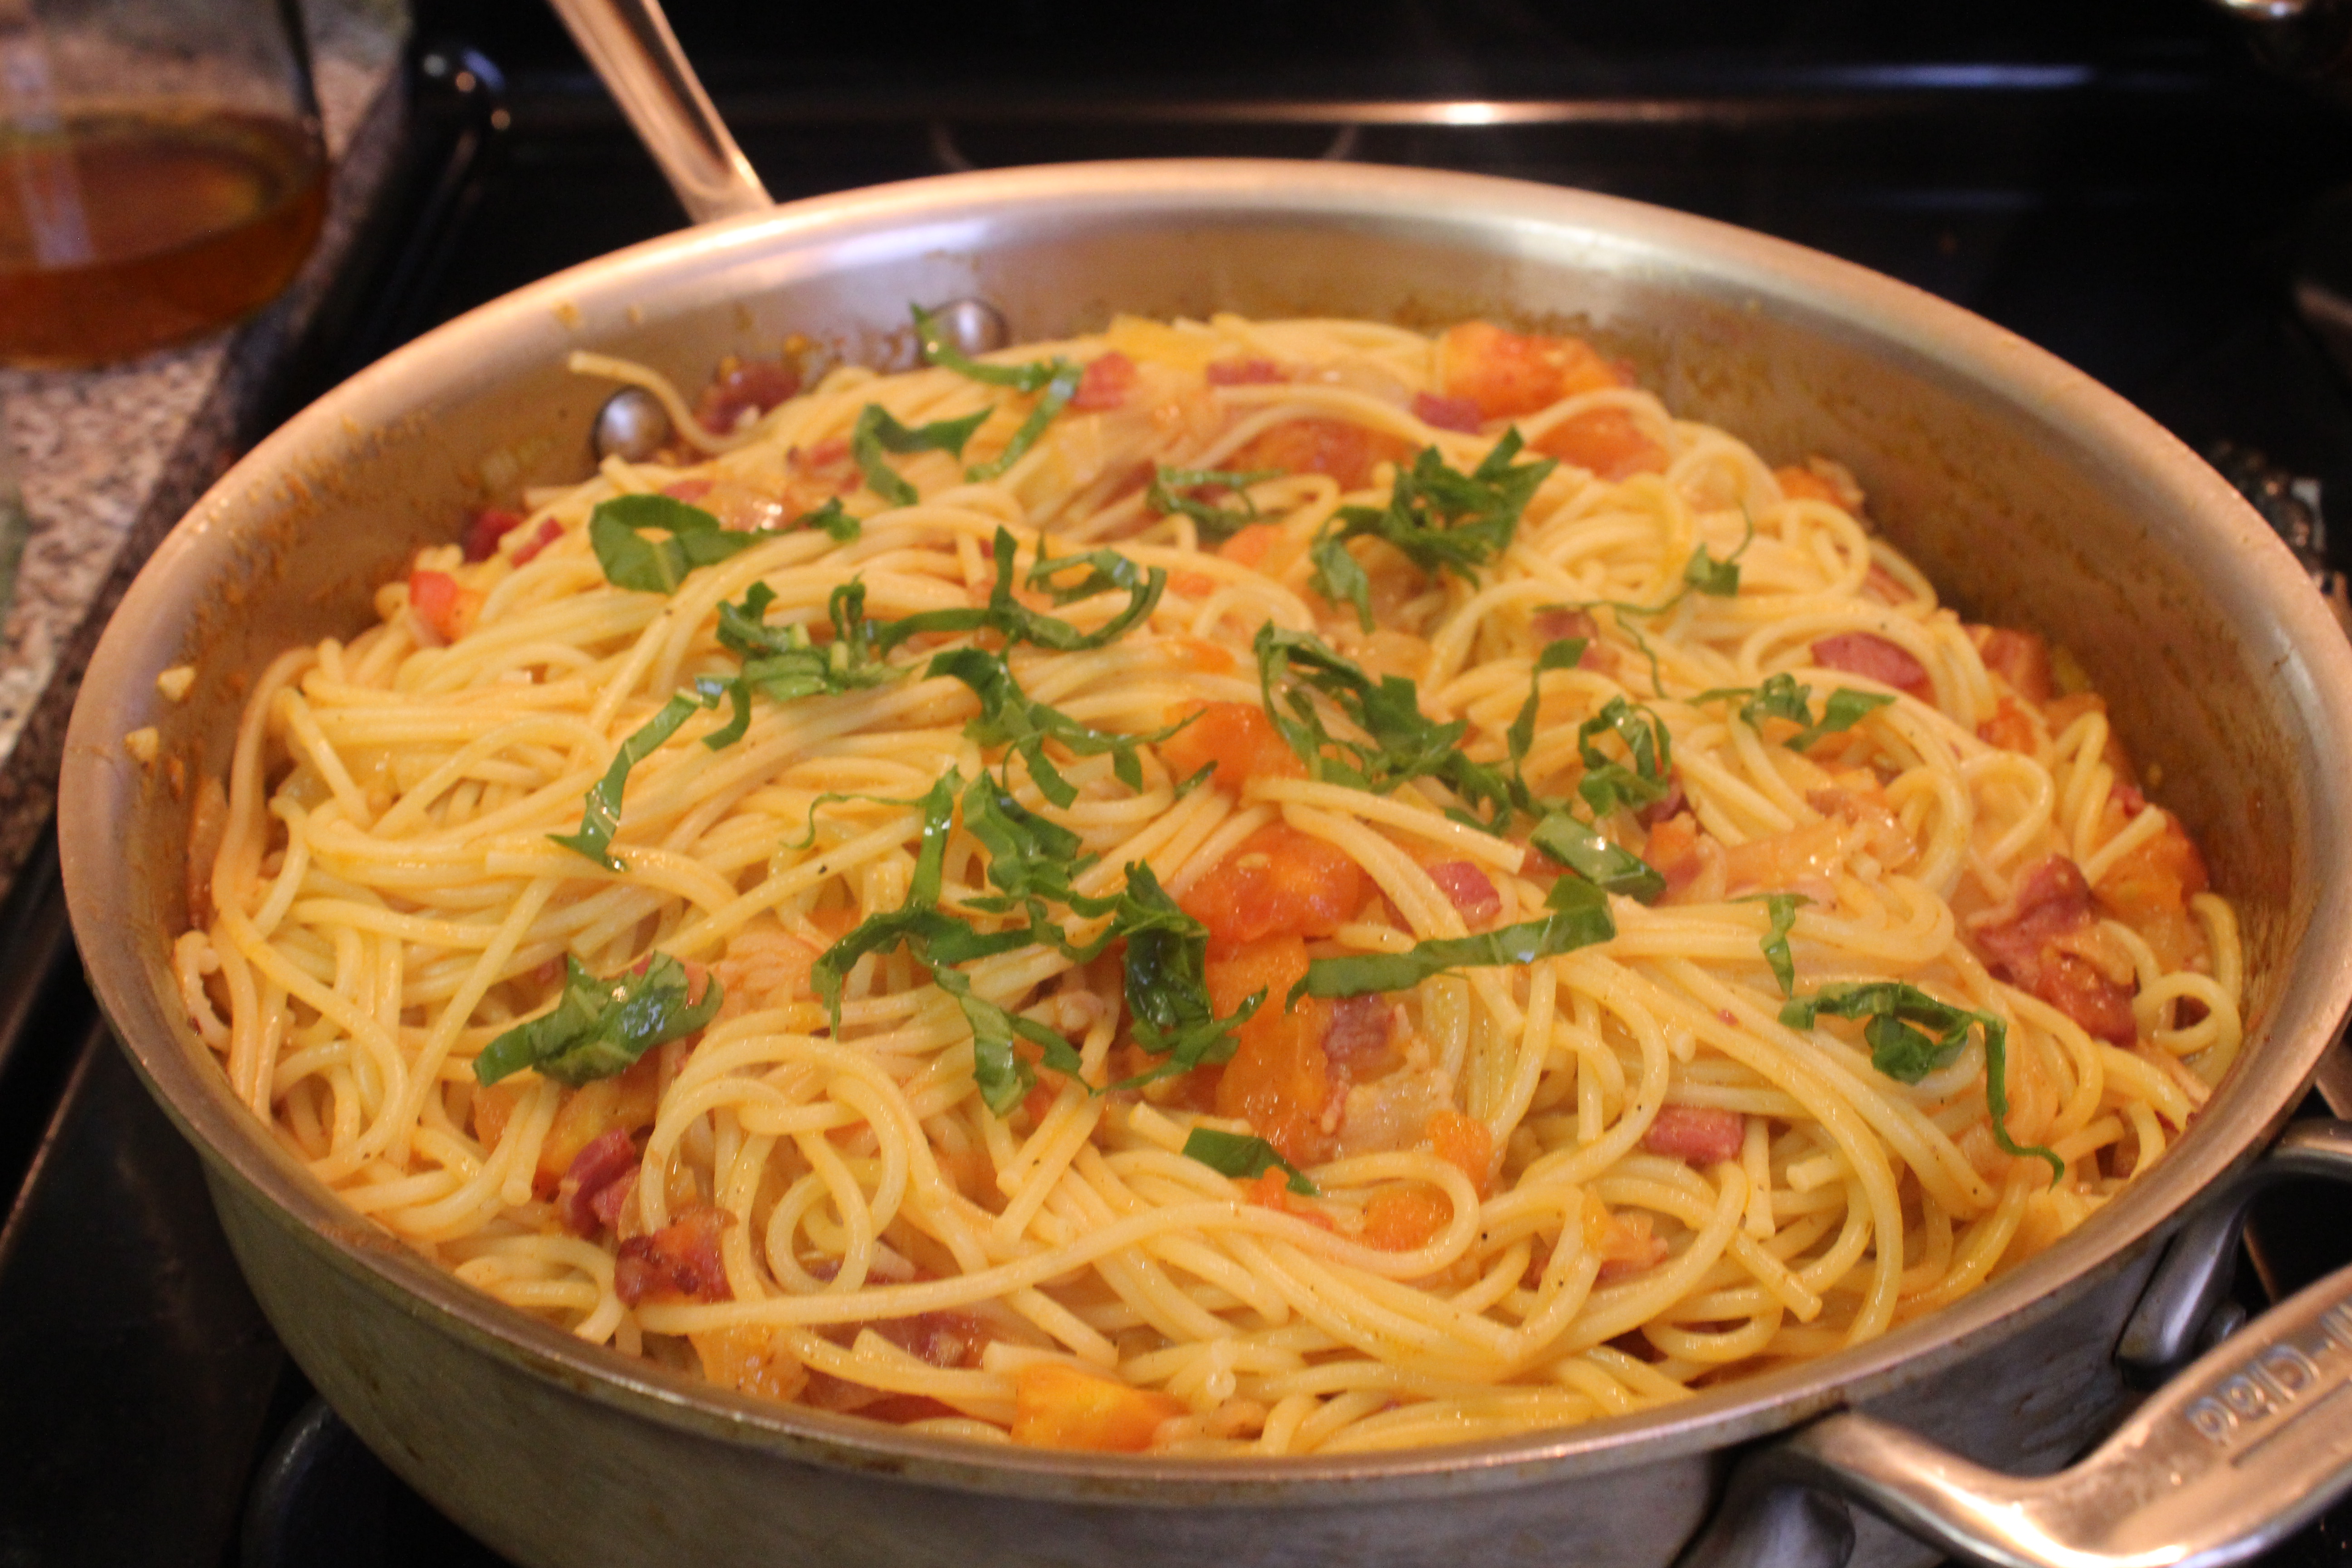
But my dear friend Amreen has been requesting this recipe from the very first time I made it for her back in college. And I, being the jerk friend that I am, have neglected to share it until now. So, on Friday, with bacon, tomatoes and sidekick Moury in hand, whipped up this old favorite.  IMG_2546This recipe is actually from my very first cookbook purchase in high school: Giada’s Everyday Italian. I know I’m always singing Ina’s praises and yes, her show really informed my current culinary outlook. But it all started with Everyday Italian. From Giada, I learned how to make my very first marinara sauce. Shrimp Fra Diavolo. Balsamic Roasted Chicken. Eggplant Caponata. Favorites that I use time and again – and they all come from this book. I can’t say as much for her follow up cookbooks, but this is definitely one I can vouch for. IMG_2557Any Roman reading this will gasp at my bastardization of their beloved Amatriciana sauce – a pancetta/onion/garlic/tomato sauce  except with halal beef bacon in place of the pancetta. I’m sorry! This is just the best we can do! The fat from the bacon balances well with the sweetness/acidity of the tomatoes. So you neither feel like you’re eating a really greasy pesto, nor a flat lined marinara (let’s face it, marinara just isn’t that exciting unless doctored up with some crushed red chili flakes). 
IMG_2576My old, and I mean old (seriously, friends for 13 years now?), friend Moury was with me in the kitchen. And contrary to our last cooking experience, I wasn’t a total tyrant. She took all these photographs for you guys. And since I haven’t been doing any day time eating, these are the only photographs I could manage for this post. IMG_2586So, bacon and pasta lovers rejoice! The perfect marriage of the two is in this dish.

Recipe from Giada De Laurentiis’ Everyday Italian

Ingredients

  • 2 tbsp olive oil
  • 6 ounces pancetta or slab bacon, diced
  • 1 yellow onion, finely chopped
  • 2 garlic cloves (I used 3), minced
  • pinch of dried crushed red pepper flakes (I would go with a generous pinch)
  • 1 (28 oz) can tomato purée (I used just over 1.5 lbs fresh tomatoes, blanched then peeled)
  • 1/2 tsp salt plus more to taste
  • 1/2 tsp black pepper plus more to taste
  • 1/2 cup grated Pecorino (I had none, so I just added some julienned basil)

Directions

  1. In a large, heavy skillet heat the oil over medium high heat. Add the bacon or pancetta and cook until the fat is rendered – about 8 minutes. Add the onion and cook for an additional 5 min. Add garlic and red pepper flakes and cook until fragrant, about 30 seconds.
  2. Add the tomatoes, salt and pepper and reduce the heat to medium-low. Allow the sauce to cook, uncovered for 15 minutes. Stir in the cheese (if you have) and salt and pepper to taste.
  3. Serve with 1 pound of cooked pasta (spaghetti or bucatini).

1 Comment · Labels: American/Mediterranean, Carb, Main, Recipes Tagged: all'amatriciana, bacon, bucatini, carbs, italian, pancetta, pasta, pecorino, pecorino romano, quick and easy, red chili flakes, roman, spaghetti, tomato sauce, tomatoes, weeknight meal

Chocolate Mousse Cake

May 31, 2014

IMG_2483I have always usually been outnumbered in my family by people who aren’t enamored by chocolate. Same was true when I married my husband. Even more so. But then the kids came, and they loved chocolate, especially  dark chocolate. It was then that I knew they were mine (that was the real testament, not the whole watching them come out of me thing). And so now I have little people to share my chocolate obsession with. Little people to make chocolate cake for on birthdays. Little hands to help stir the chocolate chips into cookie dough. And little fingers to steal chocolate chips from the counter before they even have a shot at meeting pancake batter.

IMG_7226 I’ve been planning on making this cake for months now. In March as I assembled my husband’s strawberry shortcake, I was actually thinking of this one. In January while I frosted my daughter’s rocket cake, I secretly fantasized about the light, airy and intensely chocolatey flavor this mousse would impart on a chocolate layer cake. But now it was my son’s birthday, and it was just the four of us. So I went the whole nine chocolate yards.

There are so many things that make this cake delicious. Chocolate, vanilla, and coffee all flavor the chocolate layers. The original recipe doesn’t call for espresso, but this girl learned from the school of Ina Garten, so there is going to be some coffee in my chocolate cake. The mousse is decadent with 2 cups of heavy cream, 13 oz of bittersweet chocolate, 7 egg whites. This is definitely not an everyday cake, but so worth the effort once you take a bite of the finished product. IMG_7227It’s also not for the novice baker, unfortunately. There is egg white beating, folding, chocolate melting, cooling, uniform cake slicing, etc. So if you’ve done these a few times, then you won’t be daunted by this recipe.

The recipe for the mousse makes 8 cups and the directions imply an even divide of all 8 cups between and atop the 3 layers. I needed much less, even when applying the mousse around the sides like a frosting. I used 6 cups for the layers, 1 cup around the sides, and 1 cup for my midnight craving =)

The only thing to be aware of is if you use it around the sides, this cake will have to be refrigerated. At room temperature, the liquid will start to separate and you’ll have a chocolatey mess for the cake. So, keep it in the fridge until just ready to slice and serve.

IMG_2480At this point I have to make a shout out to my friend Jenn Chowdhury, who gifted me this lovely antique cake stand! You might remember the vanilla cake with chocolate buttercream frosting I made for her birthday a few months back.  I’ve been in the market for a while now, since my previous one broke, and this came in the mail like a gift from above. So, thank  you Jenn!!

Recipe adapted from Fine Cooking.

Ingredients

For the cake

  • Butter or vegetable oil for greasing the pan
  • 1 1/2 cups cake flour
  • 6 tbsps unsweetened natural cocoa powder
  • 2 tsp baking pwder
  • 1/4 tsp baking soda
  • 1/4 tsp kosher salt
  • 1 cup white sugar
  • 1/4 cup vegetable oil
  • 1 large egg
  • 1 tsp vanilla extract
  • 1 cup hottest tap water
  • 1 tsp instant espresso

For the mousse

  • 2 cups heavy cream
  • 1/4 cup unsweetened natural cocoa
  • 4 oz (1/2 cup) unsalted butter at room temp, cut into cubes
  • 13 oz bittersweet chocolate (I used Ghirardelli)
  • 2 tsp vanilla extract
  • 7 large egg whites at room temperature
  • 1/2 cup white sugar

Directions

For the cake

  1. Position a rack in the center of the oven and preheat to 325 degrees Fahrenheit.
  2. Grease a 9×2 circular cake pan. Line the bottom with parchment paper and flour the sides of the pan.
  3. Sift the cake flour, cocoa, baking powder, baking soda, and salt into a large bowl. Add the sugar and whisk until all the ingredients are well blended. Measure the oil into a liquid measuring cup. Add the egg and vanilla and mix with a fork. Add to the dry ingredients.
  4. Fill the liquid measuring cup with 1 cup hottest tap water. Dissolve the espresso in it and add to the dry ingredients. Mix until the dry ingredients  are just moist, scraping down the sides of the bowl. Pour batter into prepared pan and bake for 32 to 34 minutes (I baked for 34 min because we’re not dealing with cupcakes here; I’m not too worried about it drying out.) Test it with a toothpick, ensuring that it comes out clean.
  5. Let it cool in the pan for a bit, until you can handle it with your bare hands. Invert it onto a wire rack to cool completely. I like to loosen the sides with a metal spatula or butterknife. Then I place on hand on top, turn the cake out onto my hand, and delicately place over the wire rack. Remove the parchment paper. Let cool to room temperature. Refrigerate or freeze until ready to apply the mousse.
  6. The original recipe suggests assembling it in a springform pan, but I just did so on the cake stand. Slice the cake into three even layers. I like to cut an inch or two deep going around the circumference, before cutting all the way through (otherwise I usually end up with slanted layers). Set the top two layers aside. Scoop about 2 cups of the mousse onto the layer. Spread delicately with a spatula. Add the second cake layer on top. Scoop an additional 2 cups of mousse and spread evenly. Add the top layer and an additional 2 cups mousse. Before applying to the sides, add strips of parchment paper on the cake stand, tucking into the bottom layer (just to keep the surface clean). Starting from the top, add a dollop of mousse and carefully push down the sides. Rotate the stand and continue until the sides are fully covered.
  7. Garnish with chocolate curls, if desired. Refrigerate until ready to be eaten.

For the mousse

  1. Set up an ice bath in a large bowl. Bring the cream and cocoa to a boil in a large saucepan over medium heat, whisking to incorporate all the cocoa. Remove from heat and add the chopped chocolate and butter. Whisk until well combined. Pour the chocolate mixture into a medium bowl and place over ice bath. Keep stirring while the mixture comes to room temperature. Remove bowl from ice bath.
  2. Beat the egg whites in a large bowl with a hand held electric mixture on low speed until frothy. Increase speed to medium and beat until soft peaks form. Add the sugar gradually and beat until peaks are almost stiff.
  3. Add the beaten egg whites to the chocolate mixture in about four batches. Fold the egg whites into the mixture carefully with each addition. Here is a great video demonstrating folding.
  4. The mousse is ready when all the egg whites are incorporated and there are no lumps.

4 Comments · Labels: American/Mediterranean, Dessert, Recipes Tagged: birthday cake, cake, celebration cake, chocolate, chocolate cake recipe, chocolate mousse recipe, dessert, mousse

Banana Date Nut Bread

March 25, 2014

IMG_2408I bought quinoa a week ago. I still don’t have the guts to prepare it, out of fear of what happens to unfortunately too many of my experiments in healthy-food-ness. Make it. Eat some the first day. Then a day goes by: everyone opts for the other options in the fridge. Another day goes by: my mom brings over a vat of chicken curry. Another day goes by: take out time! By day 4, no one will be eating what they hadn’t eaten the past 4 days (my chia seed pudding is currently suffering that fate)! So while I procrastinate on the quinoa, I tried to make some healthier substitutions in my usual banana bread. After going through Mastering the Art of French Cooking, I was all like “yeah! butter! if french people can douse their food in it, why can’t we?”. Then I read an article that scared the pants off of me about saturated fats. So what to do?! There’s got to be a balance between the Paula Deen fried mac’n’cheese-wrapped-in-bacon death on a plate and quinoa/kale/green smoothie diet.IMG_2403So, here is my answer. Banana bread. I know bananas have a bad rap for the amount of sugar in them, but hey, they have potassium. That’s important, right? Personally, I’d rather eat natural foods with natural sugars (like coconut water) and vitamins/minerals than an artificially flavored protein shake to curb my appetite! So, on to this bread. Does it have sugar? Yes. But there’s fiber from the date and whole wheat flour. Does it have fat? Yes. But it’s coconut oil and supposedly the saturated fat in that is better for you. And nuts! Good fats that keep you full longer! I cut the amount of sugar from the original recipe by a 1/2 cup. If you’re rolling your eyes at me at this point, I’m ok with that. This isn’t a cake baked in a loaf pan that you can call a breakfast. It’s hearty. It tastes good. And you don’t have to feel guilty for having a slice. Have it with a glass of milk for a snack, or with coffee for breakfast.

Ingredients

  • 1/2 cup coconut oil
  • 3/4 cup sugar
  • 5 medium bananas, smashed
  • 2 eggs
  • 1/2 cup buttermilk
  • 1 cup whole wheat flour
  • 1 1/2 cups all purpose flour
  • 1 tsp salt
  • 1 tsp baking soda
  • 1/2 cup chopped, pitted dates
  • 1/2 cup chopped pecans

Directions

  1. Bring the buttermilk and eggs to room temperature: set the half cup of buttermilk out and let it come to room temperature while assembling the rest of the ingredients. Place the eggs in a bowl with lukewarm water (cold ingredients will cause the coconut oil to congeal).
  2. Preheat oven to 350 degrees Fahrenheit. Spray a 9x5in loaf pan with non-stick spray (or grease with butter).
  3. Combine coconut oil and sugar in a stand mixer and beat on medium speed until combined (or use any electric mixer) for about 2 minutes. Add the bananas, eggs, and buttermilk, one at a time until combined.
  4. In a separate bowl, whisk together the flours, salt, and baking soda. Slowly add to the wet ingredients with the mixer running, until combined.
  5. Turn off the mixer. Add the dates and pecans. Stir with a spatula or wooden spoon to combine (scraping off the sides and bottom).
  6. Bake in preheated oven for 1 hour 15 minutes (start checking with a toothpick at 1 hour 5 minutes. It should come out dry).

4 Comments · Labels: American/Mediterranean, Breakfast, Carb, Recipes Tagged: banana bread, bananas, bread, breakfast, buttermilk, coconut oil, dates, quick bread, snack, vegetarian, whole wheat flour

Caramel Cupcakes

March 17, 2014

IMG_2372 My sweet friend Rabia is expecting her second baby and one of the organizers of her baby shower, another long time friend, Nargis, tapped me to supply the cookies and cupcakes for the event! It was such a treat to experiment with new cupcake recipes, challenge myself with making sugar cookies shaped like books (theme was bring a book for baby), and contribute to such a lovely tablescape (made by Nargis!).IMG_2370Instead of doing the usual chocolate/vanilla selection, I decided to try a caramel cupcake recipe that’s been sitting on my shelf for years. It’s from a magazine from Fine Cooking entitled “Celebration Cakes” (that I think I got from a Lowe’s or Home Depot). If you’ve never worked with caramel, it might be a little tricky to get it right. But a little practice with caramel is so worth it for the world of concoctions you can make. The burnt sugar added some wonderful deep notes to the cupcake. And it came out moist and perfectly tender.IMG_2380 Along with the cupcakes, I made sugar cookies in the shape of books by slightly bending my square cookie cutter to a rhombus shape. And, because everything tastes better with chocolate, I applied a chocolate glaze made out of 10 tbsp butter and 10 oz of semi sweet chocolate chips (melted). I did the outline of the book with a ziploc bag with the tip cut. I filled in the “cover” by applying a dollop of the glaze and smoothing it out with the back of a spoon. I applied the “pages” with a simple powdered sugar/milk concoction. And the lettering – traditional buttercream. IMG_2375For the frosting, I used Ina Garten’s cream cheese frosting from her Flower Cupcakes, tinted in blue and pink. Recipe for the caramel cupcakes from Fine Cooking below. Their suggested pairing is a butterscotch frosting. If you’d like for me to share that recipe, just let me know. Enjoy!

Ingredients

  • 1/3 cup plus 3/4 cup granulated sugar
  • 1 1/3 cups unbleached all-purpose flour
  • 1/2 tsp baking powder
  • 1/4 tsp salt
  • 1/2 cup (1 stick) unsalted butter at room temperature
  • 2 large eggs at room temperature
  • 1 tsp vanilla extract

Directions

  1. Preheat oven to 350 degree F and line a standard muffin pan with liners.
  2. Put 1/3 cup sugar in a shallow skillet and heat over medium high heat. This takes several minutes so while that goes, bring 1/3 cup of water to boil in a small saucepan. Keep warm. Once the sugar starts to melt, swirl it around every once in a while to help it along. Once it becomes a deep amber color, turn off the heat and carefully pour the water into it. It will sizzle so stand back. The caramel will harden so return to a medium high heat and stir with a wooden spoon to dissolve the caramel.
  3. Spray a glass measuring cup with non stick spray (I don’t know if this step is necessary, but I did so for good measure). Pour enough of the liquid caramel to a 1/2 cup measure. Let cool until warm.
  4. Sift the flour, baking powder, and salt into a small bowl. In your stand mixer, or in a large bowl, beat the butter on medium speed for 30 to 60 seconds. With the mixer running, slowly add the 3/4 cup sugar. Beat for about 1 minutes, scraping down the bowl as necessary. Add eggs, one at a time, beating for 60 seconds after each addition. Scrape down the bowl, add vanilla and continue beating. Switch to low speed and add 1/3 of the dry ingredients. Follow up with 1/2 of the liquid caramel. Add another third of the dry ingredients, second half of the caramel, and finally the last third of the dry ingredients.
  5. Divide the batter evenly. I like to use an ice cream scoop for this. Bake for 18 to 20 minutes, until a toothpick comes out clean.
  6. Wait to completely cool before frosting.

4 Comments · Labels: American/Mediterranean, Dessert, Recipes Tagged: baby shower, buttercream, caramel, caramel cupcakes, cream cheese frosting, cupcakes, dessert, icing, party, party favors, party ideas, sugar cookies, tablescape

  • Newer Entries
  • 1
  • …
  • 6
  • 7
  • 8
  • 9
  • 10
  • 11
  • Previous Entries
American, Bangladeshi. Savory, sweet. I don't discriminate and neither should you.

Most recently…

Load More...
Follow on Instagram

Social

Subscribe to Blog via Email

Enter your email address to subscribe to this blog and receive notifications of new posts by email.

Tags

appetizer beef bengali breakfast butter cake caramel chicken chocolate chocolate chips cilantro clean eating coconut comfort food cookies dessert dinner entertaining fall fruit ganache gluten free halal healthy homemade honest chops honest creations iftar italian pasta pastry pistachio quick and easy dinner ramadan recipe side side dish south asian spinach vegan vegetables vegetarian weeknight dinner weeknight meal whipped cream

Theme by 17th Avenue · Powered by WordPress & Genesis