Kitchen3N

Recipes and food fun from Apt 3N

  • About
  • Gallery
  • Recipes

Shrimp & Green Bean Purée (Chingri ar Beans Bhorta)

December 31, 2013

ImageI don’t really give a lot of thought to New Years resolutions. Calendars are such a man made construct – how is tomorrow more or less relevant than today? I know I seem like Buzz Killington here, while everyone is hastily getting ready for their NYE parties (and hey, I am, too). But I just got this email from wordpress reviewing the year in stats that made me reflect a bit. Although it is nowhere where I’d like to be, I’ve come a long way from the early days of dinky pictures in low lit spaces. I’ve learned a lot and have put a lot of work into sharing content that I think will be meaningful you guys. And as I make my way through my late twenties, I definitely feel the pressure to do something I am proud of, improve and grow, and do right by my kids.ImageSome of my favorite posts from this past year was Julia Child’s glorious ratatouille, the traditional Bengali Rice Pilaf that was actually approved for submission into Foodgawker, and the Sticky Toffee Pudding that I thought photographed so beautifully. I am proud though, of the progress I’ve made. Starting out with some not so relevant recipes to some pretty handy dandy ones for newbies to the [especially Bengali] kitchen. And though I haven’t garnered nearly enough traffic to consider myself a success, I’ve thoroughly enjoyed hearing anecdotes from you guys about the different recipes you’ve tried and your personal success stories in the kitchen. ImageA friend of mine posted on my Facebook page saying, “You inspire me to cook!” and I thought to myself, that is the whole reason I started this blog in the first place. To share some recipes or insights with people who don’t have the time or resources to spend in the kitchen. So to them, and to anyone else reading this, THANK YOU for making 2013 such a great year for Kitchen3N. I look forward to sharing more goodies with you guys in the years to come. Image
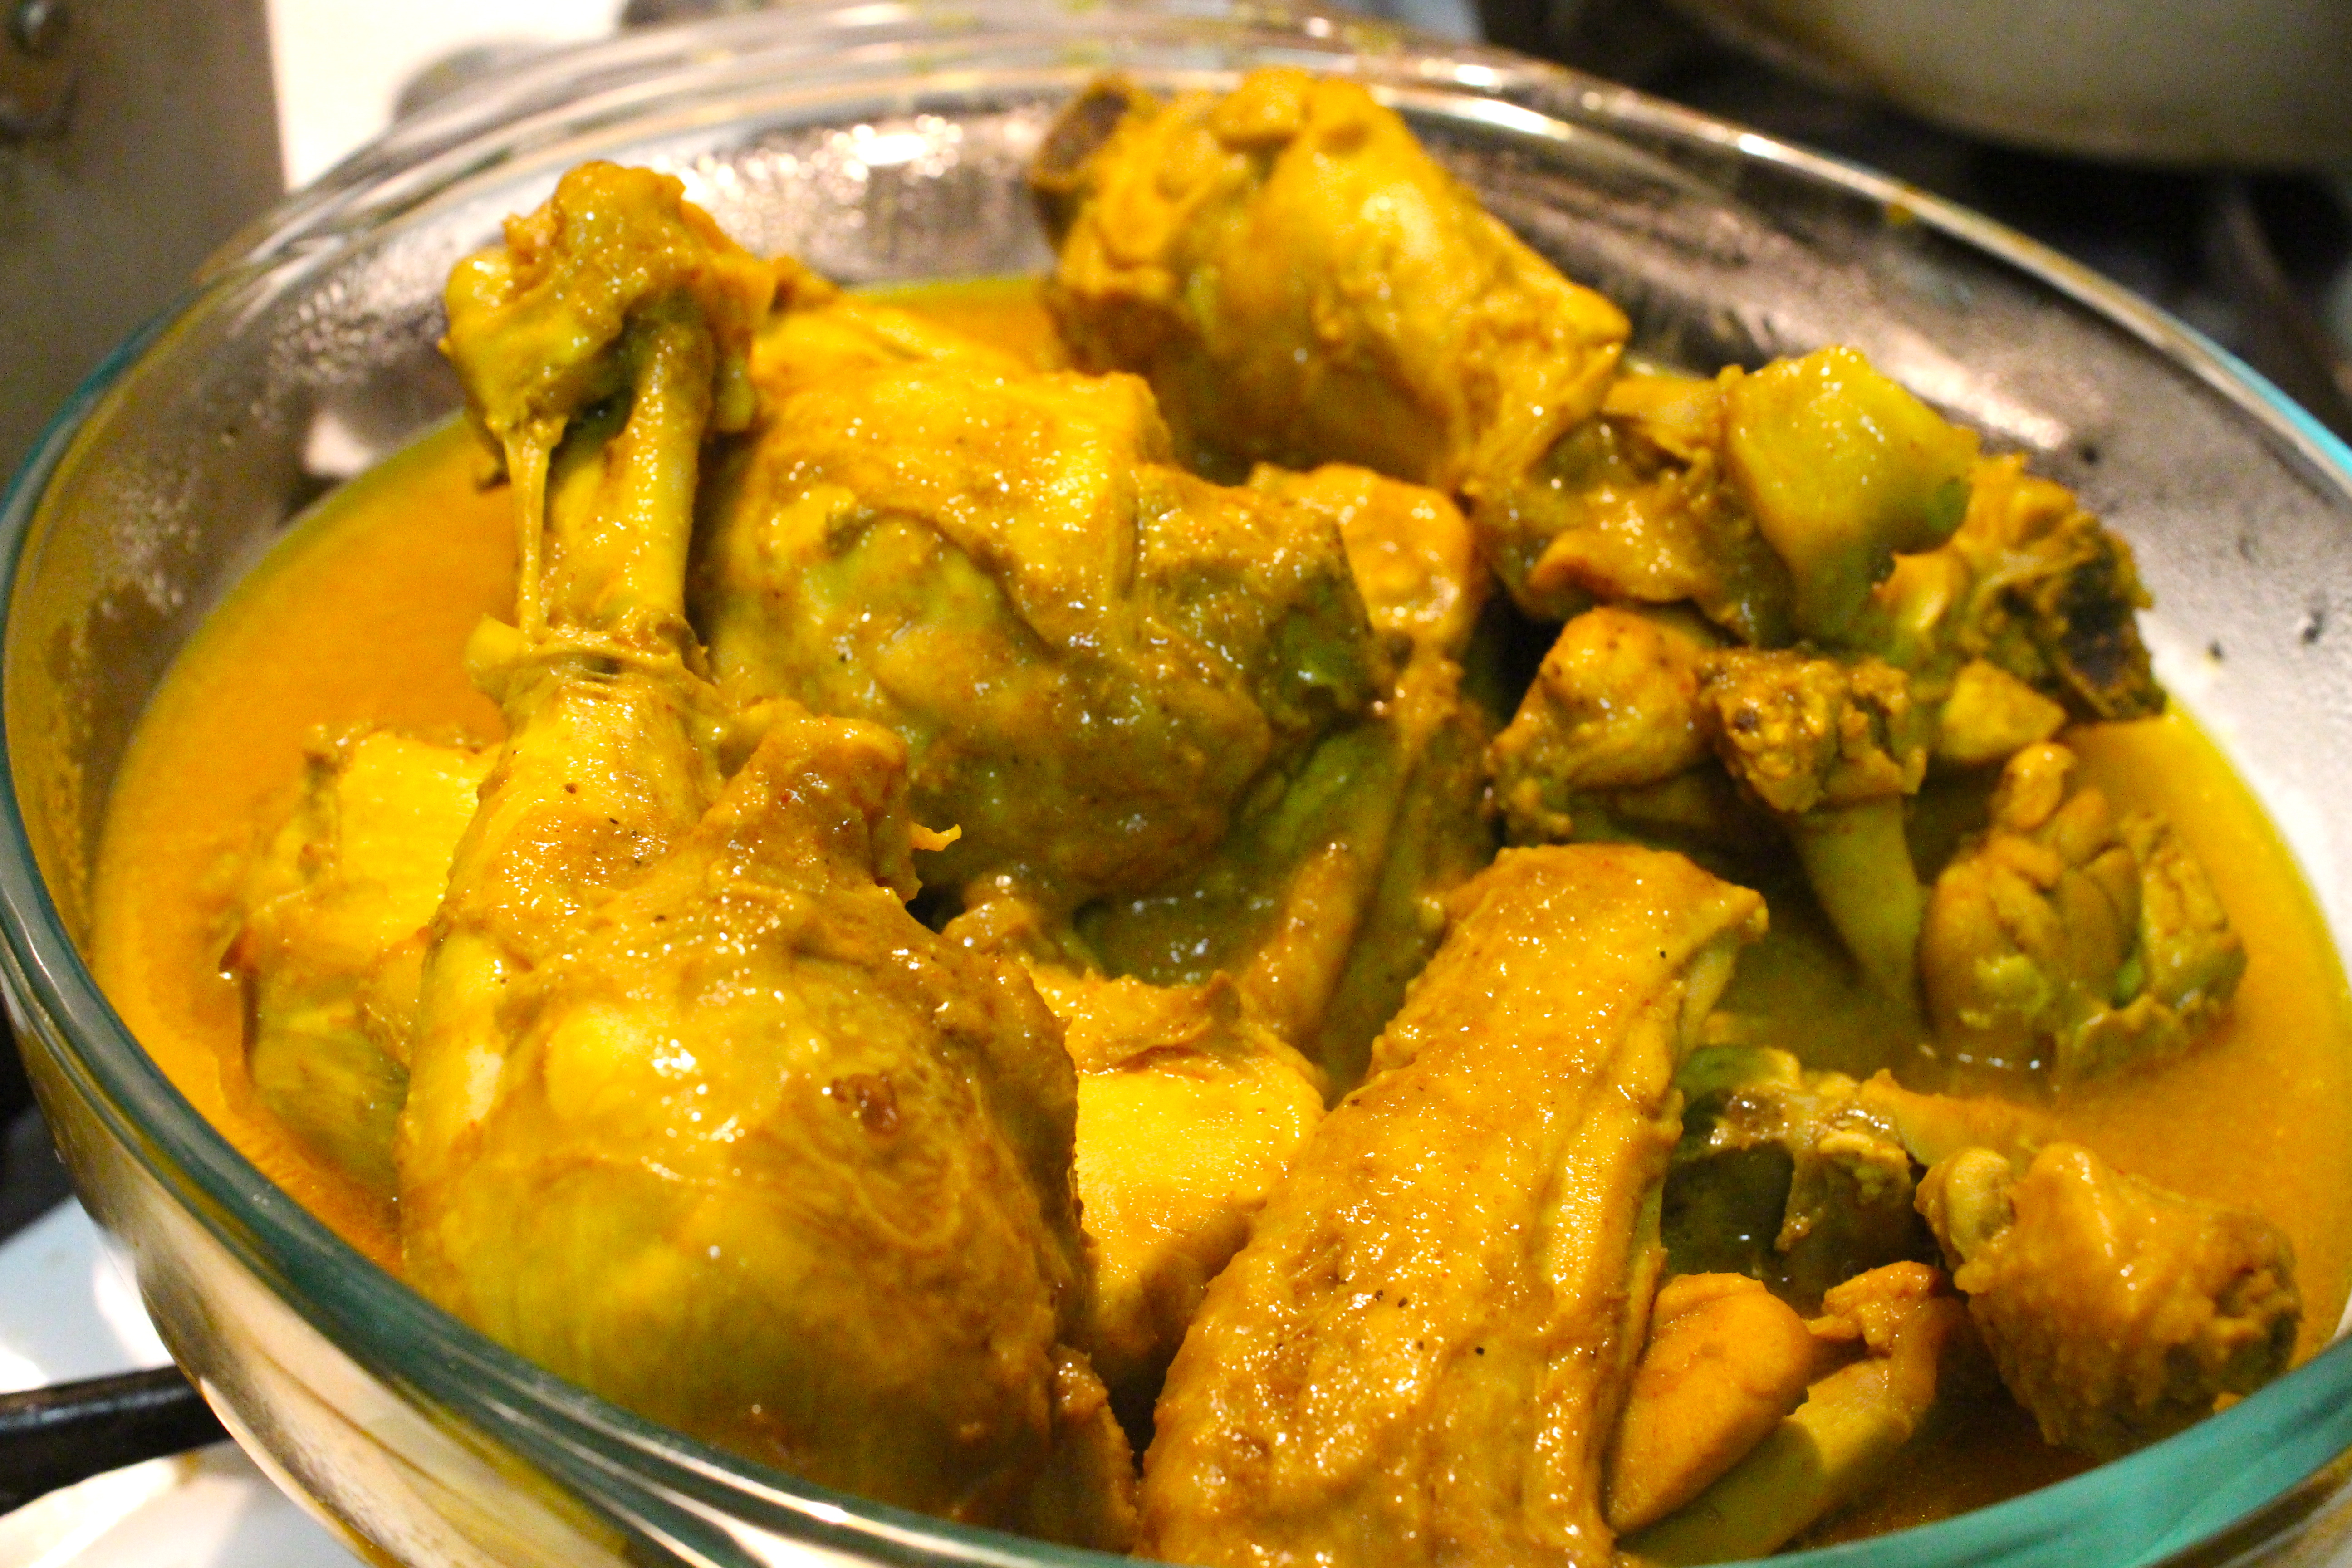
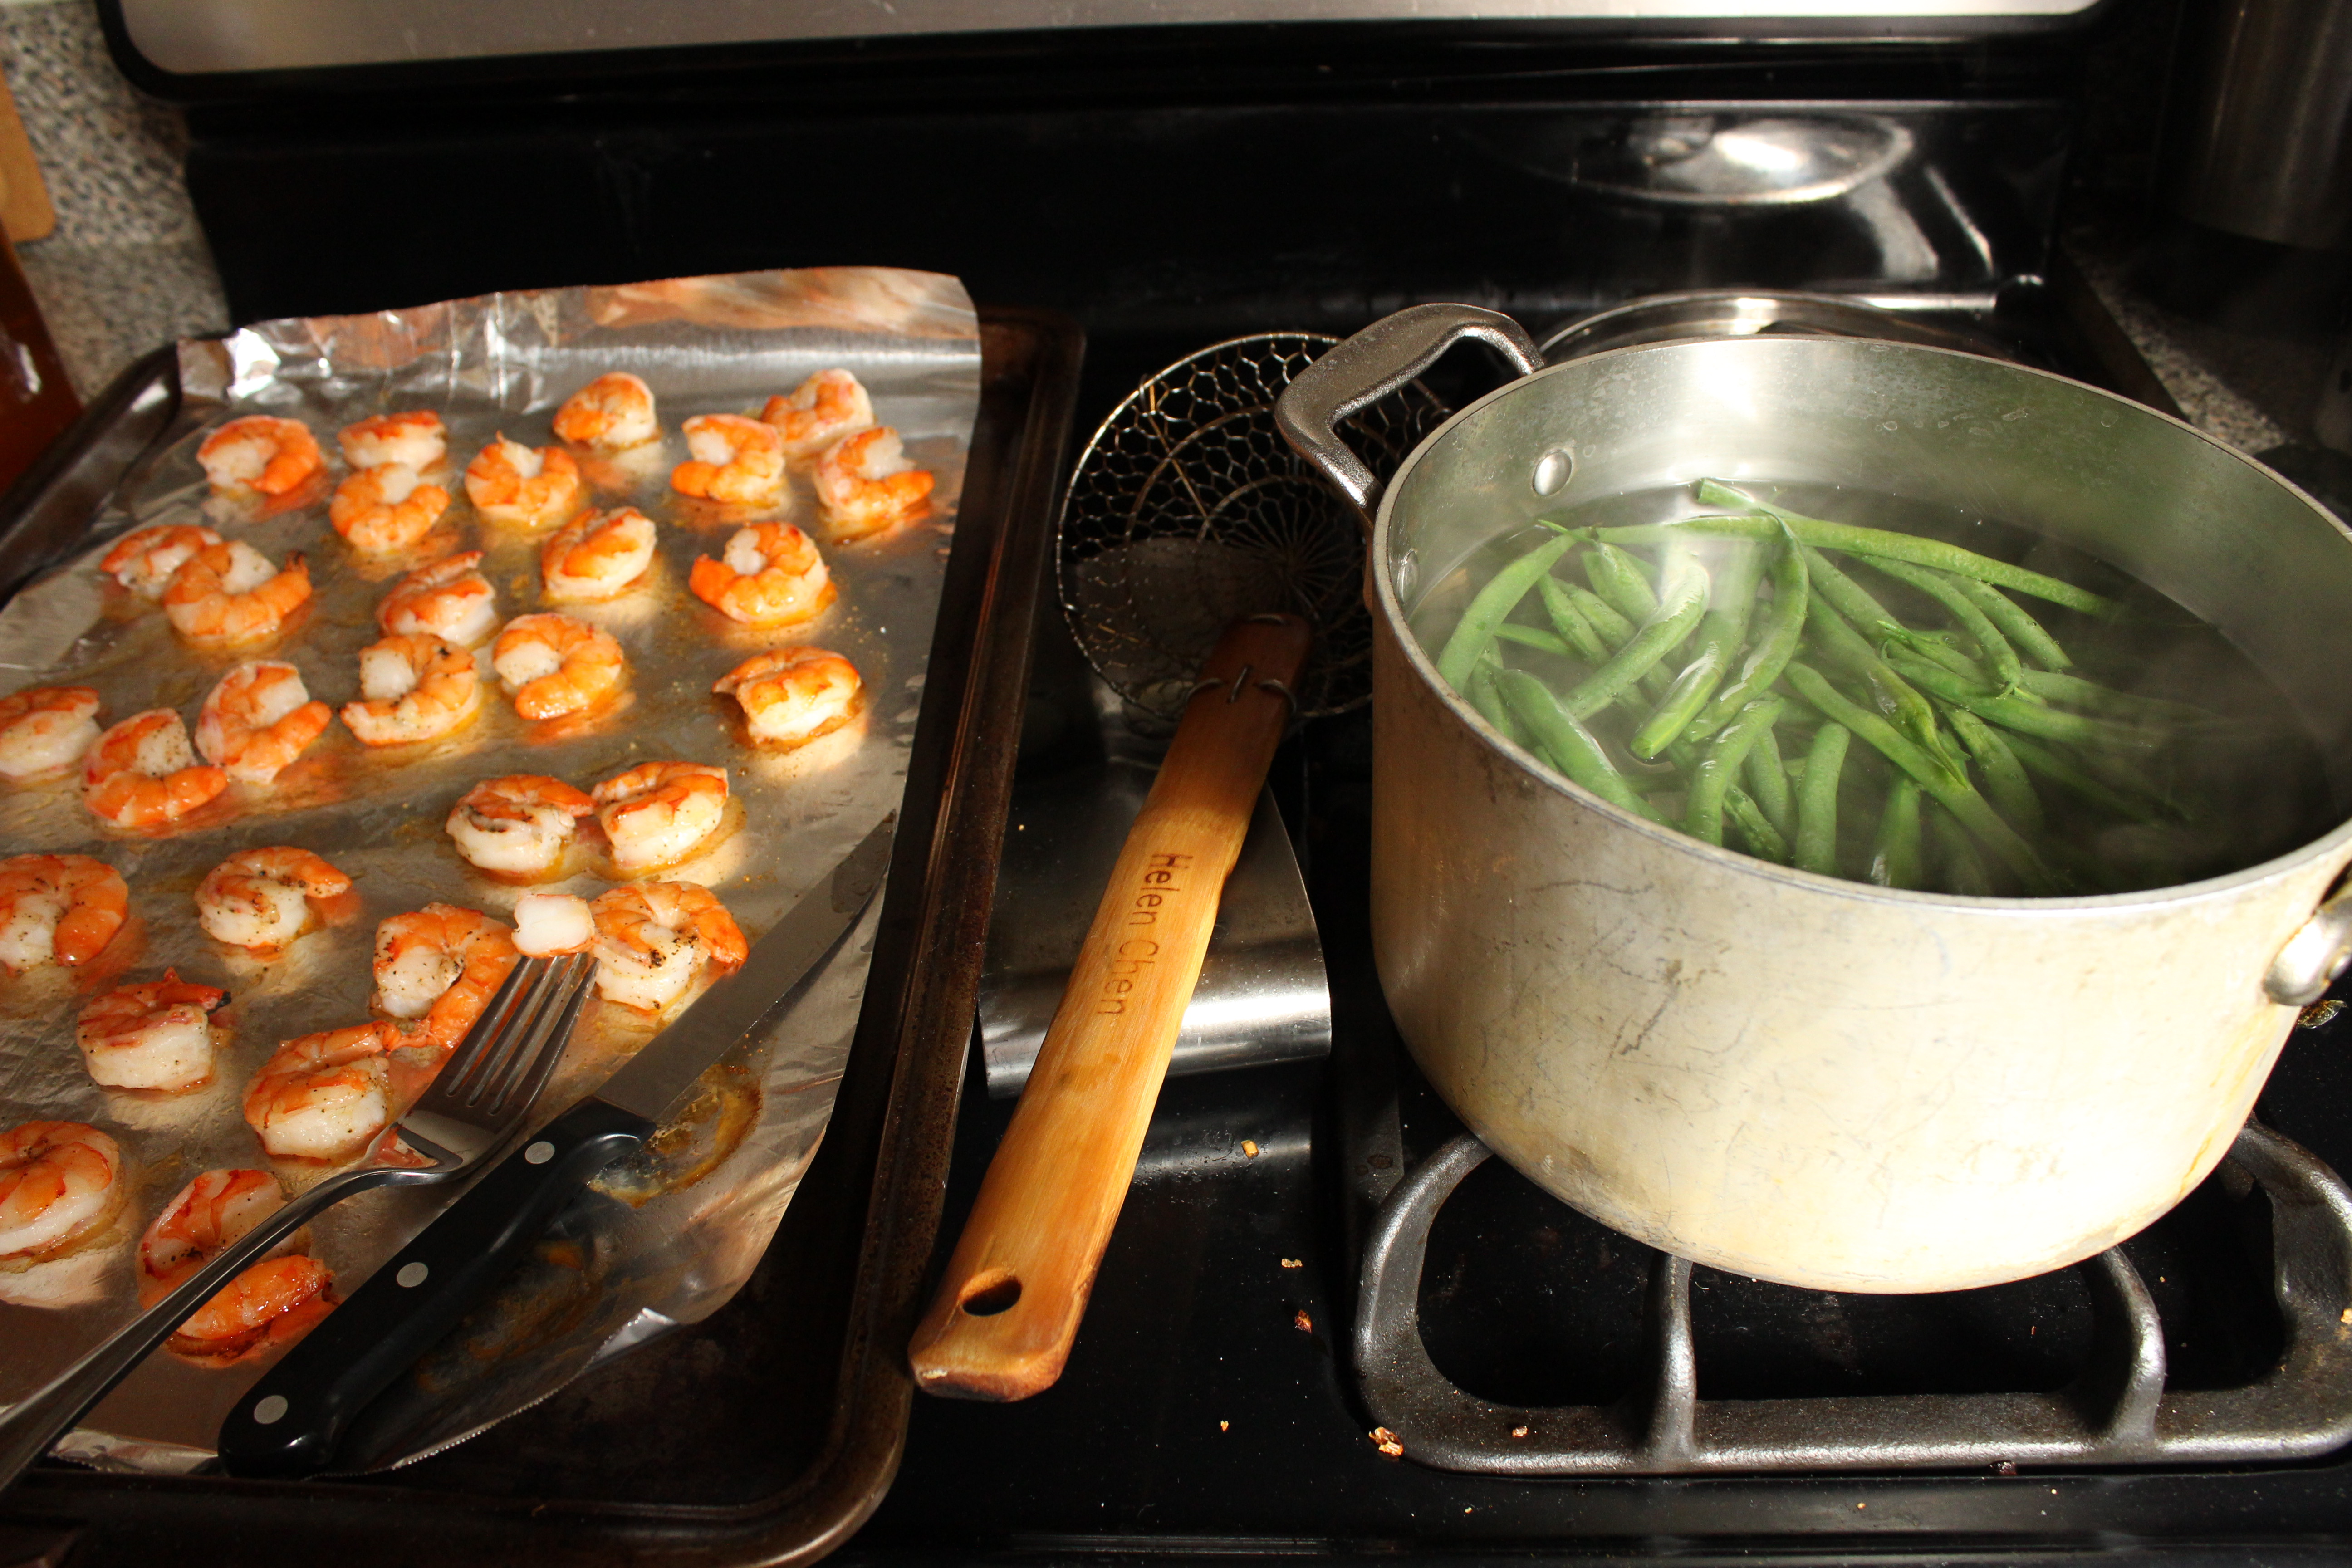
Now, what is a bhorta? They are usually made from boiled/steamed vegetables or dried fish, then ground to a pulp using a shil pata (stone slab, kind of like mortar and pestle), along with raw onions, green chilis, salt and mustard oil. Sometimes dried red chilis. They are CRAZY good. My mom’s experimented with the preserved fish readily available in this country: anchovies, sardines, etc. But this one is the best. Some permutations include lime leaves (which can be hard to find, which is why I improvised with lemon zest and lemon juice). These aren’t traditional ingredients but they help brighten up the flavor without using way too much salt. It’s a great low fat side. Be warned though: it is spicy! Of course you can adjust it to your taste, but for an authentic Bengali experience, crank up the heat! Image

Ingredients

  • 1/2 lb large shrimp, peeled, deveined and tails off
  • salt, pepper and olive oil
  • 3/4 lb string beans, stems off
  • zest of 1 lemon
  • 1 tsp lemon juice
  • 1/2 cup cilantro, roughly chopped
  • 1/4 chopped yellow onion
  • 1 tbsp mustard oil (could probably substitute regular ol’ mustard)
  • 1/2 tsp salt (or to taste)
  • 2 green chilis, roughly chopped (add just one if you are a heat lightweight! and wear gloves if necessary…just don’t stick  your fingers in your eyes afterward!)

Directions

  1. This is unconventional, but it’s the only way I cook shrimp: toss shrimp with 1/4 tsp salt, 1/8 tsp pepper and 2 tbsp extra virgin olive oil. Spread onto a baking sheet and roast in a 400 degree F oven for 7 minutes (more or less depending on the size of the shrimp. Once cool enough to handle, chop roughly and transfer into a food processor.
  2. Next boil some water in a large pot. Once it comes to a full boil, add 1 tsp salt and add the green beans (do it in batches if necessary). It should take 5 minutes to cook through. Drain, chop roughly and add to food processor.
  3. Add the remaining ingredients to the food processor and blend to combine. Serve with rice and daal.

4 Comments · Labels: Bengali, Recipes, Side, Veg Tagged: bengali, bhorta, gluten free, healthy, puree, side, spicy, vegetables, veggies

Rice Pilaf (Palau)

November 25, 2013

IMG_1777Begin rant: I’ve got social media fatigue. I even convinced myself at one point that it was a productive use of my time, because wasn’t I mainly reading news articles and stuff? Recently, that answer became a glaring NO. Buzzfeed compilations, vine videos, 20 ways to know you’re from this city or that farm or truly ghetto. And my feed is just filled with shares of blog posts from self declared intellectuals who think they have such pearls of wisdom. I learn more from my moments of quiet reflection, when I’m running or washing dishes, than I have after reading a dozen of said articles. The handful of books I’ve read on marriage and relationships have given me important tools – many of which I’ve seen recycled time and again in those pieces. I can probably count on one hand articles of merit I’ve found through social media: Anne-Marie Slaughter’s famous article Why Women Still Can’t Have It All, NY Times’ The ‘Busy’ Trap, Nicholas Carr’s How the Internet is Making us Stupid, and The Extraordinary Science of Junk Food. So, my resolution is this: read more books. Reflect more. Check-in less. With this as an exception. IMG_1757End rant. On to the food. I know a lot of my (handful) of readers are on their own for the first time, either newly married, or going to med school (ok, that probably covers all of my readers). That’s why it’s important for me to cover all the bases of Bengali cuisine. And this rice pilaf (palau) is the quintessential dish for entertaining. Any time you have company, the main decision  you have to make is: biryani or palau + curries? Plain rice isn’t considered special enough, even though some of the best meals I’ve had consisted of plain rice, served with a plethora of spicy/tangy bhortas, curries and daal. Actually, ask any Bengali and they will probably prefer the homey meals to these elevated, reserved-for-guests spreads.IMG_1758Even apart from the traditional spread, this pilaf would make a fine accompaniment to any roast poultry dish. Which is why I was eager to share it with you in advance of Thanksgiving, in hopes that you might give it a try in lieu of your usual rice or carb. IMG_1759Onions get caramelized and lend a sweet component.  Toasted rice and browned butter give it depth. The whole thing gets hit with a wonderful concoction of aromatics: garlic, ginger, cardamom, cinnamon and bay leaf, providing the warmth and flavor. IMG_1761And the whole thing comes together pretty quickly, as long as you let the rice soak in some water while you get the onions going. The peas are optional, and often not included in Bengali rice pilafs (more common in North Indian cuisine). But I like to add them in to convince myself I’m feeding the kids something healthy. IMG_1774I served this alongside another classic for-entertaining-only dish: chicken korma, a sweet and savory chicken cooked in a curry/cream sauce, and spicy shrimp bhuna. And of course, salad! You definitely need a side salad to cut the richness. Followed by ice cream sundaes with homemade hot fudge (the recipe for that coming soon!).  Pretty darn good if I do say so myself.

Ingredients

  • 4 cups long grain basmati rice
  • 1 tbsp olive oil or vegetable oil
  • 1/2 stick butter (1/4 cup)
  • 1/2 large Spanish onion, thinly sliced
  • 2 garlic cloves, minced
  • 1/2 tsp ground ginger (alternately you can use 1 heaping tsp of garlic/ginger paste)
  • 3-4 cardamom pods (or 1/2 tsp ground cardamom)
  • 1 cinnamon stick (or 1/2 tsp ground cinnamon)
  • 2 bay leaves
  • 1 tsp salt (or to taste)
  • 1 cup peas (optional)

Directions

  1. Pour the rice into a bowl and rinse the rice 3 times in cold water to get rid of excess starch. I know a lot of people say not to do it, since you lose some of the nutrients, but this is the way it’s been done for ages, so just do it. Add enough water to come up to the top of the rice, and let it sit. Set aside.
  2. In a large pot, add the oil and butter and heat over a medium high heat. Once the bubbles subside, add the onions. Stir occasionally and let brown. This will take at least 10 minutes. Once brown, add garlic and ginger. Stir. Then, working quickly, drain the excess water from the rice and add the rice to the pot. Stir constantly, to toast the rice in the butter and to redistribute the onions and garlic throughout the rice. Once everything is nice and toasty (about 5 minutes), add 6 cups of water (rice should be submerged in the water, with the water coming up about 1 in over the rice). Add the cardamom, cinnamon, bay leaves and salt. Bring to a boil, then reduce to a simmer over low heat. Cover.
  3. After letting it simmer for 10 minutes, check for doneness and seasoning. If the rice is just about cooked through, add the peas, if desired. Stir gently (or fluff with a fork if not using peas) and cover, turning off the heat. The rice will continue to steam off the heat.

4 Comments · Labels: Bengali, Carb, Recipes, Side Tagged: basmati, bengali entertaining, bengali food, bengali party, entertaining, gluten free, long grain rice, palau, peas, rice, rice pilaf, side dish

Cranberry Relish (Achar)

November 20, 2013

IMG_1740I’m not a pickle/relish/chutney person. My husband is not a turkey-with-all-the-fixin’s kind of guy. So this is how I strive to compromise. You see, I am hosting Thanksgiving dinner this year. It will be pretty small, just my family and his. But there are a few characters in this production who absolutely do not enjoy anything outside the rice and curry/biryani paradigm. So, my spread will look something like this: roast turkey (brined in buttermilk, stuffed with orange, garlic, thyme and sage flavorings), my mother in law’s khichuri, mashed potatoes, salad, either a green bean casserole or sweet potato dish, and this relish. I love cranberry sauce, but in order to make it more palatable for my husband, his brother, and my dad, I thought I’d prepare it according to the traditional Bengali method for achar (non vinegar based relish). It’s sweet, spicy, and tart all at the same time. Obviously cranberries aren’t available in Bangladesh, but they remind me of this other berry like fruit that they do use for achar. The result was pretty good!IMG_1725Mustard oil is not so common in American grocery stores, but if you’ve made the trip to an Asian grocery to get any of the other ingredients required in this (dried red peppers, pach forom), you’ll definitely find the mustard oil. The second it hits the heat, a wonderful aroma fills the whole house. If you can’t find it – don’t fret. Make it with vegetable or olive oil. The result will be a much more mellow relish. Then come all the other aromatics: pach forom, garlic, and red pepper. The seeds will start to pop once they get heated through…time to quickly add the other ingredients!IMG_1726When working with the red peppers, simply snap them in two with your fingers and dump all the seeds out onto the cutting board. Then, when you add them to the hot oil, stand back and prepare for a pepper onslaught on your sinuses! Make sure your vent is going and windows are open, otherwise you’ll find yourself and the rest of your family members in a coughing fit. At this point, I know what you’re thinking: this is really, really weird. And I’ll admit – it’s not for everybody. But if occasionally you find yourself longing for the sweet and spicy relishes of your childhood, this will definitely hit the spot! IMG_1738We would normally serve this with rice or luchi, but I’m sure it would be great on toast. You can make this with pach forom (which I’ve discussed before here) or with anise or fennel seed (which I actually prefer, since the black seeds in pach forom are a bit strong for me). Hope you try this if you’re looking to spice up the usual cranberry sauce! I would love to hear about your Thanksgiving traditions!

Ingredients

  • 12 oz fresh cranberries
  • 1 cup water or orange juice
  • 1 tbsp mustard oil (or olive oil)
  • 1 pinch pach forom or anise seeds or fennel seeds
  • 2 cloves garlic, minced
  • 3 dried red peppers, cut in half, de-seeded
  • 2 tsp salt (or to taste)
  • 5 tbsp sugar or molasses (or to taste)
  • 1 pinch chili powder

Directions

  1. Place the cranberries and juice/water in a medium saucepan and bring to a boil. As soon as the cranberries start to pop, remove from heat.
  2. In a medium (9 or 10in) nonstick skillet, heat the msutard oil over medium high heat. Add the pach form or anise/fennel seeds. Once they start to pop, add garlic and chili. Heat through, until fragrant (about 30 seconds). Add all of the cranberries, along with the juices to the skillet. Season with salt, sugar, and chili powder. Give it all a stir and lower the heat to medium. Let it cook through, until liquid reduces and mixture thickens (not completely: it will continue to thicken off the heat), about 5-7 minutes. Check for seasoning.
  3. Remove from heat. Let it cool. Store in a glass jar or other container. Refrigerate. Consume within two weeks.

3 Comments · Labels: Bengali, Recipes, Side, Snacks Tagged: accompaniment, achar, chutney, cranberries, cranberry sauce, mustard oil, pickle, red peppers, relish, sauce, sweet and savory, sweet and spicy

Mixed Vegetable Stir Fry (Bhaji)

October 28, 2013

IMG_1625When I go to a Bengali restaurant for takeout, I usually overlook the greasy curried meat dishes or the fish floundering in murky masala waters and the bhortas that usually fall short of the homemade version. At most Bengali places, these dishes are laid out buffet style so you know exactly what you’re getting. I usually opt for one of the Biryanis (chicken or goat) and a side of some sort of mixed vegetable stir fry. These things always get me salivating. I guess it’s because they strike a fabulous balance of spice and sweetness. I’m not the type of person who goes gaga for sweet and spicy, but the sweetness in this dish is brought out by the slow caramelization of the vegetables (rather than sugar or honey) and just rounds out the flavor from the usual round up of spices, plus the extra Bengali zinger: pach phorom. IMG_1630Pach phorom is a combination of five aromatic seeds: black mustard, cumin, black cumin (also known as nigella), fenugreek (methi) and fennel. It can be found at any Indian grocery alongside all the usual spices. They have a licorice flavor, which adds an extra dimension to the dish’s flavor profile. This is important for vegetable dishes that have to compete with a follow up course of a rich meat or curried fish dish. IMG_1637This is something my mom made at the beginning of the week to just last the course of the whole week. It starts out with a base of softened onions, spices and garlic/ginger paste. You can play around with the vegetables to add your favorites, but to start, I used the two vegetables I found consistent in most Bengali mixed vegetable dishes: cauliflower and cabbage. Now, the two put together makes A LOT, so make sure your wok or pot is large enough to accommodate everything. I had to add the vegetables slowly, allowing some of the cabbage at the bottom to wilt and decrease in volume before adding more, and mixing to combine.  IMG_1641While that goes, you’ll want to work on the second batch of veggies in a separate pan. I used just 2 cups of plain old frozen mixed vegetables. You can use the equivalent amount of zucchini, pumpkin, butternut squash, peas, string beans, whatever you like as long as you have a balance of green, orange, and white veggies.  IMG_1643The cauliflower and cabbage steam in the wok for about 20 minutes. They get all tender and sweet. I ended up needing a shocking amount of salt but feel free to start out small and gradually increase to taste. Top with fresh cilantro. Serve alongside rice or naan or stuff inside a pita for a delicious wrap!IMG_1657IMG_1649

Ingredients

  • 1/4 cup light olive oil or veg oil
  • half a spanish onion, diced small
  • 1 tsp cumin
  • 1 tsp coriander
  • 1 tsp turmeric
  • 1 tsp pach phorom
  • 1/4 tsp chili powder (or more if you like it hotter)
  • 2 tsp garlic/ginger paste (or 2 tsp minced garlic and/or ginger)
  • 1 head of cabbage, cut into half inch strips
  • 1 head of cauliflower, stalks and florets cut into half inch pieces
  • about 5 green chilis (optional) with slits cut into them (also optional)
  • 2 tsp salt, plus more to taste
  • 1 tsp ground black pepper
  • 1/4 cup water
  • 1 tbsp light olive oil or veg oil
  • 2 cups frozen mixed vegetables
  • 1/2 tsp cumin
  • 1/2 tsp coriander
  • 1/2 tsp turmeric
  • 3 handfuls of cilantro

Directions

  1. Heat the oil over medium high heat. Add the onions and let soften for 4 to 5 minutes. Add the cumin, coriander, turmeric, pach phorom, chili powder and garlic/ginger paste. Stir to combine. Add the cabbage in batches, allowing the bottom most wilt a bit before adding the next batch. Continue until all the cabbage is in the pot. Stir to combine. Next add the cauliflower, one batch at a time, ensuring everything gets an even coating of the oil/onion/spice mixture.
  2. Add the green chilis, salt, pepper, and water and stir to combine. Put the lid on and let it steam. It will take approximately 15 to 20 minutes for all the vegetables to cook through. Occasionally lift up the lid, and stir the vegetables, bringing the bottom vegetables to the top so everything gets an even cooking. Take care towards the end not to break apart the cauliflower florets.
  3. In a separate shallow fry pan, heat 1 tbsp oil over medium high heat. Add the frozen vegetables and remaining cumin, coriander and turmeric. Season to taste. Break apart with a wooden spoon and stir to make sure everything gets seasoned and cooked evenly. When heated through, turn off the heat.
  4. When the cauliflower and cabbage are cooked through, add the mixed vegetables and cilantro and stir to combine. Add a teaspoon or two more salt, according to taste.

5 Comments · Labels: Bengali, Recipes, Side, Veg Tagged: bengali, bhaji, cabbage, cauliflower, gluten free, make ahead, mixed vegetables, panch phorom, side, side dish, stir fry, vegan, vegetarian

Curried Shrimp & Okra (Dharosh ar Chingri)

September 17, 2013

**One week left in my $50 Sur La Table Giveaway!! Ends 9/25/13**

IMG_1482ImageMy semester abroad in Rome was the most fantastic 4 months of my life (no offense husband, kids). Immersing myself in a language and culture I had studied and seen from afar for YEARS was just so rewarding. Living down the street from the pantheon and campo dei fiori was just other worldly. But what was even better than living down the street from the pantheon, was living down the street from the gelaterie by the pantheon: gelateria della palma and giolitti. And what was so awesome about campo dei fiori is the open air market that sits daily. Needless to say, I had amazingly fresh food every day. I remember the very first thing I ate was bruschetta with kind of lackluster tomatoes (it was January, duh) but with such fruity olive oil and complex, crusty bread, that I was completely satiated. And I ate like that for about a week or two, pizza al taglio, pasta a cacio e pepe, stuffed zucchini flowers, fried artichokes, all the non porcine Roman specialties. Until I started getting homesick. ImageImageWhen I got homesick, I called my mom, and made Bengali food. And for some reason, the first thing that came to mind when I thought of comfort food was mashed okra (dherosh bhorta). So I dragged my roommate and dear friend Jess (who just got engaged!!) across town, to the Bengali market. There, I found some puny okras, red onions, green chili and the mustard oil necessary to complete my gustative trip home (Jess, for the record, did not partake because of her texture issues. If you, like her, have an aversion to squishy foods, okra is not for you). After that, it kind of became a tradition…we would invite our friends over for a traditional Bengali meal in our tiny Roman apartment, usually consisting of rice, daal, chicken curry and some sort of fried veggie or salad. Then go out for gelato. Yeah, we knew how to party.ImageSince then I always associate okra with Bengali comfort food. And this dish is just such a tasty (and quick!) way to experience it. I made this EXACTLY like my mom, not straying the least bit (except that I use Kosher salt; she swears by the iodized stuff). There is, surprisingly, no garlic or ginger. It is a tad salty, but feel free to adjust it to taste. This usually isn’t served as the main accompaniment to your rice…those would be more along the lines of chicken, beef, mutton or some sort of large fish. But it’s definitely enough for me, as I could probably destroy the whole thing in one sitting. Enjoy!IMG_1483

Ingredients

  • 2 tbsp light olive oil or vegetable oil
  • 1/2 medium onion, diced
  • 1/2 tsp paprika
  • 1/2 tsp turmeric
  • 1/2 tsp coriander
  • 1/2 tsp cumin
  • 1/2 tsp chili powder (or cayenne)
  • 1 cup water
  • About 3 cups okra, diced (I used 15 large, fresh from my in-laws’ garden!)
  • 1/2 to 3/4 lb shrimp
  • 1 and 1/4 tsp salt, separated
  • 1/2 cup cilantro, for garnish

Directions

  1. Heat oil over medium high heat. Add onions and cook until soft.
  2. Add all the spices and water. Stir to combine.
  3. Add the okra and 1 tsp salt. Cover and cook until tender, about 5 minutes (check on it occasionally. If the water dries out, add 1/4 cup more).
  4. In a separate bowl, season the shrimp with 1/4 tsp salt. After the okra is almost fully cooked through, add the shrimp. Cover and cook an additional 2 minutes.
  5. When everything is cooked through, turn off the heat and add the cilantro.

3 Comments · Labels: Bengali, Main, Protein, Recipes, Veg Tagged: bengali, chingri mach, dherosh, gluten free, okra, pescatarian, shellfish, shrimp, side

Haleem

August 5, 2013

IMG_1248Warning: this post isn’t about finding the mother of all haleem recipes. I’m not even gonna say it will give your grandma’s a run for her money (though it’s darn good). No, this post is about accessibility. Haleem is not an enigma. Sure, there’s barley, wheat, lentils, even dried papaya. But you don’t have to go out of your way looking for ingredients you don’t usually stock your pantry with. Nor do you have to run to Jamaica or Jackson Heights, or wherever you go for your fix. Instead, you pick up a box of Shan’s Easy Cook Haleem mix and get ready to wow the salwars off your friends and family.

IMG_1234Let me first back up a bit for those of you who aren’t familiar. Haleem is a thick, spicy stew made by creating a flavorful broth of spices and meat (usually goat meat or chicken), then thickening with lentils, barley and wheat. It is traditionally eaten during Ramadan, at iftar (or evening breakfast). But it’s so warm, spicy and hearty – it’s really ideal for the dead of winter!

The box includes a spice mix (which you totally don’t need all of). It is really, really spicy and salty, so I only use like 2/3 of the packet. Use 1/2 if you’re a spice eating lightweight. It also includes the lentils and grains, pulverized, so you wouldn’t need to soak them overnight like in a traditional haleem. Again – accessibility! The instructions neglect one very important ingredient: garlic/ginger paste (or finely minced garlic and ginger). Make sure to add a good heaping tablespoon to the meat as it cooks. And finally, contrary to what it says on the box, it is not ready in 30 minutes, even if you have a pressure cooker! For me, goat meat (or mutton) takes a good hour and half over a low flame, with the lid on, to get fully tender. I also get the onions going very early on, because I like to caramelize my onions low and slow. Once you do add the grains, they tend to clump up. So add them slowly, and stir continually, to breakdown any clumps.

meat and onions, going side by sidethe finished productTraditionally, you serve it with chopped cilantro, grated ginger, crispy onions, a slice of lemon/lime, and perhaps some green chilis. Not here. I loathe fresh ginger and raw chilis. I just like to add the cilantro and citrus to brighten up an otherwise long-going stew (cook time was 2 hrs!). This serves about 8-10 people. And even though Ramadan is coming to an end, it’s a great dish for your Eid spread!

Ingredients

  • 1 box Shan Haleem mix (including spice mix and grains)
  • 1/2 cup oil
  • 1 heaping tbsp garlic/ginger paste
  • 1.5 lbs mutton or chicken (don’t cop out and make the chicken one!), cut into pieces
  • 15 cups water
  • 1 large onion, or 2 medium
  • cilantro, fried onion, ginger, green chilis and/or lemon wedge for garnish

Directions

  1. In a large pot, heat up half a cup of vegetable oil or ghee over medium high heat. Add 1/2 to 2/3 of the spice packet. Add the meat and garlic/ginger paste and stir to combine.
  2. Add water, bring to a boil over high heat. Then lower the heat, put the lid back on and simmer for an hour, hour and a half. Stir occasionally to make sure no funky stuff is going on. Meat should be tender and falling off the bones when done. Taste for seasoning.
  3. While the meat is going, thinly slice the onion and add to a separate fry pan over low heat, to two tablespoons oil. Stir occasionally, increasing frequency towards the end. It take a bit of babysitting (after about 20 minutes) to make sure the edges don’t burn. Once they’re browned, turn off the heat.
  4. Meanwhile, from the haleem pot: take the meat out, and shred it using your hands or two forks. Then add the meat back into the broth along with the contents of the grains packet. Stir continuously to make sure there are no clumps. After 20-30 minutes, add caramelized onions and remove from heat. Add a cup of water if it looks too thick.
  5. Serve with cilantro, fried onion, slices of ginger, green chilis and/or lemon/lime.

Leave a Comment · Labels: Bengali, Carb, Main, Protein, Recipes Tagged: barley, dinner, haleem, iftar, lentils, mutton, ramadan, shan, stew

Khichuri (Rice and Mung Bean pilaf)

May 6, 2013

IMG_0942For Bengalis, rain does not mean good books, cozy blankets or hunter boots. Nor does snow signal hot chocolate, snowmen or shoveling. No, for Bengalis, any sort of precipitation means only one thing: khichuri. Growing up, I always noticed, though never understood why on any overcast, slightly cool day, the first thing my dad would request was khichuri. I’d think to myself, in the usual teenage overly dramatic Holden Caulfield voice: Khichuri is just rice and daal cooked together…WHAT is the big deal? So, like Peter in The Snowy Day (can you tell I’ve been reading a lot of big and little people classics?), I thought and thought and thought about it.

IMG_0939What I noticed was this: khichuri is almost always accompanied by things you’re likely to have on hand. A quick omelet with onions and green chilis. A raw onion and red pepper bhorta (mashed with salt and mustard oil). Or any variety of pickles. Because people back home aren’t likely to venture out to the bazaar on a rainy day. Slinging through the mud when perhaps the vendors themselves might not even show up. This might be a foreign concept to someone who lives in New York, where you can find someone on a jet ski in the middle of a hurricane. But in Bangladesh, where intermittent electricity and insufficient refrigeration send most to the bazaar on a daily basis (often on unpaved roads), an excuse to stay home most welcome.

I like to use a short grain, fragrant rice called Kalijeera for my khichuri. The mung bean (moong dal) can be swapped out for red lentils (masoor dal) but will of course change the taste of the dish. And though I initially stated that Bengali precipitation associations don’t include any sort of warm or fuzzies, that’s not 100% accurate. Once the rice and lentils/beans have steamed to perfection along with all the warm spices, the aroma that wafts out of the kitchen is the olfactory equivalent of great big bear hug.

IMG_0950Ingredients

  • 1 cup mung bean
  • 2 tbsp vegetable oil
  • 1 small onion, diced
  • 1 tbsp garlic/ginger paste or 4 cloves garlic, minced
  • 1/4 tsp turmeric
  • 1/4 tsp coriander
  • 6 tbsp butter
  • 2 cups rice, rinsed thoroughly to remove excess starch
  • 7 cups water
  • 1 cinnamon stick
  • 4 cardamom pods
  • 4 cloves
  • 4 peppercorns
  • 1 bay leaf
  • 2 tsp salt (or to taste)
  • 2 green chilis

Directions

  • In a medium to large stock pot, toast the mung bean over medium high heat until fragrant and slightly browned. Empty into a separate container and set aside.
  • Pour oil into the pot and add the onions. After softening for 4 to 5 minutes, add the garlic/ginger, turmeric and coriander. Mix well. Add the rice, toasted mung bean and butter and mix until well combined and the butter is melted.
  • Add the remaining ingredients, stir and bring to a boil over high heat. Then, reduce to a simmer over low heat and cover. Should be done in 15 to 20 minutes. Check for doneness at 15 minutes, fluff with a fork, and continue to steam for an extra 5 minutes if needed. Check for seasoning. I needed 2.5 tsp of kosher salt.

Keep in mind this recipe is the best I could do between my mother and mother in law’s recipes, where ingredients are stated in handfuls, liquids measured by the finger, and seasoning is always to taste. God bless them =)

3 Comments · Labels: Bengali, Carb, Recipes Tagged: lentils, rainy day, rice, vegetarian

Mashed Eggplant (Begun Bhorta)

March 28, 2013

IMG_0824

I feel like most people, when asked what their favorite vegetable is, would say corn or butternut squash or potatoes (though I bet they actually like the salt and fat that comes with the potatoes). Or perhaps mushrooms. But not me. I. Love. Eggplant. Stewed with tomatoes (imam biyaldi). Simply fried with salt and turmeric (chaak bhaji). In a curry with the insanely boney hilsa fish. In the Sicilian sweet/savory relish known as caponata. In every way except babaghanoush (sorry, haters gon hate). Or this way: charred over an open flame, peeled then mashed with simmering onions, tomatoes, garlic and spices.

IMG_0816Now, I know traditionally a bhorta consists of some boiled or steamed vegetable (or dried fish) mashed or really well mixed with raw onion, Thai chilli, mustard oil, salt and cilantro. But one fine day my mom made this and said hey, this is begun bhorta. And even though the cooking process more closely resembles a mishti kumro ghonto (think: spiced, simmered pumpkin mush), it stuck.

IMG_0809 Charring it is a bit of a pain. The juices get all over the burner. Peeling the charred pieces of skin is a pain. But the payoff is well worth it. You could perhaps do it under the broiler. I haven’t given it a go. Right now I am sticking to tried and true methods of prep. So, here it is:

Ingredients:

1 medium eggplant, poked all around with a knife or fork
1 tbsp olive oil
1 small onion, diced (yellow or red)
2 cloves garlic, minced (or 1tsp garlic paste)
1 tomato, diced
1/4 tsp cumin
1/4 tsp turmeric
1/4 tsp coriander
A pinch of chilli powder
1/2 tsp salt, plus more to taste
A handful of fresh cilantro

Directions:

Over a medium flame, start charring the eggplant by placing directly onto heat and rotating using a pair of tongs every two minutes or so (or with your fingers if you’re hardcore like my mom). It should be cooked all the way through in about 10 to 12 minutes. Prep the rest of the ingredients in the meantime.

When the eggplant is done, remove from heat and allow to cool. Then peel off the skin using your fingers or tongs, doing the best you can to get as much of it off as you can. Cut off the top and set aside.

Heat oil over medium high heat in a wok or fry pan. Add onions and tomatoes. Allow to soften a few minutes, then add garlic and the rest of the spices/seasonings (if you only have garlic/ginger paste on hand, use that). Add the eggplant and break up any chunks using a wooden spoon. Lower the heat to medium/medium low. Mix it all together and let the flavors combine while prepping the cilantro.

Off the heat, add the cilantro and check for seasoning. Serve with basmati rice or roti.

Note: as with most bengali cooking, you do not need to follow a recipe to a T to get fantastic results. Feel free to use chopped Thai chili in lieu of the chili powder. Or a dash of mustard oil for more of a kick. For example, I had some extra red pepper on hand so I added it. Made it look a ton prettier. Just don’t skimp on the charring because it really makes this dish.

2 Comments · Labels: Appetizers, Bengali, Recipes, Side, Veg Tagged: bengali, bhorta, dinner, eggplant, puree, side dish, vegetable, vegetarian

Bengali Chicken Curry

March 9, 2013

IMG_6344There is no coconut milk in your chicken curry if you are Bengali. There is no curry paste or any other amalgamation of ingredients someone else deems necessary for your comfort-in-a-bowl chicken curry. There is only your mother, your childhood, the pieces of white meat that no one ever wanted, the potatoes that you cared for only on some days, the jhol (broth) that was literally chicken soup for your soul (but only the first day, after that it just got too cardamom-y), and the leftover bones that you LOVED to chew on as you churned out every last drop of flavor but NEVER admitted to doing outside of bengali circles.

Of course this is my childhood we are recollecting and thus my mother’s recipe. There is very little room for improvement…though one could probably use chicken stock (even better, homemade chicken stock) in lieu of the water. Let’s leave that for another day, another post. For now, amidst the pristine image laid out for you of a little girl enjoying every minute of being elbow deep in her favorite food, there are some hidden perils that threaten. Hear me out: have you ever, during the course of your meal ever landed on a “flavor bomb” ? One of those whole peppercorns, cloves or worse, entire cardamom pod?? It’s disgusting! It’s painful! It’s downright heinous. Takes half the joy out of the meal. I just thought of taking the extra step of pouring the jhol through a sieve and voila! Flavor. Bomb. Out.

I hope this recipe takes you back to your childhood!

Ingredients

  • 1/4 cup vegetable oil
  • 1 medium yellow onion, sliced
  • 1 heaping tsp cumin power
  • 1 heaping tsp coriander
  • 1 tsp turmeric
  • 1/2 tsp chili powder (use more or less depending on the potency of your chili powder and how spicy you like it)
  • 1 3 lb chicken cut into curry pieces (either 10 or 12 pieces in total)
  • 1 tsp garlic paste (or minced garlic)
  • 1 tsp ginger paste (or minced ginger)
  • 1 – 1.5 cups of water (water should come about 2/3 of the way up the sides, not covering the meat)
  • 1.5 tsp kosher salt, plus more to taste
  • 1 bay leaf
  • 1 cinnamon stick or 1 tsp ground cinnamon
  • 4 whole cloves
  • 4 whole cardamom pods or 1/4 tsp cardamom
  • 5-6 whole peppercorns

Directions

  1. Heat the oil over medium high heat in a saucepan or any medium sized pot (about 4 qts) with high sides. Add the onion and let soften for 4-5 min. While onion cooks, prep your garlic and ginger, if necessary, and combine the ground spices in a bowl.
  2. Add spices to the onions, mixing well. Add the chicken pieces, turning to coat with as much of the masala mixture as possible. Let the chicken and spices cook for 4-5 minutes, taking care not to burn the spices (reduce the heat if necessary). Add garlic, ginger, water, salt, bay leaf, cinnamon, cloves, cardamom and peppercorns. Stir, then increase the heat to bring to a boil.
  3. Reduce to a simmer and cover. Let simmer for 20-25 minutes, removing the lid during the last 10 minutes if there is too much liquid.
  4. Check for seasoning. Add more salt or spice as needed.
  5. Optional: Transfer chicken pieces to a serving bowl. Pour the broth through a sieve to catch all the whole spices and push through all the last bits of curry through the sieve using a spoon.

Variations

For a bigger (4 to 5 lb chicken)

  • 1/3 cup vegetable oil
  • 1.5 to 2 small yellow onions, sliced
  • 1.5 heaping tsp cumin power
  • 1.5 heaping tsp coriander
  • 1.5 tsp turmeric
  • 3/4 tsp chili powder (use more of less depending on the potency of your chili powder and how spicy you like it)
  • 1 4 to 5 lb chicken cut into curry pieces (about 12 in total)
  • 1.5 tsp garlic paste (or minced garlic)
  • 1.5 tsp ginger paste (or minced ginger)
  • about 2 cups of water
  • 2 tsp kosher salt, plus more to taste
  • 1 bay leaf
  • 1 cinnamon stick
  • 5-6 whole cloves
  • 5-6 whole cardamom pods
  • 7-8 whole peppercorns

Increase cooking time by 2-3 minutes, testing the thickest part of the thigh to check for doneness.

To give it a refresh

Try sautéing some tomatoes into a large fry pan or wok and add the leftover chicken curry. When thoroughly heated through, remove from heat and add some chopped fresh cilantro.

4 Comments · Labels: Bengali, Main, Protein, Recipes Tagged: bengali, chicken, curry, dinner, south asian

Daal (Bengali Lentil Soup)

September 19, 2012

This is the quintessential Bengali side dish. The ultimate comfort food. It’s on every dinner table…from the most affluent of households to the most modest. When you invite someone near and dear to you, you always entice them with the promise of “daal bhat” (rice and lentils).

I hadn’t realized how extensive the ingredient list was for such a simple dish as daal. Mine is a bit heavy on the garlic (’cause let’s face it…the lentils themselves don’t have much flavor). The tomatoes and cilantro add freshness. To add depth of flavor, daal is traditionally made with panch phoron, added right at the end. Panch phoron is a Bengali blend of five different seeds: mustard, nigella, asafoetida, fenugreek, and cumin. It toasts up in the oil with the fried onion at the end to enhance its flavor. The combination of spicy, licoricey and earthy flavors give it a distinctly Bengali flavor.

IMG_6342

Ingredients:

  • 1/2 cup split red lentils
  • 3 cups water
  • 2 cloves garlic
  • 1 green (thai) chili
  • 1/2 tsp ground turmeric
  • 2 tsp salt, plus more to taste
  • 1/4 cup diced tomatoes
  • 2 tbsp olive oil
  • half a small yellow onion
  • 1 clove garlic
  • 1 pinch pach forom (optional)
  • small handful cilantro (about 1/4 cup, optional)

Directions

Rinse the lentils 2-3 times in cold water. Then, combine with water, garlic and chilli and bring to a boil over high heat (cut a slit into the chili pepper to let some of the flavor out). When it comes to a boil, lower the heat (otherwise it boils over like milk) and bring to a simmer. Spoon off some of the foam on top.
Add the turmeric, salt and tomatoes. Let simmer for about 15 minutes, or until lentils are cooked through. Optional: at this stage you can break up the lentils with a daal ghutni or an immersion blender (taking care to remove the chili and garlic) to give it a smoother consistency.
While lentils simmer, thinly slice the onion and fry until brown over medium heat. Mince the last garlic clove and add it to the onions for the last 30-45 seconds. Finish with chopped cilantro. Taste for seasoning.
Serve over rice.

6 Comments · Labels: Bengali, Protein, Recipes, Side

  • Newer Entries
  • 1
  • 2
  • 3
  • 4
  • Previous Entries
American, Bangladeshi. Savory, sweet. I don't discriminate and neither should you.

Most recently…

Load More...
Follow on Instagram

Social

Subscribe to Blog via Email

Enter your email address to subscribe to this blog and receive notifications of new posts by email.

Tags

appetizer beef bengali breakfast butter cake caramel chicken chocolate chocolate chips cilantro clean eating coconut comfort food cookies dessert dinner entertaining fall fruit ganache gluten free halal healthy homemade honest chops honest creations iftar italian pasta pastry pistachio quick and easy dinner ramadan recipe side side dish south asian spinach vegan vegetables vegetarian weeknight dinner weeknight meal whipped cream

Theme by 17th Avenue · Powered by WordPress & Genesis