Kitchen3N

Recipes and food fun from Apt 3N

  • About
  • Gallery
  • Recipes

Chocolate Swiss Meringue Buttercream

March 20, 2016

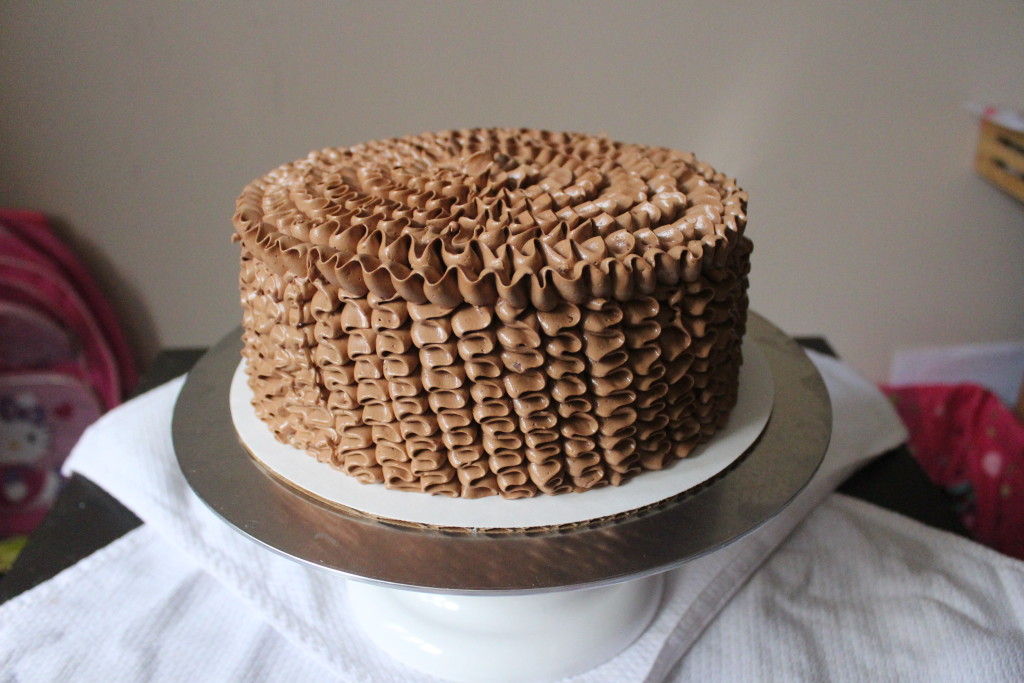
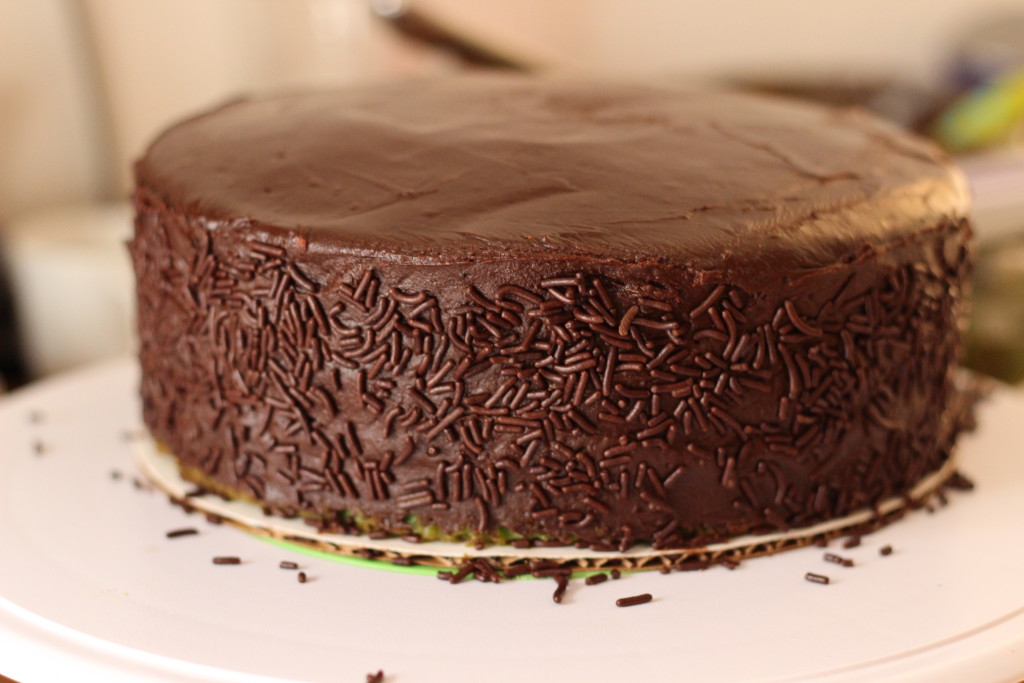
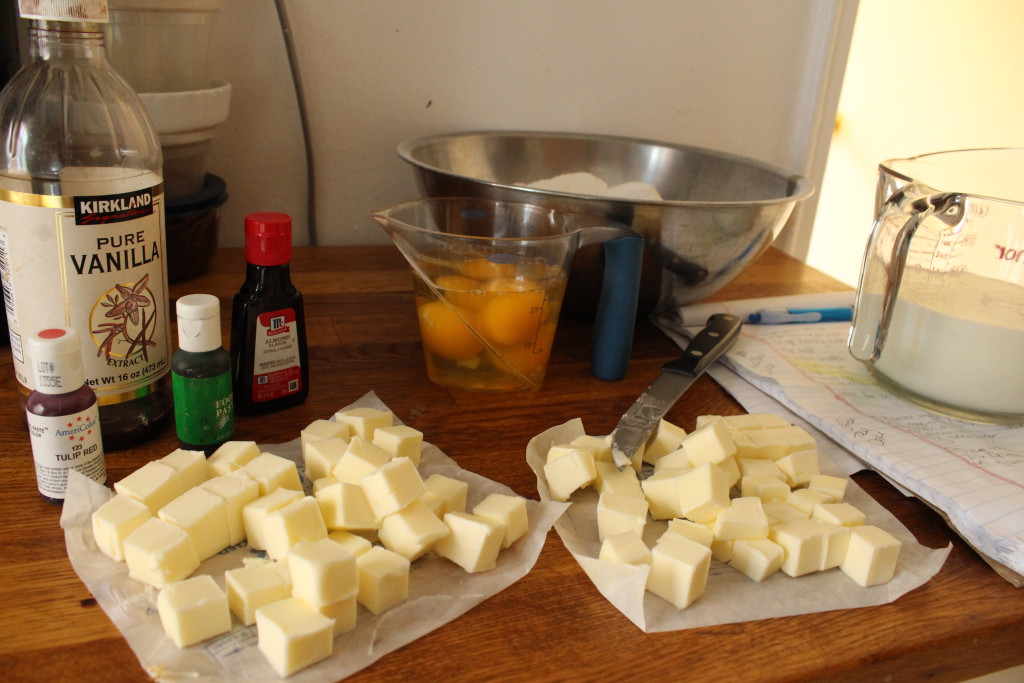
IMG_9692Swiss meringue buttercream is a cake decorator’s dream. If you’ve ever tried to get a really smooth looking cake from a traditional American buttercream, you’ve probably noticed it’s very very difficult to do so. Mainly because of air bubbles. American buttercream relies on the aerating of butter and sugar to achieve the desired volume and consistency. So between the air bubbles and stickiness from the sugar, it’s hard to get it super smooth!
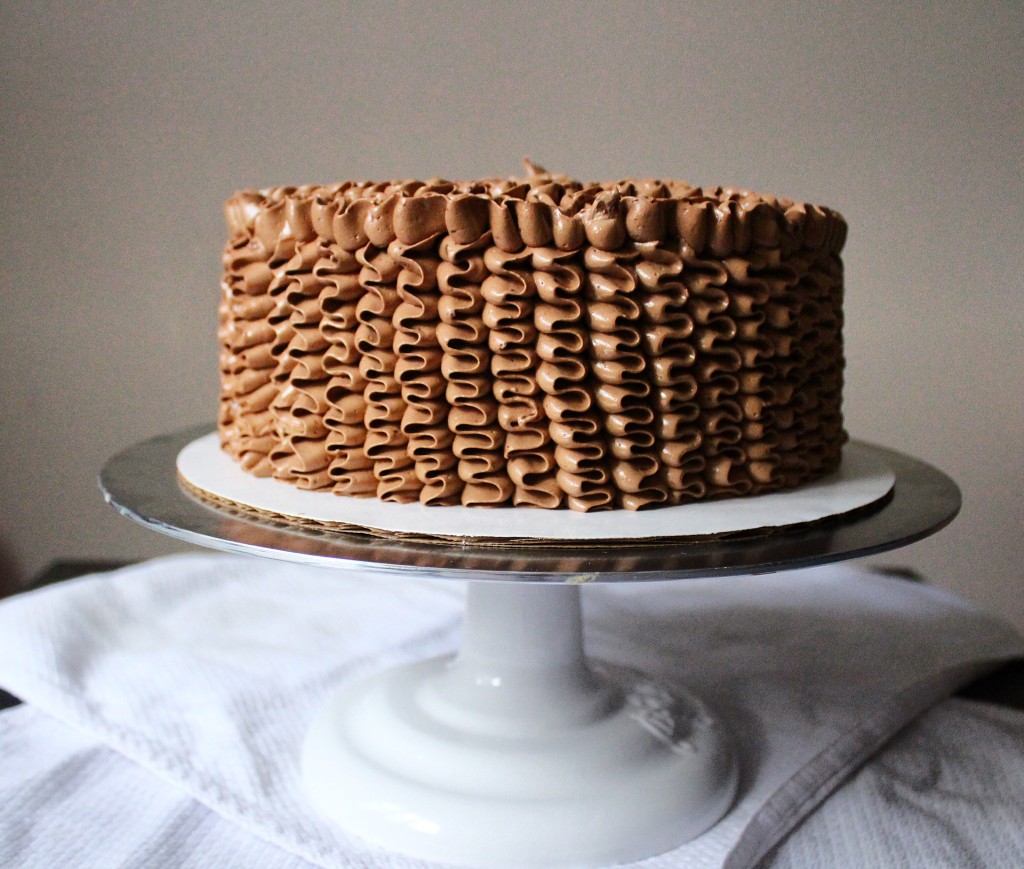
IMG_5774Swiss meringue buttercream, however, is light years beyond in terms of texture. There is a bit of a learning curve the first couple of times you make it, but once you have it down right, it is so smooth, tints so well, it really takes your cakes from home style to bakery quality.

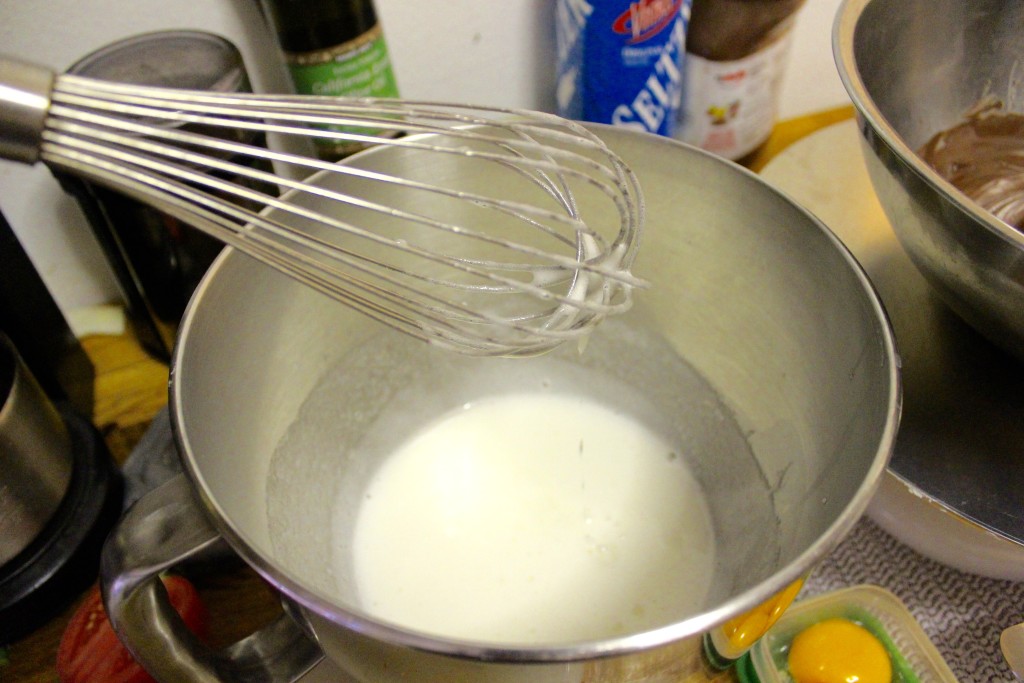
To start, you combine egg whites and sugar, and heat it over a double boiler until it’s hot to the touch (160 degrees on a candy thermometer to get the egg whites to a safe temperature). You whisk the whole time, until the mixture reaches a milky appearance. Once that’s done, you move on over to a stand mixer where you beat beat beat the egg whites until you get a beautiful, glossy meringue.

When the meringue is thick, glossy and ROOM TEMPERATURE, add the room temperature butter, one pad at a time. At this point, it might look like a gloopy mess, but stick with it and keep beating until the buttercream comes together. It should look like stiff whipped cream at this point.
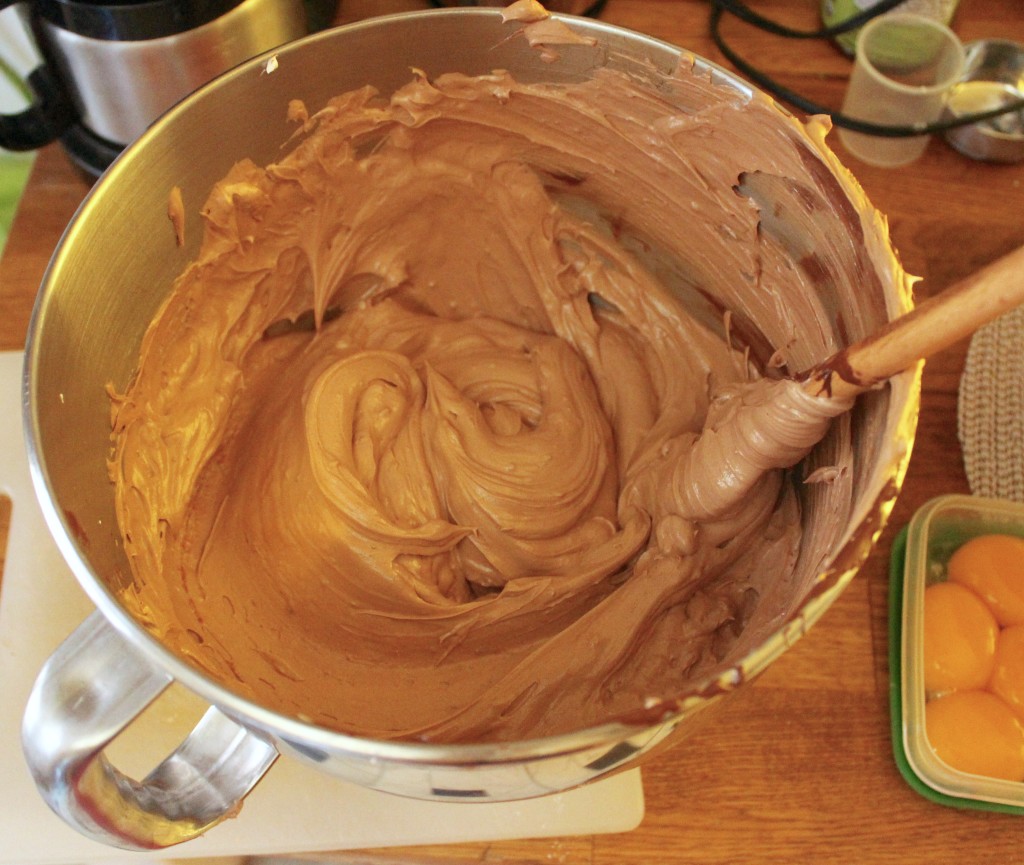
IMG_5783

Add the vanilla, then melted and cooled chocolate. This is one of the few points of departure from my beloved Ina Garten. She has a recipe for chocolate swiss meringue buttercream but there’s SO much liquid in it (vanilla, kahlua, rum, more chocolate), that it broke when I tried to make it. I’m sure it tastes wonderful, but mine does too, while still holding up to piping =)Use a spatula to wipe down the sides and bottom to ensure all the chocolate and buttercream are fully incorporated. Final step is to try to not eat it all out of the bowl. It is delicious and the added sugar from the chocolate makes it the perfect sweetness – whereas plain vanilla buttercreams are barely sweet. Enjoy!!
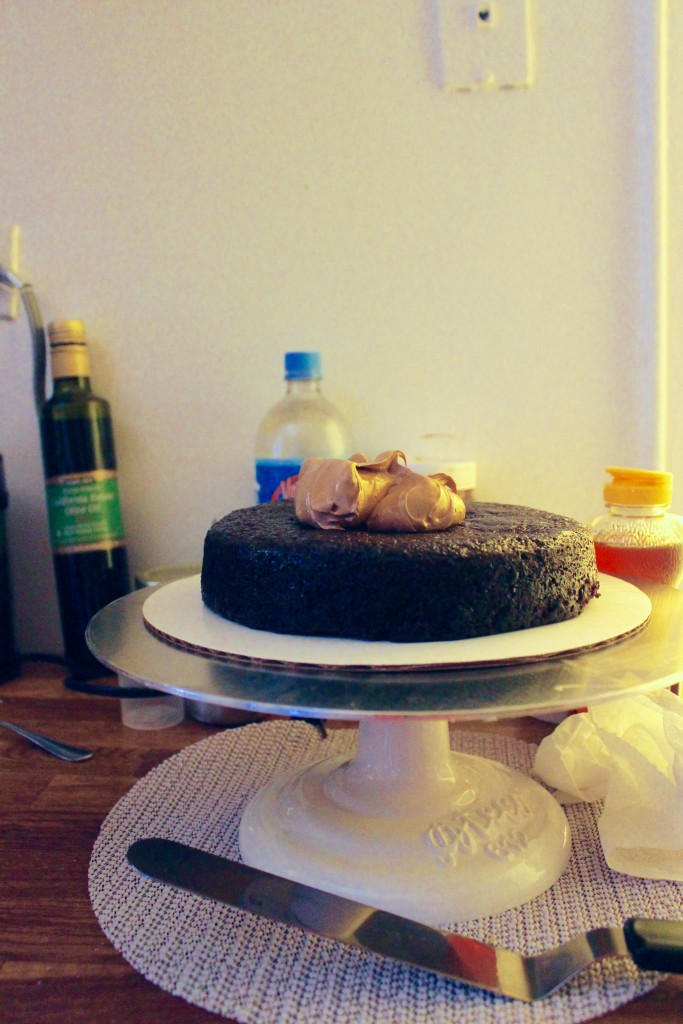
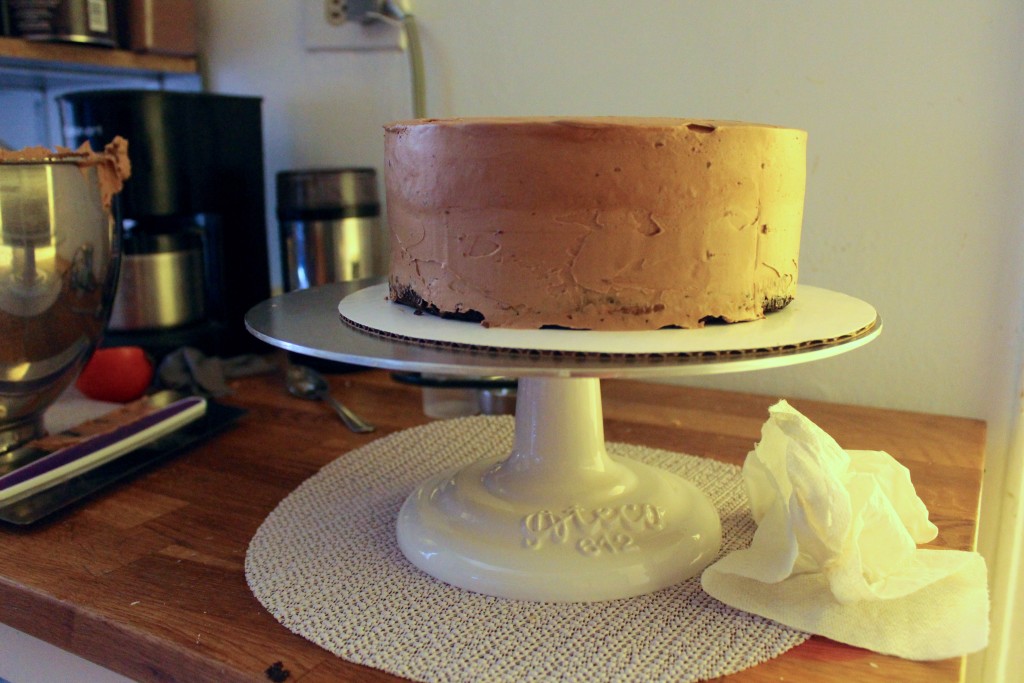
IMG_5787IMG_5790IMG_5796

Recipe adapted from smitten kitchen.

Ingredients

  • 4 egg whites
  • 1 cup sugar
  • 26 tbsp (3 sticks plus 2 tbsp) unsalted room temperature butter
  • 1 tsp vanilla
  • 1 lb plus 8 oz* semi sweet chocolate, chopped small**

Directions

  1. Melt chocolate in the microwave in a heat proof, non metal bowl at 30 second intervals, stirring in between intervals, OR over a double boiler (in a bowl set over simmering water, ensuring the water doesn’t touch the bottom of the bowl). Set aside to cool.
  2. Whisk together the egg whites and sugar in the bowl of the stand mixer. Place over double boiler, ensuring the water doesn’t touch the bottom of the bowl. Keep whisking until the sugar is dissolved AND the water is hot to the touch (if you dip your finger in, should be too uncomfortable to keep there). Or you can insert a candy thermometer and whisk until the temperature registers 160 degrees F. Then remove from double boiler, wipe the water that has condensed on the bottom of the bowl and place in the stand mixer. Insert the whisk attachment and set the speed on medium to whip up the egg whites.
  3. When the egg whites have thickened, and the temperature has cooled to room temperature, add the butter, one pad at a time (1-2 tbsps) until all the butter is incorporated. The mixture might look soupy at this point. Turn the mixer on high and keep whisking until thick. This can take 3 to 15 minutes, depending on the size of your batch. Reduce the speed to low and add vanilla and melted chocolate. Mix until thoroughly combined.***

*One pound plus 4 oz of chocolate makes a luscious, chocolately buttercream. If I need to pipe something like ruffles, I would leave it at 1 pound chocolate. If I’m just filling/frosting, I would go the full 1lb 4 oz.
**I wouldn’t recommend using chocolate chips in lieu of chopped baking chocolate or chocolate bars. The waxy coating or whatever is on them keeps them from blending in uniformly with the buttercream.

***Enough to frost, fill and decorate an 8 inch 2 layer cake. Enough to frost and fill a 9 in 2 layer cake.
Leave a Comment · Labels: American/Mediterranean, Dessert Tagged: cake decorating, chocolate, chocolate cake, chocolate frosting, egg whites, frosting, sugar, swiss meringue buttercream

Rainbow Cookie Cake

January 20, 2016

IMG_5430I just came back from the most amazing trip to Bora Bora…

IMG_5278   IMG_5291IMG_5293IMG_5296

Not really. We’ve been hangin’ back here in NYC. Celebrating my daughter’s fifth birthday. Anxiously waiting for the first snow fall so our kids’ Frozen dream can become a reality.   IMG_5323

Adulthood. Family. Saving up for a down payment on a house. Elderly parents to think about. Student loans to pay off. Retirement. Kids’ college tuition.

IMG_5422 IMG_5423 IMG_5408IMG_5425

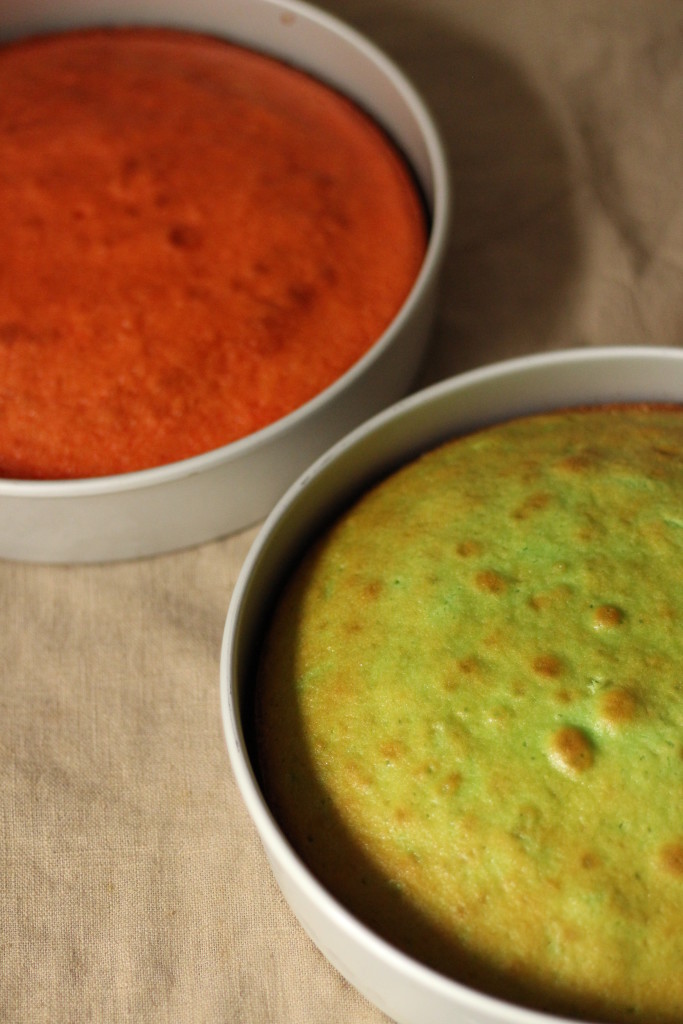
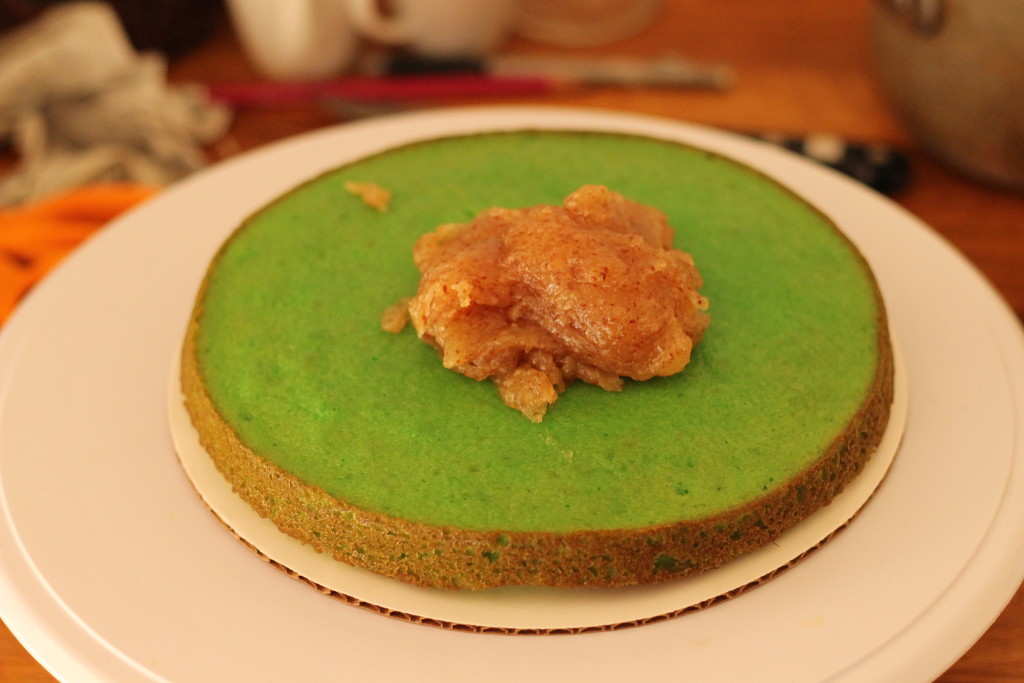
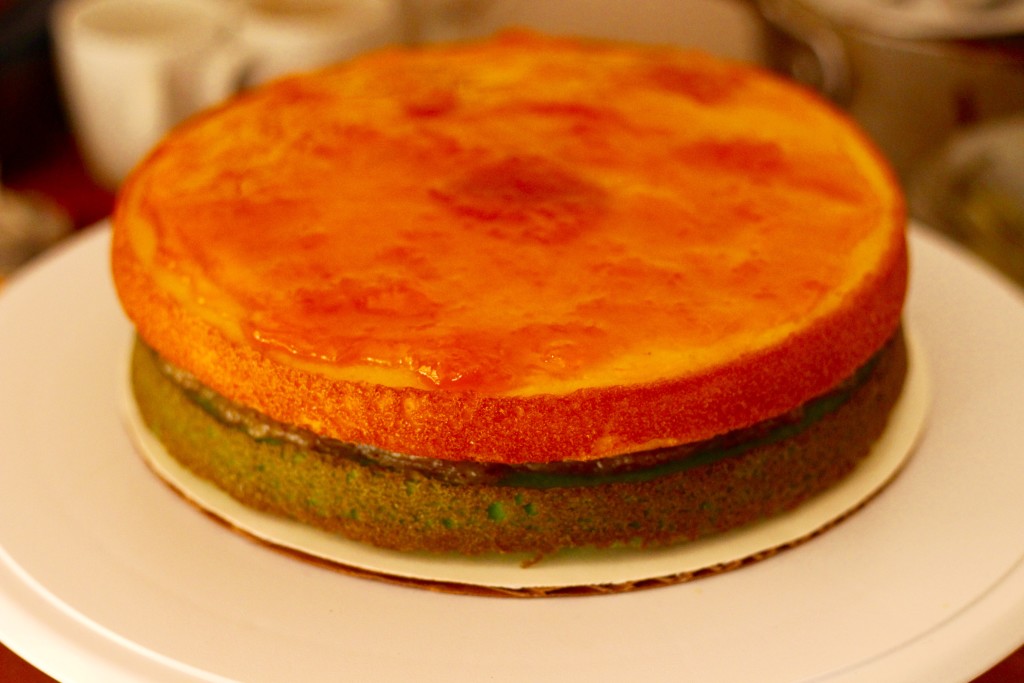
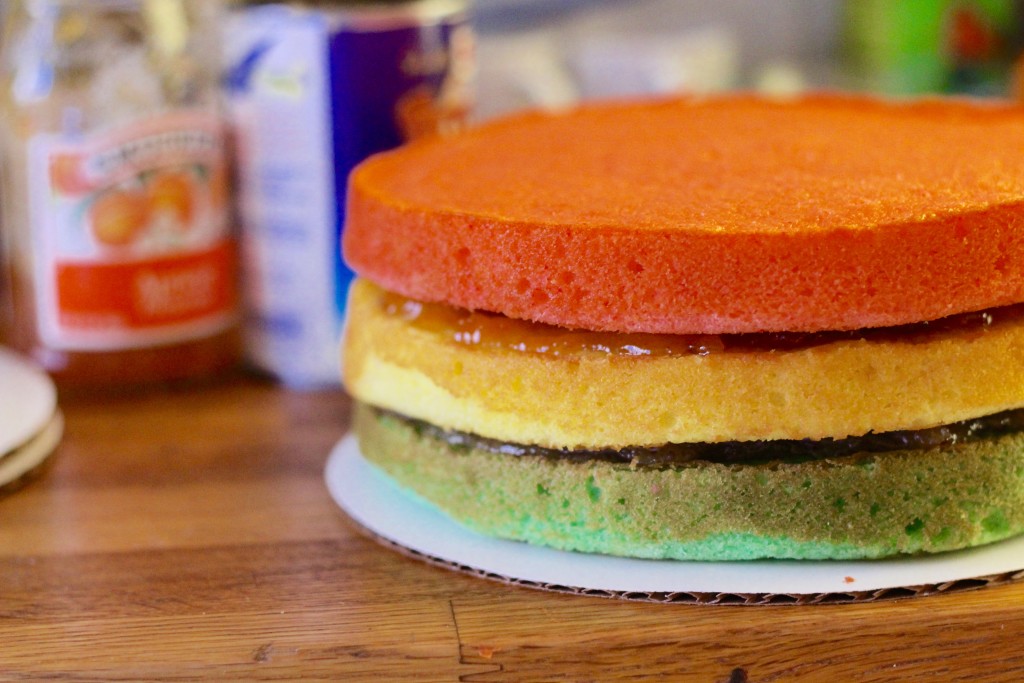
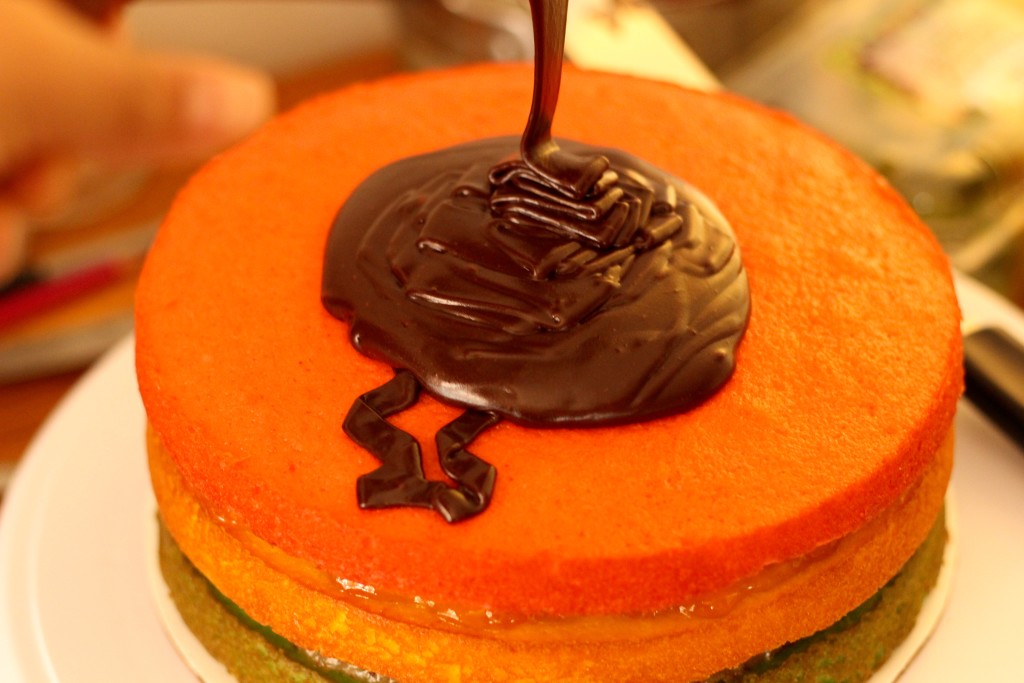
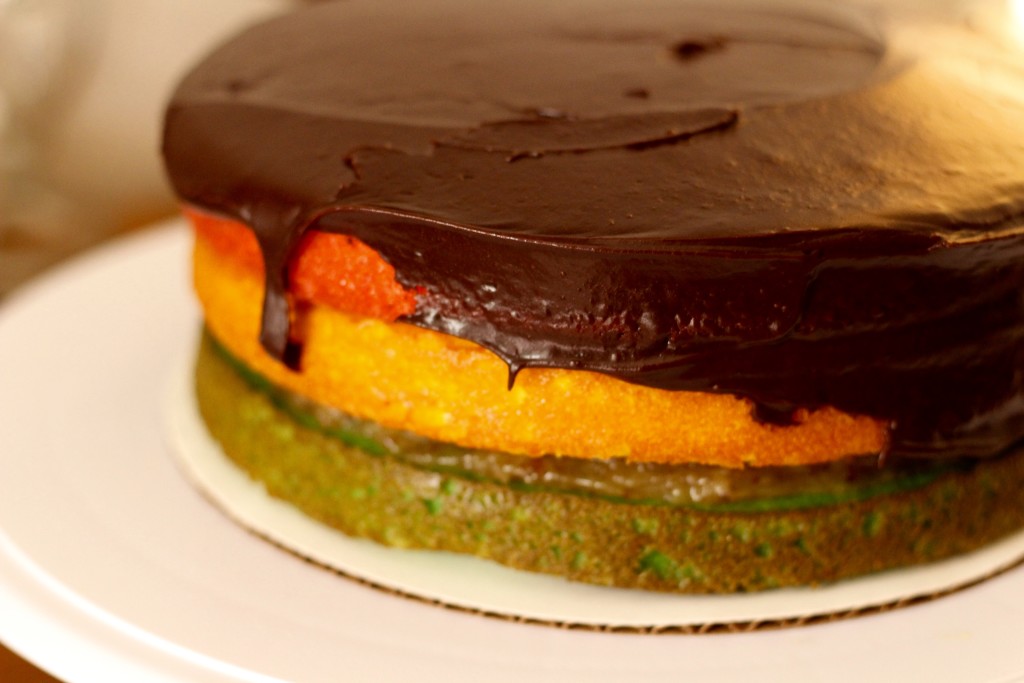
Alhamdulillah, though, right? These are good things to worry about. Every time that voice in my head wants to whine or complain that we’re not getting out as much, or  we haven’t met xyz goals yet, I always have to remind myself of what we DO have. It’s hard to compare intangible things such as peace and health to the tangible objects of house, boarding passes, the numbers of zeros in the bank account. But we have to. Because you can always look at people who have more and long for what they have. That road never leads to satisfaction. Like the folks who live in Russian mafia-ville in Queens (Jewel Ave). Every week there is a new mansion, more opulent than the one next door. More marble. More security cameras. You wonder what is check mate in that game?IMG_5428The cake is my go to yellow cake recipe ever since discovering it on The Food Blog to End All Food Blogs: Smitten Kitchen. Instead of an actual rainbow cookie cake recipe that incorporated almond paste in the batter, this is a light, fluffy, buttery yellow cake flavored with vanilla and almond. The rainbow cookie part comes in the filling, with almond between one of the layers and apricot jam in the other. It’s Beethoven’s fifth symphony of flavors. The tartness of the jam. The nuttiness of the almond. The chocolatey-ness of the frosting. All with the backdrop of the most glorious yellow cake.

IMG_5370

Cake recipe adapted from Smitten Kitchen. Frosting recipe adapted from Hershey’s.

Ingredients

For the cake

  • 2 cups plus 1 tbsp cake flour
  • 1 tsp baking powder
  • 3/4 tsp baking soda
  • 1/2 tsp kosher salt
  • 1 stick (4 oz.) unsalted butter, softened
  • 1 cup sugar
  • 1/2 tsp vanilla extract
  • 1/2 tsp almond extract
  • 2 large eggs, at room temperature
  • 1 cup buttermilk, shaken at room temperature
  • 2 drops green gel food coloring, plus more if necessary
  • 2 drops yellow gel food coloring (optional)
  • 2 drops red gel food coloring, plus more if necessary

For the filling and frosting

  • 1/2 cup almond filling
  • 1/2 cup apricot jam
  • 1 stick (4 oz. butter)
  • 2/3 cup unsweetened cocoa powder
  • 3 cups powdered sugar
  • 1/3 cup milk
  • 1 tsp vanilla extract
  • chocolate sprinkles for decorating (optional)

Directions

  1. Preheat oven to 350 degrees F. Spray the bottoms and sides of 3 (8 inch round) cake pans with non-stick spray and line the bottoms with parchment paper. Spray the parchment paper with non-stick spray. Sift cake flour, baking powder and baking soda together in a large bowl. Add salt and whisk to combine. Set aside
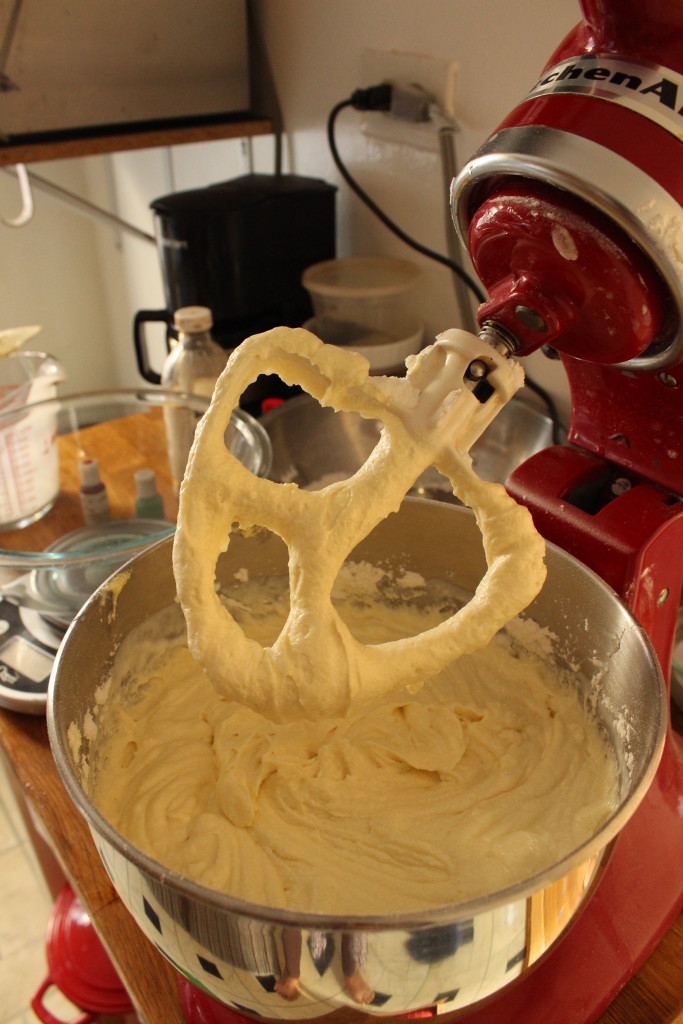
  2. In the bowl of a stand mixer, or in a large bowl using a handheld mixer, cream butter on medium speed until aerated (about 1-2 minutes). Add sugar and beat until light and fluffy (2-3 minutes more). Add eggs, one at a time, then vanilla. Stop the mixer, scrape down the sides and bottom of the bowl and beat until everything is well combined. With the mixer on low, add 1/3 of the flour mixture. When that’s incorporated, add 1/2 cup buttermilk. Add another 1/3 of flour mixture. When that’s incorporated, add the last 1/2 cup buttermilk, then the last 1/3 of the flour mixture. Mix until combined, scraping down the bowl.
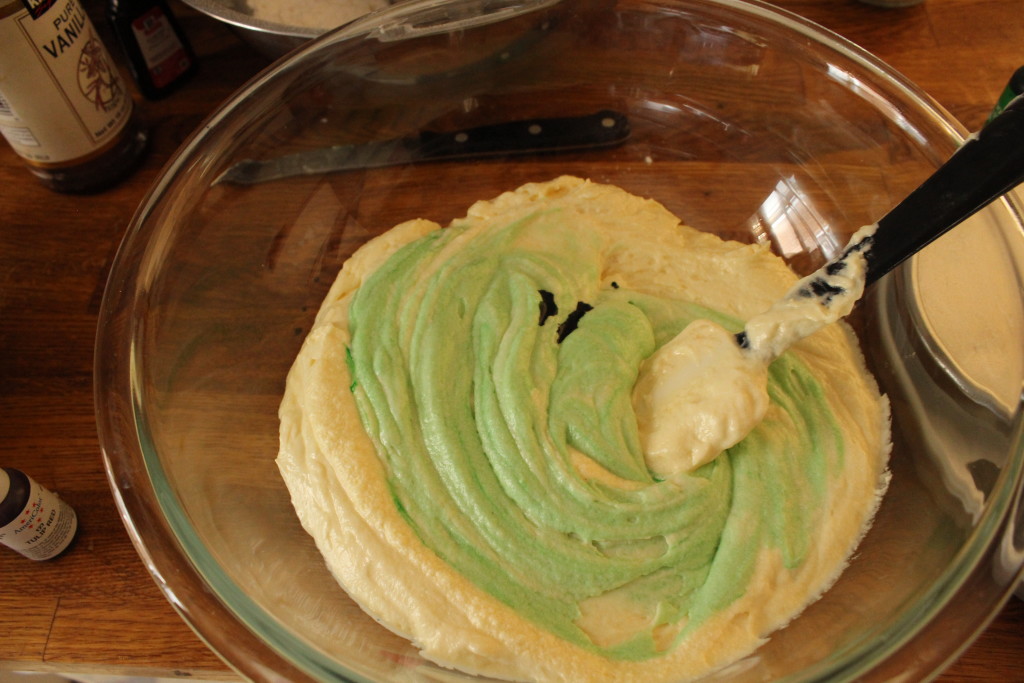
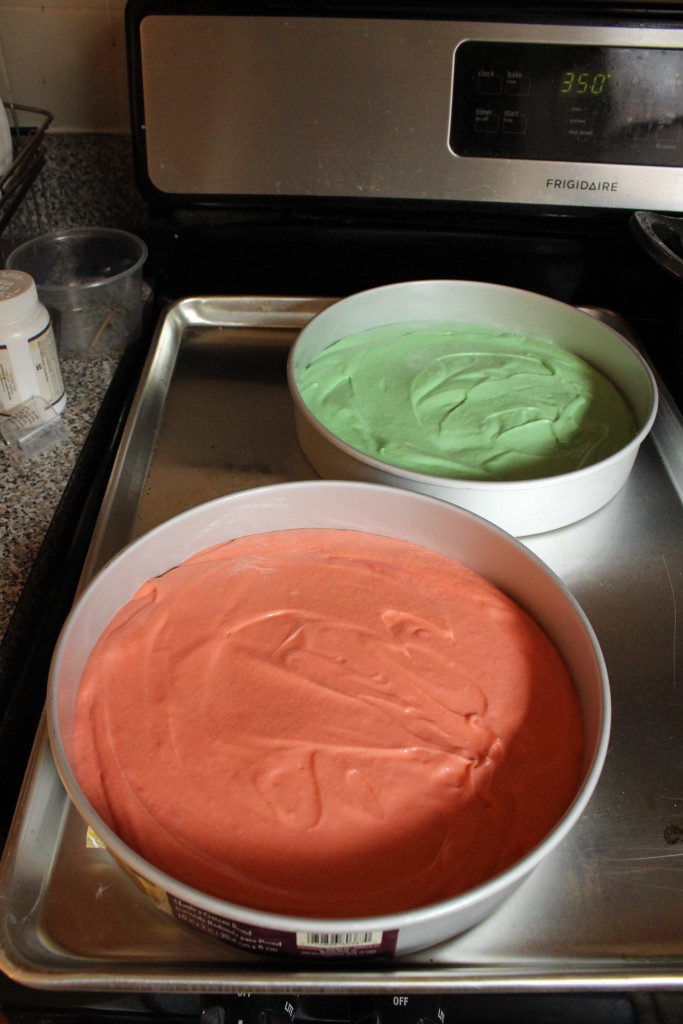
  3. Divide the batter between three bowls as evenly as you can (I used a kitchen scale to ensure even distribution). Leave one of them untinted, or tint with 2 drops yellow food color. Tint one of them green (drop 2 drops food color and mix with a spoon or spatula; the color will appear minty). Tint the final one red (the color will appear more salmon like than true red). Take care to use separate tools for each bowl so the colors don’t mix. Gently pour the batter into the three previously prepared cake pans, red in one, green in one and yellow in one. Smooth out the top and tap on the counter 2-3 times each to get rid of air bubbles.* Bake in preheated oven for 20 to 22 minutes. The edges should start to pull away from the sides of the pan and the top should spring back when touched.
  4. Let cool.
  5. When ready to assemble, carefully invert the green layer on a cake board lined with saran wrap. Peel off the parchment paper and place second cake board on top. Invert again so the domed side is up. Using a serrated knife, carefully level the top of the green cake layer. Spread almond filling evenly, to the edges.
  6. Next, invert the yellow cake layer as before onto a saran lined cake board. Remove parchment from bottom and carefully place over the green layer. Try to line it up as closely as possible. Using a serrated knife, carefully trim the dome to level the cake. Spread apricot jam evenly, to the edges.
  7. Repeat with pink layer.
  8. Make chocolate frosting: melt butter in a medium saucepan over medium heat. When melted, turn off heat and add cocoa powder. Whisk until combined. Add 1 cup of powdered sugar and 1/3 of the milk. Whisk together. Repeat with 1 more cup of powdered sugar, half of the remaining milk. Whisk. Add last cup of powdered sugar, rest of the milk, and vanilla extract. Whisk until everything is well combined.
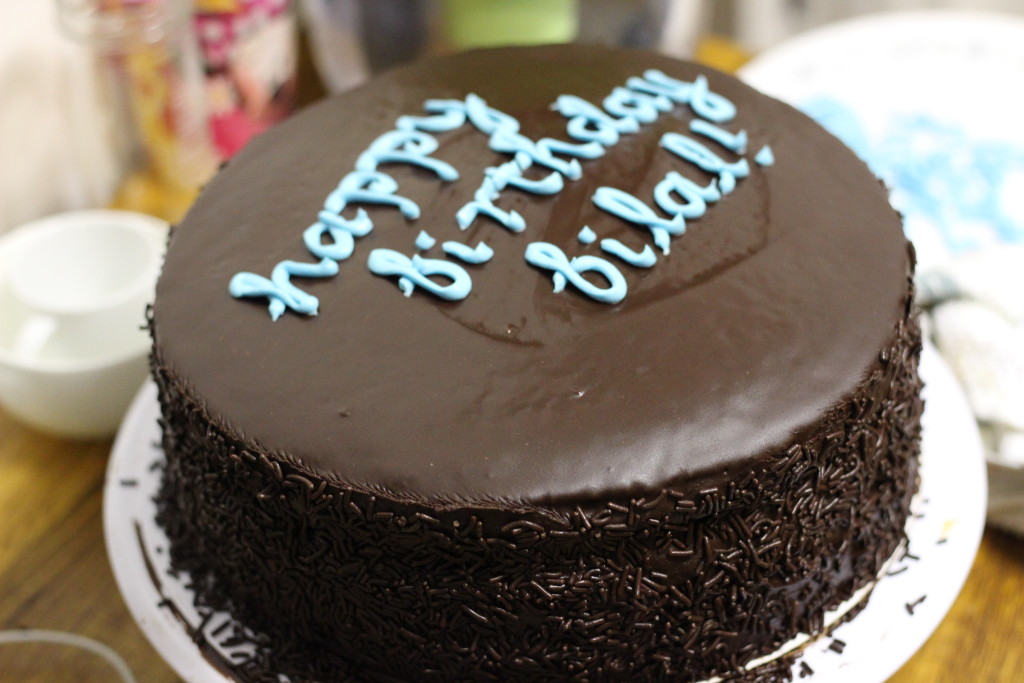
  9. Working quickly, place cake on cake turner. Pour about a cup of the frosting on top of the cake. Smooth with an offset spatula, pushing down the sides a bit. Apply one teaspoon of frosting at a time on the sides, starting from the top and working your way down.
  10. Once the sides are fully covered in frosting, apply handfuls of sprinkles to the sides, placing a plate below the turntable to catch excess sprinkles.

*Note: if you use baking strips, the cake doesn’t dome as much and bakes evenly. I cheaped out and just cut a kitchen towel into strips, drenched them in water, and pinned them around the circumference of the cake pans. Worked like a dream. The cake layers in the pictures did not have to be leveled.

Leave a Comment · Labels: American/Mediterranean, Dessert Tagged: almond, apricot, chocolate frosting, rainbow cake, rainbow cookie cake, rainbow cookies

Almond Lace Cookies with Earl Grey Ganache

January 5, 2016

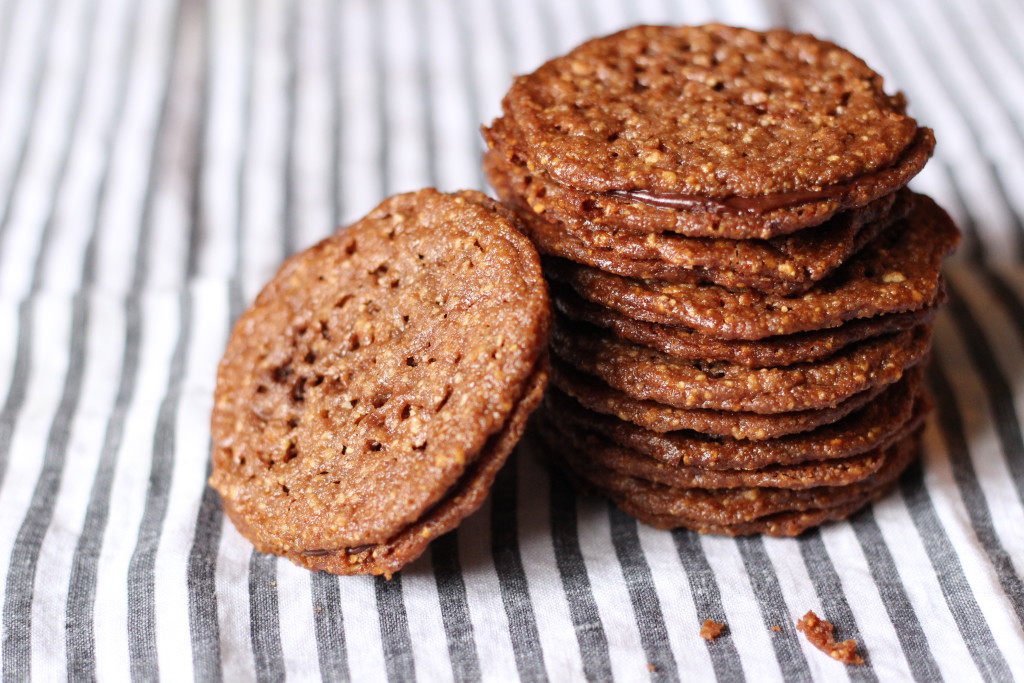
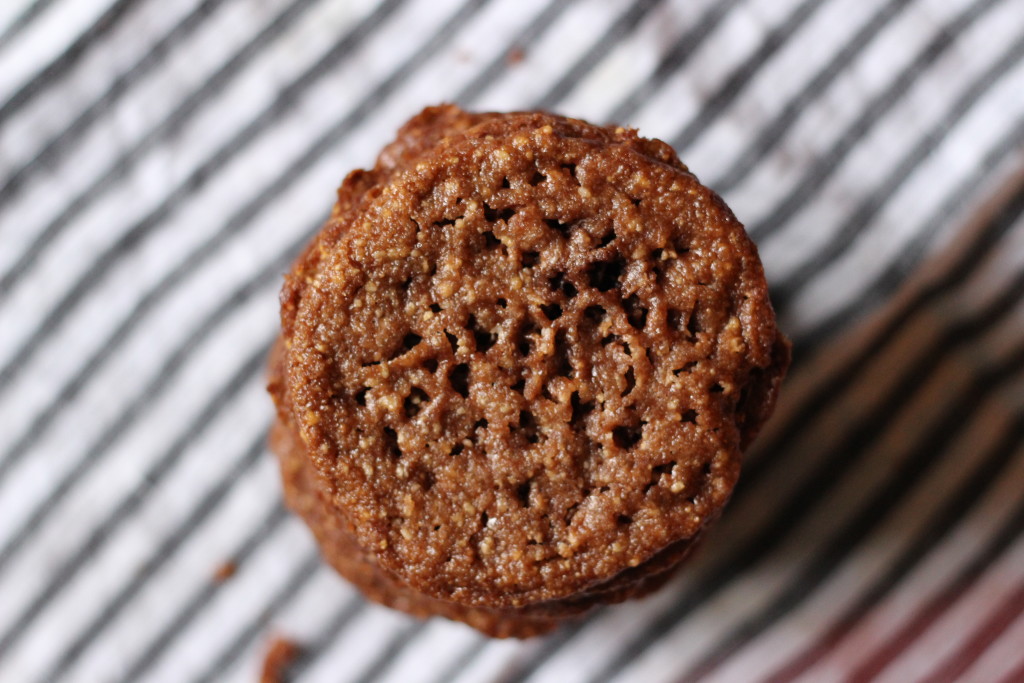
IMG_5460Oh no – I was supposed to kick off the new year with a healthy-ish recipe, right?? Gah – you’ll have to forgive me. Next post, I promise, something green. In the meantime, enjoy Kitchen3N 3.0! Now with creepy side picture so you can imagine I’m watching you as your read (and salivate at) my material. IMG_5465These cookies have many names: almond lace cookies (you can find similar ones at Trader Joe’s, except instead of sandwiching them, you’ll find them as single cookies dipped in chocolate), bocca di nonna (literally, mouth of grandma but I suppose grandma’s kisses sound better), and that’s it really. Sorry. They have wonderfully sweet, caramelly, toasty notes and the earl grey ganache just makes ya go, “hmm what IS that?!”. Throwback to Rachel Ray and every instance of her adding nutmeg to a cream sauce.

Recipe from BH&G Jan 2010

Ingredients

  • 2/3 cup all-purpose flour
  • 2 tbsp unsweetened dutch-processed cocoa powder
  • 3/4 cup butter, softened
  • 1 cup sugar
  • 3/4 teaspoon, vanilla
  • 1 1/2 cups finely ground almonds (I ground up slivered almonds in the food processor)
  • 1/3 cup heavy cream
  • 4 earl grey tea bags
  • 4 oz semi sweet chocolate, chopped

Directions

  1. Combine flour and cocoa powder in a small bowl. Whisk to combine and set aside.
  2. In your stand mixer (or in a bowl using a handheld electric mixer) cream butter at medium speed for 30 seconds. Slowly add sugar and vanilla extract. Beat until light and fluffy (3 to 4 minutes). Scrape down sides of bowl occasionally. Add ground almonds, then flour and cocoa mixture. Using a rubber spatula, scrap down the sides and bottom, give it a final mix, and dump onto a large piece of saran wrap. Wrap tightly and refrigerate for 1 hour.
  3. Preheat oven to 350 degrees F. Line a baking sheet with parchment paper. Using a cookie scoop, scoop out 1 inch balls onto prepared cookie sheet, 2 inches apart. Press down lightly to flatten.
  4. Bake for 12 to 15 minutes or until centers are firm. Let cool a few minutes on baking sheet, then move to wire rack to cool completely. Continue with the remaining dough.
  5. While they cool, make the ganache: bring the cream to just before boiling (you’ll see bubbles around the perimeter). Remove from heat. Add the 4 tea bags, cover and let steep for 15 minutes. After 15 minutes, uncover, squeeze the liquid out of the bags and discard. Heat the cream once again to just barely a boil. Add the chopped chocolate and stir until mixture is homogenous and shiny.
  6. Assemble: Spread half a teaspoon of ganache onto the flat side of one cookie. Place the flat side down of another cookie directly on the ganache. Continue with the rest of the cookies.

2 Comments · Labels: American/Mediterranean, Dessert, Recipes Tagged: almond cookies, almond lace cookies, bocca di nonna, chocolate, cocoa, cookies, dessert, earl grey, ganache, tea biscuits

Pumpkin Cupcakes

October 29, 2015

img_7429

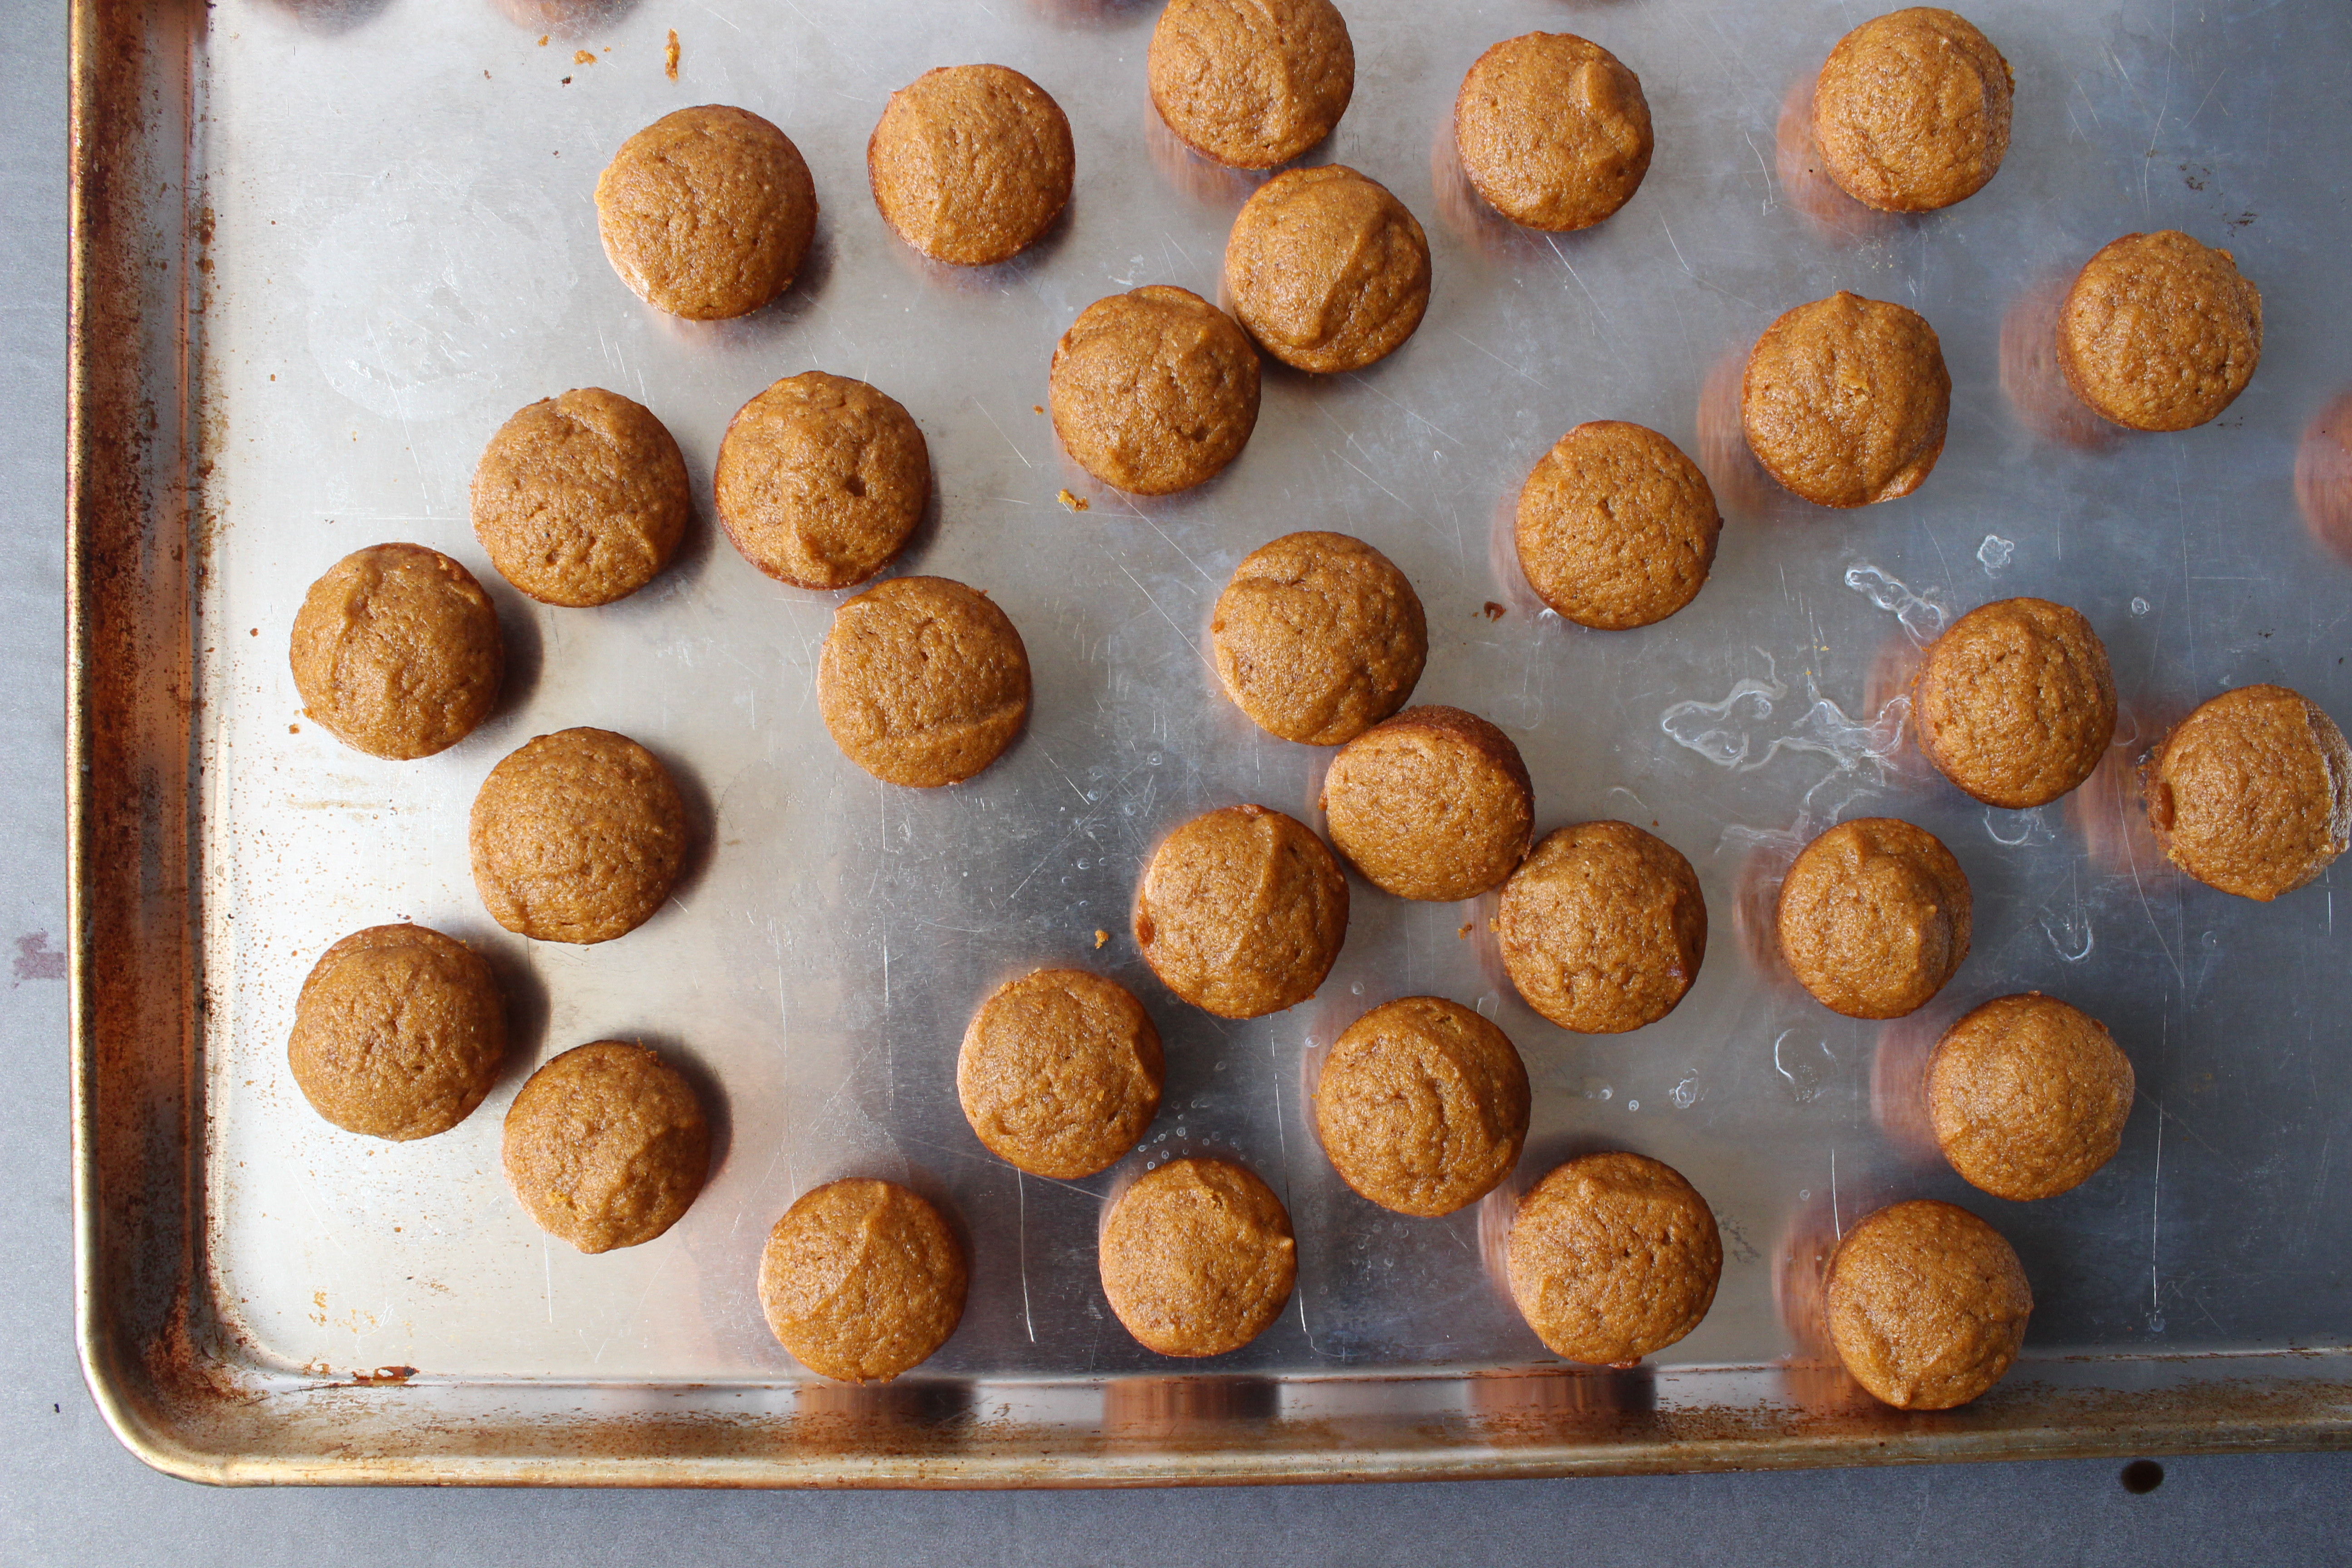
I usually shy away from pumpkin spice anything. It’s just not my cup of tea. But a few weeks ago our family went to Wightman Farms in New Jersey, where they attempt to ameliorate the hurt inflicted on your wallet from overpriced hay rides with complimentary pumpkins. Thus, I had 4 pumpkins and a whole lotta cooking to do. I made a pumpkin bread which was a bust (recipe said to bake in two 8×4 loaf pans; I brazenly baked it in a single 10×5 in pan and sadly watched through the oven door as it never rose), a pumpkin pasta which was delish, and finally, these fabulous little bites. Important to note that my homemade pumpkin puree is thinner than the canned ones, but I think since this recipe uses vegetable oil and not butter, you should be fine. IMG_5142I whipped these up without a recipe to refer to (hence most of the amounts are 1, 1, 1 [1 cup sugar, 1 cup flour, 1 cup pumpkin, etc.] but hey, it works!) and without even being sure if the end result would be a cupcake or a muffin. Since I wanted to practice my piping, I frosted them with a cream cheese frosting – so I guess they are officially in Camp Cupcake! They are so moist you can serve as a snack without the frosting.

Ingredients

  • 1/2 cup brown sugar
  • 1/2 cup granulated sugar
  • 1/2 cup vegetable oil
  • 1 egg
  • 1 cup pumpkin puree*
  • 1/2 cup all purpose flour
  • 1/2 cup whole wheat flour (could omit this and use all all-purpose flour)
  • 1/4 tsp cinnamon (can increase to 1/2 tsp if you prefer)
  • 1/8 tsp ground clove
  • 1/4 tsp kosher salt
  • 1/2 tsp baking powder (make sure it’s fresh! i.e. not older than 3 months)
  • 1/4 tsp baking soda (same)

Directions

  1. Preheat oven to 325 degrees F. Spray either a mini muffin pan or a standard muffin pan with non-stick spray.
  2. In the bowl of a stand mixer (or in a large bowl using a handheld electric mixer), combine both sugars with vegetable oil and beat for a minute. Add egg and continue beating. Add pumpkin puree and continue beating for another minute.
  3. In a separate bowl, combine flours, spices, salt and leavening. Whisk a few times.
  4. With the mixer on low speed, slowly add the dry ingredients just until combined. Scoop batter into prepared pans to about 3/4 way up. If using the mini muffin pan, bake for 15-17 minutes until a toothpick inserted in the center comes out clean. For a standard muffin pan, bake 18 to 20 minutes.
  5. If you choose to frost them, allow them to cool to room temperature. Frost with a cream cheese frosting.

*To make the pumpkin puree, I peel a pumpkin similar to how you would peel a butternut squash – with a big knife, going from top to bottom, around on all sides. Scoop out seeds, chop, then place in a large wok or pot with 1/2 inch of water. Bring to a boil then reduce heat. Simmer until tender. Blend in a food processor.


Leave a Comment · Labels: American/Mediterranean, Dessert, Recipes, Veg Tagged: autumn, cupcakes, dairy free, dairy free dessert, dessert, easy dessert, fall, pumpkin, seasonal cooking

Coconut Sheet Cake

October 19, 2015

IMG_5099I feel like I just completed a marathon. Not the running kind, though there was a lot of physical activity involved. Running to/from the store. Planning, baking, cleaning, putting away, assembling, decorating on top of the usual taking care of 2 small children and managing a household. Before this past weekend, my cake orders were usually 2-3 layer 9 in cakes. Now I had to prepare 2 full sheet cakes to feed 200 people over two consecutive days. Luckily the other cake was an icebox cake that required lots and lots of chocolate wafers that I was able to store in the fridge. I was pretty much at capacity when I baked the first layer of this cake and froze earlier in the week.       IMG_5057I had previously made this as 3 layered cake. But the recipe needed tweaking in order to make it more sturdy and stand up to the demands of a sheet cake! IMG_5058The customer requested pineapple filling in lieu of the cream cheese frosting, so if you like pina coladas then this cake is for you! I made two batches using the recipe found here. It was just perfect. IMG_5064The groom to be, after taking a bite could only say “wow”. That’s right. I don’t strive to make the most over the top decorative cakes that look like your favorite handbags. I strive to make the best cake you have ever tasted, every time.  IMG_5069I should probably mention this was for a Bengali pre-wedding party called a Gai Holud. The writing on the cake reads “Jamil’s Gai Holud”. It’s a tradition wherein the bride or groom is rubbed all over with turmeric paste and then bathed publicly (with the Bengali equivalent of a bathing suit on).  Here in America, we do a more symbolic version. Bride/groom sits on some decorated platform with an array of sweets in front of him/her. There is a bowl of turmeric paste that is rubbed on a small portion of his or her face, then wiped off. IMG_5070 IMG_5077IMG_5088This is how I prepped the board for my 16×22 in cake. Because apparently they make pans in that size, but not cake boards or cake boxes. Lame.IMG_5091IMG_5092IMG_5093I don’t usually do crumb coatings, but because I made the amount listed in the original recipe, it wasn’t enough to properly frost a cake of this size, so I used it just to cover the surface. This cake is very tender, very moist, so it needed the crumb coating. IMG_5094The real challenge was in getting the second layer onto the first. The first layer was just inverted by placing the cake board on top of the sheet pan and flipping. But the second layer was not as trivial. I stood over the first layer, second layer in hand for like 5 minutes taking deep breaths before going for it. And it didn’t align evenly! Although I held the cake in place by the bits of parchment sticking out of the edges, I couldn’t fully control how it flipped out of the cake pan so it came out slightly rotated down (by like 10 degrees). I sawed off the parts that stuck out on either side and sort of glued it onto the barren sides with frosting. IMG_5098It worked. The guests were none the wiser. Til now, of course.IMG_5103Traditional henna patterns as decoration and toasted coconut flakes all around for that extra oomph.

Coconut Sheet Cake

Recipe adapted from A Taste of Home. Please note I made two batches of the recipe below for my 2 layer sheet cake. I used the frosting from the link above (also 2 batches).

Ingredients

  • 6 eggs, separated, at room temperature
  • 2 1/4 cups sugar
  • 3/4 cup butter, softened
  • 3/4 cup vegetable oil
  • 1 tsp coconut extract
  • 1 tsp vanilla extract
  • 1/2 tsp almond extract
  • 3 cups cake flour
  • 1 1/2 tsp baking powder
  • 1 tsp baking soda
  • 1/2 tsp salt
  • 1 1/3 cup buttermilk at room temperature
  • 2 heaping cups sweetened coconut flakes
  • 1/4 tsp cream of tartar

Directions

  1. Preheat oven to 325 degrees F. Prepare 16x22in sheet pan by lining with parchment paper, spraying with non stick spray or butter, and sprinkling a bit of flour.
  2. Beat butter at low speed, gradually increasing to medium until light and aerated, 1 1/2 to 2 minutes. Gradually add 1 1/2 cups of sugar. Beat until light and fluffy – about another minute. Decrease speed to low and add oil. Gradually add the remaining sugar so as not to deflate the butter. Add the six egg yolks, one at a time, scraping down the bowl halfway through. Add the extracts and beat until combined. Stop mixer.
  3. Sift cake flour, baking powder and baking soda into a medium bowl. Add salt and give a gentle stir with a wooden spoon. Turn the mixer on low and add the dry ingredients in 3 batches, alternating with with buttermilk. Turn off mixer when dry ingredients are just incorporated.
  4. In a large bowl, beat egg whites with cream of tartar with a handheld electric mixer starting at low speed and increasing to high speed. Beat until peaks are stiff, 5 to 7 minutes. Add 1/4 of the egg whites to the batter to loosen it up. Add remaining egg whites by gently folding with a rubber spatula, cutting down the middle of the batter, then turning the bowl 1/4 of the way and bringing the spatula up and over. Repeat until you can just barely see the streaks of egg white.
  5. Pour batter evenly over sheet pan and bake in preheated oven for about 23 minutes. Start checking with a toothpick inserted in the center to make sure it’s done at about 21 min. There should be minimal crumbs on the toothpick.


Leave a Comment · Labels: American/Mediterranean, Dessert, Recipes Tagged: cake, celebration cake, coconut, coconut cake, dessert, full sheet pan, pina colada, pineapple, sheet cake, toasted coconut, tropical

Chocolate Zucchini Cake

August 18, 2015

IMG_4847I was incredulous the first time I heard the words “Zucchini Bread” at my adopted Jewish grandmother’s apartment some 15 years ago. Her name is Sophie and she was my mother’s confidant, advisor, protector and friend for many years. She taught her the value of saving. She raised two children during the Depression. She told my mother, every week she set aside $0.50. She grew such a small sum into stake in a multi-million dollar company and a condo in a luxury apartment building in downtown Manhattan. IMG_4854So when she talked, we listened:

  • “Eat Romaine lettuce, not iceberg. It’s all water.”
  • “Ya ever tried zucchini bread? It’s delicious.”
  • “Take care of ya mother. She works hard.”

Right on all counts. Take it one step further with chocolate zucchini cake. I was skeptical when a mom brought zucchini brownies to a play date. But it had such deep chocolate flavor! And it was moist! And magical! I realize that zucchini’s blandness kind of works in its favor in baked goods. Between that and the water content, it’s the perfect vessel for delivering a rich, moist, chocolate crumb. I was nervous as I folded the 3 cups into the batter, that those eating the cake would see slivers of green running throughout, but it melted right into the cake. And with that much veg content, you don’t feel like the world’s worst parent when your kid (and husband) reaches for it throughout the day.

Adapted barely from King Arthur Flour.

Ingredients

  • 1/2 cup unsalted butter (1 stick) at room temperature
  • 1/2 cup vegetable oil
  • 1 3/4 cups sugar
  • 1 tsp vanilla extract
  • 2 large eggs
  • 1 tsp baking soda
  • 1/2 tsp baking powder
  • 1/2 tsp salt (next time I would try increasing this to 1 tsp!)
  • 1/2 cup buttermilk, sour cream, or yogurt (I used buttermilk)
  • 2 1/2  cups all purpose flour
  • 3/4 cup Dutch process cocoa*
  • 3 cups shredded zucchini
  • 1 cup chocolate chips
  • 1 cup heavy cream

Directions

  1. Preheat oven to 325 degrees F. Grease a 9″x13″ baking pan.
  2. Sift flour, cocoa, baking soda, baking powder and salt into a large bowl. Stir gently to combine.
  3. In a stand mixer or in a large bowl with a handheld electric mixer, beat butter at medium high speed until light and airy – about 1 minute. Lower the speed to medium low and gradually add half the sugar, then oil, then remaining sugar. Add vanilla, then eggs, one at a time, until incorporated fully. Stop to scrape down the bowl. Turn on the mixer briefly once more to incorporate everything.
  4. At low speed, add half of the flour/cocoa mixture. Then slowly pour in the buttermilk (or sour cream or yogurt). Add the rest of the dry ingredients.
  5. Remove bowl from stand mixer and fold in the zucchini with a rubber spatula or wooden spoon. When fully incorporated, pour into greased pan and bake for 40-45 minutes, until a toothpick inserted comes out clean. Let cool.
  6. Heat heavy cream in a saucepan until scalding hot (bubbles appear around the perimeter). Pour over the chocolate chips and stir until it becomes a spreadable ganache. Pour and spread evenly over cooled cake.

*Dutch process cocoa, though harder to find, is essential for that deep chocolate flavor. When you use a quality cocoa powder, it makes all the difference between a standard chocolate cake and a gourmet one. Can be purchased online.

Leave a Comment · Labels: American/Mediterranean, Dessert, Recipes Tagged: chocolate cake, cocoa, dutch process cocoa, ganache, seasonal baking, seasonal cooking, snack cake, squash, summer squash, zucchini

5 Things I’ve Learned About Baking Chocolate Chip Cookies

August 5, 2015

IMG_4839I’ve been baking chocolate chip cookies since I was 10 years old. It was my first culinary endeavor. What does that mean for you? That means I’ve messed them up every which way so here I am to share with you some of my learnings.IMG_48291. Make sure your leaveners are still potent. For years I thought baking powder was just a more potent form of baking soda, just because the first batch of chocolate chip cookies I made came out flat as disks (and I blamed it on the baking soda! Rightfully so, just for the wrong reasons). If your baking soda and/or baking powder has been in your pantry for more than 6 months, toss them. If you’re baking cookies just for yourself or your family, you could take the risk if you fill guilty about tossing them. But if you’re planning to serve them to company or take as a hostess gift, do not take the chance! Use fresh leavener! IMG_48302. Use a cookie scoop! Gone are the days of using two teaspoons to artfully mold the perfect cookie mound. Using a cookie scoop is the only way to ensure each cookie is uniformly sized and shaped. I know it sucks to buy additional kitchen gadgets, but if you love cookies as much as I do, or when you realize how great it is to have frozen cookie dough stocked in your freezer to bake off when the occasion arises, you’ll be glad you have one in your arsenal!IMG_48313. Use parchment paper or silicon baking mat. This might be old news for many of you, but I just cringe thinking of the days I greased cookie sheets and had to deal with the aftermath of scrubbing encrusted cookie dough off of them. They slide off parchment so easily that I’ve never looked back. I always keep my pantry stocked with parchment paper, chocolate chips, and butter so I can make these if I need a last minute hostess gift (or for a sudden attack of PMS).  IMG_48324. Refrigerate your cookie dough. There’s an unmistakeable difference in texture when you bake off cookies that have had time to chill. The flavors blend, the dough rests, and the center attains a heavenly chewiness that’s consistent among the best cookie recipes. Bake times will vary depending on the temperature the recipe dictates and the size of the cookie scoop you use. I like to bake mine until the tops have the slightest blush. It may look underdone, but it will continue cooking once out of the oven and resting on the baking sheet. Be mindful not to remove it from the baking sheet right away, as it will mostly likely bend and break while in the process of transferring. IMG_48345. There is no single greatest chocolate chip cookie recipe. Your palette changes as you get older. Different recipes highlight different characteristics of a marvelous chocolate chip cookie: the nuttiness, the chewiness, the contrasting flavors. Lately I’ve been using Leit’s Consummate Chocolate Chip Cookie recipe. I like the combination of cake flour and bread flour to give it the ultimate texture – chewy while delicate. For years before switching over, I’ve used Alton Brown’s The Chewy recipe with great results. However, chocolate chip cookie recipes, like shampoo, should be switched periodically.

Leave a Comment · Labels: American/Mediterranean, Dessert, Food Fun Tagged: baking, baking 101, baking tips, chocolate, chocolate chip cookies, cookie dough, dessert, hostess gifts

A Red Velvet and A Double Chocolate Cake

June 7, 2015

IMG_4601IMG_4548Marriage is a most beautiful thing. Take for example the marriage of a hot dog to its bun. Mustard to a knish. Or in this case, the best cake recipe with the most glorious frosting.IMG_4549Oh, you thought I was referring to the marriage between two people? No, no, no – that’s a completely different story. It’s tumultuous. A dichotomy of opposing egos – it’s as generous as it is demanding. Like a cake studded with ghost peppers. You can figure out ways to maneuver around them, develop techniques over the years to handle them, but you’re inevitably going to chomp down one and when you do, you might find yourself questioning the decision to go for that slice of cake.IMG_4556But you go on anyway, running around with your head ablaze because darn it you committed to this slice of cake! And the heat dies down and you’re left with a smear of frosting on your plate that you scoop up and wonder, “Gosh this is so delightful, whatever was all that fuss about?”. That’s married life for ya.

IMG_4558 IMG_4559

People go bananas for red velvet, and personally, I’ve never understood why. Always made with a smidge of chocolate – the base cake isn’t strongly flavored enough. I opted for a recipe that has more cocoa than the usual red velvet recipe (3 tbsp vs 1 tsp) but not so much that it’s more of a chocolate cake (one recipe called for 1/3 cup cocoa!). It’s often topped with a tangy/sweet cream cheese frosting, though delicious, is better served with a sweeter cake, like banana or carrot cake. I feel like it’s striking, contrasting colors that people fall for. Also, a very tender cake made by the addition of buttermilk AND vinegar.

I wanted to try the original cooked milk/flour frosting recipe that accompanies red velvet. But as my hectic week dwindled down, all I had the energy for was whipping up two bars of Philly with a healthy stick of butter and calling it a day. I also experimented with the food coloring – since I used a gel food coloring, which is typically more pigmented than the usual food coloring. I used a rounded teaspoon rather than the tablespoon of food coloring that the recipe called for. In hindsight, I probably could have used more to offset the cocoa. Taste-wise – no complaints. IMG_4564

The second cake was for an acquaintance’s farewell party. I used my all time favorite chocolate cake recipe (Beatty’s) but with a no fuss frosting (Hershey’s perfectly chocolate frosting). I came upon this particular frosting recipe after looking for an alternative to the buttercream Ina Garten uses to accompany this cake (it has a raw egg yolk and I have two young’ns). What I love about this recipe is

  1. It uses cocoa powder rather than chocolate baking bars. Those can be so fussy. Semi-sweet vs bittersweet. Melt, then cool. Ugh.
  2. It’s made in a saucepan on a stovetop, with just a whisk. No fancy equipment necessary.
  3. It’s got a glossy sheen like that of a ganache.

That being said, it is a bit high maintenance in one respect: you’ve got to use it right away, and do not dilly dally with the application. It dries fairly quickly and as soon as it does, it becomes difficult to spread. Unlike buttercream which you can spread and tweak all the livelong day.IMG_4569 IMG_4573 IMG_4587

IMG_4590IMG_4593IMG_4591

It’s also reminiscent of the Entenmann’s chocolate fudge cake I used to have as an afterschool snack – pretty much every day of my childhood. Yup. Silky texture, rich chocolate flavor. If you’re making dessert for chocoholics, there’s no going wrong with this combo.IMG_4595 IMG_4597  IMG_4604

For the decorations I stuck to my handy dandy ziploc bags with a hole cut at the end. Really fancy equipment over here at Kitchen3N!

Red Velvet Cake recipe barely adapted from NYT Cooking.

Ingredients

  • 1/2 cup (1 stick) butter, softened
  • 3 tbsp cocoa powder (I used natural cocoa powder since it’s more acidic and would react well with the buttermilk/vinegar)
  • 1 1/2 cups sugar
  • 2 eggs
  • 2 tsp vanilla extract
  • 1 1/2 tsp red food coloring (if using the gel, traditional food coloring use 2 tbsps)
  • 1 tsp salt
  • 1 tsp baking soda
  • 2 1/2 cups flour
  • 1 cup buttermilk
  • 1 tbsp white vinegar
  • 2 8 oz packages cream cheese at room temperature
  • 1/2 cup (1 stick) softened butter
  • 1 tsp vanilla extract
  • 5 cups confectioners sugar

Directions

  1. Preheat oven to 350 degrees F. Butter and flour, or butter and apply parchment paper to two 9 in round cake pans. Set aside.
  2. Sift flour, cocoa, salt and baking soda into a bowl.
  3. Beat butter with the paddle attachment of your stand mixer for about 2 minutes on medium-low speed. Add sugar and beat for 1 minute more. Scrape down the sides of the bowl with a spatula. Reduce speed on mixer to low and add eggs, one at a time, then vanilla extract and food coloring. Next add 1/3 of the dry ingredients. Then add 1/2 cup buttermilk. Add another 1/3 of the dry ingredients. Then add vinegar to the buttermilk and add to the batter. Add final 1/3 of dry ingredients. Use a spatula to give it one final mix.
  4. Divide evenly between the two cake pans and cook until a toothpick inserted into the center comes out clean (20 to 25 min).
  5. After taking it out of the oven, let it cool until the pans are ready to handle. Loosen the sides with a spatula or knife, going under the cake a bit on all sides to loosen. Then place one hand on top of the cake, flip it out onto your hand, then set it down on the wire rack to cool completely (one of my first baking follies as a kid was to apply frosting to a cake I just pulled out of the oven…). Remove parchment paper.
  6. Make the frosting: whip cream cheese and butter on medium speed until light and fluffy (3 to 5 minutes). Add vanilla. Decrease speed to low and add confectioners sugar one at time. Taste for desired sweetness/flavor. Adjust as necessary.

Leave a Comment · Labels: American/Mediterranean, Dessert, Recipes Tagged: cacao di pernigotti, cake, chocolate, chocolate icing, cream cheese icing, dessert, double chocolate, ermine icing, frosting, fudge, hersheys, layer cake, red velvet

Strawberry Rhubarb Hand Pies

May 18, 2015

IMG_4519I gave into peer pressure, guys. When the first ramps popped up in my instagram feed, I rushed to the Union Square Green Market to pick some up. Not too long after, I picked up some rhubarb without much idea about what I was going to do with it. I am all about eating seasonal foods, local, humane, natural, sustainable, etc. But sometimes the thing that’s in season isn’t exactly worth all the hype. Ramps are great and all. If you are less familiar with them, they are a green leafy vegetable available for a few short weeks in spring. They are sold leaves, stalk, bulb and all and have a lovely mild onion flavor. I loved them first time I used them, as a topping on my homemade pizza. More recently, I chopped them up and stewed them with some tomatoes. I even bought a ramp pesto that works wonders on a tomato mozzarella panino.

IMG_4486But I thought part of the point of seasonal foods was that they would be a bit more affordable? Because of their limited availability these items can be incredibly marked up. I vow for next year (and for later on this year), to wait until the end of a crop’s season to buy them. After the hype dies down, so does the price. And that, my friends, is how I internalize Supply and Demand (take that AP Microeconomics). IMG_4488I’m not posting an original recipe here today. I worked off a Smitten Kitchen recipe and am sharing my experience as a novice in hand pie assembly. This is after all a Web-Log. I am logging my forays into new foods and techniques.  IMG_4489Observation 1: Mamma mia that’s a lot of butter. 3 sticks. That’s an amount usually reserved for Ina’s Pecan Bars or the frosting for a 2 layer cake.

Observation 2: It was a pleasant salty, tangy, sweet and savory flavor experience. I thought the tartness of the rhubarb would be off-putting, but it worked well with the buttery-ness of the crust. I am so used to inundating my tart fruits with sugar (see Lemon Yogurt Cake) that my aging palette appreciated the change of pace. I actually misread the recipe and used 1/4 cup sugar for the filling as opposed to 1/3 cup. Oops. I did, however, intentionally add 1/4 tsp of salt. I ALWAYS need plenty of salt on my tangy fruits.

Observation 3: Make sure you have a good stainless steel saucepan to make this compote in. You have to leave it in the pot for 15 minutes, covered, so it is essential that it doesn’t stick to the sides or bottom. Do not try this on your Mother’s or Mother In Law’s 100 year old Imusa pot. Next time I might try it with black pepper or balsamic vinegar added to the fruit compote. Mmmm….IMG_4490IMG_4511I got to use my pastry blender for the first time. Or as my kids like to call it, The Monster. I had to resort to my salad bowl for mixing. You need a nice, big, wide bowl to work the dough in.  IMG_4514Although I regretted not making this with store bought pie dough (because of the million other things I had to do that in preparation for our weekend beach getaway), I can comfort myself by saying that a store bought pie dough would not have been made special with buttermilk and grapefruit zest. Small comforts when you’ve got fried chicken grease splattered all over your kitchen, a cold dough to work until flat, and a suitcase that just won’t pack itself!IMG_4516Pardon my cutting board’s appearance. It’s close to retirement.IMG_4517I think I should have gotten them thinner than I did. The directions were to roll to 1/8 of an inch but this was the best I could do. Is it ghetto to roll out your dough on a cutting board rather than the counter? I don’t trust myself to clean the counter well enough to roll out dough onto it. Maybe it’s a desi thing. And given my limited counter space, I wouldn’t gain a whole lot by nixing the board. IMG_4524Directions also stated a cooking time of 15 to 20 minutes. I needed to go a bit beyond the the 20 to ensure a nice golden color on my hand pies. IMG_4529Enjoy the season, folks, and all that it has to offer (but maybe wait a week or two ;)).

Recipe adapted from Smitten Kitchen.

Ingredients

  • 3 3/4 cups all-purpose flour
  • 1/2 tsp grated orange or grapefruit zest
  • 1 1/2 tbsps granulated sugar
  • 1 1/2 tsp salt
  • 1 1/2 cups (3 sticks) cold, unsalted butter
  • 1 cup cold buttermilk
  • 3 cups chopped rhubarb and strawberries (I used two cups rhubarb, one cup strawberries. Cut off the leaves and any tough parts of the rhubarb)
  • 1/4 to 1/3 cup sugar (depending on how sweet your strawberries are, but if you’re using all rhubarb, go with 1/3 cup)
  • 1/4 tsp salt
  • 1 egg

Directions

  1. Make the dough: mix the flour, citrus zest, sugar and salt in a large bowl with a whisk. Add the butter and work with a pastry blender, fork or your fingers until you have pea sized bits of flour encrusted butter running throughout. Then, slowly add the buttermilk and mix with a spatula or wooden spoon to incorporate. When all the buttermilk has been added, knead a few times with your hand to get it in the shape of the ball. Divide the ball in four and flatten each into a disk. Wrap with plastic wrap and stick them in the fridge for at least 30 minutes.
  2. Make the filling: combine the fruit, sugar, and salt in a medium to large stainless steel saucepan. Turn on the heat to medium low, cover and cook for 15 minutes. You don’t need to stir during this time. Enough liquid emerges from the fruit to self baste. After the 15 minutes are up, uncover and cook for an additional 15 minutes at medium low. Stir occasionally to ensure nothing sticks to the bottom, particularly towards the end. After these 15 minutes are up, pour onto a plate to let cool.
  3. Preheat the oven to 400 degrees F and line two baking sheets with parchment paper. Generously flour your surface and rolling pin. Roll out one of the disks until 1/8 of an inch thick. Do this with a swift back and forth motion, rotate the dough 45 degrees, then repeat until it is sufficiently thin. Take your time with this, young Jedi. Trim off the edges with a pizza cutter or sharp knife and cut to make 4 squares or rectangles. In a small bowl, beat the egg with a dash of water. Brush two of the squares with the egg wash. These will be the bottoms (hehe). Spoon a teaspoon of the cooled fruit compote onto the two squares. Place the adjacent squares a top the squares with filling, pulling a bit to ensure the edges line up. Crimp the edges with a fork. Brush the top with egg wash and cut a slit to let the steam out while they are in the oven. Place the two completed hand pies on a baking sheet and sprinkle the tops generously with sugar. Bake in the preheated oven for about 20 minutes. While those bake, work on rolling out the next quarter of dough and assemble the next two hand pies in the same fashion. I alternated by sticking the second batch in the oven as soon as it was ready and calculating the extra time required when the first timer went off, but it really browns best when there’s only one baking sheet in the oven at a time. Continue with the rest of the dough. Let cool a few minutes before moving onto a wire rack for complete cooling.

1 Comment · Labels: American/Mediterranean, Breakfast, Carb, Dessert, Recipes Tagged: breakfast, breakfast pastry, butter, buttermilk, dough, hand pies, pastry, pastry blender, pie dough, rhubarb, seasonal, snacks, spring, strawberry

Tiramisu

March 23, 2015

IMG_3866

Tiramisu is the rare dessert that can compete with chocolate anything. And, no, the dusting of cocoa powder on top does not a chocolate dessert make. Fluffy zabaglione – an italian custard composed of raw eggs, sugar and usually some flavoring, layered with espresso or coffee soaked ladyfingers. It is the most delicious no-bake dessert you can whip up. Though, not in a snap. This dessert is best served cold, having spent the previous night in the fridge. The hardest part of this recipe, is the wait. Yes, my husband dug into his birthday tiramisu about 3o minutes after I assembled it. And yes, he enjoyed it. But you can bet when he had it the next day, the MMM! reverberated around the apartment.

IMG_3820 IMG_3821 IMG_3827 IMG_3828 IMG_3829 IMG_3830

For some reason, it’s hard to come by a tiramisu in this country without some sort of liqueur or marsala. Same goes for the top tiramisu recipes online. But I can’t recall having a single tiramisu during my time in Italy that was made with alcohol. Unless my memory serves me wrong. However,  my suspicion that traditional tiramisu is not made with alcohol was confirmed with the recipe of the ladyfingers package. Then again, tira-mi-su does mean pick-me-up. Either way – this is an alcohol free recipe for those of you desiring one.

IMG_3838 

The whipped cream is something I added in lieu of a whipped egg white that the original recipe suggests. When has a cup of cream, whipped, hurt anything (except the needle on the scale?). For tips on whipping cream no matter what kitchen equipment you have, check out this helpful how-to.

IMG_3880

I also used regular ol’ brewed coffee. My espresso machine was decommissioned ages ago. My limited NY kitchen counter space could not accommodate it. So regular brewed coffee it is – and trust me, you do not miss a thing.

 Ingredients

  • 5 egg yolks
  • 1/2 cup sugar
  • 16 oz mascarpone cheese, at room temp
  • 1 cup heavy cream, chilled
  • 2 cups brewed coffee
  • about 18 ladyfingers, available at Italian groceries, more if you are using a longer pan
  • cocoa powder, for dusting

Directions

  • Using a stand mixer or hand held electric beater, beat egg yolks and sugar in a large bowl until pale yellow. Add mascarpone and continue beating until well blended.
  • In a separate bowl, whip cream until soft peaks form. Add the cream to the egg and mascarpone mixture, by folding gently with a spatula so as not to deflate the whipped cream.
  • Carefully pour coffee onto a plate with raised edges. In a square dish, spread 1/3 of the cream mixture along the bottom. Briskly dip a ladyfinger into the coffee, and place it on top of the cream, repeating with more ladyfingers until they are arranged in a single layer (see above pictures). Spread half of the remaining cream on top of the ladyfingers. Continue by soaking the remaining ladyfingers briefly in the coffee and arranging them on top of the second cream layer. Spread the remaining cream on top. Dust the top with cocoa powder. Let chill in the refrigerator for at least 6 hours. It’s best the next day.

3 Comments · Labels: American/Mediterranean, Dessert, Recipes Tagged: coffee, dessert, espresso, italian, ladyfingers, mascarpone, whipped cream, zabaglione

  • Newer Entries
  • 1
  • 2
  • 3
  • 4
  • 5
  • 6
  • 7
  • Previous Entries
American, Bangladeshi. Savory, sweet. I don't discriminate and neither should you.

Most recently…

Load More...
Follow on Instagram

Social

Subscribe to Blog via Email

Enter your email address to subscribe to this blog and receive notifications of new posts by email.

Tags

appetizer beef bengali breakfast butter cake caramel chicken chocolate chocolate chips cilantro clean eating coconut comfort food cookies dessert dinner entertaining fall fruit ganache gluten free halal healthy homemade honest chops honest creations iftar italian pasta pastry pistachio quick and easy dinner ramadan recipe side side dish south asian spinach vegan vegetables vegetarian weeknight dinner weeknight meal whipped cream

Theme by 17th Avenue · Powered by WordPress & Genesis