Kitchen3N

Recipes and food fun from Apt 3N

  • About
  • Gallery
  • Recipes

Mashed Eggplant (Begun Bhorta)

March 28, 2013

IMG_0824

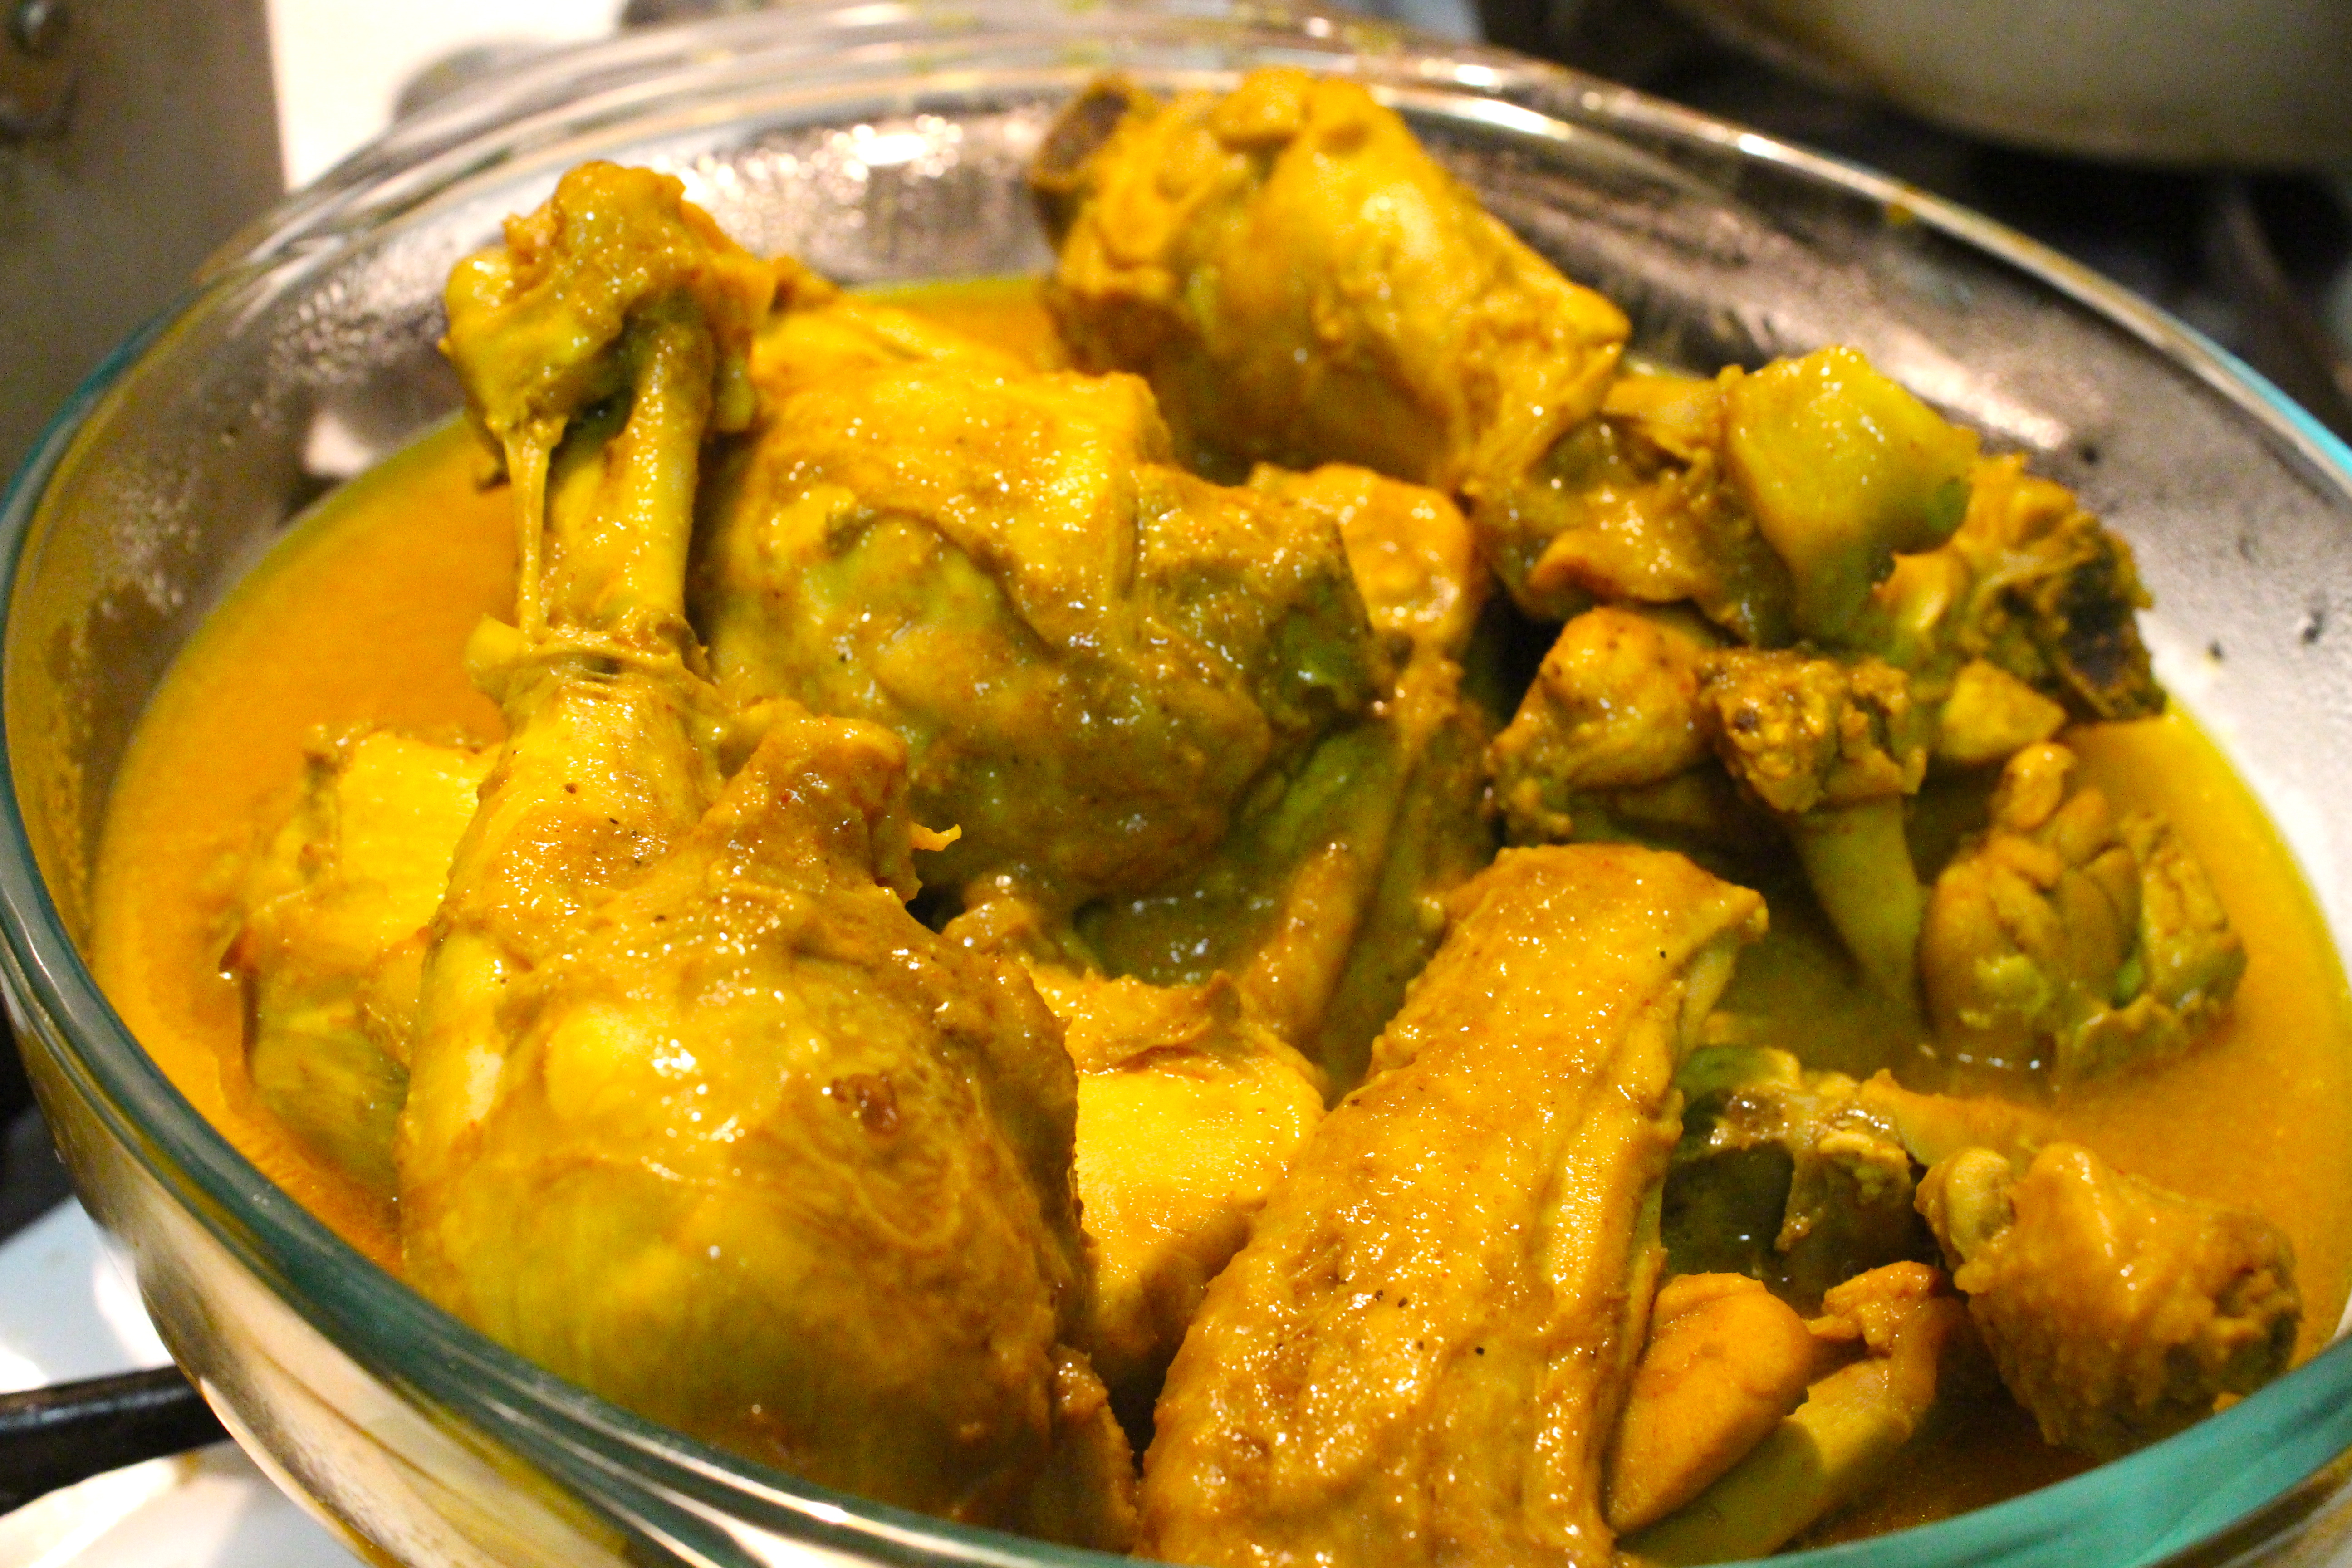
I feel like most people, when asked what their favorite vegetable is, would say corn or butternut squash or potatoes (though I bet they actually like the salt and fat that comes with the potatoes). Or perhaps mushrooms. But not me. I. Love. Eggplant. Stewed with tomatoes (imam biyaldi). Simply fried with salt and turmeric (chaak bhaji). In a curry with the insanely boney hilsa fish. In the Sicilian sweet/savory relish known as caponata. In every way except babaghanoush (sorry, haters gon hate). Or this way: charred over an open flame, peeled then mashed with simmering onions, tomatoes, garlic and spices.

IMG_0816Now, I know traditionally a bhorta consists of some boiled or steamed vegetable (or dried fish) mashed or really well mixed with raw onion, Thai chilli, mustard oil, salt and cilantro. But one fine day my mom made this and said hey, this is begun bhorta. And even though the cooking process more closely resembles a mishti kumro ghonto (think: spiced, simmered pumpkin mush), it stuck.

IMG_0809 Charring it is a bit of a pain. The juices get all over the burner. Peeling the charred pieces of skin is a pain. But the payoff is well worth it. You could perhaps do it under the broiler. I haven’t given it a go. Right now I am sticking to tried and true methods of prep. So, here it is:

Ingredients:

1 medium eggplant, poked all around with a knife or fork
1 tbsp olive oil
1 small onion, diced (yellow or red)
2 cloves garlic, minced (or 1tsp garlic paste)
1 tomato, diced
1/4 tsp cumin
1/4 tsp turmeric
1/4 tsp coriander
A pinch of chilli powder
1/2 tsp salt, plus more to taste
A handful of fresh cilantro

Directions:

Over a medium flame, start charring the eggplant by placing directly onto heat and rotating using a pair of tongs every two minutes or so (or with your fingers if you’re hardcore like my mom). It should be cooked all the way through in about 10 to 12 minutes. Prep the rest of the ingredients in the meantime.

When the eggplant is done, remove from heat and allow to cool. Then peel off the skin using your fingers or tongs, doing the best you can to get as much of it off as you can. Cut off the top and set aside.

Heat oil over medium high heat in a wok or fry pan. Add onions and tomatoes. Allow to soften a few minutes, then add garlic and the rest of the spices/seasonings (if you only have garlic/ginger paste on hand, use that). Add the eggplant and break up any chunks using a wooden spoon. Lower the heat to medium/medium low. Mix it all together and let the flavors combine while prepping the cilantro.

Off the heat, add the cilantro and check for seasoning. Serve with basmati rice or roti.

Note: as with most bengali cooking, you do not need to follow a recipe to a T to get fantastic results. Feel free to use chopped Thai chili in lieu of the chili powder. Or a dash of mustard oil for more of a kick. For example, I had some extra red pepper on hand so I added it. Made it look a ton prettier. Just don’t skimp on the charring because it really makes this dish.

2 Comments · Labels: Appetizers, Bengali, Recipes, Side, Veg Tagged: bengali, bhorta, dinner, eggplant, puree, side dish, vegetable, vegetarian

Bengali Chicken Curry

March 9, 2013

IMG_6344There is no coconut milk in your chicken curry if you are Bengali. There is no curry paste or any other amalgamation of ingredients someone else deems necessary for your comfort-in-a-bowl chicken curry. There is only your mother, your childhood, the pieces of white meat that no one ever wanted, the potatoes that you cared for only on some days, the jhol (broth) that was literally chicken soup for your soul (but only the first day, after that it just got too cardamom-y), and the leftover bones that you LOVED to chew on as you churned out every last drop of flavor but NEVER admitted to doing outside of bengali circles.

Of course this is my childhood we are recollecting and thus my mother’s recipe. There is very little room for improvement…though one could probably use chicken stock (even better, homemade chicken stock) in lieu of the water. Let’s leave that for another day, another post. For now, amidst the pristine image laid out for you of a little girl enjoying every minute of being elbow deep in her favorite food, there are some hidden perils that threaten. Hear me out: have you ever, during the course of your meal ever landed on a “flavor bomb” ? One of those whole peppercorns, cloves or worse, entire cardamom pod?? It’s disgusting! It’s painful! It’s downright heinous. Takes half the joy out of the meal. I just thought of taking the extra step of pouring the jhol through a sieve and voila! Flavor. Bomb. Out.

I hope this recipe takes you back to your childhood!

Ingredients

  • 1/4 cup vegetable oil
  • 1 medium yellow onion, sliced
  • 1 heaping tsp cumin power
  • 1 heaping tsp coriander
  • 1 tsp turmeric
  • 1/2 tsp chili powder (use more or less depending on the potency of your chili powder and how spicy you like it)
  • 1 3 lb chicken cut into curry pieces (either 10 or 12 pieces in total)
  • 1 tsp garlic paste (or minced garlic)
  • 1 tsp ginger paste (or minced ginger)
  • 1 – 1.5 cups of water (water should come about 2/3 of the way up the sides, not covering the meat)
  • 1.5 tsp kosher salt, plus more to taste
  • 1 bay leaf
  • 1 cinnamon stick or 1 tsp ground cinnamon
  • 4 whole cloves
  • 4 whole cardamom pods or 1/4 tsp cardamom
  • 5-6 whole peppercorns

Directions

  1. Heat the oil over medium high heat in a saucepan or any medium sized pot (about 4 qts) with high sides. Add the onion and let soften for 4-5 min. While onion cooks, prep your garlic and ginger, if necessary, and combine the ground spices in a bowl.
  2. Add spices to the onions, mixing well. Add the chicken pieces, turning to coat with as much of the masala mixture as possible. Let the chicken and spices cook for 4-5 minutes, taking care not to burn the spices (reduce the heat if necessary). Add garlic, ginger, water, salt, bay leaf, cinnamon, cloves, cardamom and peppercorns. Stir, then increase the heat to bring to a boil.
  3. Reduce to a simmer and cover. Let simmer for 20-25 minutes, removing the lid during the last 10 minutes if there is too much liquid.
  4. Check for seasoning. Add more salt or spice as needed.
  5. Optional: Transfer chicken pieces to a serving bowl. Pour the broth through a sieve to catch all the whole spices and push through all the last bits of curry through the sieve using a spoon.

Variations

For a bigger (4 to 5 lb chicken)

  • 1/3 cup vegetable oil
  • 1.5 to 2 small yellow onions, sliced
  • 1.5 heaping tsp cumin power
  • 1.5 heaping tsp coriander
  • 1.5 tsp turmeric
  • 3/4 tsp chili powder (use more of less depending on the potency of your chili powder and how spicy you like it)
  • 1 4 to 5 lb chicken cut into curry pieces (about 12 in total)
  • 1.5 tsp garlic paste (or minced garlic)
  • 1.5 tsp ginger paste (or minced ginger)
  • about 2 cups of water
  • 2 tsp kosher salt, plus more to taste
  • 1 bay leaf
  • 1 cinnamon stick
  • 5-6 whole cloves
  • 5-6 whole cardamom pods
  • 7-8 whole peppercorns

Increase cooking time by 2-3 minutes, testing the thickest part of the thigh to check for doneness.

To give it a refresh

Try sautéing some tomatoes into a large fry pan or wok and add the leftover chicken curry. When thoroughly heated through, remove from heat and add some chopped fresh cilantro.

4 Comments · Labels: Bengali, Main, Protein, Recipes Tagged: bengali, chicken, curry, dinner, south asian

Kitchen Sink Cookies

February 22, 2013

IMG_0734 Not the most appetizing name for a cookie, I know. But take one bite, and who? wha? What’s in a name? These are actually based off the kitchen sink cookies from a certain famous/infamous bakery that has taken Queens by storm (Martha’s, if you must). Why the duality? You either love it or you hate it. Their chocolate mousse and rainbow cookies: perfection. Their cheesecakes and gelato: leave something to be desired. Pretty much everything else is lukewarm, considering it opened shop in a city that is overrun with foodies, michelin award winning pastry chefs and french macarons that are flown in from Paris daily. Enough about their kitchen sink cookies. Mine have a tad fewer ingredients (nix the white chocolate and toffee bits) and satisfy a craving for chocolate chip cookies that have just a little extra something. The addition of coconut made them appealing even for all the South Asian mouths I have to feed around here. And obviously the oats make them a healthy and nutritious snack so when your toddler stuffs her face with them you’re not thinking “I’m a terrible parent” rather “just look at all that fiber she’s getting”. Lastly, after baking chocolate chip cookies for the past 15 years, I will leave you with some things I’ve realized:

  1. You don’t need to wait around for your eggs and butter to come to room temperature before baking. Just melt the butter in the microwave or saucepan! The cookies come out just as good. But if you insist on being old school, cube up the butter so it warms up faster.
  2. The original recipe says to use quick cooking oats but I used old fashioned and it came out just fine.
  3. Make sure your leavener isn’t too old. For years I thought baking soda was just an inferior cousin of baking powder because the first time I made CC cookies I used an out of date baking soda and my cookies just went SPLAT all over the baking sheet. So, after one year, I’d say get a new one.
  4. For a long time I under baked my cookies (325 or 350 degrees for no more than 10 minutes) but these days, I bake at a higher temp (375) for ten minutes and it just toasts up the butter in the cookies and they get that magical nuttiness to them.
  5. Finally, I’ve started using raw sugar instead of white sugar and there’s no difference in taste or texture as far as I can tell.

IMG_0738 Adapted from Allrecipes.com

Ingredients

  • 1 cup butter softened (or melted)
  • 1 cup brown sugar, firmly packed
  • 1/2 cup sugar
  • 2 large eggs
  • 2 tsps vanilla extract
  • 1 1/4 cups all purpose flour
  • 1/2 tsp baking soda
  • 1 tsp salt
  • 3 cups old fashioned or quick cooking oats
  • 1 cup chopped walnuts (optional)
  • 1 cup semisweet chocolate chips
  • 1 cup sweetened coconut flakes

Directions

  1. Preheat the oven to 375 degrees F. Line a baking sheet with parchment paper.
  2. In a large bowl, cream together the butter, brown sugar, and white sugar until smooth. Beat in eggs one at a time, then stir in vanilla. In a separate bowl, sift together the flour, baking soda, and salt; stir into the creamed mixture until just blended. Mix in the oats, walnuts, chocolate chips and coconut flakes. Drop by heaping spoonfuls onto ungreased baking sheets.
  3. Bake for 10 minutes in the preheated oven. Allow cookies to cool on baking sheet for 5 minutes before transferring to a wire rack to cool completely.


Leave a Comment · Labels: American/Mediterranean, Dessert, Recipes Tagged: chocolate chips, coconut, cookies, dessert, flour, oats

Deb’s Favorite Brownies

February 12, 2013

IMG_0726

Yes, I’m referring to her by her first name because she’s a household name around here, joining the ranks of Giada and Ina. Smitten Kitchen’s Deb Perelman is who I aspire to be. Mother, blogger, and now, cookbook author. She is a meticulous cook whose love of food and attention to detail are the biggest attributes to her success. I am a novice in many of those respects and though parenting takes up the largest percent of my time, effort and mental faculties, my hope is that in time my recipes and food photography will start to measure up to hers.

Onto the brownies. And yes, there are 1,000,001 brownie recipes out there.  Why blog about it when everyone knows that Ghirardelli’s brownies in a box is the no-fail go-to brownies to make when you’re craving some chewy, fudgy squares of chocolatey goodness? We do it because, what IF, among that pile of recipes, there exists one that is so perfect that it hits ALL THE RIGHT NOTES and you believe that you have, in that bite, found cocoa bliss? That is why we keep making these iterations. That is why Deb has 11 different brownie recipes and no doubt she will continue her brownie exploits (as we all will) until we are finally happy (which I doubt will ever happen). It’s kind of like our white whale (brown in this case)

My conclusion: excellent brownies if you happen to have unsweetened chocolate on hand. It was a rare occasion, but I did. Next time though, I might try decreasing the sugar and seeing how I like the sweetness and texture.

IMG_0721

Recipe from Smitten Kitchen.

Ingredients:

3 ounces unsweetened chocolate, roughly chopped
1 stick unsalted butter, plus extra for pan
1 1/3 cups granulated sugar
2 large eggs
1 teaspoon vanilla extract
1/2 teaspoon flaky sea salt or 1/4 teaspoon table salt
2/3 cup all-purpose flour

Directions

Heat oven to 350°F. Line an 8×8-inch square baking pan with parchment, extending it up two sides, or foil. Butter the parchment or foil or spray it with a nonstick cooking spray.

In a medium heatproof bowl over gently simmering water, melt chocolate and butter together until only a couple unmelted bits remain. Off the heat, stir until smooth and fully melted. You can also do this in the microwave in 30-second bursts, stirring between each. Whisk in sugar, then eggs, one at a time, then vanilla and salt. Stir in flour with a spoon or flexible spatula and scrape batter into prepared pan, spread until even. Bake for 25 to 30 minutes (I baked mine for 35 min), or until a toothpick inserted into the center comes out batter-free.

Let cool and cut into desired size.

Leave a Comment · Labels: American/Mediterranean, Dessert, Recipes Tagged: brownies, chocolate, dessert, smitten kitchen

Pavlova

November 1, 2012

By now, you must be thoroughly confused. Traditional Bengali food. All American desserts. Mediterranean musings. Korean restaurant review. And now an Aussie/New Zealander dessert? What kind of blog is this? In short, it’s a reflection of me. My south asian roots. My growing up in the most ethnically diverse place in the world. My brief, but glorious time in Italy. My marriage to a guy whose life is even more of a hodgepodge than mine (think, Bangladesh, Libya, New Zealand, New York).

I consider myself blessed for having the exposure I’ve had. Even if that meant that I was viewed as an outsider as much in the States as I was in Bangladesh. Because it’s led me here, to this blog, where I can share a little bit of my delicious albeit widely varied culinary experiences. Right now, it’s just a lowly food blog. But my plan for tomorrow night? TAKE OVER THE FOOD BLOGOSPHERE.

Back to the pavlova. I was intrigued when my husband first told me about it. It’s essentially a giant meringue, but coupled with the creamy, fatty goodness of whipped cream, and the freshness of fruit. Kind of like Eton Mess, but without the hassle of individual servings. Kiwi is the New Zealander’s fruit of choice, but feel free to use whatever’s in season. It’s fairly simple to make. It just requires a bit of patience as you whip the egg whites. And don’t feel badly if it cracks – I haven’t seen one that doesn’t.

A few tips:

1. Dust the parchment paper with cornstarch to avoid sticking.

2. Top with whipped cream and fresh fruit JUST before serving.

3. Leave it in the oven (heat turned off, overnight if possible) to minimize cracking.


Recipe from Allrecipes.com

Ingredients:

  • 4 egg whites
  • 1 1/4 cup sugar
  • 1 tsp vanilla extract
  • 1 tsp lemon juice
  • 2 tsp cornstarch
  • 1 pint heavy cream
  • 6 kiwi, peeled and diced

Directions

  1. Pre-heat oven to 300 degrees F (150 degrees C). Line a baking sheet with parchment paper. Draw a 9 inch circle on the parchment paper with pencil.
  2. In a large bowl, beat egg whites until stiff but not dry. Gradually add in the sugar, 1 tablespoon at a time, beating well after each addition. Beat until thick and glossy. Overbeaten egg whites lose volume and deflate when folded into other ingredients. Be absolutely sure not a particle of grease or egg yolk gets into the whites. Gently fold in vanilla extract, lemon juice and cornstarch.
  3. (Flip the parchment paper over so you don’t get any of the graphite on your pavlova!) Spoon mixture inside the circle drawn on the parchment paper. Working from the center, spread mixture toward the outside edge, building edge slightly. This should leave a slight depression in the center.
  4. Bake for 1 hour. Cool on a wire rack.
  5. In a small bowl beat heavy cream until stiff peaks form; set aside. Remove the paper, and place meringue on a flat serving plate. Fill the center of the meringue with whipped cream, sweetened if desired. Top whipped cream with kiwifruit slices.

4 Comments · Labels: American/Mediterranean, Dessert, Recipes Tagged: dessert, egg whites, gluten free, meringue, pavlova

Daal (Bengali Lentil Soup)

September 19, 2012

This is the quintessential Bengali side dish. The ultimate comfort food. It’s on every dinner table…from the most affluent of households to the most modest. When you invite someone near and dear to you, you always entice them with the promise of “daal bhat” (rice and lentils).

I hadn’t realized how extensive the ingredient list was for such a simple dish as daal. Mine is a bit heavy on the garlic (’cause let’s face it…the lentils themselves don’t have much flavor). The tomatoes and cilantro add freshness. To add depth of flavor, daal is traditionally made with panch phoron, added right at the end. Panch phoron is a Bengali blend of five different seeds: mustard, nigella, asafoetida, fenugreek, and cumin. It toasts up in the oil with the fried onion at the end to enhance its flavor. The combination of spicy, licoricey and earthy flavors give it a distinctly Bengali flavor.

IMG_6342

Ingredients:

  • 1/2 cup split red lentils
  • 3 cups water
  • 2 cloves garlic
  • 1 green (thai) chili
  • 1/2 tsp ground turmeric
  • 2 tsp salt, plus more to taste
  • 1/4 cup diced tomatoes
  • 2 tbsp olive oil
  • half a small yellow onion
  • 1 clove garlic
  • 1 pinch pach forom (optional)
  • small handful cilantro (about 1/4 cup, optional)

Directions

Rinse the lentils 2-3 times in cold water. Then, combine with water, garlic and chilli and bring to a boil over high heat (cut a slit into the chili pepper to let some of the flavor out). When it comes to a boil, lower the heat (otherwise it boils over like milk) and bring to a simmer. Spoon off some of the foam on top.
Add the turmeric, salt and tomatoes. Let simmer for about 15 minutes, or until lentils are cooked through. Optional: at this stage you can break up the lentils with a daal ghutni or an immersion blender (taking care to remove the chili and garlic) to give it a smoother consistency.
While lentils simmer, thinly slice the onion and fry until brown over medium heat. Mince the last garlic clove and add it to the onions for the last 30-45 seconds. Finish with chopped cilantro. Taste for seasoning.
Serve over rice.

6 Comments · Labels: Bengali, Protein, Recipes, Side

Your Mama’s Goat Curry (almost)

August 29, 2012

imageI wanted this blog to be part-South Asian cooking primer, part musings on Mediterranean/American/Italian cuisine and part dessert food-porn. I haven’t had much opportunity to cook South Asian food post baby no.2, mainly because I’ve been blessed with my mom’s good old home cooking most of the time.

But since it was Eid ul Fitr and my mom ran off to the homeland for a month, I got a chance to whip up some of the good stuff. The stuff that when I asked my husband to give a taste, rolled his eyes back and said “THIS is what makes the world go round”. Now, I won’t take all the credit. It’s a pretty standard curry recipe: onions, garlic, spices – with the exception of tomato paste. That’s a nifty little trick I learned from my mother in law. Intense tomato flavor and meat tenderizer in one. But it’s the meat that makes all the difference. Goat meat, very popular in the subcontinent, not so much in the states – is so flavorful, so tender. Though not as overpowering as lamb can be. I usually get ~3lbs from the shoulder/ribs/foreshank area.

I know it looks like a lot of ingredients, but they are seriously things to invest in if you enjoy south asian cooking.

image

Ingredients:

  • 1/4 cup vegetable oil
  • 1 large yellow onion or 2 small
  • 2 tbsps garlic/ginger paste (or 5 garlic cloves and 1.5 in ginger root, minced)
  • 1 tbsp tomato paste
  • 2 tsps cumin powder
  • 2 tsps coriander powder
  • 1/4 tsp cayenne powder
  • 2 tsps turmeric
  • 4-5 lbs goat meat (cut into small pieces)
  • 2 tsp salt, plus more to taste
  • 6 cardamom pods
  • 6 cloves
  • 2 cinnamon sticks
  • 4-5 peppercorns
  • 2 bay leaves
  • 2.5 cups water

Directions

Heat oil over medium high heat in a nice, big pot. Slice onion and add to hot oil. Let it soften (for 5 to 8 minutes) and add the garlic/ginger paste, tomato paste, cumin, coriander, chilli and turmeric and mix  well. Let the spices cook for 2-3 minutes, adding water as necessary to keep he spices from sticking to the bottom. Add the goat meat pieces and stir to coat every piece with the flavor base. Let cook for 10 minutes (similar to the searing stage of a meat braise). Add salt, then the garam masala (cardamom, cloves, cinnamon and peppercorns). Add water and bring to a boil. Then cover and reduce the heat to medium-low. Let simmer for 45-90 minutes, depending on the age of the goat. Young goat cooks in as little as 45 min.

Taste for doneness (meat should be tender) and seasoning.

Leave a Comment · Labels: Bengali, Main, Protein, Recipes Tagged: curry, dinner, goat

Mushroom and Carrot Salad

August 1, 2012

My best friend Moury and I are total health nuts…NOT!

She has sworn off salad greens and fruit. I am a dessert fiend and thanks to my husband, no stranger to midnight snacks (though not nearly as bad as he is…ahem empty pint of green tea ice cream sitting in recycling bin). But now, as I’m trying to lose the remaining baby weight, I’m trying to take baby steps towards better health (pun!).

Step 1: cut back on dessert!

Step 2: reduce carbs

Step 3: make the move to whole grains (I’m at multigrain bread for now, but still haven’t hopped on the brown rice bandwagon)

SInce, like Moury, am not crazy about salad greens (arugula being an exception) I try to come up with salads that I can really enjoy. And trust me, this is GOOD!

Adapted from Giada’s Fresh Mushroom and Parsley Salad.

Ingredients:

  • 2 carrots
  • 1/2 package mushrooms
  • handfull of chopped parsley
  • juice from 1 lemon
  • 2 tbsps extra virgin olive oil
  • salt & pepper to taste

Directions

Peel and thinly slice the carrots (at an angle for aesthetics). Thinly slice mushrooms. Combine with parsley in a bowl. Drizzle over the lemon juice and olive oil. Salt and pepper to taste. Let stand for 10 minutes to let all the flavors infuse the mushroom and carrots (since they are raw).

4 Comments · Labels: American/Mediterranean, Recipes, Salad, Veg Tagged: avocado, guacamole, recipe

Mint syrup

July 31, 2012

First post post-baby! That excuses a 3 month hiatus, right?

Anyway, my in laws have been blessed with abundant crops this year. Zucchini twice the size of butternut squash (pictures to come). A never ending supply of mixed greens. Cucumbers to rival the zucchini. All of these things make their way into my fridge. Part of their generosity included a giant bag of mint leaves (peppermint I believe). Now, you can only have so much mint tea before you realize you haven’t even made a dent and the leaves are starting to go. Hence, this simple recipe.

It can be used in a variety of ways:

  1. To sweeten your warm or iced tea
  2. Mojitos (ours are virgin of course)
  3. Vinaigrettes (particularly on a fruit salad)

Ingredients:

  • 3 cups water
  • 3 cups sugar
  • 6 sprigs of mint

Directions

Combine all three ingredients in a saucepan over high heat. Bring to a boil then lower the heat until the sugar dissolves and the mint leaves wilt. Let it cool then pour through a sieve into sterilized jars. It will keep in the fridge for about 2 to 3 weeks.

1 Comment · Labels: American/Mediterranean, Drinks, Recipes Tagged: mint, simple syrup

Spaghettini with Cherry Tomatoes

May 9, 2012

By now you all know that consistency is NOT my middle name. I offer, not as an excuse, but as a simple explanation for my long absence the fact that I am just about to pop this baby out (of course that means posts will become even more intermittent once I am a fully sleep deprived zombie/mother of two). I have been relying on a combo take-out, mom’s cooking and trader joe’s prepared meals to get by.

Nowadays, when I do find pockets of time when the stars align (I’ve got energy, the grandparents have taken the little one out), I look for recipes that are less involved, requiring fewer dishes to clean. I’ve seen many permutations of the thin-pasta-with-cherry-tomato-based sauce, including some from my favs (Giada’s linguine with shrimp, cherry tomatoes and asparagus or Ina’s summer garden pasta). I try not to be as pour-happy with the olive oil as Ina, and compensate the sparseness of the ingredients with the slow, careful nurturing of the complimenting flavors: garlic and red pepper flakes. Come to think of it, it is really a twist on the italian classic spaghetti con aglio, olio e peperoncino (spaghetti with garlic, olive oil and red pepper flakes).

Whatever it resembles, wherever it came from – it’s good. Try it.

Ingredients:

  • 1 pound spaghettini (or any other long, thin pasta)
  • 1/4 cup olive oil
  • 3 garlic cloves
  • 1/2 tsp chili pepper flakes
  • 1 lb cherry tomatoes
  • 1 tsp salt (or more, to taste)
  • 1/2 cup grated parmesan
  • handful of basil

Directions

Cook pasta al dente according to package directions. Set aside in a big bowl while reserving some pasta water.

In a large skillet, heat up the olive oil over low heat. Slice the garlic and add to the oil, letting it infuse. Discard when the garlic becomes fragrant, but not brown. Increase the heat to medium and add the cherry tomatoes, red pepper flakes and salt to the garlic infused oil. Cook until the tomatoes are just bursting (about 5-7 minutes). Add in the cooked pasta, parmesan and julienned (rolled up like a cigar and sliced thinly) basil all into the skillet. Give it a big toss. Add a ladle or two of the pasta water to help bring everything together.

1 Comment · Labels: American/Mediterranean, Carb, Dinner, Main, Recipes Tagged: basil, cherry tomatoes, light dinner, pasta, quick and easy dinner, spaghetti, spring meal, spring pasta, summer pasta, summertime meal, tomatoes, weeknight dinner

  • Newer Entries
  • 1
  • …
  • 9
  • 10
  • 11
  • 12
  • Previous Entries
American, Bangladeshi. Savory, sweet. I don't discriminate and neither should you.

Most recently…

Load More...
Follow on Instagram

Social

Subscribe to Blog via Email

Enter your email address to subscribe to this blog and receive notifications of new posts by email.

Tags

appetizer beef bengali breakfast butter cake caramel chicken chocolate chocolate chips cilantro clean eating coconut comfort food cookies dessert dinner entertaining fall fruit ganache gluten free halal healthy homemade honest chops honest creations iftar italian pasta pastry pistachio quick and easy dinner ramadan recipe side side dish south asian spinach vegan vegetables vegetarian weeknight dinner weeknight meal whipped cream

Theme by 17th Avenue · Powered by WordPress & Genesis