Kitchen3N

Recipes and food fun from Apt 3N

  • About
  • Gallery
  • Recipes

Mexican Chicken Noodle Soup

April 13, 2016

IMG_0006

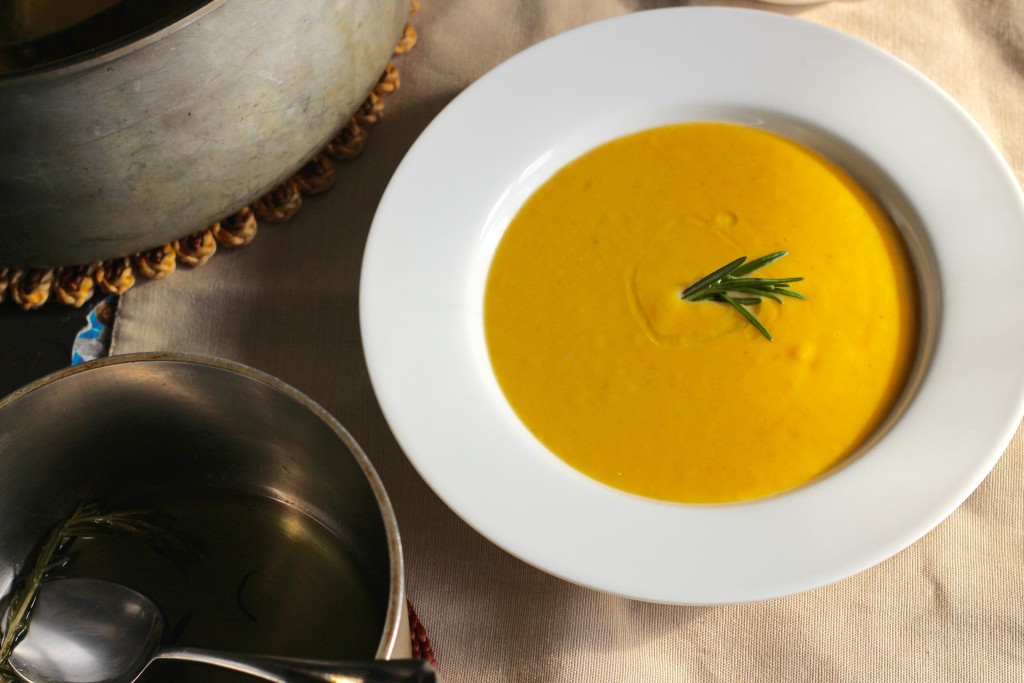
The first thing I do when someone sneezes in the house, is submerge a chicken in a pot of boiling water to make chicken stock for soup. That’s a normal, knee-jerk reaction, right?

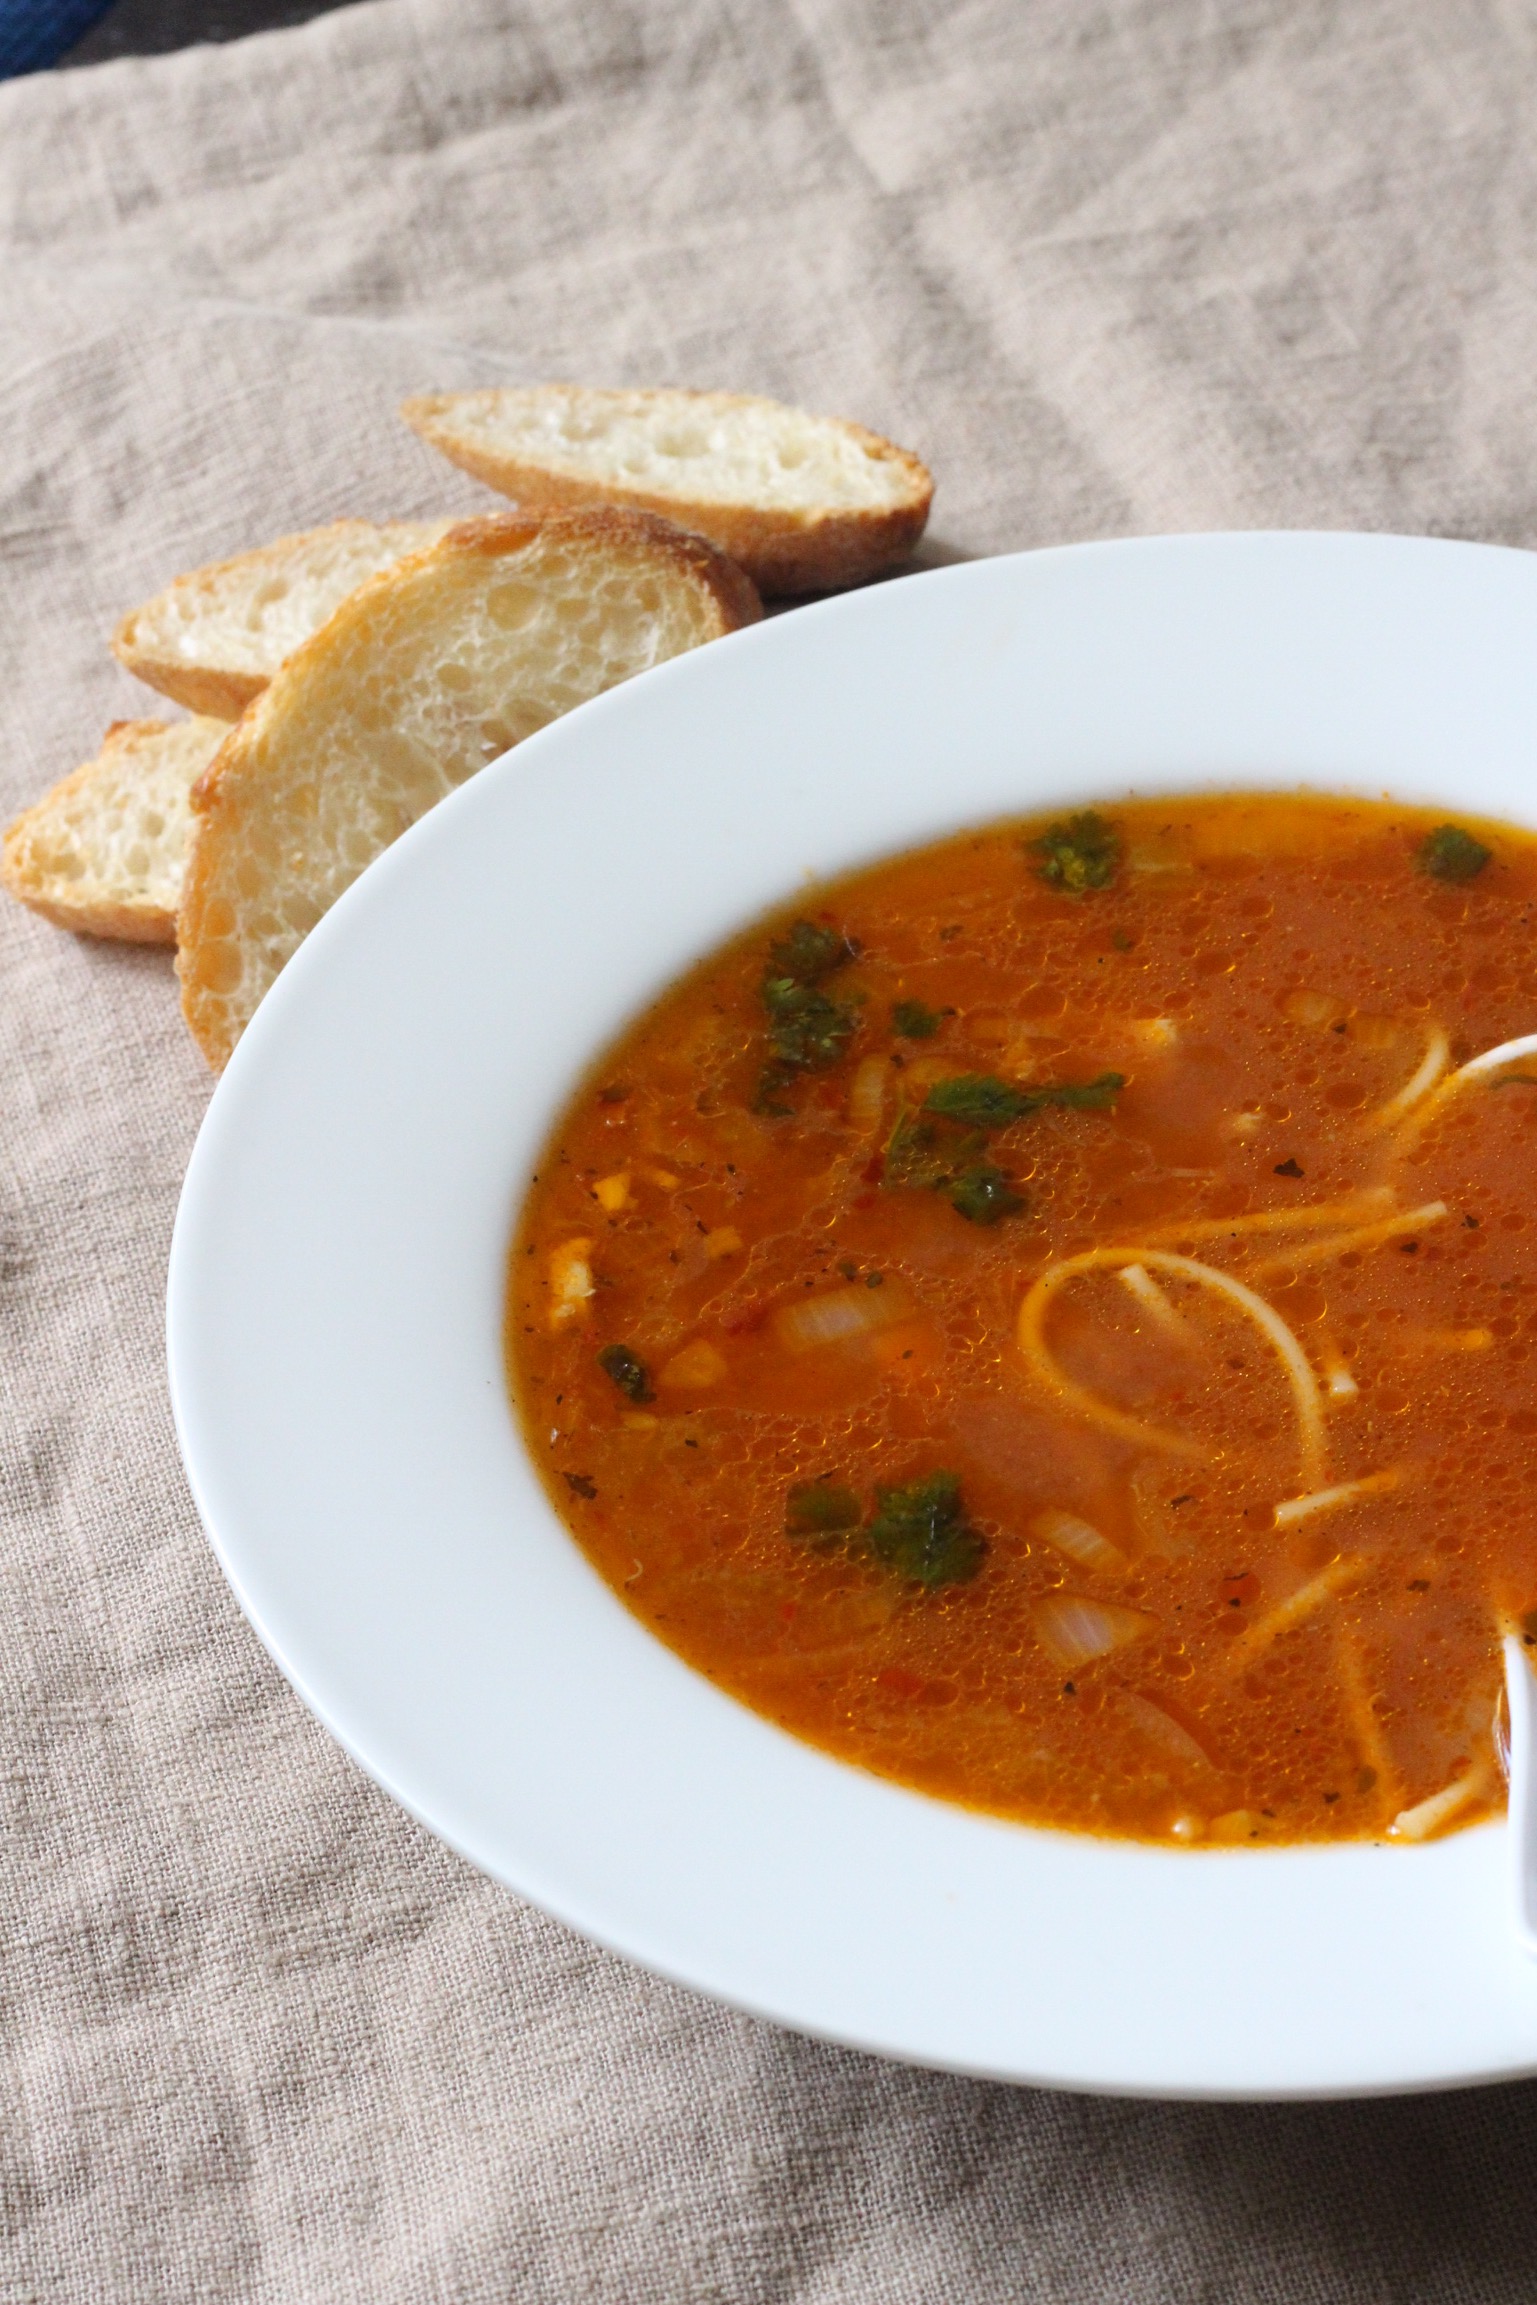
Ok, perhaps I exaggerate. But there’s just something about the thought of clear, warming chicken noodle soup that makes me feel like it will banish all the ickiness of a cold away. And while the classic has a special place, this tomato paste and spice spiked version will carry you over from your sick days to your top o’ the mornin’, heel clickin’ days. Because for some reason, the weather is still dipping below freezing here in NYC in the middle of spring and the kids have caught strep throat while the hubby and I work our way through the common cold. Un-believable.

Back to the soup. It was the perfect dish for my crusty-bread obsessed husband to dip his baguette into. It was the only thing my preschool aged son has ever declared his love for, apart from trains and well, me. And it was one of the few items I did not have to struggle to finish from the fridge as a leftover.

IMG_0005

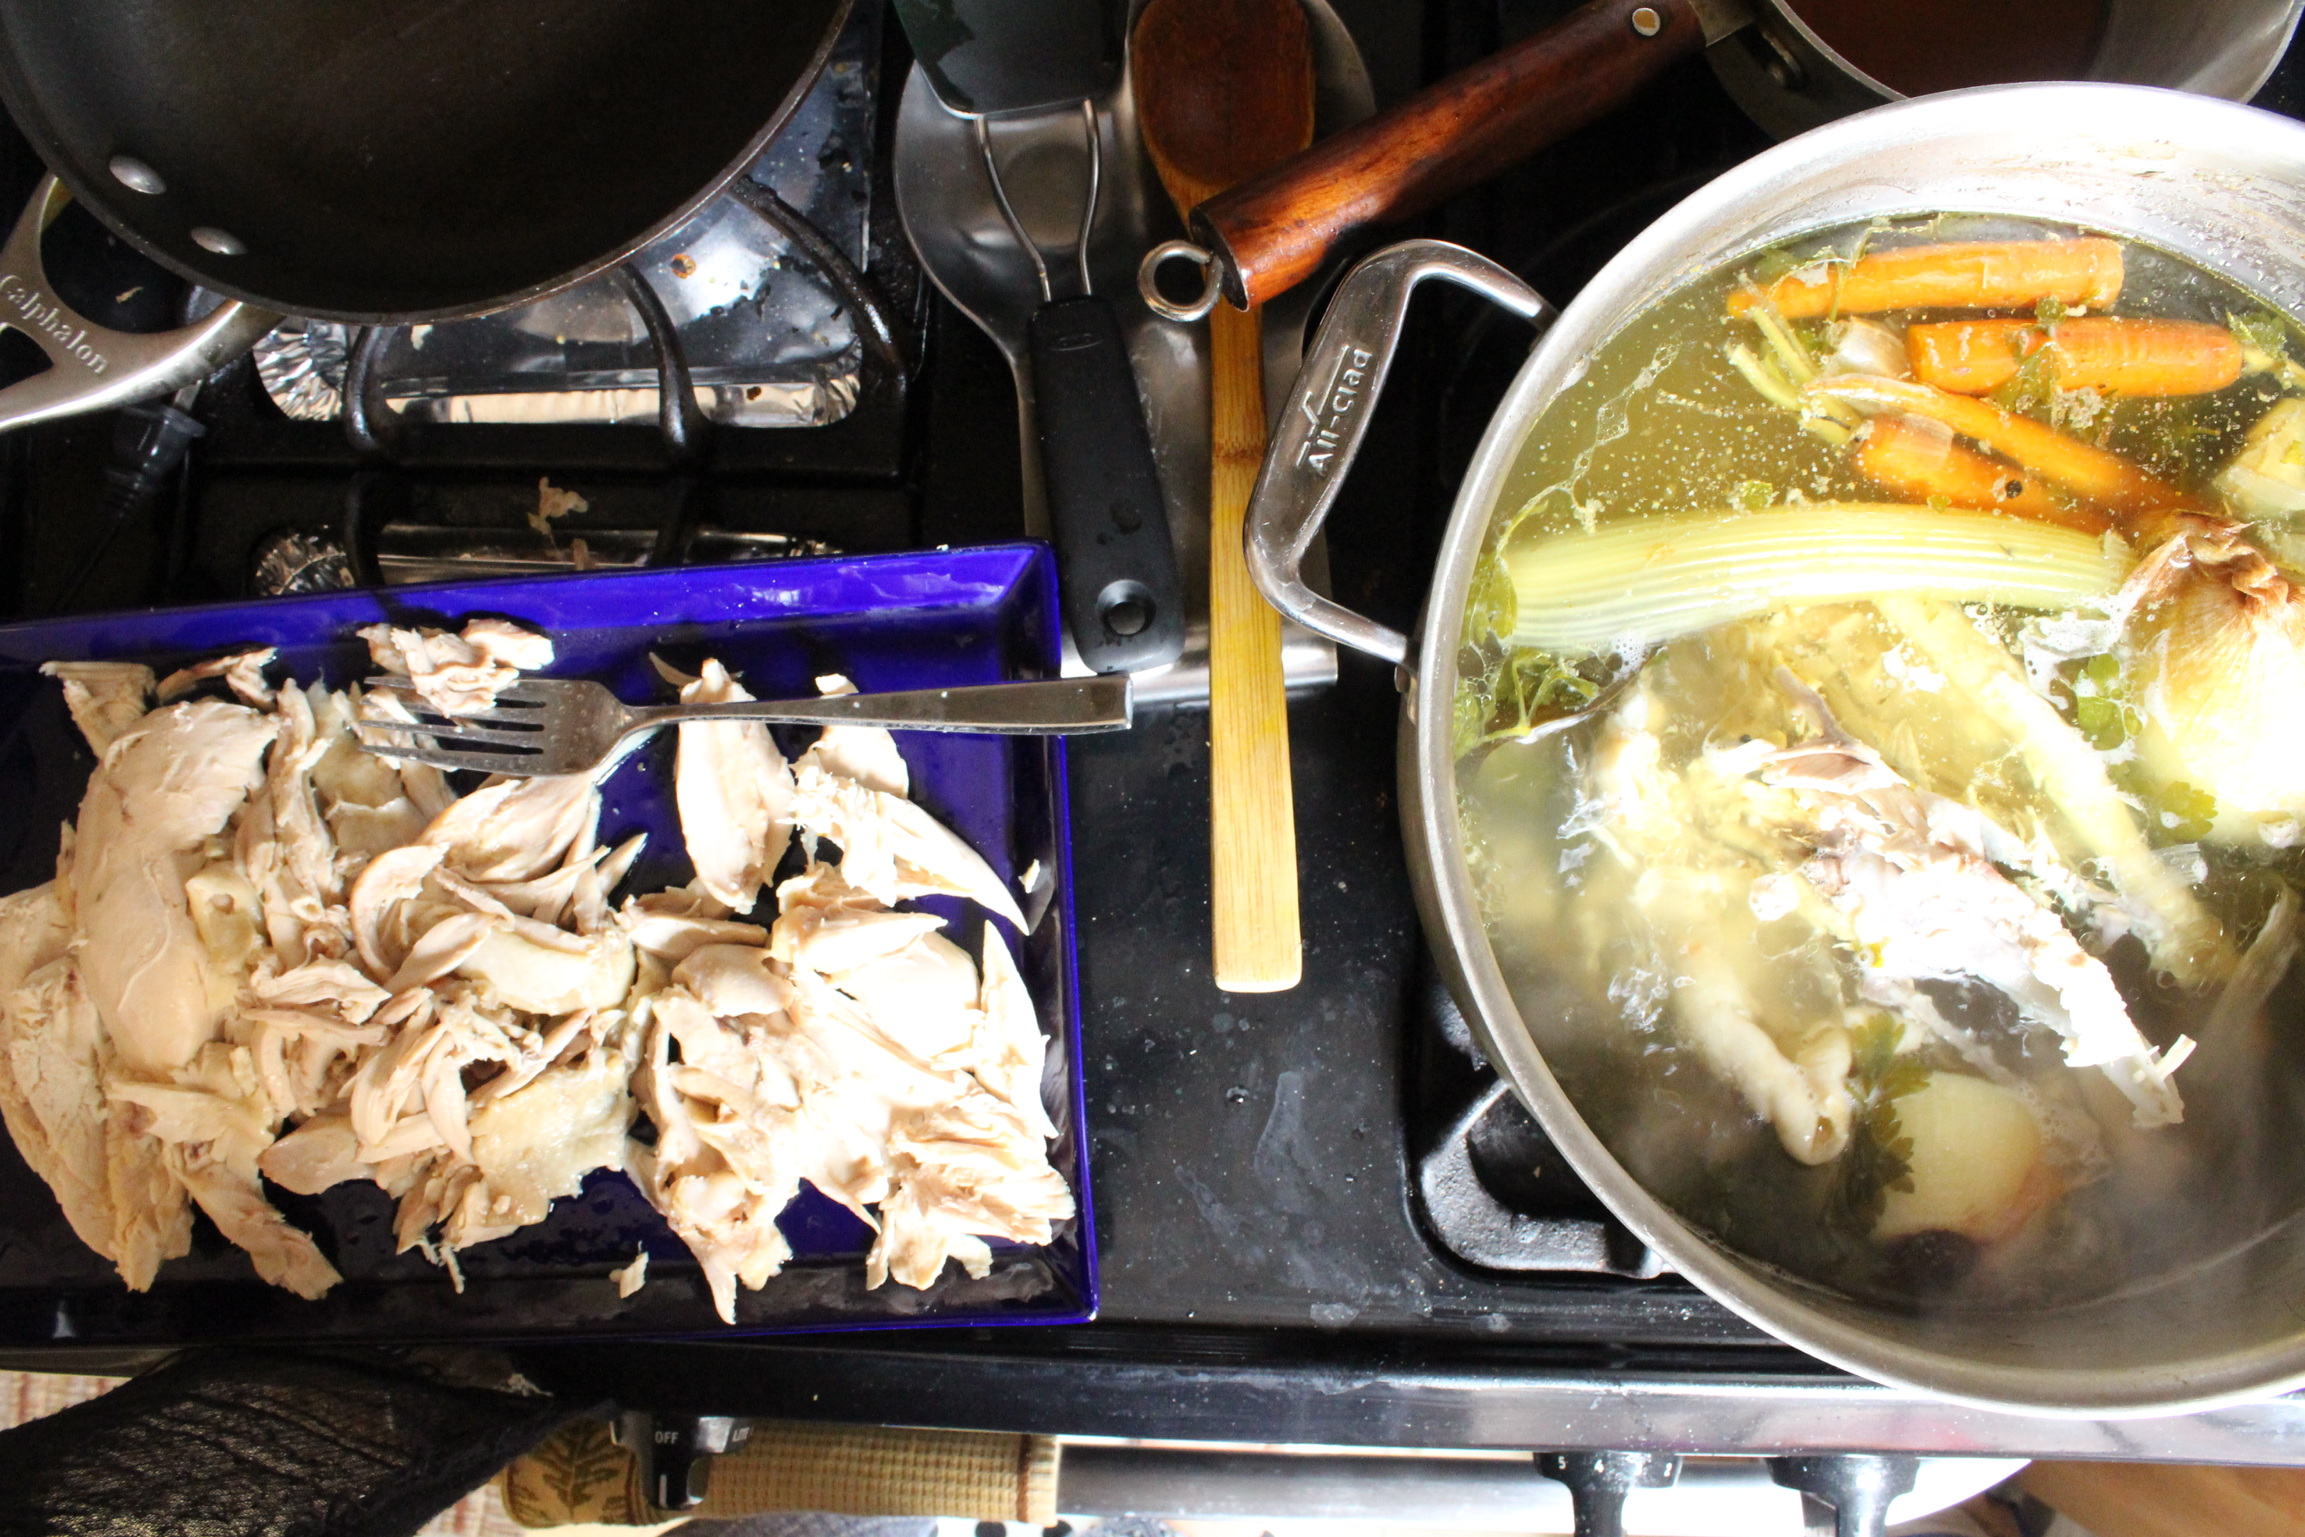
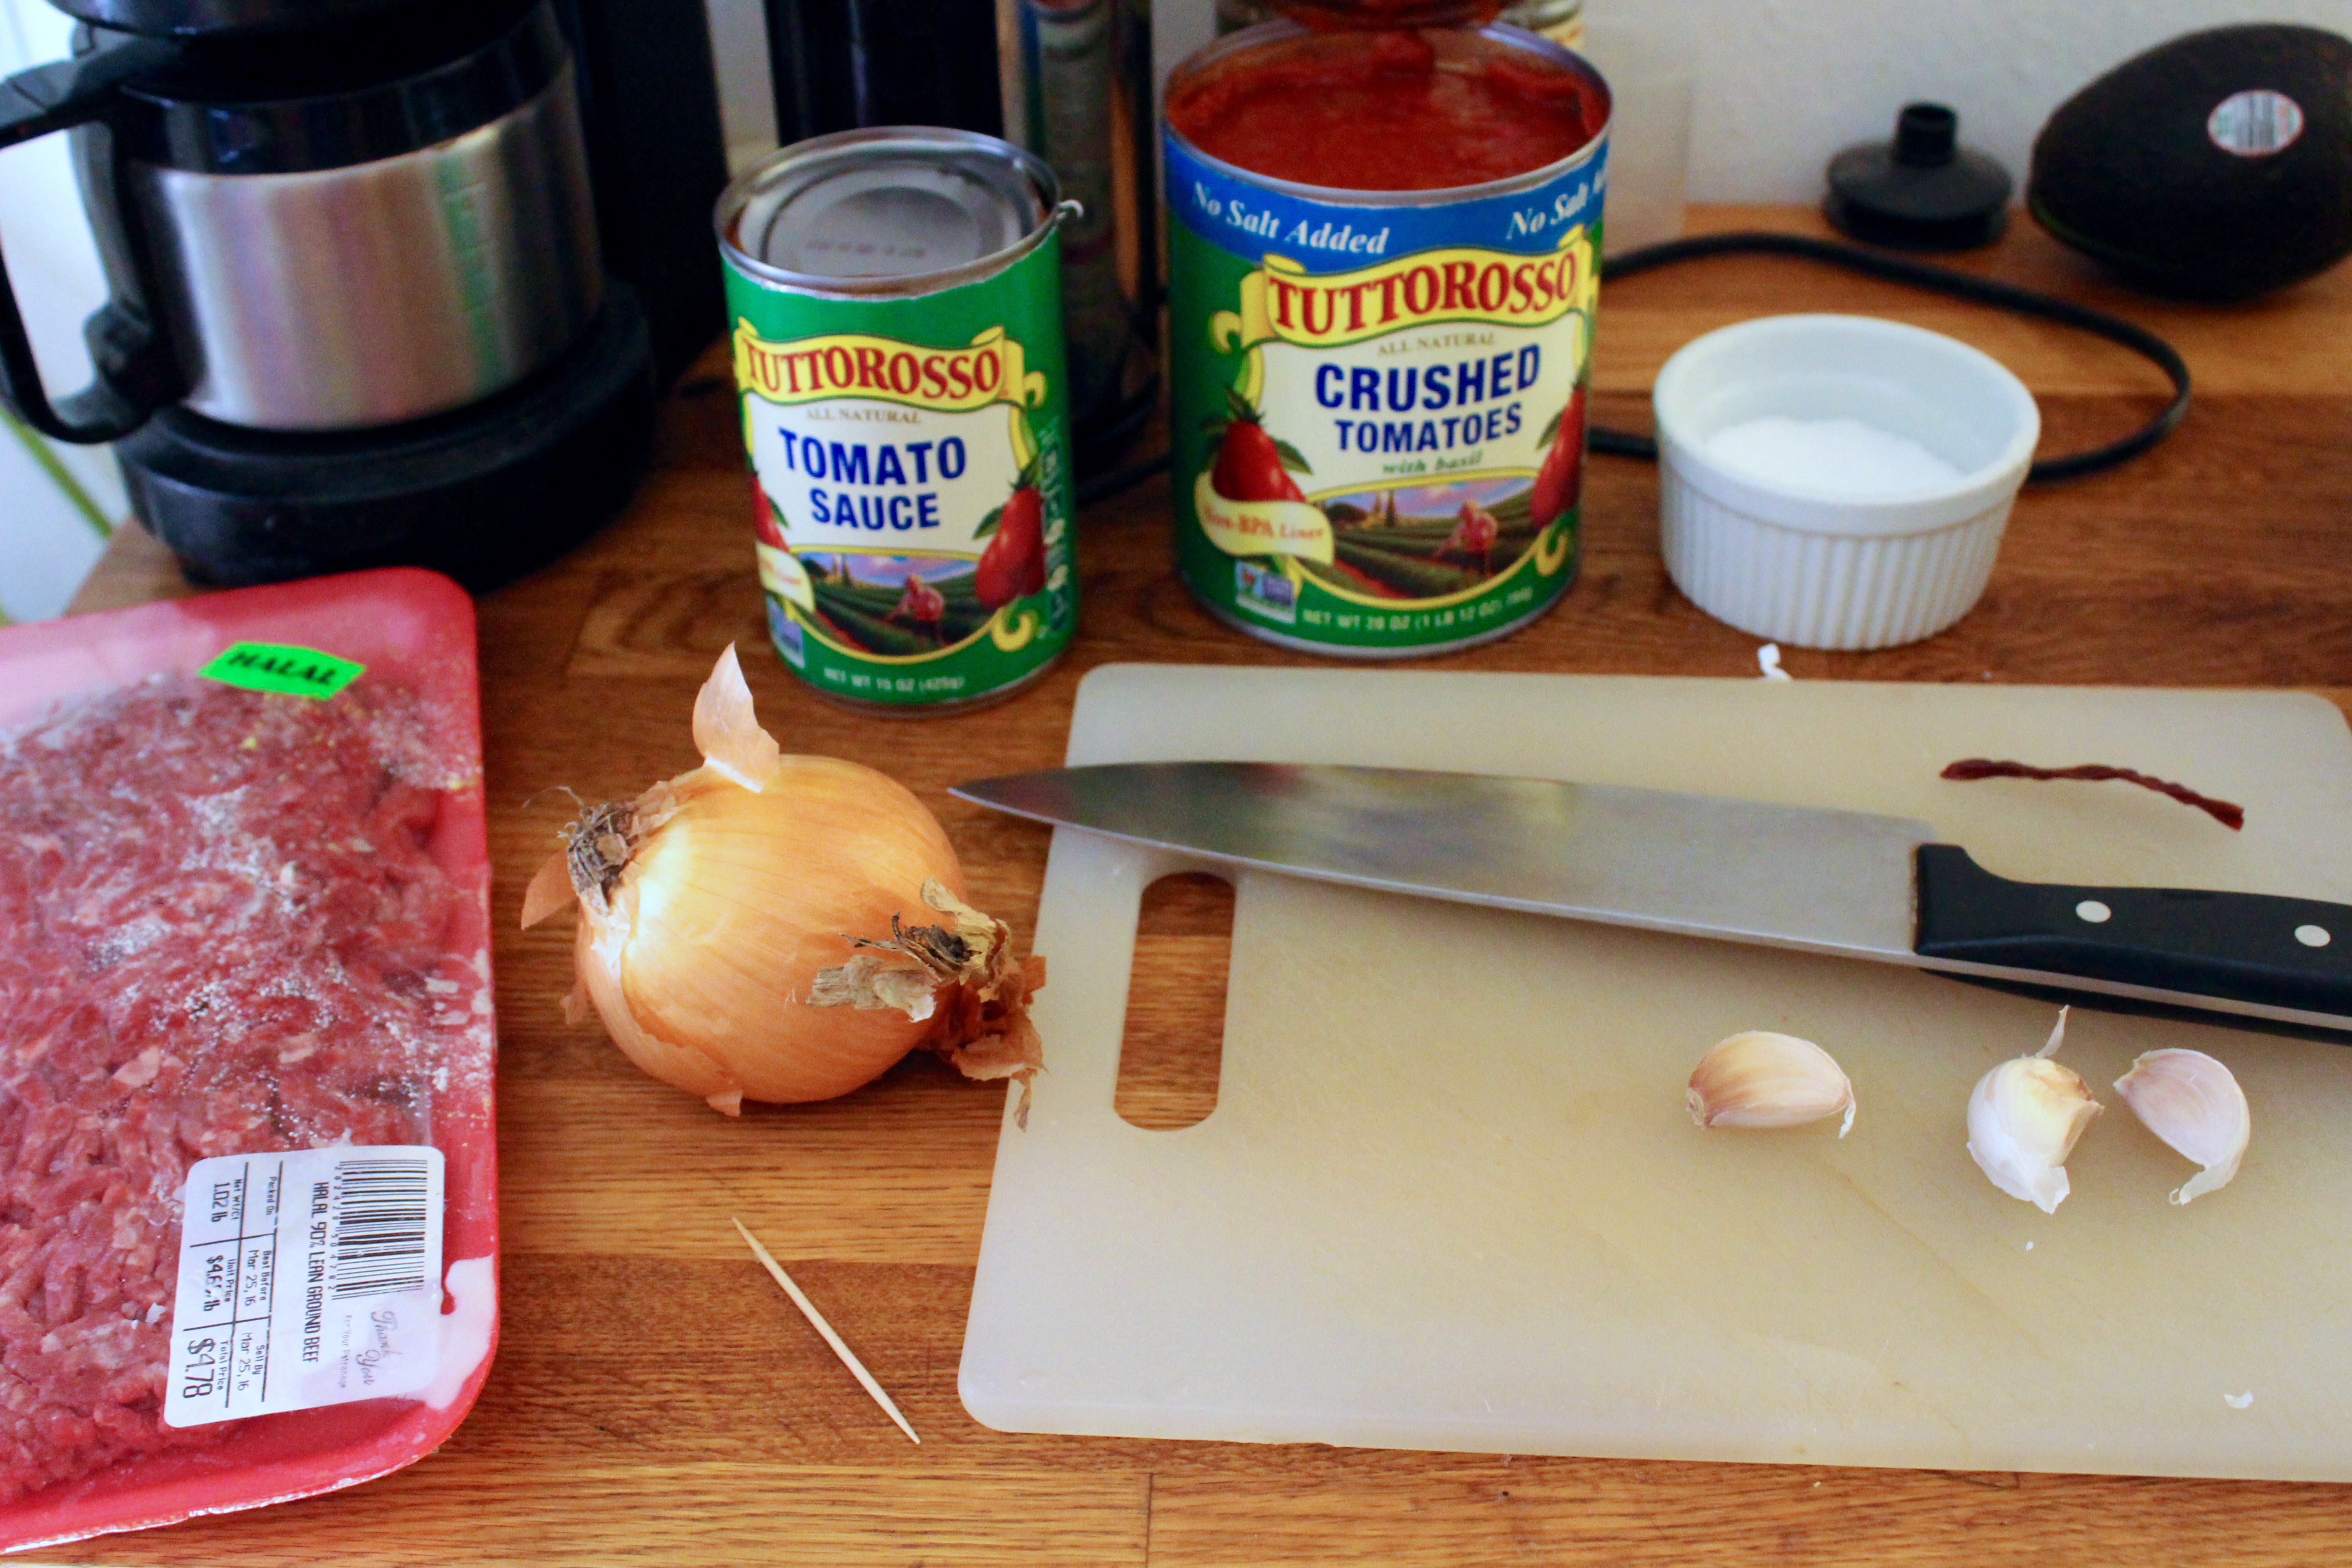
If I make my own chicken stock, I usually boil away chicken with veggies (onion, garlic, carrot, celery), aromatics (parsley, dill, thyme, bay leaf) and seasoning (salt, whole peppercorns). However, unlike most, I take the chicken out about an hour into the process, strip the meat off the bones, and re-submerge the carcass. That way the bones continue to flavor the stock for about 2 more hours and I don’t have to waste the meat. Does that make me crazy?

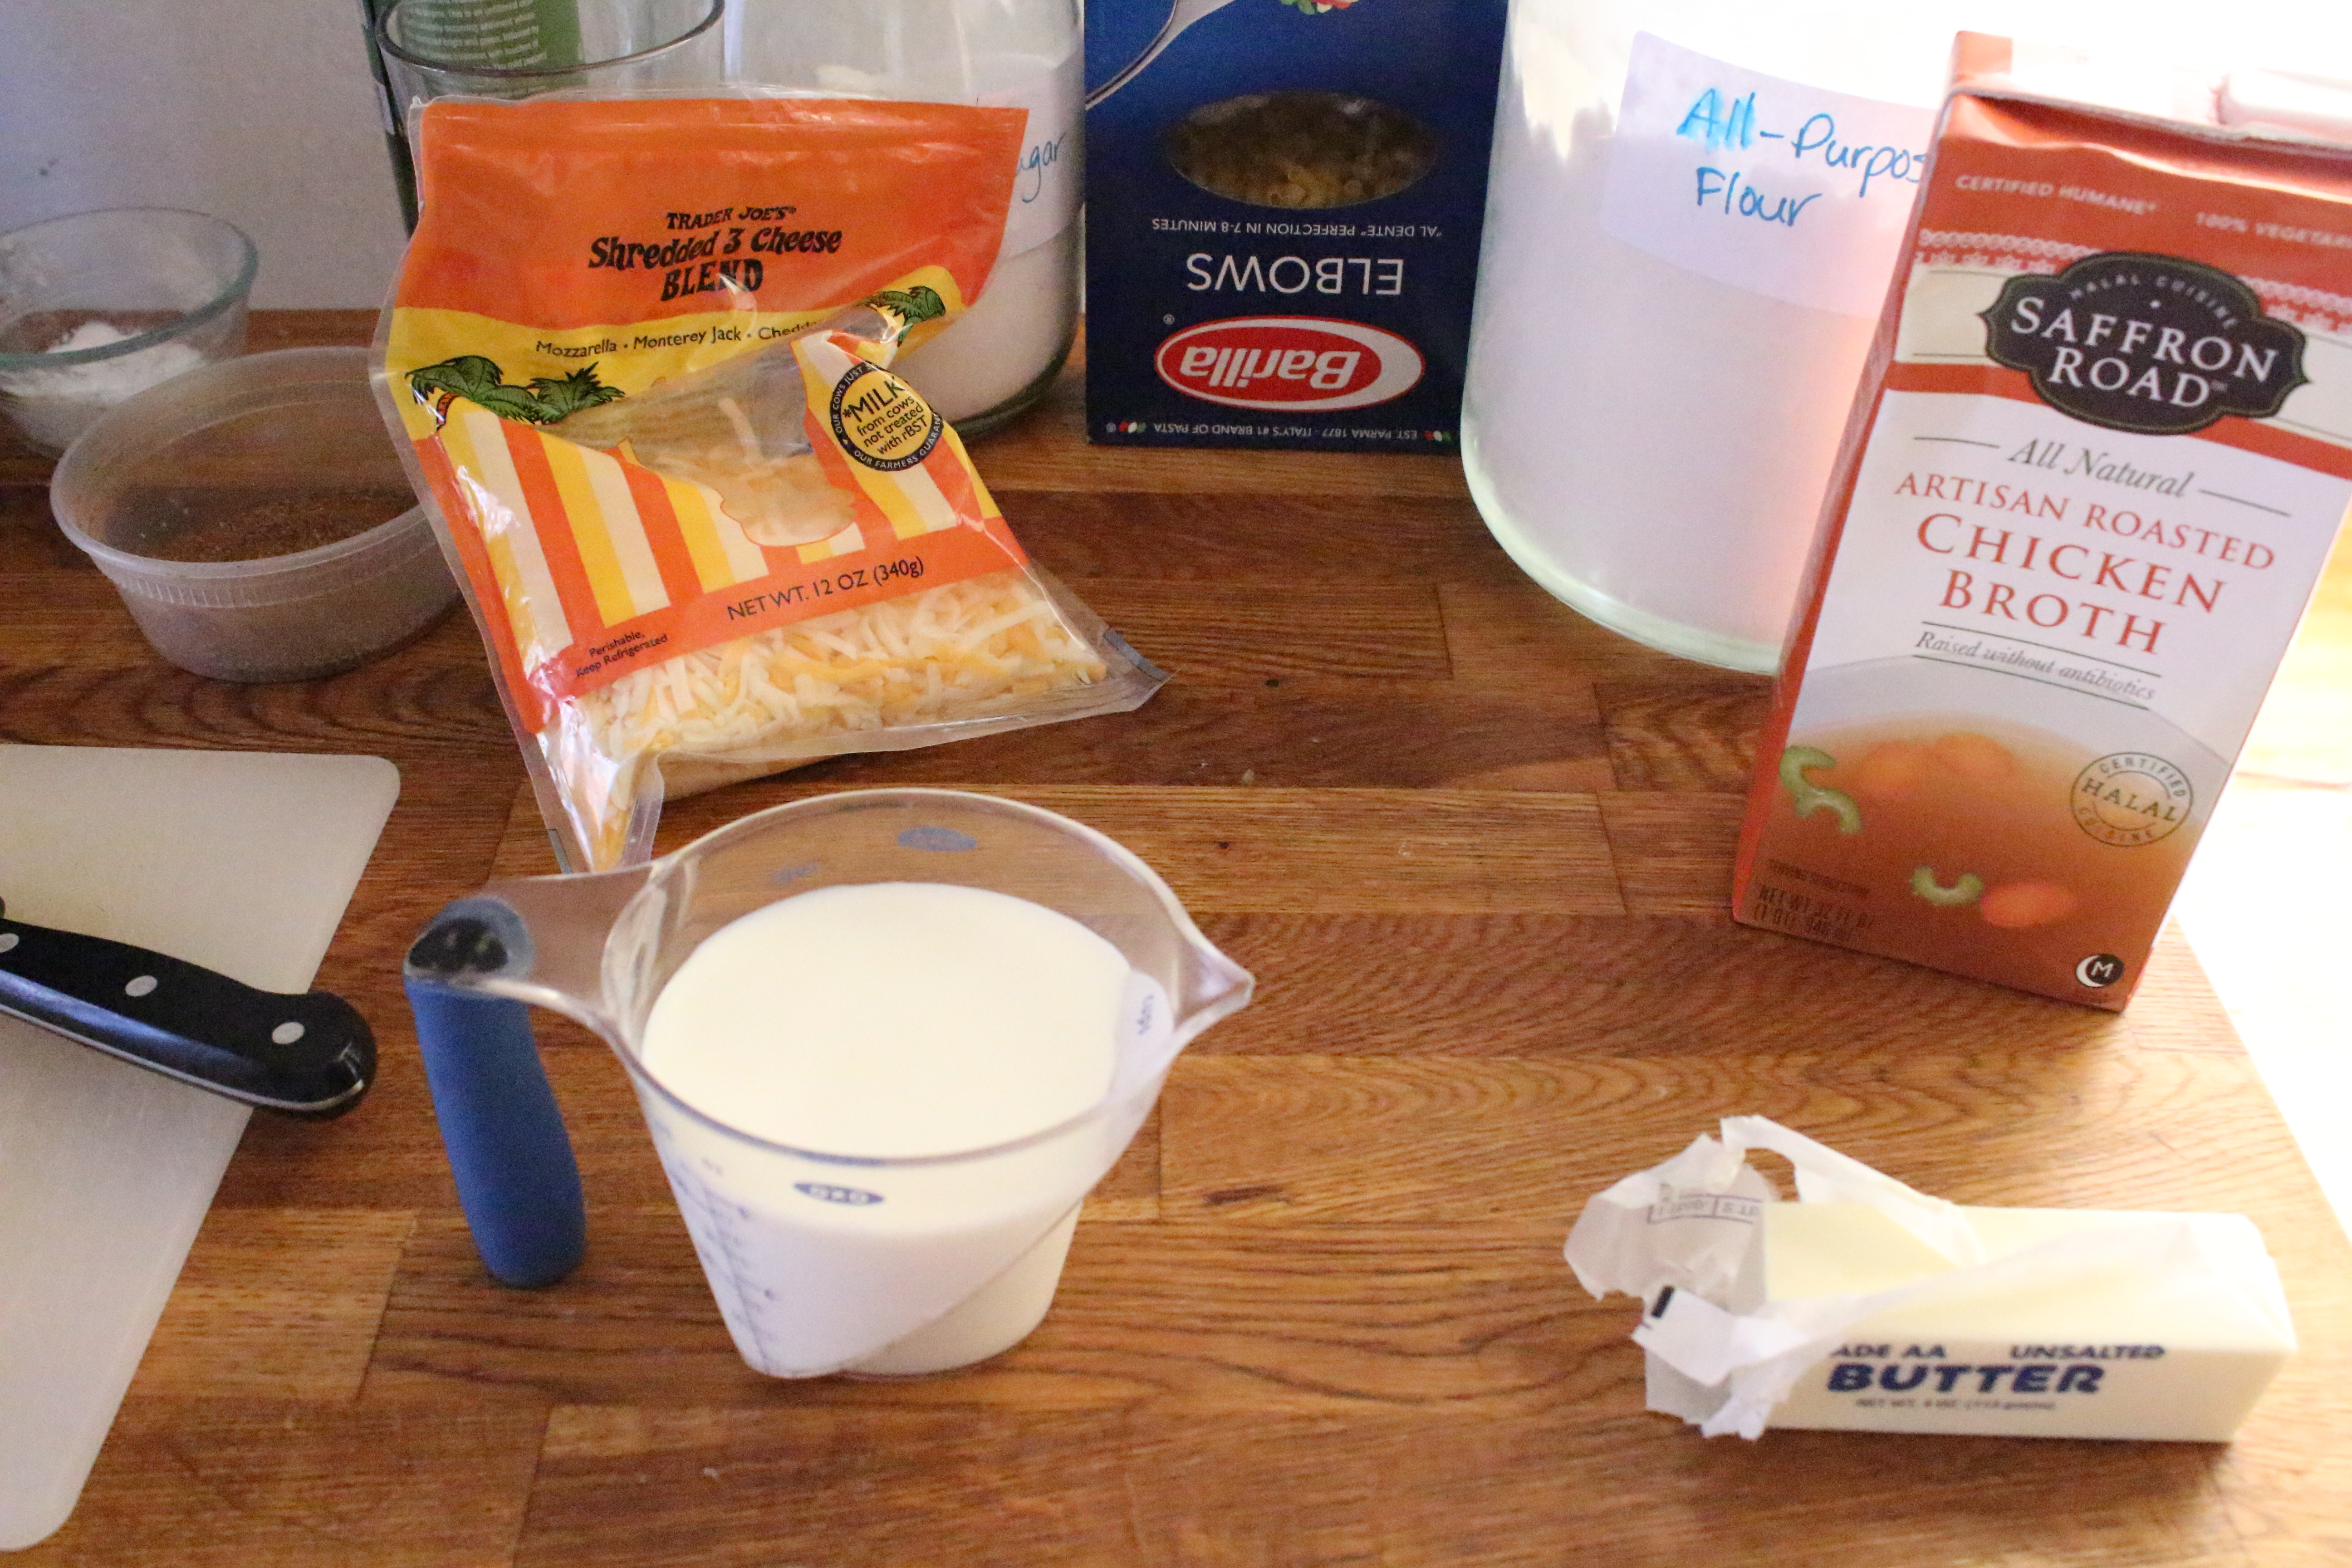
If you are using store bought stock, it comes together SO fast. When I don’t have homemade on hand (which is quite often) I use Saffron Road Halal Artisan Chicken Stock. Awesome flavor and deep golden color. You can tell it’s not just one of those salt water in a box chicken stocks. And if you want to make this vegetarian, use vegetable stock and chickpeas in lieu of the chicken. The tomato paste and spices are magical in how they liven up pretty much anything.

Ingredients

  • 2 tbsp olive oil
  • 1 medium yellow onion, diced small
  • 2 carrots, diced small
  • 2 celery stalks, diced small
  • 2 large garlic cloves, minced
  • 1 tsp each of cumin, coriander and paprika
  • 1 1/2 tsp salt plus more to taste
  • 1/4 to 1/2 tsp crushed red chili flakes
  • 14 oz crushed tomatoes (if you have a 15 oz can that’s fine)
  • 8 cups chicken broth
  • 1 cup shredded chicken
  • 1/4 lb spaghetti or noodle of choice
  • 1/2 cup chopped cilantro

Directions

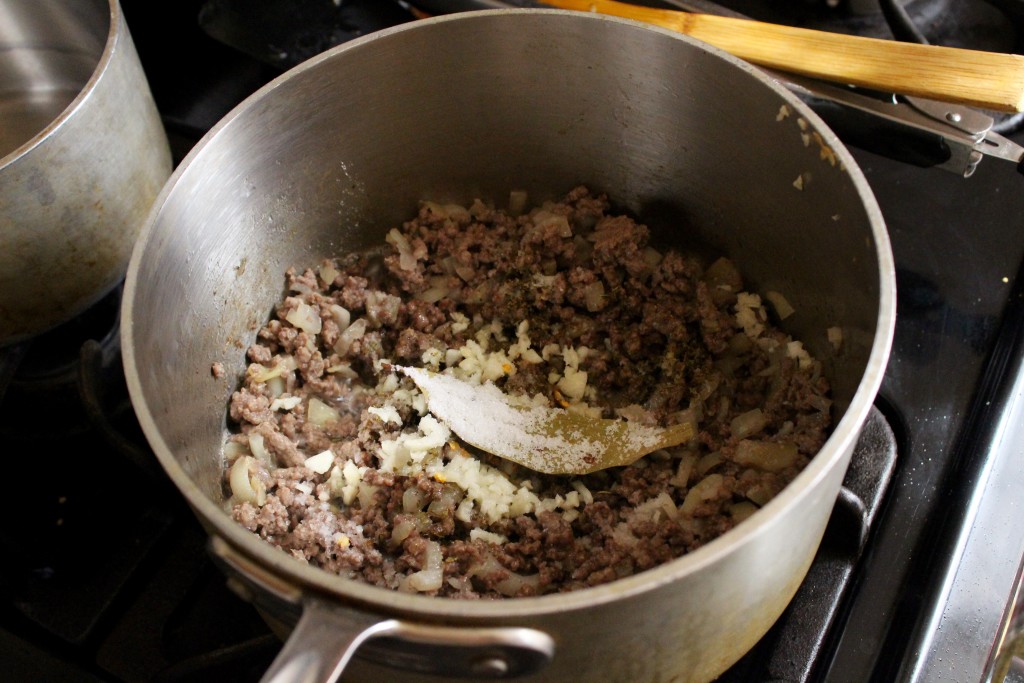
  1. In a large pot, heat the olive oil over medium high heat. Add the onions, carrots and celery. Saute for 4-5 minutes, until the vegetables begin to soften. Add the garlic and spices (cumin, coriander, paprika, salt and pepper). Cook for 2 minutes more, allowing the vegetables to get more tender and the spices to toast up a bit.
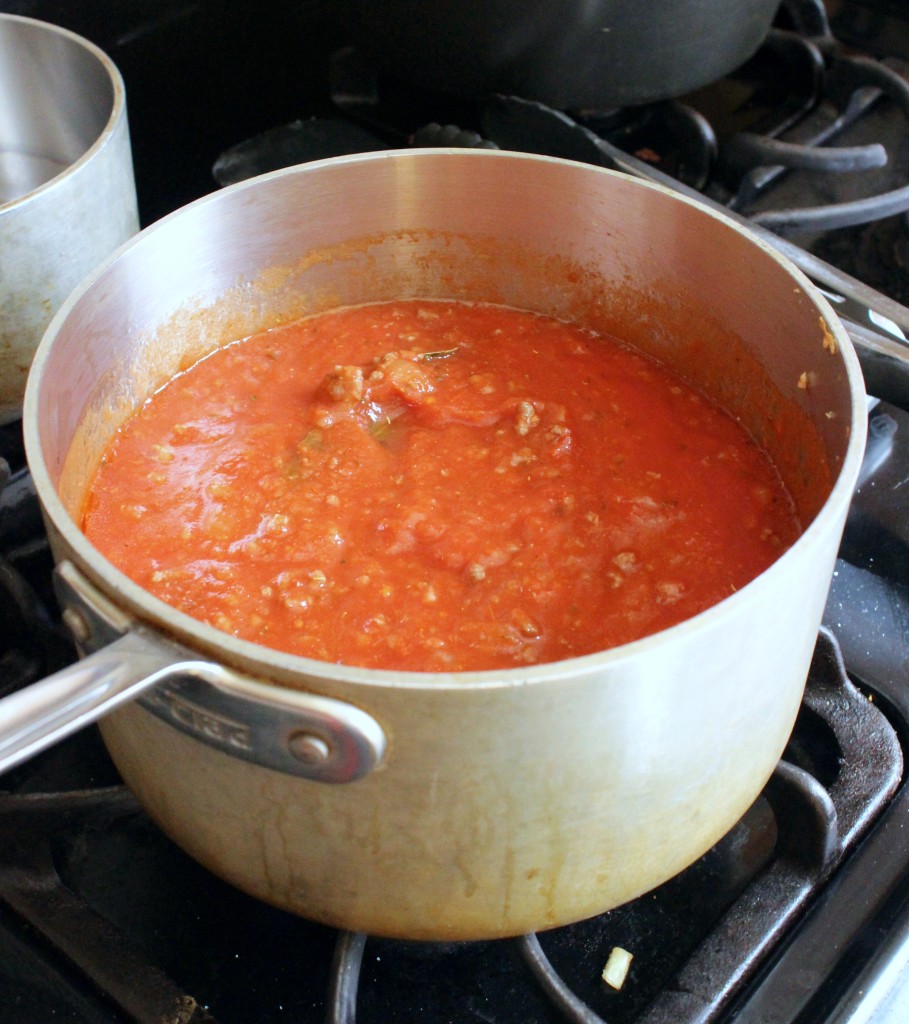
  2. Add the tomatoes, broth, chicken and pasta. Cook for 9 to 10 minutes, depending on the package directions of your pasta.
  3. Add the cilantro and taste for seasoning.

Leave a Comment · Labels: American/Mediterranean, Dinner, Main, Side Tagged: broth, chicken, chicken noodle soup, chicken soup, comfort food, healthy, homecooking, homemade, low fat, mexican, noodle, sick days, soup, spices, stock, tomato paste, weeknight, weeknight cooking, weeknight dinner

My Go-To Bolognese

March 30, 2016

IMG_5997

One of my first cookbooks ever was Giada De Laurentiis’s “Everyday Italian“. From it, I made my first pesto, marinara sauce, bolognese, vegetable bolognese, her fabulous balsamic roasted chicken, and many other Italian classics. For that reason, it will hold a special place in my bookshelf. One thing I noticed though, was that many of the tomato based sauces required celery, onion, and carrots as the base. While I always have onion on hand, the times I bought celery and carrot for those specific recipes, it was a pain to try to finish them off. I’m not a big celery-snacker. I might make a salad out of the celery and carrot (though I much prefer carrot and mushroom salad). So while I appreciate the flavors attributed to the classic mirepoix (sweet onion, sweet earthy carrots, licoricey celery), I needed one that suited my family’s needs and my grocery habits.

IMG_5933

Enter My Go-To Bolognese. Olive oil. Onion. Garlic. Beef. Tomato. Seasonings. Almost all of these things I have on hand – I don’t even bother with the fresh herbs. Dried oregano. Basil already in the canned tomato. Done. Deal.

IMG_5934

I amp up the flavor with crushed red pepper flakes. I add tomato sauce along with the crushed tomatoes – something I picked up from watching Pioneer Woman. It adds moisture and flavor to the sauce. And the best part is…

IMG_5940

It gets better the longer it sits in the fridge. The first day you taste it, you’re like yeah, it’s good. But the second day you taste it and you’re like wow where did this meaty flavor come from?! And because my family is relatively small (both kids under 6), I can get away with freezing half and thawing it out later in the week when I’m knee deep in frosting for a cake order! One of the few things I don’t mind eating out of the freezer.

IMG_6007

And the cinnamon! It’s my not-so-secret-anymore ingredient. Ever since I made Ina’s Pastitsio, I fell in love with the flavor combination. It makes you go “hmm what is that?!” – in the best possible way.

Ingredients

  • 2 tbsp olive oil
  • 1 medium yellow onion, diced small
  • 1 pound lean ground beef
  • 3 cloves garlic, minced
  • 1/2 tsp dried oregano
  • 1/2 tsp crushed red pepper flakes
  • 1/2 tsp ground cinnamon
  • 1 1/4 tsp salt plus more to taste
  • 1/4 tsp ground black pepper
  • 1 dried bay leaf
  • 1 tsp sugar
  • 1 28oz can crushed tomatoes
  • 1 15oz can tomato sauce

Directions

  1. In a medium saucepan, warm olive oil over medium high heat. Add onion and ground beef. Cook, stirring frequently, until the onions are soft and the meat is no longer pink. Add the seasonings: garlic, oregano, salt, both peppers, cinnamon, sugar and bay leaf. Stir until fragrant – 30 seconds to 1 minute. Add the crushed tomatoes and tomato sauce. When the sauce comes to a boil, lower the heat to low and cover. Simmer, stirring occasionally for 30 to 45 minutes.
  2. Taste for seasoning and serve with pasta of choice and a grating of fresh parmesan.

Leave a Comment · Labels: American/Mediterranean, Dinner, Main, Protein, Recipes Tagged: bolognese, italian, keema, meal planning, pasta, pasta sauce, tomato, tomato sauce

Chocolate Swiss Meringue Buttercream

March 20, 2016

IMG_9692
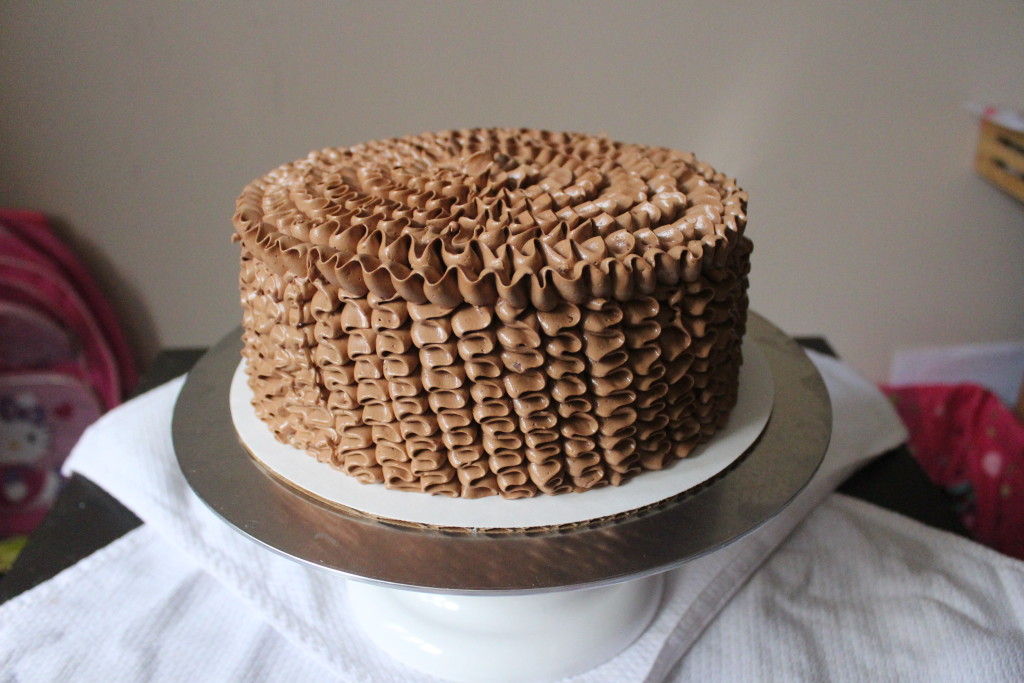
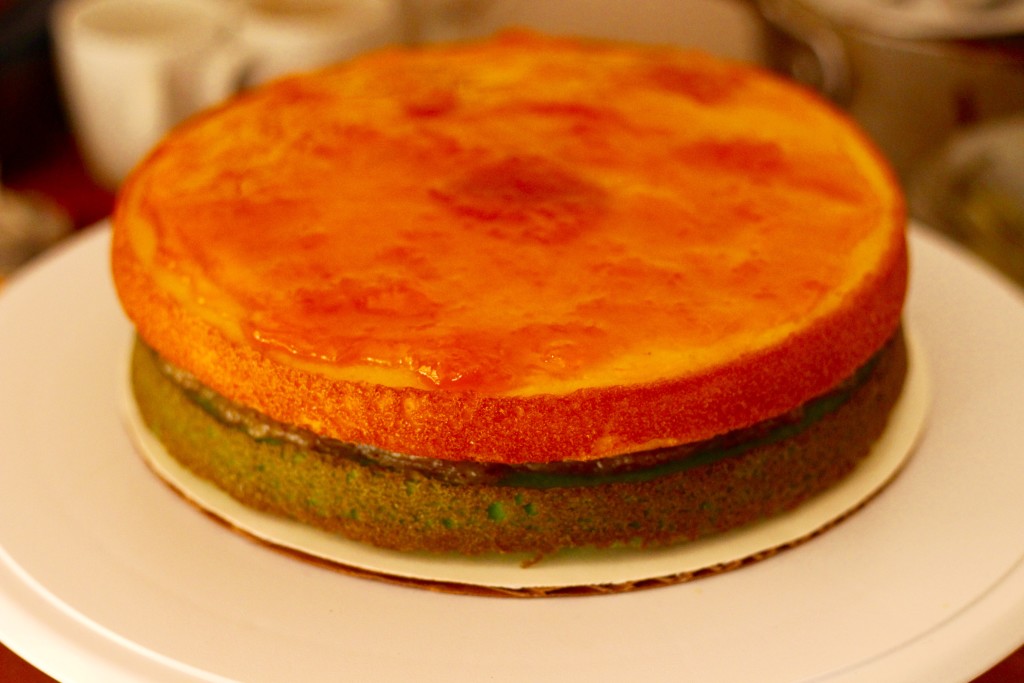
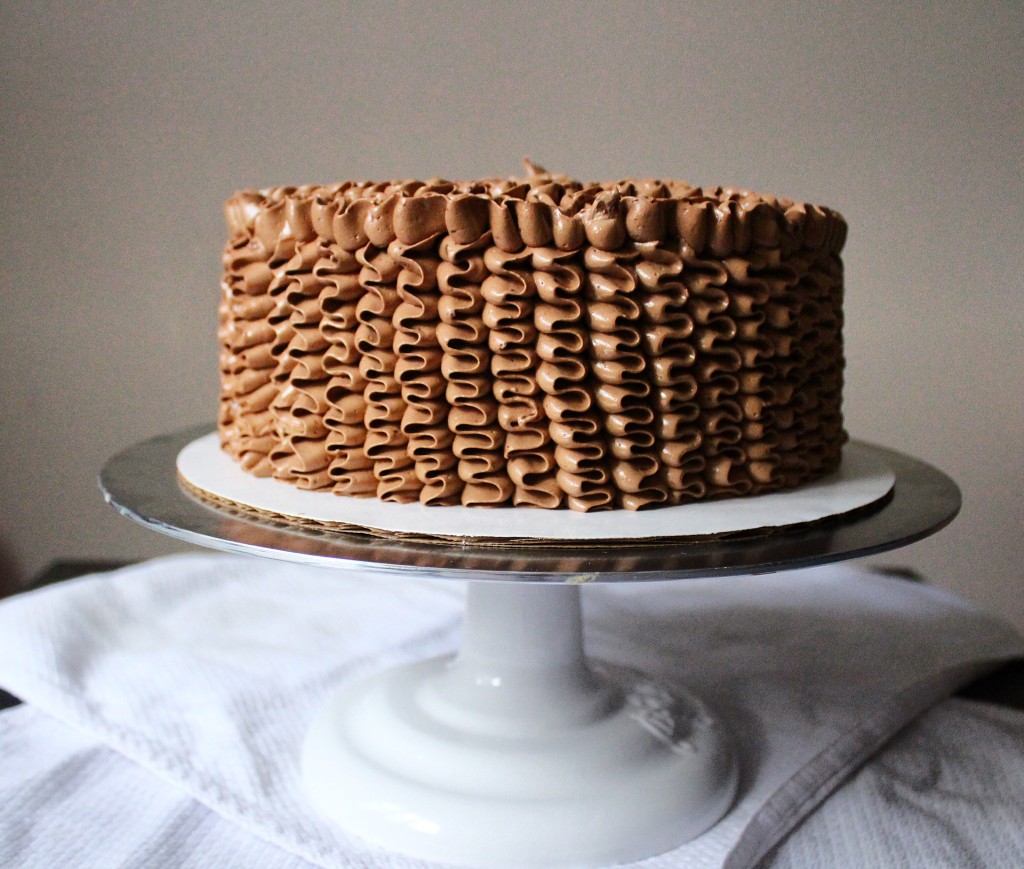
Swiss meringue buttercream is a cake decorator’s dream. If you’ve ever tried to get a really smooth looking cake from a traditional American buttercream, you’ve probably noticed it’s very very difficult to do so. Mainly because of air bubbles. American buttercream relies on the aerating of butter and sugar to achieve the desired volume and consistency. So between the air bubbles and stickiness from the sugar, it’s hard to get it super smooth!
IMG_5774Swiss meringue buttercream, however, is light years beyond in terms of texture. There is a bit of a learning curve the first couple of times you make it, but once you have it down right, it is so smooth, tints so well, it really takes your cakes from home style to bakery quality.

To start, you combine egg whites and sugar, and heat it over a double boiler until it’s hot to the touch (160 degrees on a candy thermometer to get the egg whites to a safe temperature). You whisk the whole time, until the mixture reaches a milky appearance. Once that’s done, you move on over to a stand mixer where you beat beat beat the egg whites until you get a beautiful, glossy meringue.

When the meringue is thick, glossy and ROOM TEMPERATURE, add the room temperature butter, one pad at a time. At this point, it might look like a gloopy mess, but stick with it and keep beating until the buttercream comes together. It should look like stiff whipped cream at this point.

IMG_5783

Add the vanilla, then melted and cooled chocolate. This is one of the few points of departure from my beloved Ina Garten. She has a recipe for chocolate swiss meringue buttercream but there’s SO much liquid in it (vanilla, kahlua, rum, more chocolate), that it broke when I tried to make it. I’m sure it tastes wonderful, but mine does too, while still holding up to piping =)Use a spatula to wipe down the sides and bottom to ensure all the chocolate and buttercream are fully incorporated. Final step is to try to not eat it all out of the bowl. It is delicious and the added sugar from the chocolate makes it the perfect sweetness – whereas plain vanilla buttercreams are barely sweet. Enjoy!!

IMG_5787IMG_5790IMG_5796

Recipe adapted from smitten kitchen.

Ingredients

  • 4 egg whites
  • 1 cup sugar
  • 26 tbsp (3 sticks plus 2 tbsp) unsalted room temperature butter
  • 1 tsp vanilla
  • 1 lb plus 8 oz* semi sweet chocolate, chopped small**

Directions

  1. Melt chocolate in the microwave in a heat proof, non metal bowl at 30 second intervals, stirring in between intervals, OR over a double boiler (in a bowl set over simmering water, ensuring the water doesn’t touch the bottom of the bowl). Set aside to cool.
  2. Whisk together the egg whites and sugar in the bowl of the stand mixer. Place over double boiler, ensuring the water doesn’t touch the bottom of the bowl. Keep whisking until the sugar is dissolved AND the water is hot to the touch (if you dip your finger in, should be too uncomfortable to keep there). Or you can insert a candy thermometer and whisk until the temperature registers 160 degrees F. Then remove from double boiler, wipe the water that has condensed on the bottom of the bowl and place in the stand mixer. Insert the whisk attachment and set the speed on medium to whip up the egg whites.
  3. When the egg whites have thickened, and the temperature has cooled to room temperature, add the butter, one pad at a time (1-2 tbsps) until all the butter is incorporated. The mixture might look soupy at this point. Turn the mixer on high and keep whisking until thick. This can take 3 to 15 minutes, depending on the size of your batch. Reduce the speed to low and add vanilla and melted chocolate. Mix until thoroughly combined.***

*One pound plus 4 oz of chocolate makes a luscious, chocolately buttercream. If I need to pipe something like ruffles, I would leave it at 1 pound chocolate. If I’m just filling/frosting, I would go the full 1lb 4 oz.
**I wouldn’t recommend using chocolate chips in lieu of chopped baking chocolate or chocolate bars. The waxy coating or whatever is on them keeps them from blending in uniformly with the buttercream.

***Enough to frost, fill and decorate an 8 inch 2 layer cake. Enough to frost and fill a 9 in 2 layer cake.

Leave a Comment · Labels: American/Mediterranean, Dessert Tagged: cake decorating, chocolate, chocolate cake, chocolate frosting, egg whites, frosting, sugar, swiss meringue buttercream

Rainbow Cookie Cake

January 20, 2016

IMG_5430I just came back from the most amazing trip to Bora Bora…

IMG_5278   IMG_5291IMG_5293IMG_5296

Not really. We’ve been hangin’ back here in NYC. Celebrating my daughter’s fifth birthday. Anxiously waiting for the first snow fall so our kids’ Frozen dream can become a reality.   IMG_5323

Adulthood. Family. Saving up for a down payment on a house. Elderly parents to think about. Student loans to pay off. Retirement. Kids’ college tuition.

IMG_5422 IMG_5423 IMG_5408IMG_5425

Alhamdulillah, though, right? These are good things to worry about. Every time that voice in my head wants to whine or complain that we’re not getting out as much, or  we haven’t met xyz goals yet, I always have to remind myself of what we DO have. It’s hard to compare intangible things such as peace and health to the tangible objects of house, boarding passes, the numbers of zeros in the bank account. But we have to. Because you can always look at people who have more and long for what they have. That road never leads to satisfaction. Like the folks who live in Russian mafia-ville in Queens (Jewel Ave). Every week there is a new mansion, more opulent than the one next door. More marble. More security cameras. You wonder what is check mate in that game?IMG_5428The cake is my go to yellow cake recipe ever since discovering it on The Food Blog to End All Food Blogs: Smitten Kitchen. Instead of an actual rainbow cookie cake recipe that incorporated almond paste in the batter, this is a light, fluffy, buttery yellow cake flavored with vanilla and almond. The rainbow cookie part comes in the filling, with almond between one of the layers and apricot jam in the other. It’s Beethoven’s fifth symphony of flavors. The tartness of the jam. The nuttiness of the almond. The chocolatey-ness of the frosting. All with the backdrop of the most glorious yellow cake.

IMG_5370

Cake recipe adapted from Smitten Kitchen. Frosting recipe adapted from Hershey’s.

Ingredients

For the cake

  • 2 cups plus 1 tbsp cake flour
  • 1 tsp baking powder
  • 3/4 tsp baking soda
  • 1/2 tsp kosher salt
  • 1 stick (4 oz.) unsalted butter, softened
  • 1 cup sugar
  • 1/2 tsp vanilla extract
  • 1/2 tsp almond extract
  • 2 large eggs, at room temperature
  • 1 cup buttermilk, shaken at room temperature
  • 2 drops green gel food coloring, plus more if necessary
  • 2 drops yellow gel food coloring (optional)
  • 2 drops red gel food coloring, plus more if necessary

For the filling and frosting

  • 1/2 cup almond filling
  • 1/2 cup apricot jam
  • 1 stick (4 oz. butter)
  • 2/3 cup unsweetened cocoa powder
  • 3 cups powdered sugar
  • 1/3 cup milk
  • 1 tsp vanilla extract
  • chocolate sprinkles for decorating (optional)

Directions

  1. Preheat oven to 350 degrees F. Spray the bottoms and sides of 3 (8 inch round) cake pans with non-stick spray and line the bottoms with parchment paper. Spray the parchment paper with non-stick spray. Sift cake flour, baking powder and baking soda together in a large bowl. Add salt and whisk to combine. Set aside
  2. In the bowl of a stand mixer, or in a large bowl using a handheld mixer, cream butter on medium speed until aerated (about 1-2 minutes). Add sugar and beat until light and fluffy (2-3 minutes more). Add eggs, one at a time, then vanilla. Stop the mixer, scrape down the sides and bottom of the bowl and beat until everything is well combined. With the mixer on low, add 1/3 of the flour mixture. When that’s incorporated, add 1/2 cup buttermilk. Add another 1/3 of flour mixture. When that’s incorporated, add the last 1/2 cup buttermilk, then the last 1/3 of the flour mixture. Mix until combined, scraping down the bowl.
  3. Divide the batter between three bowls as evenly as you can (I used a kitchen scale to ensure even distribution). Leave one of them untinted, or tint with 2 drops yellow food color. Tint one of them green (drop 2 drops food color and mix with a spoon or spatula; the color will appear minty). Tint the final one red (the color will appear more salmon like than true red). Take care to use separate tools for each bowl so the colors don’t mix. Gently pour the batter into the three previously prepared cake pans, red in one, green in one and yellow in one. Smooth out the top and tap on the counter 2-3 times each to get rid of air bubbles.* Bake in preheated oven for 20 to 22 minutes. The edges should start to pull away from the sides of the pan and the top should spring back when touched.
  4. Let cool.
  5. When ready to assemble, carefully invert the green layer on a cake board lined with saran wrap. Peel off the parchment paper and place second cake board on top. Invert again so the domed side is up. Using a serrated knife, carefully level the top of the green cake layer. Spread almond filling evenly, to the edges.
  6. Next, invert the yellow cake layer as before onto a saran lined cake board. Remove parchment from bottom and carefully place over the green layer. Try to line it up as closely as possible. Using a serrated knife, carefully trim the dome to level the cake. Spread apricot jam evenly, to the edges.
  7. Repeat with pink layer.
  8. Make chocolate frosting: melt butter in a medium saucepan over medium heat. When melted, turn off heat and add cocoa powder. Whisk until combined. Add 1 cup of powdered sugar and 1/3 of the milk. Whisk together. Repeat with 1 more cup of powdered sugar, half of the remaining milk. Whisk. Add last cup of powdered sugar, rest of the milk, and vanilla extract. Whisk until everything is well combined.
  9. Working quickly, place cake on cake turner. Pour about a cup of the frosting on top of the cake. Smooth with an offset spatula, pushing down the sides a bit. Apply one teaspoon of frosting at a time on the sides, starting from the top and working your way down.
  10. Once the sides are fully covered in frosting, apply handfuls of sprinkles to the sides, placing a plate below the turntable to catch excess sprinkles.

*Note: if you use baking strips, the cake doesn’t dome as much and bakes evenly. I cheaped out and just cut a kitchen towel into strips, drenched them in water, and pinned them around the circumference of the cake pans. Worked like a dream. The cake layers in the pictures did not have to be leveled.

Leave a Comment · Labels: American/Mediterranean, Dessert Tagged: almond, apricot, chocolate frosting, rainbow cake, rainbow cookie cake, rainbow cookies

Potato Leek Soup with Rosemary Garlic Oil

January 14, 2016

IMG_5566
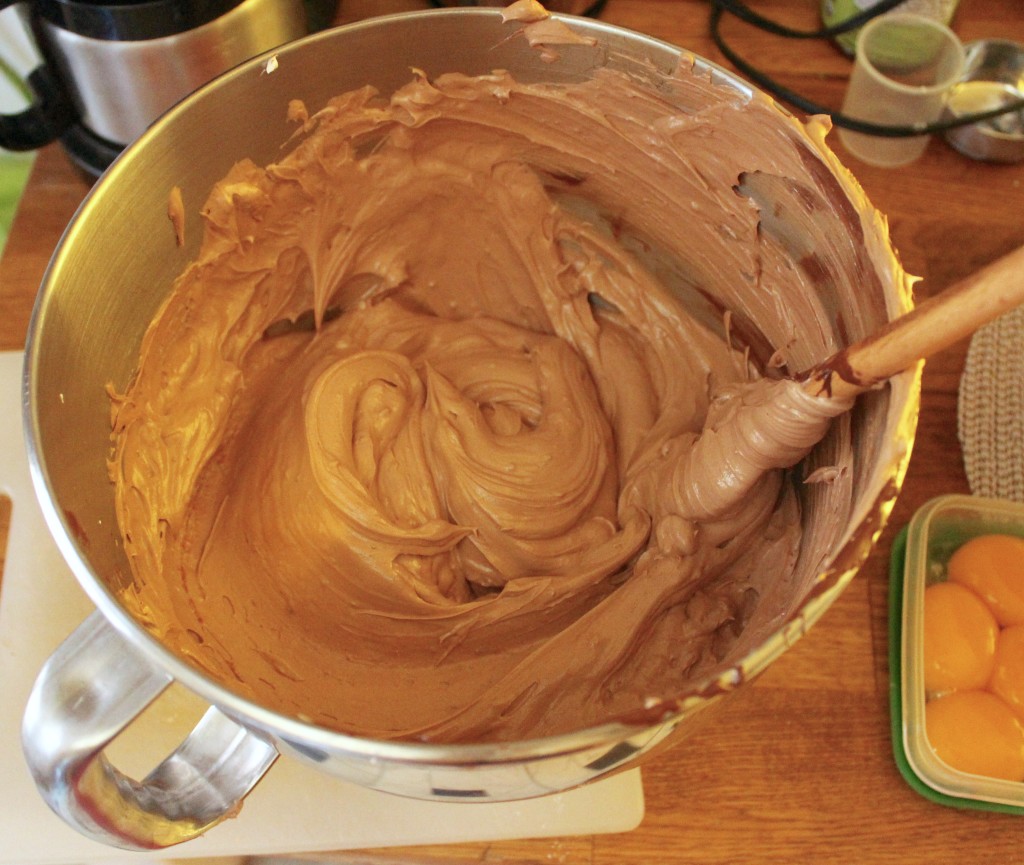
I had a hankering for warm, comforting American dishes the other day. Creamy tomato soup. Potato leek soup. Corn chowder. Pan seared scallops. Flat bread dotted with goat cheese and herbs. Just things I wouldn’t usually make since there isn’t a huge appetite for these things in our household. Take exhibit A: potato leek soup. Despite my daughter’s proclamation that she LOVED THIS SOUP and my husband’s accolade, “this soup’s good, Jaan!”, they each had just one serving. Just one. So guess who else had ALL the remaining servings?IMG_5558
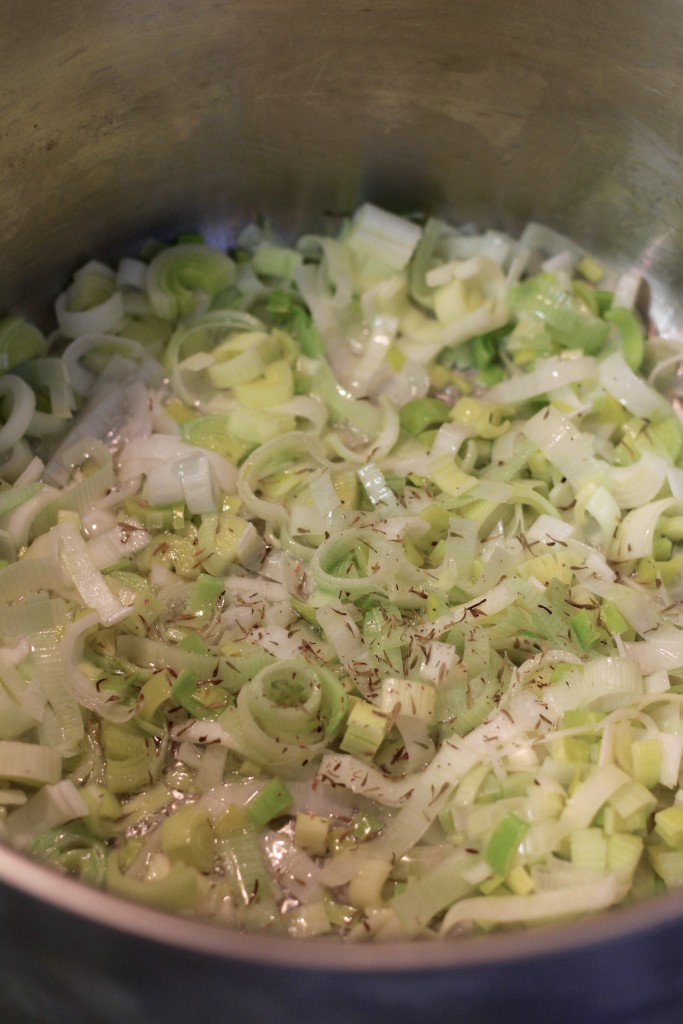
Yours, truly, of course. When I was a work study (undergraduate doing an on-campus job) at Columbia Business School, I would go down to the cafeteria and scope out what I could afford. Back then, a small soup with crackers cost about $4.75. With tax, it came out to almost $6. Which was a lot for me to fork over for lunch. But a girl’s gotta eat. Neither the $3.50 muffin nor the $12 sandwiches weren’t good alternatives. IMG_5560

I looked at a bunch of different recipes before diving into this. I knew I wanted to caramelize the leeks a bit. I knew I didn’t have chicken stock on hand, and not even the full amount of vegetable stock needed for this amount. I knew despite all the different herbs I read people used, I wanted to use dry thyme (one of my favorite pantry items since it adds such a lovely aroma and flavor and I could sense my kids associating its scent with my cooking), and rosemary. Finally, I knew I didn’t want to have a big huge batch because something told me I’d be eating 90% of it. IMG_5562

So I halved the amounts I read in other recipes, I sautéed the veggies a bit longer, and I used a combo of vegetable stock and water. Depending on the type of vegetable stock you use, your color will vary. Mine was the low sodium one from Trader Joe’s. Made from carrots, tomatoes, among other vegetables. Thus imparting an orange hue to a normally off-white soup. IMG_5575 
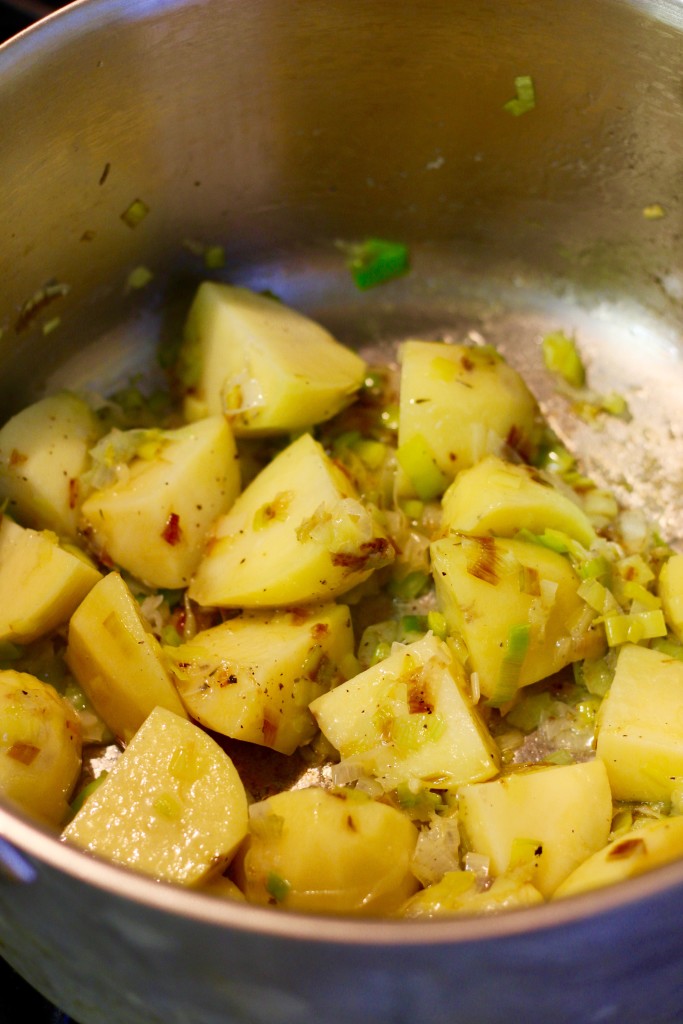
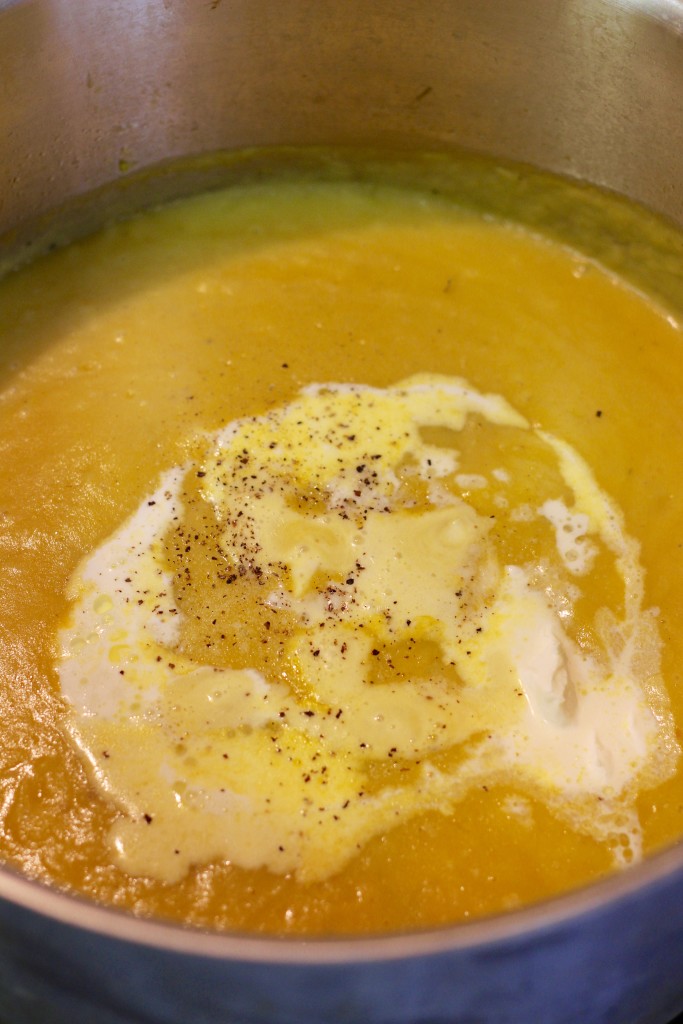
The type of vegetable stock you use will also affect the seasoning required, so make sure to add just enough salt and pepper until it’s really really tasty. IMG_5570I didn’t put rosemary in the soup directly. I thought the presentation and flavor would be more pronounced with an infused oil added at the very end. Take that, winter.

Ingredients

  • 2 tbsp olive oil
  • 2 leeks, dark ends trimmed
  • 4 Yukon gold potatoes (about 1 pound), diced into large chunks
  • 1/2 tsp salt (plus more to taste)
  • 1/2 tsp black pepper
  • 1/2 tsp dried thyme
  • 1 bay leaf
  • 1 1/2 cups vegetable stock*
  • 2 1/2 cups water
  • 1 cup cream
  • 1 tbsp creme fraiche (optional)
  • 1/4 cup olive oil
  • 1 clove garlic
  • 1 sprig rosemary

Directions

  1. Slice ends off of leeks and slice down the middle lengthwise. Rinse well to get rid of the dirt in between all the layers. Thinly slice into about 1/4 strips. Heat oil in a large pot (stainless steel or enameled both work) over medium high heat. Add leeks and dried thyme. Sauté until leeks are softened (6 to 8 minutes). Add the potatoes, salt and pepper. Stir to coat all the vegetables in the seasonings. Add stock, water and bay leaf and bring to a boil. Lower the heat, put the lid on and cook for about 20 minutes, until potatoes are tender.
  2. Once the potatoes are tender, turn off heat and remove the bay leaf. Purée the mixture with an immersion blender, or in batches in a blender. Put the pot with the puree back on medium heat. Add the cream and creme fraiche if using. Stir. When mixture comes to a boil, stir and taste for seasoning. Add more seasoning as required and remove from heat.
  3. Make the rosemary garlic oil: in a small saucepan, combine olive oil, garlic clove (smashed with the palm of your hand or side of a knife) and rosemary. Cook over low heat, allowing the garlic and rosemary to gently infuse the oil. Remove from heat when fragrant, about 5 minutes.
  4. Ladle the soup in a shallow bowl. Drizzle with a bit of oil and a dollop of more creme fraiche, if desired.

*Can use chicken stock. Can nix the water and use all stock instead. One and half cups was how much I had on hand, so that’s what I used.

Leave a Comment · Labels: American/Mediterranean, Dinner, Main, Recipes, Side, Veg Tagged: comfort food, hearty, leek, meal, potato, potato leek soup, vegetable stock, vegetarian, winter

Almond Lace Cookies with Earl Grey Ganache

January 5, 2016

IMG_5460Oh no – I was supposed to kick off the new year with a healthy-ish recipe, right?? Gah – you’ll have to forgive me. Next post, I promise, something green. In the meantime, enjoy Kitchen3N 3.0! Now with creepy side picture so you can imagine I’m watching you as your read (and salivate at) my material. IMG_5465These cookies have many names: almond lace cookies (you can find similar ones at Trader Joe’s, except instead of sandwiching them, you’ll find them as single cookies dipped in chocolate), bocca di nonna (literally, mouth of grandma but I suppose grandma’s kisses sound better), and that’s it really. Sorry. They have wonderfully sweet, caramelly, toasty notes and the earl grey ganache just makes ya go, “hmm what IS that?!”. Throwback to Rachel Ray and every instance of her adding nutmeg to a cream sauce.

Recipe from BH&G Jan 2010

Ingredients

  • 2/3 cup all-purpose flour
  • 2 tbsp unsweetened dutch-processed cocoa powder
  • 3/4 cup butter, softened
  • 1 cup sugar
  • 3/4 teaspoon, vanilla
  • 1 1/2 cups finely ground almonds (I ground up slivered almonds in the food processor)
  • 1/3 cup heavy cream
  • 4 earl grey tea bags
  • 4 oz semi sweet chocolate, chopped

Directions

  1. Combine flour and cocoa powder in a small bowl. Whisk to combine and set aside.
  2. In your stand mixer (or in a bowl using a handheld electric mixer) cream butter at medium speed for 30 seconds. Slowly add sugar and vanilla extract. Beat until light and fluffy (3 to 4 minutes). Scrape down sides of bowl occasionally. Add ground almonds, then flour and cocoa mixture. Using a rubber spatula, scrap down the sides and bottom, give it a final mix, and dump onto a large piece of saran wrap. Wrap tightly and refrigerate for 1 hour.
  3. Preheat oven to 350 degrees F. Line a baking sheet with parchment paper. Using a cookie scoop, scoop out 1 inch balls onto prepared cookie sheet, 2 inches apart. Press down lightly to flatten.
  4. Bake for 12 to 15 minutes or until centers are firm. Let cool a few minutes on baking sheet, then move to wire rack to cool completely. Continue with the remaining dough.
  5. While they cool, make the ganache: bring the cream to just before boiling (you’ll see bubbles around the perimeter). Remove from heat. Add the 4 tea bags, cover and let steep for 15 minutes. After 15 minutes, uncover, squeeze the liquid out of the bags and discard. Heat the cream once again to just barely a boil. Add the chopped chocolate and stir until mixture is homogenous and shiny.
  6. Assemble: Spread half a teaspoon of ganache onto the flat side of one cookie. Place the flat side down of another cookie directly on the ganache. Continue with the rest of the cookies.

2 Comments · Labels: American/Mediterranean, Dessert, Recipes Tagged: almond cookies, almond lace cookies, bocca di nonna, chocolate, cocoa, cookies, dessert, earl grey, ganache, tea biscuits

Menemen (Turkish Scrambled Eggs)

December 22, 2015

IMG_5405I invited my childhood friend, Aileen Olmedo of TheStyleBoro, over for breakfast this past weekend.  Her blog is a fun destination for the unequivocally stylish and youthful city dweller. Youthfulness is a state of mind folks, not a number. Rather than prepare traditional brunch items she could enjoy at a number of NYC spots (e.g. eggs benedict, waffles, french toast) I thought I’d make her a spread reminiscent of my beloved babymoon in Istanbul.IMG_5394BTW, Zeynep if you are reading this please don’t hate me if I butchered an authentic Turkish dish. I know you’re supposed to use Turkish peppers, not jalapeno or Chinese peppers. I know you’re supposed to use onion not scallion. And any other changes I made, I only made to make this wonderful breakfast dish a bit more accessible to the average American home cook!IMG_5395I love how the colors pop in a Turkish breakfast spread. White cheese, green cucumbers, red tomatoes, rich Soujuk (Turkish sausage), black olives, fresh squeezed orange juice. Makes for a dramatic presentation. If you can find apple tea and borek (cheese or meat pastry), those are also wonderful additions. Even if you aren’t looking for an all out breakfast extravaganza, you can enjoy the recipe below for Menemen – eggs scrambled with peppers, tomato and onion until they are just barely set. A wonderful change up from your usual eggs and toast breakfast.

Ingredients

  • 3 tbsp olive oil
  • 2 scallions, thinly sliced
  • 1 long green pepper (I used the Basque Fryer, but feel free to use a deseeded jalapeno), thinly sliced
  • 1 Roma tomato, diced
  • dash of cayenne pepper
  • 1/2 tsp paprika
  • 1/4 tsp salt
  • 6 eggs
  • salt and pepper to taste
  • 2 tbsp chopped parsley

Directions

  1. Heat oil in a large non-stick skillet or wok over medium high heat. Add scallions, tomato, pepper and cook 4-5 minutes, until soft. Add cayenne, paprika and salt and cook for until tomatoes break down and onions get super soft, another 2-3 minutes.
  2. While the veggies cook, crack eggs into a bowl. Season with a pinch each of salt and pepper and whisk with a fork. Whisk well – until the eggs look like a uniform yellow mixture. Pour into skillet and lower the heat to low. Cook, stirring occasionally, until the eggs just start to set. Turn off the heat and add the parsley. Give it a final stir and serve with warm bread.

Leave a Comment · Labels: American/Mediterranean, Breakfast, Main, Protein, Recipes Tagged: eggs, scrambled eggs, turkish, turkish breakfast

Fish Curry

December 13, 2015

IMG_5310I was going to write about how comfort food for me is not cream laden, starch based dish. About how I would be disappointed during weekend lunches when my mom would bring out a pot of fish curry yet when I moved out to my dorm it was those memories that comforted me during cold, dark and lonely weekday nights. And one of the few things that connected me to my childhood as a married woman cooking for her own family. IMG_8319But I realized I’ve written all of that before. And as touching as it is, I can’t dwell on it. Not with all that’s going on. I am sick of the vitriol being spewed from my screen. From fellow commuters. From people I’ve shared a hometown with for years. But I’m emboldened by the acts of good among all the recent backlash against my community. The little Texan boy that donated his savings to a mosque in his neighborhood that was vandalized. Brandon of HONY, who appeared on Fareed Zakaria, pleading the case of the Syrian refugees. Justin Trudeau and the choir that welcomed refugees with a rendition of Tala Al Badru Alayna – the song that the people of Medina sang to receive the Prophet Muhammad and his followers when they left Mecca due to persecution.IMG_5319Scapegoating, racism, xenophobia – these are nothing new to mankind. But social media is. So I ask you, during these historic times, will we find ourselves as complacent as the citizens of the world during WWII? Will we let the negative news saturate our feeds? Or will we use the platforms we’ve been given to help our neighbors, speak the truth and contribute to the forces of good?

Ingredients

  • 2 tilapia filets (about 3/4 pound total), cut widthwise into 1/2 in to 3/4 in pieces*
  • 1/4 tsp turmeric
  • 1/4 tsp salt
  • 3 tbsp light olive oil
  • pinch anise seeds (optional)**
  • 1/2 large onion (or 1 medium one), sliced
  • 1 Roma tomato, sliced into half inch slices
  • 3 cloves garlic, minced
  • 1 jalapeno, tip cut off and sliced down the middle
  • 1/2 tsp ground cumin
  • 1/2 tsp ground coriander
  • 1/2 tsp salt
  • dash cayenne pepper
  • 1/2 pound shrimp, peeled, deveined, with the tail on
  • 1/2 cup chopped fresh cilantro

Directions

  1. Season tilapia with turmeric and salt – rub to coat the fish with the spices.
  2. Heat oil over medium high heat in a large wok or fry pan with high sides. Lightly fry the fish about 2 minutes on each side to get a nice golden brown crust on them. I like to use tongs for this. Do this in two batches. Set aside browned fish on a plate or bowl.
  3. In the same oil, add the anise seeds and onion and cook until onions are translucent – about 4 minutes. Next add tomato, garlic, and jalapeno. Cook for 1-2 minutes, then add cumin, coriander, salt and cayenne pepper. Stir to combine then add 1/2 cup of water to allow the spices to cook down. When the water is almost fully evaporated, add shrimp and stir with the vegetable and spice mixture. Allow to cook for 1 minutes. Then add 1/2 cup more water, the tilapia and bring to a boil. When it reaches a boil, put the lid on and the heat low and allow to simmer for 4-5 minutes, stirring occasionally.***
  4. Meanwhile chop cilantro. When the shrimp and tilapia are cooked through and the broth looks like a broth (homogenous in appearance, not like water with bits floating in it), then turn off the heat. Add the cilantro and taste for seasoning.

*Cook’s note: you can substitute about 2-2 1/2 pounds of bone-in, gutted and de-scaled fish that have been cut into thirds (e.g. porgy, whiting, buffalo). You can skip the shrimp in that case. We’re looking for flavor here (bones of the fish or tails of the shrimp).

**You ever notice that the French use Pernod (anise liqueur) to bouillabaisse (fish stew) and Italians add fennel to cioppino (fish stew). There’s just something about the combination of anise flavor with fish that just works!

***I know most recipes warn of overcooking shrimp but my personal taste is – I like it with a bit of a bite to it!

Leave a Comment · Labels: Bengali, Main, Protein, Recipes Tagged: bengali fish, bengali fish curry, cilantro, curry, fish, fish filets, pesce, pescetarian, shrimp, spicy, tilapia

Creamy Less Cheesy Mac and Cheese

November 13, 2015

IMG_5206Anyone else find themselves questioning their life choices? First world problems, right? I’ve got a roof over my head, food to eat, a wonderful family – so much to be grateful for. But I’m feeling sorry for myself because I haven’t “made it” yet or didn’t pursue one of the more conventional paths of engineering, medicine, or law (not that I have a litigating bone in my body). Of course this comes at a time when most of my high school and college classmates are receiving their secondary degrees and the grass is looking greener on the other side. But I’ve been trying to embody the saying I’ve read recently, “The grass is greener where you water it”. I love my family and would be so empty without them. But I need to reach my professional goals as well. Would love to grow this blog or my little side hustle (custom cakes) but I feel like I’m lacking some guidance. Is it my content? My outreach? Help me out, guys!! Granted I have two little ones, one who is isn’t in school yet, so my resources are limited.   IMG_5195Speaking of little ones, for years I lamented that despite my efforts to make mac and cheese from scratch, my kids preferred the stuff from the blue box. Relieved, since dinner could be ready in a snap if I had the blue box on hand. Affronted, as well. So I sought a solution. The problem was the traditional mac and cheese recipes I followed were quite cheesy. Resulting in a strongly flavored and thick sauce.IMG_5196So, I thought I’d make a bechamel sauce, add in a little bit of cheese at a time until it had just enough thickness and was mildly flavored enough for my kiddos, and voila! I made something that my 3 1/2 year old would lick clean off the plate.   IMG_5199This comes together so quickly, you’ll be like, blue box, who? Granted you have pre-shredded cheese. I use the Trader Joe’s blend of mozzarella, cheddar and jack cheese. It’s wonderful in omelettes, grilled cheese, etc. IMG_5200Throw in some frozen peas with the pasta during the last minute of cooking to make it a complete meal. Or shredded beef/chicken. The sky’s the limit. I just keep the chicken broth on hand in case it gets too thick. IMG_5205  IMG_5215Make this once and you’ll never go back to Panera’s mac and cheese! Feel free to double the recipe if you have more mouths to feed!

Ingredients

  • 2 tbsp butter
  • 2 tbsp all purpose flour
  • 2 cups whole milk
  • 1/2 cup grated cheese (cheddar or I use a combo of mozzarella, cheddar and pepper jack)
  • 3/4 tsp salt plus more to taste
  • dash black pepper
  • dash cayenne pepper
  • 1/2 pound elbows or small shell pasta

Directions

  1. In a medium to large pot, heat about 4 quarts of water over high heat. Let it come to a boil while you prepare the other ingredients.
  2. When it comes to a boil, add a teaspoon of salt and the pasta to the water. Give it a stir and set the timer to 8 minutes (check the time on the box for shells since I used elbows).
  3. Melt the butter over medium heat. Add the flour and whisk together. Allow to cook for 1-2 minutes. Next, slowly pour in the milk, while whisking. Continue whisking, taking care to get all the bits of flour and butter from the bottom of the pan. Lower the heat to a simmer a let cook for 5 minutes. It won’t thicken fully at this point. Make sure the mixture is not boiling otherwise the cheese will curdle*. Turn off the heat (and the heat of the pasta if the timer is up). Add salt and pepper and stir to combine.** Add cheese and stir – now the sauce should be sufficiently thick to coat the pasta.
  4. Strain pasta and add it to the cheese sauce. Serve immediately.***

*I learned this the hard way after ruining two batches during our suite’s Thanksgiving potluck in college.

**Congratulations, you’ve just made bechamel sauce!

***To reheat, add a bit of chicken broth to a saucepan and warm over medium low heat until heated through.

5 Comments · Labels: American/Mediterranean, Carb, Dinner, Main, Recipes, Side Tagged: bechamel, blue box, comfort food, cream sauce, creamy, elbow macaroni, mac and cheese, pasta, shells, white sauce

Cake Design at ICE

November 9, 2015

IMG_8052I took a class in trends in cake decorating today. The chef instructor was kind of mean. Not like my fourth grade teacher, Ms Steiner kind of mean. No, Ms. Steiner made a point of making everyone in our class cry at some point in time. I succumbed one day when she called me stupid for messing some grammar up. This from a lady who took in a stray cat (whom she named Junior), invited him to sleep with her on her bed, and proceeded to give her rabies. No, our Chef Instructor was just a bit eccentric. I think Gordon Ramsey has set the bar pretty high for kitchen totalitarianism. I think most people go into a culinary course half expecting their instructor to fall closer to the Gordon Ramsey part of the eccentric teacher spectrum (Julia Childs being on the far end). IMG_5179It was time well spent! I’ve seen all the tutorials online for rosettes, ribbons, ombre, etc. but not very many opportunities to practice them hands on. I have to practice the ombre as the gradient wasn’t quite what I wanted. But ombre cakes just have such a spectacular wow factor. Definitely worth the time to get it right! IMG_5183 Now might be a good time to mention the new section of my page: Custom Cakes! After supplying friends and family with custom cakes over the past year and I half, I want to open it up to anyone in the NYC metro area who is looking for delicious, beautiful cakes custom designed for their event!IMG_5192I still love cooking and food and will continue that portion of the blog. But unless I start a full on catering company, I need hone in a little bit! So let me make your next event even more special by sharing one of my custom creations with you! Shoot me an e-mail at kitchen3n@gmail.com or use the form in the link.

Leave a Comment · Labels: Food Fun

  • Newer Entries
  • 1
  • …
  • 4
  • 5
  • 6
  • 7
  • 8
  • …
  • 17
  • Previous Entries
American, Bangladeshi. Savory, sweet. I don't discriminate and neither should you.

Most recently…

Load More...
Follow on Instagram

Social

Subscribe to Blog via Email

Enter your email address to subscribe to this blog and receive notifications of new posts by email.

Tags

appetizer beef bengali breakfast butter cake caramel chicken chocolate chocolate chips cilantro clean eating coconut comfort food cookies dessert dinner entertaining fall fruit ganache gluten free halal healthy homemade honest chops honest creations iftar italian pasta pastry pistachio quick and easy dinner ramadan recipe side side dish south asian spinach vegan vegetables vegetarian weeknight dinner weeknight meal whipped cream

Theme by 17th Avenue · Powered by WordPress & Genesis