Kitchen3N

Recipes and food fun from Apt 3N

  • About
  • Gallery
  • Recipes

Rhubarb Mango Chutney

May 15, 2014

IMG_2464Is rhubarb out of season yet? I am way behind with this post, I know. I have been behind on life, in general, as of late. So even though I made my husband track down rhubarb when the season for it first came around (it is surprisingly difficult to find around these parts) and serendipitously also had some delicious, though overripe, Haitian mangoes on hand to make this weeks ago…I am only now sharing it with you. Sad face.

I know the combination of rhubarb, overripe mangoes, anise seeds and mustard oil aren’t ingredients most people have on hand most of the time. But as we near the end of rhubarb season, I hope you can still attempt to make this chutney. Or at least save it for next year.

I know most people tend to make some sort of rhubarb/strawberry pastry this time of year but something strange has happened to me recently. My sweet tooth has faded. Maybe I’ve made one too many cookies. But for some reason, butter rich, sugar filled treats just don’t give me the same satisfaction it used to. Not to say I’ve shunned them for good. I still taste test what I make and indulge when I go out with my girlfriends. Anyway, I was looking for something a bit more savory, and palatable for the rest of the clan. This was probably one of my most successful experimentations. It was annihilated at my in-laws’. Reduced to half in my own home overnight. It just hit every note. Admittedly, there is a lot of sugar in this, but only because the rhubarb was so darn tart. I don’t regularly have rhubarb, I don’t know if they range in tartness, but the tartness of this batch rivaled any lemon. If yours is less tart, feel free to start out with a smaller amount of sugar, and add more as needed.

Ingredients

  • 1 tbsp mustard oil
  • 1 pinch anise seeds or pach forom
  • 1/2 red onion, diced
  • 3 stalks of rhubarb, leaves and ends trimmed, diced into 1 in pieces
  • 4-5 dried red chilis (less for mild heat)
  • 1/4 cup brown sugar
  • 1 tbsp apple cider vinegar
  • 1 1/2 tsp salt
  • pulp of 2 overripe mangoes, preferably the haitian variety

Directions

  1. Heat oil over medium high heat in a medium saucepan. Add the anise seeds or pach forom and fry until fragrant, about 30 seconds. Add the onions and cook until translucent. Add rhubarb, chilis, sugar, vinegar, salt and mango pulp. Stir and bring to a boil. Reduce heat to a simmer and cover.
  2. Cook for 40 minutes, stirring occasionally, until everything is broken down. Taste for seasoning.

Leave a Comment · Labels: Bengali, Recipes, Side Tagged: achar, anise seeds, bengali, chutney, condiment, gluten free, mango, mustard oil, pickle, rhubarb, rhubarb season, sauce, side, vegan, vegetarian

Coconut Egg Curry (Deem Bhuna)

February 26, 2014

IMG_2326This weekend was a welcome respite from the bitter cold of the past few months. Temperatures soared to the 50s (watch out LA, we’re catching up). I refused to wear socks…despite that fact that all the snow hadn’t fully melted. We took it all in. Enjoyed our walks instead of rushing from building to car to store then back.

But now the week has begun and and with it, freezing temps. So you can imagine my efforts to avoid multiple trips to the store. I’m pulling out all the stops to use up pantry ingredients. And I know how my readers love a CHEAP, QUICK and DELICIOUS weeknight meal.IMG_2322This doesn’t look like your usual curry (for lack of liquid). This type of dish is called a bhuna: where the liquids are allowed to evaporate for the most part, leaving a concentrated flavor enhanced usually by a large amount of caramelized onions. Most Bengalis would leave a dish like this for special occasions, typically shunning the high amount of cholesterol by the egg and coconut milk combination. Except now, according to recent studies, the cholesterol/fat found in both is good for you (but perhaps not for South Asian populations??). Who knows what to believe anymore with studies constantly disproving what we thought to be true for so long. I’m going to go with my usual wisdom: enjoy in moderation!

Ingredients

  • 6 eggs
  • 1/4 cup olive oil or vegetable oil
  • 1 medium onion, thinly sliced
  • 1 12 oz can coconut milk
  • 3 cloves garlic, minced
  • 1/4 tsp ground ginger
  • 3/4 tsp cumin
  • 3/4 tsp coriander
  • a pinch of turmeric (optional)
  • 1 bay leaf
  • 2 green chilis (or more if you like)
  • 1 tsp salt (or to taste
  • 1/2 tsp black pepper (or white pepper for a more mild heat)

Directions

  1. Place the eggs gently into a small saucepan and add enough water to cover the eggs. Bring to a boil over hight heat, then put the lid on and turn off the heat. Let sit for 6 minutes. Then run under cold water to help cool down enough to peel. PEELING TIP: crack on the counter and roll around. That helps loosen the shell.
  2. In a small nonstick saute pan, heat a tablespoon of oil over high heat. While it heats, toss the eggs with a pinch of turmeric and salt. Once hot, add the peeled eggs and let it sear on one side, after 30 seconds or so, stir to brown the flip side (do the best you can with this). Remove from heat.
  3. In a large saute pan, heat the remaining oil over medium high heat. Add the onions and saute until they are brown around the edges (8 to 10 minutes). Add the coconut milk, garlic, ginger, cumin, coriander, turmeric (if using), bay leaf, chilis, salt and pepper.  Let it simmer over a medium heat for about 5 minutes. Add the eggs, toss to combine, and check for seasoning.

VARIATIONS

Simple bhuna: ditch the coconut milk for water. Increase turmeric to 1/2 tsp.

Tomato and cilantro: use 1 cup water instead of coconut milk and add 1 tomato, diced. Garnish with 1/4 cup chopped cilantro.

Korma: Ditch the turmeric. Use milk or half and half in lieu of coconut milk. Garnish with raisins and slivered almonds.


1 Comment · Labels: Bengali, Main, Protein, Recipes Tagged: bengali, cheap, coconut curry sauce, coconut milk, curry, deem bhuna, egg, egg curry, eggs, gluten free, low budget, vegan, vegetarian, weeknight meal

Shrimp & Green Bean Purée (Chingri ar Beans Bhorta)

December 31, 2013

ImageI don’t really give a lot of thought to New Years resolutions. Calendars are such a man made construct – how is tomorrow more or less relevant than today? I know I seem like Buzz Killington here, while everyone is hastily getting ready for their NYE parties (and hey, I am, too). But I just got this email from wordpress reviewing the year in stats that made me reflect a bit. Although it is nowhere where I’d like to be, I’ve come a long way from the early days of dinky pictures in low lit spaces. I’ve learned a lot and have put a lot of work into sharing content that I think will be meaningful you guys. And as I make my way through my late twenties, I definitely feel the pressure to do something I am proud of, improve and grow, and do right by my kids.ImageSome of my favorite posts from this past year was Julia Child’s glorious ratatouille, the traditional Bengali Rice Pilaf that was actually approved for submission into Foodgawker, and the Sticky Toffee Pudding that I thought photographed so beautifully. I am proud though, of the progress I’ve made. Starting out with some not so relevant recipes to some pretty handy dandy ones for newbies to the [especially Bengali] kitchen. And though I haven’t garnered nearly enough traffic to consider myself a success, I’ve thoroughly enjoyed hearing anecdotes from you guys about the different recipes you’ve tried and your personal success stories in the kitchen. ImageA friend of mine posted on my Facebook page saying, “You inspire me to cook!” and I thought to myself, that is the whole reason I started this blog in the first place. To share some recipes or insights with people who don’t have the time or resources to spend in the kitchen. So to them, and to anyone else reading this, THANK YOU for making 2013 such a great year for Kitchen3N. I look forward to sharing more goodies with you guys in the years to come. ImageNow, what is a bhorta? They are usually made from boiled/steamed vegetables or dried fish, then ground to a pulp using a shil pata (stone slab, kind of like mortar and pestle), along with raw onions, green chilis, salt and mustard oil. Sometimes dried red chilis. They are CRAZY good. My mom’s experimented with the preserved fish readily available in this country: anchovies, sardines, etc. But this one is the best. Some permutations include lime leaves (which can be hard to find, which is why I improvised with lemon zest and lemon juice). These aren’t traditional ingredients but they help brighten up the flavor without using way too much salt. It’s a great low fat side. Be warned though: it is spicy! Of course you can adjust it to your taste, but for an authentic Bengali experience, crank up the heat! Image

Ingredients

  • 1/2 lb large shrimp, peeled, deveined and tails off
  • salt, pepper and olive oil
  • 3/4 lb string beans, stems off
  • zest of 1 lemon
  • 1 tsp lemon juice
  • 1/2 cup cilantro, roughly chopped
  • 1/4 chopped yellow onion
  • 1 tbsp mustard oil (could probably substitute regular ol’ mustard)
  • 1/2 tsp salt (or to taste)
  • 2 green chilis, roughly chopped (add just one if you are a heat lightweight! and wear gloves if necessary…just don’t stick  your fingers in your eyes afterward!)

Directions

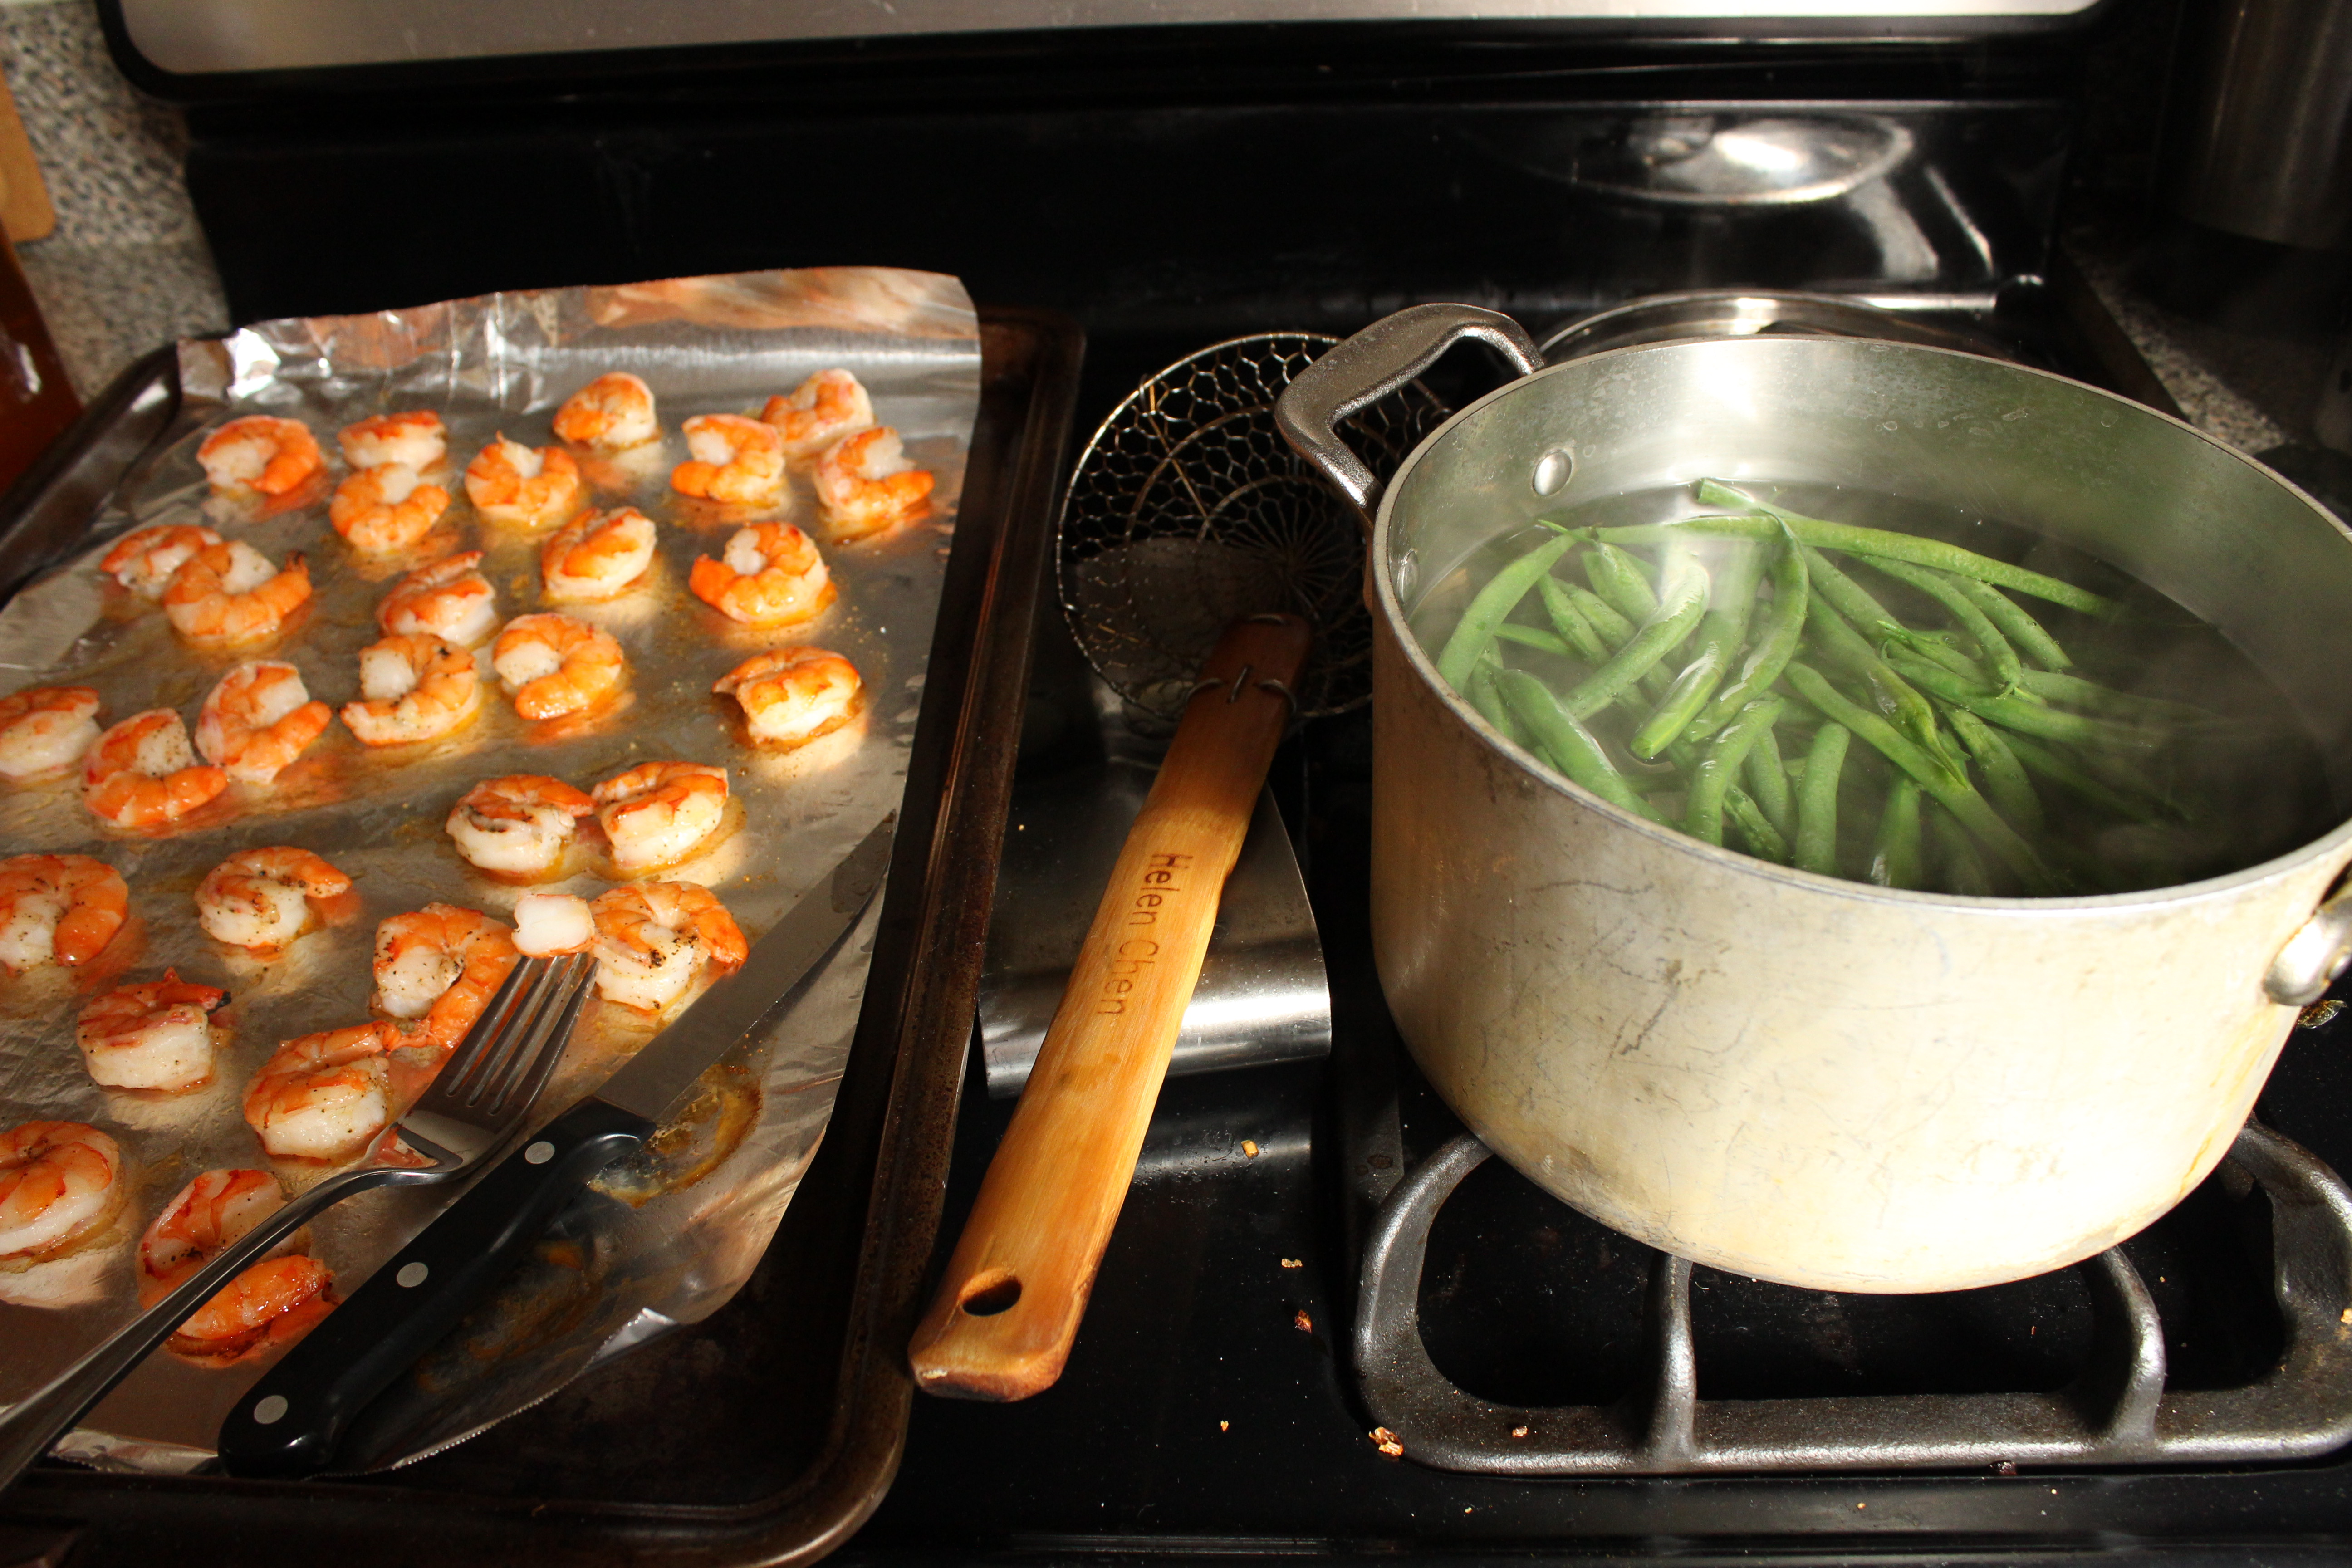
  1. This is unconventional, but it’s the only way I cook shrimp: toss shrimp with 1/4 tsp salt, 1/8 tsp pepper and 2 tbsp extra virgin olive oil. Spread onto a baking sheet and roast in a 400 degree F oven for 7 minutes (more or less depending on the size of the shrimp. Once cool enough to handle, chop roughly and transfer into a food processor.
  2. Next boil some water in a large pot. Once it comes to a full boil, add 1 tsp salt and add the green beans (do it in batches if necessary). It should take 5 minutes to cook through. Drain, chop roughly and add to food processor.
  3. Add the remaining ingredients to the food processor and blend to combine. Serve with rice and daal.

4 Comments · Labels: Bengali, Recipes, Side, Veg Tagged: bengali, bhorta, gluten free, healthy, puree, side, spicy, vegetables, veggies

Mixed Vegetable Stir Fry (Bhaji)

October 28, 2013

IMG_1625When I go to a Bengali restaurant for takeout, I usually overlook the greasy curried meat dishes or the fish floundering in murky masala waters and the bhortas that usually fall short of the homemade version. At most Bengali places, these dishes are laid out buffet style so you know exactly what you’re getting. I usually opt for one of the Biryanis (chicken or goat) and a side of some sort of mixed vegetable stir fry. These things always get me salivating. I guess it’s because they strike a fabulous balance of spice and sweetness. I’m not the type of person who goes gaga for sweet and spicy, but the sweetness in this dish is brought out by the slow caramelization of the vegetables (rather than sugar or honey) and just rounds out the flavor from the usual round up of spices, plus the extra Bengali zinger: pach phorom. IMG_1630Pach phorom is a combination of five aromatic seeds: black mustard, cumin, black cumin (also known as nigella), fenugreek (methi) and fennel. It can be found at any Indian grocery alongside all the usual spices. They have a licorice flavor, which adds an extra dimension to the dish’s flavor profile. This is important for vegetable dishes that have to compete with a follow up course of a rich meat or curried fish dish. IMG_1637This is something my mom made at the beginning of the week to just last the course of the whole week. It starts out with a base of softened onions, spices and garlic/ginger paste. You can play around with the vegetables to add your favorites, but to start, I used the two vegetables I found consistent in most Bengali mixed vegetable dishes: cauliflower and cabbage. Now, the two put together makes A LOT, so make sure your wok or pot is large enough to accommodate everything. I had to add the vegetables slowly, allowing some of the cabbage at the bottom to wilt and decrease in volume before adding more, and mixing to combine.  IMG_1641While that goes, you’ll want to work on the second batch of veggies in a separate pan. I used just 2 cups of plain old frozen mixed vegetables. You can use the equivalent amount of zucchini, pumpkin, butternut squash, peas, string beans, whatever you like as long as you have a balance of green, orange, and white veggies.  IMG_1643The cauliflower and cabbage steam in the wok for about 20 minutes. They get all tender and sweet. I ended up needing a shocking amount of salt but feel free to start out small and gradually increase to taste. Top with fresh cilantro. Serve alongside rice or naan or stuff inside a pita for a delicious wrap!IMG_1657IMG_1649

Ingredients

  • 1/4 cup light olive oil or veg oil
  • half a spanish onion, diced small
  • 1 tsp cumin
  • 1 tsp coriander
  • 1 tsp turmeric
  • 1 tsp pach phorom
  • 1/4 tsp chili powder (or more if you like it hotter)
  • 2 tsp garlic/ginger paste (or 2 tsp minced garlic and/or ginger)
  • 1 head of cabbage, cut into half inch strips
  • 1 head of cauliflower, stalks and florets cut into half inch pieces
  • about 5 green chilis (optional) with slits cut into them (also optional)
  • 2 tsp salt, plus more to taste
  • 1 tsp ground black pepper
  • 1/4 cup water
  • 1 tbsp light olive oil or veg oil
  • 2 cups frozen mixed vegetables
  • 1/2 tsp cumin
  • 1/2 tsp coriander
  • 1/2 tsp turmeric
  • 3 handfuls of cilantro

Directions

  1. Heat the oil over medium high heat. Add the onions and let soften for 4 to 5 minutes. Add the cumin, coriander, turmeric, pach phorom, chili powder and garlic/ginger paste. Stir to combine. Add the cabbage in batches, allowing the bottom most wilt a bit before adding the next batch. Continue until all the cabbage is in the pot. Stir to combine. Next add the cauliflower, one batch at a time, ensuring everything gets an even coating of the oil/onion/spice mixture.
  2. Add the green chilis, salt, pepper, and water and stir to combine. Put the lid on and let it steam. It will take approximately 15 to 20 minutes for all the vegetables to cook through. Occasionally lift up the lid, and stir the vegetables, bringing the bottom vegetables to the top so everything gets an even cooking. Take care towards the end not to break apart the cauliflower florets.
  3. In a separate shallow fry pan, heat 1 tbsp oil over medium high heat. Add the frozen vegetables and remaining cumin, coriander and turmeric. Season to taste. Break apart with a wooden spoon and stir to make sure everything gets seasoned and cooked evenly. When heated through, turn off the heat.
  4. When the cauliflower and cabbage are cooked through, add the mixed vegetables and cilantro and stir to combine. Add a teaspoon or two more salt, according to taste.

5 Comments · Labels: Bengali, Recipes, Side, Veg Tagged: bengali, bhaji, cabbage, cauliflower, gluten free, make ahead, mixed vegetables, panch phorom, side, side dish, stir fry, vegan, vegetarian

Curried Shrimp & Okra (Dharosh ar Chingri)

September 17, 2013

**One week left in my $50 Sur La Table Giveaway!! Ends 9/25/13**

IMG_1482ImageMy semester abroad in Rome was the most fantastic 4 months of my life (no offense husband, kids). Immersing myself in a language and culture I had studied and seen from afar for YEARS was just so rewarding. Living down the street from the pantheon and campo dei fiori was just other worldly. But what was even better than living down the street from the pantheon, was living down the street from the gelaterie by the pantheon: gelateria della palma and giolitti. And what was so awesome about campo dei fiori is the open air market that sits daily. Needless to say, I had amazingly fresh food every day. I remember the very first thing I ate was bruschetta with kind of lackluster tomatoes (it was January, duh) but with such fruity olive oil and complex, crusty bread, that I was completely satiated. And I ate like that for about a week or two, pizza al taglio, pasta a cacio e pepe, stuffed zucchini flowers, fried artichokes, all the non porcine Roman specialties. Until I started getting homesick. ImageImageWhen I got homesick, I called my mom, and made Bengali food. And for some reason, the first thing that came to mind when I thought of comfort food was mashed okra (dherosh bhorta). So I dragged my roommate and dear friend Jess (who just got engaged!!) across town, to the Bengali market. There, I found some puny okras, red onions, green chili and the mustard oil necessary to complete my gustative trip home (Jess, for the record, did not partake because of her texture issues. If you, like her, have an aversion to squishy foods, okra is not for you). After that, it kind of became a tradition…we would invite our friends over for a traditional Bengali meal in our tiny Roman apartment, usually consisting of rice, daal, chicken curry and some sort of fried veggie or salad. Then go out for gelato. Yeah, we knew how to party.ImageSince then I always associate okra with Bengali comfort food. And this dish is just such a tasty (and quick!) way to experience it. I made this EXACTLY like my mom, not straying the least bit (except that I use Kosher salt; she swears by the iodized stuff). There is, surprisingly, no garlic or ginger. It is a tad salty, but feel free to adjust it to taste. This usually isn’t served as the main accompaniment to your rice…those would be more along the lines of chicken, beef, mutton or some sort of large fish. But it’s definitely enough for me, as I could probably destroy the whole thing in one sitting. Enjoy!IMG_1483

Ingredients

  • 2 tbsp light olive oil or vegetable oil
  • 1/2 medium onion, diced
  • 1/2 tsp paprika
  • 1/2 tsp turmeric
  • 1/2 tsp coriander
  • 1/2 tsp cumin
  • 1/2 tsp chili powder (or cayenne)
  • 1 cup water
  • About 3 cups okra, diced (I used 15 large, fresh from my in-laws’ garden!)
  • 1/2 to 3/4 lb shrimp
  • 1 and 1/4 tsp salt, separated
  • 1/2 cup cilantro, for garnish

Directions

  1. Heat oil over medium high heat. Add onions and cook until soft.
  2. Add all the spices and water. Stir to combine.
  3. Add the okra and 1 tsp salt. Cover and cook until tender, about 5 minutes (check on it occasionally. If the water dries out, add 1/4 cup more).
  4. In a separate bowl, season the shrimp with 1/4 tsp salt. After the okra is almost fully cooked through, add the shrimp. Cover and cook an additional 2 minutes.
  5. When everything is cooked through, turn off the heat and add the cilantro.

3 Comments · Labels: Bengali, Main, Protein, Recipes, Veg Tagged: bengali, chingri mach, dherosh, gluten free, okra, pescatarian, shellfish, shrimp, side

Mashed Eggplant (Begun Bhorta)

March 28, 2013

IMG_0824

I feel like most people, when asked what their favorite vegetable is, would say corn or butternut squash or potatoes (though I bet they actually like the salt and fat that comes with the potatoes). Or perhaps mushrooms. But not me. I. Love. Eggplant. Stewed with tomatoes (imam biyaldi). Simply fried with salt and turmeric (chaak bhaji). In a curry with the insanely boney hilsa fish. In the Sicilian sweet/savory relish known as caponata. In every way except babaghanoush (sorry, haters gon hate). Or this way: charred over an open flame, peeled then mashed with simmering onions, tomatoes, garlic and spices.

IMG_0816Now, I know traditionally a bhorta consists of some boiled or steamed vegetable (or dried fish) mashed or really well mixed with raw onion, Thai chilli, mustard oil, salt and cilantro. But one fine day my mom made this and said hey, this is begun bhorta. And even though the cooking process more closely resembles a mishti kumro ghonto (think: spiced, simmered pumpkin mush), it stuck.

IMG_0809 Charring it is a bit of a pain. The juices get all over the burner. Peeling the charred pieces of skin is a pain. But the payoff is well worth it. You could perhaps do it under the broiler. I haven’t given it a go. Right now I am sticking to tried and true methods of prep. So, here it is:

Ingredients:

1 medium eggplant, poked all around with a knife or fork
1 tbsp olive oil
1 small onion, diced (yellow or red)
2 cloves garlic, minced (or 1tsp garlic paste)
1 tomato, diced
1/4 tsp cumin
1/4 tsp turmeric
1/4 tsp coriander
A pinch of chilli powder
1/2 tsp salt, plus more to taste
A handful of fresh cilantro

Directions:

Over a medium flame, start charring the eggplant by placing directly onto heat and rotating using a pair of tongs every two minutes or so (or with your fingers if you’re hardcore like my mom). It should be cooked all the way through in about 10 to 12 minutes. Prep the rest of the ingredients in the meantime.

When the eggplant is done, remove from heat and allow to cool. Then peel off the skin using your fingers or tongs, doing the best you can to get as much of it off as you can. Cut off the top and set aside.

Heat oil over medium high heat in a wok or fry pan. Add onions and tomatoes. Allow to soften a few minutes, then add garlic and the rest of the spices/seasonings (if you only have garlic/ginger paste on hand, use that). Add the eggplant and break up any chunks using a wooden spoon. Lower the heat to medium/medium low. Mix it all together and let the flavors combine while prepping the cilantro.

Off the heat, add the cilantro and check for seasoning. Serve with basmati rice or roti.

Note: as with most bengali cooking, you do not need to follow a recipe to a T to get fantastic results. Feel free to use chopped Thai chili in lieu of the chili powder. Or a dash of mustard oil for more of a kick. For example, I had some extra red pepper on hand so I added it. Made it look a ton prettier. Just don’t skimp on the charring because it really makes this dish.

2 Comments · Labels: Appetizers, Bengali, Recipes, Side, Veg Tagged: bengali, bhorta, dinner, eggplant, puree, side dish, vegetable, vegetarian

Bengali Chicken Curry

March 9, 2013

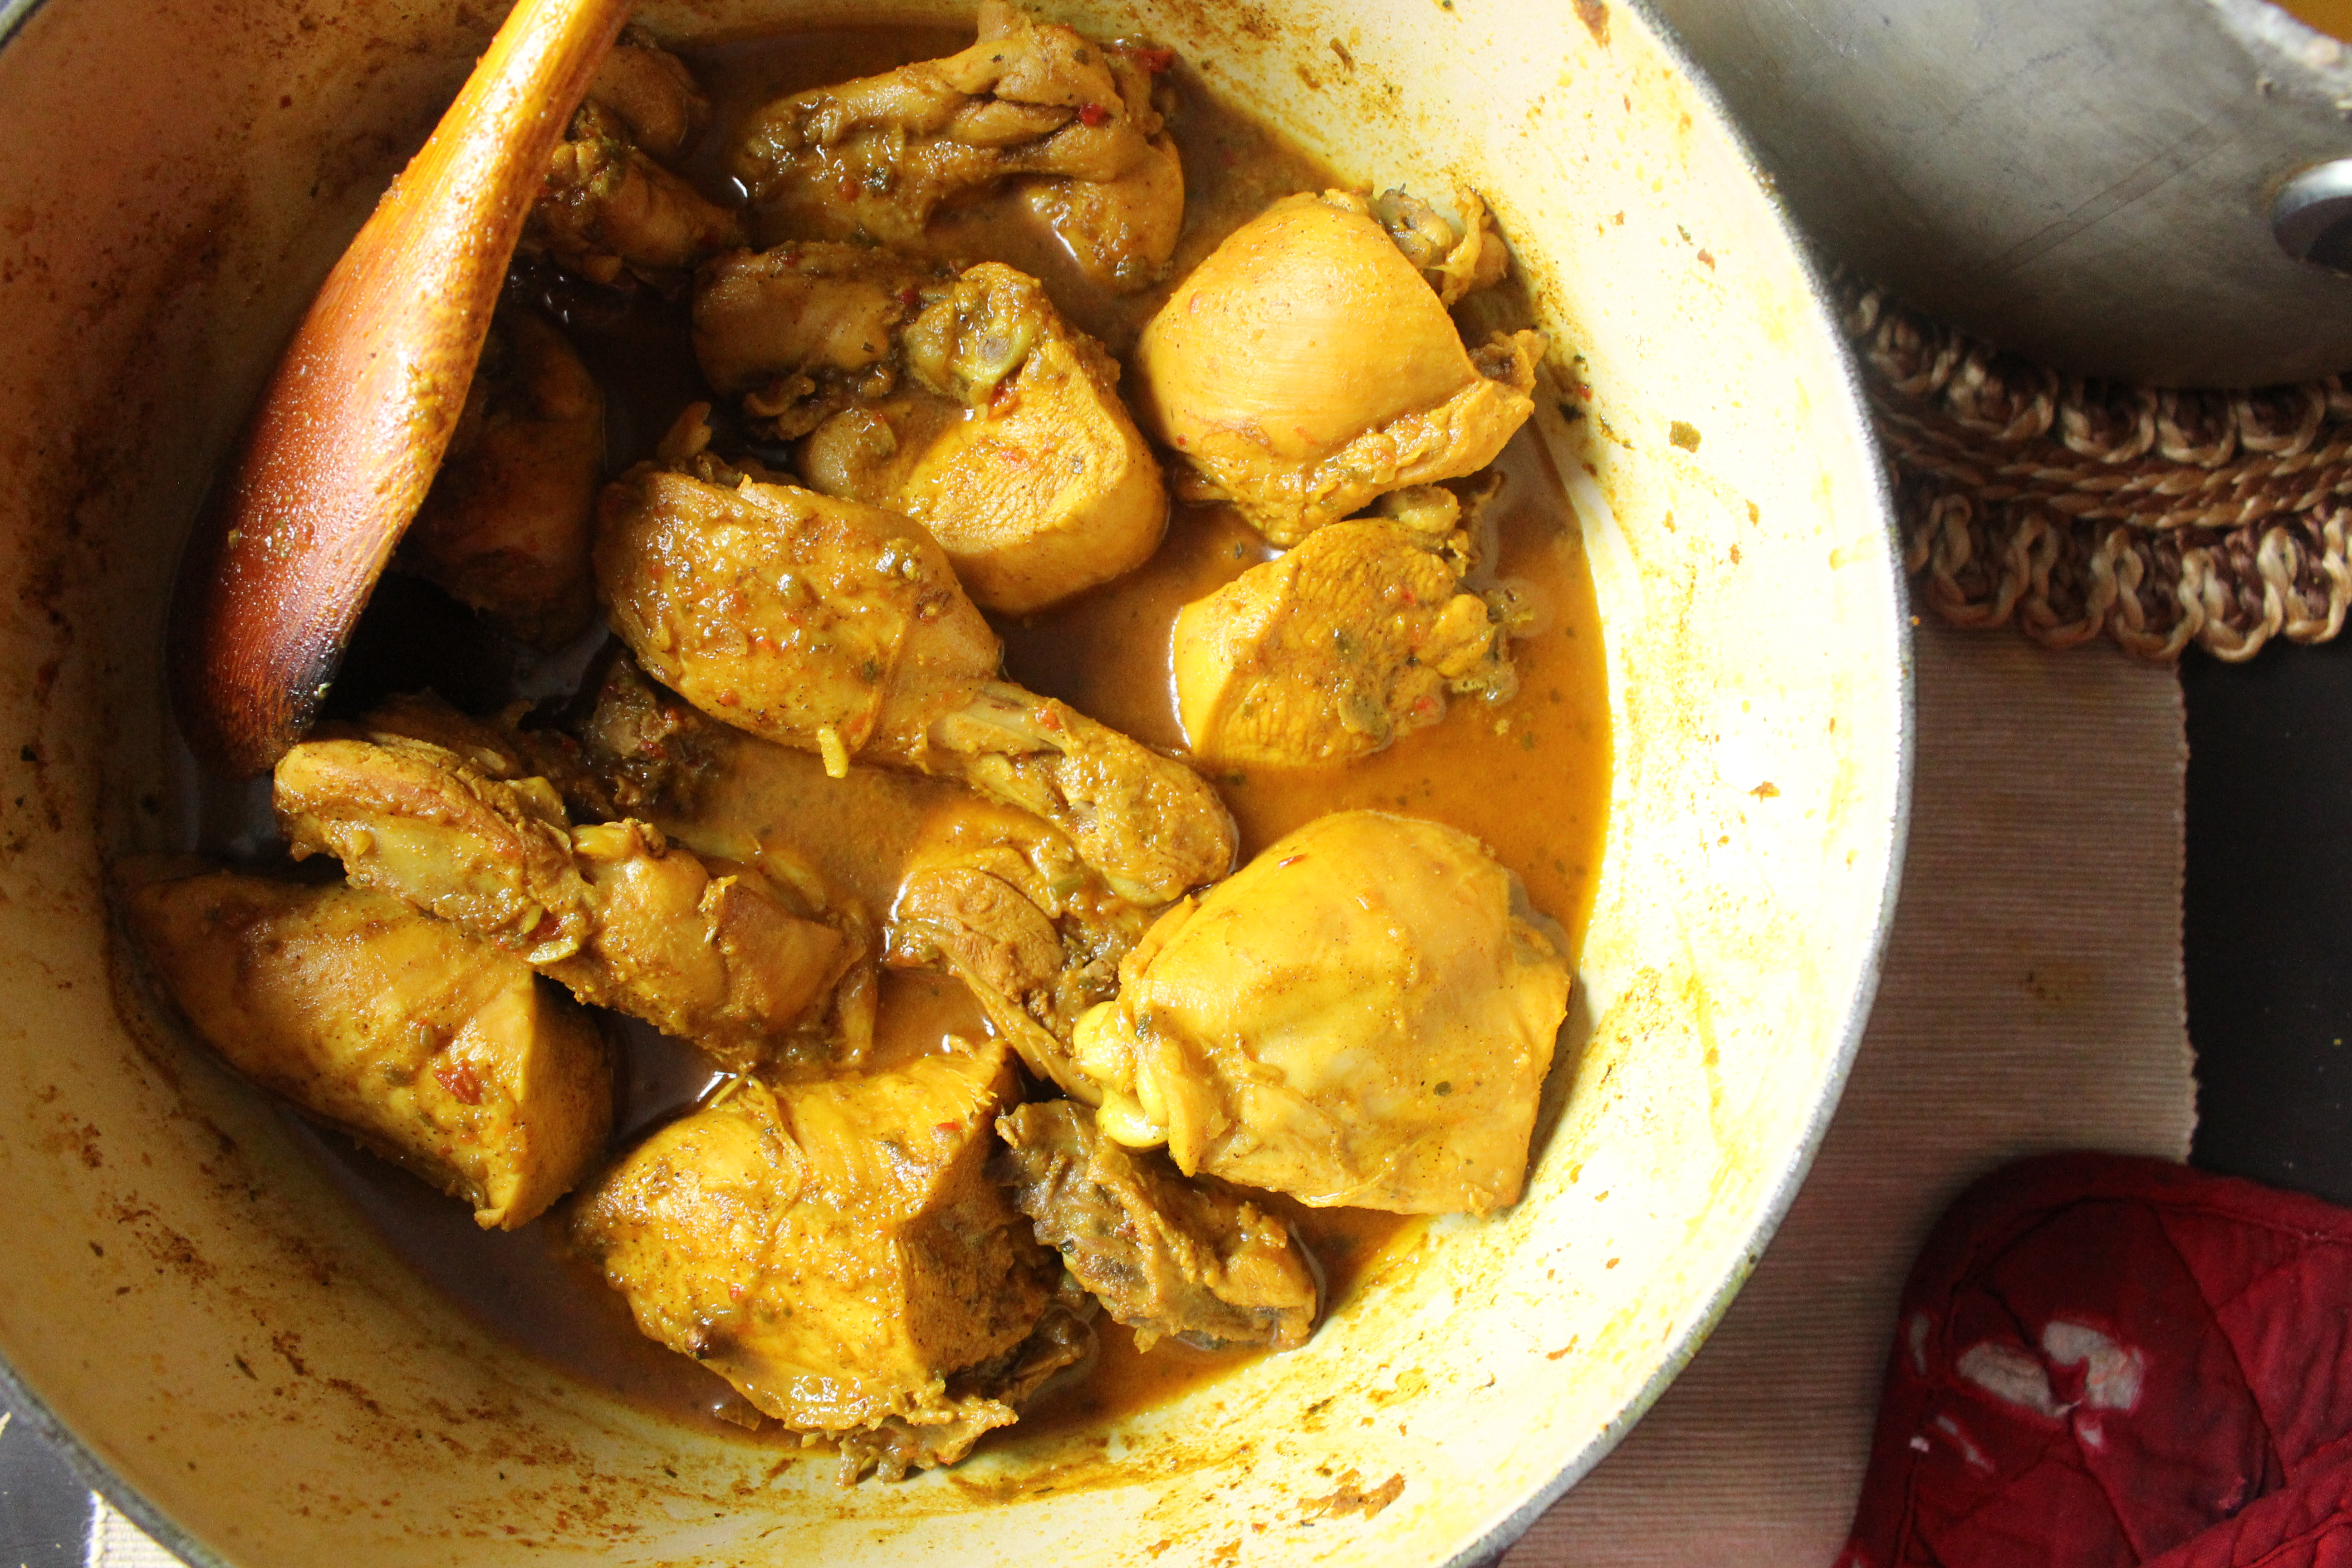
IMG_6344There is no coconut milk in your chicken curry if you are Bengali. There is no curry paste or any other amalgamation of ingredients someone else deems necessary for your comfort-in-a-bowl chicken curry. There is only your mother, your childhood, the pieces of white meat that no one ever wanted, the potatoes that you cared for only on some days, the jhol (broth) that was literally chicken soup for your soul (but only the first day, after that it just got too cardamom-y), and the leftover bones that you LOVED to chew on as you churned out every last drop of flavor but NEVER admitted to doing outside of bengali circles.

Of course this is my childhood we are recollecting and thus my mother’s recipe. There is very little room for improvement…though one could probably use chicken stock (even better, homemade chicken stock) in lieu of the water. Let’s leave that for another day, another post. For now, amidst the pristine image laid out for you of a little girl enjoying every minute of being elbow deep in her favorite food, there are some hidden perils that threaten. Hear me out: have you ever, during the course of your meal ever landed on a “flavor bomb” ? One of those whole peppercorns, cloves or worse, entire cardamom pod?? It’s disgusting! It’s painful! It’s downright heinous. Takes half the joy out of the meal. I just thought of taking the extra step of pouring the jhol through a sieve and voila! Flavor. Bomb. Out.

I hope this recipe takes you back to your childhood!

Ingredients

  • 1/4 cup vegetable oil
  • 1 medium yellow onion, sliced
  • 1 heaping tsp cumin power
  • 1 heaping tsp coriander
  • 1 tsp turmeric
  • 1/2 tsp chili powder (use more or less depending on the potency of your chili powder and how spicy you like it)
  • 1 3 lb chicken cut into curry pieces (either 10 or 12 pieces in total)
  • 1 tsp garlic paste (or minced garlic)
  • 1 tsp ginger paste (or minced ginger)
  • 1 – 1.5 cups of water (water should come about 2/3 of the way up the sides, not covering the meat)
  • 1.5 tsp kosher salt, plus more to taste
  • 1 bay leaf
  • 1 cinnamon stick or 1 tsp ground cinnamon
  • 4 whole cloves
  • 4 whole cardamom pods or 1/4 tsp cardamom
  • 5-6 whole peppercorns

Directions

  1. Heat the oil over medium high heat in a saucepan or any medium sized pot (about 4 qts) with high sides. Add the onion and let soften for 4-5 min. While onion cooks, prep your garlic and ginger, if necessary, and combine the ground spices in a bowl.
  2. Add spices to the onions, mixing well. Add the chicken pieces, turning to coat with as much of the masala mixture as possible. Let the chicken and spices cook for 4-5 minutes, taking care not to burn the spices (reduce the heat if necessary). Add garlic, ginger, water, salt, bay leaf, cinnamon, cloves, cardamom and peppercorns. Stir, then increase the heat to bring to a boil.
  3. Reduce to a simmer and cover. Let simmer for 20-25 minutes, removing the lid during the last 10 minutes if there is too much liquid.
  4. Check for seasoning. Add more salt or spice as needed.
  5. Optional: Transfer chicken pieces to a serving bowl. Pour the broth through a sieve to catch all the whole spices and push through all the last bits of curry through the sieve using a spoon.

Variations

For a bigger (4 to 5 lb chicken)

  • 1/3 cup vegetable oil
  • 1.5 to 2 small yellow onions, sliced
  • 1.5 heaping tsp cumin power
  • 1.5 heaping tsp coriander
  • 1.5 tsp turmeric
  • 3/4 tsp chili powder (use more of less depending on the potency of your chili powder and how spicy you like it)
  • 1 4 to 5 lb chicken cut into curry pieces (about 12 in total)
  • 1.5 tsp garlic paste (or minced garlic)
  • 1.5 tsp ginger paste (or minced ginger)
  • about 2 cups of water
  • 2 tsp kosher salt, plus more to taste
  • 1 bay leaf
  • 1 cinnamon stick
  • 5-6 whole cloves
  • 5-6 whole cardamom pods
  • 7-8 whole peppercorns

Increase cooking time by 2-3 minutes, testing the thickest part of the thigh to check for doneness.

To give it a refresh

Try sautéing some tomatoes into a large fry pan or wok and add the leftover chicken curry. When thoroughly heated through, remove from heat and add some chopped fresh cilantro.

4 Comments · Labels: Bengali, Main, Protein, Recipes Tagged: bengali, chicken, curry, dinner, south asian

South Asian rice pudding (Kheer)

February 29, 2012

Apologies for dragging him into yet another one of my posts, but I’ll do it anyway. One of the many things my dear husband and I bond over is our mutual disdain for South Asian sweets. It seems they’re all permutations of milk products or by products, overly sweetened and offering little by way of depth of flavor (think: golap jam, rosh golla, malai kari and so on). We have, however, a few exceptions:  sweet doi (yogurt), rosh malai and my Rahima Aunty’s kheer.

This is a very traditional dish done in a not-so-traditional way. In the olden days, you would slave over a hot stove all day, slowly reducing a vat of milk to about half, then adding the rice and sugar until cooked and sufficiently thickened. Rahima Aunty has figured out a way to cut down the cooking time and even add richness by using a 2:1 milk to heavy cream combination. She also blitzes the rice (increasing the surface area), which allows the starches to develop further, resulting in super thick and creamy, almost gelatinous pudding.

To achieve the traditional smokey flavor of a gurer (date molasses) kheer, I’d highly recommend picking up some from your local South Asian market. I haven’t tried it with regular molasses, but you’re welcome to give it a shot! And of course, because I can never just stick to a recipe, I added a dash of salt and bit of vanilla to round out the flavors. I’ve already made a serious dent to the bowl…thanks, Aunty!

Ingredients:

  • 1/2 cup basmati rice
  • 4 cups whole milk
  • 2 cups heavy cream
  • 3/4 cup date molasses
  • 3/4 tsp vanilla
  • dash salt
  • 1 tbsp butter (or ghee [clarified butter])

Directions

Soak the rice in water for 8 hours or overnight.

When ready to prepare the pudding, drain the rice and dump into a food processor. Pulse to break up the rice (don’t overdo this step…you don’t want a paste).

Combine milk and cream in a medium saucepan over high heat. Bring to a boil and reduce the heat to a simmer. Pour in the rice and simmer until the rice is cooked through, stirring occasionally (about 20 minutes). Continue to simmer until reduced, for 15 minutes. Add molasses, vanilla and salt and stir continuously for the last 5 minutes. Off the heat, add the butter (or ghee) until melted.

Pour into serving bowl immediately and cover with plastic wrap to keep a skin from forming.

2 Comments · Labels: Bengali, Carb, Dessert, Recipes Tagged: bengali, dairy, dessert, firni, heavy cream, kheer, rice, rice pudding, south asian

  • Newer Entries
  • 1
  • 2
American, Bangladeshi. Savory, sweet. I don't discriminate and neither should you.

Most recently…

Load More...
Follow on Instagram

Social

Subscribe to Blog via Email

Enter your email address to subscribe to this blog and receive notifications of new posts by email.

Tags

appetizer beef bengali breakfast butter cake caramel chicken chocolate chocolate chips cilantro clean eating coconut comfort food cookies dessert dinner entertaining fall fruit ganache gluten free halal healthy homemade honest chops honest creations iftar italian pasta pastry pistachio quick and easy dinner ramadan recipe side side dish south asian spinach vegan vegetables vegetarian weeknight dinner weeknight meal whipped cream

Theme by 17th Avenue · Powered by WordPress & Genesis