Kitchen3N

Recipes and food fun from Apt 3N

  • About
  • Gallery
  • Recipes

The Last Chocolate Chunk Cookie

January 4, 2018

fullsizeoutput_6ccd
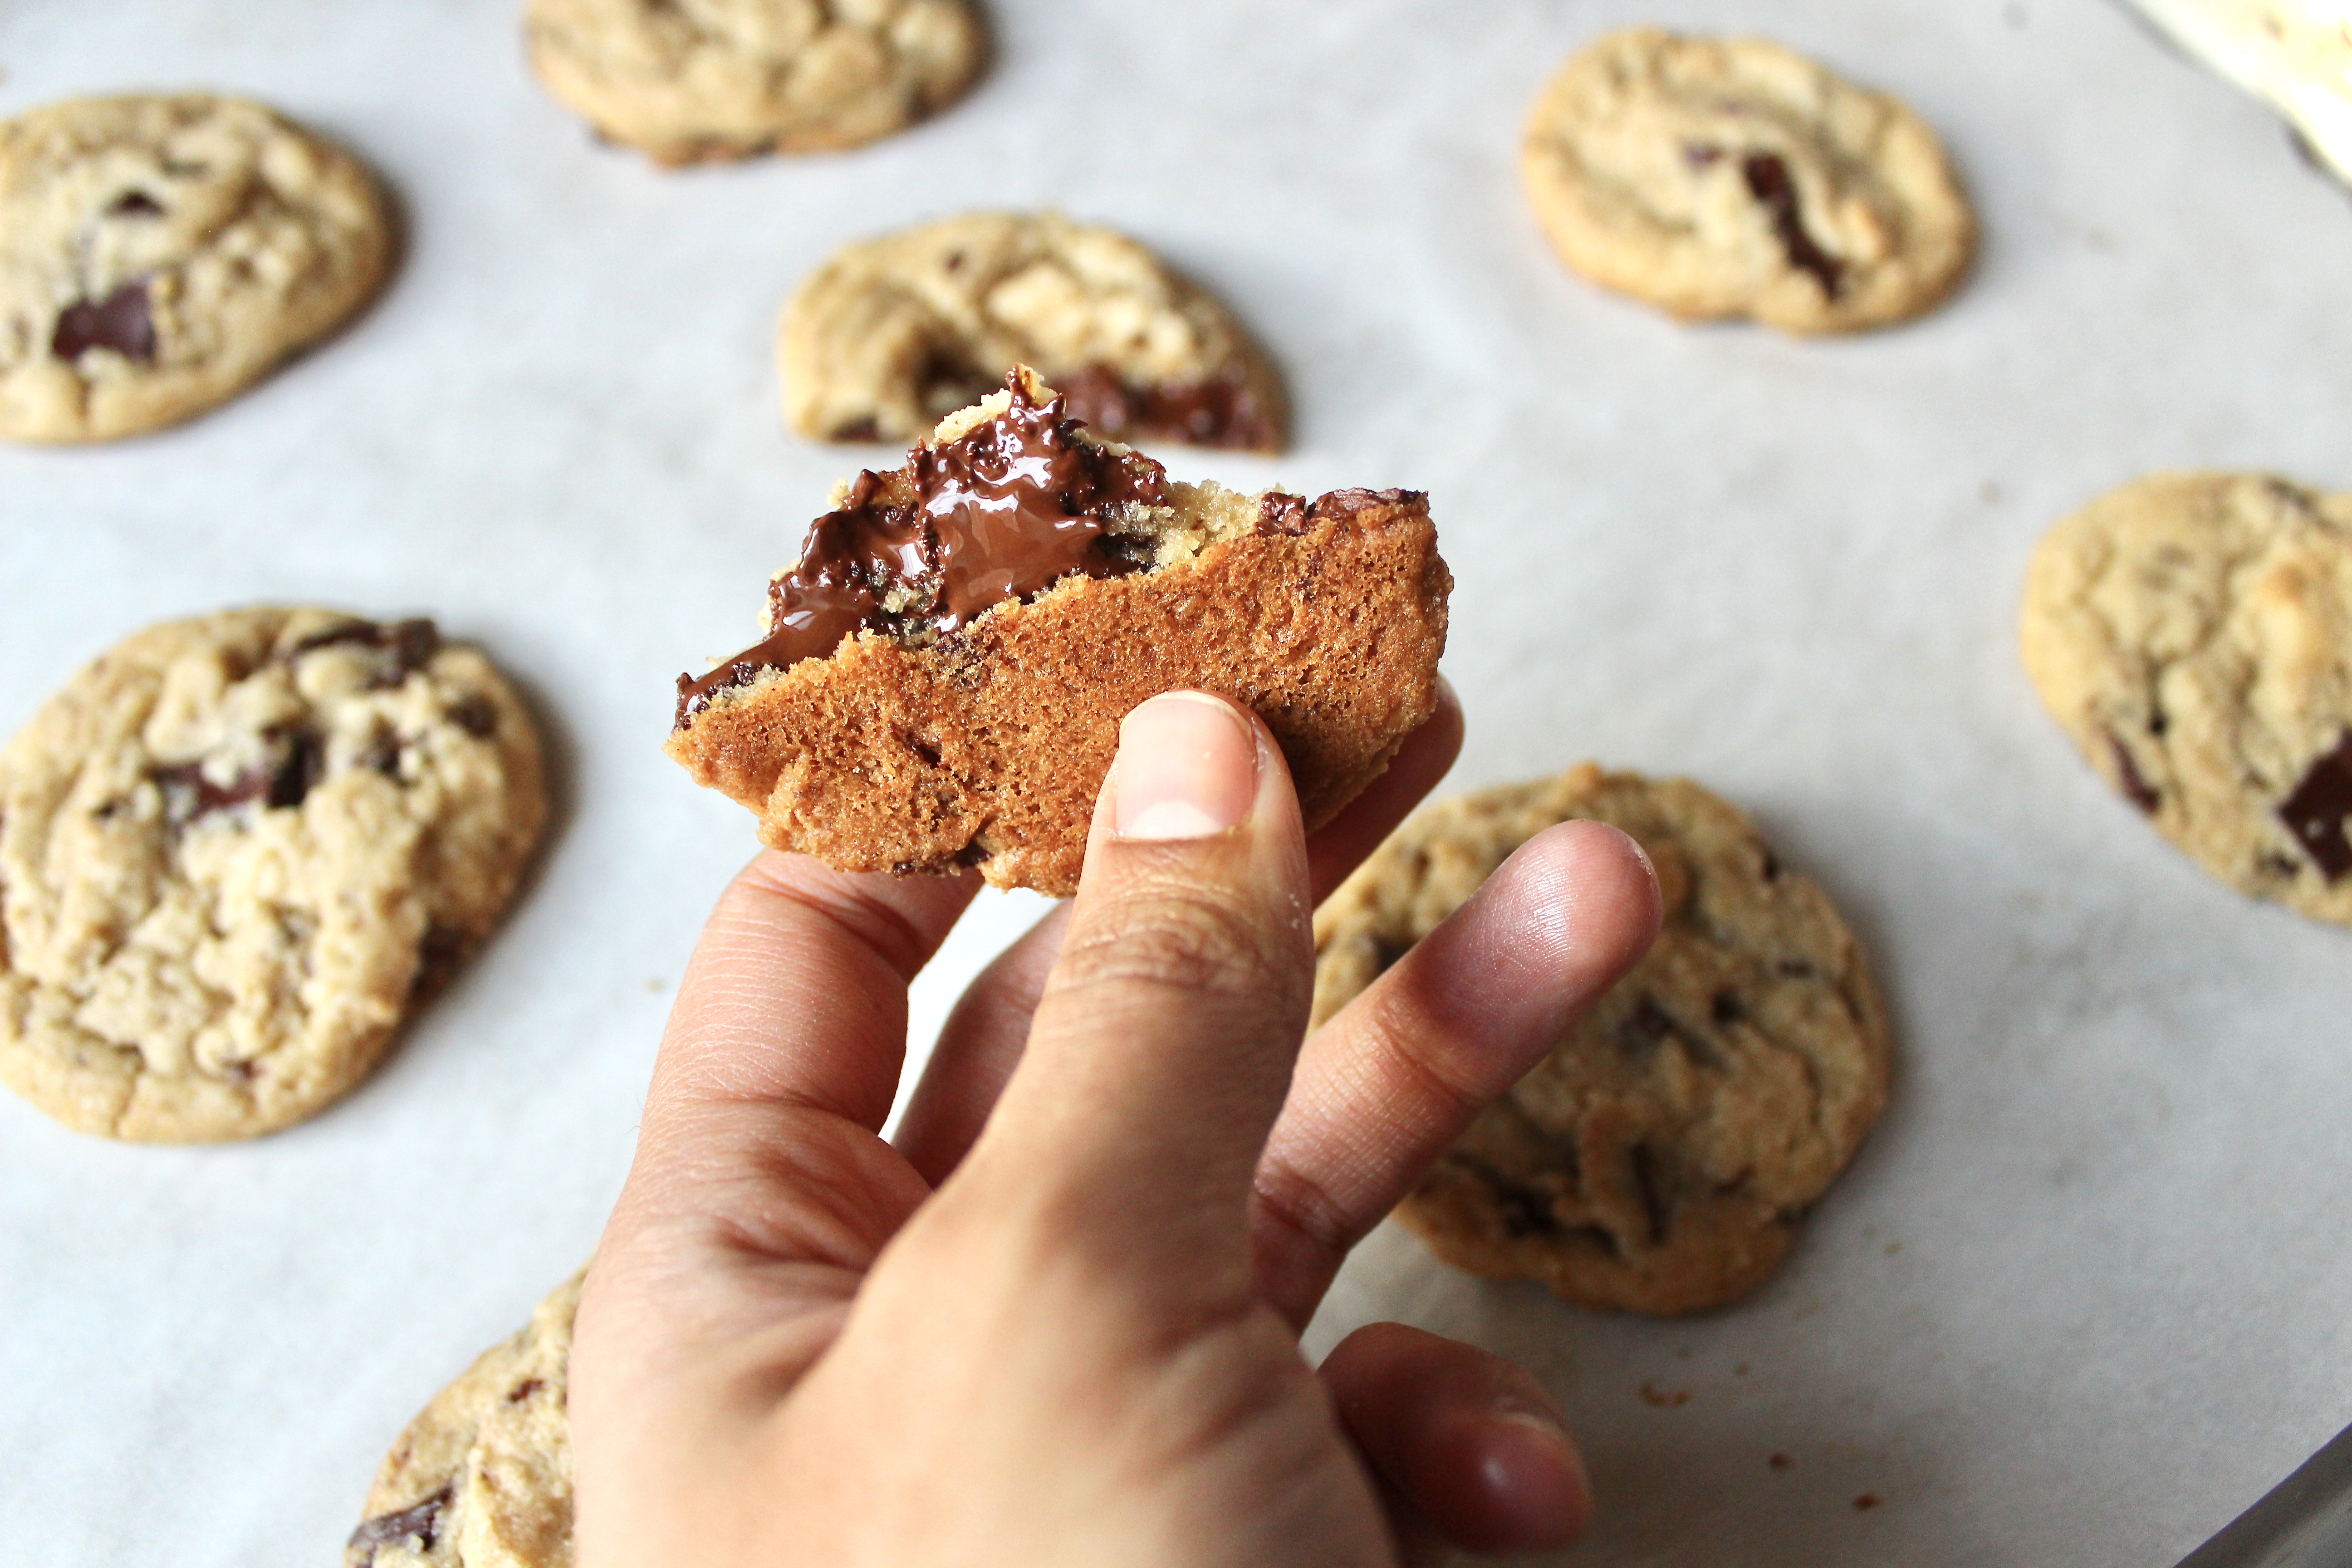
When I die, I want this recipe printed on my tombstone.
img_0939
Just kidding, Muslims don’t do tombstones.
img_0948
But this really is the cookie I’ve been searching for all my life. Free of all the silly things people add to chocolate chip cookies (CCC’s from here on out) to one up their game like extra SALT on top or TAHINI or the worst of all, NUTS. I don’t understand the need to muck up the most brilliant baking invention of all time with things that are not chocolate, flour, sugar, butter, leaveners, salt or vanilla. The original Nestle Toll House recipe, as brilliant as is, is missing a little complexity, and little texture.
img_0940
I’ve tried SO many CCC recipes. Bang on a Pan. The Chewy. The Thin. Something from Buzzfeed. Tahini. Nestle. America’s Test Kitchen. And they all have their redeeming qualities. But for me, the NY Times recipe by David Leite is the closest I’ve come to perfection: a combination of cake flour and bread flour, one makes it tender, the other adds a chewy texture. A full 2 tsp vanilla for extra flavor. Refrigerating the dough to let the gluten relax.
img_0959
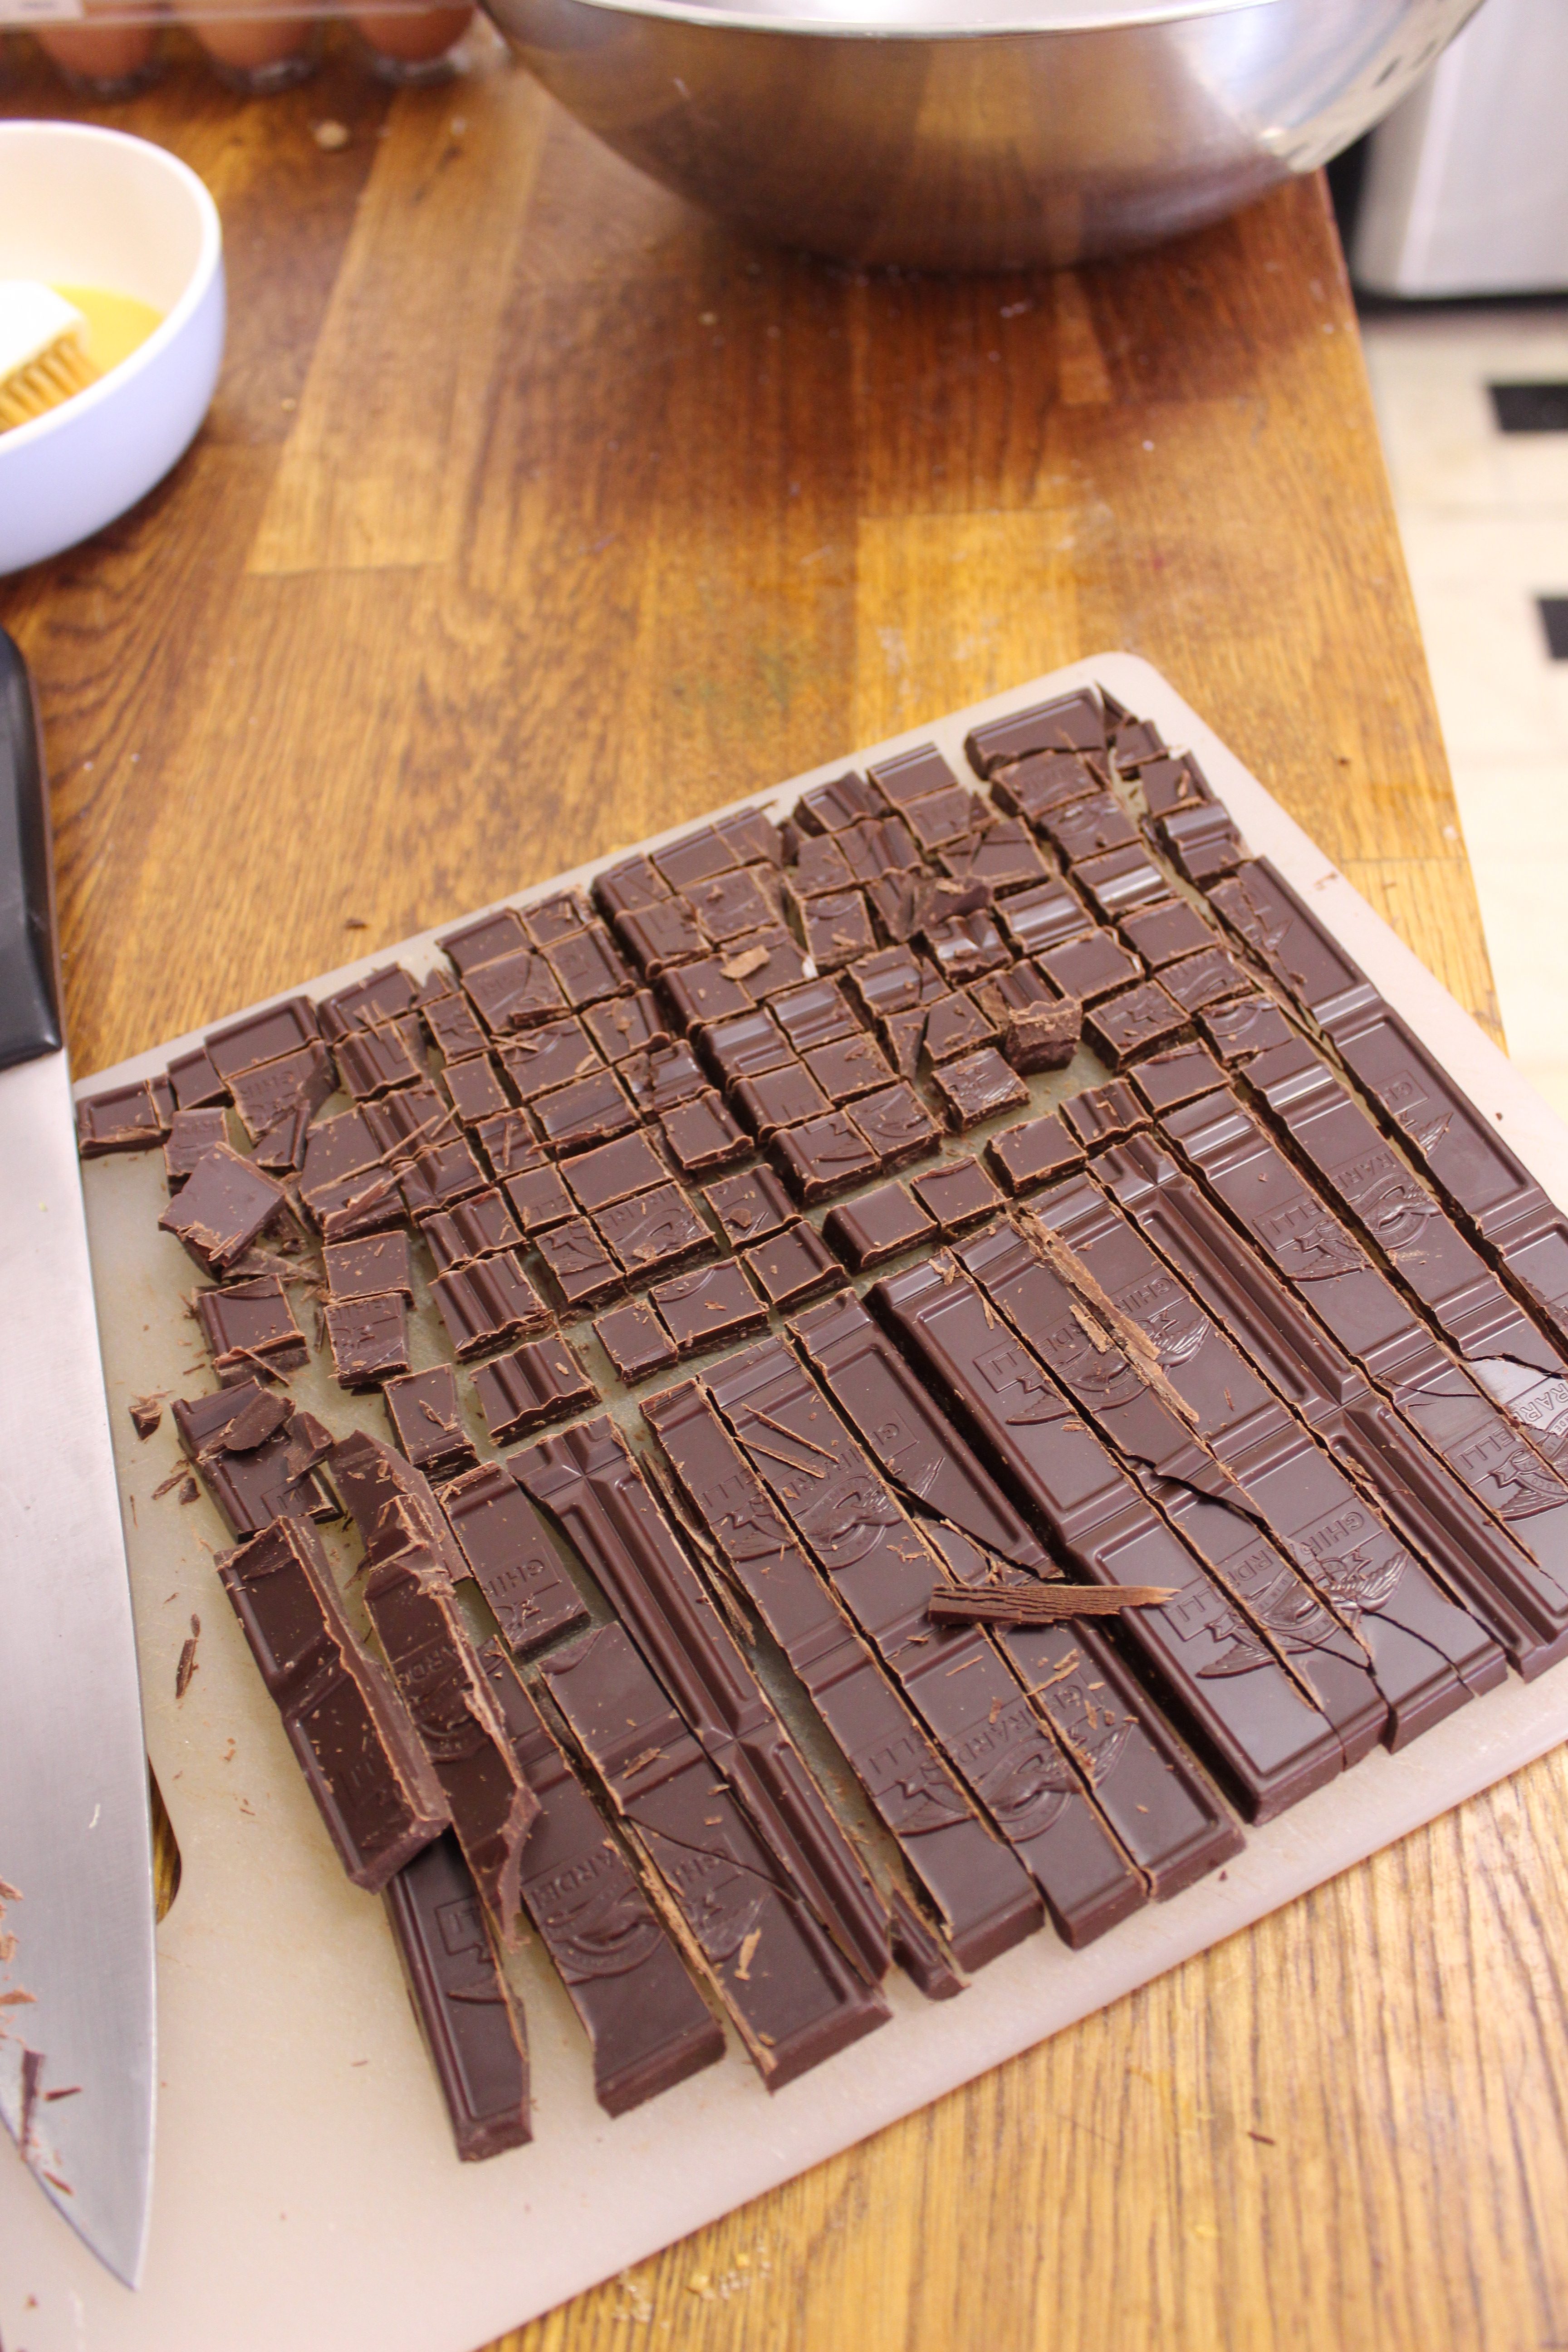
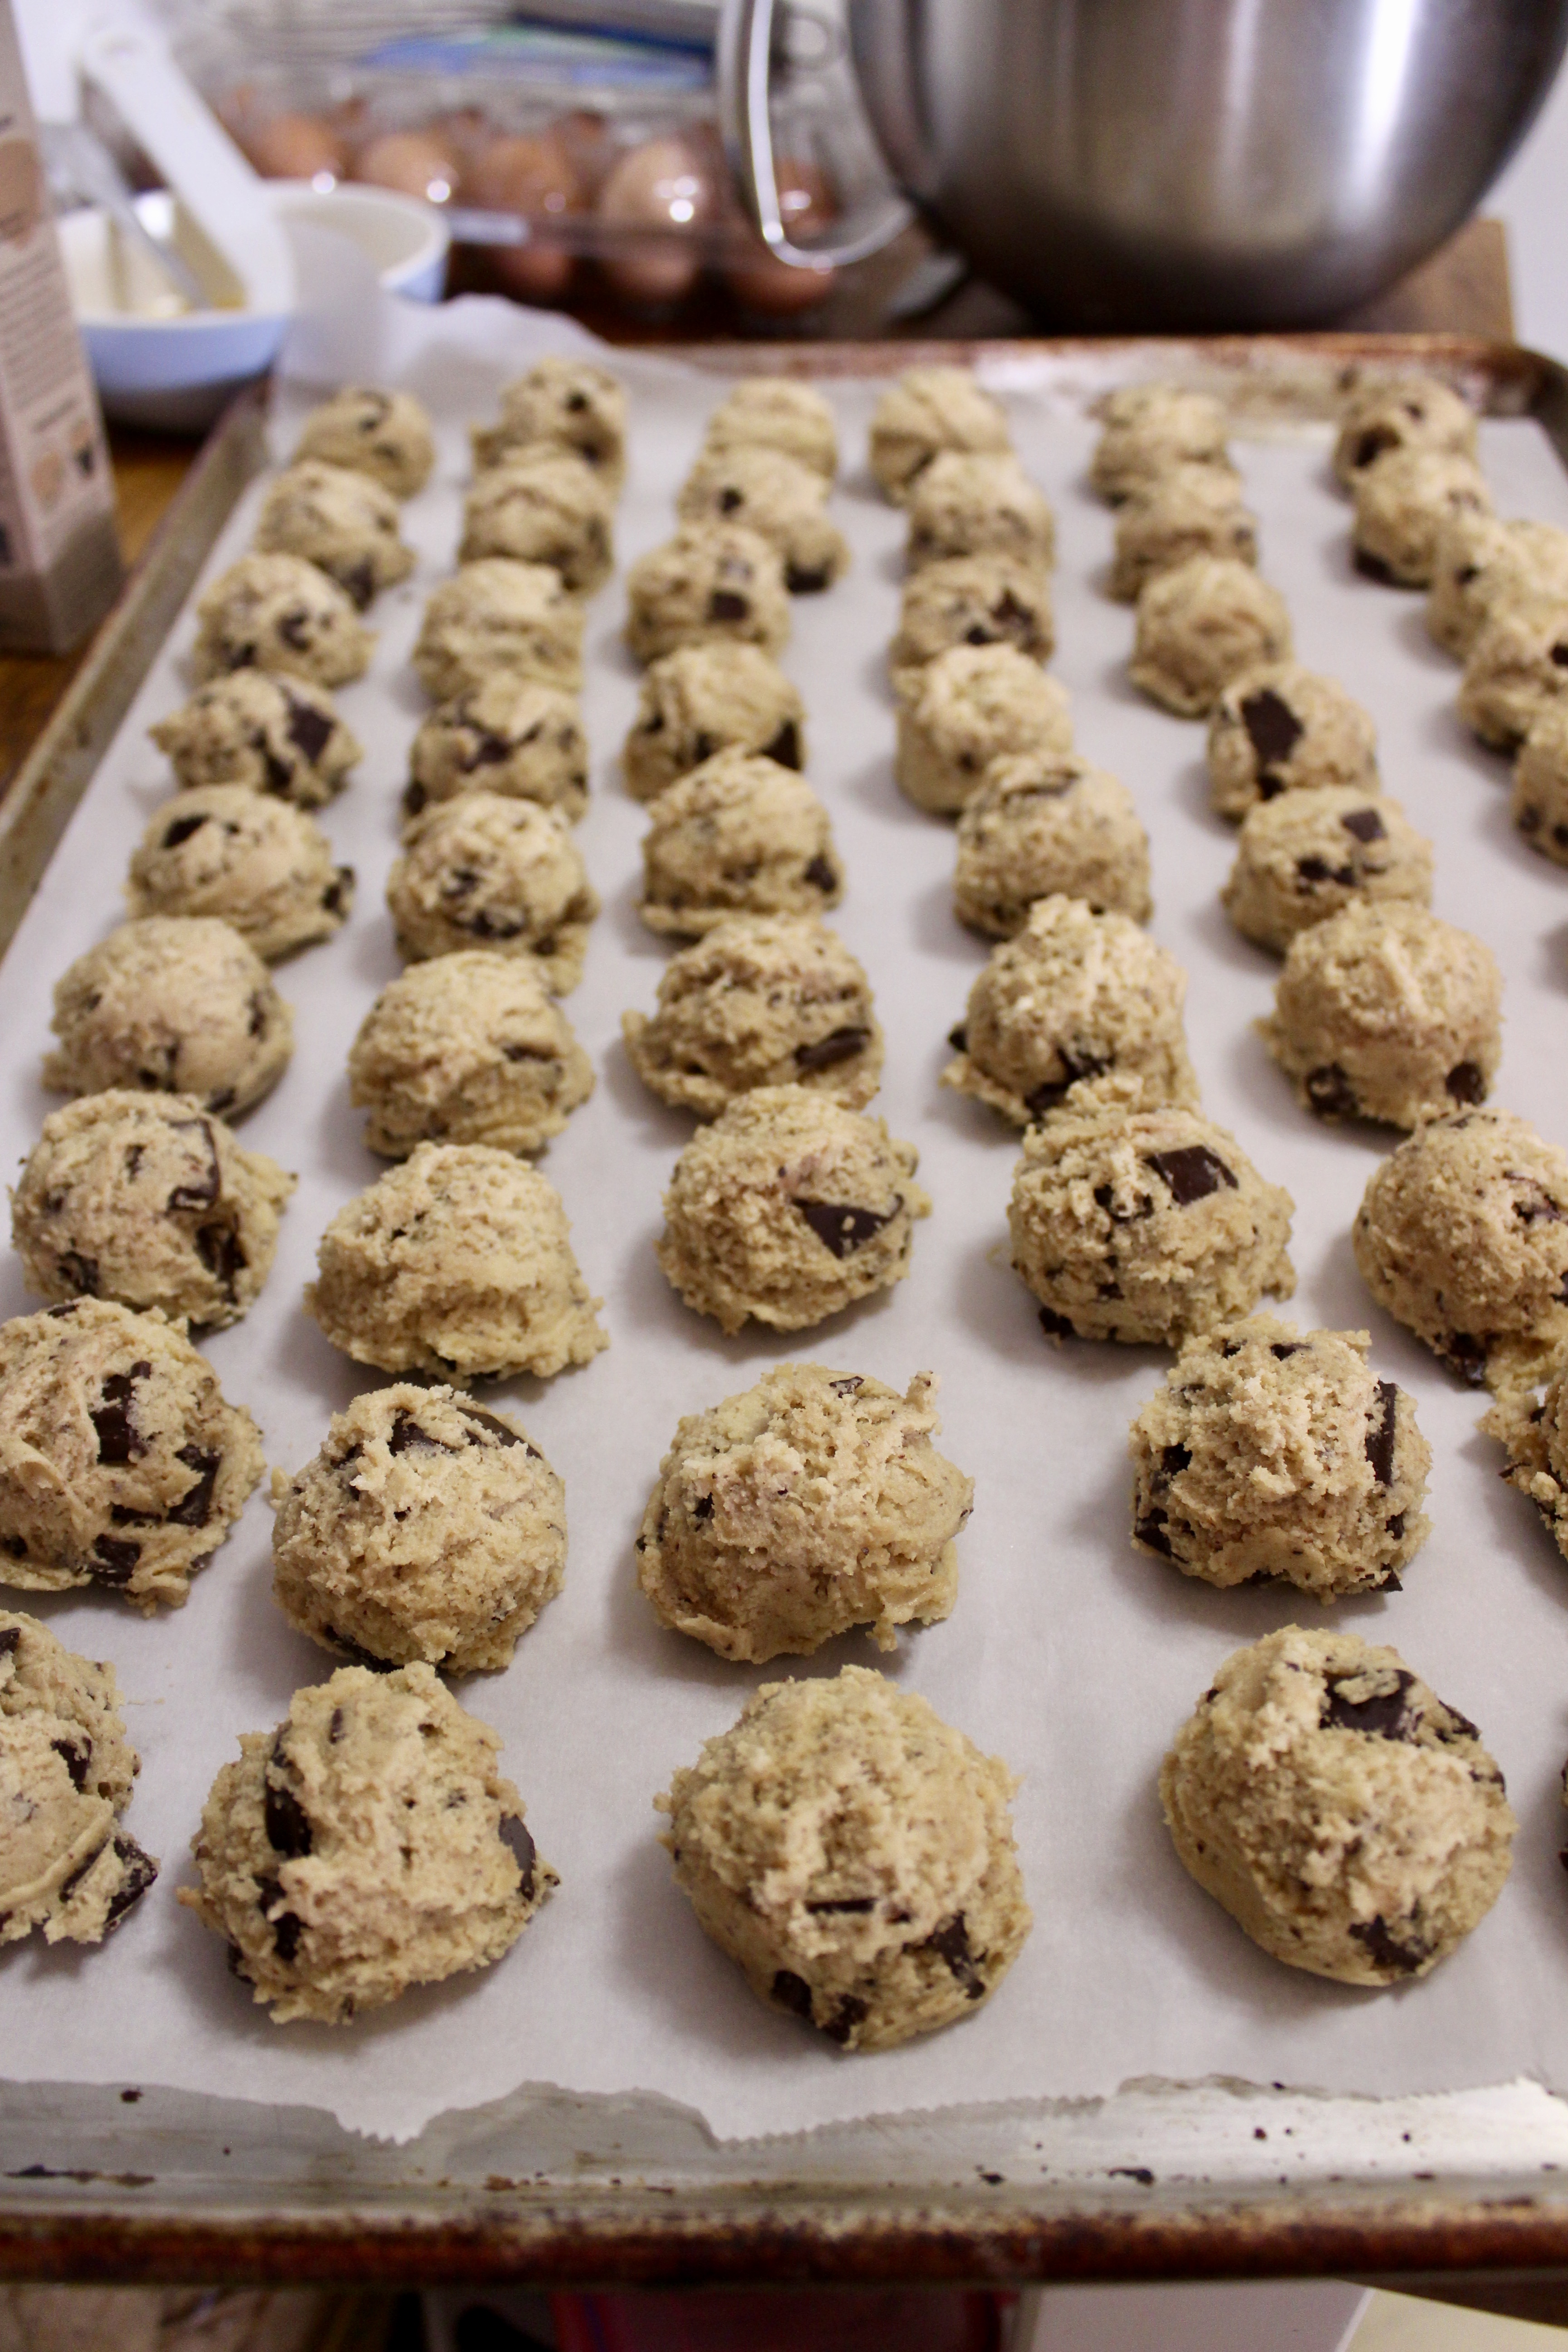
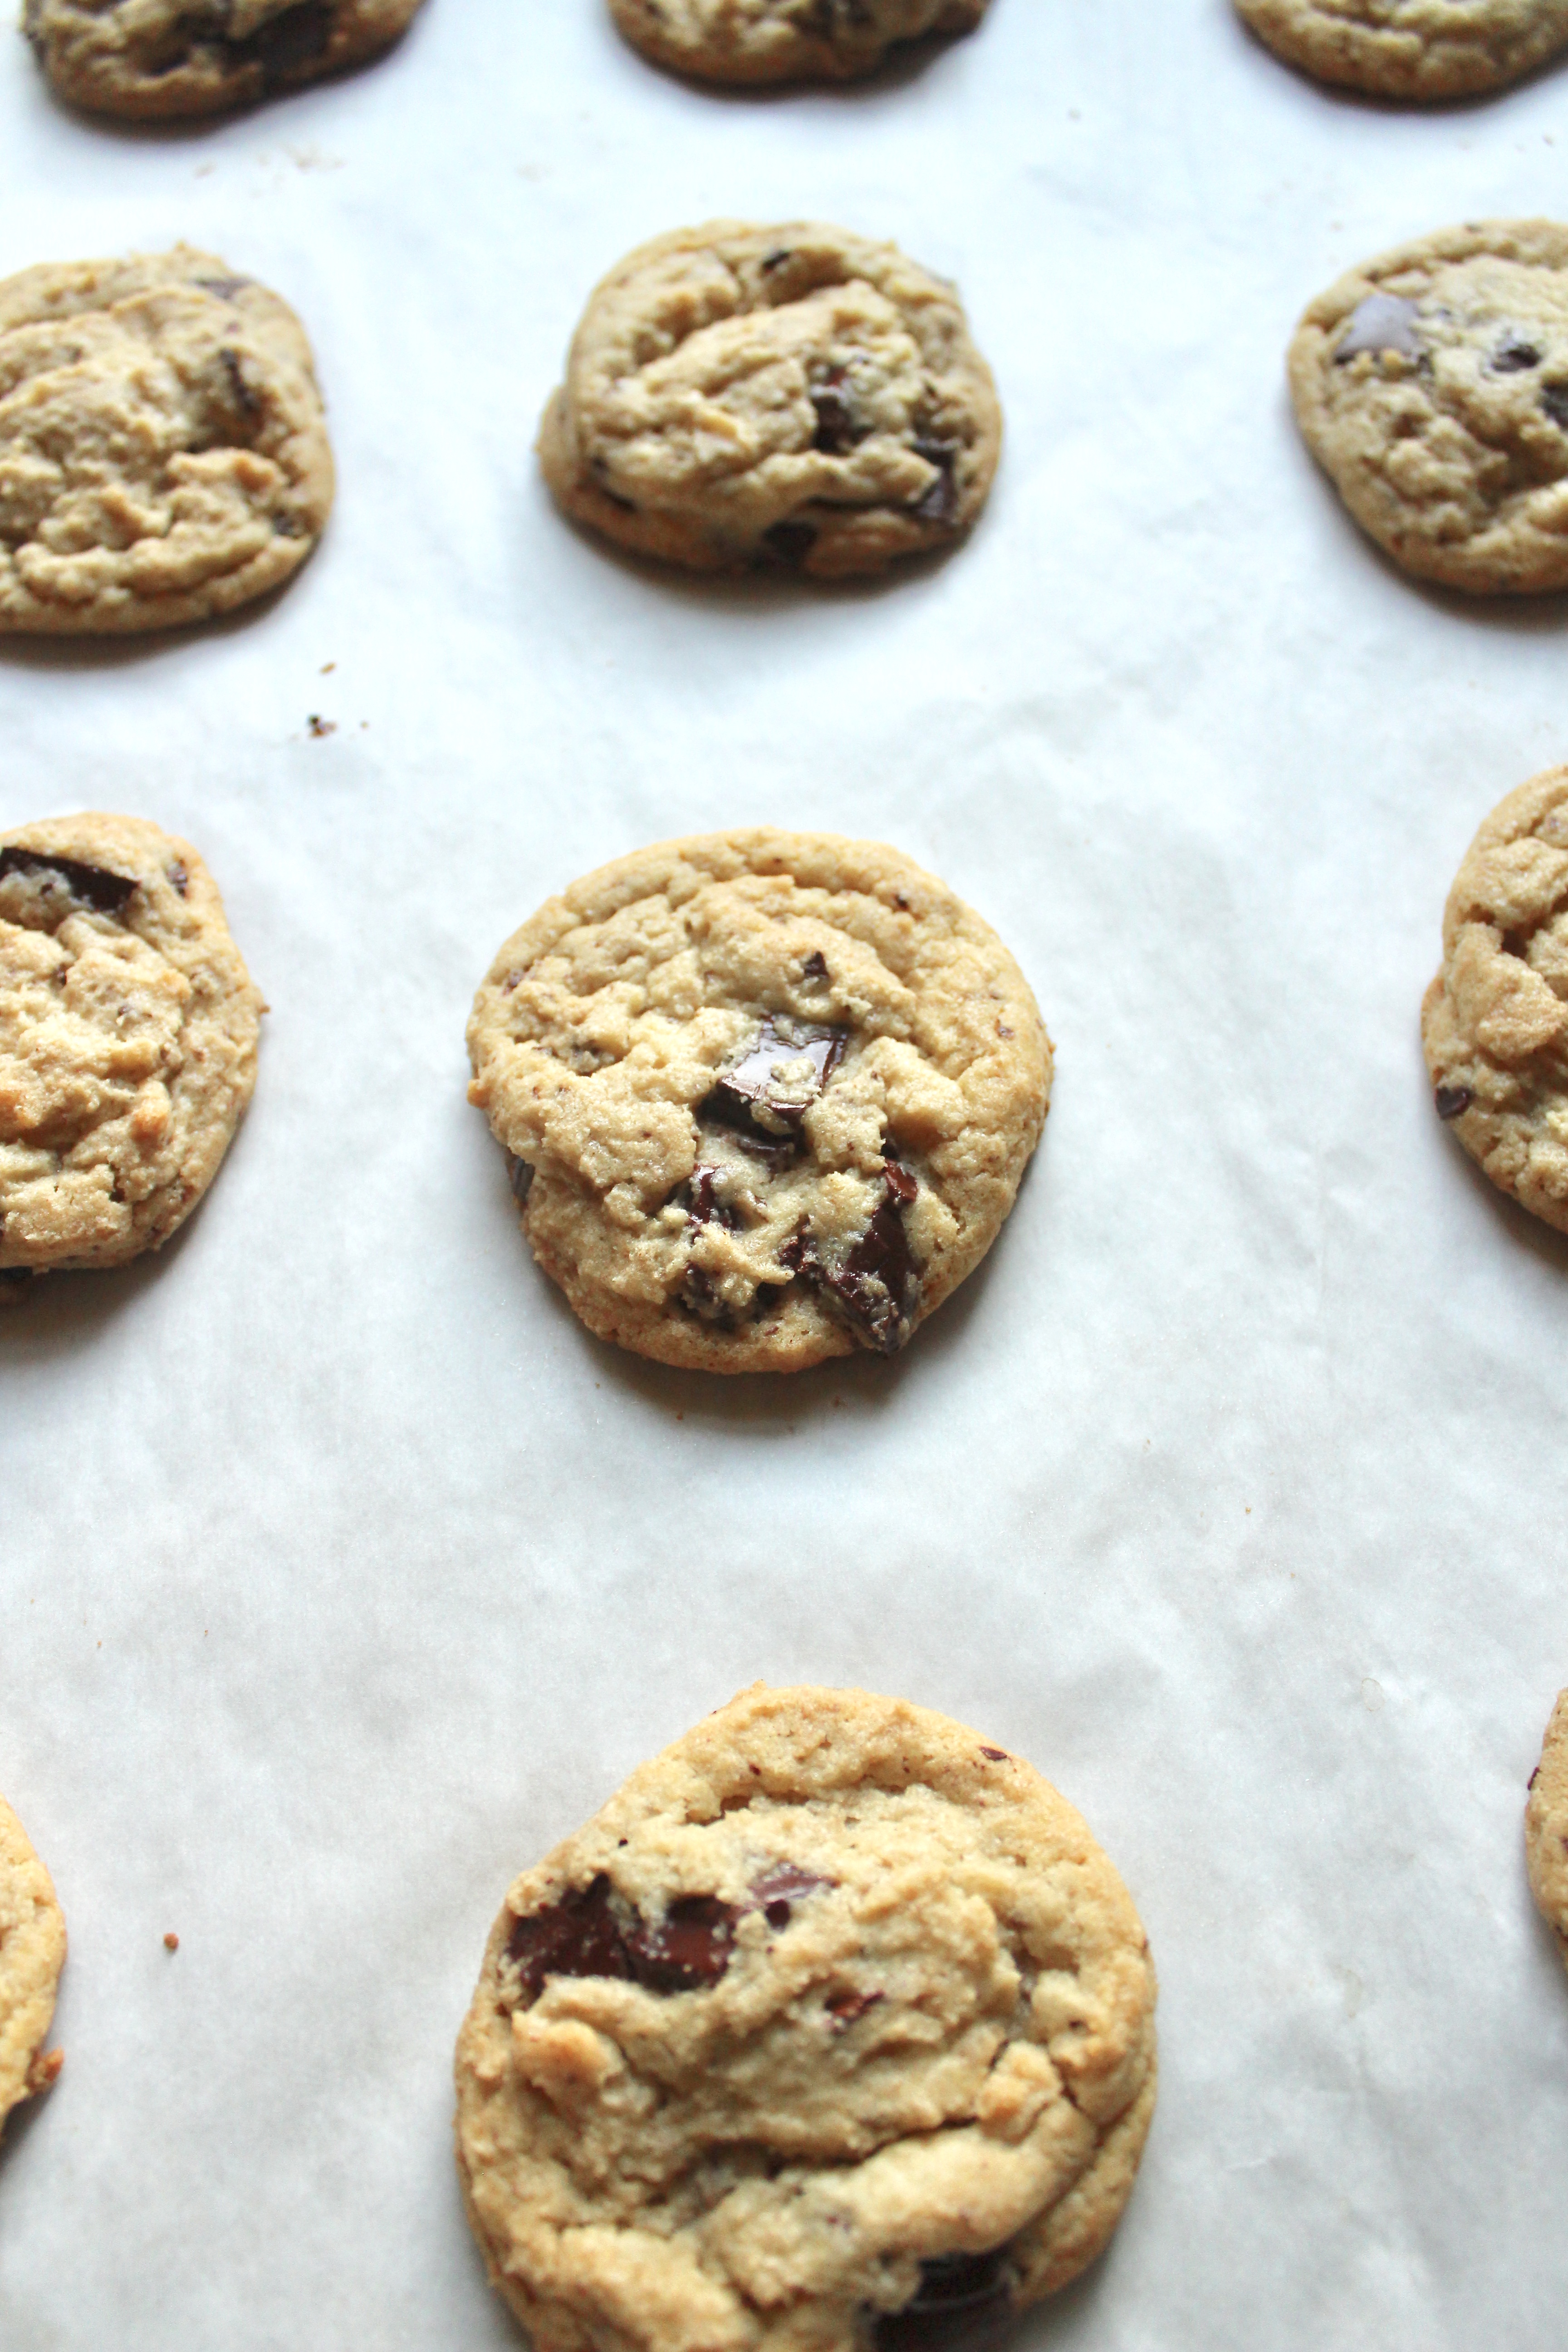
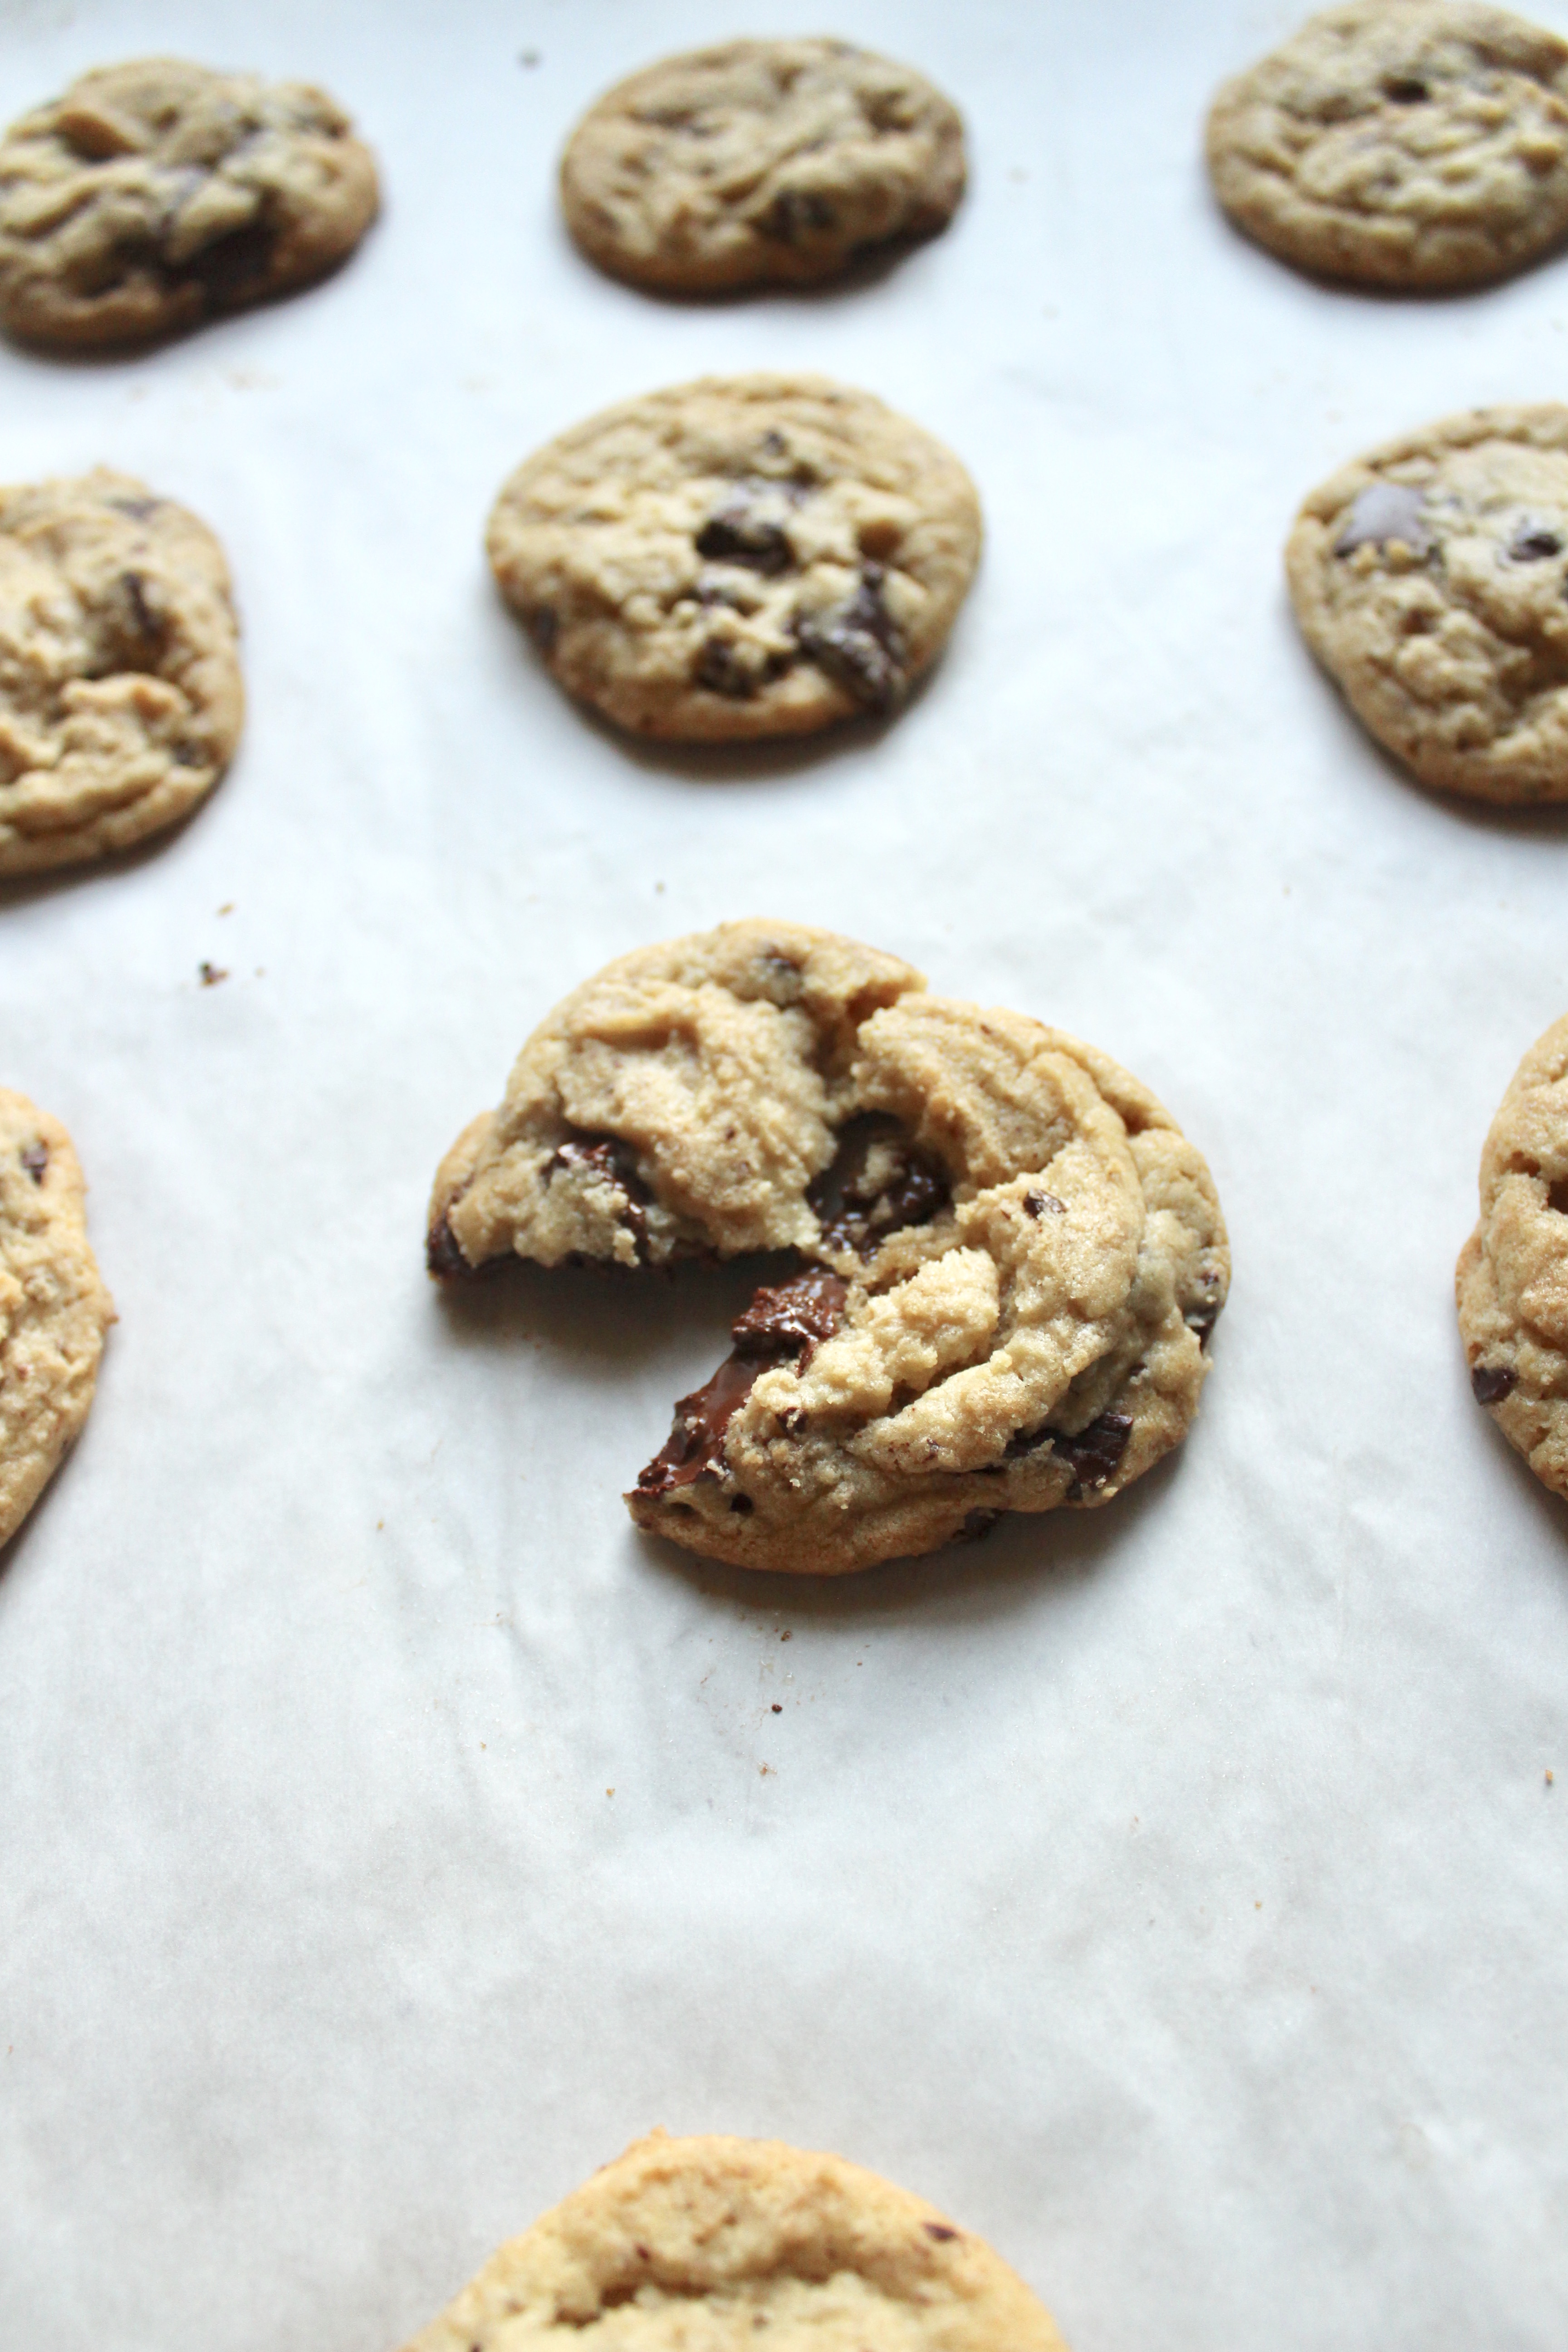
I did need to tweak it to my tastes. I use my trusty OXO medium cookie scoop for perfect sizing. I use chocolate chunks in lieu of chocolate disks/feves/chips and I reduce the amount of chocolate from the original recipe. I know I make fun of my husband a lot for his critiquing the amount of chocolate in the original recipe, but he’s kind of right. The 16oz that I have here gives you a generous amount of chocolate (use good quality!) while allowing you to taste the nutty, buttery, chewy cookie.
img_0950
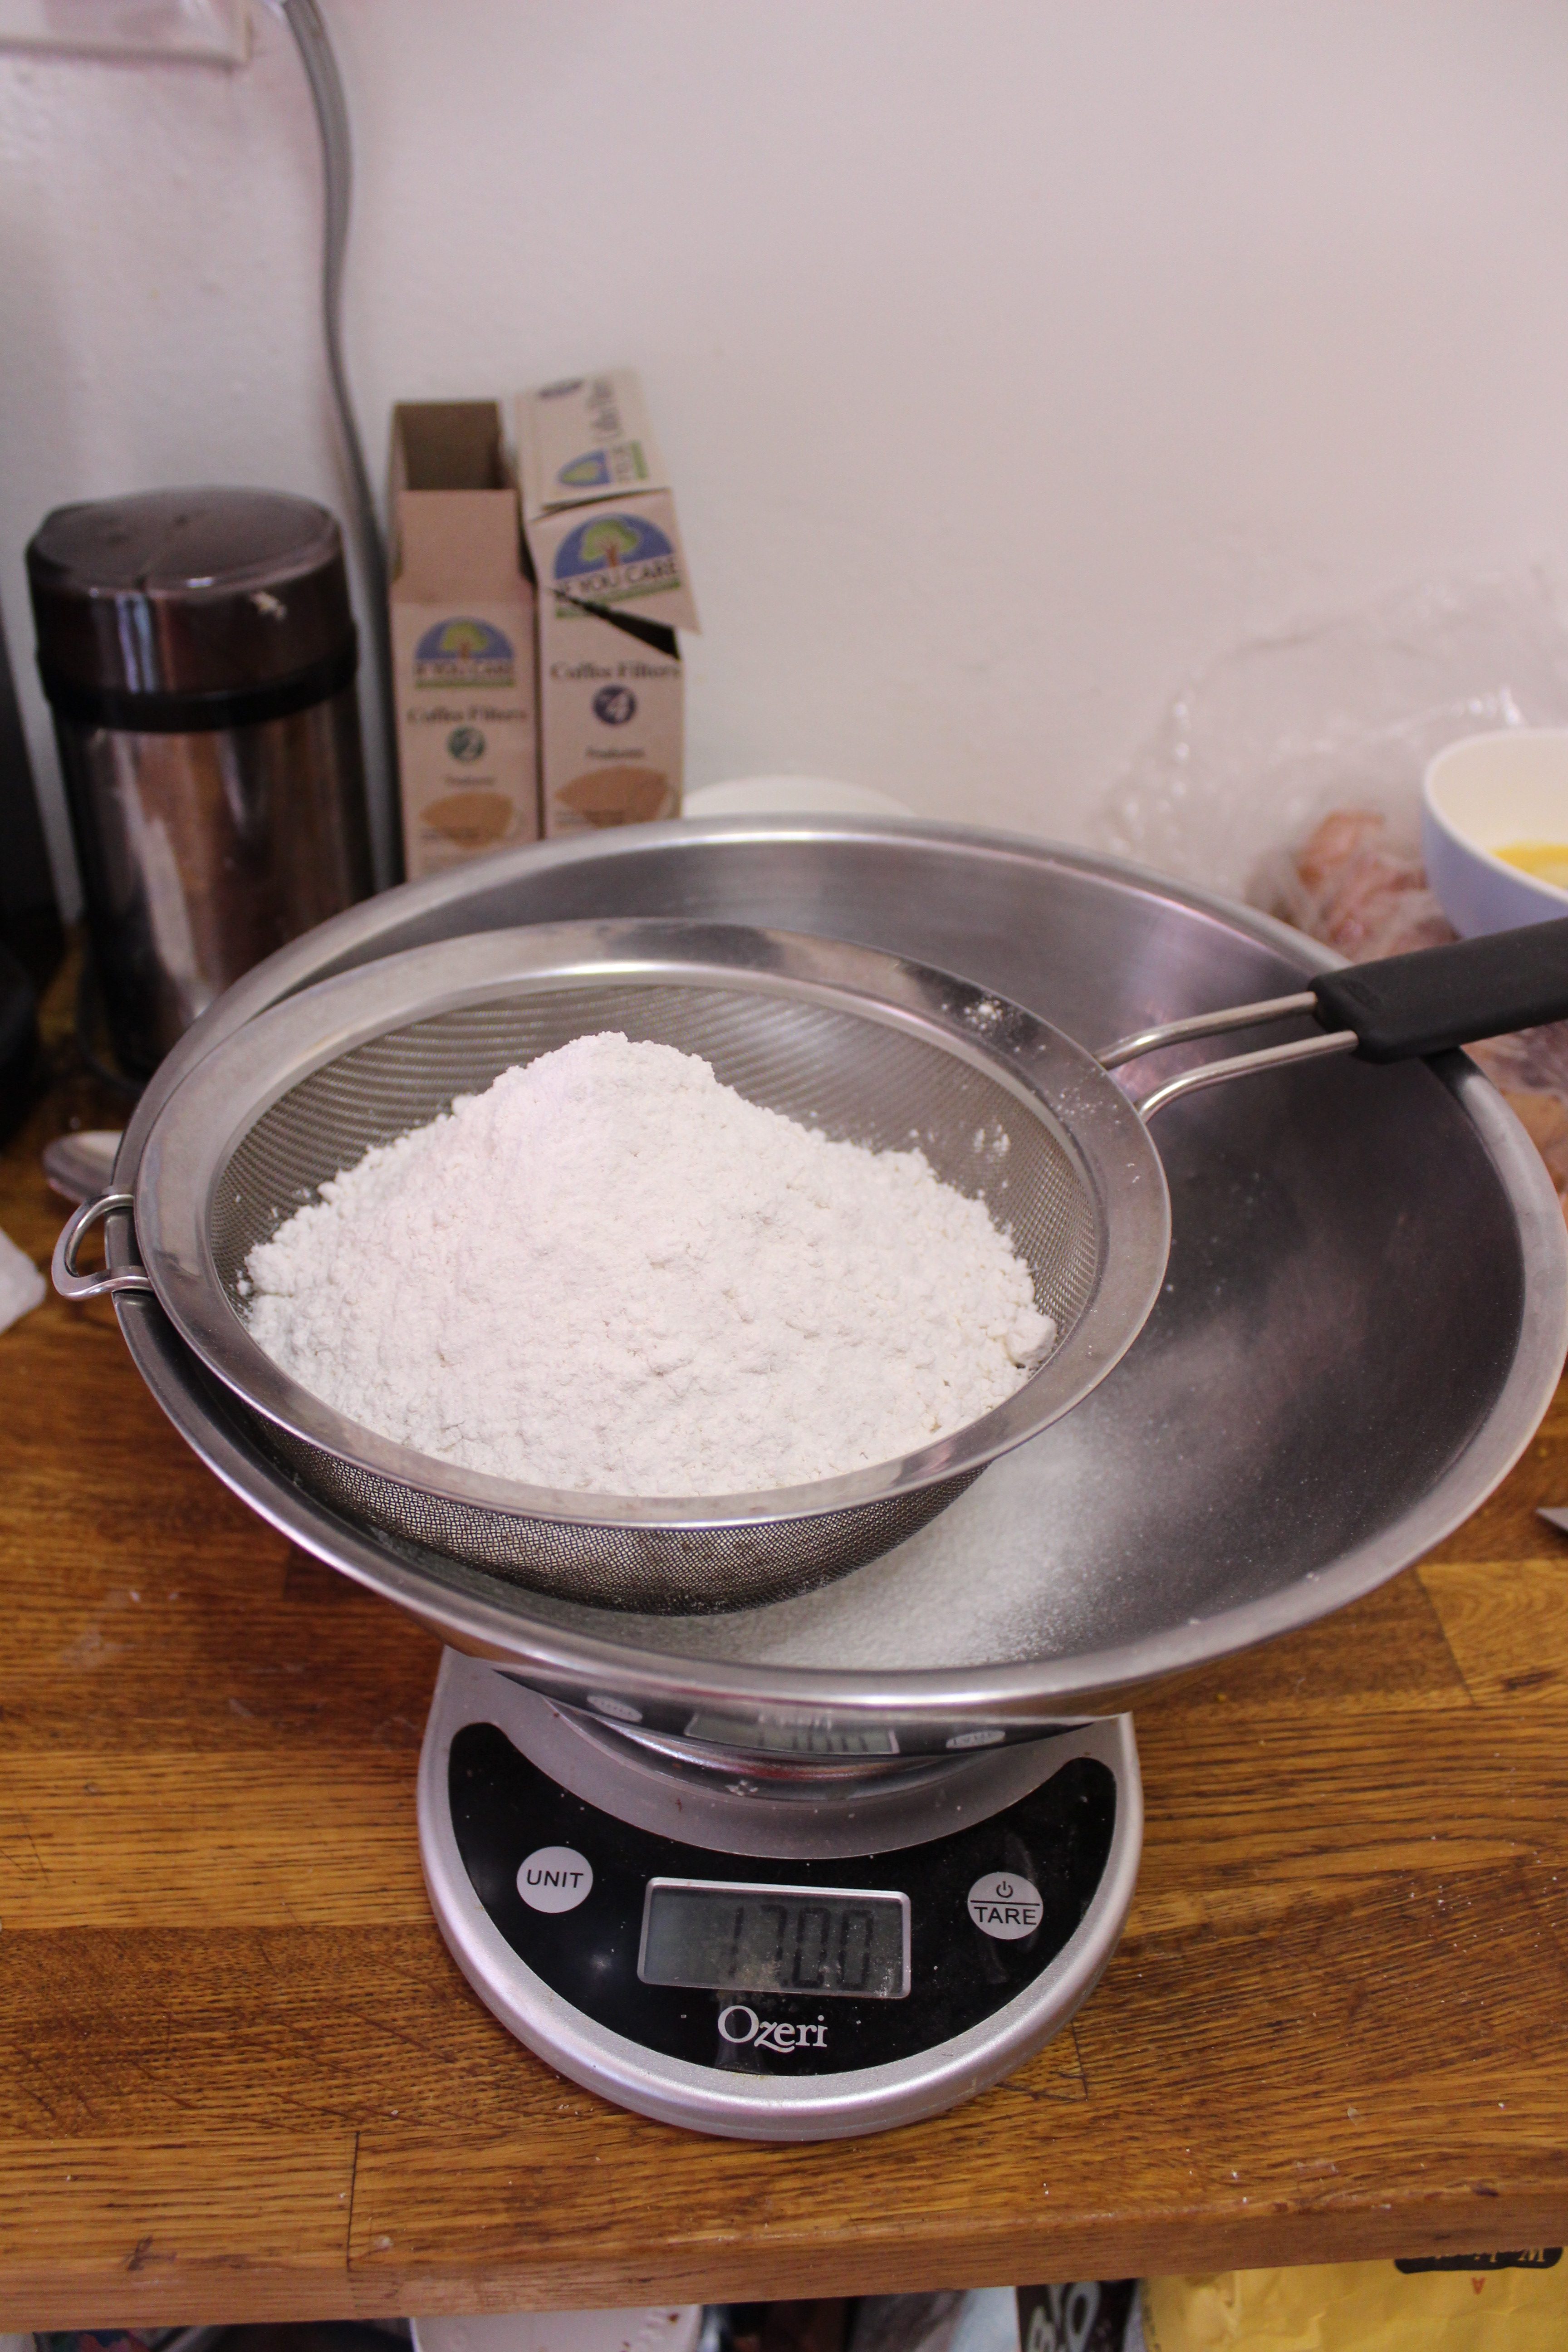
This is the only recipe I use my scale for, mainly because the measurements are so fussy otherwise, with so many cup measures, plus or minus tablespoons. But this recipe is worth the fuss. Think of every delectable high quality CCC you’ve had at the best bakery – this one is it. Everything from the size (it’s big enough so the centers are chewy, the edges are crispy), to the proportions, to the wait time – it’s sheer perfection.
fullsizeoutput_6cc4
Pro tip – if your brown sugar hardens, don’t toss it! Place in a microwave safe bowl, cover with a damp paper towel and microwave at 30 second intervals at medium power until softened.
fullsizeoutput_6cca
Final tip, I don’t know about your sieve, but salt doesn’t go through mine. So I usually sift the flours and leaveners together, then add the salt. Whisking to combine. Don’t let the butter get too soft, and that’s it. Happy baking!
fullsizeoutput_6cce

Ingredients

  • 2 cups minus 2tbsp cake flour (8 1/2oz)
  • 1 2/3 cup flour bread flour (8 1/2oz)
  • 1 1/4 tsp baking soda
  • 1 1/2 tsp baking powder
  • 1 1/2 tsp kosher salt
  • 2 1/2 sticks (1 1/4 cups) unsalted butter
  • 1 1/4 cups (10oz) light brown sugar
  • 1 cup plust 2 tbsp (8oz) granulated sugar
  • 2 large eggs
  • 2 tsp vanilla
  • 16 oz chopped bittersweet or semisweet chocolate, or a combination of both

Directions

  1. In a large bowl, sift together the flours, baking soda, baking powder and salt. Set aside.
  2. In the bowl of your stand mixer or in a large bowl using an electric hand mixer cream the butter and sugars together at medium speed for 5 minutes. It should be light and fluffy. Add one egg at a time. Stop to scrape down the bowl before turning on mixer again. Add vanilla. Then, with the mixer on low add the dry ingredients, stopping occasionally to scrape down the bowl. Finally, add the chopped chocolate and stir with the mixer if it can handle it, if not, use a wooden spoon.
  3. Line a large baking sheet with parchment paper. Using a 1 3/4in cookie dough scoop (I use the OXO medium scoop), scoop out balls of dough until sheet is full. Flash freeze for 30 minutes. Take out then plop them into large ziploc bags or plastic containers. I recommend sticking them in the fridge to let the dough rest and the gluten to relax, as well as the flours to absorb some of the flavors/moisture. Refrigerate between 24 and 72 hours or freeze them if you’d like to bake them a week or two later*.
  4. When ready to bake, preheat oven to 350 degrees F. Place on a parchment paper or silpat lined baking sheet with plenty of space between each. Bake in preheated oven for 12-14 minutes, at least 15 if taking directly out of freezer. Bottoms should be caramelized, nutty brown. Tops may look underdone but that’s ok as it continues to cook on the pan, even after taking out from the oven. After they cool completely, store in an airtight container and consume within 2 days.**

*I know I can’t help but bake some off right away, so please go ahead and do so (after the 30 minute freeze), but do save some for baking later so you can taste the difference!
**It loses freshness after that, but probably still edible dipped in milk.

Leave a Comment · Labels: American/Mediterranean, Dessert Tagged: brown sugar, butter, chocolate, chocolate chip cookies, chocolate chips, chocolate chunks, cookie dough, cookies, david leite, freeze and bake, home baking, ny times

Spice Rubbed Chicken Cutlets

October 8, 2015

IMG_5035My first born starting school has opened up a world of culinary challenges: what can I make and pack for her that a) she’ll eat b) is nutritious (most of the time) and c) not too messy? The top two contenders so far as been a chicken “salad” sandwich made from leftover chicken curry, mayo and provolone cheese. First choice though, banana nutella sandwich. That’s my cop out sandwich. Something I’m sure Park Slope moms would be aghast at finding out was given to a child. You’ve heard about that, right? The parents who wanted to ban the ice cream truck coming ’round the block so they wouldn’t have to deal with their kids ice cream wanting tantrums. IMG_5026While I empathize with the tantrum dealing – I wonder how many parents in my generation reflect on the food they grew up versus the food they feed their kids. Sometimes I get so hung up on, “Are my kids eating enough greens?” “Are they getting enough fiber?” “Is it too late in the evening for chocolate?”. While it’s definitely good to be thinking of these things, some of us go off the deep end when it comes to this stuff. A certain parent comes to mind who flipped out when her daughter was given a rice biscuit or whatever too close to her dinner time.  IMG_5027Do you know what my after-school snacks consisted of? Double chocolate chip muffins laden with all kinds of artificial flavorings and preservatives with a can of pepsi. Or entenmann’s chocolate cake. Or chips ahoy cookies with milk. My gourmet touch was microwaving the chips ahoy cookies to give ’em that just baked quality. Right.IMG_5037So, over the years, I’ve given myself a break. Not all their fruits and veggies are organic anymore. Sometimes they have nutella toast for dinner. And lollipops or ice cream in the evening? One heck of a reward for cleaning up their toys! Not to say I’ve thrown all caution to the wind. I snuck some baby kale leaves into my daughter’s wrap this morning. Usually I make her sandwiches with soft whole wheat bread. Pictured below is Malaysian style paratha which, if you were with me during my semester in Rome, you know it is crazy good. It’s a flaky flatbread that makes anything taste good (not that this chicken needs any help!!). IMG_5043My favorite part of this chicken is the wonderful caramelization from cooking it in the butter. Why didn’t we eat more butter growing up? It is so glorious when treated well. Buttered toast in our household usually meant Country Crock vegetable spread on lightly toasted Wonder Bread.IMG_5036So enjoy these chicken cutlets all throughout the week:

  • Sliced across the grain and over salad
  • Diced and mixed with a mayo dressing for chicken salad sandwiches
  • Sliced and inside wraps with lettuce and tomato
  • Diced and tossed with buttered pasta and peas
  • Or as is, with a side of quinoa and leafy greens!

Ingredients

  • 2 large chicken breasts, each sliced in half widthwise to make 4 cutlets
  • 1/4 tsp cumin
  • 1/4 tsp paprika
  • 1/4 tsp ground black pepper
  • 1/2 tsp garlic powder
  • 1 tsp salt
  • pinch of cayenne pepper
  • 2 tbsp olive oil, divided
  • 1 tbsp butter, divided

Directions

  1. Combine spices in a small bowl and sprinkle all or most of it evenly over both sides of each chicken cutlet.
  2. In a large fry pan over medium high heat, heat 1 tbsp oil and 1/2 tbsp butter. When the bubbling of the butter dies down, add two pieces of the chicken cutlets. Cook for 2-3 minutes on each side. You’ll know when to flip when the bottom side is golden brown and the white (cooked) part of the chicken creeps up to the middle. Flip and cook for an additional 2-3 minutes.
  3. When the first two are done, remove from heat and let them rest on a plate (not a cutting board as the juices will run). Clean the pan with a rubber spatula to get the overly brown bits and oil off and into a ramekin or bowl. Add the remaining tablespoon oil and half tablespoon butter. Cook the remaining two cutlets the same way. Remove to plate and let rest 5 minutes before slicing.

Leave a Comment · Labels: American/Mediterranean, Dinner, Main, Protein, Recipes Tagged: butter, chicken, chicken breast, chicken cutlets, meal planning, olive oil, salads, sandwiches, school lunch, spices, weeknight cooking, wraps

Strawberry Rhubarb Hand Pies

May 18, 2015

IMG_4519I gave into peer pressure, guys. When the first ramps popped up in my instagram feed, I rushed to the Union Square Green Market to pick some up. Not too long after, I picked up some rhubarb without much idea about what I was going to do with it. I am all about eating seasonal foods, local, humane, natural, sustainable, etc. But sometimes the thing that’s in season isn’t exactly worth all the hype. Ramps are great and all. If you are less familiar with them, they are a green leafy vegetable available for a few short weeks in spring. They are sold leaves, stalk, bulb and all and have a lovely mild onion flavor. I loved them first time I used them, as a topping on my homemade pizza. More recently, I chopped them up and stewed them with some tomatoes. I even bought a ramp pesto that works wonders on a tomato mozzarella panino.

IMG_4486But I thought part of the point of seasonal foods was that they would be a bit more affordable? Because of their limited availability these items can be incredibly marked up. I vow for next year (and for later on this year), to wait until the end of a crop’s season to buy them. After the hype dies down, so does the price. And that, my friends, is how I internalize Supply and Demand (take that AP Microeconomics). IMG_4488I’m not posting an original recipe here today. I worked off a Smitten Kitchen recipe and am sharing my experience as a novice in hand pie assembly. This is after all a Web-Log. I am logging my forays into new foods and techniques.  IMG_4489Observation 1: Mamma mia that’s a lot of butter. 3 sticks. That’s an amount usually reserved for Ina’s Pecan Bars or the frosting for a 2 layer cake.

Observation 2: It was a pleasant salty, tangy, sweet and savory flavor experience. I thought the tartness of the rhubarb would be off-putting, but it worked well with the buttery-ness of the crust. I am so used to inundating my tart fruits with sugar (see Lemon Yogurt Cake) that my aging palette appreciated the change of pace. I actually misread the recipe and used 1/4 cup sugar for the filling as opposed to 1/3 cup. Oops. I did, however, intentionally add 1/4 tsp of salt. I ALWAYS need plenty of salt on my tangy fruits.

Observation 3: Make sure you have a good stainless steel saucepan to make this compote in. You have to leave it in the pot for 15 minutes, covered, so it is essential that it doesn’t stick to the sides or bottom. Do not try this on your Mother’s or Mother In Law’s 100 year old Imusa pot. Next time I might try it with black pepper or balsamic vinegar added to the fruit compote. Mmmm….IMG_4490IMG_4511I got to use my pastry blender for the first time. Or as my kids like to call it, The Monster. I had to resort to my salad bowl for mixing. You need a nice, big, wide bowl to work the dough in.  IMG_4514Although I regretted not making this with store bought pie dough (because of the million other things I had to do that in preparation for our weekend beach getaway), I can comfort myself by saying that a store bought pie dough would not have been made special with buttermilk and grapefruit zest. Small comforts when you’ve got fried chicken grease splattered all over your kitchen, a cold dough to work until flat, and a suitcase that just won’t pack itself!IMG_4516Pardon my cutting board’s appearance. It’s close to retirement.IMG_4517I think I should have gotten them thinner than I did. The directions were to roll to 1/8 of an inch but this was the best I could do. Is it ghetto to roll out your dough on a cutting board rather than the counter? I don’t trust myself to clean the counter well enough to roll out dough onto it. Maybe it’s a desi thing. And given my limited counter space, I wouldn’t gain a whole lot by nixing the board. IMG_4524Directions also stated a cooking time of 15 to 20 minutes. I needed to go a bit beyond the the 20 to ensure a nice golden color on my hand pies. IMG_4529Enjoy the season, folks, and all that it has to offer (but maybe wait a week or two ;)).

Recipe adapted from Smitten Kitchen.

Ingredients

  • 3 3/4 cups all-purpose flour
  • 1/2 tsp grated orange or grapefruit zest
  • 1 1/2 tbsps granulated sugar
  • 1 1/2 tsp salt
  • 1 1/2 cups (3 sticks) cold, unsalted butter
  • 1 cup cold buttermilk
  • 3 cups chopped rhubarb and strawberries (I used two cups rhubarb, one cup strawberries. Cut off the leaves and any tough parts of the rhubarb)
  • 1/4 to 1/3 cup sugar (depending on how sweet your strawberries are, but if you’re using all rhubarb, go with 1/3 cup)
  • 1/4 tsp salt
  • 1 egg

Directions

  1. Make the dough: mix the flour, citrus zest, sugar and salt in a large bowl with a whisk. Add the butter and work with a pastry blender, fork or your fingers until you have pea sized bits of flour encrusted butter running throughout. Then, slowly add the buttermilk and mix with a spatula or wooden spoon to incorporate. When all the buttermilk has been added, knead a few times with your hand to get it in the shape of the ball. Divide the ball in four and flatten each into a disk. Wrap with plastic wrap and stick them in the fridge for at least 30 minutes.
  2. Make the filling: combine the fruit, sugar, and salt in a medium to large stainless steel saucepan. Turn on the heat to medium low, cover and cook for 15 minutes. You don’t need to stir during this time. Enough liquid emerges from the fruit to self baste. After the 15 minutes are up, uncover and cook for an additional 15 minutes at medium low. Stir occasionally to ensure nothing sticks to the bottom, particularly towards the end. After these 15 minutes are up, pour onto a plate to let cool.
  3. Preheat the oven to 400 degrees F and line two baking sheets with parchment paper. Generously flour your surface and rolling pin. Roll out one of the disks until 1/8 of an inch thick. Do this with a swift back and forth motion, rotate the dough 45 degrees, then repeat until it is sufficiently thin. Take your time with this, young Jedi. Trim off the edges with a pizza cutter or sharp knife and cut to make 4 squares or rectangles. In a small bowl, beat the egg with a dash of water. Brush two of the squares with the egg wash. These will be the bottoms (hehe). Spoon a teaspoon of the cooled fruit compote onto the two squares. Place the adjacent squares a top the squares with filling, pulling a bit to ensure the edges line up. Crimp the edges with a fork. Brush the top with egg wash and cut a slit to let the steam out while they are in the oven. Place the two completed hand pies on a baking sheet and sprinkle the tops generously with sugar. Bake in the preheated oven for about 20 minutes. While those bake, work on rolling out the next quarter of dough and assemble the next two hand pies in the same fashion. I alternated by sticking the second batch in the oven as soon as it was ready and calculating the extra time required when the first timer went off, but it really browns best when there’s only one baking sheet in the oven at a time. Continue with the rest of the dough. Let cool a few minutes before moving onto a wire rack for complete cooling.

1 Comment · Labels: American/Mediterranean, Breakfast, Carb, Dessert, Recipes Tagged: breakfast, breakfast pastry, butter, buttermilk, dough, hand pies, pastry, pastry blender, pie dough, rhubarb, seasonal, snacks, spring, strawberry

Over the Muffin Top Blueberry Muffins

April 6, 2015

IMG_3893 I wasn’t planning on posting anything anytime soon. I’ve been swamped with work and caught in a whirlwind of Pre-K applications. If some of you have read my previous posts, you know I had been planning on homeschooling my kids. I felt I could provide them with a much more tailored education than could be provided at a public school – supplementing my kids’ homeschooling with extracurricular activities like soccer or dance classes, for the socialization, discipline, and physical outlet.

IMG_3889  But the extracurricular activities aren’t exactly panning out. My kids (ages 4 and almost 3) have such intense stranger/separation anxiety that they don’t want to participate. That’s not the only thing. As parenting young children evolves, it goes from becoming a physically demanding endeavor to an emotionally taxing one. As my days are less and less filled with diaper changes, bottle prep, washing, rocking to sleep, etc. those pockets of time are increasingly filled with

  • negotiations – how many times can you re-wear the same old tutu? when IS bedtime really?
  • refereeing – who deserves that toy? how do you ask patience of an almost 3 year old when you are running out of it?
  • cleaning up spilled milk/juice/paint – i literally cry over spilled milk

IMG_3897 So, we’ve made the decision to enroll our daughter in Pre-K, and my son, when he is ready, next year, God willing. I think it will be good for me – and by extension, the kids. I’ve found in my conversations with other moms (full time workers, part time workers, and stay at home homeschooling mothers) that mothers who work part time have the best of both worlds. They have an outlet in the form of work – using their intellect, getting tangible rewards, conversing with other adults, etc. Plus, they get to spend a good amount of time with their kids afterschool or whenever. There are obviously exceptions to this. I can’t imagine my previous boss allocating any less time from her profession, or rather, her mission in life, to anything else. On the other end of the spectrum I’ve seen some homeschooling moms who just have it together and are getting it done!  IMG_3900 But until my baby girl starts her long, arduous journey of education, she will continue helping me out in the kitchen. Somehow both kids helped with making these (from sifting the dry ingredients, to scooping batter) and despite it all – they came out decent looking! These started off with good intentions – part whole wheat flour, part almond flour. But ended up getting a sprinkling of butter/brown sugar/cinnamon that – you guessed it – sent them over the muffin top. It’s got that nice sugary crust that bakery style muffins have. Everyone is crazy about brown butter these days and I am, too. But not so much browning butter, then adding it to the batter. I like when the food cooks in the butter (pancakes, toast, you name it), so that the browning happens at the surface, where it can impart a crunch when possible and elevate the whole flavor profile of said food.

Try these crunchy, nutty, fruity, delicious muffins. Recipe adapted from Food.com.

Ingredients

  • 1 cup all purpose flour
  • 1 cup whole wheat flour
  • 1/2 cup almond meal (if you don’t have this, then you can use all purpose flour, but it won’t be the same!)
  • 1 1/2 tsp baking powder
  • 1/2 tsp baking soda
  • 3/4 cup sugar
  • 1/4 tsp salt
  • zest from 1 lemon
  • 2 eggs, beaten
  • 1 cup buttermilk
  • 1/2 cup vegetable oil
  • half pint of blueberries
  • 1/4 cup butter, diced
  • 1/4 cup brown sugar
  • 1/8 tsp ground cinnamon

Directions

  1. Preheat oven to 400 degrees F. Line muffin pan with 18 muffin liners.
  2. Sift flour, baking powder and baking soda together in a bow. Add the whole wheat flour, almond meal, sugar, salt and lemon zest. Stir with a whisk (if you try to sift the latter 4 ingredients, I’ve found that it just doesn’t pass through the mesh).
  3. In a separate large measuring cup or bowl, combine eggs, buttermilk and vegetable oil. Beat with a fork or whisk until well combined. Add to the dry ingredients, incorporating everything slowly. Take care not to over mix as that will toughen your muffins. Add the blueberries and carefully fold into the batter (you don’t want to mush the berries!).
  4. Using an ice cream scoop, evenly distribute the batter among the muffin pans. In a separate bowl, combine diced butter, brown sugar and cinnamon with your fingers. Dot the tops of each muffin with the butter/brown sugar mixture and bake for 20-30 minutes in preheated oven.

Leave a Comment · Labels: American/Mediterranean, Breakfast, Carb, Recipes Tagged: almond meal, blueberry, blueberry muffins, breakfast, brown butter, butter, buttermilk, crumble, lemon zest, muffins, summer, whole wheat flour

Braised Green Beans

October 22, 2014

IMG_2800 When it comes to vegetables, I find myself oscillating between tradition (oh, hello soggy vegetables swimming in grease and spices) and modernity (steamed, then tossed with garlic infused oil or vinaigrette). Even though I felt pretty good about myself cooking it until just cooked through, and going easy with the fat, I would always second guess myself when I’d go to my mom’s and find myself thoroughly enjoying her sides. Until I recently read about braising vegetables in Julia Child’s Mastering the Art of French Cooking. The idea is, you combine everything in a pot or saute pan: vegetable, fat, cooking liquid, seasonings, and you cook it through until the liquid evaporates and the veggies just finish cooking in the fat. PERFECT. IMG_2793Once you have the technique down, the possibilities are endless! Of course it takes some trial and error with each vegetable. They vary in cooking times, moisture levels, and sizes (of course it’s up to you how big or small to make your pieces). A few tips to recall are:

  1. Root vegetables take longer to cook. Account for that.
  2. I added a few smashed garlic cloves to the pot. You can feel free to add any seasonings you like with your vegetables: soy sauce, ginger, crushed red pepper flakes, garam masala, lemon zest whatever!
  3. When trimming the beans, take a small paring knife, cut just below the woody stem and pull down along the rib of the bean. That way you take off some of the fibrous part that runs along the middle. You can continue this motion when cutting the beans into thirds.IMG_2797

Slivered almonds also go well green beans. The only words of caution I have are stay away from chicken or vegetable stocks for this dish. The flavors concentrate and it just overpowers the vegetable (speaking from experience). Hope this helps for your upcoming holiday (or weeknight!) cooking.

Ingredients

  • 1 lb green beans, trimmed, cut into thirds
  • 1/4 cup water
  • 1 1/2 tbsp butter
  • 2 garlic cloves, smashed
  • 1/2 tsp salt (plus more to taste)
  • 1/4 tsp black pepper (plus more to taste

 Directions

  1. Combine all the ingredients in a large saute pan with a lid. Turn heat up to medium high and cook for about 5 minutes, covered. After 5 minutes, check for seasoning and consistency. If you like your beans with a bite, turn off the heat. If you like them tender (like I do), let it cook for an additional 2 minutes.

Leave a Comment · Labels: American/Mediterranean, Recipes, Veg Tagged: braised, braising, butter, french cooking, green beans, Julia Child, side dish, vegetable

On Butter

April 8, 2013

IMG_0865I didn’t grow up eating butter. My eggs were fried in vegetable oil. We spread country crock vegetable spread on our toast. The only time I saw butter were in big blocks in the freezer that my mother eventually cooked down to make ghee, which was reserved for bengali mashed potatoes (like yours except with raw onions and green chilis but definitely no milk) and biryani (morog palau in bengali, rice and meat pilaf in english). Why the discrimination against butter? As my sister explained, butter does not do so well in tropical climates. So, by removing the milk solids from it, they are able to preserve it for longer. Which makes sense given what a commodity it is over there.

So when I left the nest, I started buying butter FOR REAL. Not to spite tradition or anything. I made the change simply because it felt more wholesome, less artificial than some of the alternatives. And there is definitely something to be said for consuming moderate amounts of natural fats rather than hydrogenated vegetable fat. Or using a small amount of flavorful fat (eg olive oil) rather than vasts amount of corn oil to make your food taste good. Though, admittedly, I have been tip toeing the line between moderate and excessive only because of this:  IMG_0867

OH MY GOD. You have not lived until you’ve had one of these high fat content european butters (puglia is another one) on your toast, topped with a sprinkling of powdered sugar. I know because I went sky diving. This is better than sky diving. I never cared to spend the extra money on these before, until I read Dorie Greenspan’s take on these french butter cookies. The lady knows what she’s doing, so I picked up a bar of one of these at my local TJ’s. I have not looked back!

So, the next time you are thinking of whipping up a batch of Sunday morning pancakes (I use a combo of whole wheat flour and almond meal in mine) or super easy French toast, try adding a little bit of gourmet to the mix. You won’t regret it! Then perhaps we’ll all ease up a bit on Paula. IMG_0871On a final note: remember to use the salted butter on your pancakes, french toast, etc. The sweet/salty combo takes it over the edge!

2 Comments · Labels: Food Fun Tagged: breakfast, butter, kerrygold

American, Bangladeshi. Savory, sweet. I don't discriminate and neither should you.

Most recently…

Load More...
Follow on Instagram

Social

Subscribe to Blog via Email

Enter your email address to subscribe to this blog and receive notifications of new posts by email.

Tags

appetizer beef bengali breakfast butter cake caramel chicken chocolate chocolate chips cilantro clean eating coconut comfort food cookies dessert dinner entertaining fall fruit ganache gluten free halal healthy homemade honest chops honest creations iftar italian pasta pastry pistachio quick and easy dinner ramadan recipe side side dish south asian spinach vegan vegetables vegetarian weeknight dinner weeknight meal whipped cream

Theme by 17th Avenue · Powered by WordPress & Genesis