Kitchen3N

Recipes and food fun from Apt 3N

  • About
  • Gallery
  • Recipes

Chocolate Swiss Meringue Buttercream

March 20, 2016

IMG_9692
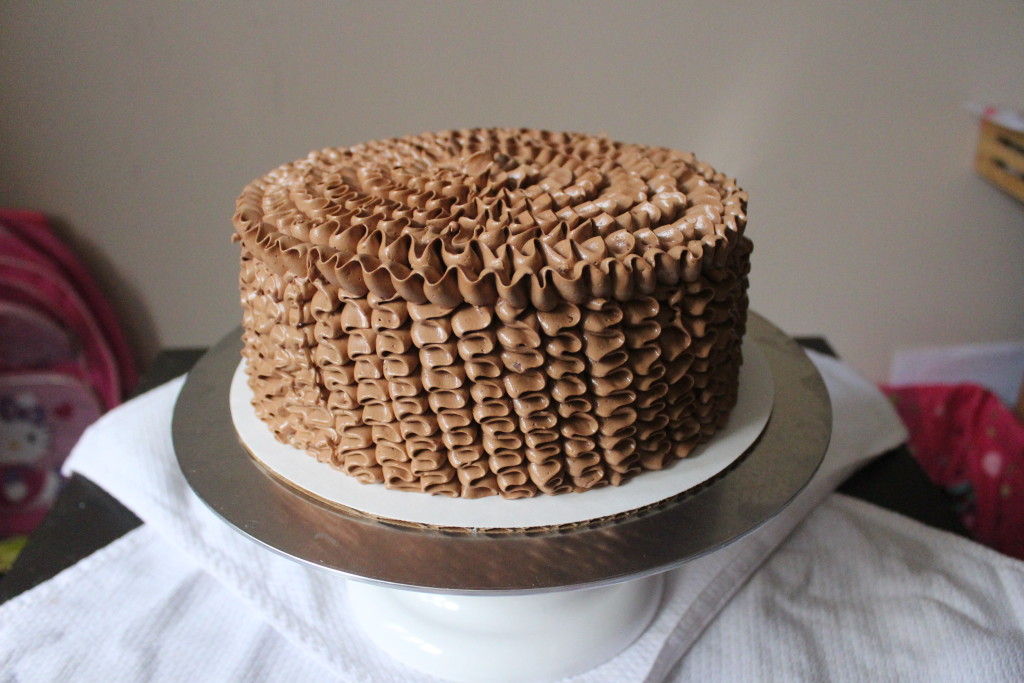
Swiss meringue buttercream is a cake decorator’s dream. If you’ve ever tried to get a really smooth looking cake from a traditional American buttercream, you’ve probably noticed it’s very very difficult to do so. Mainly because of air bubbles. American buttercream relies on the aerating of butter and sugar to achieve the desired volume and consistency. So between the air bubbles and stickiness from the sugar, it’s hard to get it super smooth!
IMG_5774
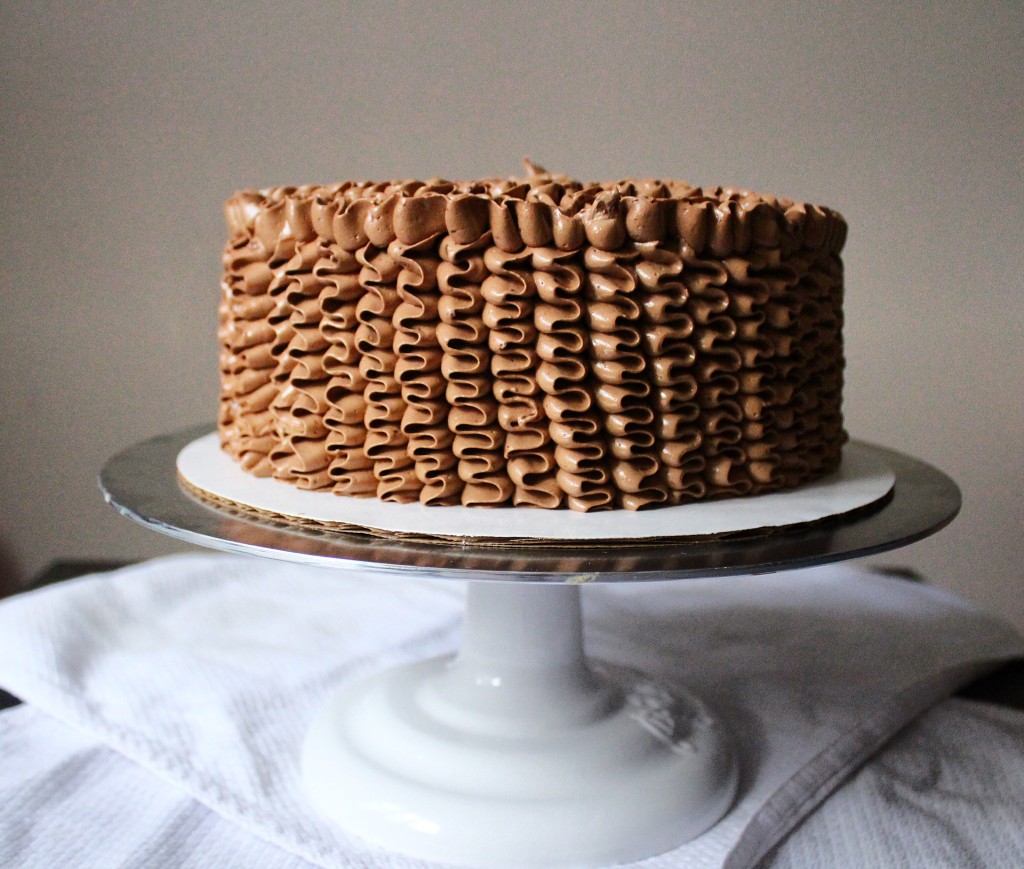
Swiss meringue buttercream, however, is light years beyond in terms of texture. There is a bit of a learning curve the first couple of times you make it, but once you have it down right, it is so smooth, tints so well, it really takes your cakes from home style to bakery quality.

To start, you combine egg whites and sugar, and heat it over a double boiler until it’s hot to the touch (160 degrees on a candy thermometer to get the egg whites to a safe temperature). You whisk the whole time, until the mixture reaches a milky appearance. Once that’s done, you move on over to a stand mixer where you beat beat beat the egg whites until you get a beautiful, glossy meringue.

When the meringue is thick, glossy and ROOM TEMPERATURE, add the room temperature butter, one pad at a time. At this point, it might look like a gloopy mess, but stick with it and keep beating until the buttercream comes together. It should look like stiff whipped cream at this point.

IMG_5783

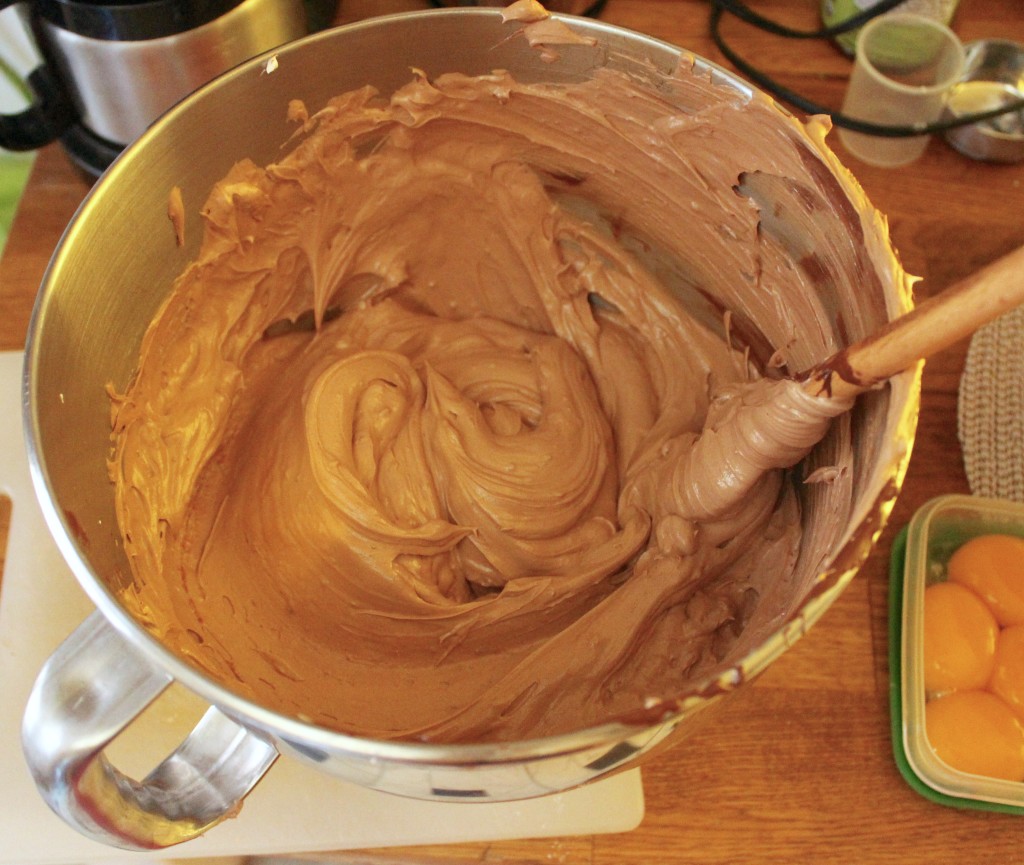
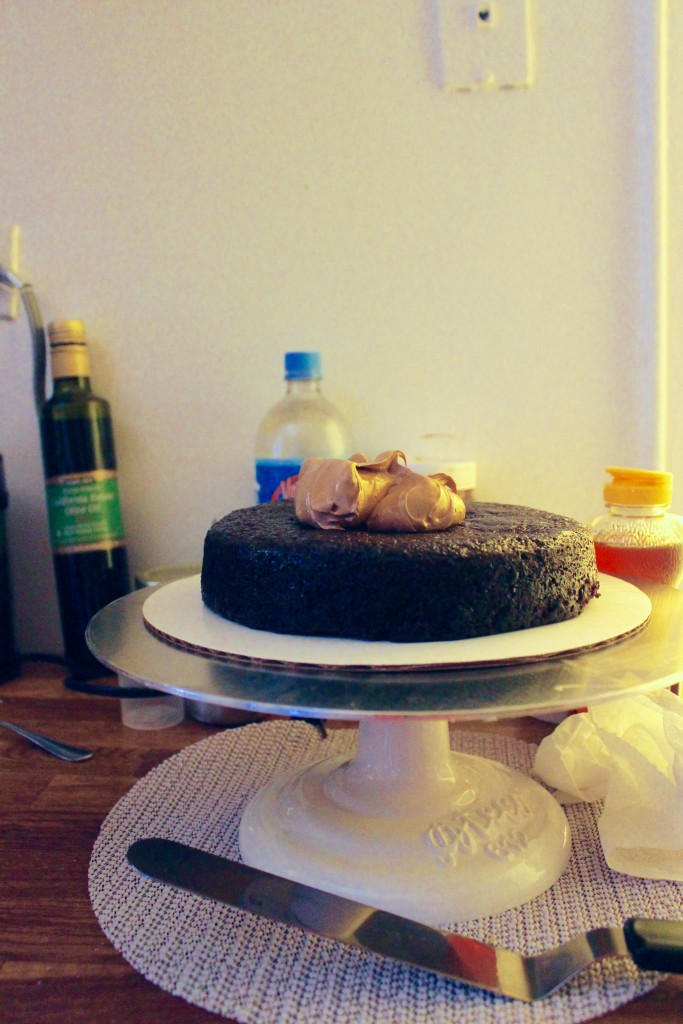
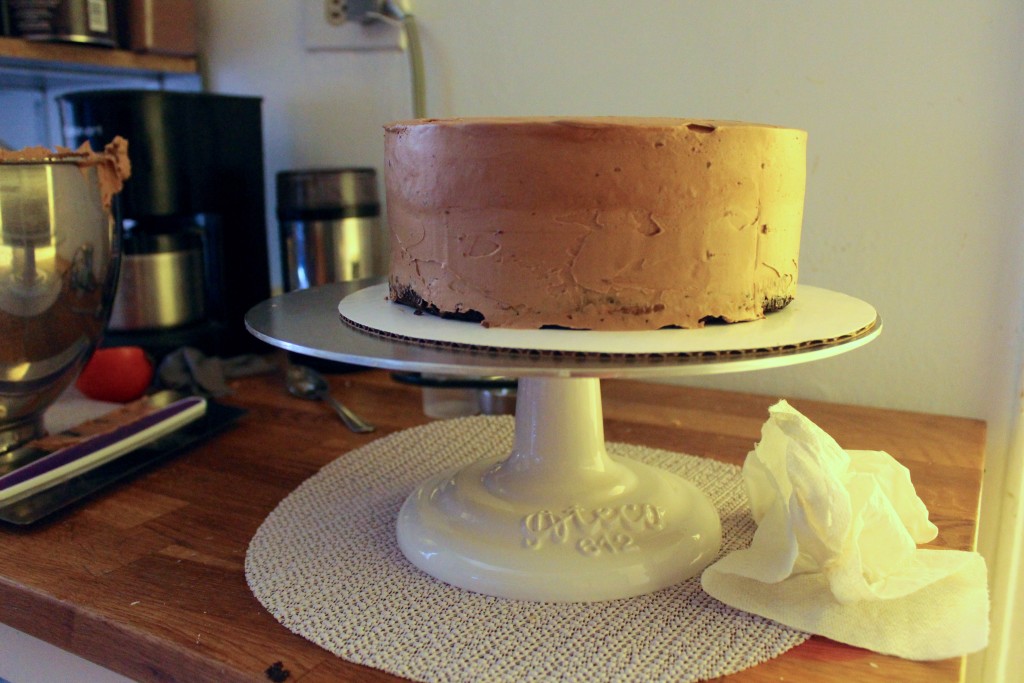
Add the vanilla, then melted and cooled chocolate. This is one of the few points of departure from my beloved Ina Garten. She has a recipe for chocolate swiss meringue buttercream but there’s SO much liquid in it (vanilla, kahlua, rum, more chocolate), that it broke when I tried to make it. I’m sure it tastes wonderful, but mine does too, while still holding up to piping =)Use a spatula to wipe down the sides and bottom to ensure all the chocolate and buttercream are fully incorporated. Final step is to try to not eat it all out of the bowl. It is delicious and the added sugar from the chocolate makes it the perfect sweetness – whereas plain vanilla buttercreams are barely sweet. Enjoy!!

IMG_5787IMG_5790IMG_5796

Recipe adapted from smitten kitchen.

Ingredients

  • 4 egg whites
  • 1 cup sugar
  • 26 tbsp (3 sticks plus 2 tbsp) unsalted room temperature butter
  • 1 tsp vanilla
  • 1 lb plus 8 oz* semi sweet chocolate, chopped small**

Directions

  1. Melt chocolate in the microwave in a heat proof, non metal bowl at 30 second intervals, stirring in between intervals, OR over a double boiler (in a bowl set over simmering water, ensuring the water doesn’t touch the bottom of the bowl). Set aside to cool.
  2. Whisk together the egg whites and sugar in the bowl of the stand mixer. Place over double boiler, ensuring the water doesn’t touch the bottom of the bowl. Keep whisking until the sugar is dissolved AND the water is hot to the touch (if you dip your finger in, should be too uncomfortable to keep there). Or you can insert a candy thermometer and whisk until the temperature registers 160 degrees F. Then remove from double boiler, wipe the water that has condensed on the bottom of the bowl and place in the stand mixer. Insert the whisk attachment and set the speed on medium to whip up the egg whites.
  3. When the egg whites have thickened, and the temperature has cooled to room temperature, add the butter, one pad at a time (1-2 tbsps) until all the butter is incorporated. The mixture might look soupy at this point. Turn the mixer on high and keep whisking until thick. This can take 3 to 15 minutes, depending on the size of your batch. Reduce the speed to low and add vanilla and melted chocolate. Mix until thoroughly combined.***

*One pound plus 4 oz of chocolate makes a luscious, chocolately buttercream. If I need to pipe something like ruffles, I would leave it at 1 pound chocolate. If I’m just filling/frosting, I would go the full 1lb 4 oz.
**I wouldn’t recommend using chocolate chips in lieu of chopped baking chocolate or chocolate bars. The waxy coating or whatever is on them keeps them from blending in uniformly with the buttercream.

***Enough to frost, fill and decorate an 8 inch 2 layer cake. Enough to frost and fill a 9 in 2 layer cake.

Leave a Comment · Labels: American/Mediterranean, Dessert Tagged: cake decorating, chocolate, chocolate cake, chocolate frosting, egg whites, frosting, sugar, swiss meringue buttercream

Almond Lace Cookies with Earl Grey Ganache

January 5, 2016

IMG_5460Oh no – I was supposed to kick off the new year with a healthy-ish recipe, right?? Gah – you’ll have to forgive me. Next post, I promise, something green. In the meantime, enjoy Kitchen3N 3.0! Now with creepy side picture so you can imagine I’m watching you as your read (and salivate at) my material. IMG_5465These cookies have many names: almond lace cookies (you can find similar ones at Trader Joe’s, except instead of sandwiching them, you’ll find them as single cookies dipped in chocolate), bocca di nonna (literally, mouth of grandma but I suppose grandma’s kisses sound better), and that’s it really. Sorry. They have wonderfully sweet, caramelly, toasty notes and the earl grey ganache just makes ya go, “hmm what IS that?!”. Throwback to Rachel Ray and every instance of her adding nutmeg to a cream sauce.

Recipe from BH&G Jan 2010

Ingredients

  • 2/3 cup all-purpose flour
  • 2 tbsp unsweetened dutch-processed cocoa powder
  • 3/4 cup butter, softened
  • 1 cup sugar
  • 3/4 teaspoon, vanilla
  • 1 1/2 cups finely ground almonds (I ground up slivered almonds in the food processor)
  • 1/3 cup heavy cream
  • 4 earl grey tea bags
  • 4 oz semi sweet chocolate, chopped

Directions

  1. Combine flour and cocoa powder in a small bowl. Whisk to combine and set aside.
  2. In your stand mixer (or in a bowl using a handheld electric mixer) cream butter at medium speed for 30 seconds. Slowly add sugar and vanilla extract. Beat until light and fluffy (3 to 4 minutes). Scrape down sides of bowl occasionally. Add ground almonds, then flour and cocoa mixture. Using a rubber spatula, scrap down the sides and bottom, give it a final mix, and dump onto a large piece of saran wrap. Wrap tightly and refrigerate for 1 hour.
  3. Preheat oven to 350 degrees F. Line a baking sheet with parchment paper. Using a cookie scoop, scoop out 1 inch balls onto prepared cookie sheet, 2 inches apart. Press down lightly to flatten.
  4. Bake for 12 to 15 minutes or until centers are firm. Let cool a few minutes on baking sheet, then move to wire rack to cool completely. Continue with the remaining dough.
  5. While they cool, make the ganache: bring the cream to just before boiling (you’ll see bubbles around the perimeter). Remove from heat. Add the 4 tea bags, cover and let steep for 15 minutes. After 15 minutes, uncover, squeeze the liquid out of the bags and discard. Heat the cream once again to just barely a boil. Add the chopped chocolate and stir until mixture is homogenous and shiny.
  6. Assemble: Spread half a teaspoon of ganache onto the flat side of one cookie. Place the flat side down of another cookie directly on the ganache. Continue with the rest of the cookies.

2 Comments · Labels: American/Mediterranean, Dessert, Recipes Tagged: almond cookies, almond lace cookies, bocca di nonna, chocolate, cocoa, cookies, dessert, earl grey, ganache, tea biscuits

5 Things I’ve Learned About Baking Chocolate Chip Cookies

August 5, 2015

IMG_4839I’ve been baking chocolate chip cookies since I was 10 years old. It was my first culinary endeavor. What does that mean for you? That means I’ve messed them up every which way so here I am to share with you some of my learnings.IMG_48291. Make sure your leaveners are still potent. For years I thought baking powder was just a more potent form of baking soda, just because the first batch of chocolate chip cookies I made came out flat as disks (and I blamed it on the baking soda! Rightfully so, just for the wrong reasons). If your baking soda and/or baking powder has been in your pantry for more than 6 months, toss them. If you’re baking cookies just for yourself or your family, you could take the risk if you fill guilty about tossing them. But if you’re planning to serve them to company or take as a hostess gift, do not take the chance! Use fresh leavener! IMG_48302. Use a cookie scoop! Gone are the days of using two teaspoons to artfully mold the perfect cookie mound. Using a cookie scoop is the only way to ensure each cookie is uniformly sized and shaped. I know it sucks to buy additional kitchen gadgets, but if you love cookies as much as I do, or when you realize how great it is to have frozen cookie dough stocked in your freezer to bake off when the occasion arises, you’ll be glad you have one in your arsenal!IMG_48313. Use parchment paper or silicon baking mat. This might be old news for many of you, but I just cringe thinking of the days I greased cookie sheets and had to deal with the aftermath of scrubbing encrusted cookie dough off of them. They slide off parchment so easily that I’ve never looked back. I always keep my pantry stocked with parchment paper, chocolate chips, and butter so I can make these if I need a last minute hostess gift (or for a sudden attack of PMS).  IMG_48324. Refrigerate your cookie dough. There’s an unmistakeable difference in texture when you bake off cookies that have had time to chill. The flavors blend, the dough rests, and the center attains a heavenly chewiness that’s consistent among the best cookie recipes. Bake times will vary depending on the temperature the recipe dictates and the size of the cookie scoop you use. I like to bake mine until the tops have the slightest blush. It may look underdone, but it will continue cooking once out of the oven and resting on the baking sheet. Be mindful not to remove it from the baking sheet right away, as it will mostly likely bend and break while in the process of transferring. IMG_48345. There is no single greatest chocolate chip cookie recipe. Your palette changes as you get older. Different recipes highlight different characteristics of a marvelous chocolate chip cookie: the nuttiness, the chewiness, the contrasting flavors. Lately I’ve been using Leit’s Consummate Chocolate Chip Cookie recipe. I like the combination of cake flour and bread flour to give it the ultimate texture – chewy while delicate. For years before switching over, I’ve used Alton Brown’s The Chewy recipe with great results. However, chocolate chip cookie recipes, like shampoo, should be switched periodically.

Leave a Comment · Labels: American/Mediterranean, Dessert, Food Fun Tagged: baking, baking 101, baking tips, chocolate, chocolate chip cookies, cookie dough, dessert, hostess gifts

A Red Velvet and A Double Chocolate Cake

June 7, 2015

IMG_4601IMG_4548Marriage is a most beautiful thing. Take for example the marriage of a hot dog to its bun. Mustard to a knish. Or in this case, the best cake recipe with the most glorious frosting.IMG_4549Oh, you thought I was referring to the marriage between two people? No, no, no – that’s a completely different story. It’s tumultuous. A dichotomy of opposing egos – it’s as generous as it is demanding. Like a cake studded with ghost peppers. You can figure out ways to maneuver around them, develop techniques over the years to handle them, but you’re inevitably going to chomp down one and when you do, you might find yourself questioning the decision to go for that slice of cake.IMG_4556But you go on anyway, running around with your head ablaze because darn it you committed to this slice of cake! And the heat dies down and you’re left with a smear of frosting on your plate that you scoop up and wonder, “Gosh this is so delightful, whatever was all that fuss about?”. That’s married life for ya.

IMG_4558 IMG_4559

People go bananas for red velvet, and personally, I’ve never understood why. Always made with a smidge of chocolate – the base cake isn’t strongly flavored enough. I opted for a recipe that has more cocoa than the usual red velvet recipe (3 tbsp vs 1 tsp) but not so much that it’s more of a chocolate cake (one recipe called for 1/3 cup cocoa!). It’s often topped with a tangy/sweet cream cheese frosting, though delicious, is better served with a sweeter cake, like banana or carrot cake. I feel like it’s striking, contrasting colors that people fall for. Also, a very tender cake made by the addition of buttermilk AND vinegar.

I wanted to try the original cooked milk/flour frosting recipe that accompanies red velvet. But as my hectic week dwindled down, all I had the energy for was whipping up two bars of Philly with a healthy stick of butter and calling it a day. I also experimented with the food coloring – since I used a gel food coloring, which is typically more pigmented than the usual food coloring. I used a rounded teaspoon rather than the tablespoon of food coloring that the recipe called for. In hindsight, I probably could have used more to offset the cocoa. Taste-wise – no complaints. IMG_4564

The second cake was for an acquaintance’s farewell party. I used my all time favorite chocolate cake recipe (Beatty’s) but with a no fuss frosting (Hershey’s perfectly chocolate frosting). I came upon this particular frosting recipe after looking for an alternative to the buttercream Ina Garten uses to accompany this cake (it has a raw egg yolk and I have two young’ns). What I love about this recipe is

  1. It uses cocoa powder rather than chocolate baking bars. Those can be so fussy. Semi-sweet vs bittersweet. Melt, then cool. Ugh.
  2. It’s made in a saucepan on a stovetop, with just a whisk. No fancy equipment necessary.
  3. It’s got a glossy sheen like that of a ganache.

That being said, it is a bit high maintenance in one respect: you’ve got to use it right away, and do not dilly dally with the application. It dries fairly quickly and as soon as it does, it becomes difficult to spread. Unlike buttercream which you can spread and tweak all the livelong day.IMG_4569 IMG_4573 IMG_4587

IMG_4590IMG_4593IMG_4591

It’s also reminiscent of the Entenmann’s chocolate fudge cake I used to have as an afterschool snack – pretty much every day of my childhood. Yup. Silky texture, rich chocolate flavor. If you’re making dessert for chocoholics, there’s no going wrong with this combo.IMG_4595 IMG_4597  IMG_4604

For the decorations I stuck to my handy dandy ziploc bags with a hole cut at the end. Really fancy equipment over here at Kitchen3N!

Red Velvet Cake recipe barely adapted from NYT Cooking.

Ingredients

  • 1/2 cup (1 stick) butter, softened
  • 3 tbsp cocoa powder (I used natural cocoa powder since it’s more acidic and would react well with the buttermilk/vinegar)
  • 1 1/2 cups sugar
  • 2 eggs
  • 2 tsp vanilla extract
  • 1 1/2 tsp red food coloring (if using the gel, traditional food coloring use 2 tbsps)
  • 1 tsp salt
  • 1 tsp baking soda
  • 2 1/2 cups flour
  • 1 cup buttermilk
  • 1 tbsp white vinegar
  • 2 8 oz packages cream cheese at room temperature
  • 1/2 cup (1 stick) softened butter
  • 1 tsp vanilla extract
  • 5 cups confectioners sugar

Directions

  1. Preheat oven to 350 degrees F. Butter and flour, or butter and apply parchment paper to two 9 in round cake pans. Set aside.
  2. Sift flour, cocoa, salt and baking soda into a bowl.
  3. Beat butter with the paddle attachment of your stand mixer for about 2 minutes on medium-low speed. Add sugar and beat for 1 minute more. Scrape down the sides of the bowl with a spatula. Reduce speed on mixer to low and add eggs, one at a time, then vanilla extract and food coloring. Next add 1/3 of the dry ingredients. Then add 1/2 cup buttermilk. Add another 1/3 of the dry ingredients. Then add vinegar to the buttermilk and add to the batter. Add final 1/3 of dry ingredients. Use a spatula to give it one final mix.
  4. Divide evenly between the two cake pans and cook until a toothpick inserted into the center comes out clean (20 to 25 min).
  5. After taking it out of the oven, let it cool until the pans are ready to handle. Loosen the sides with a spatula or knife, going under the cake a bit on all sides to loosen. Then place one hand on top of the cake, flip it out onto your hand, then set it down on the wire rack to cool completely (one of my first baking follies as a kid was to apply frosting to a cake I just pulled out of the oven…). Remove parchment paper.
  6. Make the frosting: whip cream cheese and butter on medium speed until light and fluffy (3 to 5 minutes). Add vanilla. Decrease speed to low and add confectioners sugar one at time. Taste for desired sweetness/flavor. Adjust as necessary.

Leave a Comment · Labels: American/Mediterranean, Dessert, Recipes Tagged: cacao di pernigotti, cake, chocolate, chocolate icing, cream cheese icing, dessert, double chocolate, ermine icing, frosting, fudge, hersheys, layer cake, red velvet

Chocolate Pavlova

December 29, 2014

IMG_3292 This is for my friend Aaisha of BakingPartTime. Last time she was over for a brunch party at our place, I made two pavlovas – one classic and one chocolate. I’ve posted the classic recipe before, but this time around I’m serving up the chocolate version.   IMG_3271 
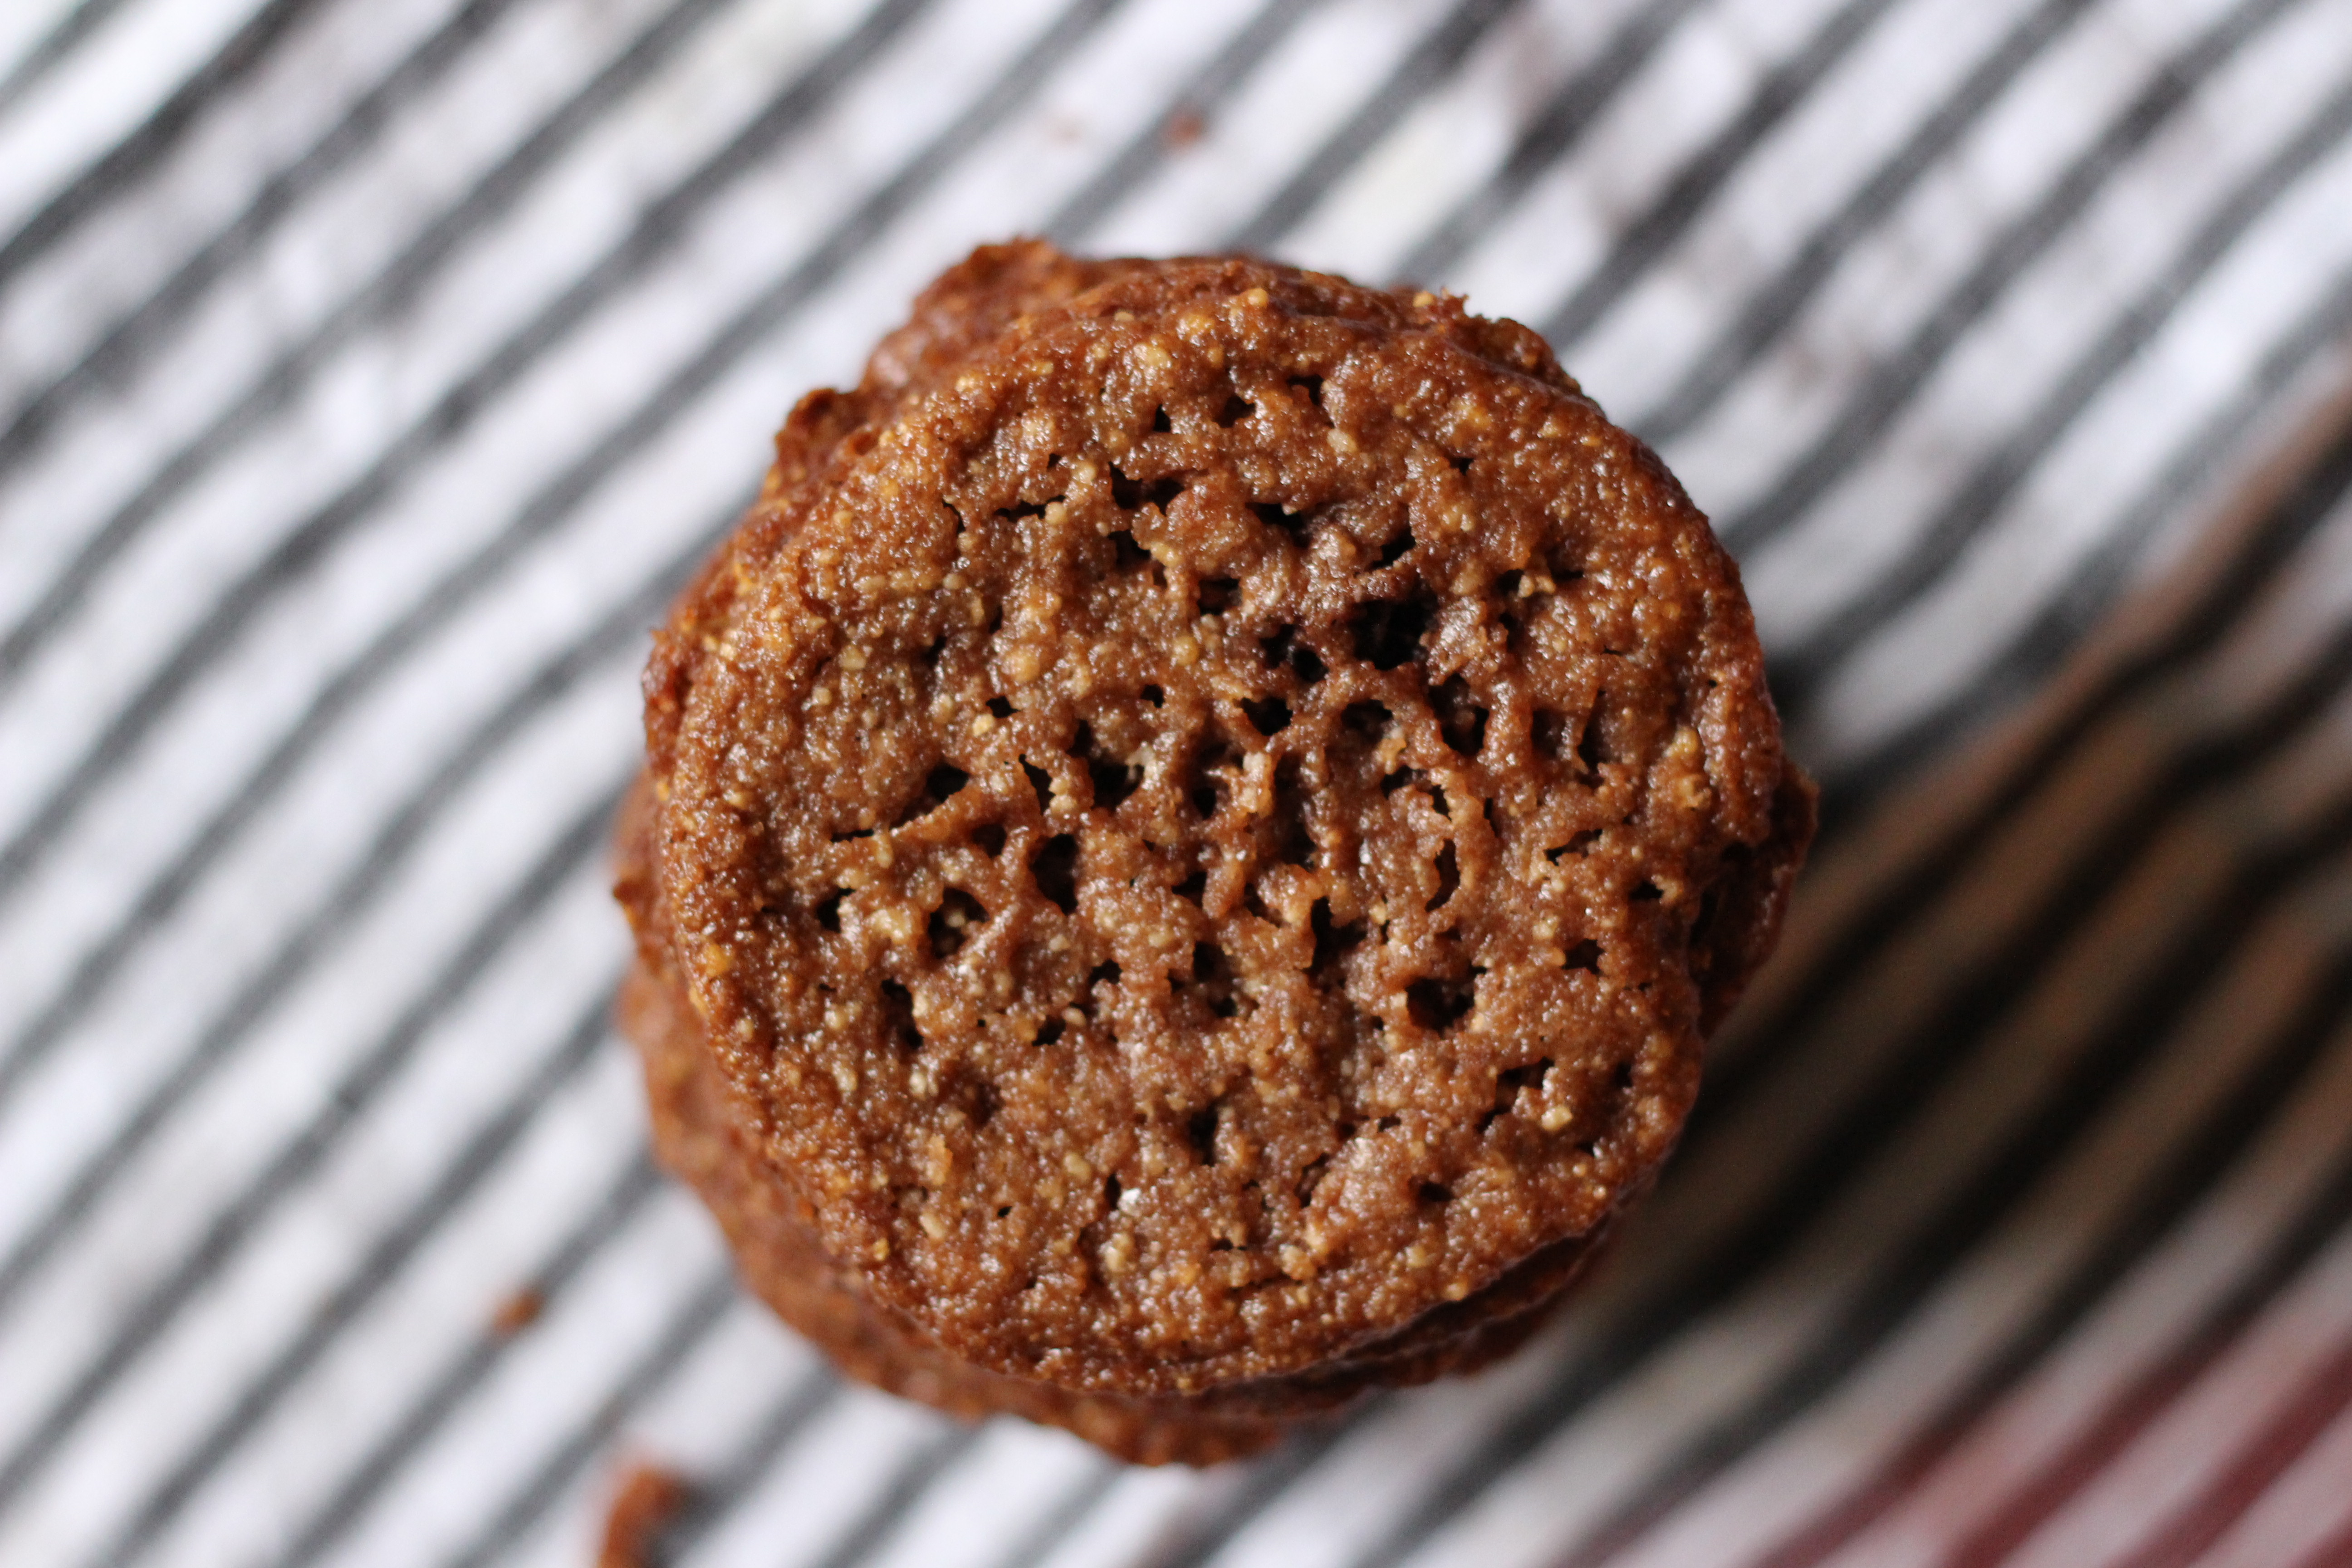
By the way, can you tell we are crazy about pavlovas around here? If you haven’t had one – it’s high time to try. They hail from New Zealand, where my husband spent a good part of his teenage years. I love this man more than anything, but I love him a wee bit more for introducing me to this dessert. A welcome change of pace from cakes or cookies. Much easier to prepare than a pie. They are just the most perfect dessert to have in your arsenal. They are a winner presentation wise, as well. They just have the wow factor, but are deceptively easy to assemble, kind of like a trifle. You just whip up some egg whites with sugar. Bake it low and slow for 45 min to 1 hour. Once cooled, top with whipped cream and fruit (or chocolate). IMG_3274 The original recipe suggests topping it with strawberries and chocolate sauce. I didn’t have strawberries on hand, or the time to assemble the chocolate sauce, so I just have the bare bones version here. If you haven’t worked with whipped egg whites before, you needn’t worry. Just have patience. They take a while to whip up to the right consistency, unlike whipped cream (which I’ve turned into butter many times just by looking away for a minute).

IMG_3281 If you’ve had plain meringues, then you might not think this dessert would amount to anything. Meringues have a tendency to be cloyingly sweet. But with the topping of just slightly sweetened cream, and the complexity of the chocolate (or in most cases a fruit topping), the combination of textures and flavors is just divine. The outside of the meringue is crisp. The inner part melts in  your mouth, kind of like a marshmallow. The cream eases the sweetness and ties all the flavors together. IMG_3287 The original recipe calls for superfine sugar – something I never have on hand – and for the chocolate in the meringue to be grated – something for which I have no patience. So, I swapped out superfine sugar for granulated sugar and was not in the least bit disappointed. I also finely chopped instead of grated the chocolate, which I think is for the best really. If you’re grating chocolate by hand, it’s going to melt all over your hands (which is probably not the worst problem to have). IMG_3283   Don’t worry about the crackly appearance. I’ve tried every trick in the book for keeping it from cracking and nothing’s worked. Take comfort in the fact that it gets smothered and mostly concealed by the toppings. Feel free to top it with chopped strawberries, raspberries or even blackberries.

Adapted from Easy Desserts: Deliciously Indulgent Treats

Ingredients

  • 4 large egg whites
  • 1 cup granulated sugar plus 1 tbsp
  • a pinch of salt
  • 1 tsp cornstarch
  • 1 tablespoon unsweetened cocoa
  • 1 tsp vanilla extract
  • 1 tsp white wine vinegar (or lemon juice)
  • 4 oz. bittersweet chocolate, finely chopped
  • 1 1/4 cup heavy cream
  • semi sweet chocolate bar, for grating

Directions

  1. Preheat oven to 275 degrees F. Draw a 9 in circle on a piece of parchment paper. Place it pencil side down on a baking sheet and sprinkle on some cornstarch. Spread the cornstarch over the area of the circle.
  2. Whisk the egg whites and salt (preferably with your stand mixer or with a hand held electric mixer) until soft peaks form. Gradually add in 1 cup of the sugar. Whisk in the cornstarch, cocoa, vanilla and vinegar.
  3. Add the chopped chocolate and fold carefully. That is – take a rubber spatula, cut through the eggs whites down the middle, moving to the left, lift spatula from the bottom to the top. Rotate bowl, and repeat until chocolate is incorporated. See demonstration here.
  4. Bake in preheated oven for 45 minutes. Allow to cool.
  5. Whip cream until soft peaks form. Add sugar and continue beating, just shy of firm peaks. Top cooled pavlova with whipped cream, and garnish with grated semi sweet chocolate, if desired.

Leave a Comment · Labels: American/Mediterranean, Dessert, Recipes Tagged: bittersweet chocolate, chocolate, chocolate dessert, dessert, egg whites, gluten free, light and fluffy, meringue, meringue dessert, new zealand, pavlova, whipped cream

Chocolate Pastry Cream (Chocolate Pudding)

November 17, 2014

IMG_2887 There’s a story behind these plates: we got them for free from our last CB2 purchase. I’m assuming because no one else would buy them. There are like 4 of them, all rectangular appetizer plates with quirky stick figure/food illustrations. This is the first time I busted them out. Somehow the bite taken out of the cream puff worked perfectly with this ugly little dude.IMG_2890 I was inspired to bake these delectable cream puffs after purchasing Around My French Table by Dorie Greenspan. There’s so much goodness in this book. I was surprised at how much Moroccan cuisine permeated French food culture (as interpreted by Greenspan). The result is a multitude of really promising mezze/hors d’oeuvres, salads and other veg-centric dishes. IMG_2891The cream puff is made from a standard pate a choux recipe (minus one egg) – serving only as a vehicle for my silky smooth chocolate emulsion. Once I made and chilled the pastry cream, I started it eating it by the spoonful. I couldn’t help myself. That’s when I realized pastry cream is barely different from the more conventional pudding. Not the type of puddings that are thickened by just cornstarch, rather the ones that are thickened (and thus made more rich) by egg yolks. It’s great as a stand alone dessert. I piped these into the cream puffs using a pastry bag fitted with a long tip.

Now I couldn’t just leave well enough alone. It’s not enough to use great quality chocolate and a recipe from a James Beard award winning chef. I had to add a thing or two. In my case it was some instant coffee and vanilla. I added half a teaspoon of each. Next time though, I might try 1 tsp each and see if it accentuates or overwhelms the chocolate flavor. To be continued!

I’ll share one more thing with you: some of them I filled with jaggery (gur), or sap from date palm trees. If you’re South Asian you’ve no doubt seen this sweetener in steamed rice sweets. Or if you’re Muslim, with your pre-dawn Ramadan meal. Think of maple syrup, but thicker and slightly bitter. The flavor is sweet yet complex and pairs surprisingly well with cream puffs! I’ve been adding it to my morning oatmeal for a wonderful change up.

Recipe adapted from Dorie Greenspan.

Ingredients:

  • 2 cups milk
  • 4 large egg yolks
  • 6 tbsps granulated sugar
  • 3 tbsp cornstarch, sifted
  • pinch of salt
  • 7 oz bittersweet choc melted (I used 4 oz bittersweet choc and 3 oz semi sweet)
  • 1/2 tsp vanilla extract
  • 1/2 tsp instant coffee granules
  • 2 1/2 tbsps unsalted butter, cut into small pieces, at room temperature

Directions

  1. Warm the milk in small sauce pan until it’s scalding (you see bubbles around the edges).
  2. In a medium saucepan, whisk together egg yolks, sugar, sifted cornstarch, and salt until it’s blended together. While whisking continuously, drizzle in 1/4 cup of the milk (to raise the temperature of the egg yolks). Then, in a steady stream, add the remaining milk and whisk continuously. Multitasking folks. A flat whisk is great in ensuring you get all the bits around the edges. Bring to a boil and whisk for 1-2 minutes more, until thickened (it should be thick enough to coat the back of a spoon).
  3. Stir in the melted chocolate, coffee granules and vanilla. Whisk until combined. Let stand for 5 minutes. Then add butter and stir until the mixture is smooth. At this point, I like to push the custard through a strainer to make sure it’s uniform consistency. This is optional. Pour into a bowl, cover and refrigerate until ready to serve (at least 20 minutes).

Leave a Comment · Labels: American/Mediterranean, Dessert, Recipes Tagged: chocolate, chocolate pastry cream, dessert, french, french dessert, gur, jaggery, pastry cream, pudding

Double Chocolate Brownies

October 22, 2014

IMG_2802 Apologies for the month of silence from Kitchen3n. The dog ate my computer. More like the Apple store took my malfunctioning iMac for a week and couldn’t reproduce the problem we are CONSISTENTLY having at home. Does anyone else’s mac do this thing where it just randomly starts producing a lot of noise (like the fans are in hyperdrive) even though there are NO CPU intensive programs running? Then just goes berserk and shuts off? Any ideas would be much appreciated. I just barely got to edit these photos before the issue started up again and am finishing up this post from my laptop.

I realize there is pretty much no more room in the food blogosphere for another brownie recipe. I don’t care. I’m sharing my favorite. Also, because, everyone loves looking at pictures of chocolate desserts.

This is the classic Ghirardelli brownie recipe remixed to my liking. The original recipe (rightly so) had chocolate chips. NECESSARY in any brownie recipe. I added a teaspoon of instant coffee to the melted butter/chocolate mixture. A key ingredient in any luscious chocolate dessert. I also use bittersweet chocolate instead of semi-sweet, for a richer, less sweet brownie. IMG_2808I baked these three different ways:

  1. In a parchment paper lined glass baking dish (square). Baked at 350 for 30 minutes. PERFECTLY FUDGEY CENTERS, SLIGHTLY CAKEY OUTSIDES.
  2. In a parchment paper lined glass baking dish (square). Baked at 350 for 25 minutes. TOO FUDGEY.
  3. In a greased glass baking dish (square). Baked at 350 for 30 minutes. TOO DRY.

There is one more option: unlined baking dish for 25 minutes. I’ll save that for the next rainy day experiment. Serve these babies with a scoop of vanilla ice cream and live your life with no regrets.

Adapted from Ghirardelli.

Ingredients

  • 4 oz. bittersweet baking chocolate (you can use semi sweet if you prefer)
  • 1/2 cup (1 stick) unsalted butter
  • 1 tsp instant coffee granules
  • 1 cup firmly packed light brown sugar
  • 1 tsp vanilla extract
  • 2 large eggs
  • 3/4 cup plus 2 tbsp all purpose flour
  • 1/4 tsp baking soda
  • 3/8 tsp salt
  • 1/2 cup semi sweet chocolate chips

Directions

  1. Heat water in a medium saucepan over low heat. Keep to a simmer. Place a large bowl over the simmering water and melt the chocolate and butter. When it’s just about fully melted, take off the heat and stir until completely melted. Add the coffee granules. Let cool for 10 minutes.
  2. While the chocolate mixture cools, preheat oven to 350 degrees Fahrenheit. Line an 8×8 glass baking dish with parchment paper.
  3. Next, add the brown sugar to the chocolate mixture and stir with a wooden spoon. Add vanilla extract and eggs, one at a time. Next, add the flour, baking soda and salt. Stir to combine. Finally, add the chocolate chips. Pour batter into prepared baking dish.
  4. Bake for 25-30 minutes (the top should look dry). I know I said 30 minutes was good for me, but every oven is calibrated differently, so definitely check at 25 min. The toothpick shouldn’t come out clean, but there should be some crumbs (but not too wet).

2 Comments · Labels: American/Mediterranean, Dessert, Recipes Tagged: bittersweet chocolate, brownies, chocolate, chocolate chips, dessert, fudge, fudgey, ghirardelli, semi sweet chocolate

Chocolate Mousse Cake

May 31, 2014

IMG_2483I have always usually been outnumbered in my family by people who aren’t enamored by chocolate. Same was true when I married my husband. Even more so. But then the kids came, and they loved chocolate, especially  dark chocolate. It was then that I knew they were mine (that was the real testament, not the whole watching them come out of me thing). And so now I have little people to share my chocolate obsession with. Little people to make chocolate cake for on birthdays. Little hands to help stir the chocolate chips into cookie dough. And little fingers to steal chocolate chips from the counter before they even have a shot at meeting pancake batter.

IMG_7226 I’ve been planning on making this cake for months now. In March as I assembled my husband’s strawberry shortcake, I was actually thinking of this one. In January while I frosted my daughter’s rocket cake, I secretly fantasized about the light, airy and intensely chocolatey flavor this mousse would impart on a chocolate layer cake. But now it was my son’s birthday, and it was just the four of us. So I went the whole nine chocolate yards.

There are so many things that make this cake delicious. Chocolate, vanilla, and coffee all flavor the chocolate layers. The original recipe doesn’t call for espresso, but this girl learned from the school of Ina Garten, so there is going to be some coffee in my chocolate cake. The mousse is decadent with 2 cups of heavy cream, 13 oz of bittersweet chocolate, 7 egg whites. This is definitely not an everyday cake, but so worth the effort once you take a bite of the finished product. IMG_7227It’s also not for the novice baker, unfortunately. There is egg white beating, folding, chocolate melting, cooling, uniform cake slicing, etc. So if you’ve done these a few times, then you won’t be daunted by this recipe.

The recipe for the mousse makes 8 cups and the directions imply an even divide of all 8 cups between and atop the 3 layers. I needed much less, even when applying the mousse around the sides like a frosting. I used 6 cups for the layers, 1 cup around the sides, and 1 cup for my midnight craving =)

The only thing to be aware of is if you use it around the sides, this cake will have to be refrigerated. At room temperature, the liquid will start to separate and you’ll have a chocolatey mess for the cake. So, keep it in the fridge until just ready to slice and serve.

IMG_2480At this point I have to make a shout out to my friend Jenn Chowdhury, who gifted me this lovely antique cake stand! You might remember the vanilla cake with chocolate buttercream frosting I made for her birthday a few months back.  I’ve been in the market for a while now, since my previous one broke, and this came in the mail like a gift from above. So, thank  you Jenn!!

Recipe adapted from Fine Cooking.

Ingredients

For the cake

  • Butter or vegetable oil for greasing the pan
  • 1 1/2 cups cake flour
  • 6 tbsps unsweetened natural cocoa powder
  • 2 tsp baking pwder
  • 1/4 tsp baking soda
  • 1/4 tsp kosher salt
  • 1 cup white sugar
  • 1/4 cup vegetable oil
  • 1 large egg
  • 1 tsp vanilla extract
  • 1 cup hottest tap water
  • 1 tsp instant espresso

For the mousse

  • 2 cups heavy cream
  • 1/4 cup unsweetened natural cocoa
  • 4 oz (1/2 cup) unsalted butter at room temp, cut into cubes
  • 13 oz bittersweet chocolate (I used Ghirardelli)
  • 2 tsp vanilla extract
  • 7 large egg whites at room temperature
  • 1/2 cup white sugar

Directions

For the cake

  1. Position a rack in the center of the oven and preheat to 325 degrees Fahrenheit.
  2. Grease a 9×2 circular cake pan. Line the bottom with parchment paper and flour the sides of the pan.
  3. Sift the cake flour, cocoa, baking powder, baking soda, and salt into a large bowl. Add the sugar and whisk until all the ingredients are well blended. Measure the oil into a liquid measuring cup. Add the egg and vanilla and mix with a fork. Add to the dry ingredients.
  4. Fill the liquid measuring cup with 1 cup hottest tap water. Dissolve the espresso in it and add to the dry ingredients. Mix until the dry ingredients  are just moist, scraping down the sides of the bowl. Pour batter into prepared pan and bake for 32 to 34 minutes (I baked for 34 min because we’re not dealing with cupcakes here; I’m not too worried about it drying out.) Test it with a toothpick, ensuring that it comes out clean.
  5. Let it cool in the pan for a bit, until you can handle it with your bare hands. Invert it onto a wire rack to cool completely. I like to loosen the sides with a metal spatula or butterknife. Then I place on hand on top, turn the cake out onto my hand, and delicately place over the wire rack. Remove the parchment paper. Let cool to room temperature. Refrigerate or freeze until ready to apply the mousse.
  6. The original recipe suggests assembling it in a springform pan, but I just did so on the cake stand. Slice the cake into three even layers. I like to cut an inch or two deep going around the circumference, before cutting all the way through (otherwise I usually end up with slanted layers). Set the top two layers aside. Scoop about 2 cups of the mousse onto the layer. Spread delicately with a spatula. Add the second cake layer on top. Scoop an additional 2 cups of mousse and spread evenly. Add the top layer and an additional 2 cups mousse. Before applying to the sides, add strips of parchment paper on the cake stand, tucking into the bottom layer (just to keep the surface clean). Starting from the top, add a dollop of mousse and carefully push down the sides. Rotate the stand and continue until the sides are fully covered.
  7. Garnish with chocolate curls, if desired. Refrigerate until ready to be eaten.

For the mousse

  1. Set up an ice bath in a large bowl. Bring the cream and cocoa to a boil in a large saucepan over medium heat, whisking to incorporate all the cocoa. Remove from heat and add the chopped chocolate and butter. Whisk until well combined. Pour the chocolate mixture into a medium bowl and place over ice bath. Keep stirring while the mixture comes to room temperature. Remove bowl from ice bath.
  2. Beat the egg whites in a large bowl with a hand held electric mixture on low speed until frothy. Increase speed to medium and beat until soft peaks form. Add the sugar gradually and beat until peaks are almost stiff.
  3. Add the beaten egg whites to the chocolate mixture in about four batches. Fold the egg whites into the mixture carefully with each addition. Here is a great video demonstrating folding.
  4. The mousse is ready when all the egg whites are incorporated and there are no lumps.

4 Comments · Labels: American/Mediterranean, Dessert, Recipes Tagged: birthday cake, cake, celebration cake, chocolate, chocolate cake recipe, chocolate mousse recipe, dessert, mousse

Homemade Hot Fudge

December 3, 2013

IMG_1890It’s bad enough that hot fudge you get from the ice cream spot around the corner is crack. But when you make it at home with good quality ingredients, Ghirardelli (like I did) or even better…Callebaut or Valrhona? This happens:

 (Image courtesy of Tumblr, katty-mee) 

We were entertaining some old friends and so I thought I’d set up a little sundae bar with some of my favorite toppings: this hot fudge sauce, walnuts, and sprinkles (the ROUND kind, not those silly cylindrical ones. hmmph. who came up with those?? i’ll tell you who, someone with kids because they know once these sprinkles make landfall, they get scattered EVERYWHERE.) Get fancy with bananas, gummy bears, whatever you like. Just not whipped cream. I just don’t get whipped cream over ice cream. The latter is so much more rich and flavorful, what is the point of the whipped cream?? If your opinions on this are as strong as mine, please comment below.IMG_1794This is the first thing I made from my copy of Rose Levy Berenbaum’s The Cake Bible. Ok second. First was Swedish pancakes, which were a disaster. Anywho, she says to use dutch processed cocoa, but honestly, I have such a hard time finding dutch processed cocoa (in fact most of her chocolate cake recipes call for it. I’m going to have to experiment with subbing natural cocoa and making the appropriate leavening adjustments) and never get around to ordering it online, so I just went ahead and made it with good old fashioned natural cocoa. As many of you know, dutch processed cocoa is less acidic than natural and usually has a darker color, but I can tell you I did not miss a thing. And for the solid chocolate, I am sure she finely chopped 3 ounces of THE BEST CHOCOLATE IN THE WORLD, but I just used my semi sweet chips from Costco. They are already flavored with vanilla, so I did not add any, as the original recipe calls for. Make this for your next lunch/dinner party!

Adapted from Rose Levy Berenbaum’s The Cake Bible.

Ingredients

  • 3 oz semisweet chocolate chips
  • 2 tablespoons unsweetened cocoa
  • 1/3 cup water
  • 3 tbsp unsalted butter
  • 1/3 cup sugar
  • 2 tbsp corn syrup
  • pinch salt
  • 1/2 tsp vanilla (if your chocolate isn’t already flavored with vanilla)

Directions

  1. Combine the chocolate chips, cocoa and water in a small saucepan (she suggests nonstick, but I used my usual stainless steel All Clad saucepan). Heat over medium heat, stirring constantly, until chocolate is melted and everything is combined. Add the butter, sugar, corn syrup, and salt. Stir until the sugar melts. Then let it cook away, boiling moderately, for 5 to 10 minutes, until the mixture reduces to 2/3 cup (I stopped at 5 minutes, weary of overcooking it). If you want to measure: coat a heatproof glass measuring cup with oil, then pour in the sauce.
  2. Cool slightly before adding the vanilla. Can be reheated in a microwave. Keeps in the fridge for 1 month.

Leave a Comment · Labels: American/Mediterranean, Dessert, Recipes Tagged: burnt sugar, chocolate, chocolate chips, cocoa, dessert, hot fudge, ice cream, ice cream sundaes, semisweet chocolate chips, sprinkles, vanilla

Chocolate Almond Torte & Giveaway!

September 11, 2013

IMG_1467There is nothing more pleasing to me than a decadent chocolate dessert (a sublime mousse, a rich flourless chocolate cake, piping hot fudge on ice cream). After that comes almond cookies, anything from tricolor cookies to macarons to straight up marzipan. So, of course, when I found this recipe, I definitely heard a KA-CHING somewhere and my eyes reflected cupcake silhouettes or something.IMG_1449 A few departures from the original Epicurious recipe: as in all of my baking, I use raw sugar. And instead of slivered almonds like the original recipe, I just use almond meal, using a scant 1 1/2 cups instead of a full 1 1/2 cups to account for settling and density of ground almonds vs. slivered.IMG_1451I’m not sure why the recipe called for a 1/2 tsp of lemon zest. I didn’t find it added anything to the flavor (it was way overpowered by the almond extract). My guess is because Capri (which is off the Amalfi coast) is brimming with lemons, some the size of pineapples, so they probably just add it to everything.   IMG_1455This recipe was also perfect for feeding my almond meal obsession. I just love adding it to everything in lieu of some amount of flour. It adds such a nice texture to otherwise plain jane pancakes or sugar cookies. As you can see, there was some spillage. I won’t point fingers, but if I did they might point down. IMG_1458I am terrible at clearing counter space. And yes, that is Pam in the background that I used for greasing my springform pan instead of the butter the recipe so clearly stated to use. I haven’t noticed a difference…have you? IMG_1461The torte’s not so sexy close-up. Folding the whipped egg whites in three batches. So proud of myself for not deflating (it)! IMG_1462This is just seconds after it had a close encounter with a toddler with a truck in hand. It barely squeezed through.   IMG_1470We whipped out the extra fancy serving dishes and silverware for this torte. Actually my husband and his brother were so eager to dive into it, I had to get up before I could finish my meal and scramble to get the camera before this precious first slice entered into the oblivion. IMG_1473Don’t be sad when your torte deflates. It’s an egg thing. You probably won’t even notice since you’ve taken a bite of chocolate heaven are doubly smacked in the face with almond flavor (both meal and extract), like Billy Crystal’s consigliere in Analyze This. Think, chocolate macaron meets rainbow cookie meets brownie. Really, really good with a dollop of homemade sweetened cream (as opposed to the powdered sugar the original recipe suggests).

On another note…GIVEAWAY TIME! Enter here for a chance to win a $50 gift card to my favorite cookware/bakeware/serveware/specialty food store Sur La Table! Thanks to all my readers for keeping me going!

Recipe from Epicurious.

Ingredients

  • 1 1/2 cups blanched slivered almonds (or scant 1 1/2 cups almond meal)
  • 1 cup sugar
  • 8 ounces bittersweet (not unsweetened) or semisweet chocolate, chopped
  • 5 large eggs, separated
  • 1/2 teaspoon almond extract
  • 1/2 teaspoon grated lemon peel (optional)
  • 1/2 cup (1 stick) unsalted butter, melted, cooled (I did not cool mine)
  • 1/4 teaspoon salt

Directions

Preheat oven to 350°F. Butter 10-inch-diameter springform pan with 2 3/4-inch-high sides. Combine almonds and 1/3 cup sugar in processor. Blend until almonds are very finely ground. Transfer almond mixture to medium bowl; do not clean processor. Add chocolate and 1/3 cup sugar to processor. Blend until chocolate is finely ground but not beginning to clump, about 45 seconds; stir into almond mixture. Using electric mixer, beat egg yolks and remaining 1/3 cup sugar in large bowl until mixture falls in heavy ribbon when beaters are lifted, about 5 minutes. Beat in almond extract and lemon peel. Fold in chocolate-almond mixture, then butter.

Using clean dry beaters, beat egg whites and salt in another large bowl until stiff but not dry. Fold whites into chocolate batter in three additions. Transfer batter to prepared pan.

Bake cake until tester inserted into center comes out with moist crumbs attached, about 40 minutes. Cool cake completely in pan on rack. (Can be made 1 day ahead. Cover; store at room temperature.) Cut around pan sides to loosen; release sides. Serve with sweetened whipped cream.

Leave a Comment · Labels: American/Mediterranean, Dessert, Recipes Tagged: almond, chocolate, decadent, dessert, gluten free, rich, torta caprese, torte

  • Newer Entries
  • 1
  • 2
  • 3
  • Previous Entries
American, Bangladeshi. Savory, sweet. I don't discriminate and neither should you.

Most recently…

Load More...
Follow on Instagram

Social

Subscribe to Blog via Email

Enter your email address to subscribe to this blog and receive notifications of new posts by email.

Tags

appetizer beef bengali breakfast butter cake caramel chicken chocolate chocolate chips cilantro clean eating coconut comfort food cookies dessert dinner entertaining fall fruit ganache gluten free halal healthy homemade honest chops honest creations iftar italian pasta pastry pistachio quick and easy dinner ramadan recipe side side dish south asian spinach vegan vegetables vegetarian weeknight dinner weeknight meal whipped cream

Theme by 17th Avenue · Powered by WordPress & Genesis