
Patishapta pitha was the rare pitha I would eat growing up. Maybe it’s a regional thing, but I just did not enjoy most pithas I had. [Pitha: Bengali dumplings. Usually made out of rice flour. Sometimes a combo of rice flour and wheat flour. And in my experience, dry af most of the time. Sometimes sweet with a coconut or jaggery filling. And, as I found out after marriage, sometimes plain, eaten with curry.]
Chocolate Pudding or Pastry Cream

I had a revelation this week: pastry cream is basically pudding, with perhaps an egg yolk or two more. Both start off with a milk/sugar base, thickened over the stove top using some combination of cornstarch/flour/egg yolks then flavored with vanilla, chocolate or any other flavor of choice. This recipe, in my opinion, can pass for both.
Cinnamon Honey Skillet Cornbread
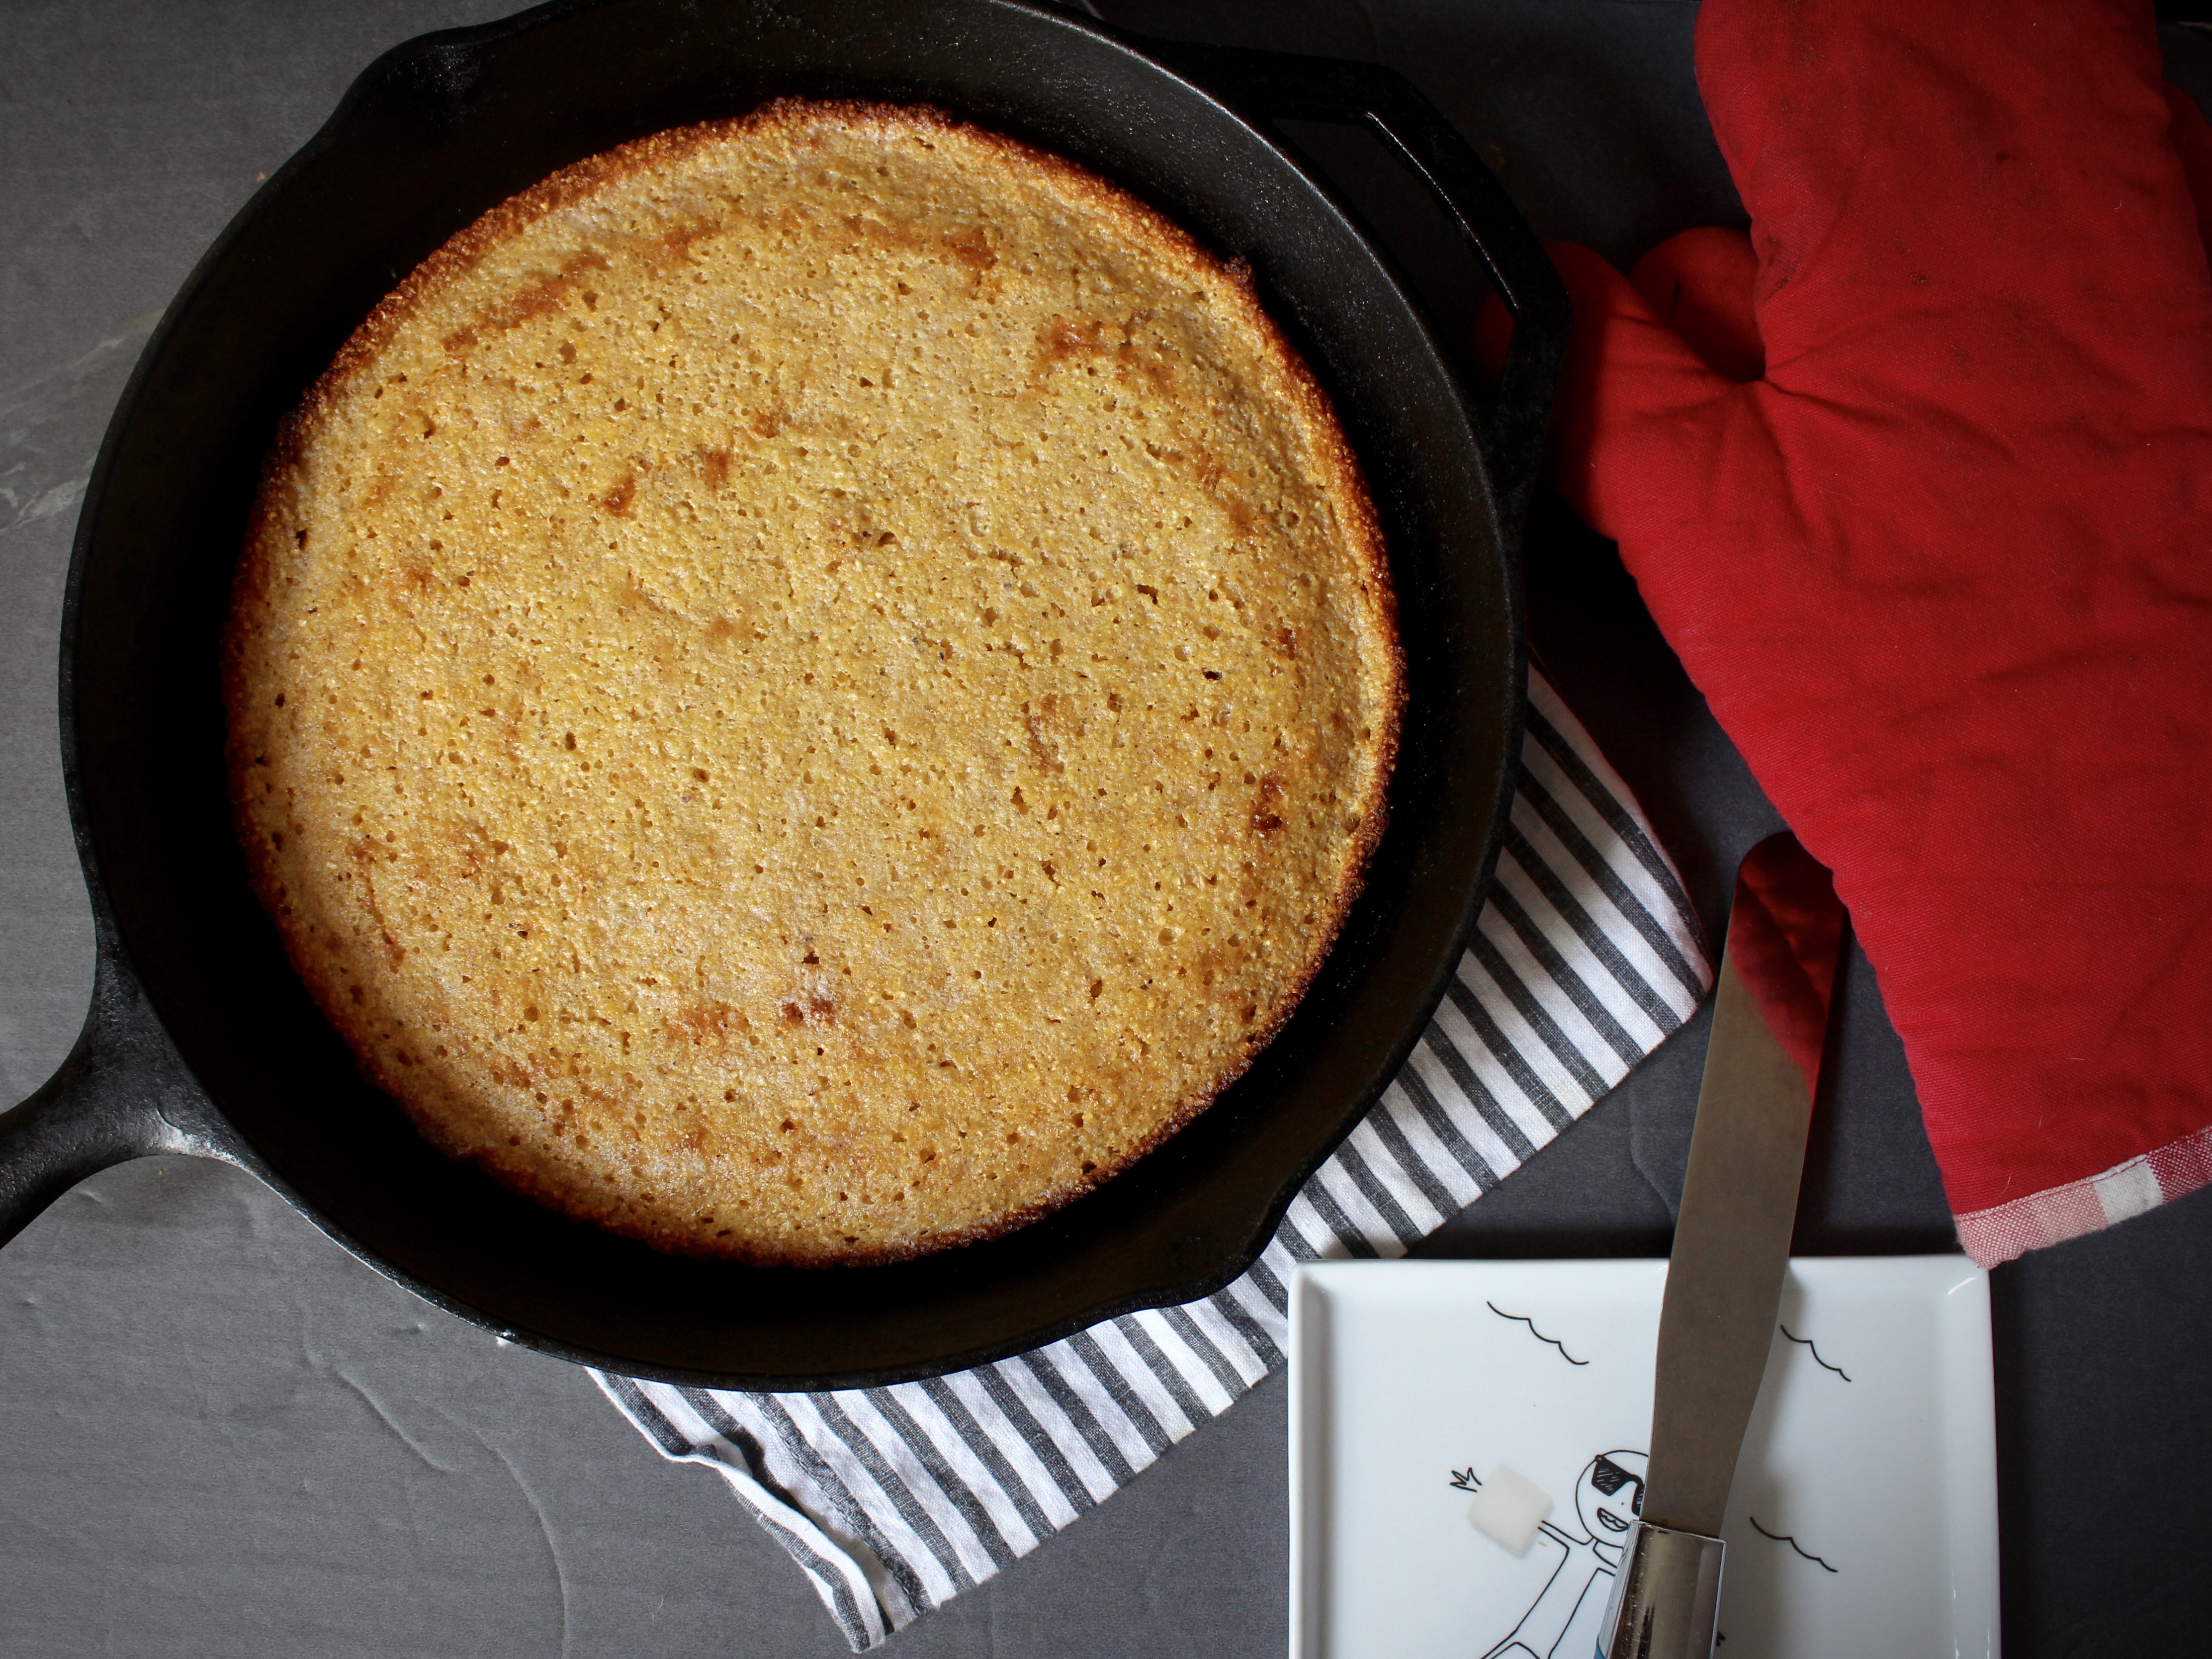
What’s the best gift you’ve ever received? Was it jewelry? A nice bag? Maybe those shoes you’ve been eyeing? For me, it was my engagement ring, hands down. BUT apart from the that, the best gift I continue to receive is from my mother. Every few months she gives me a jar of homemade ginger/garlic paste that is quintessential in Bengali cuisine. Sure, you can buy the jarred stuff from the desi grocery, but it’s just not the same. It’s fresh, preservative free, and it’s made with LOVE. Such a life saver on busy weeknights to not have to peel/chop fresh ginger and garlic.
This time though, she outdid herself. She brought me some homemade GHEE. Ghee, or clarified butter, is made exactly how the French make it. Warm up butter in a pot or saucepan until melted. Then let sit for an hour or two, until the milk solids fall to the bottom, while the fat comes to the top. When she brought it, I opened it up and OH MY NUTTYNESS it smelled good.
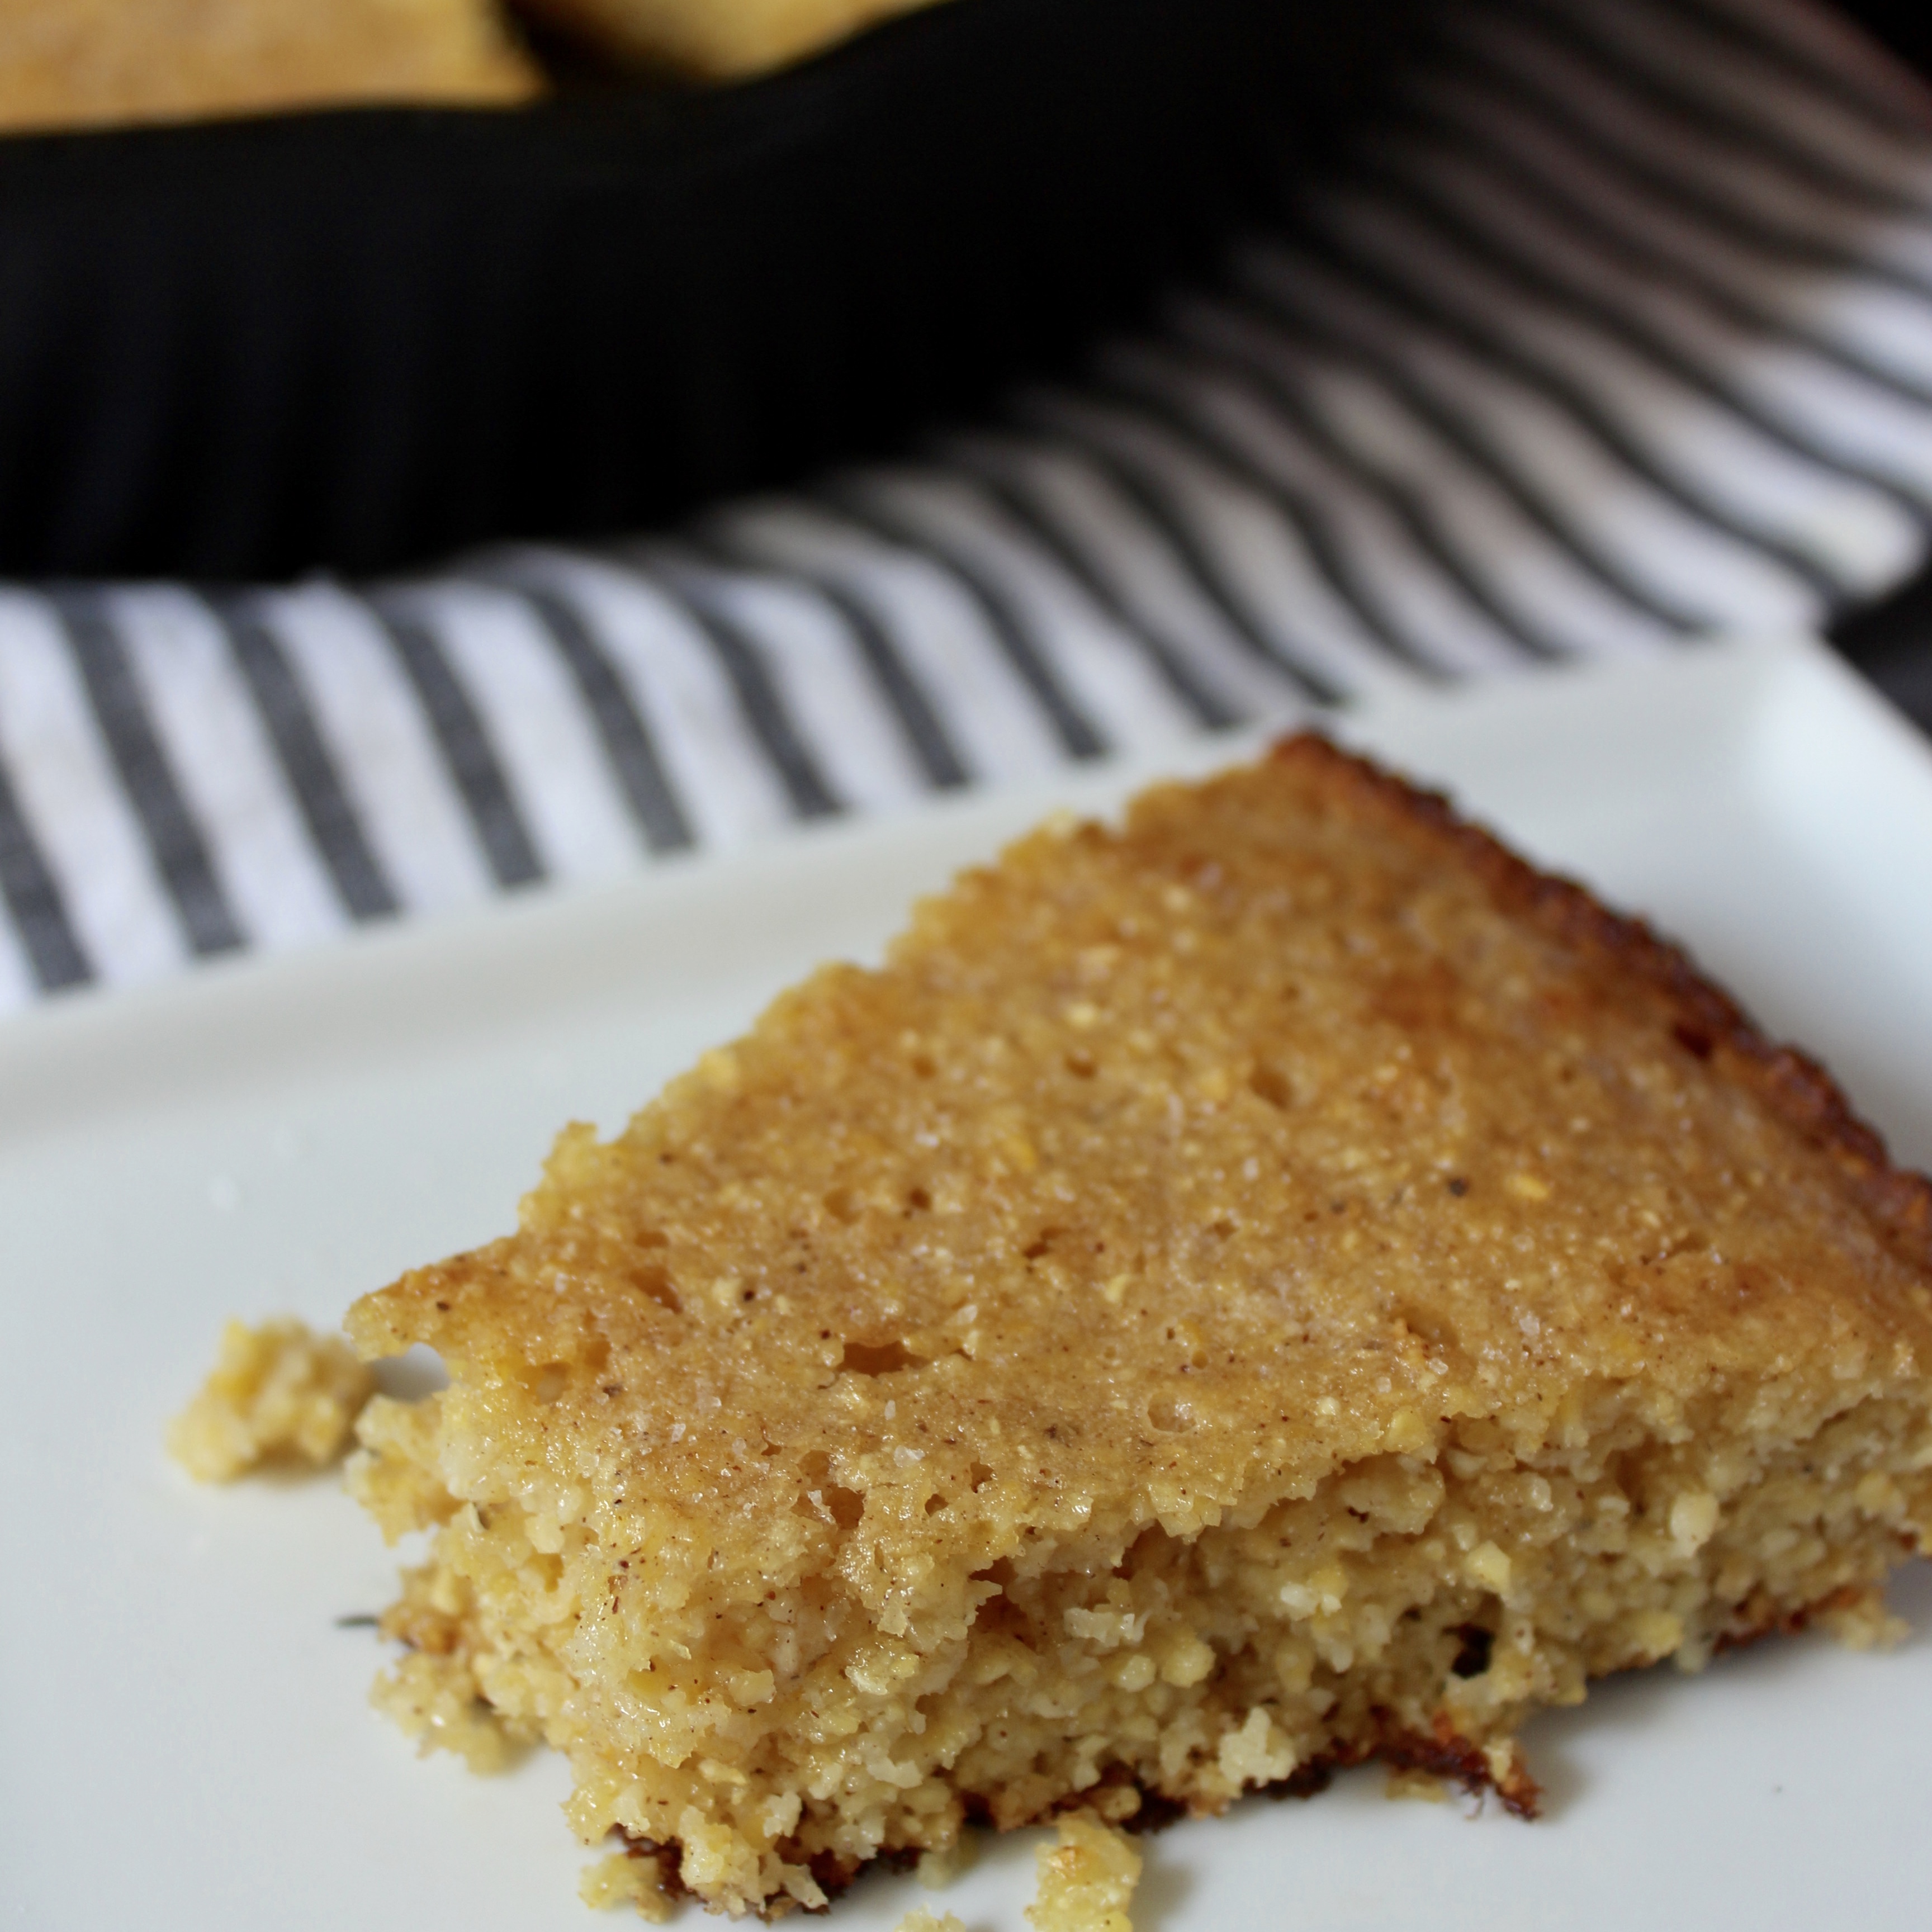
So, when I found the recipe for this cornbread in my Thanksgiving edition of Bon Appetit, I knew I wanted to sub the lard with ghee. It was perfect because I’ve had this coarse ground corn meal in my pantry for months, neglecting it because it was too coarse for muffins, but little did I know, perfect for this skillet cornbread. I added cinnamon and honey because I loved the cornbread croutons in Trader Joe’s Fall Harvest salad and I’m pretty sure they have a hint of both ingredients. I’m fairly certain this will be part of our Thanksgiving spread this year as cornnbread dressing. Mmmm.
Recipe adapted from Bon Appetit.
Ingredients
- 2 cups coarse ground cornmeal
- 1 tsp kosher salt
- 1/2 tsp baking powder
- 1/2 tsp baking soda
- 1/2 tsp cinnamon
- 1 large egg
- 1 1/2 cups buttermilk
- 2 tbsp honey
- 1 tbsp lard, veg oil or ghee
- 1 stick or 1/2 cup butter room temperature
- Fine sea salt for sprinkling
Directions
1. Place a rack in the middle of your oven and place a 9 to 10in cast iron skillet to preheat.
2. In a large bowl, combined corn meal, salt, baking powder, baking soda and cinnamon. In a separate bowl or mixing cup, combine buttermilk, egg and honey. Slowly add to dry ingredients, stirring with a wooden spoon to incorporate.
3. Wearing oven mitts, carefully remove the skillet from the oven. Melt the ghee/lard/oil and swirl around the skillet. Pour the batter into prepared pan and bake in the preheated oven for 15-20 minutes.
4. After removing from oven, add butter to the top of cornbread an allow to melt all over the top. Serve with an extra sprinkling of sea salt.
Aloo Chop (Fried Mashed Potato Balls)

Traditional Bengali iftars are an exercise in how many different ways can we consume fried foods. Ground up lentils and herbs? FRY IT! Fresh sliced eggplant? BATTER AND FRY IT! Whole green chilis? FRY IT! Mashed potatoes? FRY. IT.

There’s been a backlash by my generation against the fried iftars of our parents’ generation:
- “We’re just doing broiled salmon and sauteed green beans for iftar.”
- “I’m doing a green smoothie for iftar.”
- “Every year I gain weight during Ramadan. No fried foods for me this year.”
Yet when we go to the inevitable iftar dawat at our parents’ or aunts’ or grandparents’, we’re still gonna pop a couple of fritters on our plate while no one’s looking. Not the whole deep fried green chilis – dear God no. I don’t know WHO that appeals to. But we can pretty unanimously agree on the Aloo Chop. Any manifestation of a fried potato is right by my books. And when filled with tiny cubes of hard boiled egg, well it becomes a whole darn meal!

I justify it by compounding it with salad. Lots of greens and veggies. And water. I read somewhere on the internets that junk food is ok, as long as you drink lots of water afterward. =)

I went with Yukon gold potatoes, as they are more waxy than Idaho. I didn’t add any butter or milk to the potatoes themselves, as I wanted them to hold their shape as well as they could while sizzling away in the hot oil.

The best part is, they freeze beautifully. Just pop them in the a ziploc before the egg wash/breading stage, and fry them up whenever you want them. These take a little bit of time to prepare, but these are the things childhood memories are made of.
Ingredients
- 2 lbs yukon gold potato, quartered
- 1 tsp kosher salt plus more to taste
- 1 tsp chaat masala*
- 1/2 tsp ground cumin
- 4 scallions, thinly sliced
- 1/2 cup minced cilantro
- 1 green chili, minced (optional)
- 3 hard boiled eggs, chopped small
- a squeeze of lemon juice (optional)
- a dash of salt
- a dash of cayenne pepper
- 3 eggs
- 2 cups seasoned breadcrumbs
- vegetable oil for frying
Directions
- In a large pot, bring 4 quarts of water to boil. Carefully lower potatoes and cook until tender: 10-12 minutes. I don’t bother peeling them. I boil them skin on, then when cool to the touch, peel back the skins like my mom used to do.
- Season the potatoes with salt, chaat masala and cumin. Taste for seasoning and add more salt if necessary. Mash with a potato masher. Add scallions, cilantro (all but 1 tbsp of it) and green chili is using**. Then get in there with your hand and incorporate very well. Set aside.
- Season the diced hard boiled eggs with the remaining 1 tbsp cilantro, lemon juice, salt and cayenne pepper. Toss lightly.
- Make balls with the mashed potato mixture by grabbing a handful, rolling into a ball, pressing in to make an indent (see picture above), and fill with a tiny bit of the egg mixture. Enclose the egg mixture fully with the edges of the potato ball. Set aside on a plate or baking sheet and continue making the rest of the balls. At this point you can freeze the balls and fry them off at a later time as needed.
- Heat up oil (enough to come up 2 inches) in a small wok or saucepan to 325 to 350 degrees F. In a shallow bowl, crack eggs and beat lightly. In another shallow bowl, pour out the breadcrumbs. roll each ball in the egg, then in the bread mixture, then lower carefully into the hot oil. Do not crowd the pan. Fry for 2 to 4 minutes, until lightly browned. Remove from oil and onto a paper towel lined plate. Serve with Sriracha or Ketchup.
*Chaat masala is a tangy/salty/spicy spice mix that can bring any dish to life. Easily available at any Indian grocery.
**I wouldn’t recommend adding the green chili unless you are a LOVER of spicy foods. I just have it listed as it is a traditional ingredient.
Mexican Chicken Noodle Soup

The first thing I do when someone sneezes in the house, is submerge a chicken in a pot of boiling water to make chicken stock for soup. That’s a normal, knee-jerk reaction, right?
Ok, perhaps I exaggerate. But there’s just something about the thought of clear, warming chicken noodle soup that makes me feel like it will banish all the ickiness of a cold away. And while the classic has a special place, this tomato paste and spice spiked version will carry you over from your sick days to your top o’ the mornin’, heel clickin’ days. Because for some reason, the weather is still dipping below freezing here in NYC in the middle of spring and the kids have caught strep throat while the hubby and I work our way through the common cold. Un-believable.
Back to the soup. It was the perfect dish for my crusty-bread obsessed husband to dip his baguette into. It was the only thing my preschool aged son has ever declared his love for, apart from trains and well, me. And it was one of the few items I did not have to struggle to finish from the fridge as a leftover.

If I make my own chicken stock, I usually boil away chicken with veggies (onion, garlic, carrot, celery), aromatics (parsley, dill, thyme, bay leaf) and seasoning (salt, whole peppercorns). However, unlike most, I take the chicken out about an hour into the process, strip the meat off the bones, and re-submerge the carcass. That way the bones continue to flavor the stock for about 2 more hours and I don’t have to waste the meat. Does that make me crazy?
If you are using store bought stock, it comes together SO fast. When I don’t have homemade on hand (which is quite often) I use Saffron Road Halal Artisan Chicken Stock. Awesome flavor and deep golden color. You can tell it’s not just one of those salt water in a box chicken stocks. And if you want to make this vegetarian, use vegetable stock and chickpeas in lieu of the chicken. The tomato paste and spices are magical in how they liven up pretty much anything.
Ingredients
- 2 tbsp olive oil
- 1 medium yellow onion, diced small
- 2 carrots, diced small
- 2 celery stalks, diced small
- 2 large garlic cloves, minced
- 1 tsp each of cumin, coriander and paprika
- 1 1/2 tsp salt plus more to taste
- 1/4 to 1/2 tsp crushed red chili flakes
- 14 oz crushed tomatoes (if you have a 15 oz can that’s fine)
- 8 cups chicken broth
- 1 cup shredded chicken
- 1/4 lb spaghetti or noodle of choice
- 1/2 cup chopped cilantro
Directions
- In a large pot, heat the olive oil over medium high heat. Add the onions, carrots and celery. Saute for 4-5 minutes, until the vegetables begin to soften. Add the garlic and spices (cumin, coriander, paprika, salt and pepper). Cook for 2 minutes more, allowing the vegetables to get more tender and the spices to toast up a bit.
- Add the tomatoes, broth, chicken and pasta. Cook for 9 to 10 minutes, depending on the package directions of your pasta.
- Add the cilantro and taste for seasoning.
Potato Leek Soup with Rosemary Garlic Oil
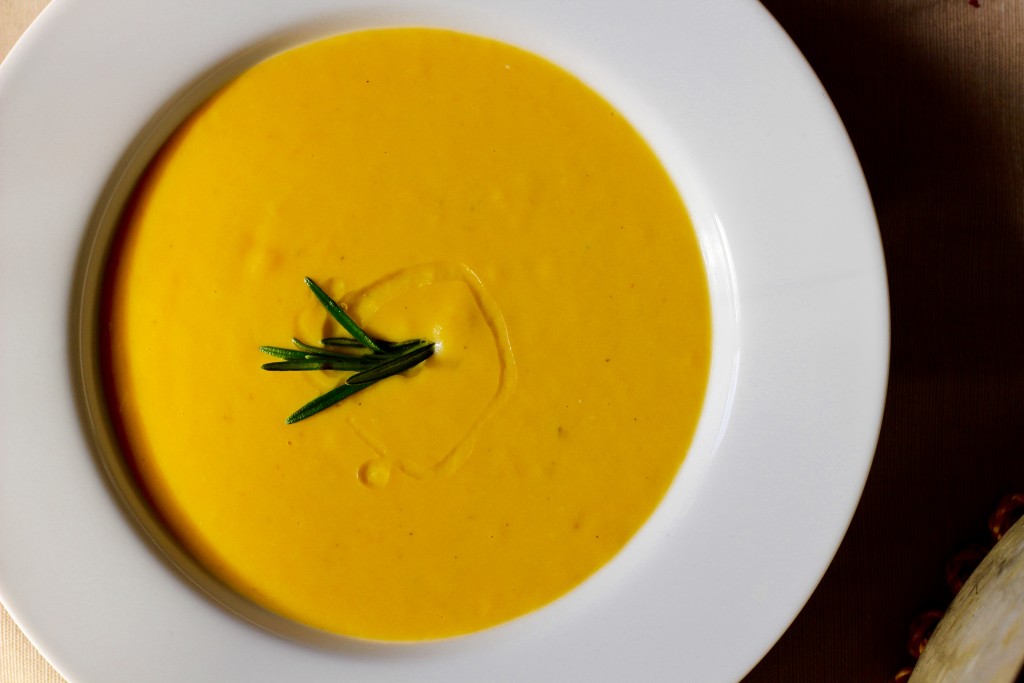 I had a hankering for warm, comforting American dishes the other day. Creamy tomato soup. Potato leek soup. Corn chowder. Pan seared scallops. Flat bread dotted with goat cheese and herbs. Just things I wouldn’t usually make since there isn’t a huge appetite for these things in our household. Take exhibit A: potato leek soup. Despite my daughter’s proclamation that she LOVED THIS SOUP and my husband’s accolade, “this soup’s good, Jaan!”, they each had just one serving. Just one. So guess who else had ALL the remaining servings?
 Yours, truly, of course. When I was a work study (undergraduate doing an on-campus job) at Columbia Business School, I would go down to the cafeteria and scope out what I could afford. Back then, a small soup with crackers cost about $4.75. With tax, it came out to almost $6. Which was a lot for me to fork over for lunch. But a girl’s gotta eat. Neither the $3.50 muffin nor the $12 sandwiches weren’t good alternatives.
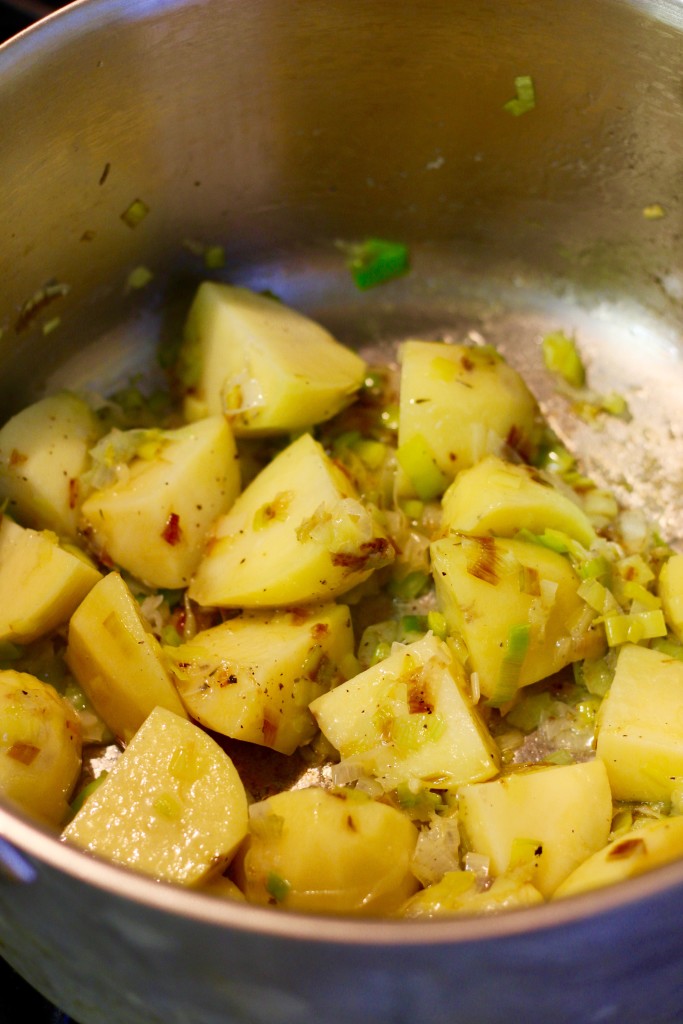
I looked at a bunch of different recipes before diving into this. I knew I wanted to caramelize the leeks a bit. I knew I didn’t have chicken stock on hand, and not even the full amount of vegetable stock needed for this amount. I knew despite all the different herbs I read people used, I wanted to use dry thyme (one of my favorite pantry items since it adds such a lovely aroma and flavor and I could sense my kids associating its scent with my cooking), and rosemary. Finally, I knew I didn’t want to have a big huge batch because something told me I’d be eating 90% of it. 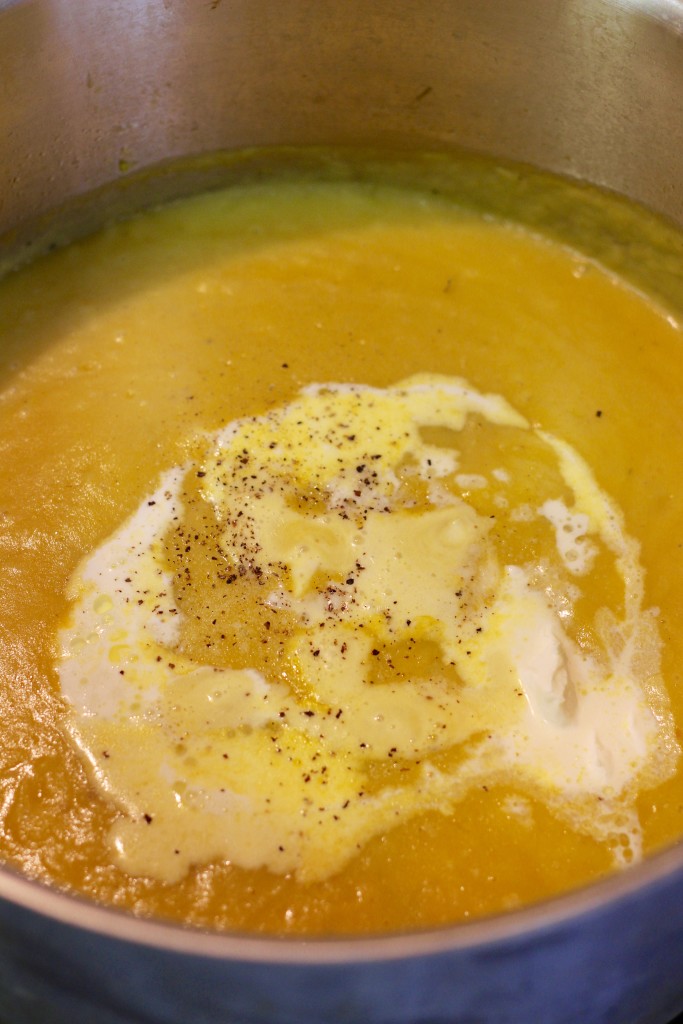
So I halved the amounts I read in other recipes, I sautéed the veggies a bit longer, and I used a combo of vegetable stock and water. Depending on the type of vegetable stock you use, your color will vary. Mine was the low sodium one from Trader Joe’s. Made from carrots, tomatoes, among other vegetables. Thus imparting an orange hue to a normally off-white soup. 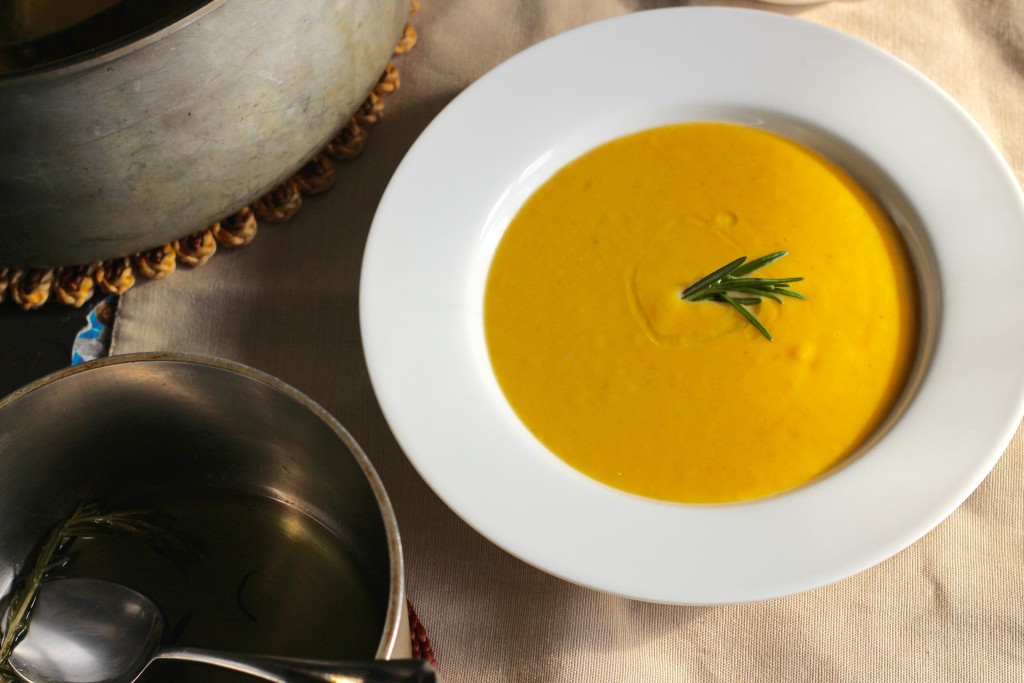 The type of vegetable stock you use will also affect the seasoning required, so make sure to add just enough salt and pepper until it’s really really tasty.
 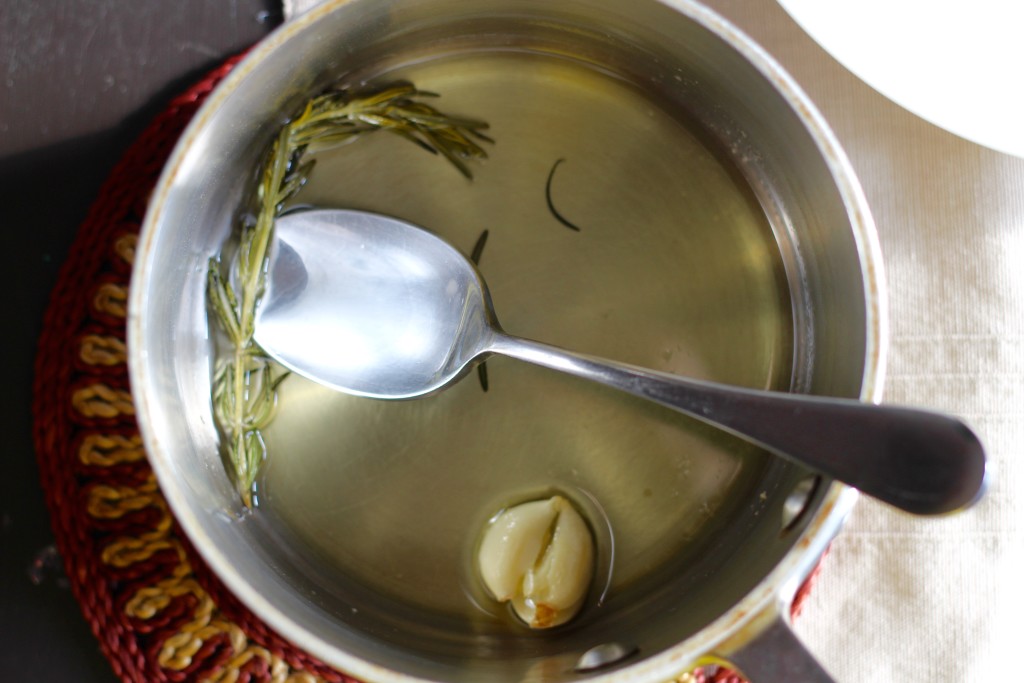 I didn’t put rosemary in the soup directly. I thought the presentation and flavor would be more pronounced with an infused oil added at the very end. Take that, winter.
Ingredients
- 2 tbsp olive oil
- 2 leeks, dark ends trimmed
- 4 Yukon gold potatoes (about 1 pound), diced into large chunks
- 1/2 tsp salt (plus more to taste)
- 1/2 tsp black pepper
- 1/2 tsp dried thyme
- 1 bay leaf
- 1 1/2 cups vegetable stock*
- 2 1/2 cups water
- 1 cup cream
- 1 tbsp creme fraiche (optional)
- 1/4 cup olive oil
- 1 clove garlic
- 1 sprig rosemary
Directions
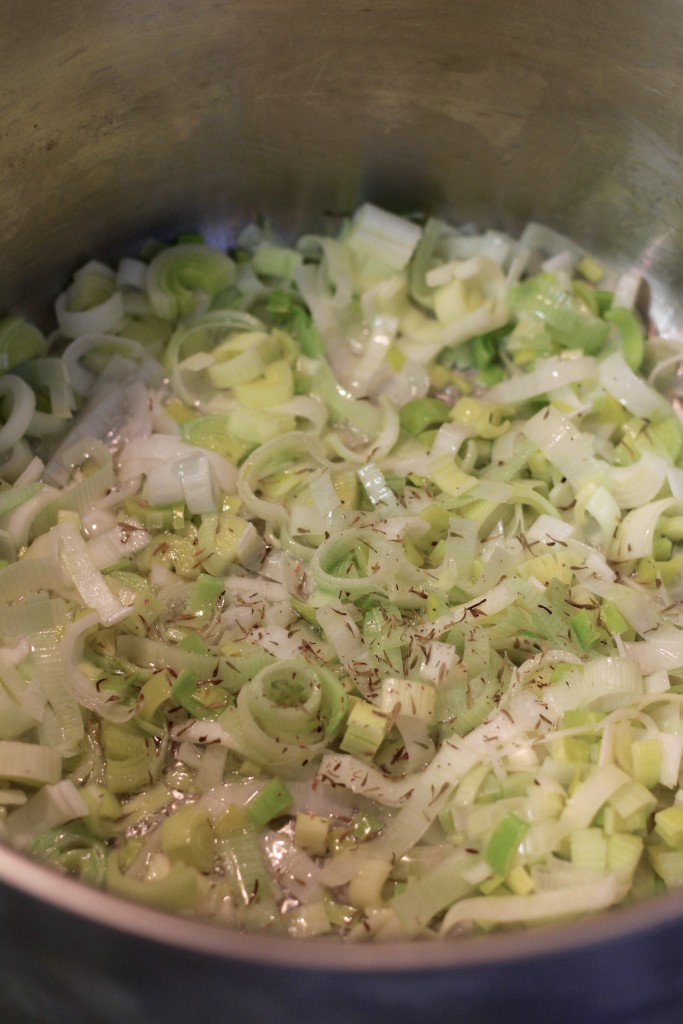
- Slice ends off of leeks and slice down the middle lengthwise. Rinse well to get rid of the dirt in between all the layers. Thinly slice into about 1/4 strips. Heat oil in a large pot (stainless steel or enameled both work) over medium high heat. Add leeks and dried thyme. Sauté until leeks are softened (6 to 8 minutes). Add the potatoes, salt and pepper. Stir to coat all the vegetables in the seasonings. Add stock, water and bay leaf and bring to a boil. Lower the heat, put the lid on and cook for about 20 minutes, until potatoes are tender.
- Once the potatoes are tender, turn off heat and remove the bay leaf. Purée the mixture with an immersion blender, or in batches in a blender. Put the pot with the puree back on medium heat. Add the cream and creme fraiche if using. Stir. When mixture comes to a boil, stir and taste for seasoning. Add more seasoning as required and remove from heat.
- Make the rosemary garlic oil: in a small saucepan, combine olive oil, garlic clove (smashed with the palm of your hand or side of a knife) and rosemary. Cook over low heat, allowing the garlic and rosemary to gently infuse the oil. Remove from heat when fragrant, about 5 minutes.
- Ladle the soup in a shallow bowl. Drizzle with a bit of oil and a dollop of more creme fraiche, if desired.
*Can use chicken stock. Can nix the water and use all stock instead. One and half cups was how much I had on hand, so that’s what I used.
Creamy Less Cheesy Mac and Cheese
 Anyone else find themselves questioning their life choices? First world problems, right? I’ve got a roof over my head, food to eat, a wonderful family – so much to be grateful for. But I’m feeling sorry for myself because I haven’t “made it” yet or didn’t pursue one of the more conventional paths of engineering, medicine, or law (not that I have a litigating bone in my body). Of course this comes at a time when most of my high school and college classmates are receiving their secondary degrees and the grass is looking greener on the other side. But I’ve been trying to embody the saying I’ve read recently, “The grass is greener where you water it”. I love my family and would be so empty without them. But I need to reach my professional goals as well. Would love to grow this blog or my little side hustle (custom cakes) but I feel like I’m lacking some guidance. Is it my content? My outreach? Help me out, guys!! Granted I have two little ones, one who is isn’t in school yet, so my resources are limited.
  Speaking of little ones, for years I lamented that despite my efforts to make mac and cheese from scratch, my kids preferred the stuff from the blue box. Relieved, since dinner could be ready in a snap if I had the blue box on hand. Affronted, as well. So I sought a solution. The problem was the traditional mac and cheese recipes I followed were quite cheesy. Resulting in a strongly flavored and thick sauce.
 So, I thought I’d make a bechamel sauce, add in a little bit of cheese at a time until it had just enough thickness and was mildly flavored enough for my kiddos, and voila! I made something that my 3 1/2 year old would lick clean off the plate.
  This comes together so quickly, you’ll be like, blue box, who? Granted you have pre-shredded cheese. I use the Trader Joe’s blend of mozzarella, cheddar and jack cheese. It’s wonderful in omelettes, grilled cheese, etc.
  Throw in some frozen peas with the pasta during the last minute of cooking to make it a complete meal. Or shredded beef/chicken. The sky’s the limit. I just keep the chicken broth on hand in case it gets too thick.
 Make this once and you’ll never go back to Panera’s mac and cheese! Feel free to double the recipe if you have more mouths to feed!
Ingredients
- 2 tbsp butter
- 2 tbsp all purpose flour
- 2 cups whole milk
- 1/2 cup grated cheese (cheddar or I use a combo of mozzarella, cheddar and pepper jack)
- 3/4 tsp salt plus more to taste
- dash black pepper
- dash cayenne pepper
- 1/2 pound elbows or small shell pasta
Directions
- In a medium to large pot, heat about 4 quarts of water over high heat. Let it come to a boil while you prepare the other ingredients.
- When it comes to a boil, add a teaspoon of salt and the pasta to the water. Give it a stir and set the timer to 8 minutes (check the time on the box for shells since I used elbows).
- Melt the butter over medium heat. Add the flour and whisk together. Allow to cook for 1-2 minutes. Next, slowly pour in the milk, while whisking. Continue whisking, taking care to get all the bits of flour and butter from the bottom of the pan. Lower the heat to a simmer a let cook for 5 minutes. It won’t thicken fully at this point. Make sure the mixture is not boiling otherwise the cheese will curdle*. Turn off the heat (and the heat of the pasta if the timer is up). Add salt and pepper and stir to combine.** Add cheese and stir – now the sauce should be sufficiently thick to coat the pasta.
- Strain pasta and add it to the cheese sauce. Serve immediately.***
*I learned this the hard way after ruining two batches during our suite’s Thanksgiving potluck in college.
**Congratulations, you’ve just made bechamel sauce!
***To reheat, add a bit of chicken broth to a saucepan and warm over medium low heat until heated through.
Mustard and Chili Mashed Potatoes and a Giveaway!
 There’s a lot going on in today’s post.
  Firstly, we’re talking vegetable peelers and a giveaway! My good friend’s husband has started a company selling premium kitchen products, with their first being this awesome curved Japanese blade vegetable peeler! Using mine was a breeze – the sharp blade made for smooth cuts and the design definitely required less pressure from the hand doing the peeling. The sprout remover on either side helped get those little “eyes” out. I tackled these buds in no time. I will say, though, if you are used to the vertical peelers, it may take some getting used to. But as with any sharp edge, take care to curl the fingers of your supporting hand away while using!
 Because this is such a great product and think you guys would love it, too, we are giving one away! To enter, simply comment on my FB page responding to this question: What’s the first thing you would use ChefBasix Vegetable Peeler for? Good luck!

 Secondly, we’re talking about ghee – clarified butter that South Asians use to cook (some dishes) with. It doesn’t have the milk solids of butter, so it has a higher burning temperature. This picture shows how it happens. After melting the butter over low heat, you keep it on until it attains this golden color, not the amber color you would look for while making browned butter. We are just looking for the milk solids in the butter to toast up to give the ghee a nice nutty flavor. You don’t want to get to that light brown stage, otherwise you will lose too much moisture. Once you’ve gotten the right color, take it off the heat. You can let it cool in the pot, but I poured it into this bowl to show you what was going on. The milk solids sink to the bottom so you only spoon off the fluid on top. Left to cool long enough it will congeal and resemble the store bought ghee. This last step is not totally necessary in today’s dish, as we are not cooking with the ghee. It’s more for aesthetic purposes so you don’t have bits of brown running through the mashed potatoes (don’t toss it, though! spoon it over toast for a snack!).
 Finally, we are talking about aloo bhorta (mashed potatoes)! It seems like potatoes are a universal comfort food. When coming back from a family trip, or on days when we were low on groceries, dinner looked like this: steamed rice, aloo bhorta, an omelette and daal. South Asian immigrant parents have an almost militant attitude toward eating out. Take out was a non-existent concept. As newcomers, our parents had to reign with frugality. Though we were brats about it and whined about wanting pizza or burgers, our parents did the hard work of making every single meal from scratch. The aloo bhorta and omelette were studded with pieces of raw onion and slivers of green chilis. Most of my time during those meals were spent picking out the aforementioned bits to get to the good stuff. I was never a part of the set-my-mouth-ablaze-to-enjoy-my-meal set.
  So now, since I’m in charge of my kitchen, I’ve started to substitute scallion for the raw onion and dried red chili for the fruity spice of the green chili (or Thai chili as it’s known to some). The dried red chili still has some heat – just not as explosive as its green counterpart.
Traditionally, the potatoes are mixed by hand with mustard oil, salt, the onions and chilis. Individuals will later add as much or as little ghee atop the potatoes as they like to their portion. However, my many years of making and eating American style mashed potatoes would not allow me to serve a butter-barren bowl of spuds. It just needs the silkiness that butter imparts!  Definitely mix by hands to achieve the full effect. I wore gloves, though, to protect my eczema prone hands from the heat. Though these are mustard and chili mashed potatoes, the mustard that’s used is in the form of oil, rather than the paste. I’ve never made it with the paste, but if you have trouble locating mustard oil, definitely feel free to use the powder or paste (starting with a 1/2 tsp and working your way up).
Ingredients
- 2 lbs Russet potatoes, peeled and quartered
- 1/2 cup (1 stick) unsalted butter
- 2 1/2 tbsps mustard oil
- 1 tsp salt (plus more to taste)
- 3 scallions, sliced thinly
- 2 dried chilis (3 if you like it HOT)
Directions
- Bring a large pot of water to boil. Carefully lower the potatoes in and let cook for about 20 minutes. Drain in a colander and set aside.
- While the potatoes cook, add the butter to a small saucepan and cook over low heat until melted and the butter becomes golden and fragrant. Turn off the heat and let cool.
- In a dry non stick skillet or cast iron skillet, toast the chilis over medium high heat for 2-3 minutes. You should see the oil on the surface and the aroma emerge. Set aside.
- Add the cooked potatoes to a large bowl. Season with mustard oil and salt. Mash together with a potato masher. Add the scallions, chilis, and 4 tbsps of the clarified butter. Mix by hand, using your fingertips to break apart the chilis, until everything is uniformly distributed. Taste to see if the seasoning is just right. Serve with an extra dollop of the clarified butter.
Ridiculously Good Fried Chicken
 If you follow me on instagram (kitchen3n), you’ll notice I went on a little trip recently! I had the opportunity to help organize a company retreat at the magnificent Qasr Al Sarab in UAE (about 2 hours south of Abu Dhabi). It was my first time abroad since having my kids so you can be sure leading up to the trip I juggled feelings of anxiety and excitement…but mostly anxiety.


As difficult as it was leaving the kiddos behind for a whole week, it was so refreshing and rewarding to immerse myself in work, in a new place, with faces that I don’t see often. The food at the resort was fabulous and plentiful. UAE is truly a mix of ethnic groups and it shows in the dining options. Traditional emirati dishes are punctuated by South Asian, Filipino and pan-Arab foods. Some of the most memorable items I had were fresh labne (strained yogurt), congee (chinese rice porridge with dried shrimp and soy sauce), stewed tomatoes, bbq beef short ribs, and mustard (yes – the condiment, a whole grain, fruity, spicy concoction) atop veal chops – ugh, it was heavenly. 
One thing they did not have, was my fried chicken. That, you have to come to Kitchen3N for. My fried chicken is special in that I brine it in a buttermilk, salt and spice mixture that gives it incomparable tenderness and flavor (a nod to smitten kitchen’s buttermilk roast chicken). Then, to make it even more special, the coating it gets before hitting the hot oil is a combination of flour, bread crumbs and even more seasoning. Finally, I finish it in the oven on a wire rack atop a baking sheet because I can never seem to get it cooked throughout without burning the outside when I stick to just the stove top method. Thanks for the idea, Ina.
I don’t even know why I’m disclosing my secrets. Yes, I want you to have outrageously good fried chicken. No, I’m not opening a restaurant any time soon. I suppose these are good reasons for sharing. 
I used to be horrid at fried chicken. I would impatiently put the chicken in before the oil was hot enough. I didn’t bother with the extra step of finishing in the oven so half the pieces would be pink inside. So now, when I make fried chicken, though it is a production with the brining, coating, frying, and baking, it is so worth the end result. I mentioned in earlier posts the immeasurable importance of a candy thermometer (pun!). It is essential in regulating the heat of the oil, as it varies so much from when all the pieces are just placed in, to when they are cooked, to when the pan is empty again in between batches. I kept my oil between 325 and 350 – this is optimal for ensuring the outside doesn’t brown too much.
Though I wish I could share a no-frills fried chicken recipe with you that didn’t involve more than 2 steps or kitchen gadgets, these were the things that I’ve found to set mediocre fried chicken apart from Ridiculously Good Fried Chicken. These are like Throwdown-with-Bobby-Flay Good Fried Chicken.
I served mine with some creamy dreamy mashed potatoes. But serve with a side salad if you are watching your carbs 😉
Ingredients
- 3 lbs chicken legs and thighs, skin on or off
- 2 cups buttermilk
- 3 cloves of garlic, halved
- 1 tsp paprika
- 2 tsps salt
- 3/4 tsp black pepper
- 1/4 tsp cayenne or chili powder
- 1 1/2 cups of flour
- 1 cup of bread crumbs (preferably panko)
- 3/4 tsp salt
- 1/2 tsp garlic powder
- 1/4 tsp black pepper, or more to taste
- 1/4 tsp cayenne or chili powder
- vegetable or peanut oil for frying
Directions
- Several hours or the night before cooking, combine buttermilk, garlic, paprika, salt and both peppers in a bowl or gallon ziploc bag. Combine well and add the chicken legs and thighs. Let marinate for at least two hours, but better yet at 6-8 hours.
- Pour oil into a cast iron skillet or casserole pan so the oil is 1 to 1 1/2 inches deep. Turn on the flame and using a candy thermometer inserted into the oil and attached to one side of the pan, bring the heat up to 325 degrees F. This takes about 10 minutes or so over high heat.
- Preheat oven to 350 degrees F. Place a wire rack over a baking sheet and set aside. The wire rack is essential here because if you place the chicken directly on the baking sheet, the underside will get soggy.
- In a shallow dish combine flour, bread crumbs and remaining seasonings. Carefully take out chicken pieces, shaking off the excess and place into flour/bread crumb mixture. Coat evenly, 3 to 4 pieces depending on the size of your pan, and carefully lower into the oil. Regulate the heat so it doesn’t go above 350 or below 325. After 5-7 minutes, flip and cook until the other side is golden brown (another 5 minutes or so). Place on the wire rack and continue with the next batch.
- When all the pieces are fried and placed on the wire rack over the baking sheet, bake in preheated oven for 15 minutes. After 15 minutes check one of the thigh pieces for doneness by cutting right through the middle and ensuring that the meat closest to the bone is not pink and the juices run clear. If not done, stick back in the oven for 5 more minutes.
Sloppy Joes

I recall an episode of Anthony Bourdain’s No Reservations when he was schooling his viewers on some things every home cook should know. Among them:
- How to slice and onion. Key take away: don’t leave your fingers sprawled all over the onion. You are asking for it. Tuck your finger tips under like you’re tossing a knuckleball. Life-saver.
- Beef bourguignon. It’s just a pot of unattractive, purple-hued beef cubes simmering in an even less attractive liquid base UNTIL the magic time is up. For the first two, two and a half hours, that’s all it is. But when the time is right, it all comes together to become the legendary French stew. That’s a lesson I’ve carried with me for all my stews and curries. The key factor is time. Time for the meat to flavor the broth and for the broth to cook/tenderize the meat. You have to learn what that time is for each dish to have truly delicious stews and curries.
- There were a few other lessons. Since I’ve forgotten them, they clearly weren’t as life changing.

I’ve made sloppy joes the traditional American way before, loaded with ketchup, brown sugar, sometimes Worcestshire sauce and/or vinegar. It’s just too sweet for me. In my version, I add some warming spices, paprika to complement the bell pepper, a tiny bit of sugar to bring out the sweetness in the crushed tomatoes, and peas (hey food groups!). Both version wayyy surpass the school lunch version I had as a NYC public school student. 
I have my usual brioche buns as the delivery vehicle for this hot mess. You can use kaiser rolls, hamburger buns – so long as it’s nice and porous and soaks up all the juices.

Ingredients
- 2 tbsp olive or vegetable oil
- 1 medium yellow onion or 1/2 large yellow onion, diced
- 1 red/orange/yellow pepper, seeds and ribs removed, diced
- about 1 pound Honest Chops organic ground beef
- 3 cloves garlic, minced
- 1 tsp dried oregano
- 1 tsp cumin
- 1 tsp paprika
- 1/4 to 1/2 tsp cayenne/chili pepper
- 1 tsp salt, or to taste
- 1/2 tsp black pepper
- 1 tsp sugar
- 1 bay leaf
- 1 can of crushed tomatoes (about 1 1/2 lbs)
- 1/2 cup frozen peas
- 1/4 cup chopped cilantro or parsley
Directions
- Heat oil in a pot and add onion, pepper and beef. Brown over high heat for 5-7 minutes. Add garlic and spices and mix well. Add bay leaf, crushed tomatoes and stir to combine. Reduce the heat to medium low, cover and simmer for 20 min, stirring occasionally.
- Add peas and cook for an additional 2-3 minutes. Off the heat, add cilantro and stir to combine. Serve on hamburger buns, kaiser rolls, brioche buns – something that’s going to absorb all the juices!

