Kitchen3N

Recipes and food fun from Apt 3N

  • About
  • Gallery
  • Recipes

Krumkake

January 12, 2018

img_1189
If you’ve been following along on social media (esp Instagram!) you’ll know I’ve had an exciting week: my little girl turned 7, my favorite fashion blogger of all time (Aimee Song!) showed my IG some love, and I discovered a classic Norwegian dessert called Krumkake.
img_1103
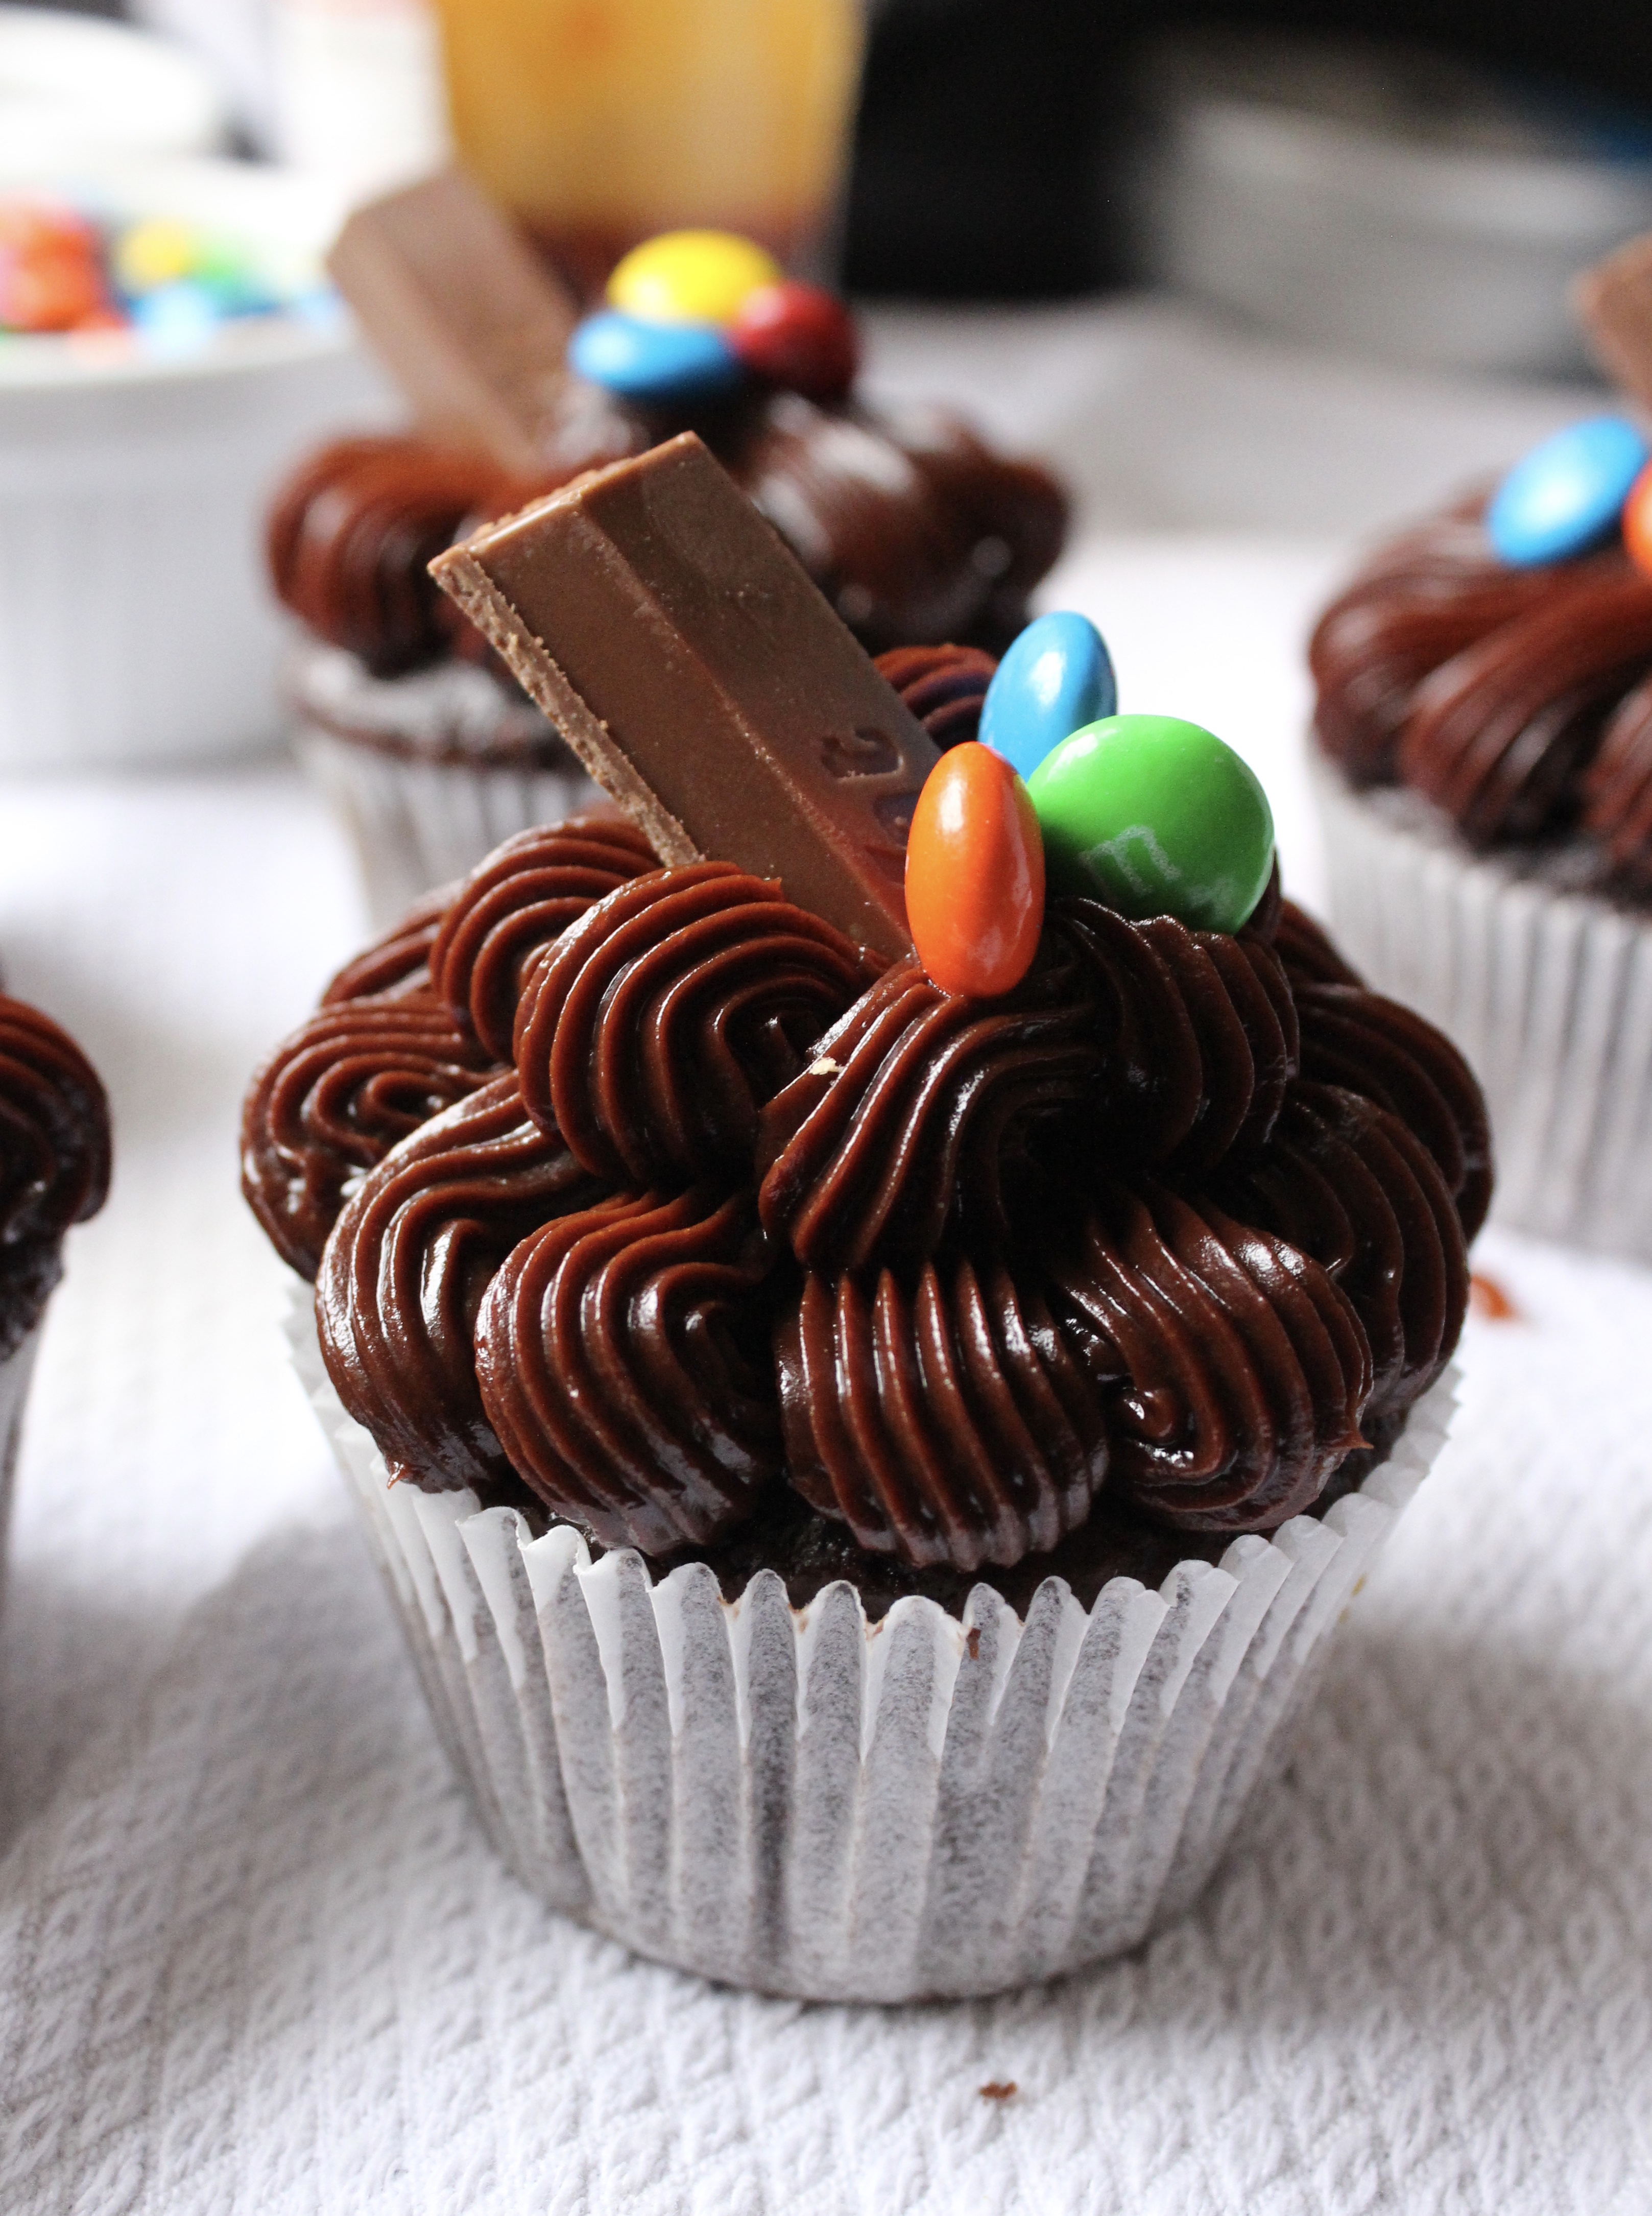
In anticipation of my daughter’s birthday, I got to thinking what kind of cake should I make for her? Chocolate and vanilla can get tiresome when you make them almost every day. I thought, what about a Kit Kat cake? What would I need?
img_1104
Chocolate, wafers, and more chocolate. I did some research on the filling of KitKat – apparently it’s some trade secret! Rumor has it the filling is made up of crushed KitKat?? That’s kind of dark. Like, candy cannibalism.
img_1112
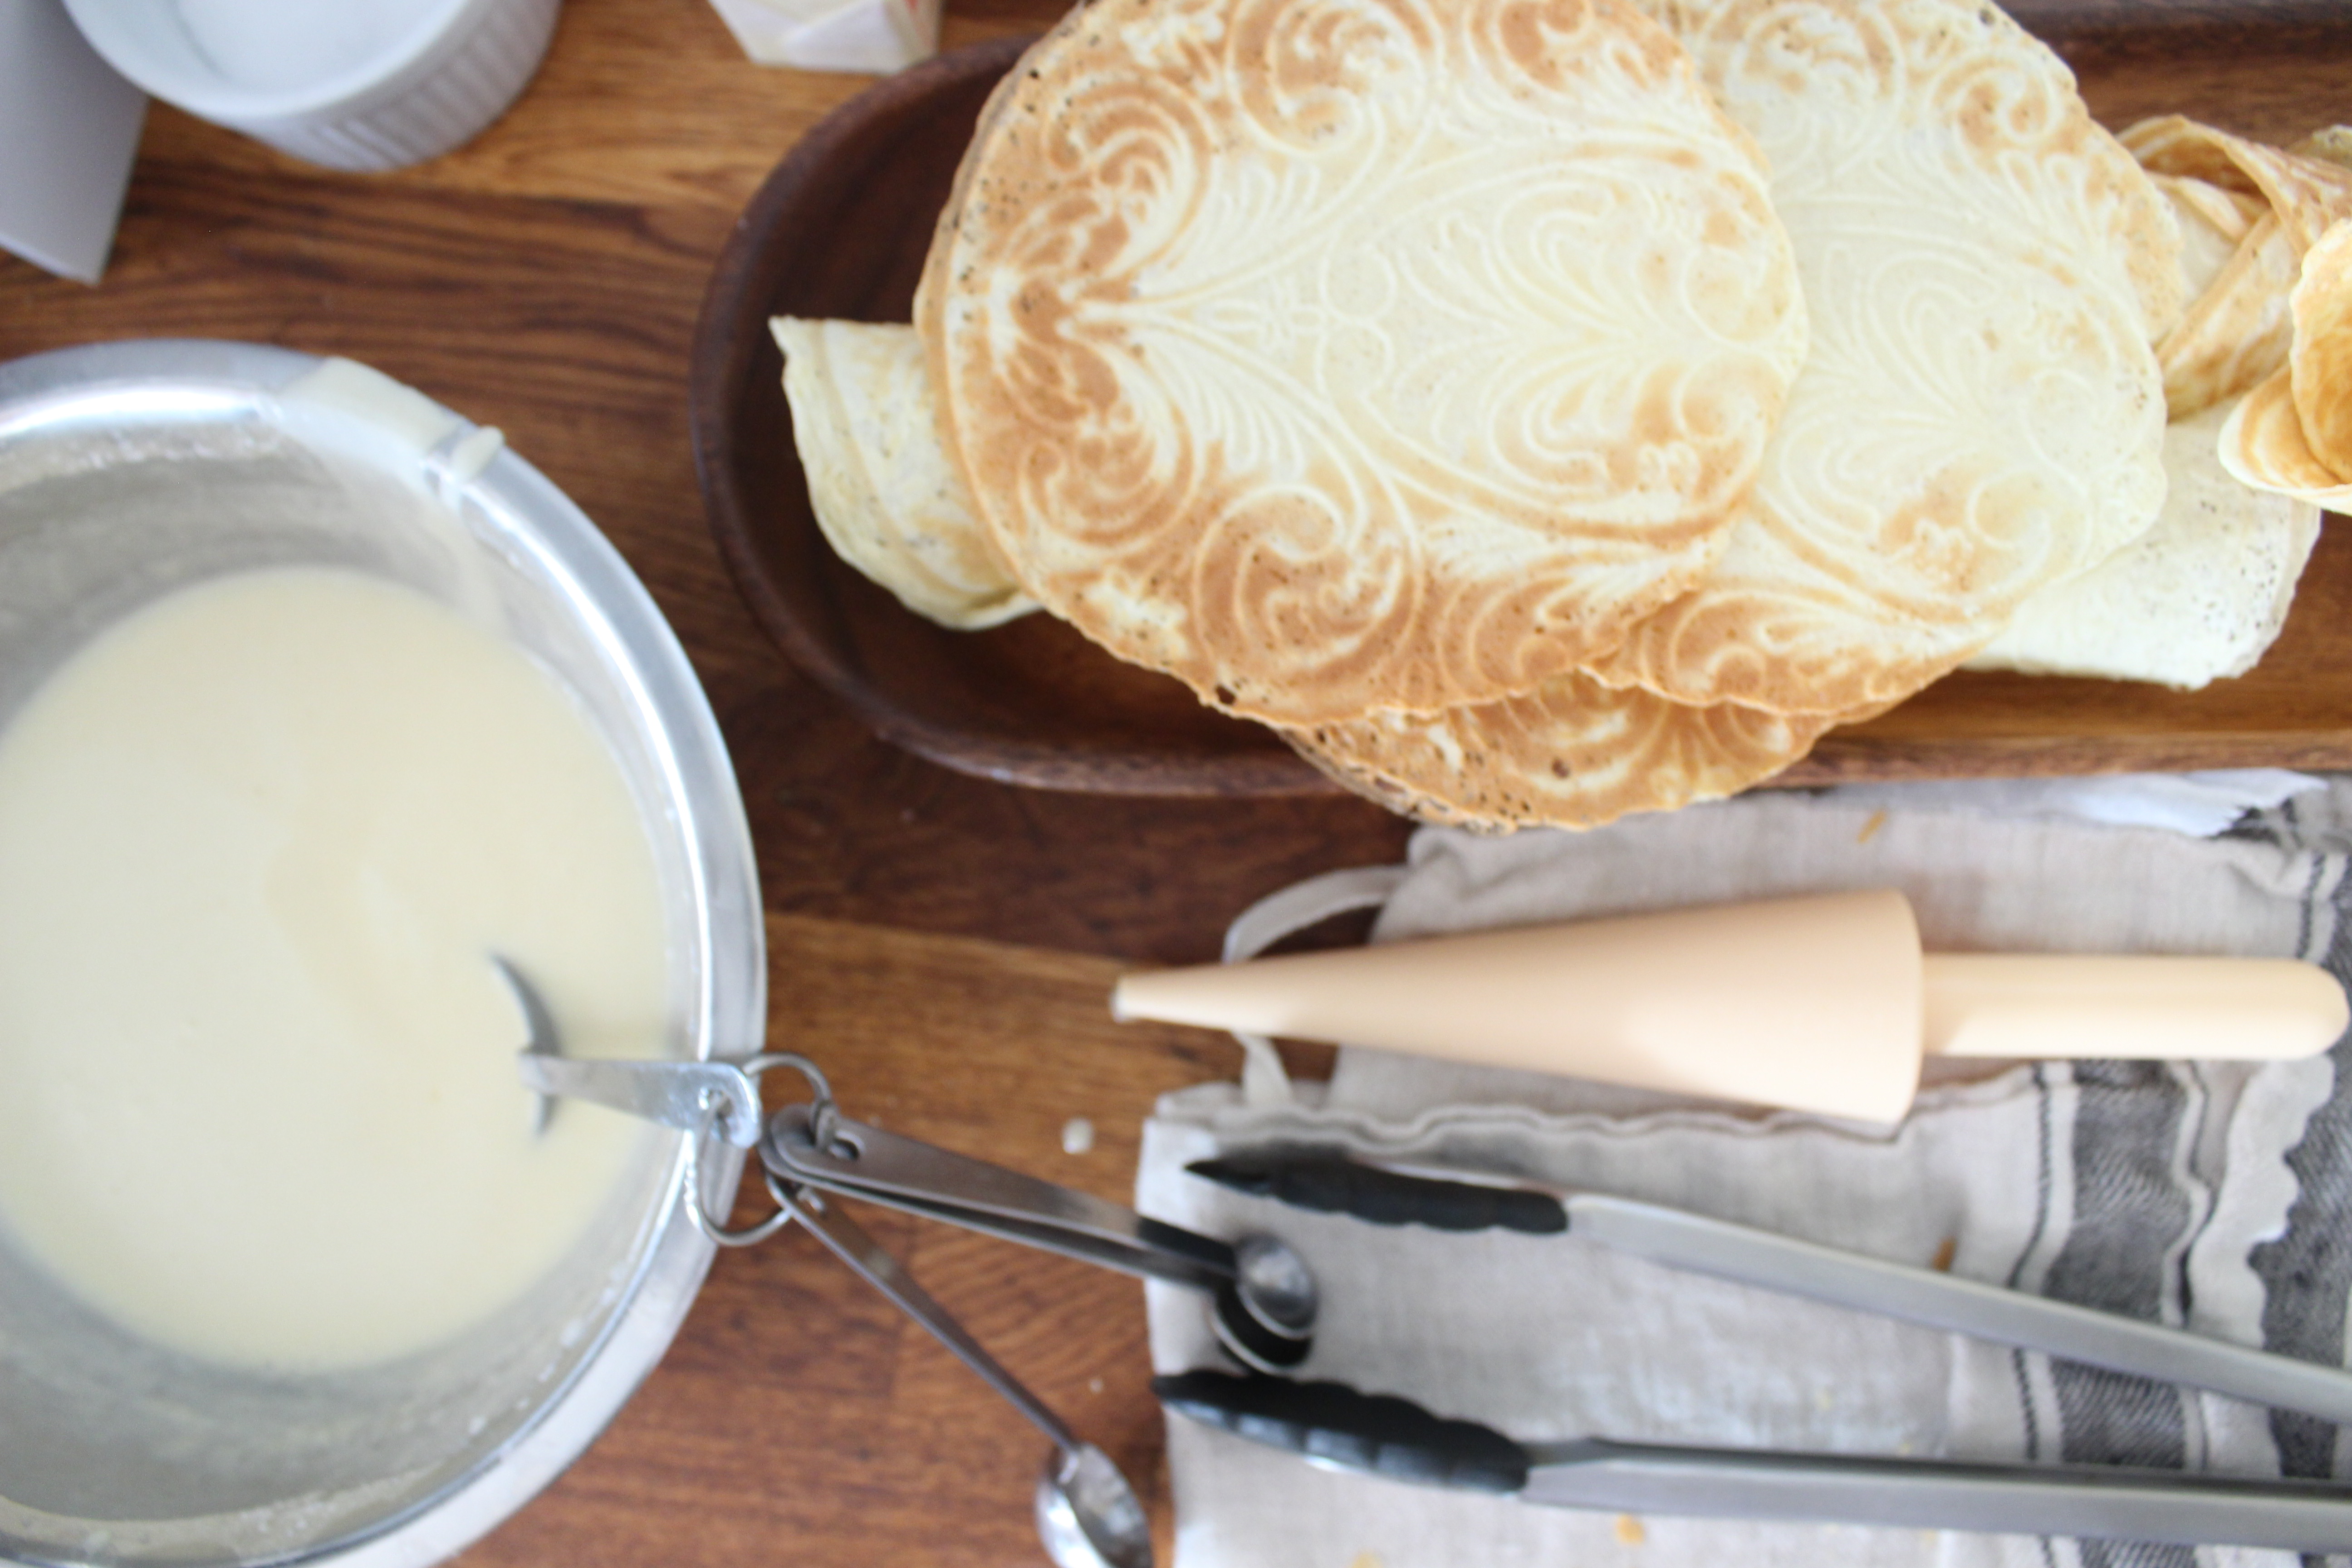
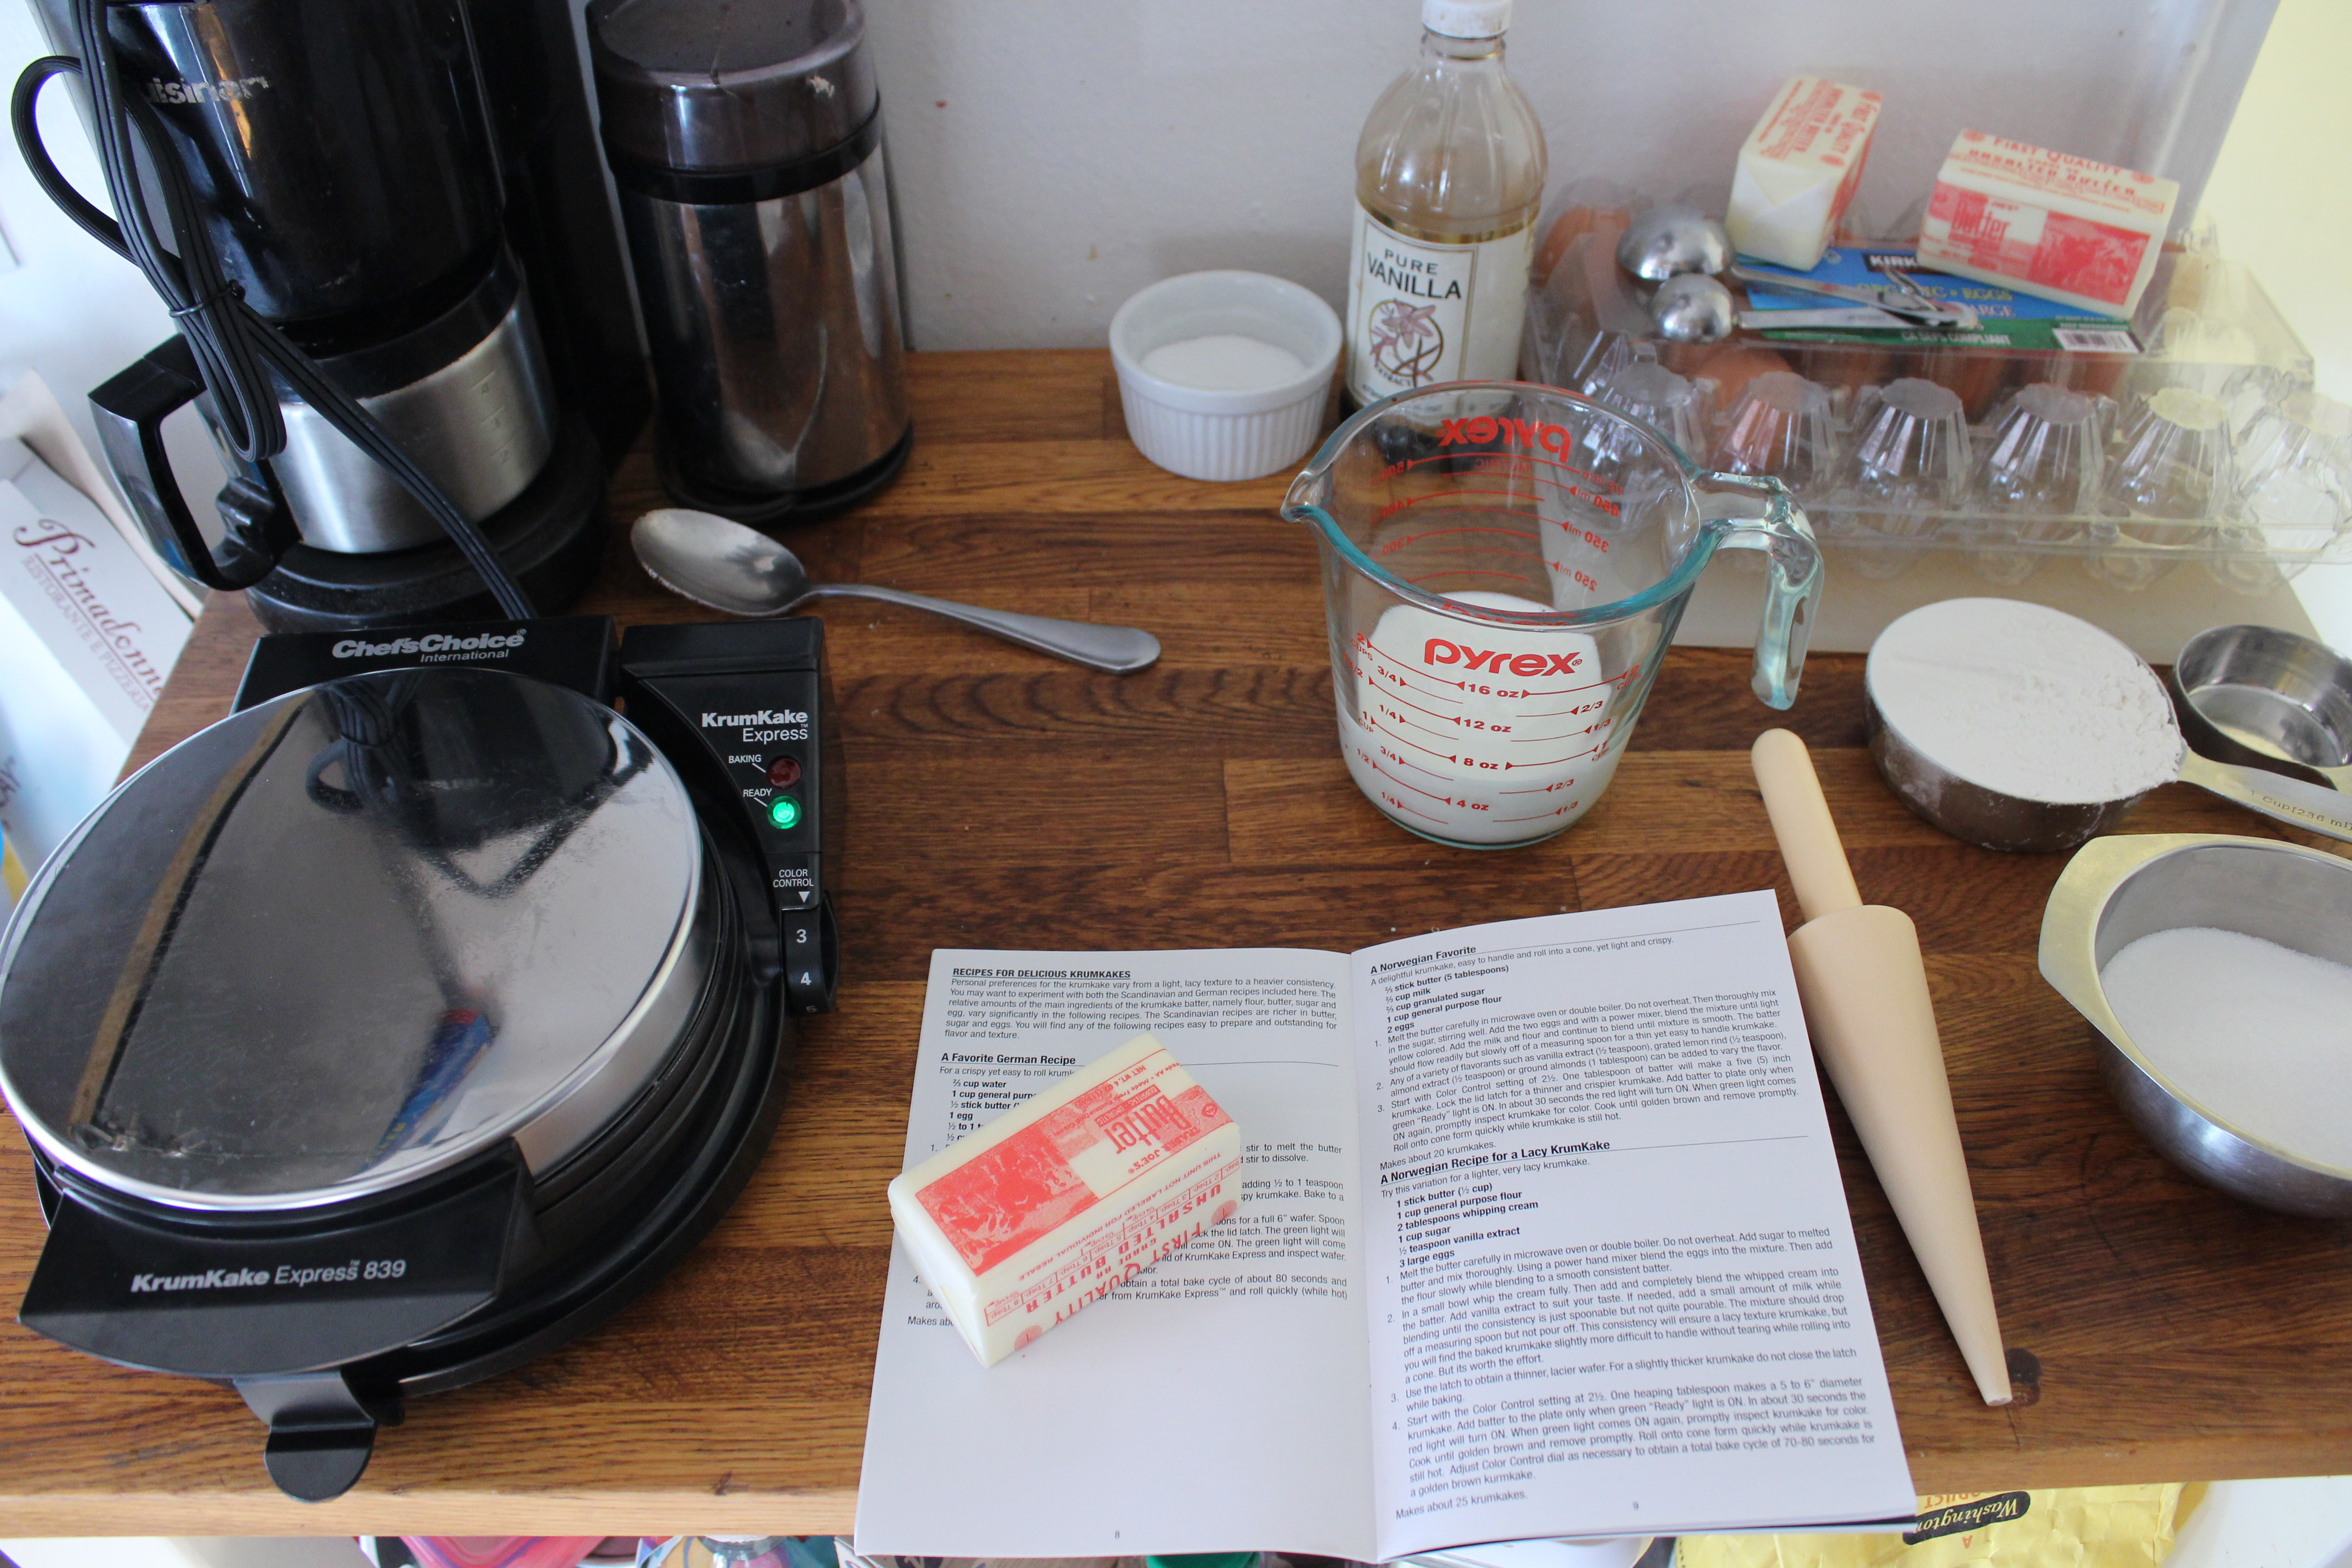
Anywho, that’s what got me started on my wafer journey. Looked up a wafer recipe, said recipe directed me to various presses. Instead of a waffle press, I went with this Norwegian Krumkake press, with it’s beautiful design, I couldn’t resist!
fullsizeoutput_6d4a
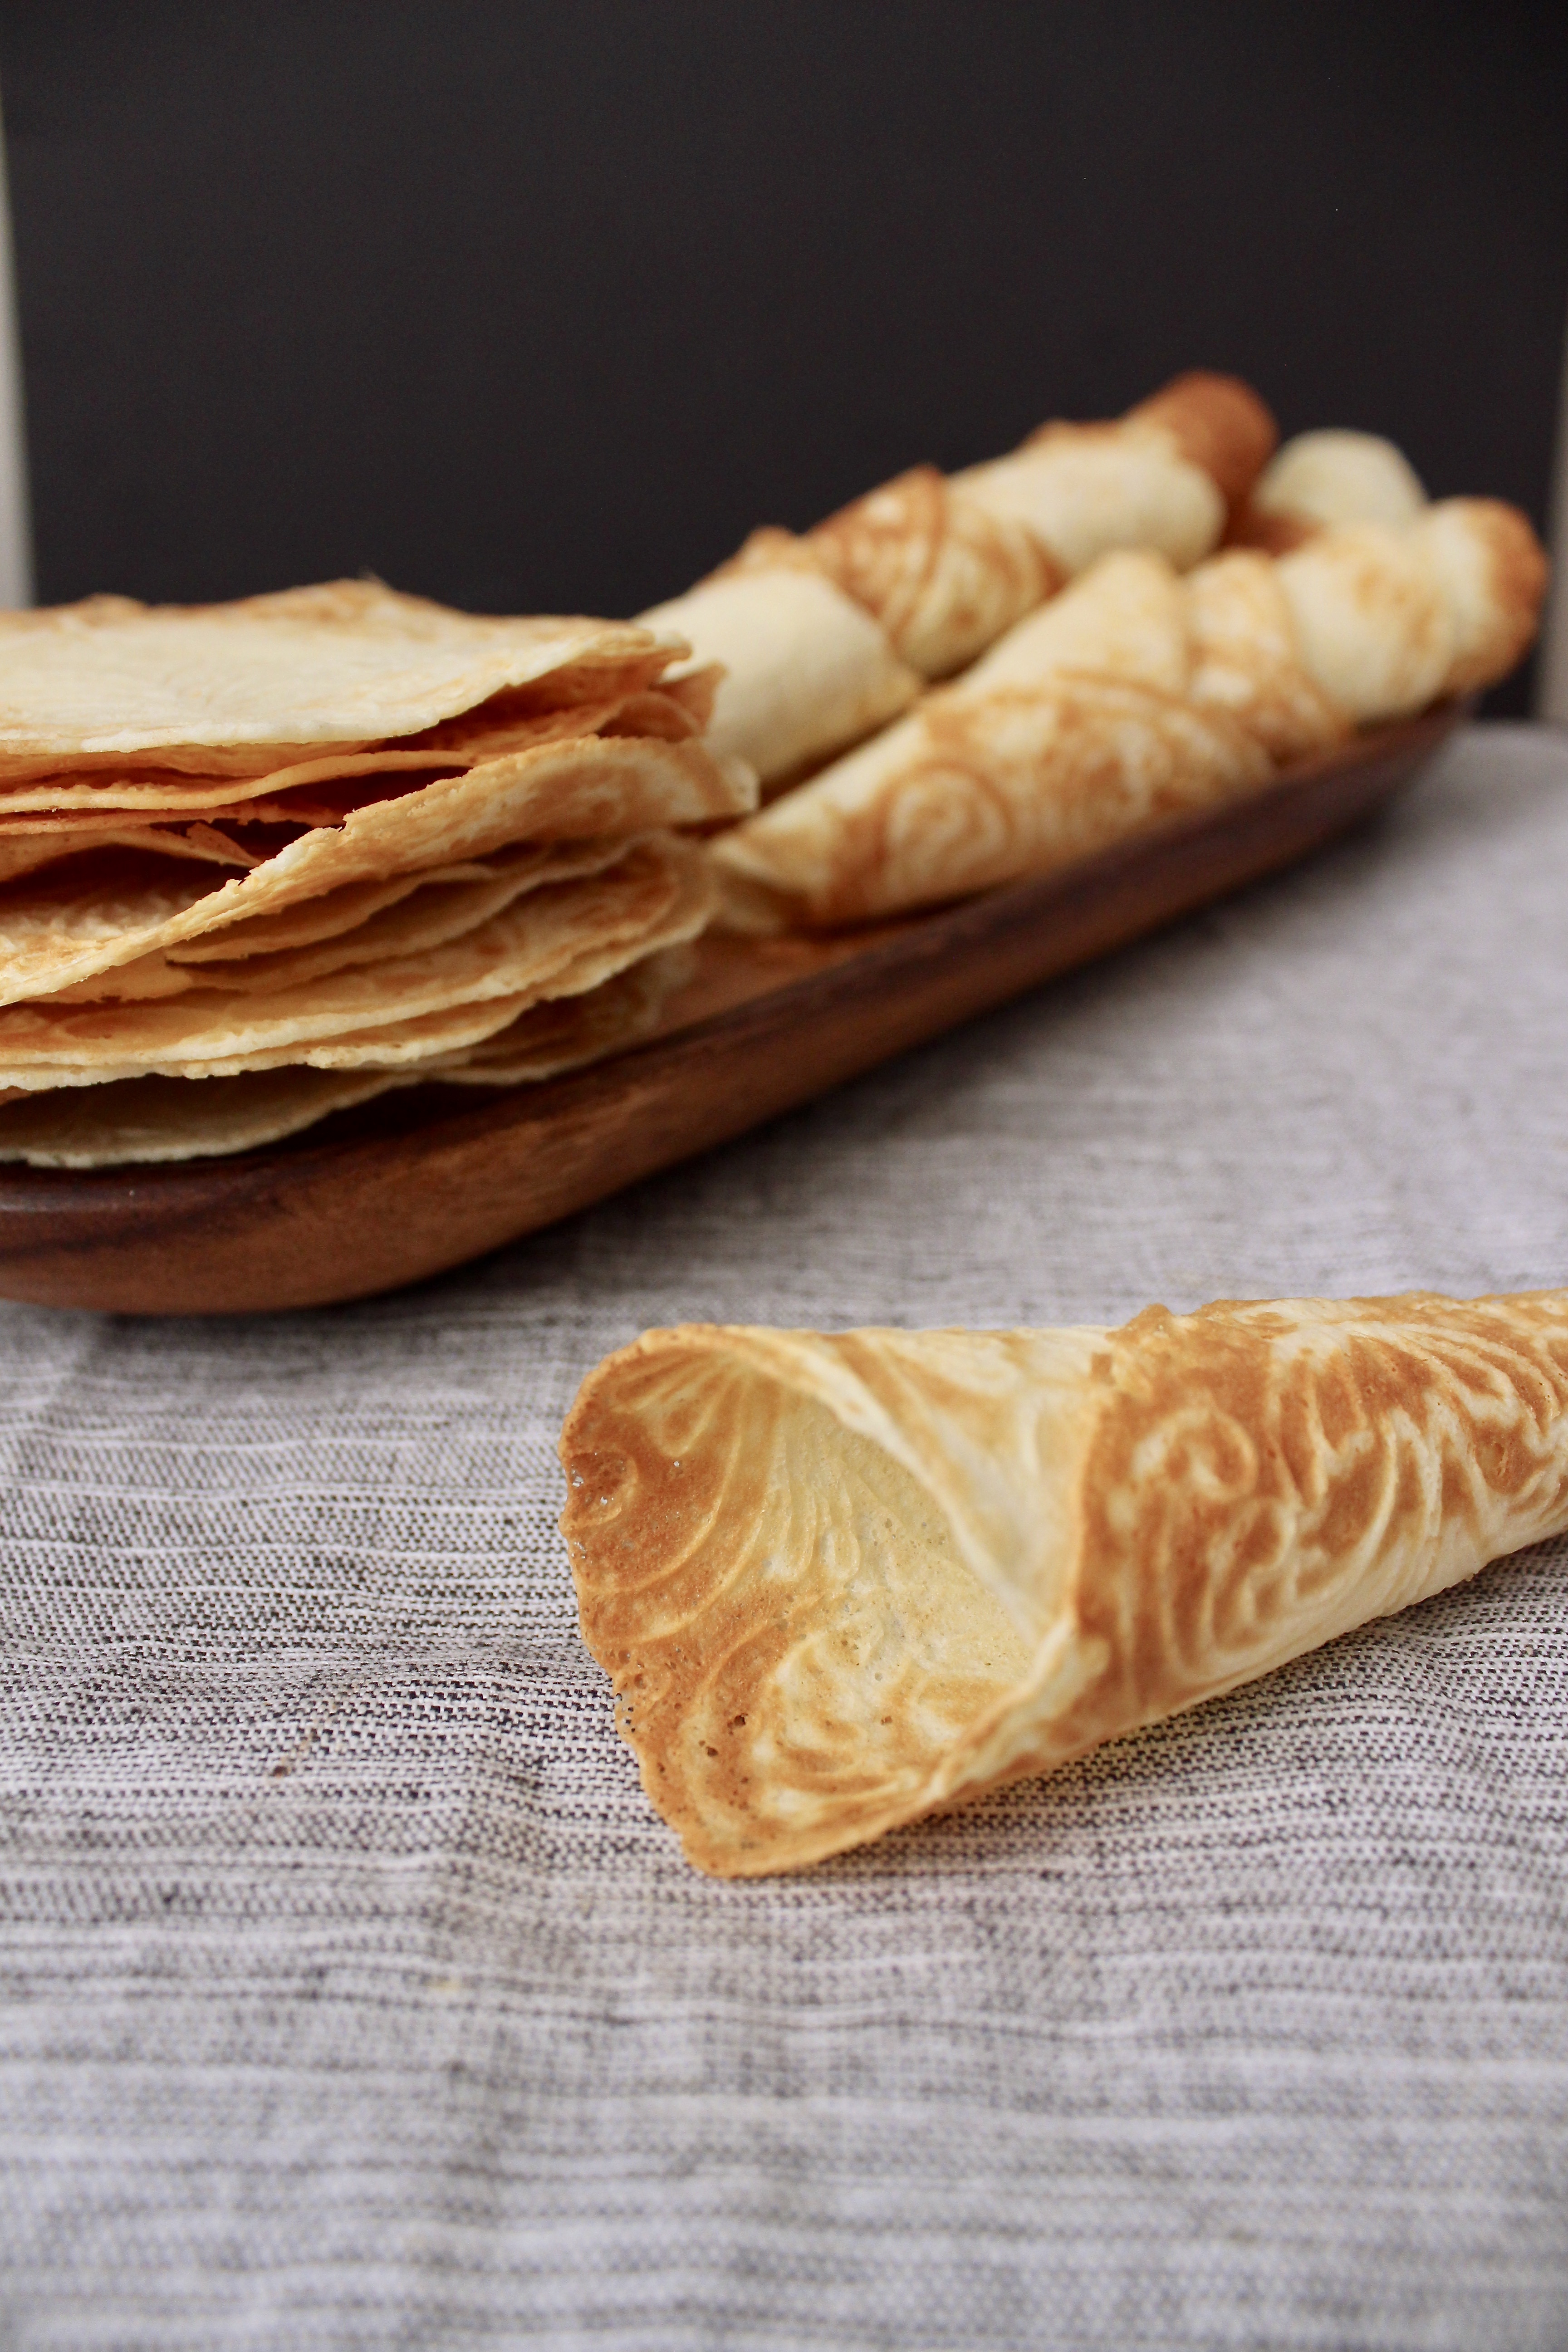
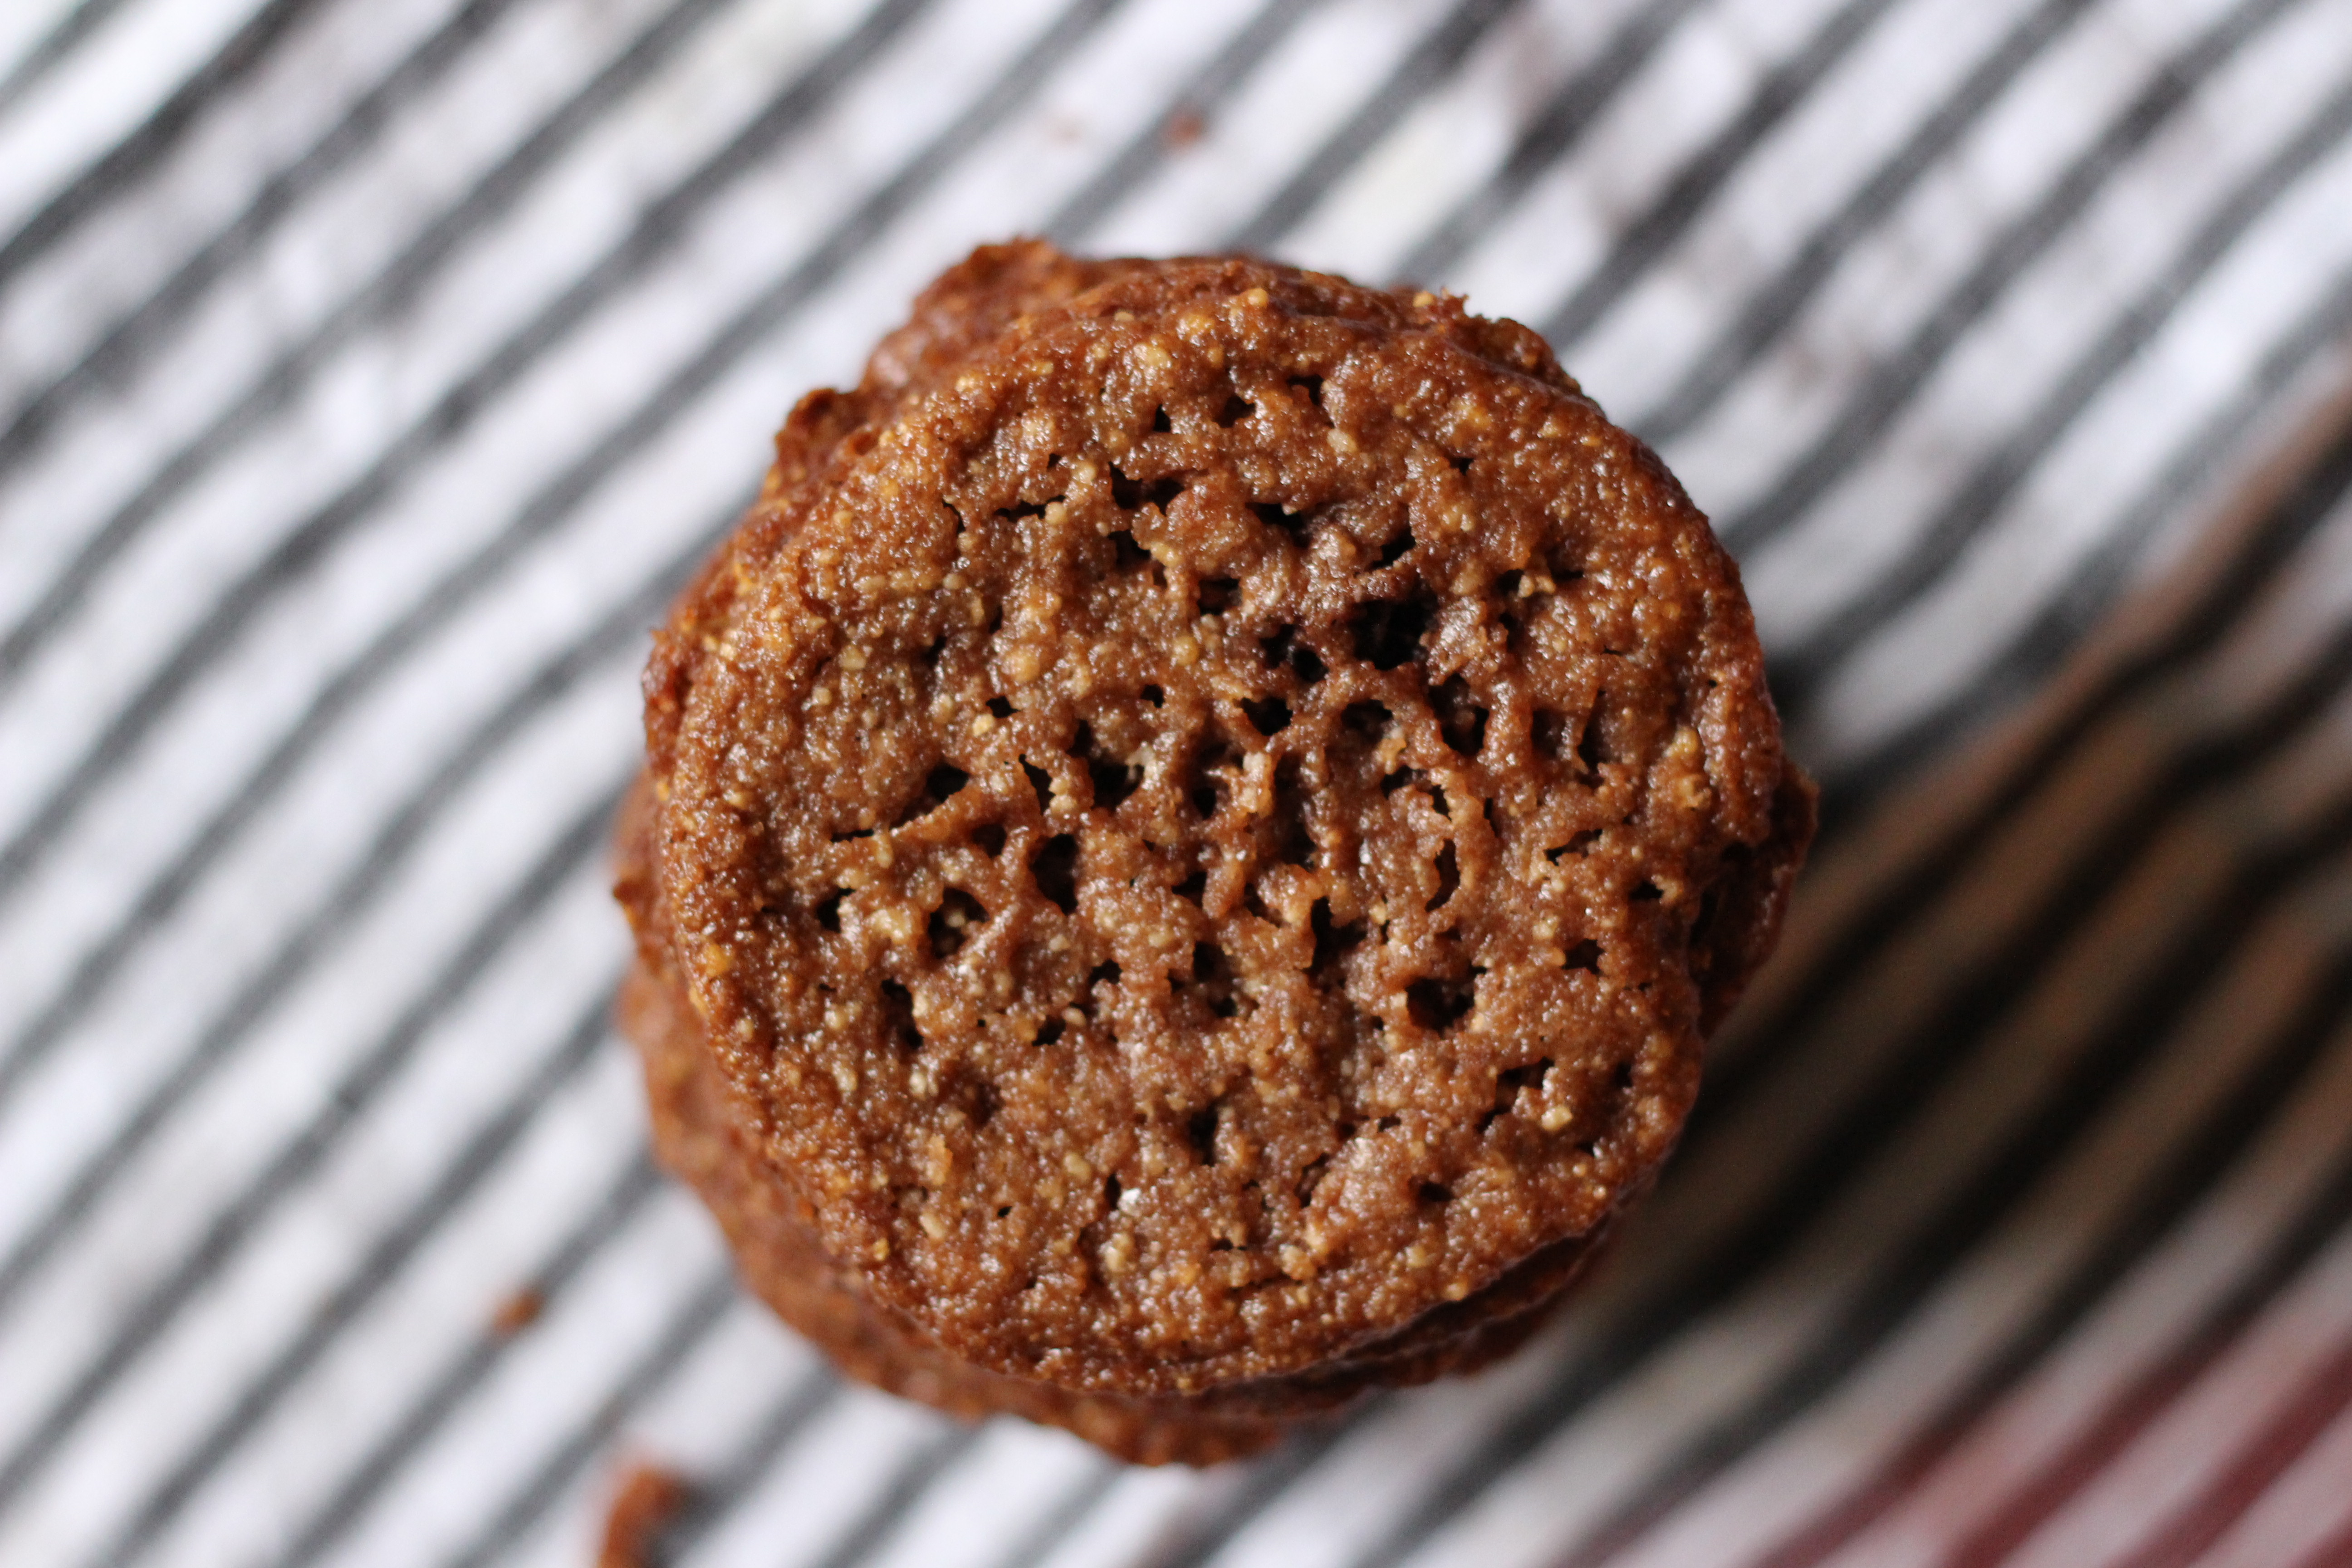
The simplest batter of butter, flour, eggs, sugar and milk gives you excellent wafers. The only thing is you need like 1 hour in the kitchen, baking each one for about 30 seconds each, and rolling them around the cone that the press comes with, or leaving flat if you want to stack them for a cake.
img_1172
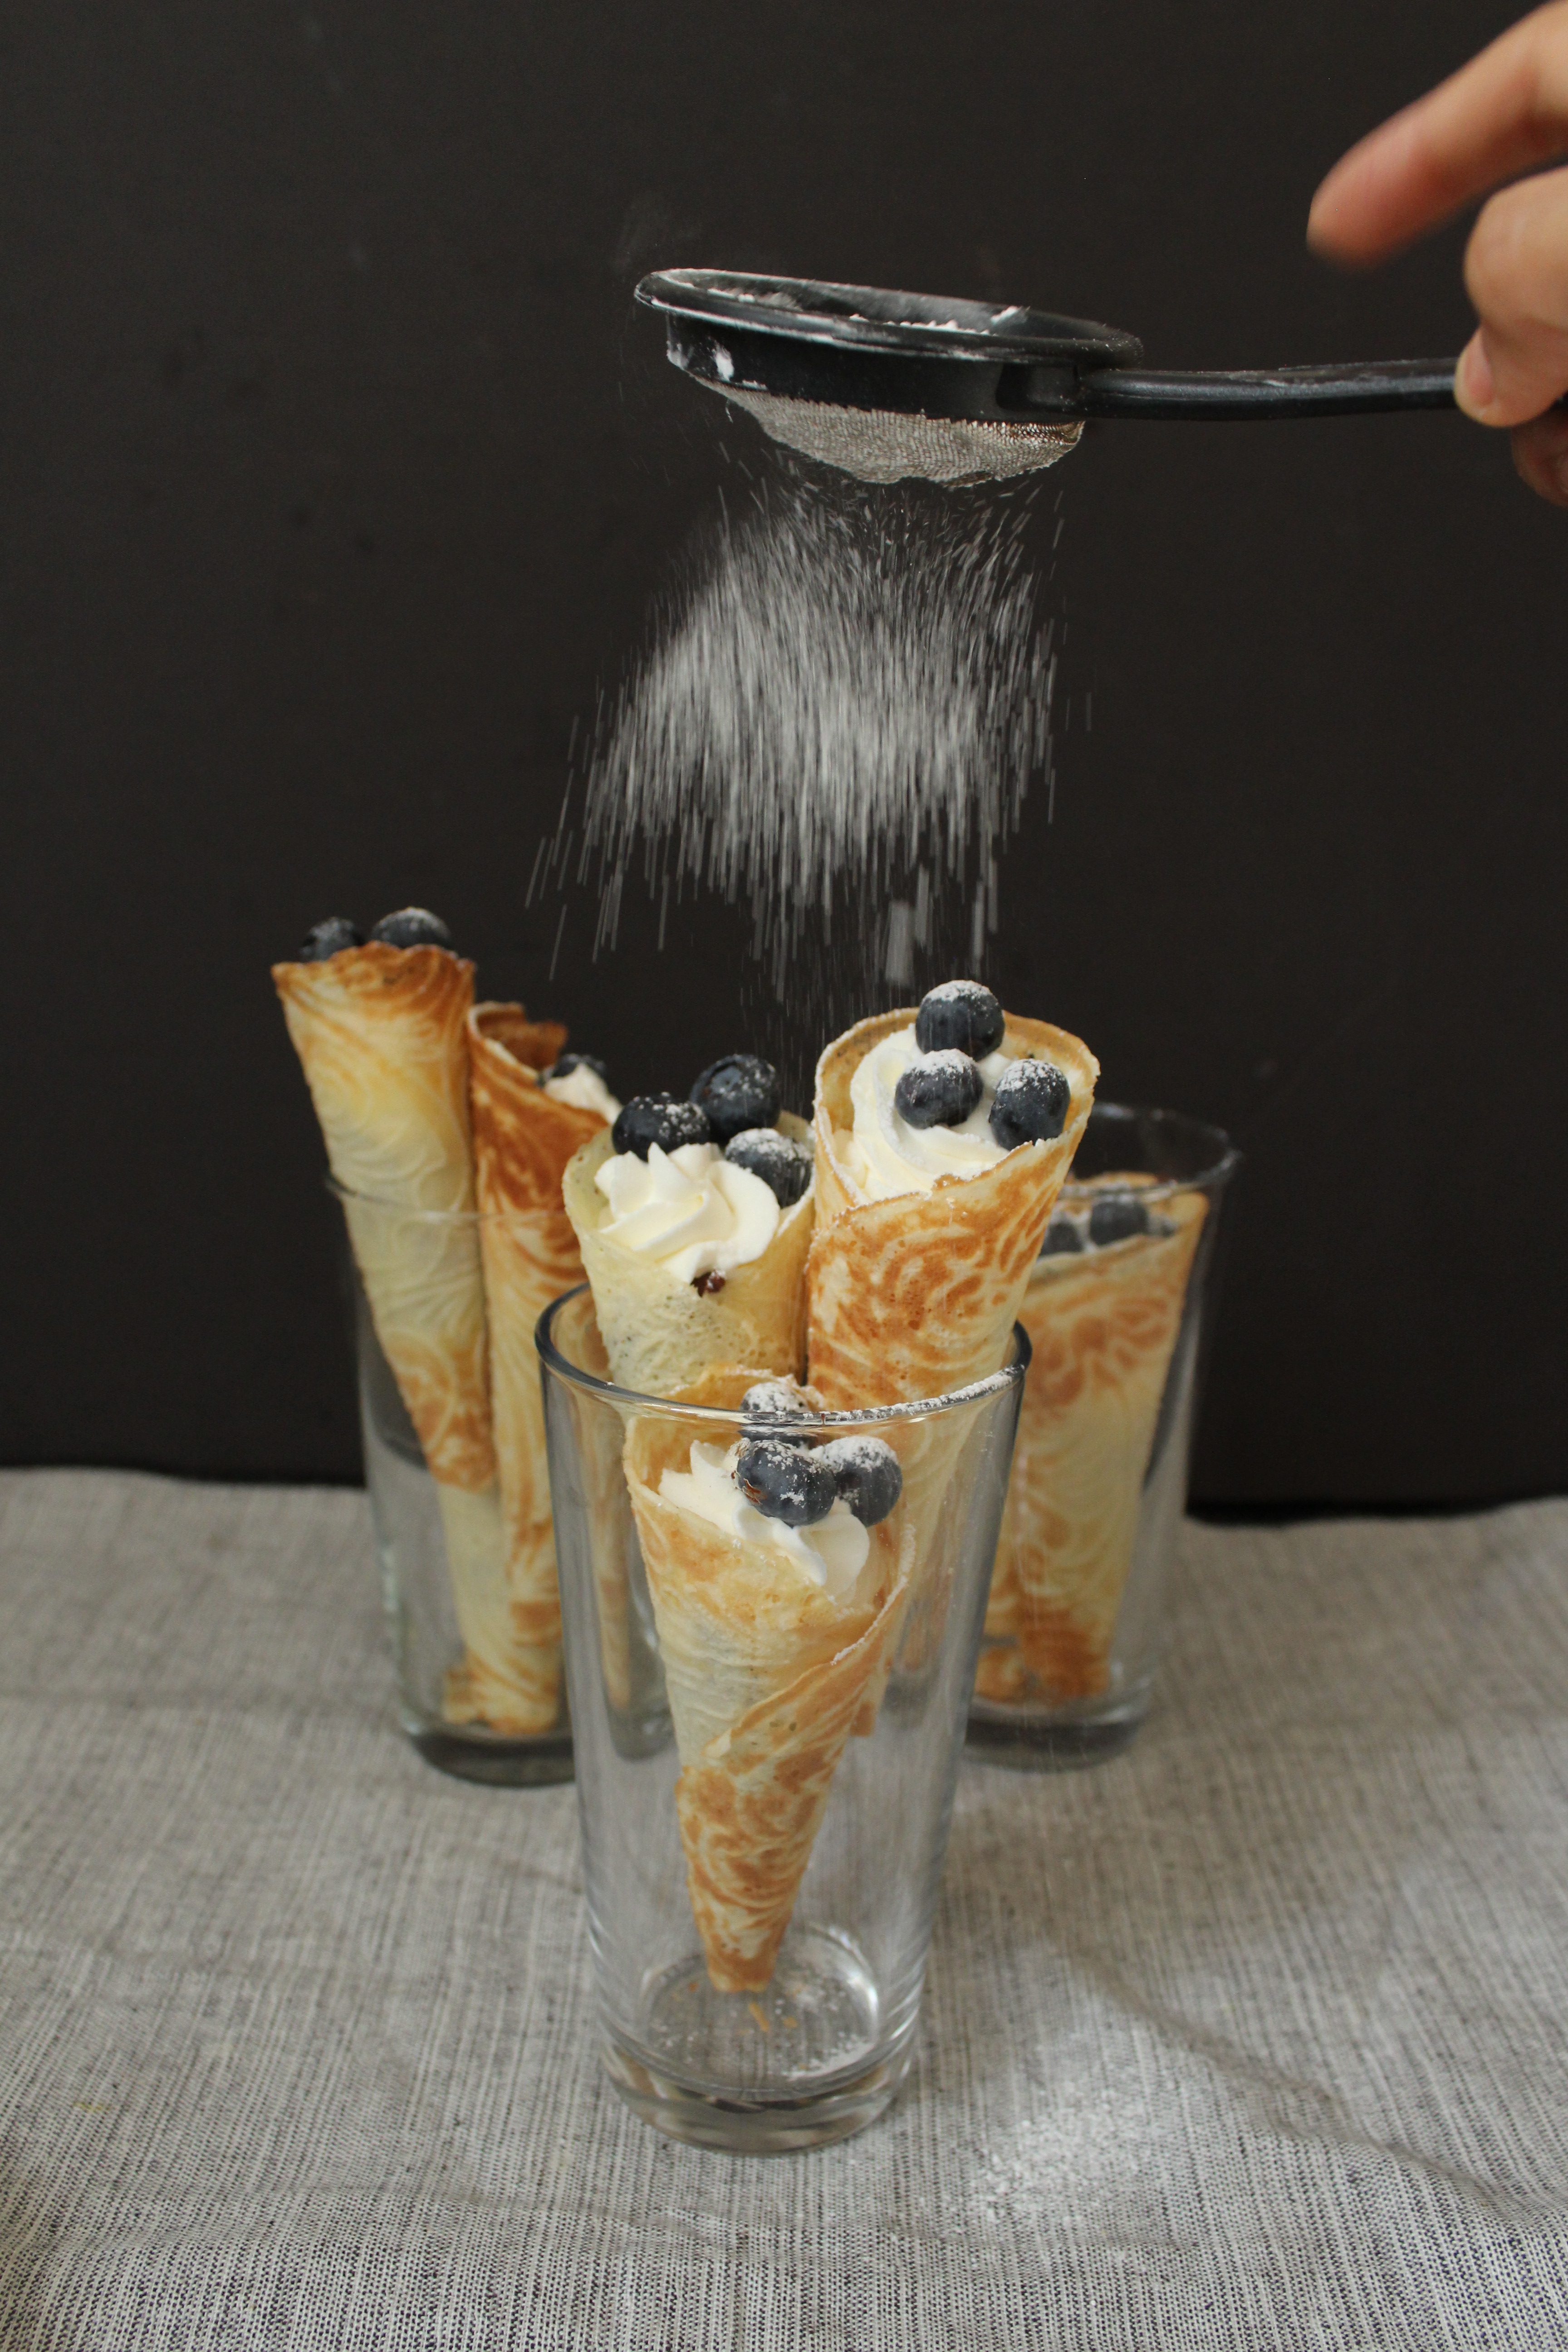
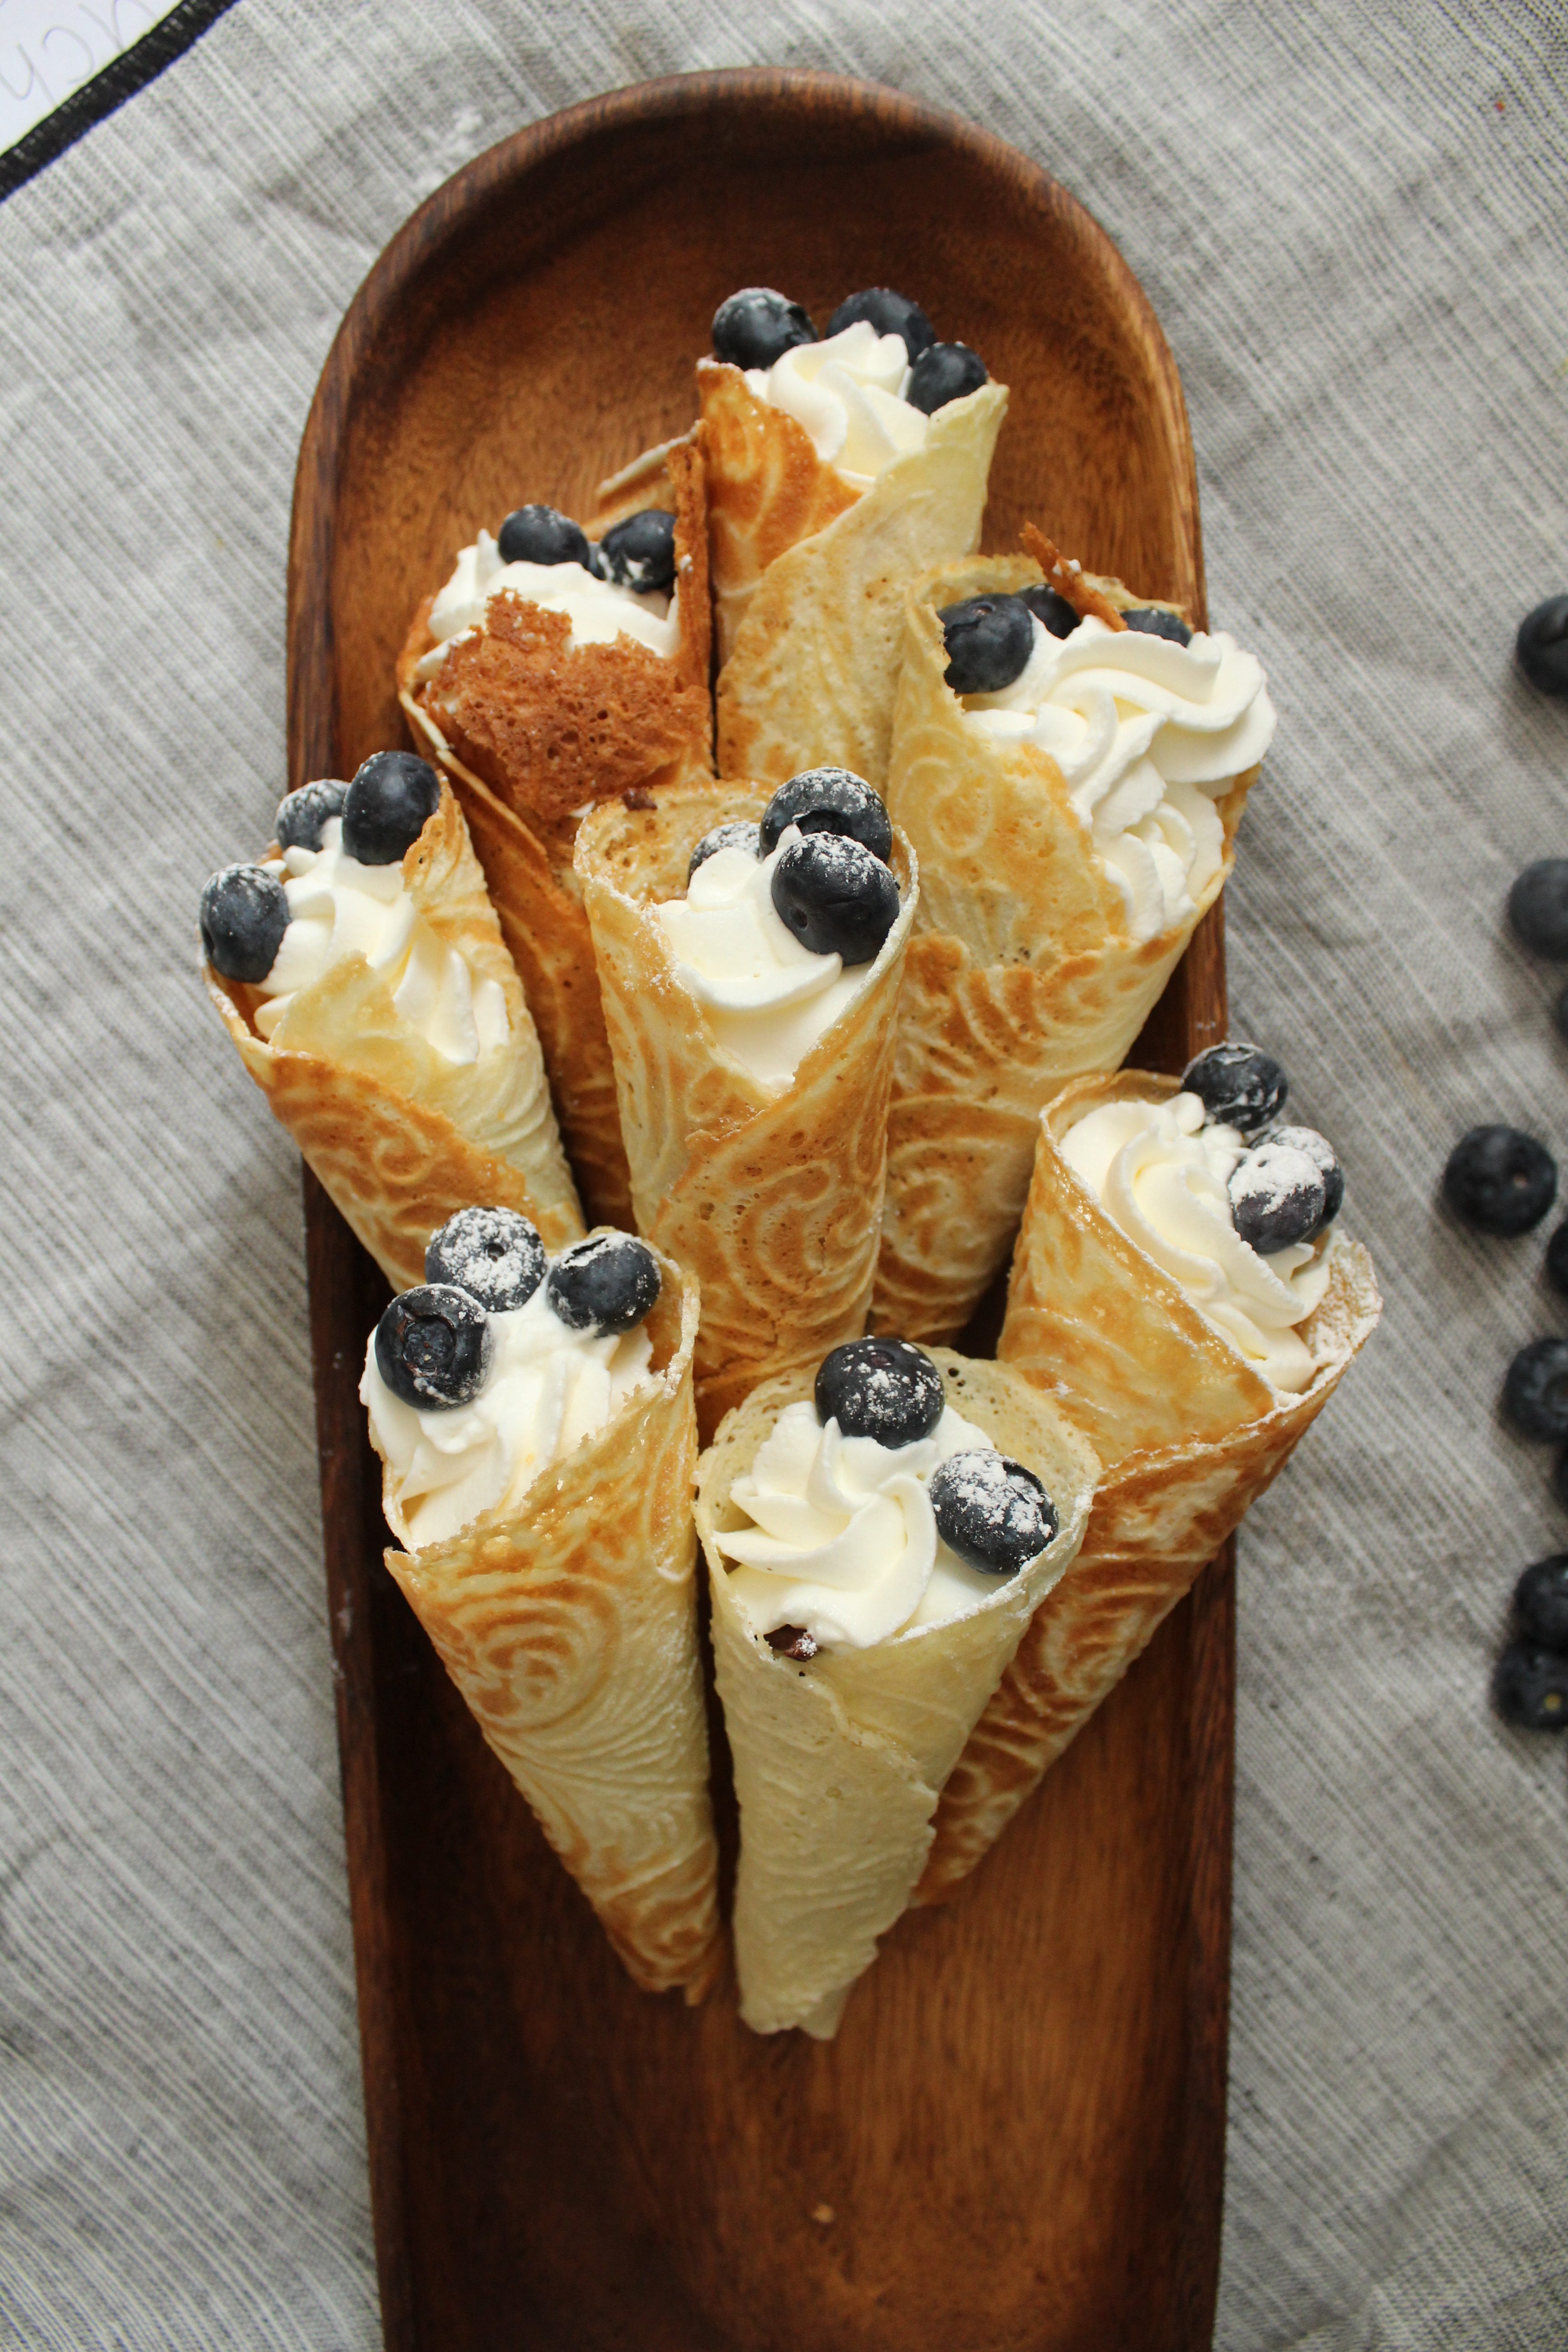
You can fill them with pretty much anything you like! Whipped cream, pastry cream, fresh fruit, ice cream. I opted for a dark chocolate ganache, whipped cream, blueberries and powdered sugar. They are delicious on their own, as well!

/wp-content/uploads/2018/01/Krumkake.mp4

They are delicate, so take care handling them after they’ve dried. I found it easier to fill and decorate by placing them in tall glasses. Serve on a nice wooden platter and enjoy immediately!

Ingredients

  • 2/3 stick (5 tbsp) unsalted butter
  • 2/3 cup granulated sugar
  • pinch salt
  • 2 eggs
  • 2/3 cup milk
  • 1 cup all purpose flour
  • 1/2 tsp vanilla extract
  • chocolate ganache (optional)
  • whipped cream (optional)
  • blueberries (optional)

Directions

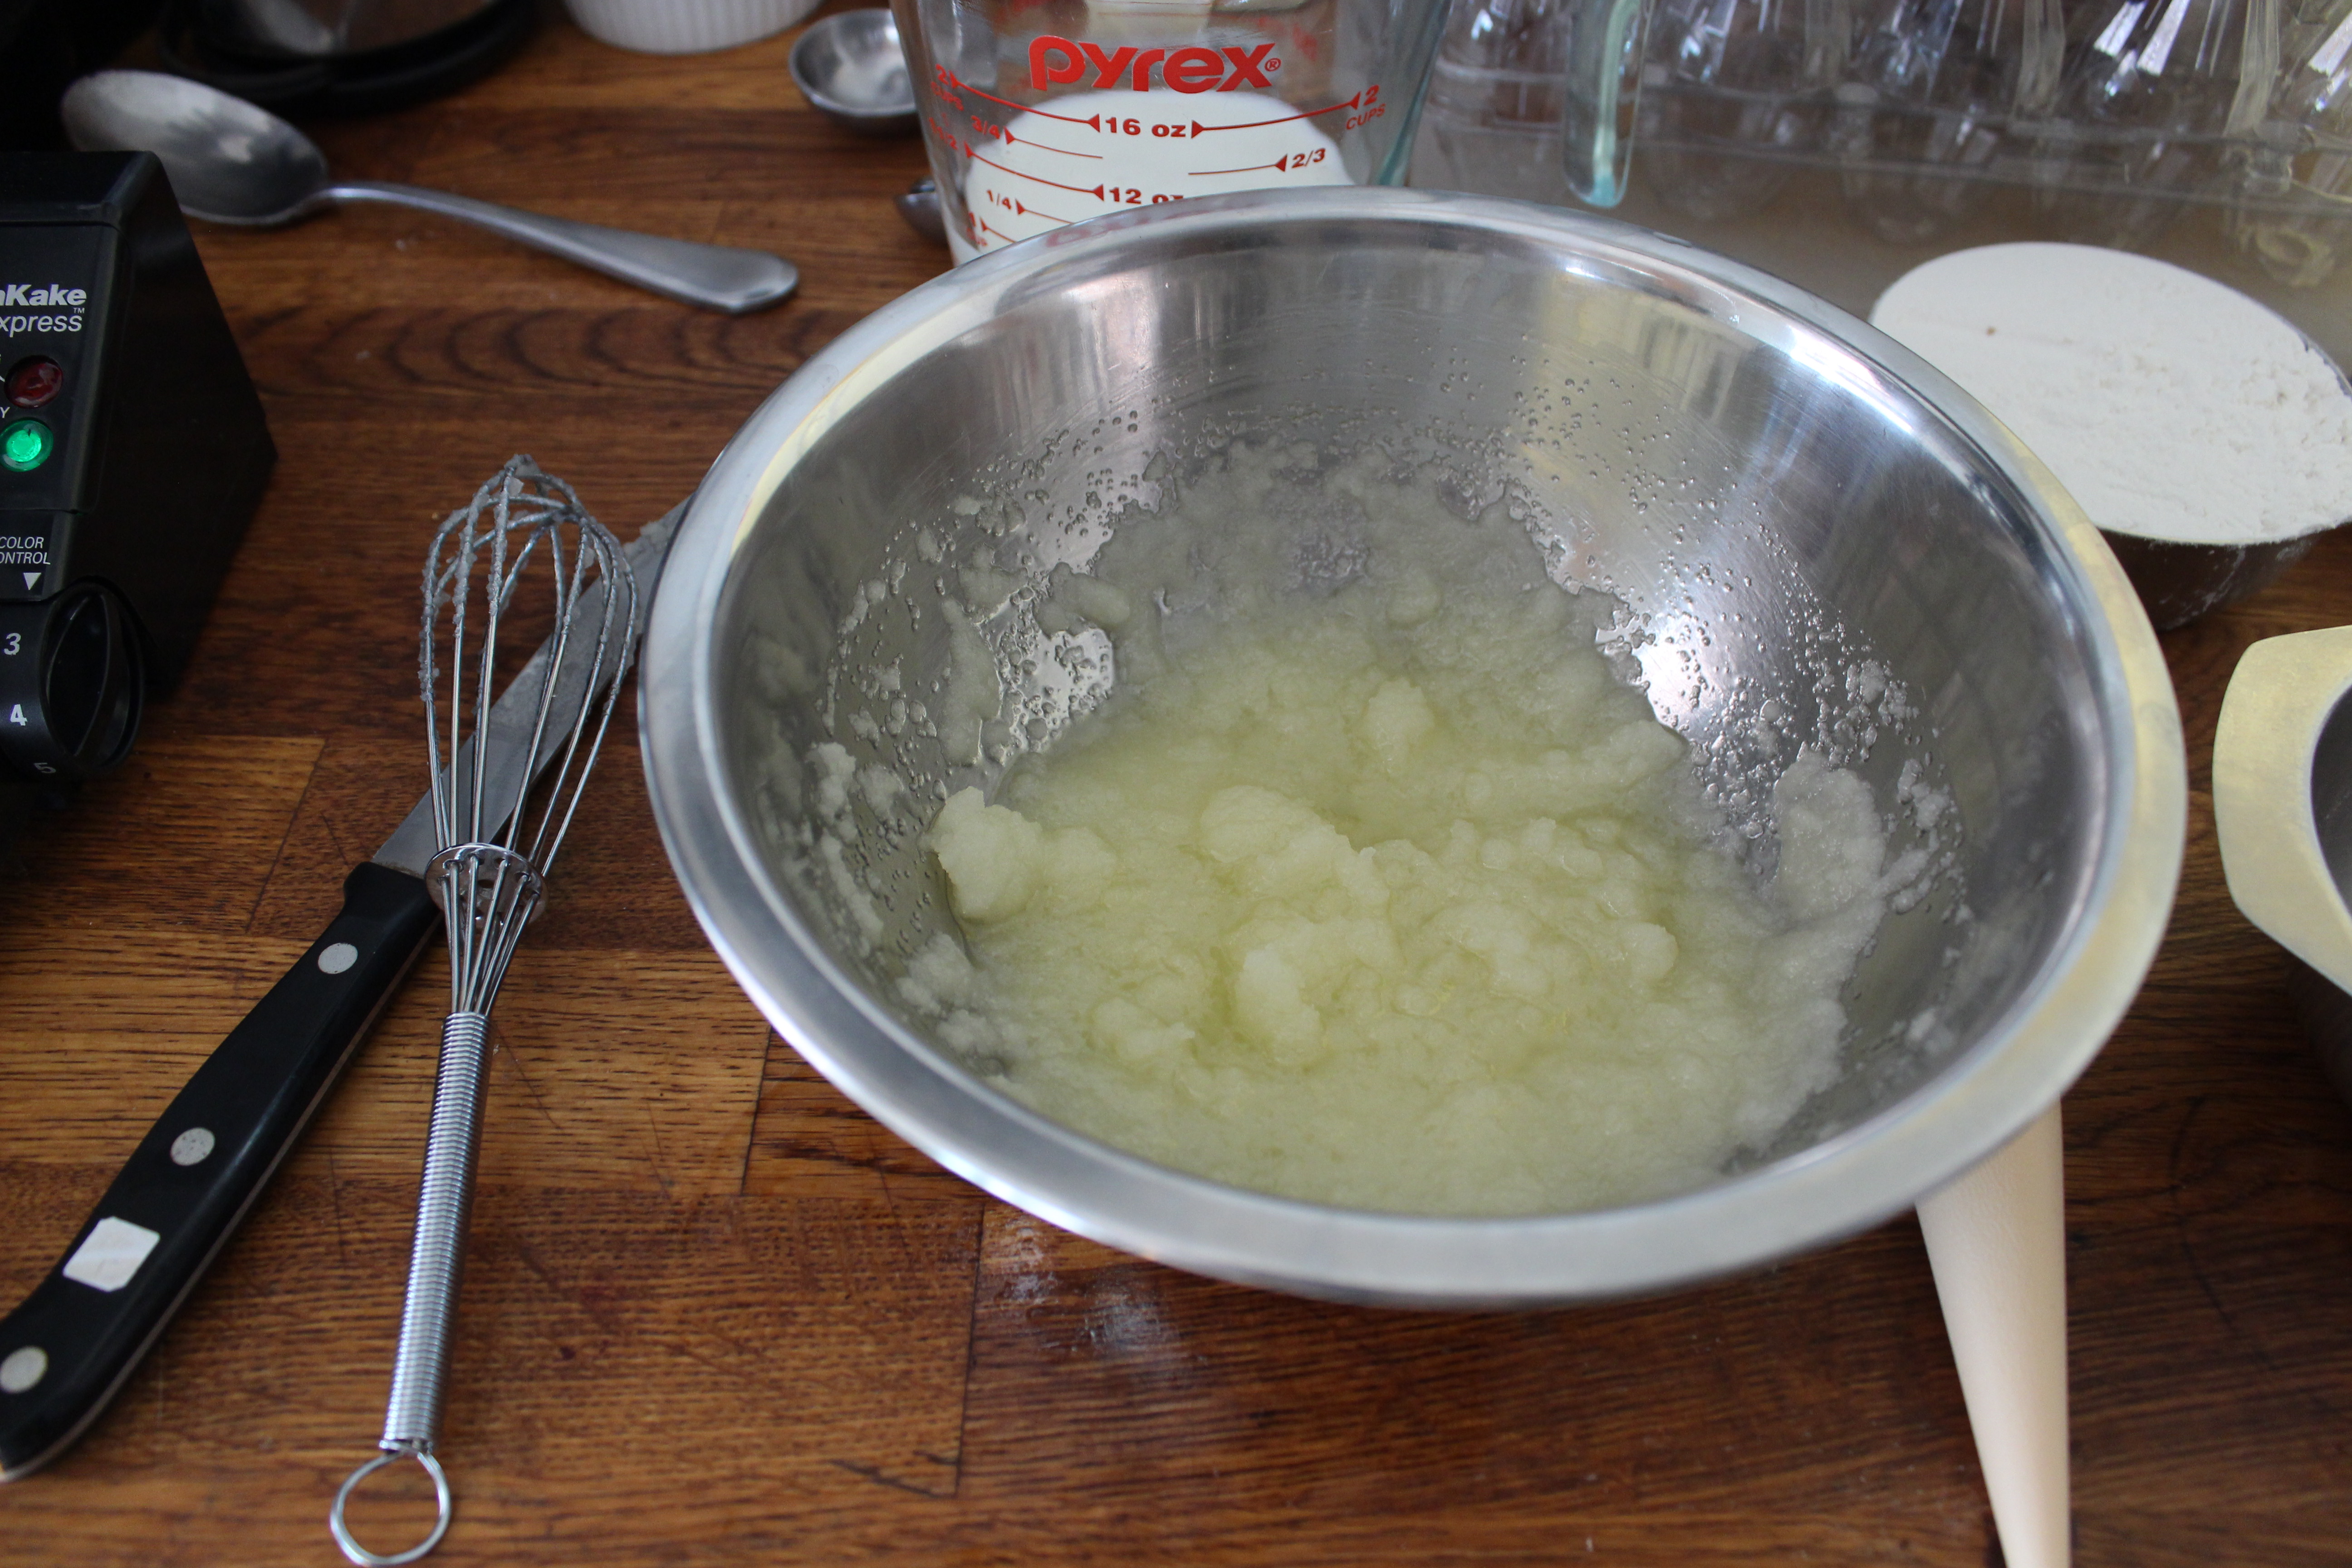
  1. Melt the butter in a double boiler (a heat proof bowl set over a saucepan of simmering water, not allowing the water to touch the bottom of the bowl), careful not to let it brown or get too hot. Add sugar + salt and beat on high speed with a handheld electric mixer until well combined. Add eggs one at a time and blend until mixture is a pale yellow color. Add milk, alternating with flour until all ingredients are combined. Add vanilla. Batter should be thick but drip off the spoon easily.
  2. Plug in your krumkake maker and set the color number to 4. Set out a kitchen towel and rolling cone. Spray the inside with non stick cooking spray. The red “baking” light will turn on. When the light changes to green (“ready”), drop 1tbsp of batter in the center. Close the lid and snap the latch shut. The light will switch back to red and when done, green again. Use tongs to carefully remove the krumkake and place over the cone, aligning the center of the krumkake along the length of the cone. Roll to form a cone and allow to set while working on the next one.
  3. Repeat (no need to spray additional spray) and remove previous krumkake from shaping cone. Adjust the color if you prefer a lighter krumkake*.
  4. When all the krumkakes have dried and keep their shape, place in tall glasses to fill. Fill with puddings, whipped cream, chocolate ganache and/or fresh fruit for a delicate, wonderful and tasty dessert.

*My manual suggests a setting of 2.5 but I was getting zero color at that setting.

· Labels: Dessert, Recipes Tagged: biscuits, blueberries, chocolate, chocolate ganache, christmas, cones, confectioners sugar, cookies, crisps, dessert, ganache, kromkake, krumkake, norwegian, sugar cones, wafers, whipped cream

Pistachio Layer Cake

December 7, 2017

fullsizeoutput_6aab
I’ve been making pistachio cakes in various forms since my friend asked me to make one for her wedding last year. The truth is, it’s very difficult to make a strongly pistachio flavored cake. It’s not like ice cream where the nuttiness easily comes through the cream and sugar. In cakes, in its attempt to compete with all the flour, eggs and dairy, it struggles to maintain its flavor while maintaining a light, tender crumb we expect in a cake.
I changed this recipe from the original, to include pistachio paste (which you can get online). I looked at peanut butter cake recipes and saw they utilized peanut butter in lieu or in combination with butter, so I thought I’d apply the same principal here. It provides a rich, creamy pistachio flavor. The cake is then lightened with beaten egg whites to add lightness. The result is a light, nutty cake.
fullsizeoutput_6aa9
I’m not sharing an accompany frosting recipe, because in all honesty, I haven’t got one. I tried making the boiled milk icing from the original recipe, but oh my God did it die on me. It was a runny mess (perhaps my boiled milk/flour/sugar combo was too thin?). I spent all morning trying to salvage it – first by adding some confectioners sugar, then some more cream cheese, then butter, then more confectioners sugar. After removing a small amount to mix with pistachio paste (my last ditch effort to salvage at least some of it), I was able to make a concoction that held up JUST enough to fill the cake. fullsizeoutput_6aa8
For the outside, I went with a tried and true (and quick) recipe: chocolate ganache. Which isn’t much of a recipe at all as it’s just some baking chocolate bars, broken up in chunks, then melted in the microwave at medium power with half its weight in heavy cream (so in this case, 24oz chocolate with 12oz heavy cream). Mixing every once in a while until completely melted and smooth. Not to say it’s straightforward to make ganache.
There are plenty of ways to muck it up. If you mix it before it is warm enough, it will start to get grainy. If you make it too hot, it will get grainy. Basically you need the Goldilocks temperature to get chocolate ganache just right (between 90 and 110 degrees). I recommend using an instant read thermometer to get your ganache just right, but if you don’t, just make sure it’s warm to the touch while you are stirring. fullsizeoutput_6aa7fullsizeoutput_6aaa
I then placed it over a bowl of ice water, whisking with an electric mixer until it was thick and glossy. img_0584
Finally, I decided to try decorating with pistachio sugar shards. I’m not sure if that’s what it’s called, but it’s not quite praline, not quite toffee, not quite caramel either. It’s just 1 cup sugar melted with 1/4 cup water until light golden in color. I then poured it over 1/4 cup shelled pistachios on a parchment paper lined baking sheet and let it cool. Once cool enough to handle, I broke it up into big chunks to decorate, then further crushed the remaining chunks with my rolling pin and a ziploc bag. img_0596
It was surprisingly tasty. Next time, I will definitely add some salt to make them even better!

Recipe adapted from Handle the Heat

Ingredients

  • 1/4 cup pistachio paste
  • 12 tbsp unsalted butter (1 1/2 sticks)
  • 1 3/4 cups granulated sugar
  • 1 cup shelled, raw, unsalted pistachios
  • 3 cups all purpose flour
  • 1 tbsp baking powder
  • 1 tsp baking soda
  • 1/2 tsp salt
  • 1/4 cup cornstarch
  • 1 large egg
  • 1 tsp vanilla extract
  • 1 1/2 cups milk
  • 3 egg whites
  • 1/4 tsp cream of tartar

Directions

  1. Preheat oven to 350 degrees F. Grease 3 8in baking tins with non stick cooking spray and line the bottom with parchment paper (place the pans on top a large sheet of parchment, draw a circle around the circumference with a pencil, and cut out). Set aside.
  2. Pulse the pistachios in a food processor until finely ground. Careful not to let it go for too long, since it will turn into a paste. Pour ground pistachios into a large mixing bowl.
  3. In the bowl of your stand mixer or in a large bowl using an electric hand mixer, cream pistachio paste, butter and sugar for 2 minutes at medium speed.
  4. While that goes, combine the ground pistachios with flour, baking powder, baking soda, salt and cornstarch. Whisk until combined.
  5. Stop the mixer, scrape down the sides and bottom of the bowl, turn mixer back on. Add egg, then vanilla. Then alternately add the dry ingredients with the milk – 1/3 dry ingredients, 1/2 milk, ending in the dry ingredients. Periodically scrape down the sides and bottom of bowl. Stop mixing when dry ingredients are just incorporated in the batter.
  6. In a medium bowl, combine egg whites with cream of tartar. Whisk with an electric mixer at medium speed until stiff peaks form when you pull the beaters up and out of the egg whites. Add a little beat of the beaten egg whites to the batter to thin out the batter. Then add half of the remaining egg white, folding in carefully so as not to deflate them. Add the second half and fold just until you no longer see white streaks.
  7. Divide equally between the three prepared pans and bake for 28-30 minutes until browned on top and a toothpick inserted comes out clean. Cool the cakes and level them before frosting.

Leave a Comment · Labels: American/Mediterranean, Dessert Tagged: cake, candied, chocolate, dessert, ganache, homemade, layer cake, pistachio, recipe

Raspberry Swiss Meringue Buttercream

November 30, 2017

img_0488 
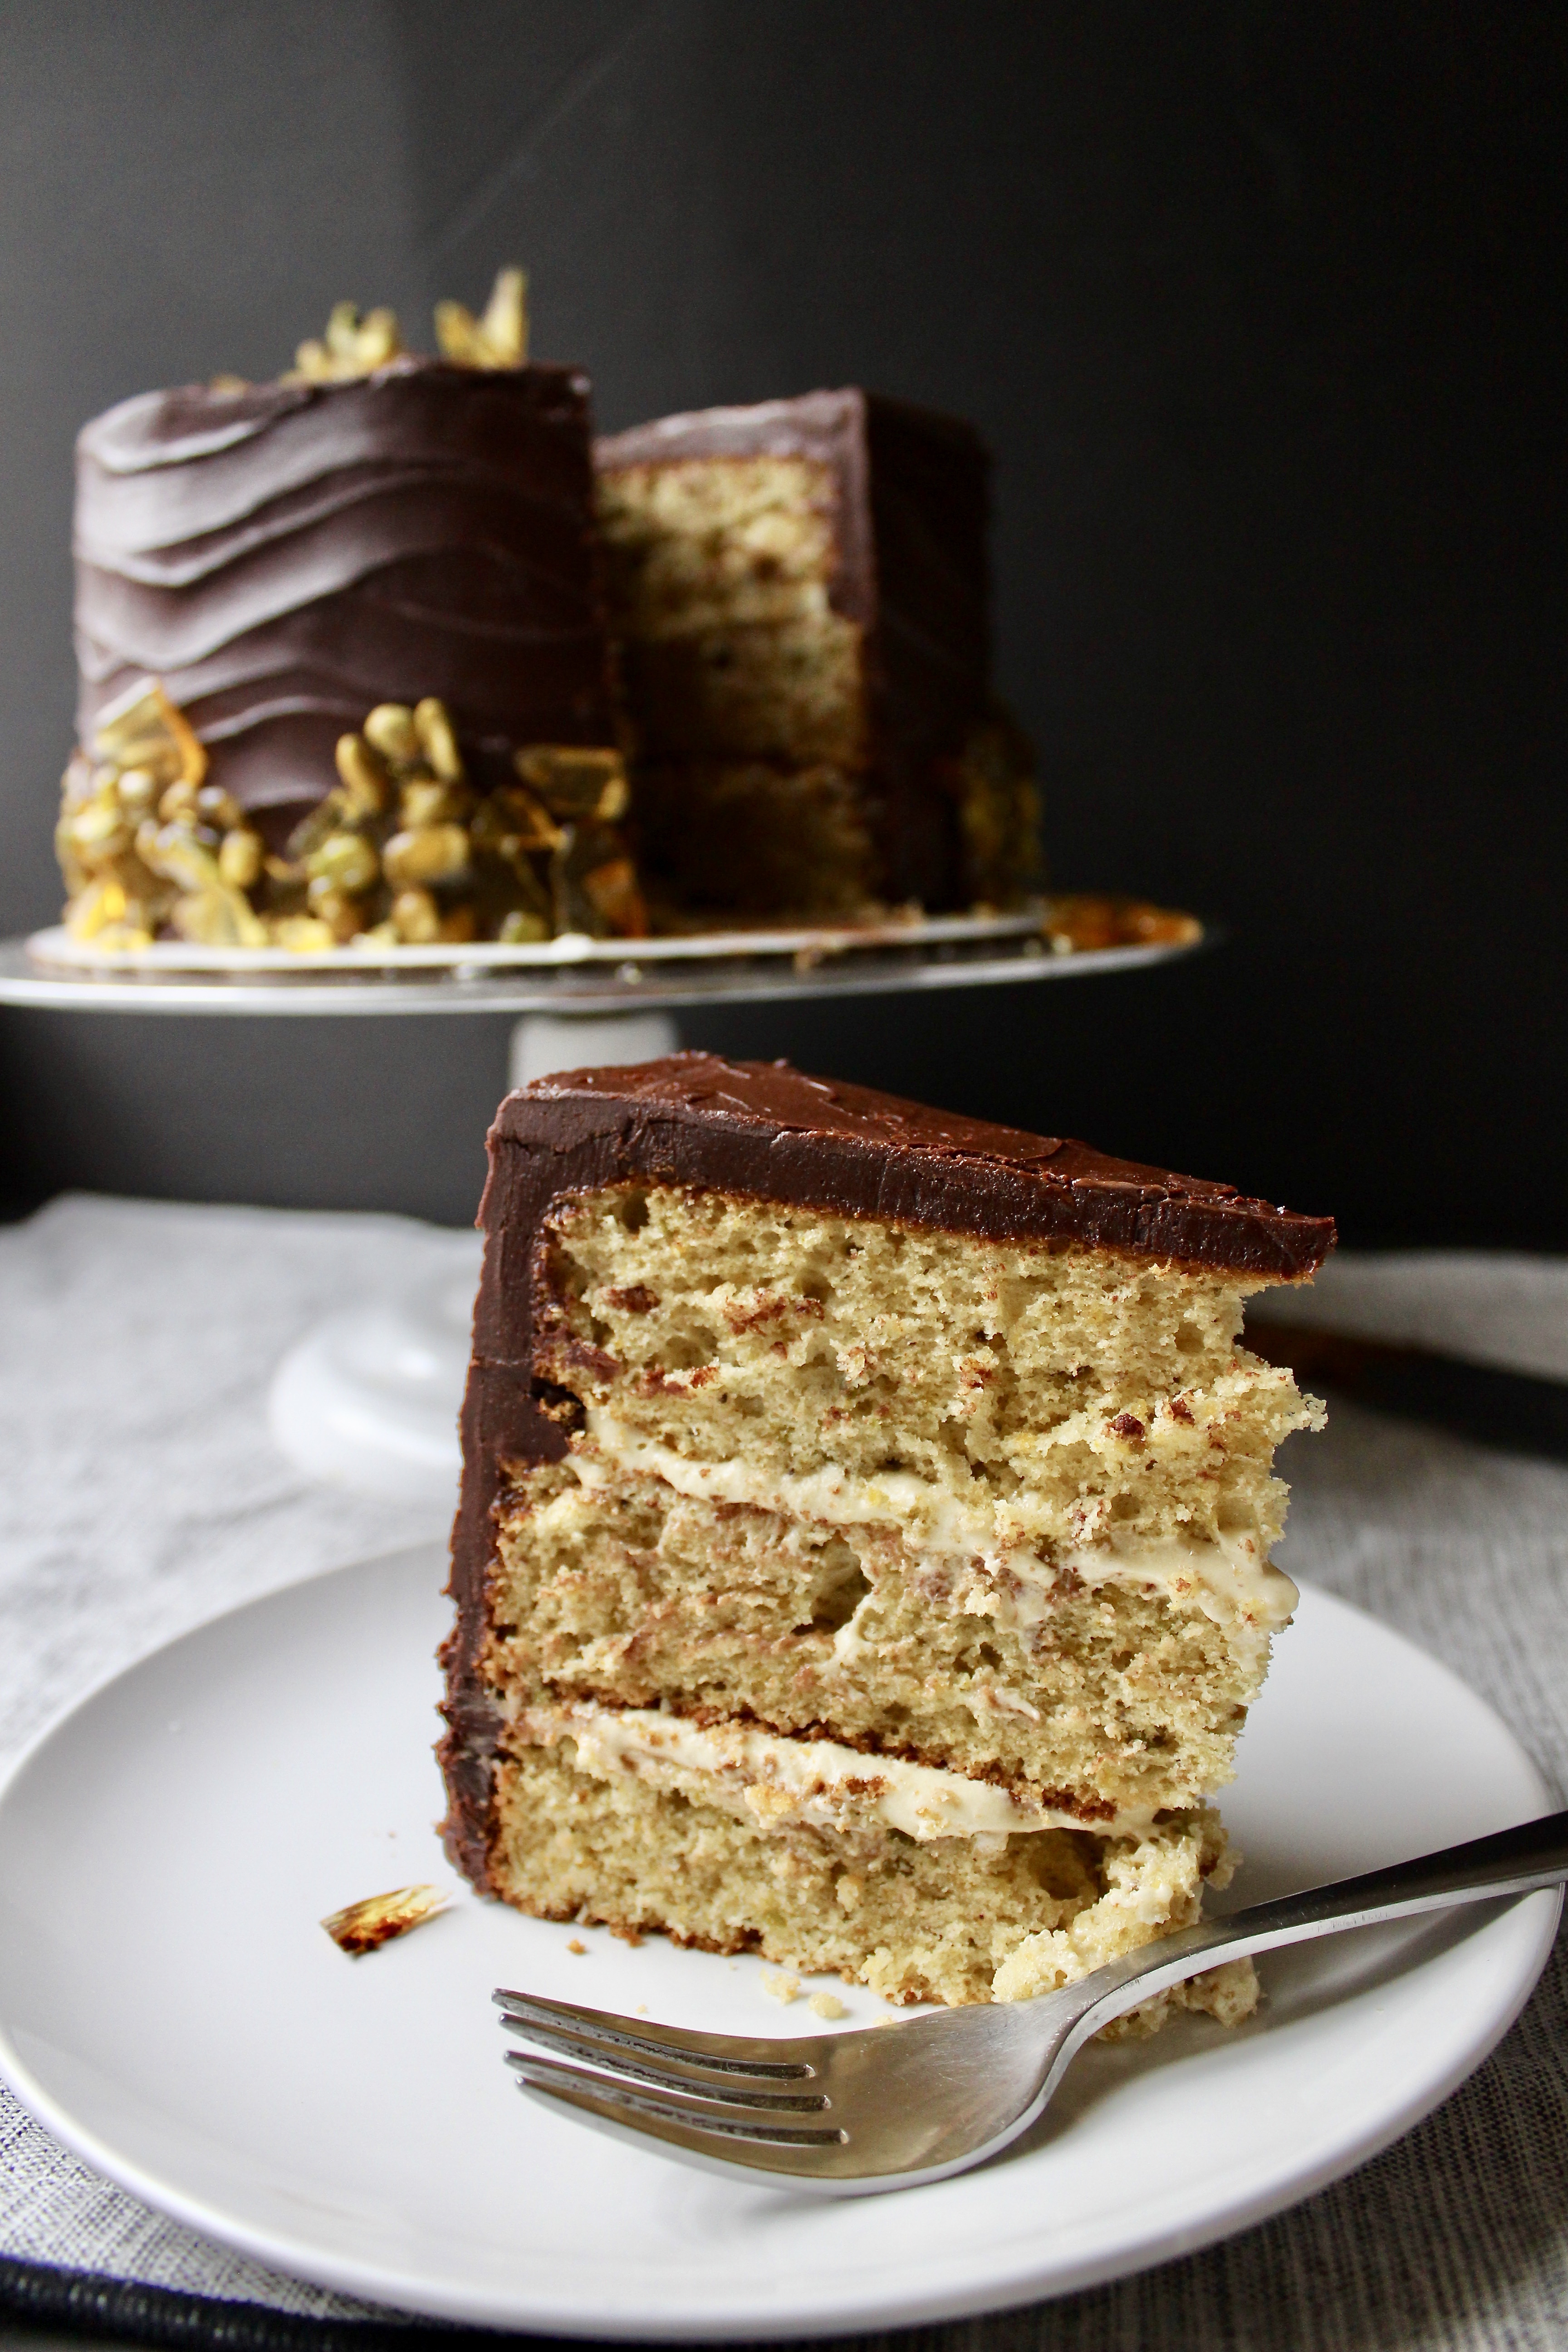
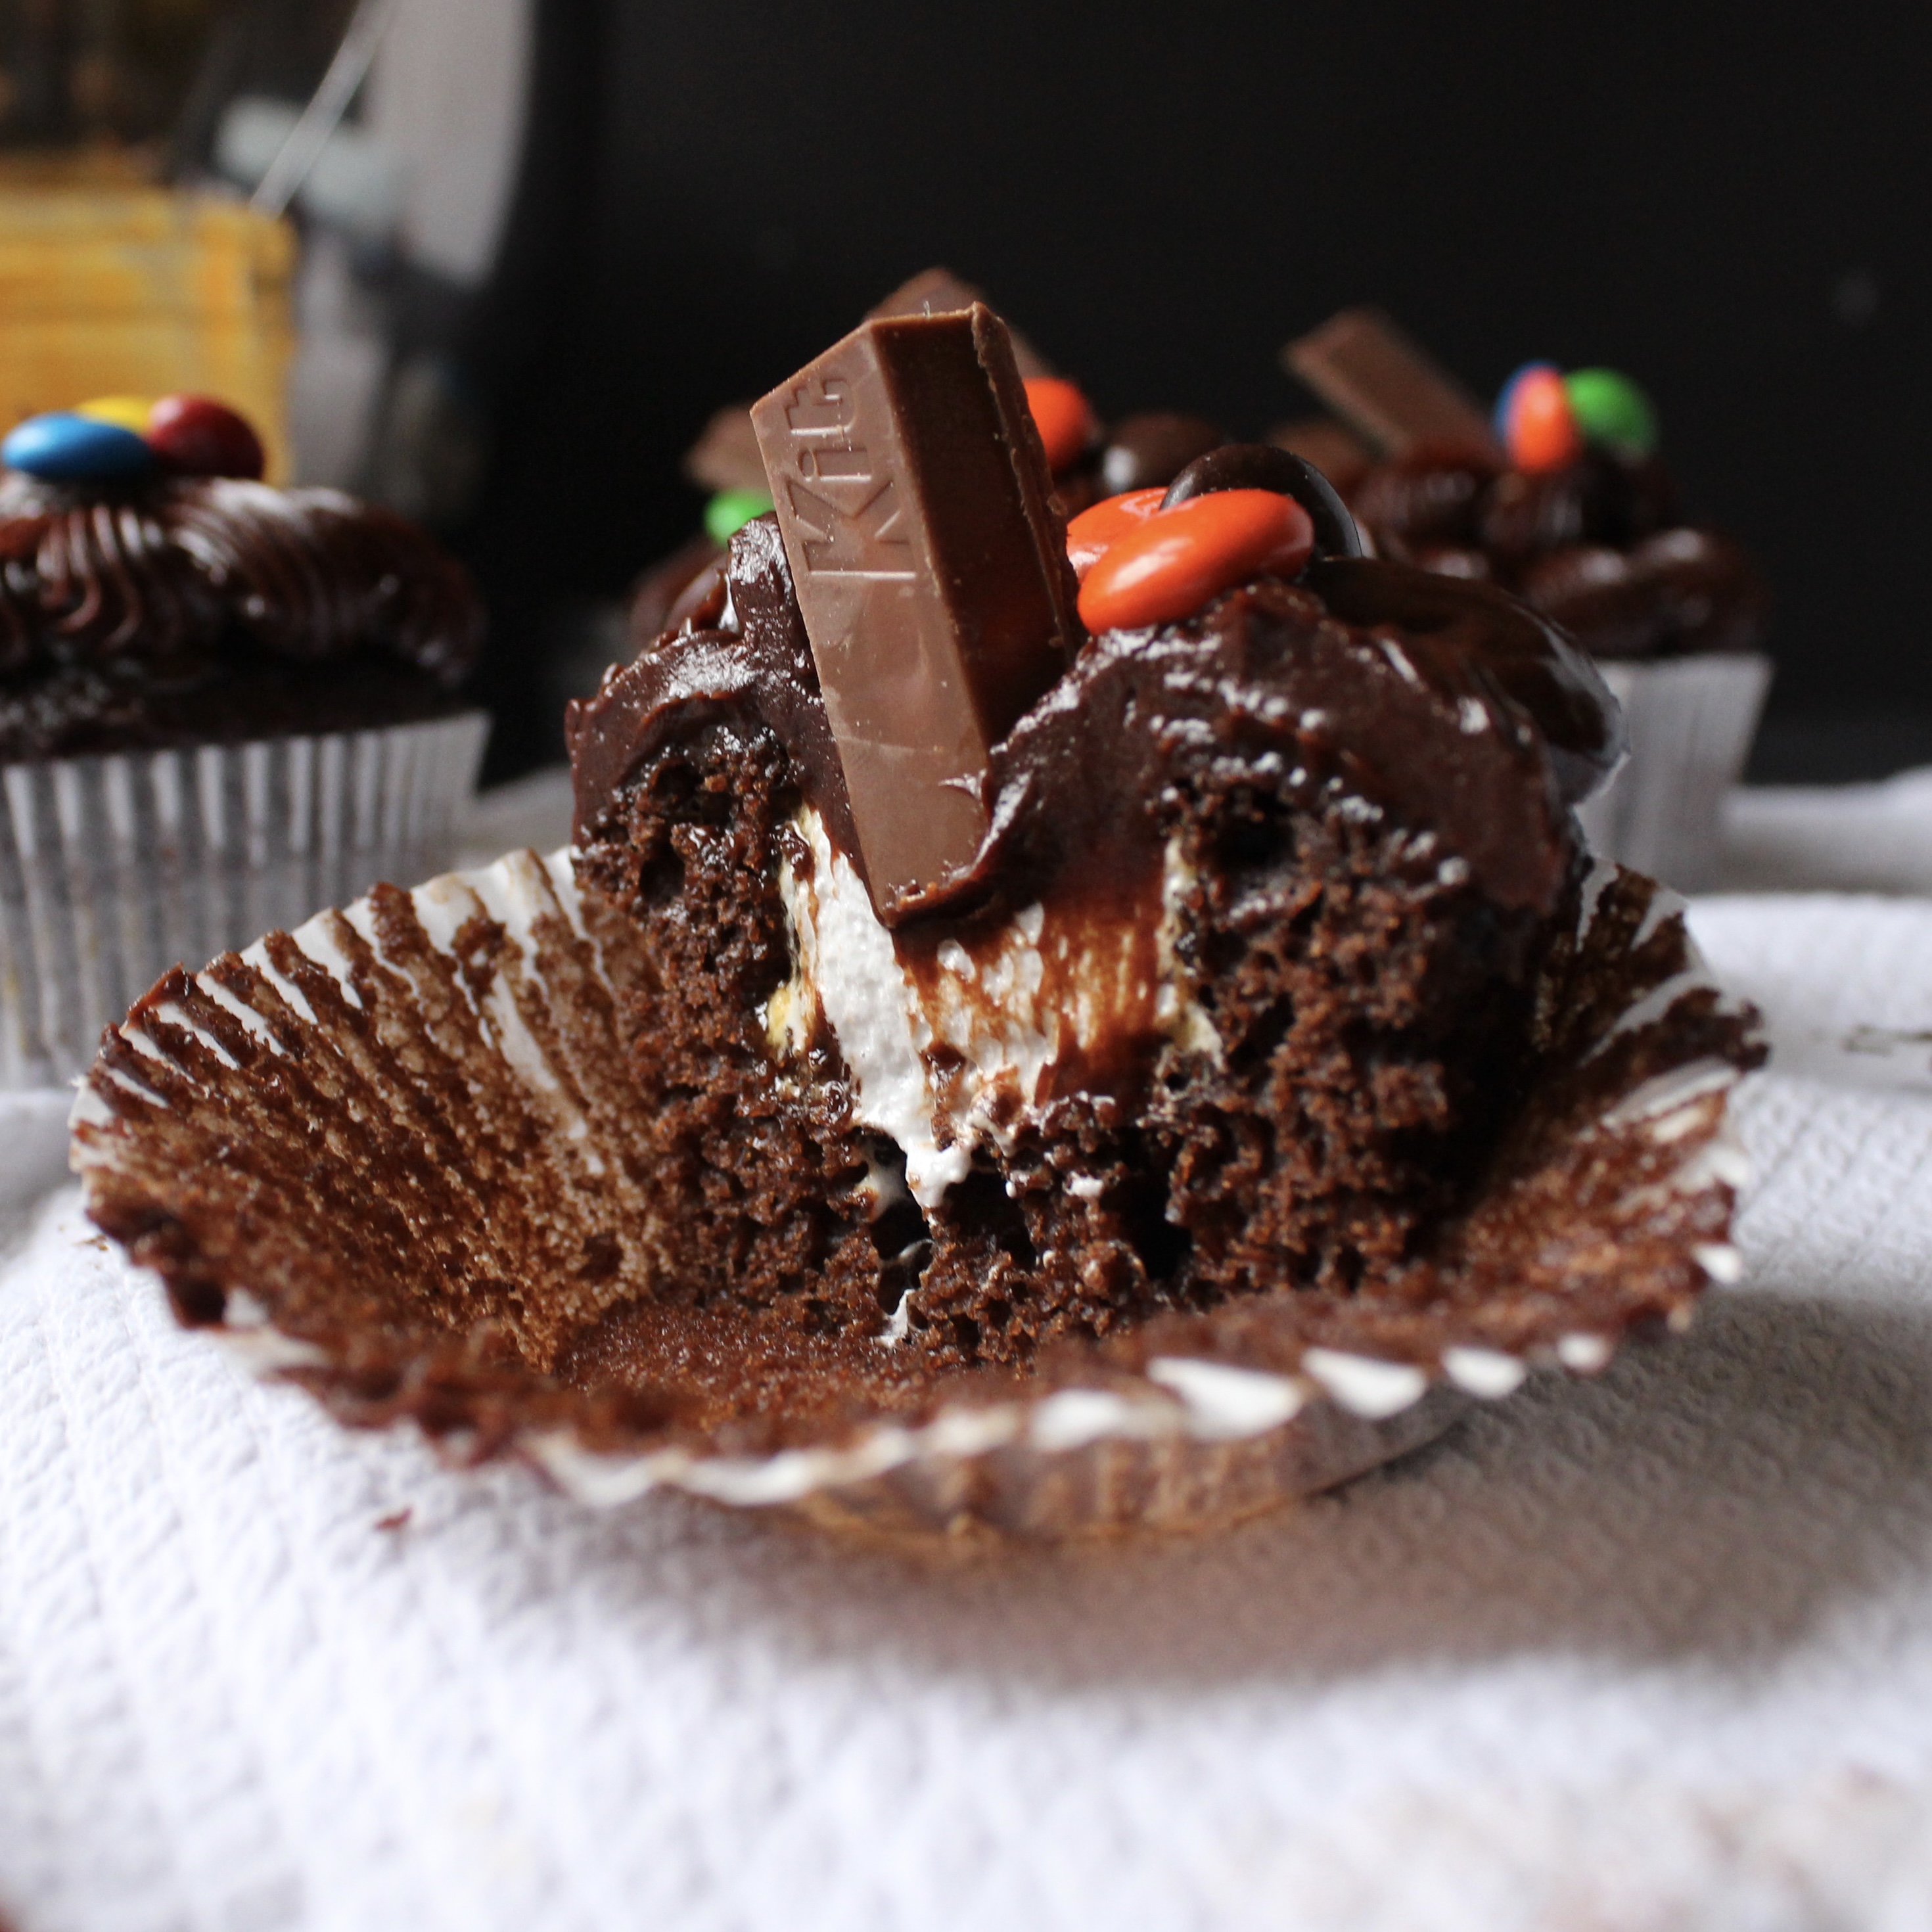
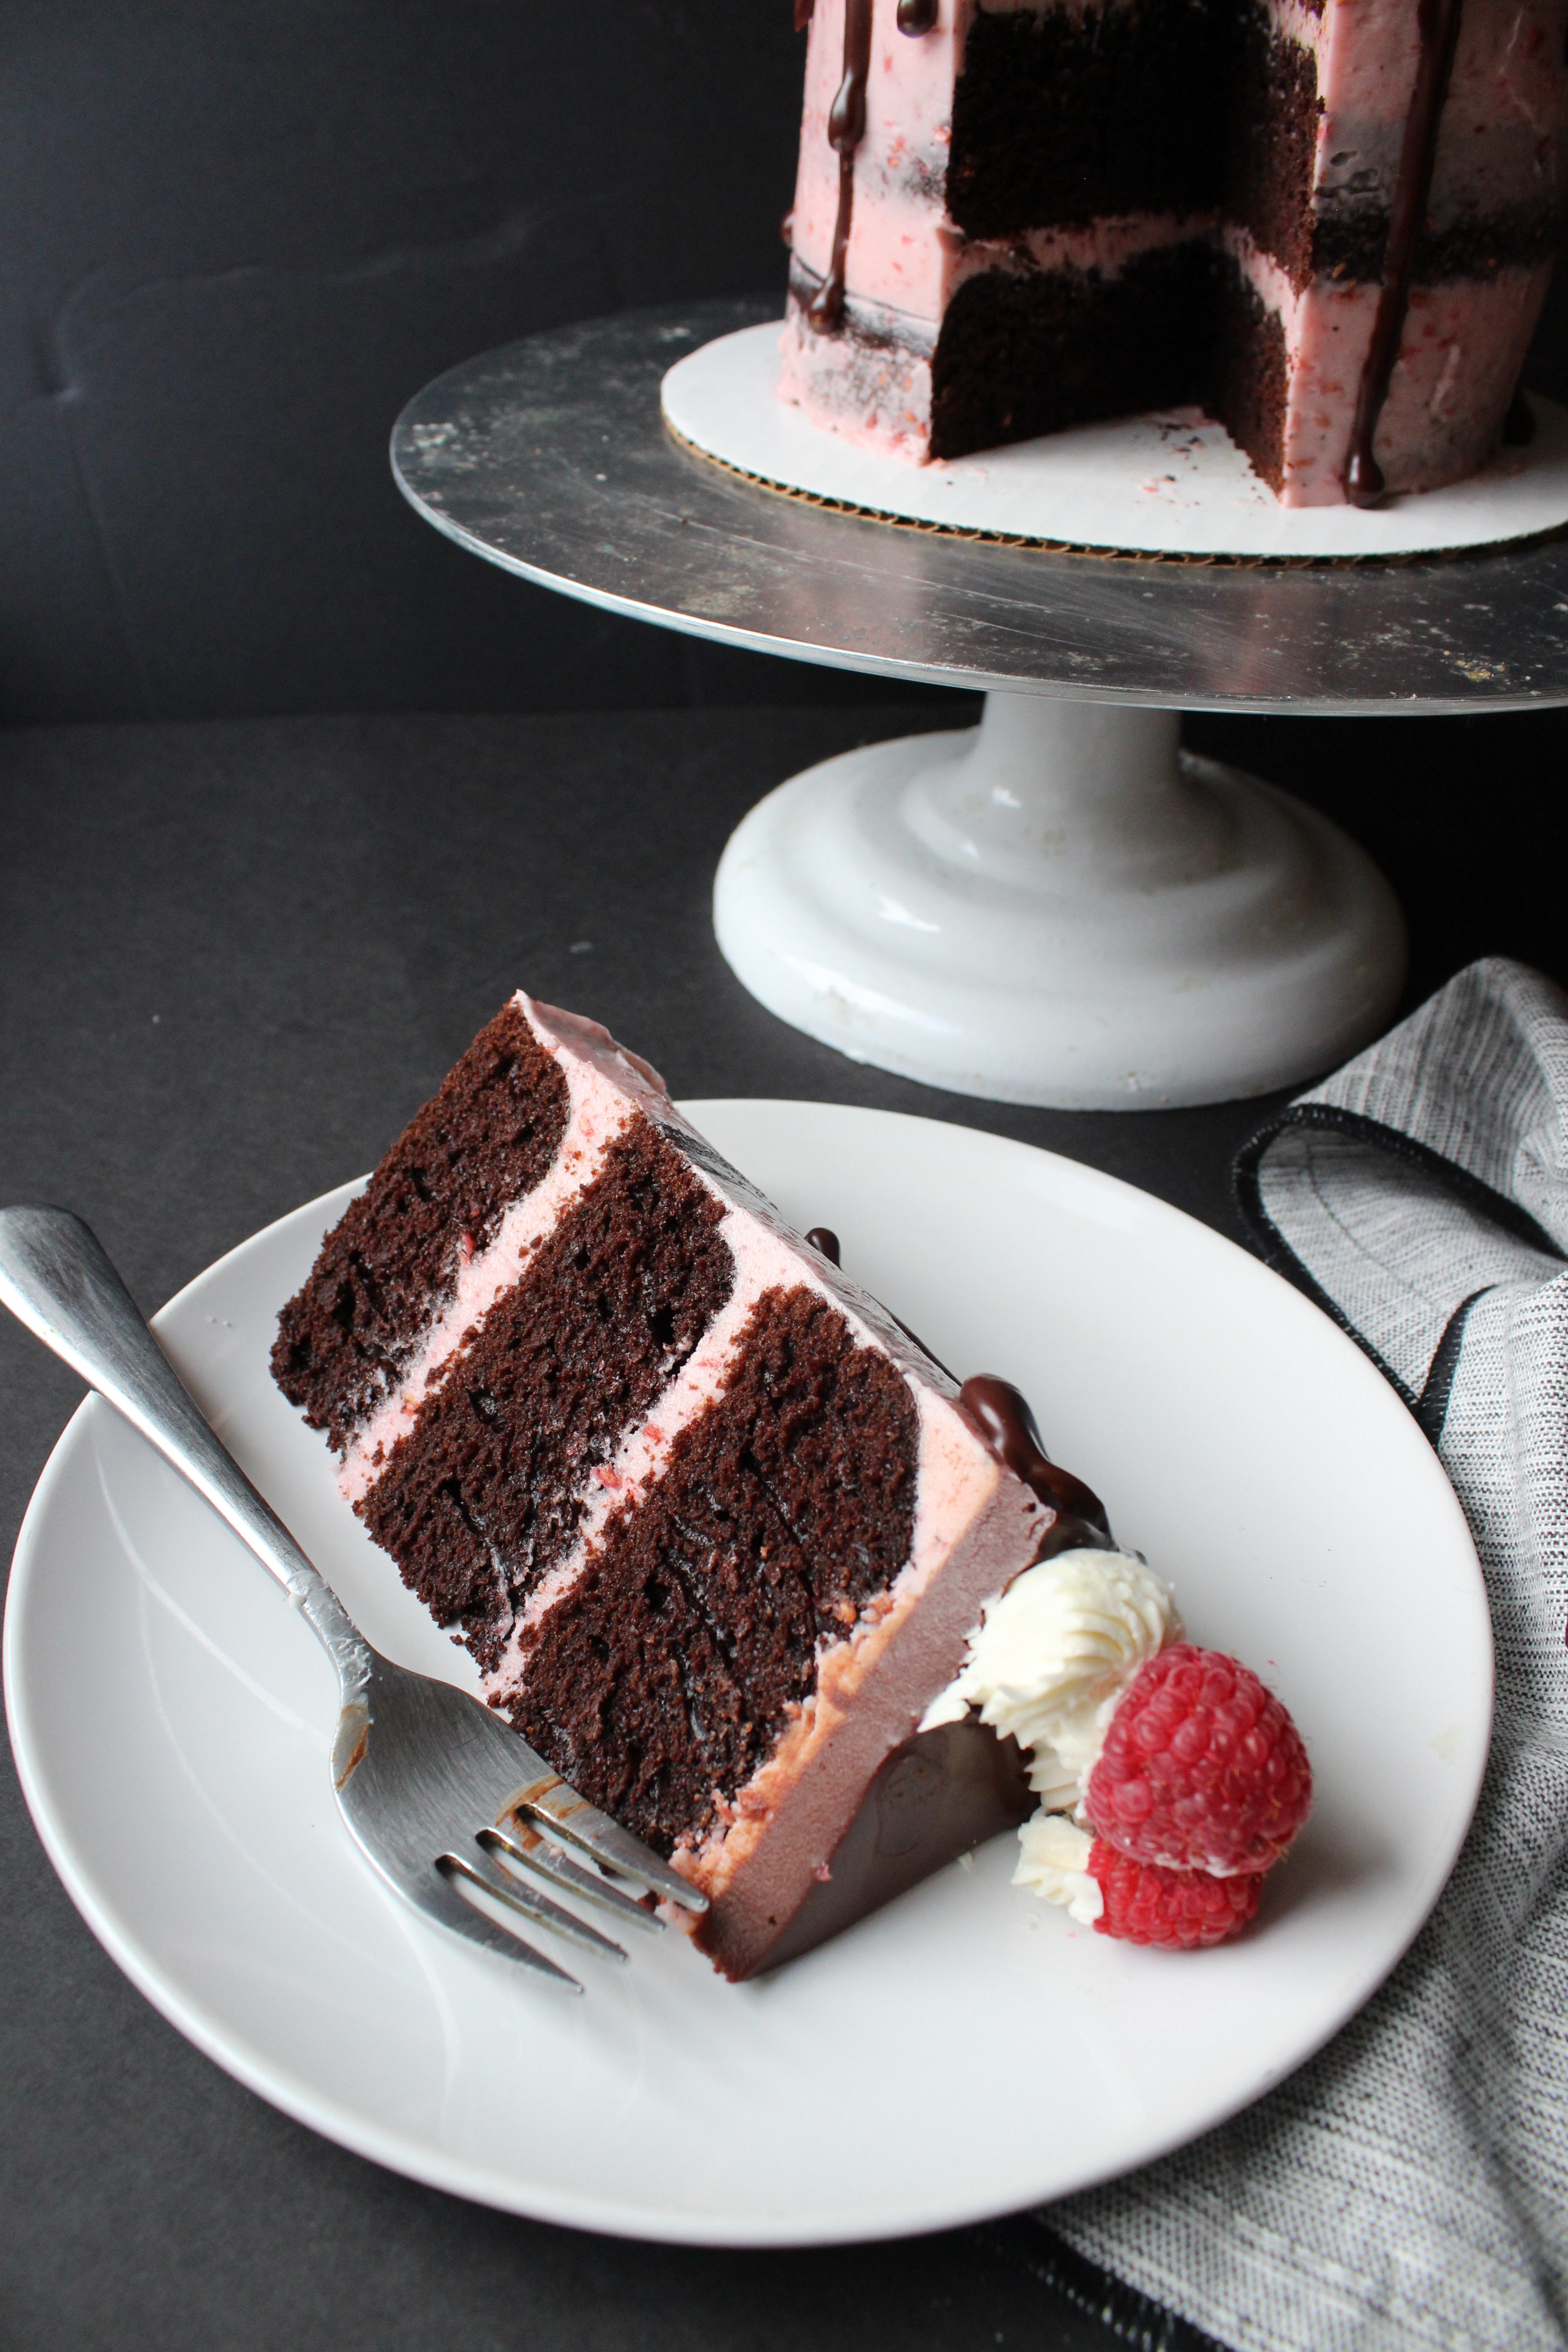
I recall as a kid, I would get visibly angry if upon cutting into a cake at someone’s birthday party, the interior revealed a pale cake with fruit wedged between the layers. I mean c’mon! Save the fruits for the healthy afterschool snack. If I’m dressing up and buying you a present, the least you can do is serve up some decadent chocolately goodness. I mean as I kid I wasn’t on the hunt for swiss chocolate or anything, heck I’d be happy if they served the Entenmann’s double chocolate cake over any of those cakes from my childhood. The one exception I make: raspberries. But only when smothered in chocolate, no less. Chocolate and raspberry will forever be one of my favorite flavor combinations. fullsizeoutput_6a2a
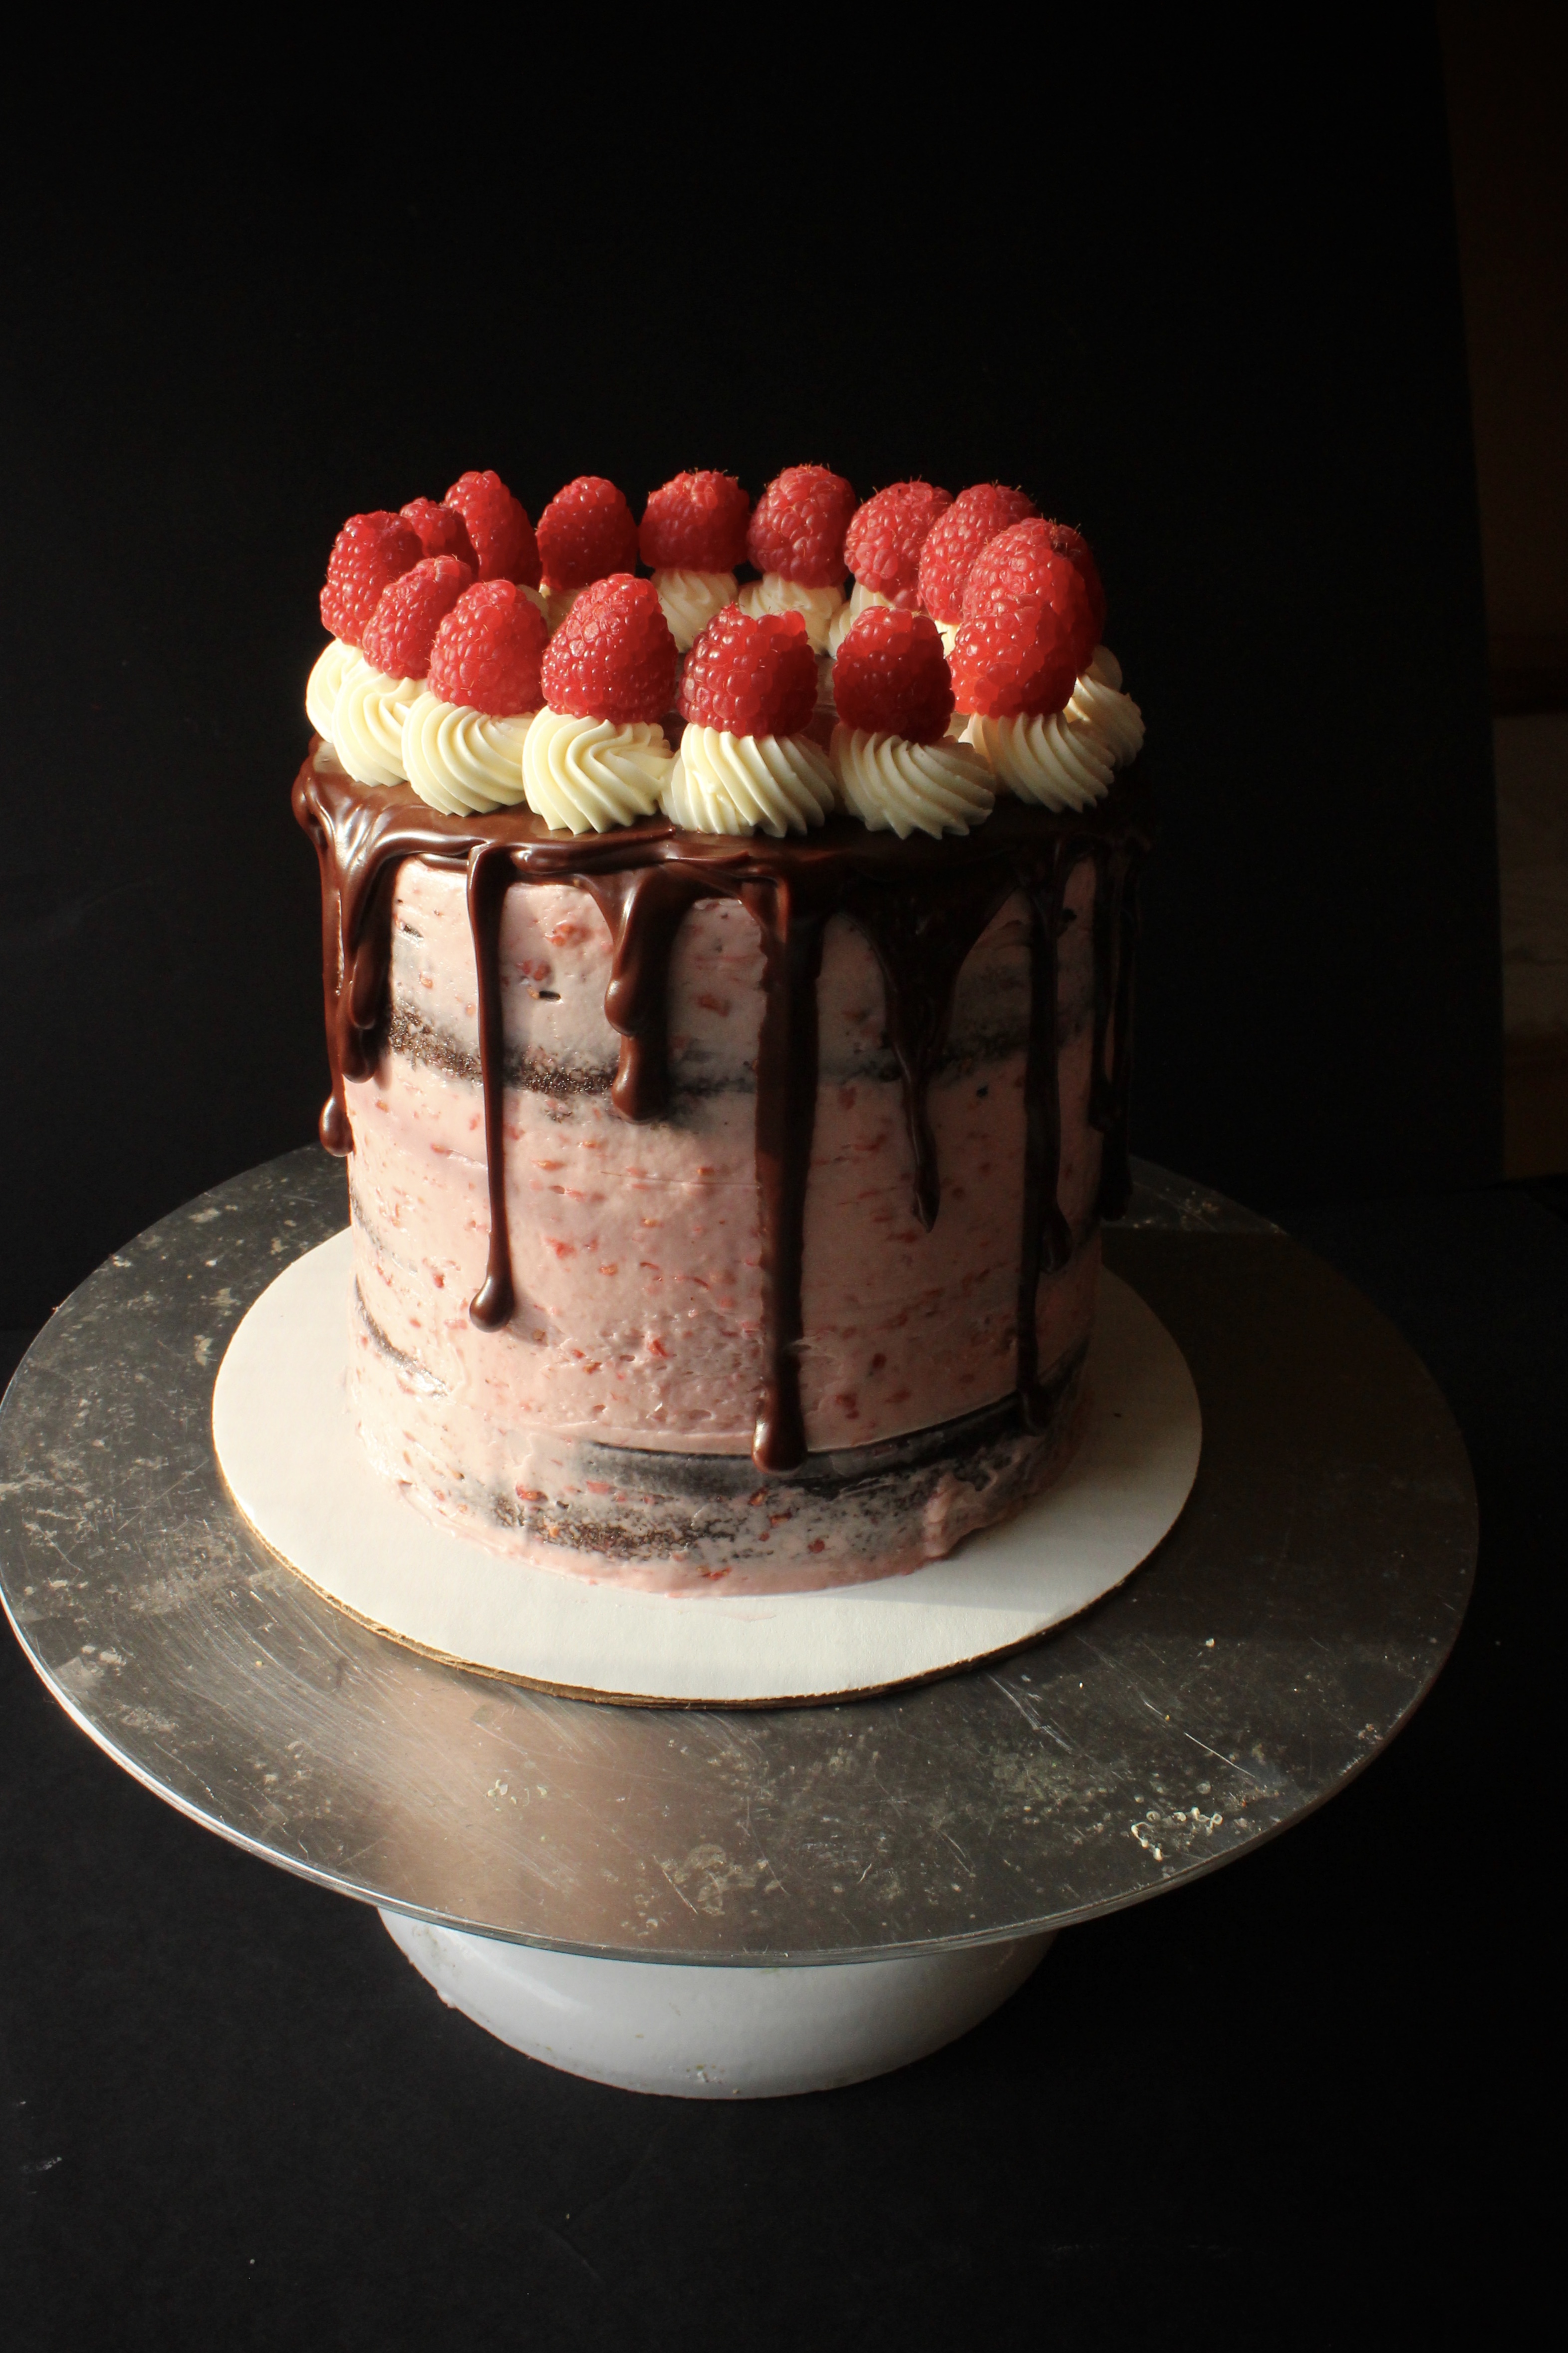
The chocolate/raspberry mousse cake from my local bakery was a long time favorite of mine, until my palette changed and only my homemade chocolate cake will do. So I created this homemade version, using swiss meringue buttercream instead of mousse as they are similar in texture and sweetness. In traditional Naureen style this is chocolate ganache dripping all over the cake, the perfect accent to the raspberry and chocolate layers underneath.

This recipe makes enough to frost a three layer 6 in round cake in the semi naked style.

Ingredients

  • 6oz. fresh raspberries
  • 1 1/4 cups granulated sugar, divided
  • 1 tsp lemon juice
  • 3 egg whites
  • 18 tbsp room temperature unsalted butter, cut into tbsps
  • 1 tsp vanilla extract

Directions

  1. In a small saucepan over medium heat combine raspberries, 1/2 cup sugar and lemon juice. Stir and allow to come to a boil. Once it comes to a boil, lower the heat to low and allow to reduce and thicken, about 10 minutes. Remove from heat and mash with fork. Allow to cool.
  2. In another small saucepan bring a small (about 1in thick) amount of water to simmer. In the bowl of your stand mixer or in a large heat proof mixing bowl, whisk together egg whites with 3/4 cup sugar.
  3. Place over the simmering water and whisk occasionally until the sugar has dissolved and mixture is quite warm to the touch (you shouldn’t feel any granules when you stick your finger in). Remove from heat and start beating with the whisk attachment at medium speed. Beat for a few minutes, until the mixture cools down to room temperature and the mixture is thick and glossy. When the bowl no longer feels warm (test the temperature by placing the back of your hand on the side of the bowl), start adding the butter, 1 tbsp at a time. It will look weird. Feel free to stop and scrape down the bowl.
  4. Continue beating at medium to high speed until the mixture looks curdled. Keep beating until it comes together into a homogenous, smooth buttercream. Lower the mixing speed and add vanilla and cooled raspberry compote. Use immediately, or store in the refrigerator, covered for 2 weeks. To use after thawing, re-beat with a whisk attachment until smooth.

Leave a Comment · Labels: American/Mediterranean, Dessert Tagged: buttercream, chocolate, dessert, fruit, ganache, homemade, raspberry

Chocolate Candy Cupcakes

January 16, 2017

fullsizeoutput_48ea

After a startling reading on the weight scale towards the end of December, I swore off sugar. Just two years prior I worked so hard to lose my baby weight. Inspired by beach body coaches in my network, I vastly cut down sweets, decreased portion sizes, drank tons more water, swapped quinoa for rice in many of my meals, and began to regularly exercise using Fitnessblender, the only exercise I’ve been able to stick to thanks to the fact that I can choose from workouts of different durations and can do it from the convenience of my home. So I lost the 9 pounds of lingering weight, and 8 pounds on top of that.

img_4672

And then I fell off the wagon. Slowly but surely I downward spiraled, picking back up my sweets habits and eating rice and curry without restraint. I kept up with the exercise more or less but it wasn’t enough with my slowing metabolism.

So I decided to stop eating foods with added sugar. It’s just one step, but surely it should help. But of course the universe has to align to make this impossible for me. Shortly after making my resolution, I attended a gingerbread house making playdate where I was SURROUNDED by candy and cake and all kinds of good stuff. Soon after that my daughter’s birthday rolled around and somebody’s gotta do QC and make sure things taste right. Amiright?

img_4685

I did a good job holding off on tasting these, but then I needed a cross section for the blog, so guess where the other half went.

Yup.

fullsizeoutput_48e9

This is a really magical combination for the chocolate lover in your life. It’s reminiscent of the creme filled hostess cupcakes, but made even better with quality cocoa in the cupcake and chocolate in the ganache, homemade salted caramel sauce and delicious candy toppings. Remember we eat with our eyes first, and kids moreso than us. So if they see m&ms, they automatically think it’s a superb cupcake.

Enjoy the quick video tutorial below!

This is an adaptation of Hershey’s Perfectly Chocolate Chocolate cake. Because I used Dutch-process cocoa (which is alkalized, or less acidic than natural cocoa), I upped the amount of baking powder and decreased the amount of baking soda from the original recipe. I also used boiling water instead of hot coffee as many chocolate cake recipes call for, as it made for a way too tender a crumb. Perfect in layer cakes, but for cupcakes, you need something with structure.

Ingredients

  • 2 cups sugar
  • 1 3/4 cups all purpose flour
  • 3/4 cup dutch process cocoa (I use Rodelle)
  • 2 1/2 tsp baking powder
  • 1/2 tsp baking soda
  • 1 tsp salt
  • 2 eggs
  • 1 cup whole milk
  • 1/2 cup vegetable oil
  • 2 tsp vanilla extract
  • 1 cup boiling water

Directions

  1. Preheat oven to 350 degrees F. Line a muffin/cupcake pan with paper liners. You will need 15 in total. My cupcake pan only has room for 12, so I need to make these in 2 batches.
  2. In a large bowl or in the bowl of your stand mixer add the sugar. Place a sifter over the top of the bowl and add flour, cocoa, baking powder and soda. Sift the ingredients into the sugar. Add salt. Stir to combine using the paddle attachment.
  3. In a 4 cup measuring cup or in a medium bowl, measure out the milk and vegetable oil. Add eggs and vanilla and mix well using a fork. With the mixer running on low, slowly drizzle in the wet ingredients into the dry. Stop occasionally to scrape down the sides and bottom of the bowl. Turn the mixer back onto low and slowly drizzle in boiling water. Stop the mixer and scrape down with a spatula to ensure the batter is homogenous.
  4. Using an ice scream scoop, scoop batter into the cupcake liners 2/3 of the way to the top. Bake for 15 to 18 minutes or until a toothpick inserted in the middle comes out clean.
  5. After they cool, hollow out the middle using a small circular cookie cutter. I used the smallest one from this set. I filled it with marshmallow creme using a piping bag and wide tip. I drizzled some salted caramel sauce over them. Then frosted them with chocolate ganache and garnished with chocolate candies.

Leave a Comment · Labels: American/Mediterranean, Carb, Dessert, Food Fun, Recipes Tagged: candy, caramel, chocolate, cupcakes, ganache, marshamallow creme, marshmallow fluff

Almond Lace Cookies with Earl Grey Ganache

January 5, 2016

IMG_5460Oh no – I was supposed to kick off the new year with a healthy-ish recipe, right?? Gah – you’ll have to forgive me. Next post, I promise, something green. In the meantime, enjoy Kitchen3N 3.0! Now with creepy side picture so you can imagine I’m watching you as your read (and salivate at) my material. IMG_5465These cookies have many names: almond lace cookies (you can find similar ones at Trader Joe’s, except instead of sandwiching them, you’ll find them as single cookies dipped in chocolate), bocca di nonna (literally, mouth of grandma but I suppose grandma’s kisses sound better), and that’s it really. Sorry. They have wonderfully sweet, caramelly, toasty notes and the earl grey ganache just makes ya go, “hmm what IS that?!”. Throwback to Rachel Ray and every instance of her adding nutmeg to a cream sauce.

Recipe from BH&G Jan 2010

Ingredients

  • 2/3 cup all-purpose flour
  • 2 tbsp unsweetened dutch-processed cocoa powder
  • 3/4 cup butter, softened
  • 1 cup sugar
  • 3/4 teaspoon, vanilla
  • 1 1/2 cups finely ground almonds (I ground up slivered almonds in the food processor)
  • 1/3 cup heavy cream
  • 4 earl grey tea bags
  • 4 oz semi sweet chocolate, chopped

Directions

  1. Combine flour and cocoa powder in a small bowl. Whisk to combine and set aside.
  2. In your stand mixer (or in a bowl using a handheld electric mixer) cream butter at medium speed for 30 seconds. Slowly add sugar and vanilla extract. Beat until light and fluffy (3 to 4 minutes). Scrape down sides of bowl occasionally. Add ground almonds, then flour and cocoa mixture. Using a rubber spatula, scrap down the sides and bottom, give it a final mix, and dump onto a large piece of saran wrap. Wrap tightly and refrigerate for 1 hour.
  3. Preheat oven to 350 degrees F. Line a baking sheet with parchment paper. Using a cookie scoop, scoop out 1 inch balls onto prepared cookie sheet, 2 inches apart. Press down lightly to flatten.
  4. Bake for 12 to 15 minutes or until centers are firm. Let cool a few minutes on baking sheet, then move to wire rack to cool completely. Continue with the remaining dough.
  5. While they cool, make the ganache: bring the cream to just before boiling (you’ll see bubbles around the perimeter). Remove from heat. Add the 4 tea bags, cover and let steep for 15 minutes. After 15 minutes, uncover, squeeze the liquid out of the bags and discard. Heat the cream once again to just barely a boil. Add the chopped chocolate and stir until mixture is homogenous and shiny.
  6. Assemble: Spread half a teaspoon of ganache onto the flat side of one cookie. Place the flat side down of another cookie directly on the ganache. Continue with the rest of the cookies.

2 Comments · Labels: American/Mediterranean, Dessert, Recipes Tagged: almond cookies, almond lace cookies, bocca di nonna, chocolate, cocoa, cookies, dessert, earl grey, ganache, tea biscuits

Chocolate Zucchini Cake

August 18, 2015

IMG_4847I was incredulous the first time I heard the words “Zucchini Bread” at my adopted Jewish grandmother’s apartment some 15 years ago. Her name is Sophie and she was my mother’s confidant, advisor, protector and friend for many years. She taught her the value of saving. She raised two children during the Depression. She told my mother, every week she set aside $0.50. She grew such a small sum into stake in a multi-million dollar company and a condo in a luxury apartment building in downtown Manhattan. IMG_4854So when she talked, we listened:

  • “Eat Romaine lettuce, not iceberg. It’s all water.”
  • “Ya ever tried zucchini bread? It’s delicious.”
  • “Take care of ya mother. She works hard.”

Right on all counts. Take it one step further with chocolate zucchini cake. I was skeptical when a mom brought zucchini brownies to a play date. But it had such deep chocolate flavor! And it was moist! And magical! I realize that zucchini’s blandness kind of works in its favor in baked goods. Between that and the water content, it’s the perfect vessel for delivering a rich, moist, chocolate crumb. I was nervous as I folded the 3 cups into the batter, that those eating the cake would see slivers of green running throughout, but it melted right into the cake. And with that much veg content, you don’t feel like the world’s worst parent when your kid (and husband) reaches for it throughout the day.

Adapted barely from King Arthur Flour.

Ingredients

  • 1/2 cup unsalted butter (1 stick) at room temperature
  • 1/2 cup vegetable oil
  • 1 3/4 cups sugar
  • 1 tsp vanilla extract
  • 2 large eggs
  • 1 tsp baking soda
  • 1/2 tsp baking powder
  • 1/2 tsp salt (next time I would try increasing this to 1 tsp!)
  • 1/2 cup buttermilk, sour cream, or yogurt (I used buttermilk)
  • 2 1/2  cups all purpose flour
  • 3/4 cup Dutch process cocoa*
  • 3 cups shredded zucchini
  • 1 cup chocolate chips
  • 1 cup heavy cream

Directions

  1. Preheat oven to 325 degrees F. Grease a 9″x13″ baking pan.
  2. Sift flour, cocoa, baking soda, baking powder and salt into a large bowl. Stir gently to combine.
  3. In a stand mixer or in a large bowl with a handheld electric mixer, beat butter at medium high speed until light and airy – about 1 minute. Lower the speed to medium low and gradually add half the sugar, then oil, then remaining sugar. Add vanilla, then eggs, one at a time, until incorporated fully. Stop to scrape down the bowl. Turn on the mixer briefly once more to incorporate everything.
  4. At low speed, add half of the flour/cocoa mixture. Then slowly pour in the buttermilk (or sour cream or yogurt). Add the rest of the dry ingredients.
  5. Remove bowl from stand mixer and fold in the zucchini with a rubber spatula or wooden spoon. When fully incorporated, pour into greased pan and bake for 40-45 minutes, until a toothpick inserted comes out clean. Let cool.
  6. Heat heavy cream in a saucepan until scalding hot (bubbles appear around the perimeter). Pour over the chocolate chips and stir until it becomes a spreadable ganache. Pour and spread evenly over cooled cake.

*Dutch process cocoa, though harder to find, is essential for that deep chocolate flavor. When you use a quality cocoa powder, it makes all the difference between a standard chocolate cake and a gourmet one. Can be purchased online.

Leave a Comment · Labels: American/Mediterranean, Dessert, Recipes Tagged: chocolate cake, cocoa, dutch process cocoa, ganache, seasonal baking, seasonal cooking, snack cake, squash, summer squash, zucchini

American, Bangladeshi. Savory, sweet. I don't discriminate and neither should you.

Most recently…

Load More...
Follow on Instagram

Social

Subscribe to Blog via Email

Enter your email address to subscribe to this blog and receive notifications of new posts by email.

Tags

appetizer beef bengali breakfast butter cake caramel chicken chocolate chocolate chips cilantro clean eating coconut comfort food cookies dessert dinner entertaining fall fruit ganache gluten free halal healthy homemade honest chops honest creations iftar italian pasta pastry pistachio quick and easy dinner ramadan recipe side side dish south asian spinach vegan vegetables vegetarian weeknight dinner weeknight meal whipped cream

Theme by 17th Avenue · Powered by WordPress & Genesis