Kitchen3N

Recipes and food fun from Apt 3N

  • About
  • Gallery
  • Recipes

Coconut Layer Cake

December 29, 2017

fullsizeoutput_6cc1
This cake was kind of born 2 and half years ago when I was tasked with feeding 100 people with a coconut cake. “Can it have pineapple filling?” my dear friend Jaf asked. YES, YES IT CAN!
fullsizeoutput_6cc0
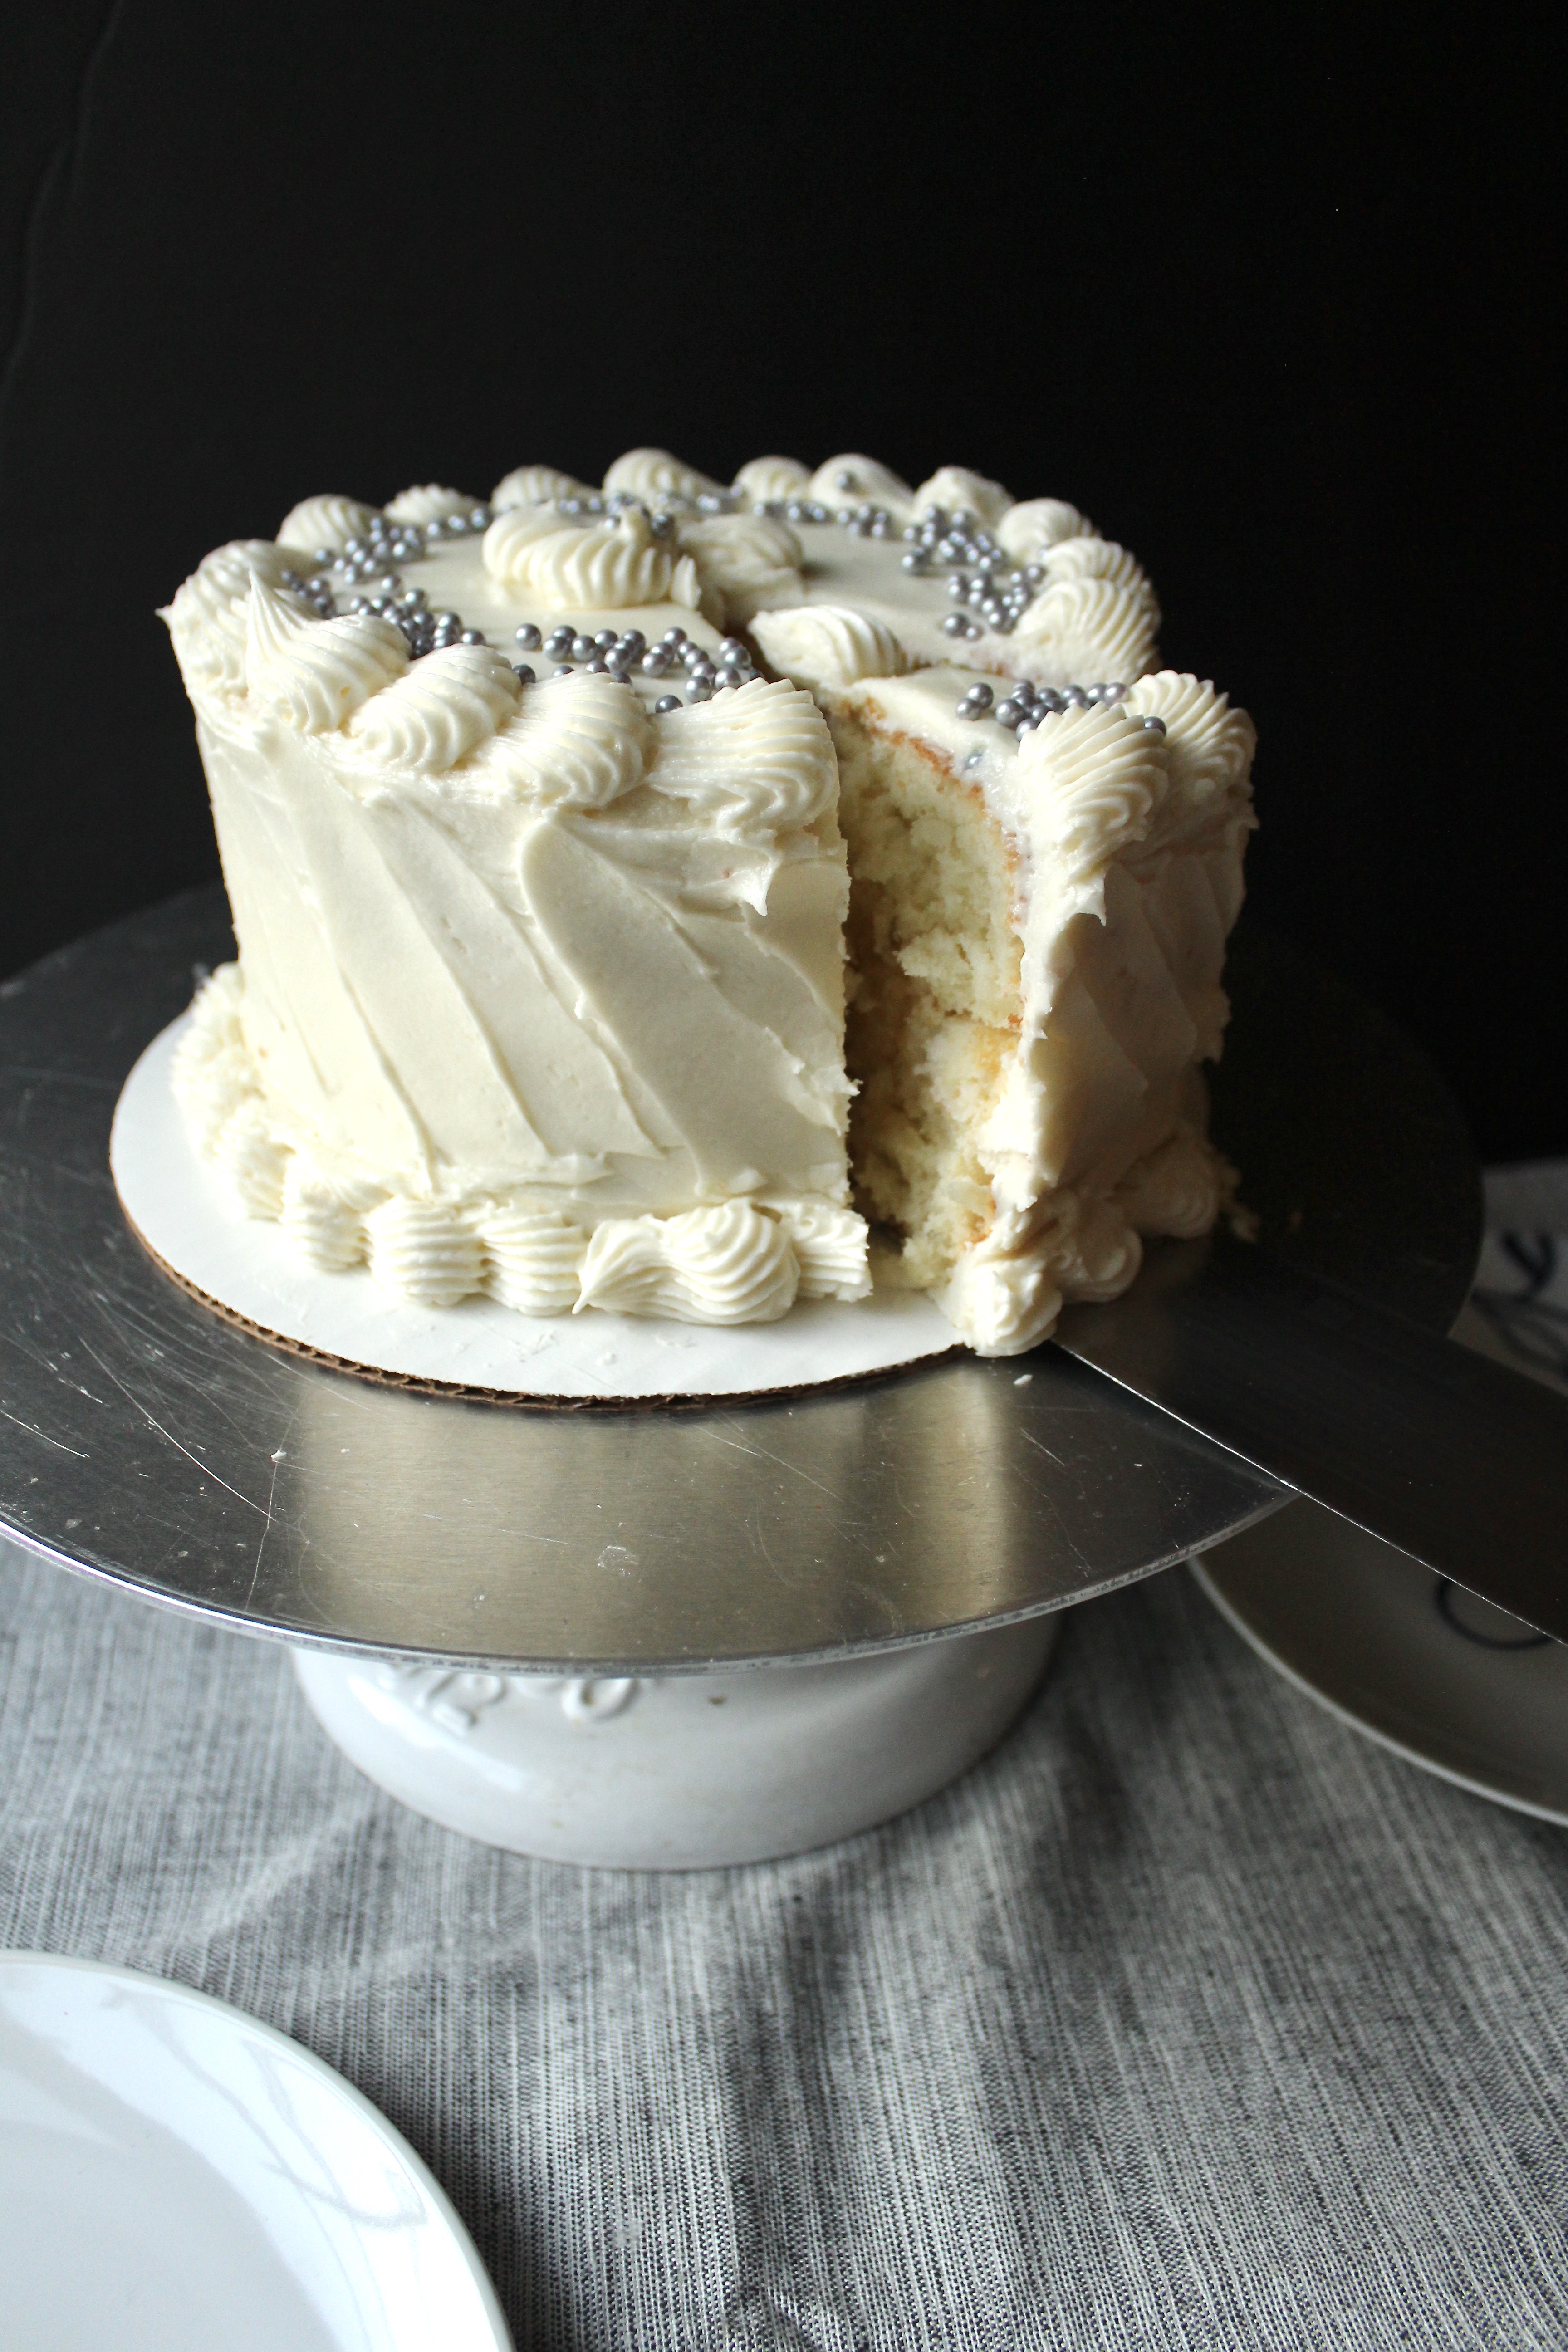
This cake is a delicious, crowd pleasing hit in its original version, but with this pineapple filling, it takes it over the edge. It’s kind of retro, but the fruitiness balances out the richness and creaminess from the buttercream.
fullsizeoutput_6cba
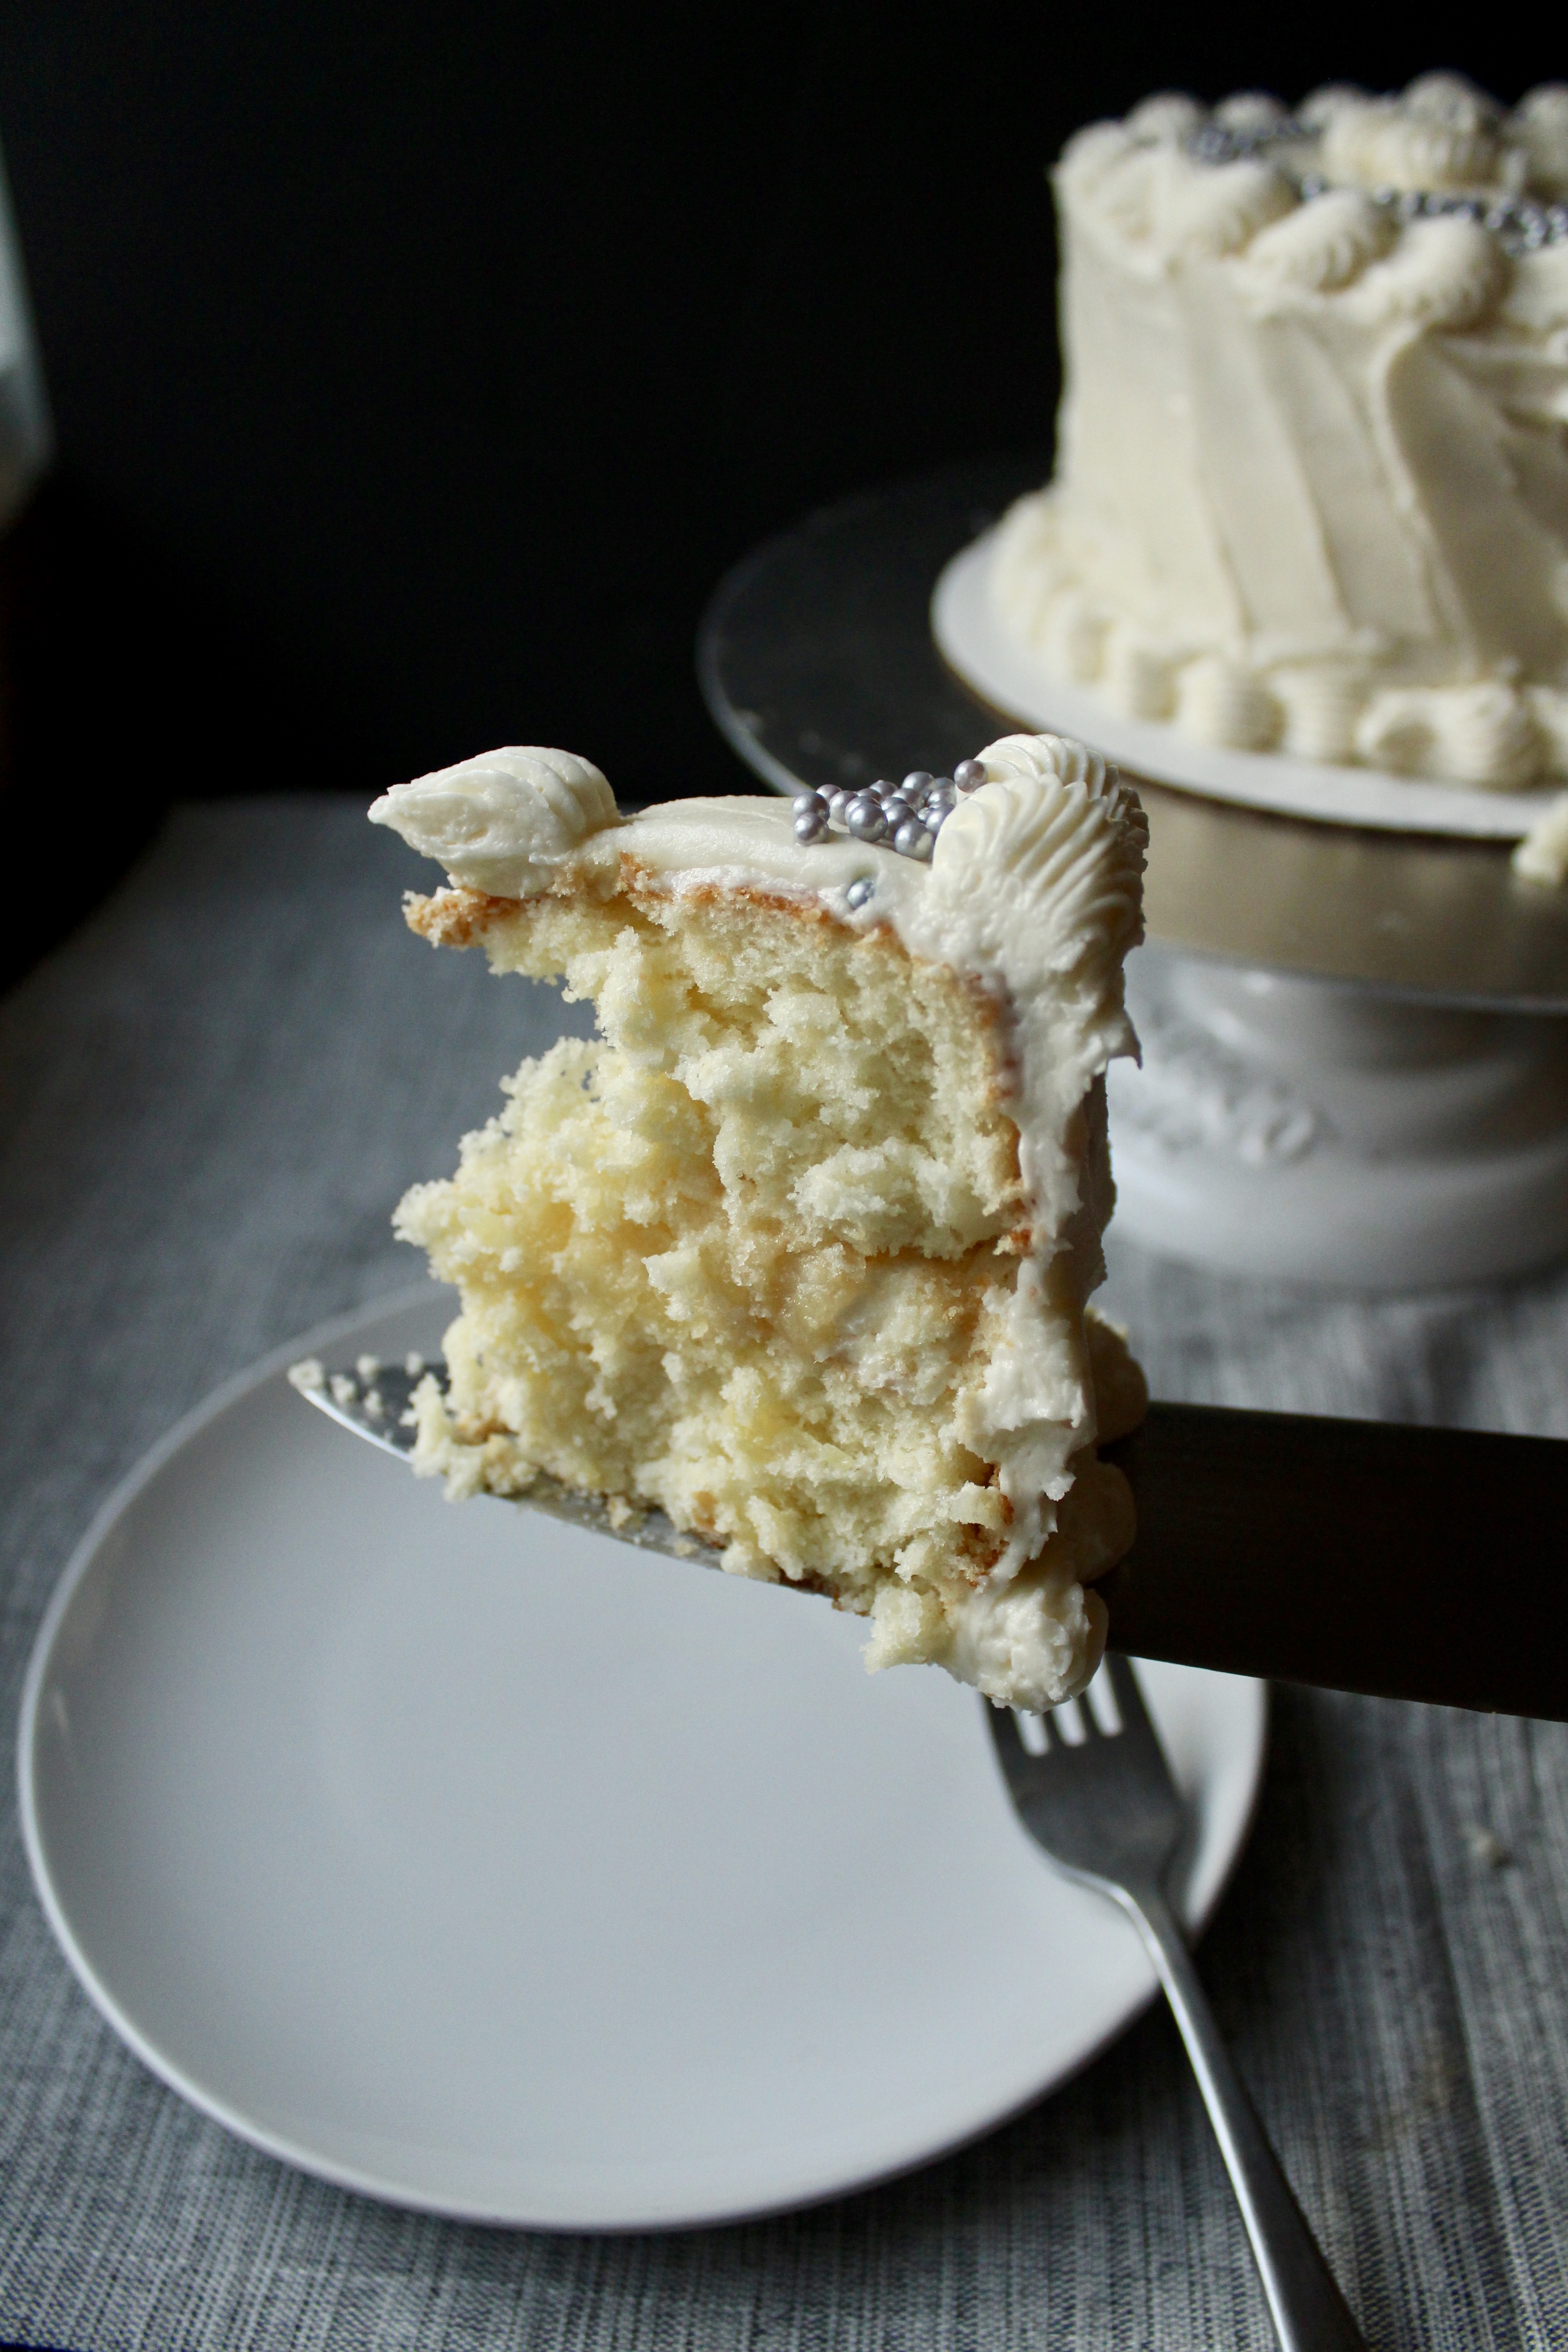
It’s a little fussy, yes, with the beating of egg whites and the careful folding in, but the payout is worth it. It’s the lightest, fluffiest, sweetest, nuttiest, flavorfullest cake you’ll ever have. Ever.
fullsizeoutput_6cb9
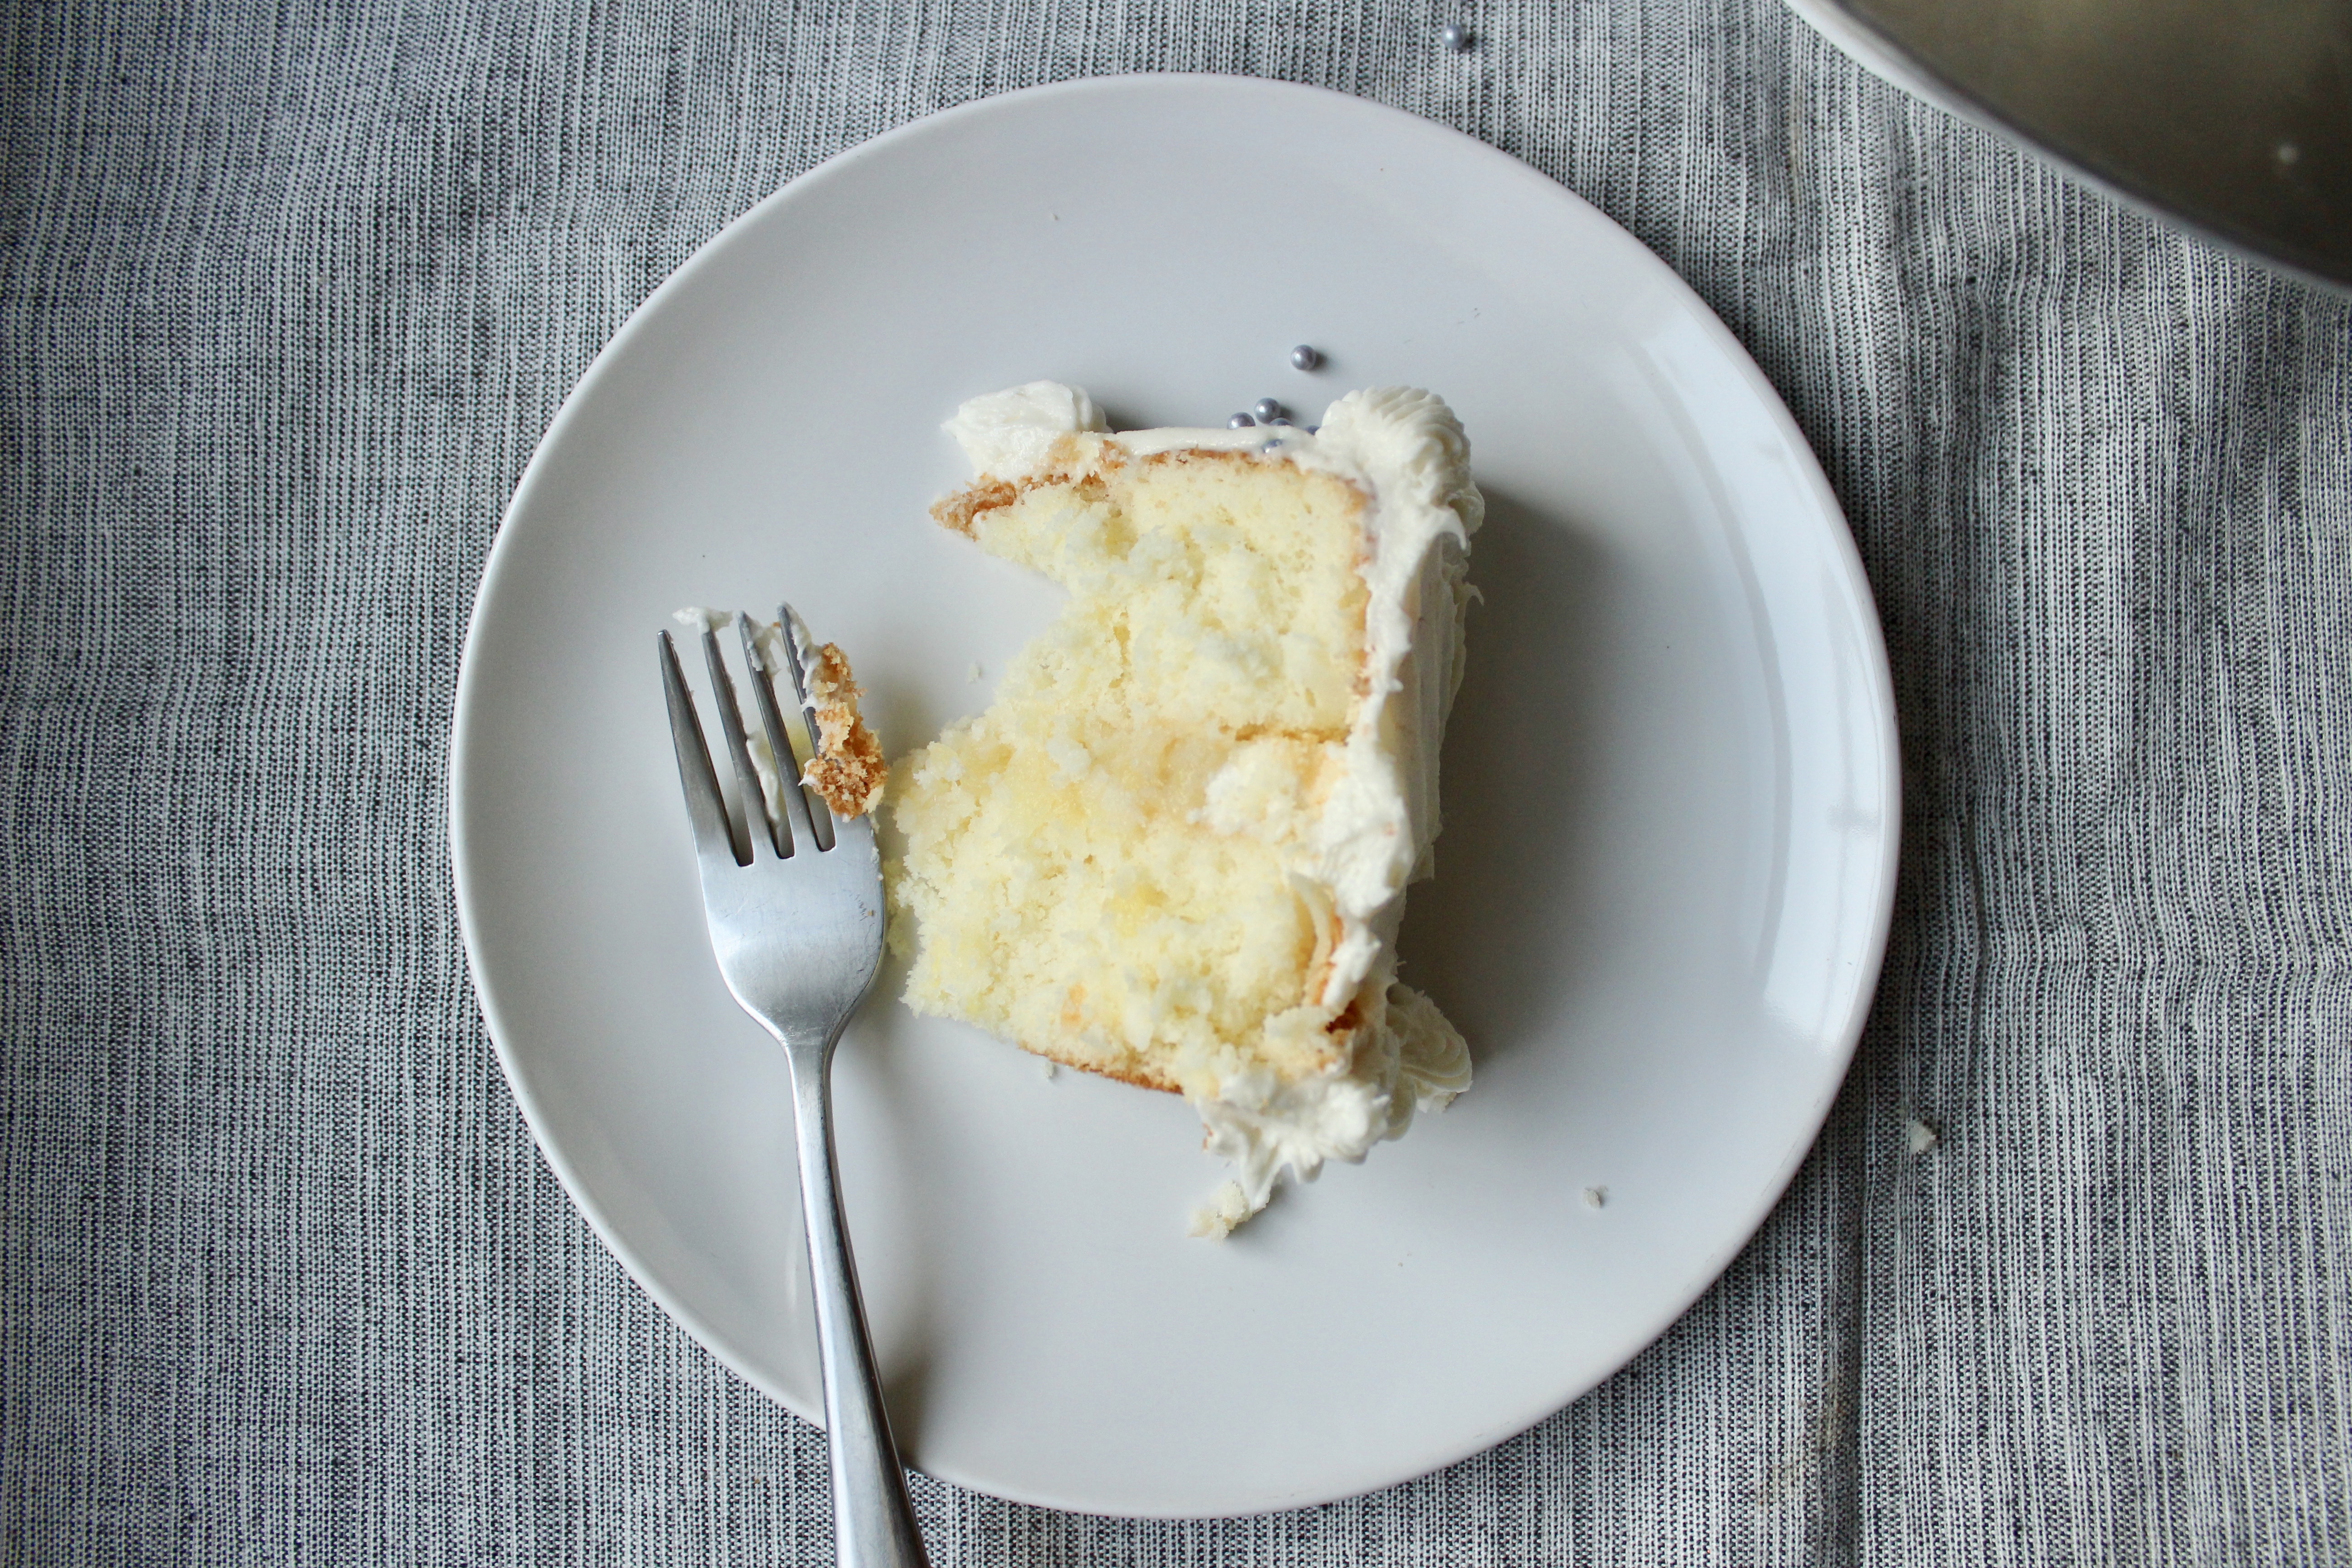
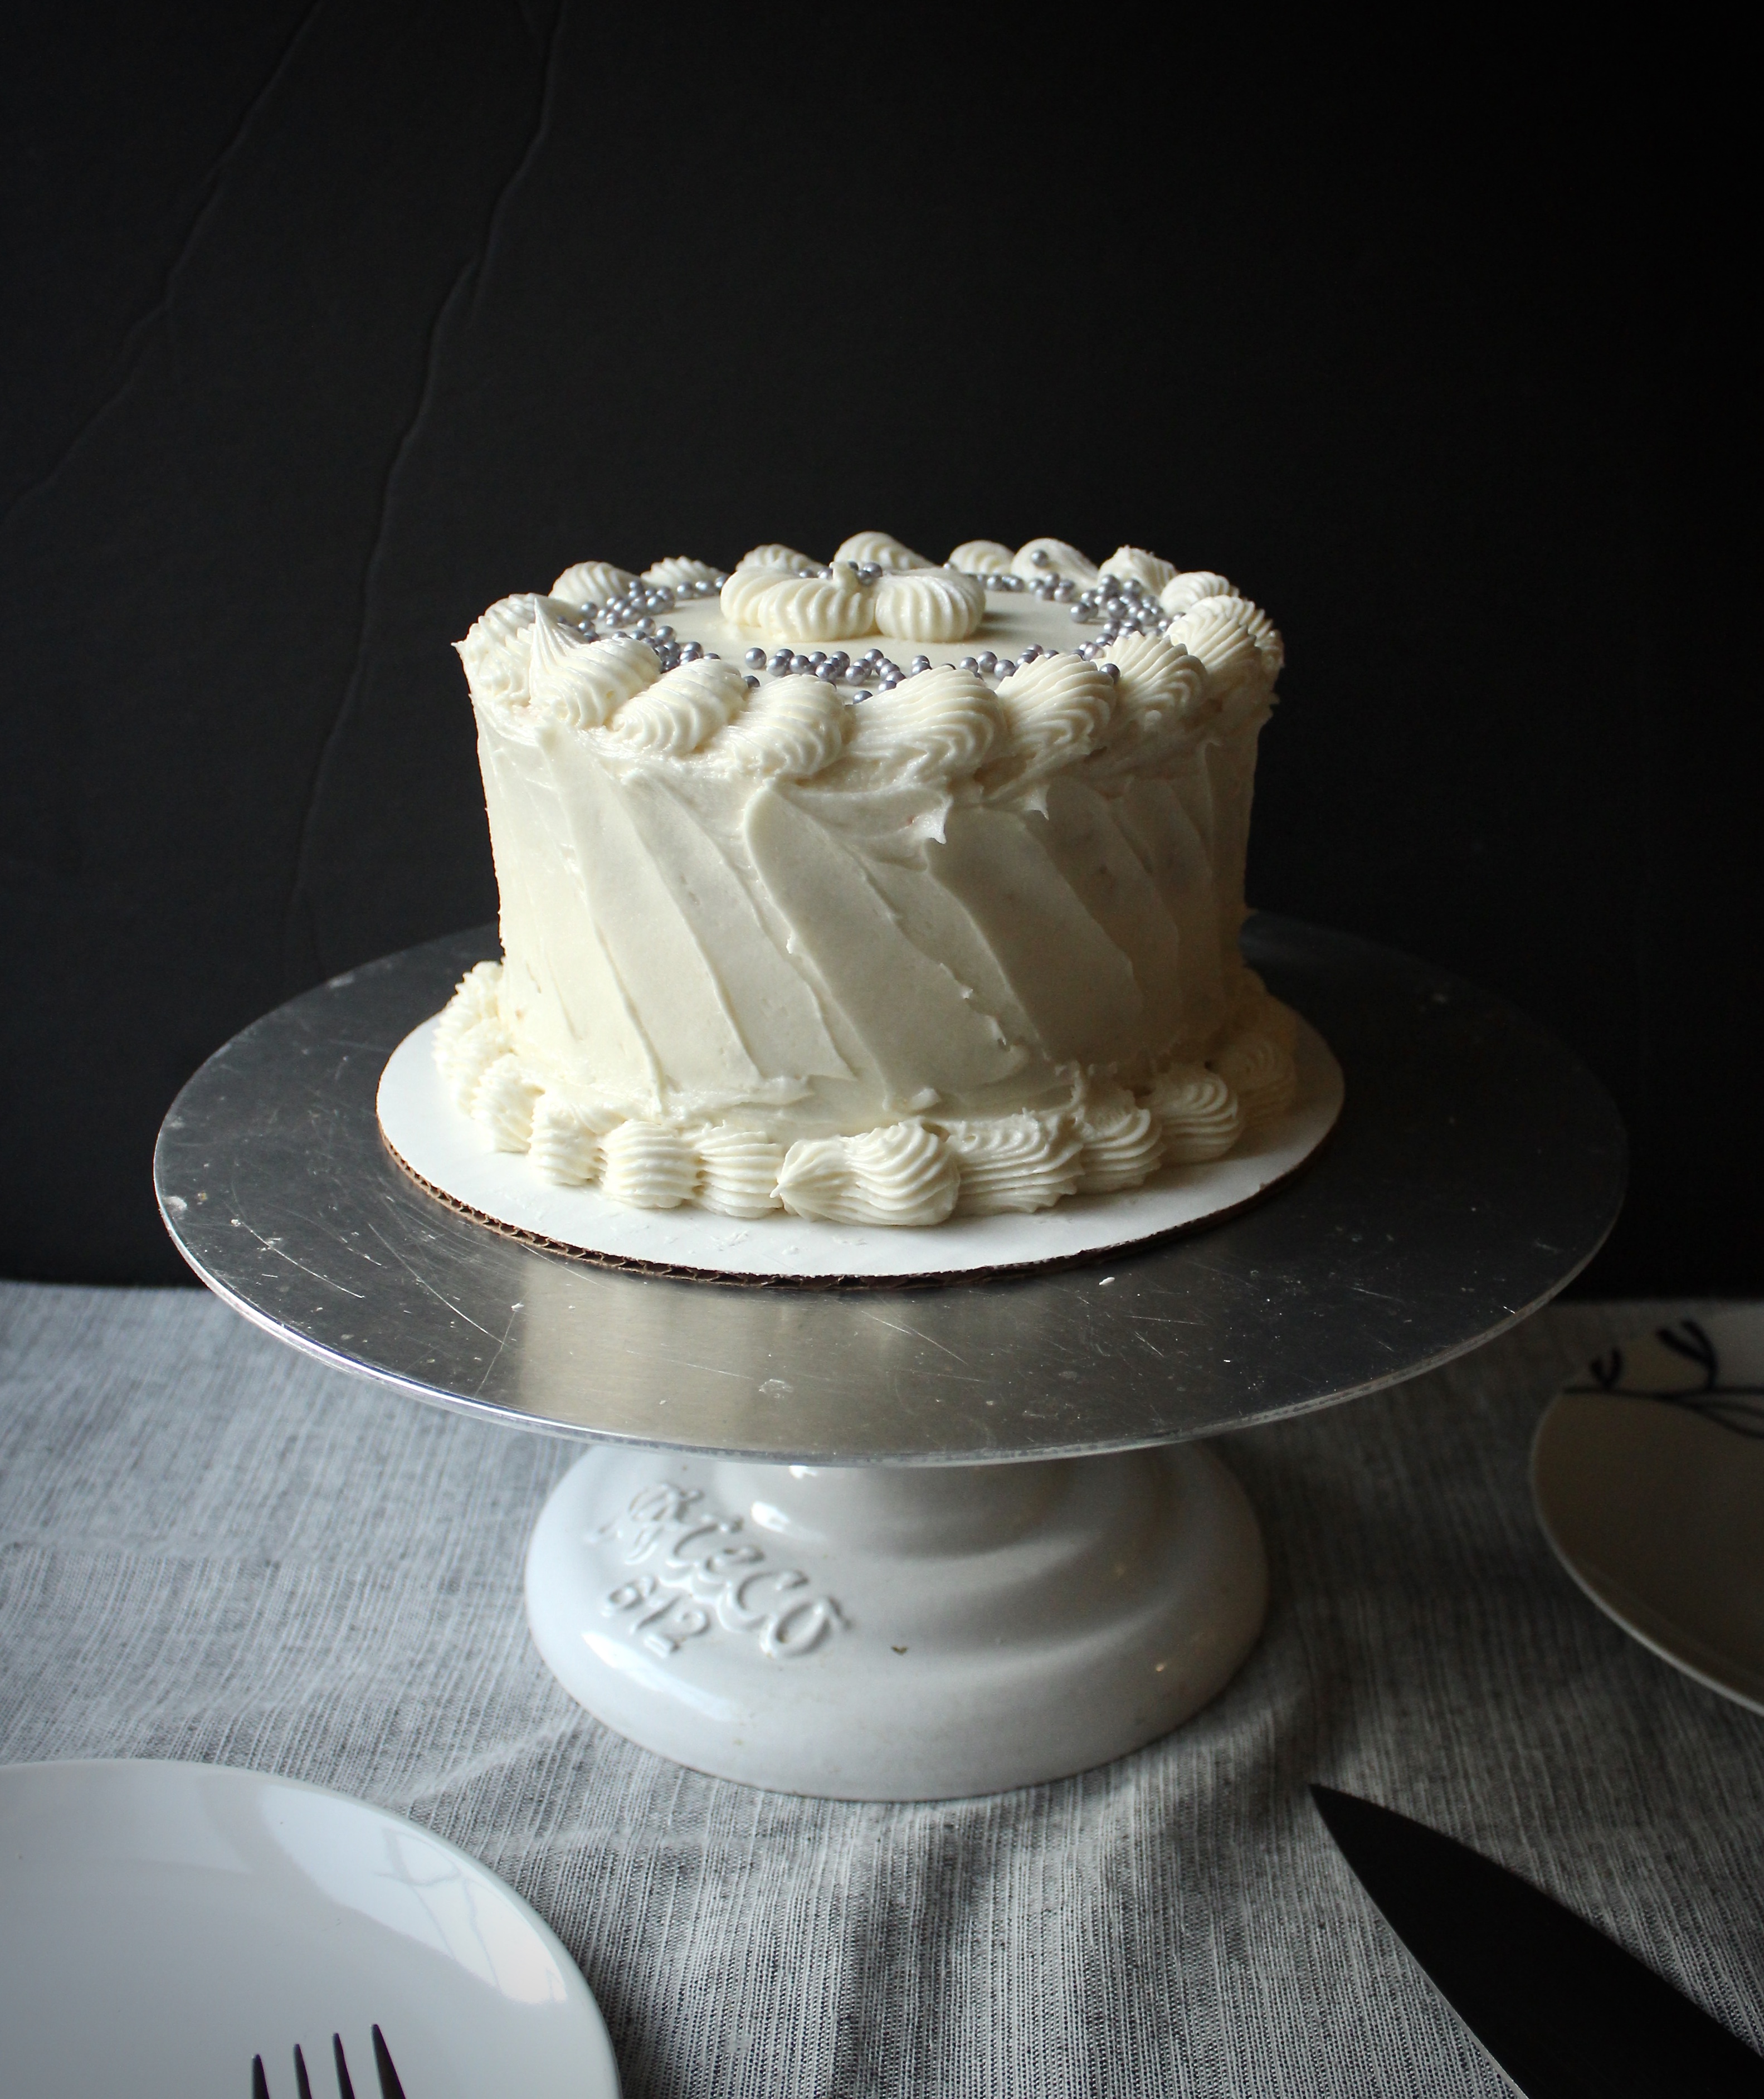
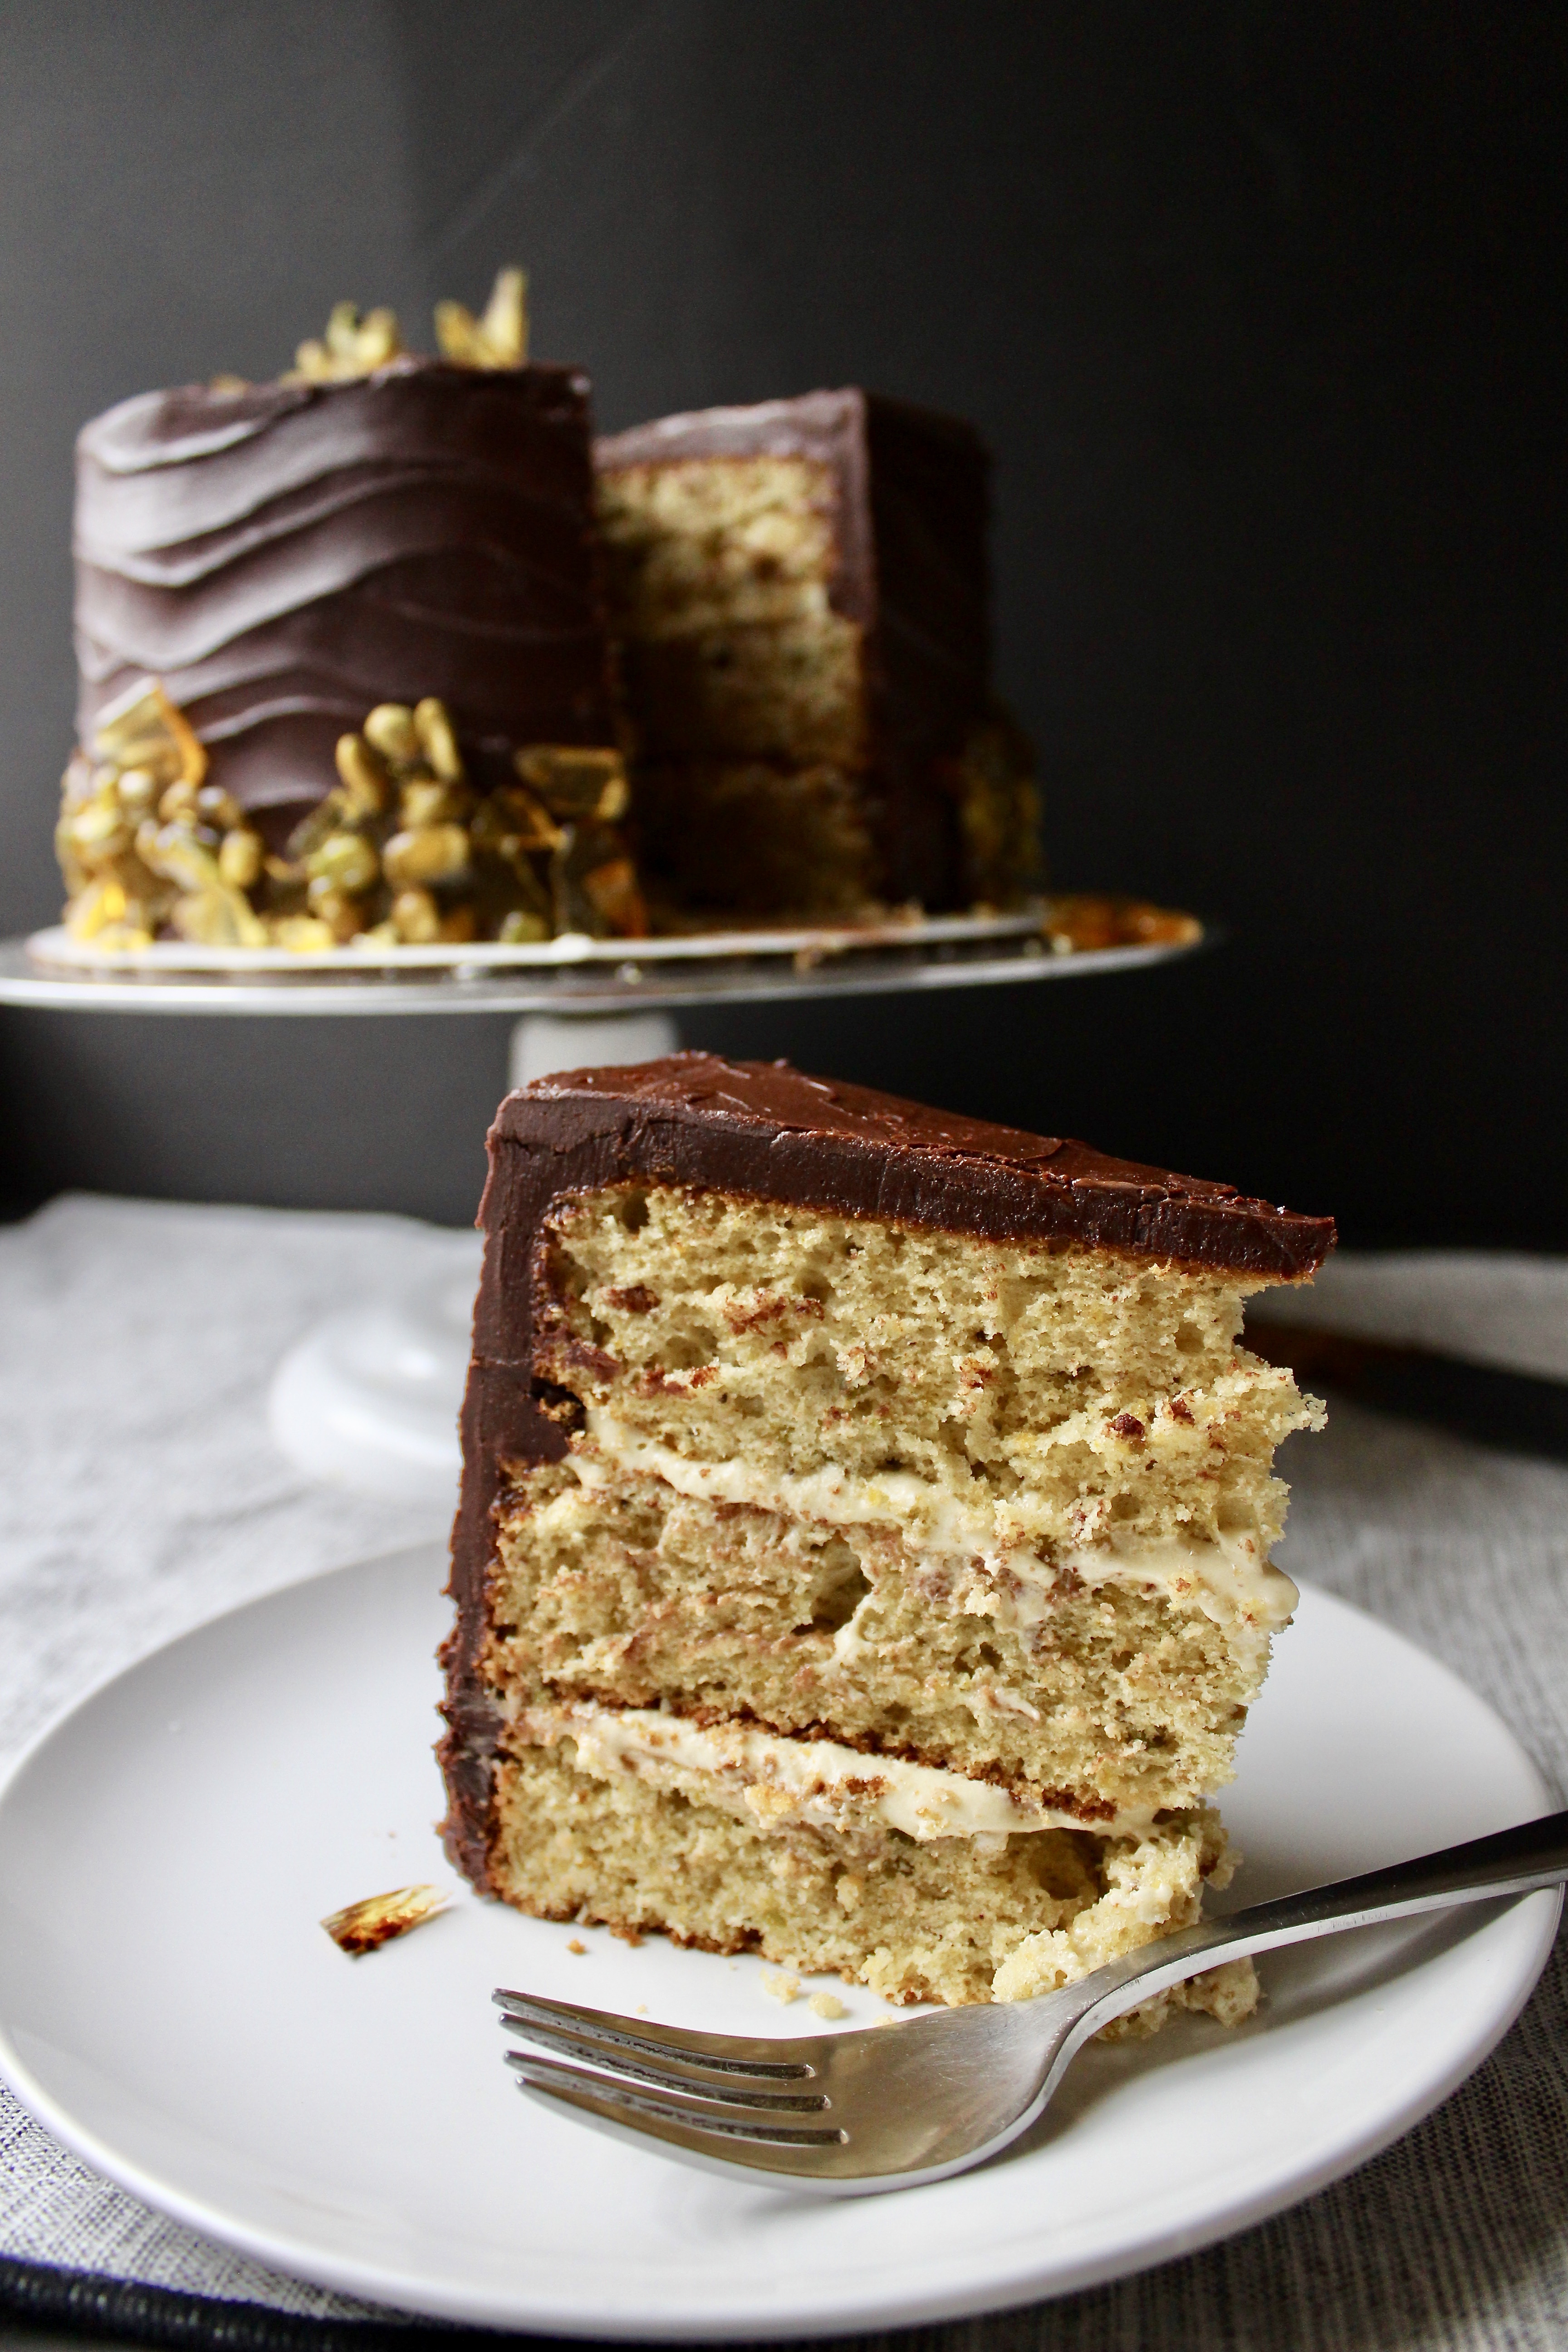
A retro cake deserves a retro look, so feel free to frost this simply, with swooshes of buttercream and toasted (and cooled) coconut flakes.
img_0857
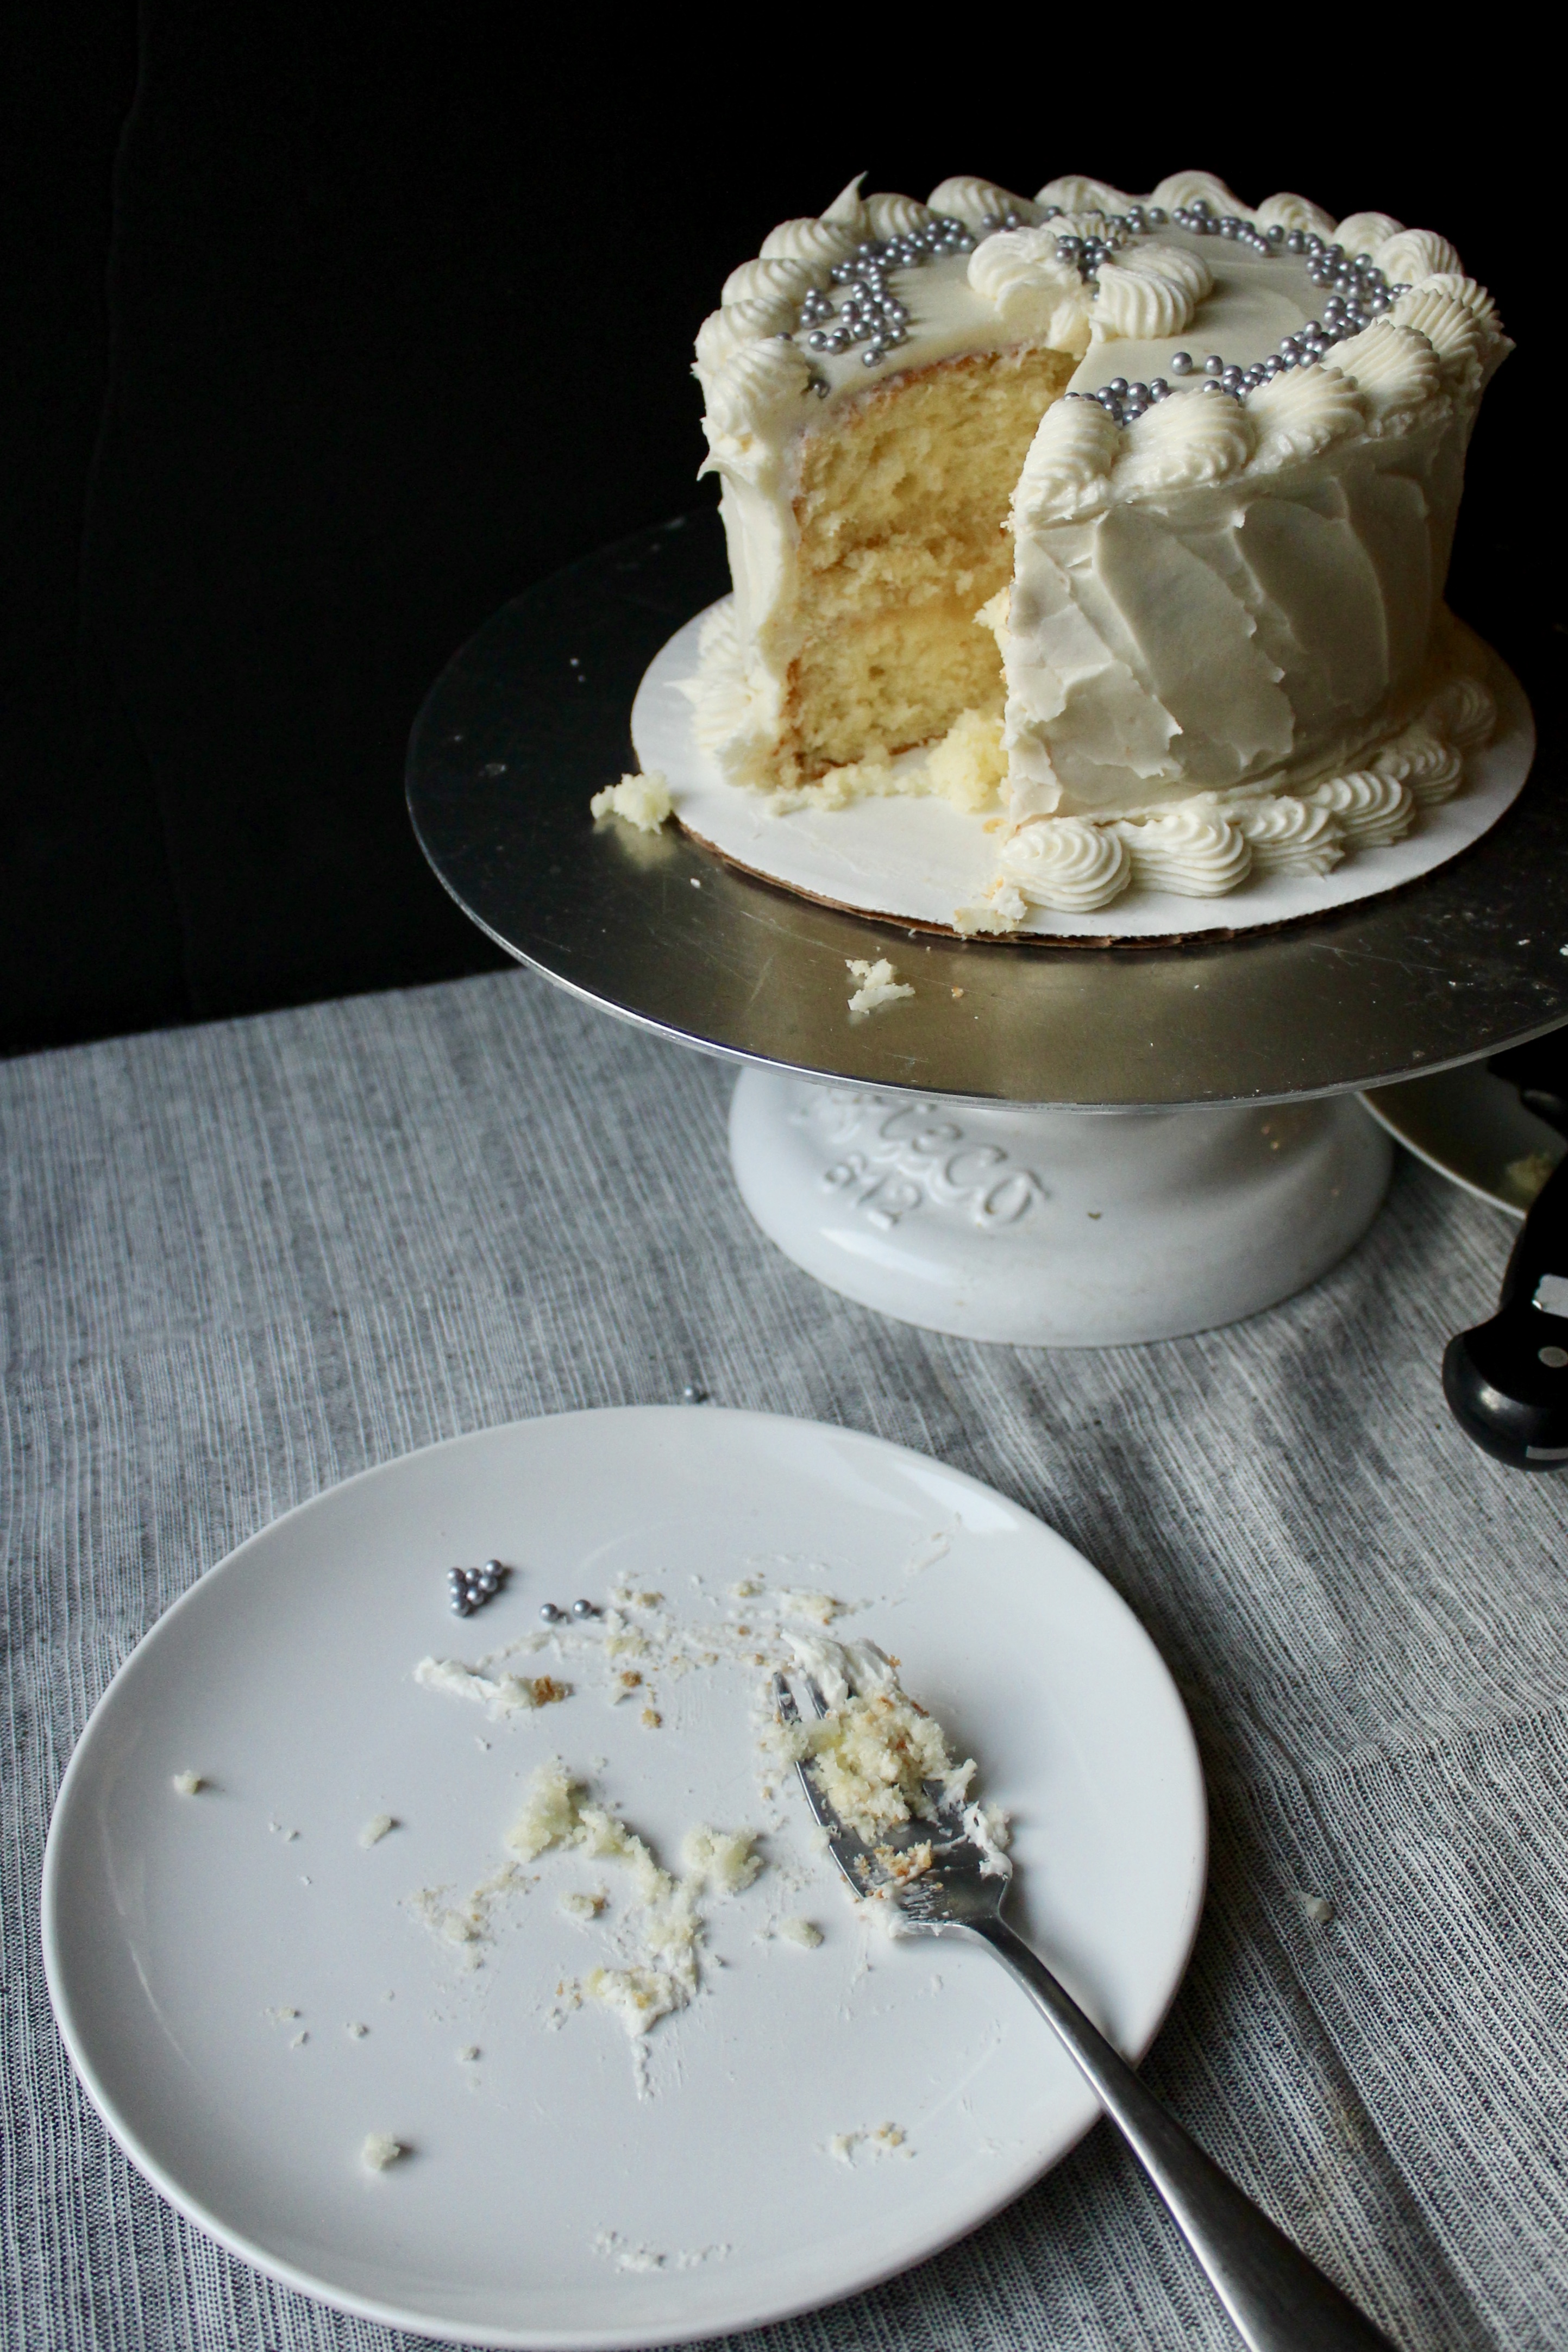
I’ve piped some old school borders here with Wilton’s open star tip and some silver dragee accents.
img_0865
I haven’t tinkered with the original recipe at all, except that I bake them in 8in cake pans as opposed to 9in. I like the look of taller cakes, but if 9in is all you have, feel free to use those, just decrease the bake time by a few minutes.
fullsizeoutput_6cb8
Cake recipe adapted from Taste of Home. Pineapple filling recipe from Genius Kitchen.

Ingredients

For the cake:

  • 5 eggs, yolks separated from whites
  • 2 cups sugar
  • 1/2 cup (1 stick) unsalted butter, room temperature
  • 1/2 cup vegetable oil
  • 1 tsp coconut extract
  • 1/2 tsp vanilla extract
  • 1/4 tsp almond extract
  • 2 1/4 cups cake flour
  • 1 tsp baking powder
  • 1/2 tsp baking soda
  • 1/4 tsp salt
  • 1 cup buttermilk, room temperature
  • 2 cups flaked coconut (I like Baker’s brand for this)
  • 1/4 tsp cream of tartar

For the filling:

  • 1/2 tsp kosher salt
  • 1/2 cup plus 2 tbsp granulated sugar
  • 3 tbsp corn starch
  • 1 20oz can crushed pineapple in its juices
  • 3 tbsp butter

For the buttercream

  • 1 cup butter, room temperature
  • 4 oz cream cheese, room temperature
  • 4 to 5 cups confectioner’s sugar, to taste
  • 1 tsp coconut extract
  • 1 tsp vanilla extract
  • 1-2tbsp whole milk

Directions

  1. Preheat oven to 325 degrees F. Grease 3 8in cake pans with non stick cooking spray. Place over a large sheet of parchment paper and draw circles around the circumference of each pan. Cut out each circle and place at the bottom of each pan. Spray parchment circles with non stick spray.
  2. In the bowl of stand mixer or in a large bowl with an electric hand mixer, beat butter with 1 cup of sugar on medium low. After about 2 minutes, when butter and sugar is pale and fluffy, add oil and remaining sugar. When well combined, add egg yolks, one at a time. Stop occasionally to scrape down the bowl. Add coconut, vanilla and almond extracts. Stop the mixer.
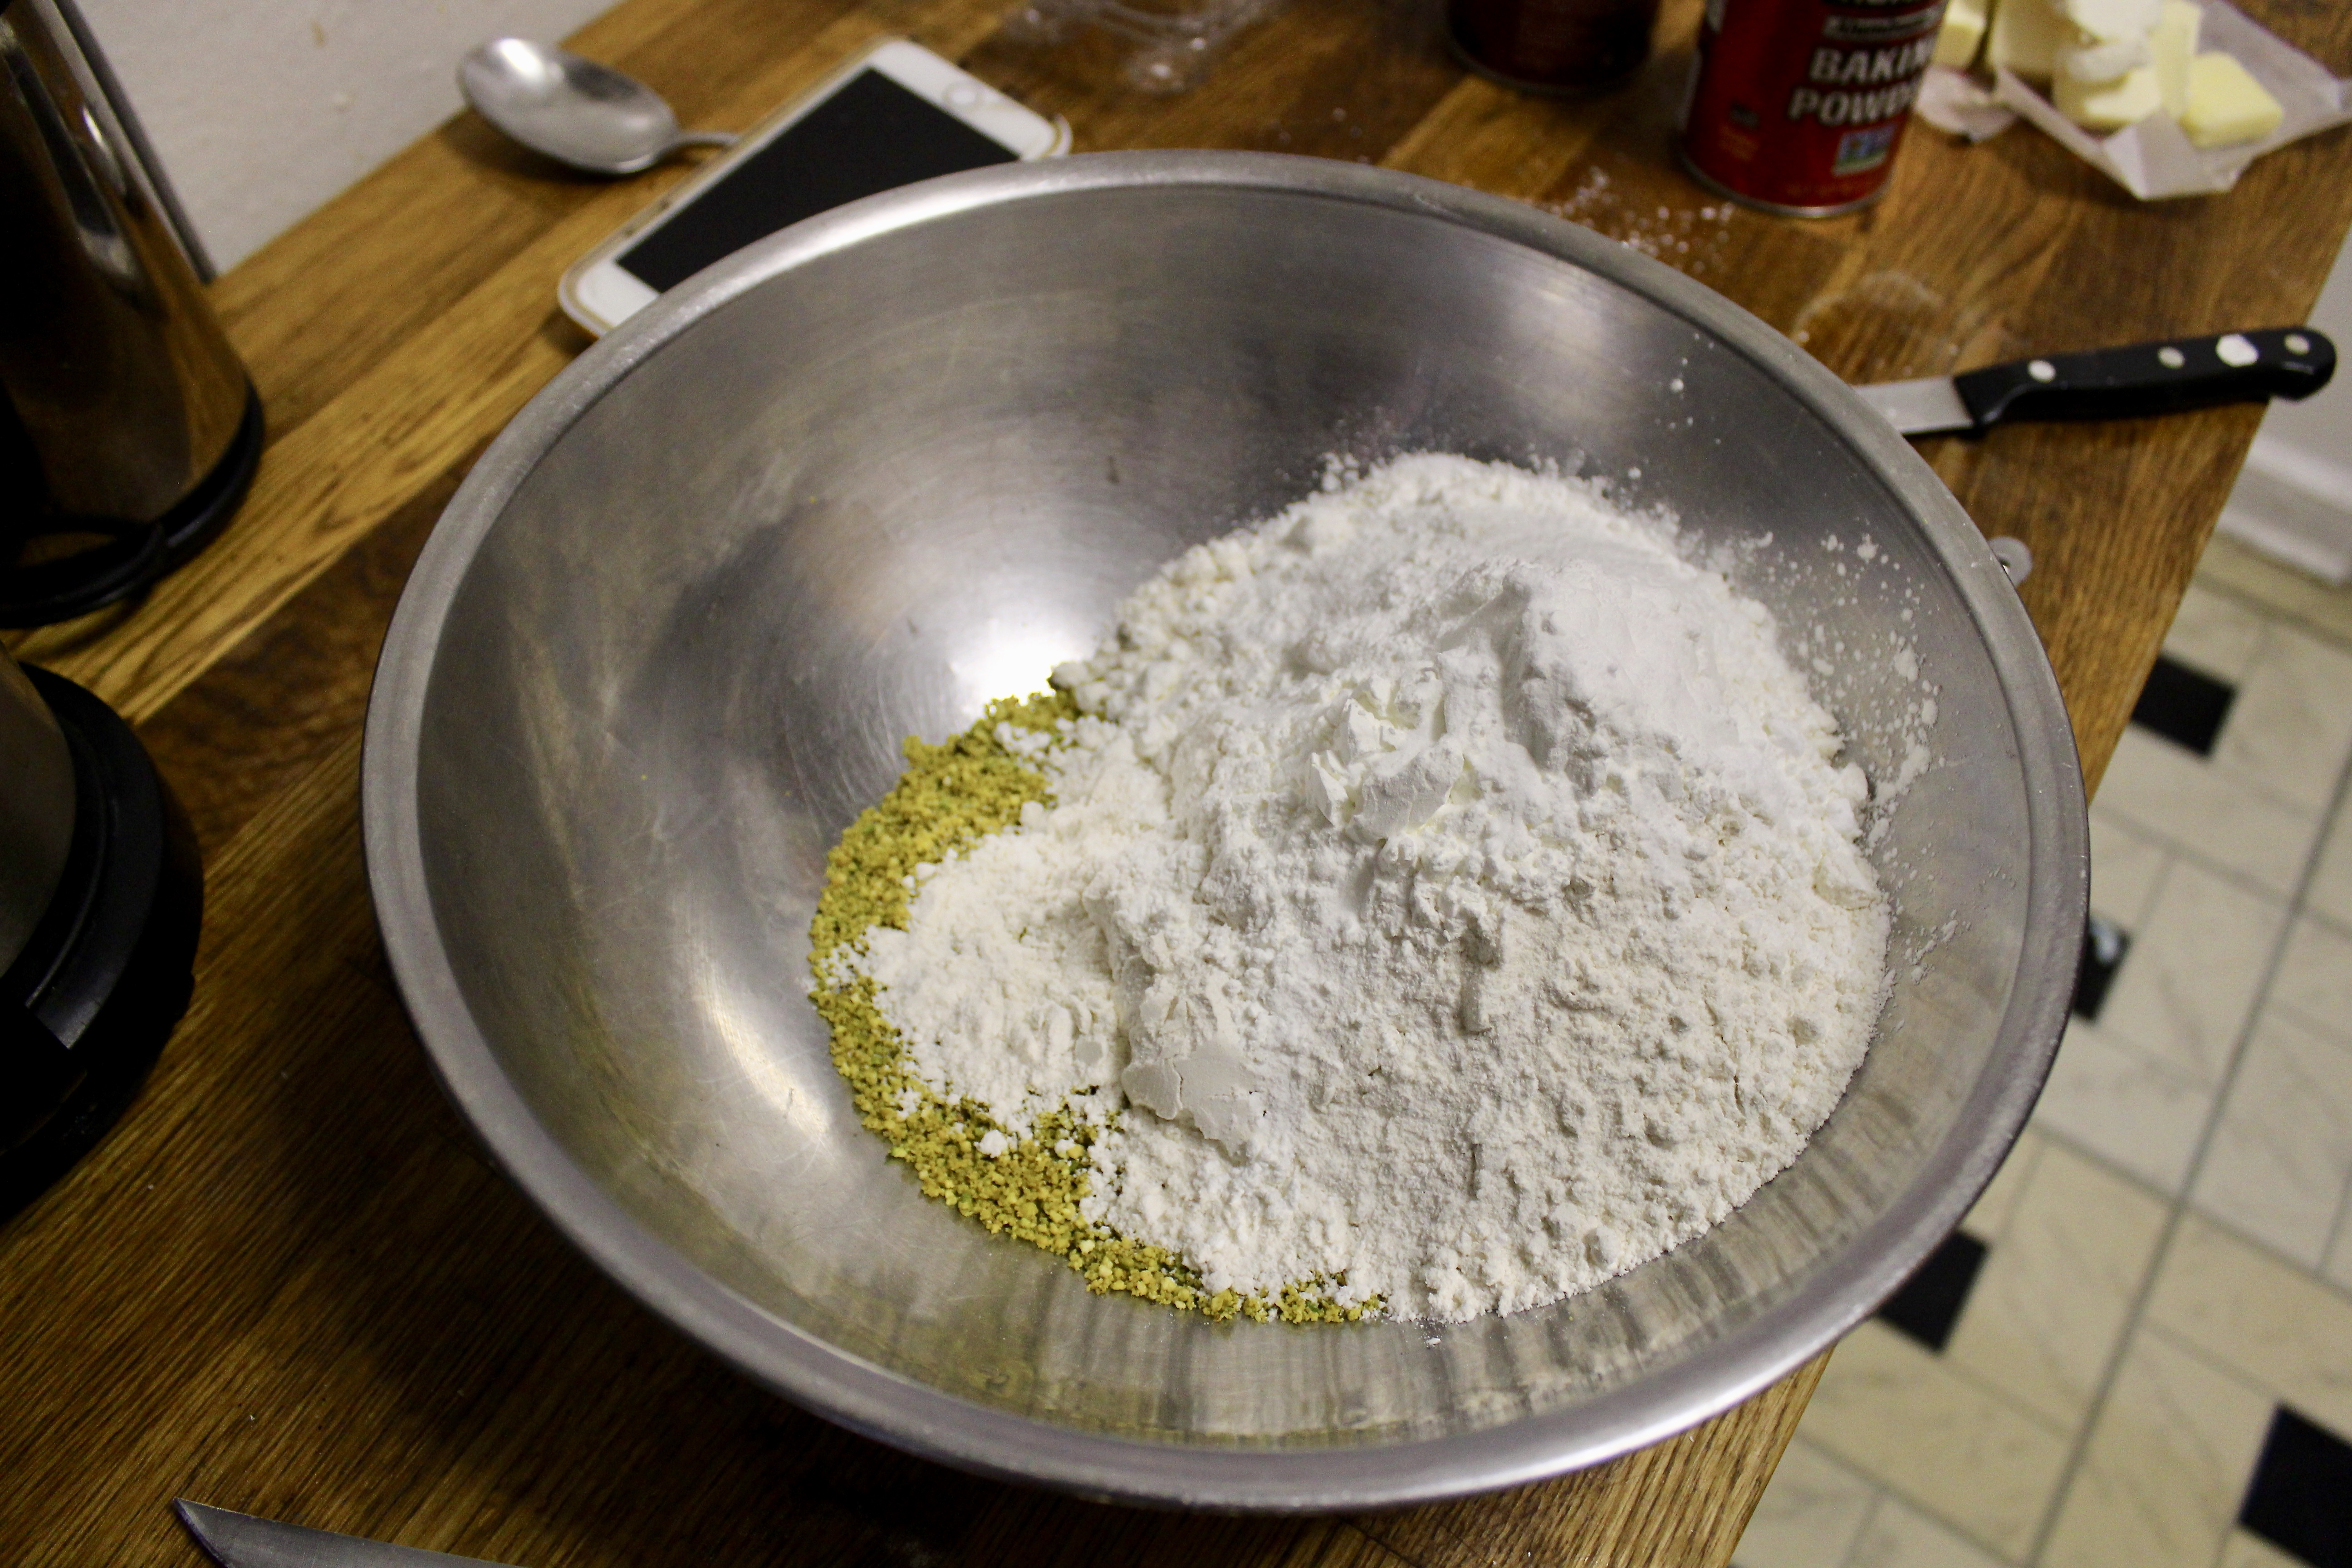
  3. For the dry ingredients: sift the flour, baking powder, and baking soda. Add salt and combine with a whisk. Add 1/3 of the dry ingredients to the batter, then 1/2 of the buttermilk. Add second third of dry ingredients then remaining buttermilk. Add remaining dry ingredients and flaked coconut. Mix on low until just combined.
  4. In a large bowl, combine egg whites and cream of tartar. Mix on low, increasing to high, for about 4-5 minutes until beaters come out of the egg whites with stiff peaks.
    Add 1/3 of beaten egg whites to the batter to loosen it up. Add half of remaining egg whites to batter and fold in with spatula, cutting down the middle, then scraping against the bowl and folding up and over the batter. Rotate the bowl slightly and continue until you can no longer see egg white. Add remaining egg white and fold until just combined.
  5. Divide equally between 3 cake pans and bake in preheated oven for 25-30 minutes or until a toothpick inserted comes out clean. Let cool.*
  6. For the filling: in a small to medium saucepan combine salt, sugar, cornstarch. Whisk with preferably a flat whisk until combined. Add crushed pineapple and stir to combine. Turn on the heat to medium high. Bring to a boil, stirring occasionally, for about 5 minutes until no longer milky white in appearance. When thickened, remove from heat and stir in butter. Turn out onto a plate to cool.
  7. For the frosting: beat butter with cream cheese with the paddle attachment of your stand mixer, or in a large bowl with handheld electric mixer. Sift 4 cups sugar into a bowl. Add a little bit of sugar into the butter and cream cheese until well combined. After adding 4 cups of sugar, beat until light and fluffy. Add vanilla and coconut extracts. Scrape down the bowl occasionally. Taste the frosting. If desired, add final cup of sugar, sifted. Add milk as needed to thin out frosting. Give a final beat until it looks like buttercream.
  8. Fill a large piping bag with buttercream and snip off 1/2in tip. Place a small amount of frosting onto a 10in round cake board. Place first cake layer onto cake board. Pipe a dam around the circumference of the cake layer. Spoon 2-3tbsp pineapple filling onto cake. Smooth it out. Place second layer, press down slightly. Repeat and decorate as desired.

*I usually invert onto 8in round cake boards lined with plastic wrap and freeze until reach to decorate. These cakes are super tender and work best for decorating when frozen solid.

Leave a Comment · Labels: American/Mediterranean, Dessert, Recipes Tagged: baking, cake, coconut, coconut cake, dessert, genius kitchen, home baking, homemade, homemade dessert, pineapple filling, taste of home

Pistachio Layer Cake

December 7, 2017

fullsizeoutput_6aab
I’ve been making pistachio cakes in various forms since my friend asked me to make one for her wedding last year. The truth is, it’s very difficult to make a strongly pistachio flavored cake. It’s not like ice cream where the nuttiness easily comes through the cream and sugar. In cakes, in its attempt to compete with all the flour, eggs and dairy, it struggles to maintain its flavor while maintaining a light, tender crumb we expect in a cake.
I changed this recipe from the original, to include pistachio paste (which you can get online). I looked at peanut butter cake recipes and saw they utilized peanut butter in lieu or in combination with butter, so I thought I’d apply the same principal here. It provides a rich, creamy pistachio flavor. The cake is then lightened with beaten egg whites to add lightness. The result is a light, nutty cake.
fullsizeoutput_6aa9
I’m not sharing an accompany frosting recipe, because in all honesty, I haven’t got one. I tried making the boiled milk icing from the original recipe, but oh my God did it die on me. It was a runny mess (perhaps my boiled milk/flour/sugar combo was too thin?). I spent all morning trying to salvage it – first by adding some confectioners sugar, then some more cream cheese, then butter, then more confectioners sugar. After removing a small amount to mix with pistachio paste (my last ditch effort to salvage at least some of it), I was able to make a concoction that held up JUST enough to fill the cake. fullsizeoutput_6aa8
For the outside, I went with a tried and true (and quick) recipe: chocolate ganache. Which isn’t much of a recipe at all as it’s just some baking chocolate bars, broken up in chunks, then melted in the microwave at medium power with half its weight in heavy cream (so in this case, 24oz chocolate with 12oz heavy cream). Mixing every once in a while until completely melted and smooth. Not to say it’s straightforward to make ganache.
There are plenty of ways to muck it up. If you mix it before it is warm enough, it will start to get grainy. If you make it too hot, it will get grainy. Basically you need the Goldilocks temperature to get chocolate ganache just right (between 90 and 110 degrees). I recommend using an instant read thermometer to get your ganache just right, but if you don’t, just make sure it’s warm to the touch while you are stirring. fullsizeoutput_6aa7fullsizeoutput_6aaa
I then placed it over a bowl of ice water, whisking with an electric mixer until it was thick and glossy. img_0584
Finally, I decided to try decorating with pistachio sugar shards. I’m not sure if that’s what it’s called, but it’s not quite praline, not quite toffee, not quite caramel either. It’s just 1 cup sugar melted with 1/4 cup water until light golden in color. I then poured it over 1/4 cup shelled pistachios on a parchment paper lined baking sheet and let it cool. Once cool enough to handle, I broke it up into big chunks to decorate, then further crushed the remaining chunks with my rolling pin and a ziploc bag. img_0596
It was surprisingly tasty. Next time, I will definitely add some salt to make them even better!

Recipe adapted from Handle the Heat

Ingredients

  • 1/4 cup pistachio paste
  • 12 tbsp unsalted butter (1 1/2 sticks)
  • 1 3/4 cups granulated sugar
  • 1 cup shelled, raw, unsalted pistachios
  • 3 cups all purpose flour
  • 1 tbsp baking powder
  • 1 tsp baking soda
  • 1/2 tsp salt
  • 1/4 cup cornstarch
  • 1 large egg
  • 1 tsp vanilla extract
  • 1 1/2 cups milk
  • 3 egg whites
  • 1/4 tsp cream of tartar

Directions

  1. Preheat oven to 350 degrees F. Grease 3 8in baking tins with non stick cooking spray and line the bottom with parchment paper (place the pans on top a large sheet of parchment, draw a circle around the circumference with a pencil, and cut out). Set aside.
  2. Pulse the pistachios in a food processor until finely ground. Careful not to let it go for too long, since it will turn into a paste. Pour ground pistachios into a large mixing bowl.
  3. In the bowl of your stand mixer or in a large bowl using an electric hand mixer, cream pistachio paste, butter and sugar for 2 minutes at medium speed.
  4. While that goes, combine the ground pistachios with flour, baking powder, baking soda, salt and cornstarch. Whisk until combined.
  5. Stop the mixer, scrape down the sides and bottom of the bowl, turn mixer back on. Add egg, then vanilla. Then alternately add the dry ingredients with the milk – 1/3 dry ingredients, 1/2 milk, ending in the dry ingredients. Periodically scrape down the sides and bottom of bowl. Stop mixing when dry ingredients are just incorporated in the batter.
  6. In a medium bowl, combine egg whites with cream of tartar. Whisk with an electric mixer at medium speed until stiff peaks form when you pull the beaters up and out of the egg whites. Add a little beat of the beaten egg whites to the batter to thin out the batter. Then add half of the remaining egg white, folding in carefully so as not to deflate them. Add the second half and fold just until you no longer see white streaks.
  7. Divide equally between the three prepared pans and bake for 28-30 minutes until browned on top and a toothpick inserted comes out clean. Cool the cakes and level them before frosting.

Leave a Comment · Labels: American/Mediterranean, Dessert Tagged: cake, candied, chocolate, dessert, ganache, homemade, layer cake, pistachio, recipe

Raspberry Swiss Meringue Buttercream

November 30, 2017

img_0488 
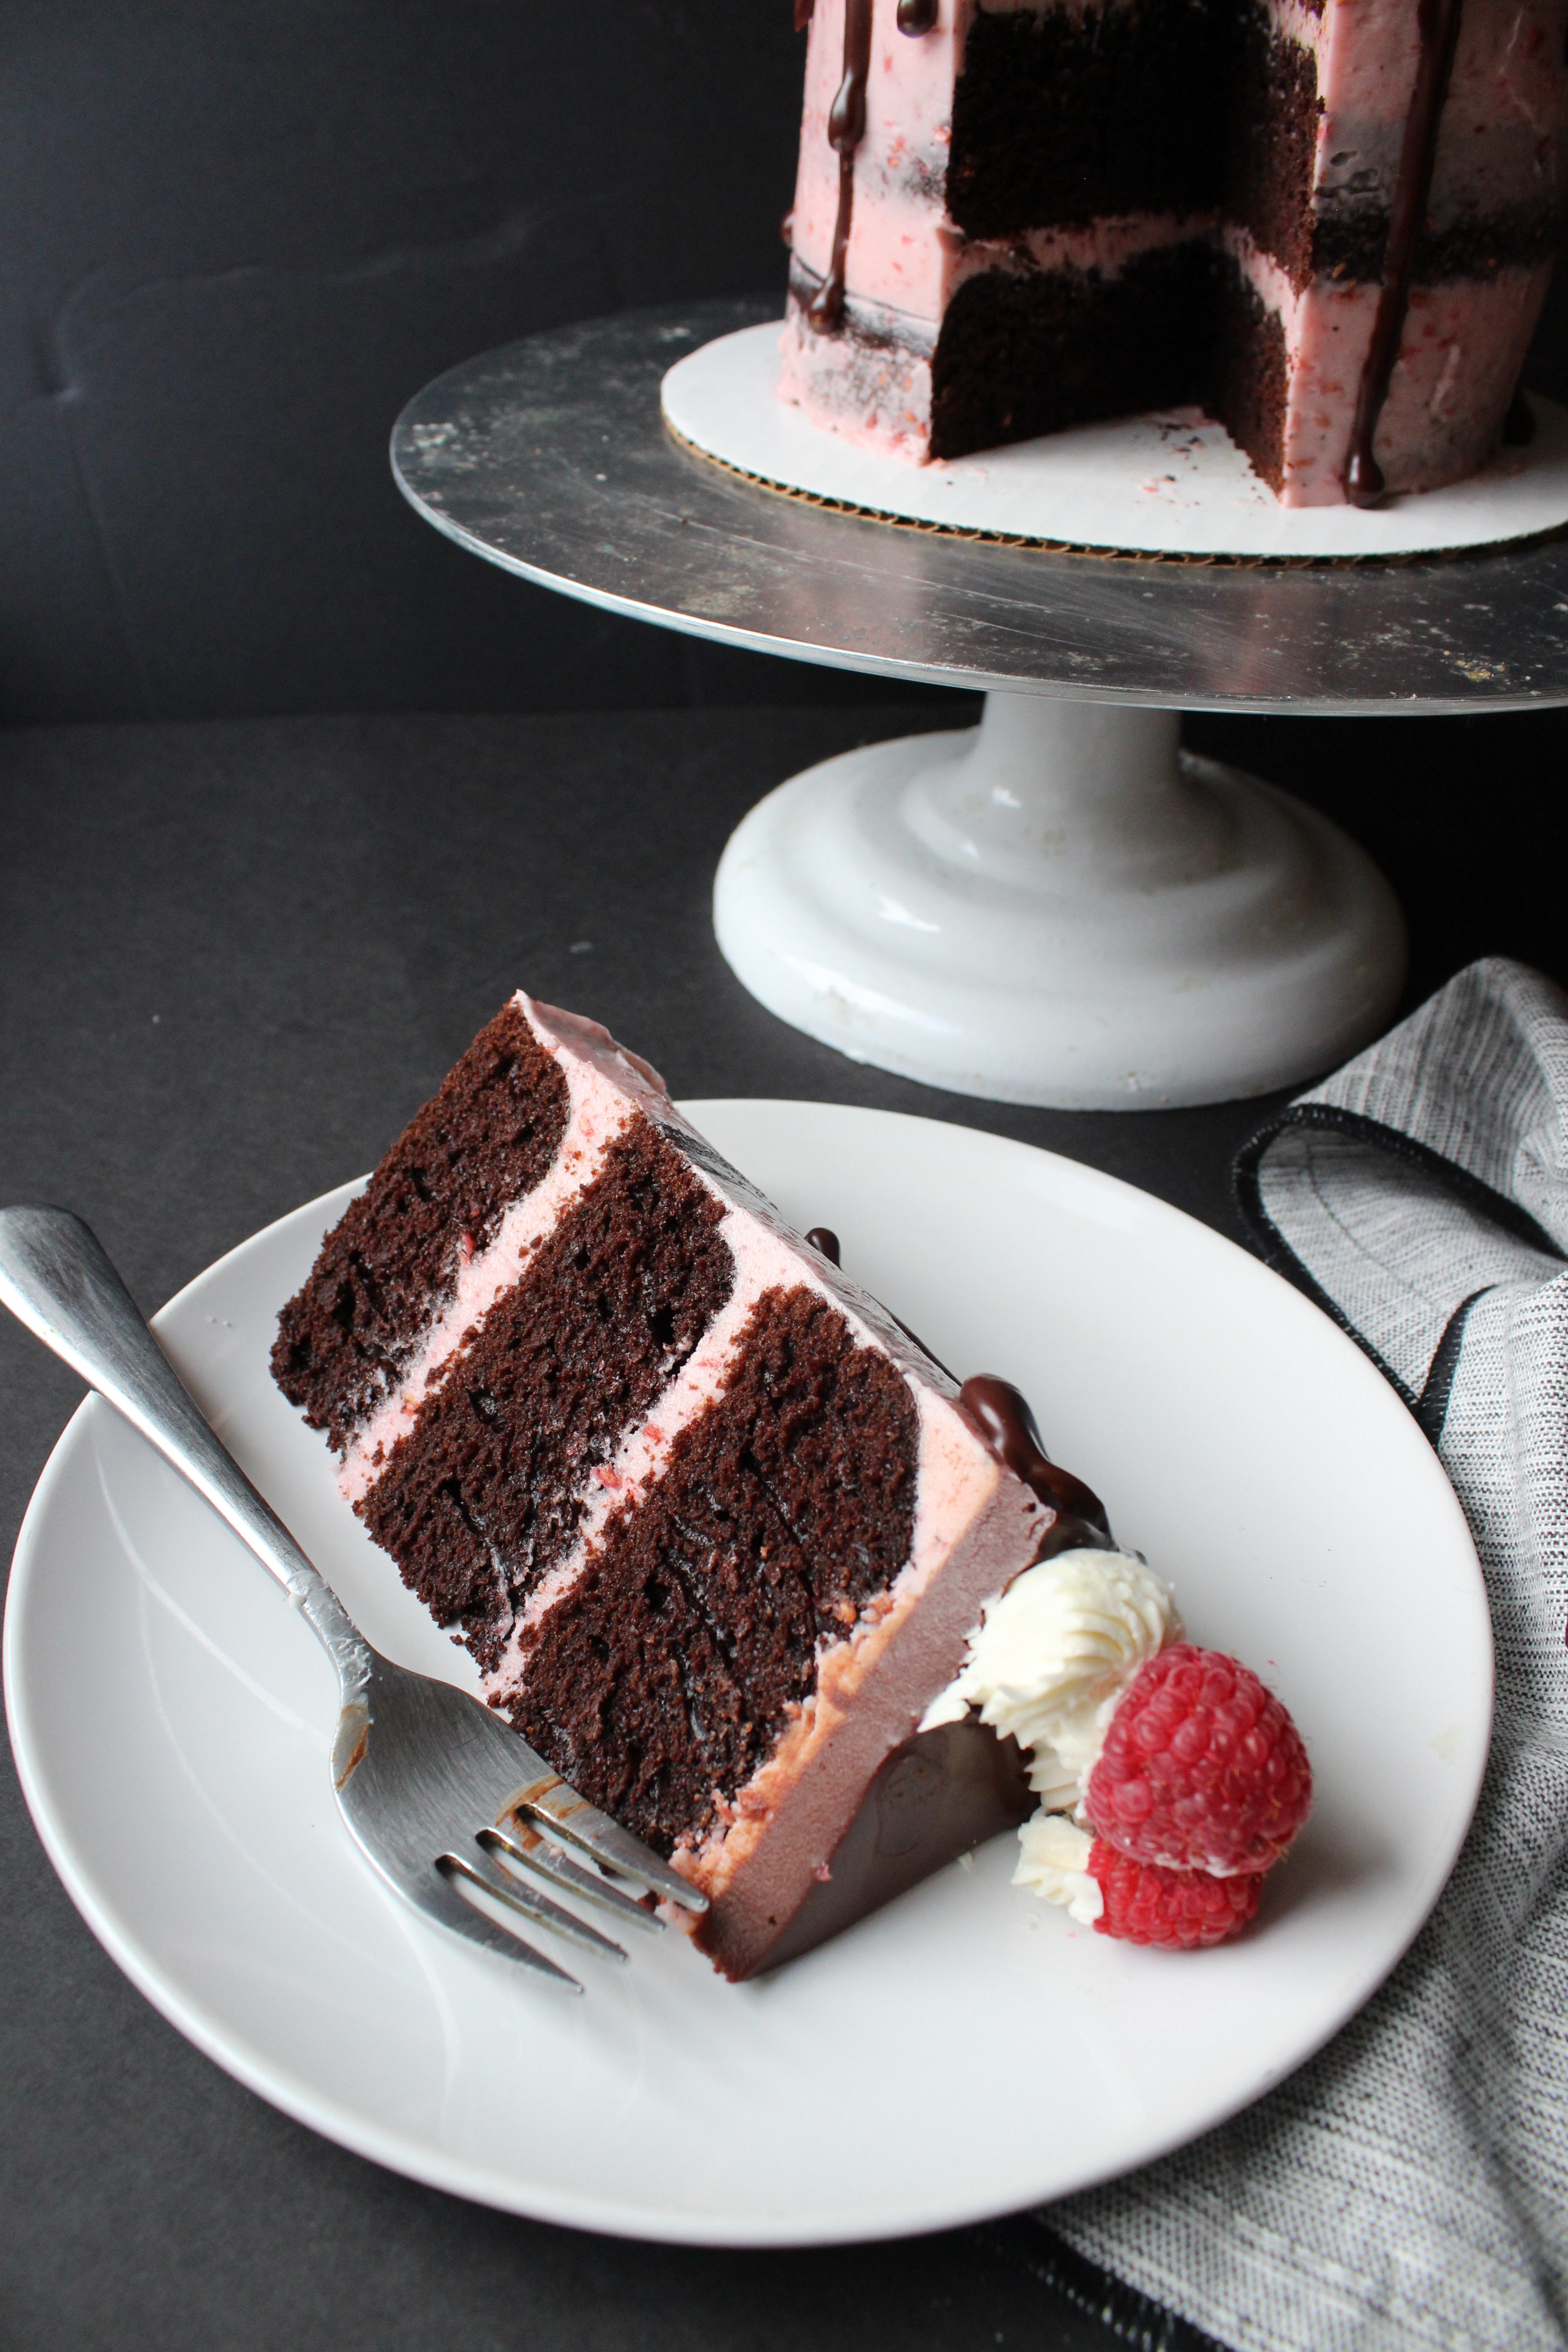
I recall as a kid, I would get visibly angry if upon cutting into a cake at someone’s birthday party, the interior revealed a pale cake with fruit wedged between the layers. I mean c’mon! Save the fruits for the healthy afterschool snack. If I’m dressing up and buying you a present, the least you can do is serve up some decadent chocolately goodness. I mean as I kid I wasn’t on the hunt for swiss chocolate or anything, heck I’d be happy if they served the Entenmann’s double chocolate cake over any of those cakes from my childhood. The one exception I make: raspberries. But only when smothered in chocolate, no less. Chocolate and raspberry will forever be one of my favorite flavor combinations. fullsizeoutput_6a2a
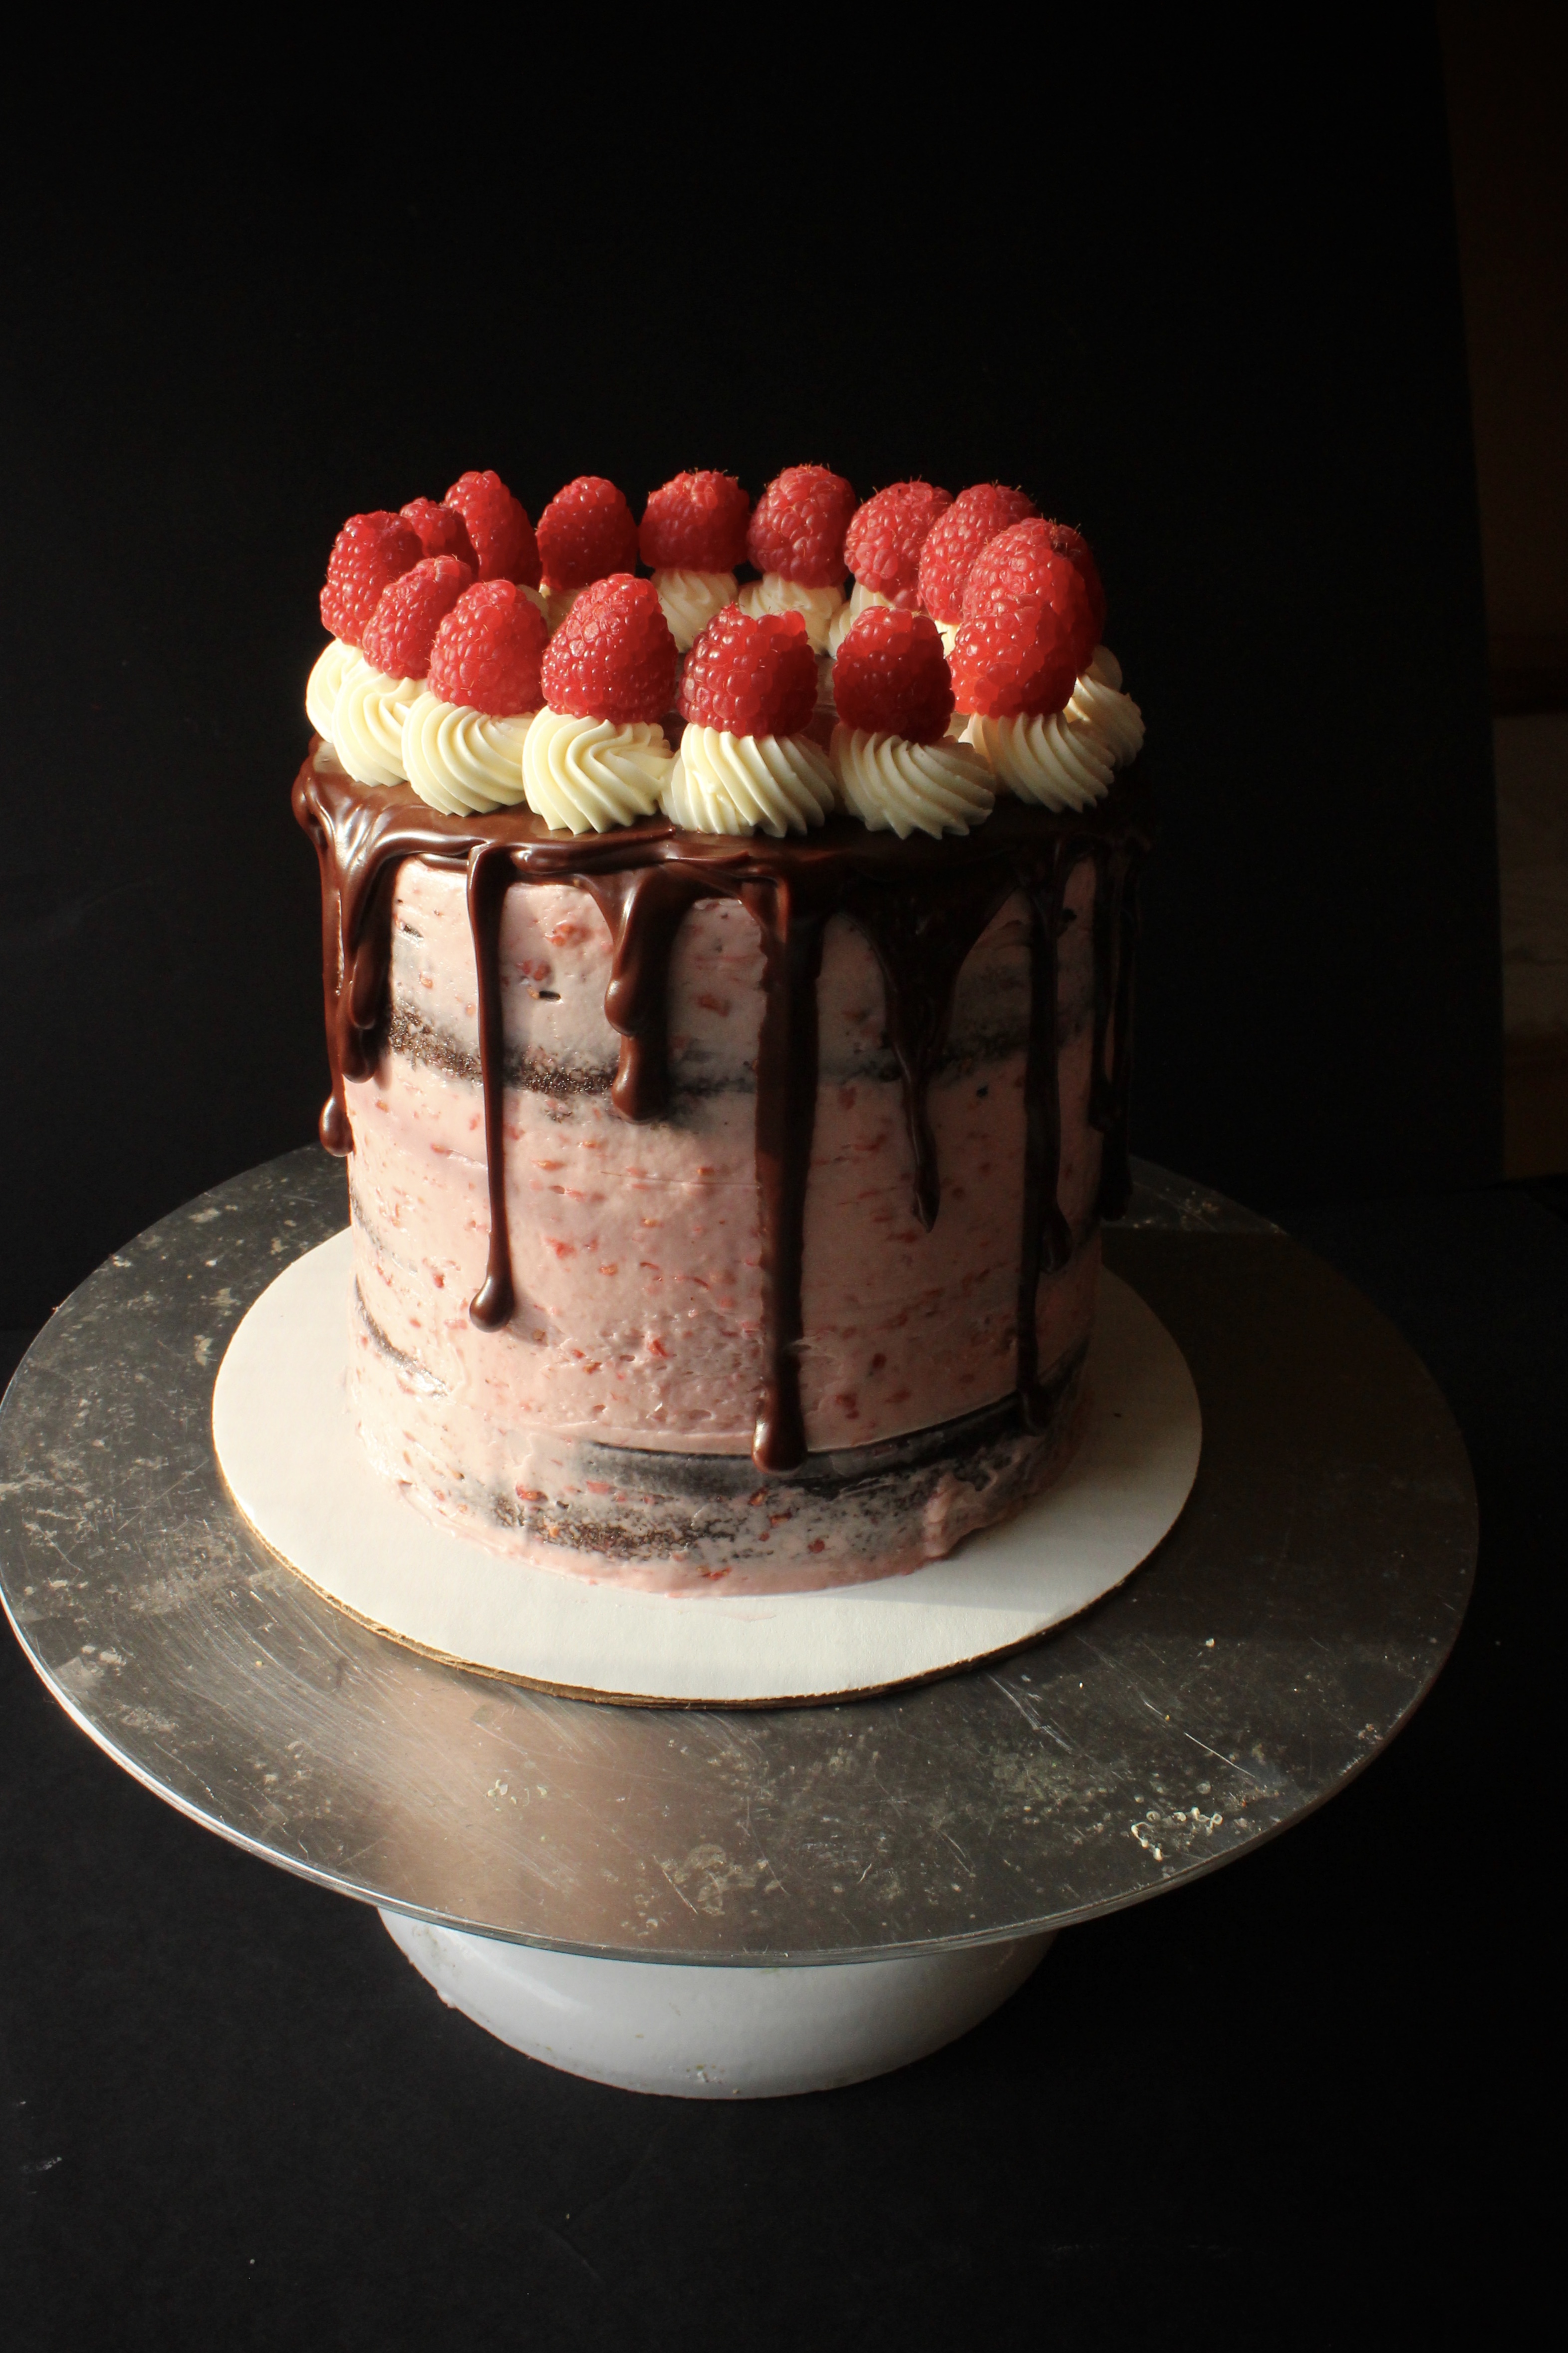
The chocolate/raspberry mousse cake from my local bakery was a long time favorite of mine, until my palette changed and only my homemade chocolate cake will do. So I created this homemade version, using swiss meringue buttercream instead of mousse as they are similar in texture and sweetness. In traditional Naureen style this is chocolate ganache dripping all over the cake, the perfect accent to the raspberry and chocolate layers underneath.

This recipe makes enough to frost a three layer 6 in round cake in the semi naked style.

Ingredients

  • 6oz. fresh raspberries
  • 1 1/4 cups granulated sugar, divided
  • 1 tsp lemon juice
  • 3 egg whites
  • 18 tbsp room temperature unsalted butter, cut into tbsps
  • 1 tsp vanilla extract

Directions

  1. In a small saucepan over medium heat combine raspberries, 1/2 cup sugar and lemon juice. Stir and allow to come to a boil. Once it comes to a boil, lower the heat to low and allow to reduce and thicken, about 10 minutes. Remove from heat and mash with fork. Allow to cool.
  2. In another small saucepan bring a small (about 1in thick) amount of water to simmer. In the bowl of your stand mixer or in a large heat proof mixing bowl, whisk together egg whites with 3/4 cup sugar.
  3. Place over the simmering water and whisk occasionally until the sugar has dissolved and mixture is quite warm to the touch (you shouldn’t feel any granules when you stick your finger in). Remove from heat and start beating with the whisk attachment at medium speed. Beat for a few minutes, until the mixture cools down to room temperature and the mixture is thick and glossy. When the bowl no longer feels warm (test the temperature by placing the back of your hand on the side of the bowl), start adding the butter, 1 tbsp at a time. It will look weird. Feel free to stop and scrape down the bowl.
  4. Continue beating at medium to high speed until the mixture looks curdled. Keep beating until it comes together into a homogenous, smooth buttercream. Lower the mixing speed and add vanilla and cooled raspberry compote. Use immediately, or store in the refrigerator, covered for 2 weeks. To use after thawing, re-beat with a whisk attachment until smooth.

Leave a Comment · Labels: American/Mediterranean, Dessert Tagged: buttercream, chocolate, dessert, fruit, ganache, homemade, raspberry

Pastry Pillows

November 27, 2017

fullsizeoutput_69aa
I’m baaaaaaaack! After recovering from hosting Thanksgiving dinner, I’m back in the kitchen making some of my favorite things: small bites, filled with butter, sugar, then topped with more fat and more sugar. Yeah! Just in time for the holiday season, I’m whippin’ out my trusty old “100 Best Cookies” catalogue from Better Homes and Gardens that I got way back when I used to live Poughkeepsie (2010). I don’t celebrate Christmas, but I love all the holiday baking that comes along with the season.
img_9337
I’ve also been watching a whole lot of The Great British Baking Show so I’m super inspired by all the different creations I see on the screen. What shall I bake next? A Stollen (a German holiday bread studded with dried fruit with a marzipan center)? A chocolate twist bread? Chocolate revel bars? I’m enjoying the down time to explore cakes’ buttery brethren – though I’ll be back in the kitchen baking cakes as of tomorrow =).
fullsizeoutput_69a8

I was fascinated by this recipe. Most pastry dough requires skillful combining of cold butter and flour in order to achieve flaky texture, but this fool proof dough creams together butter and cream cheese and mixes in flour. Somehow they puff up in the oven and look like glorious buttery pillows. The best kind of bedding I’d say! I did something sneaky and subbed mini chocolate chips for the jam in some of my later pillows. Hope you enjoy these as much as my friends and family have!

Recipe adapted from Better Homes and Gardens “100 Best Cookies” 2010.

Ingredients

  • 1 cup butter, at room temp
  • 8oz cream cheese, at room temp
  • 2 cups all purpose flour
  • 1/4 tsp salt
  • 1/4 cup apricot preserves (or any other fruit preserve you like)
  • 1/4 cup almond paste (I used marzipan)
  • 1 egg, lightly beaten
  • 1 tablespoon water
  • Pearlized, coarse or granulated sugar for sprinkling

Directions

  1. In the bowl of your stand mixer, or in a medium bowl using an electric hand mixer, beat the butter and cream cheese on medium speed for 30 seconds. While that mixes, whisk together flour and salt in a small bowl. Reduce speed to low and add flour mixture to the butter/cream cheese mixture. Mix until just combined, scraping the sides of the bowl occasionally. Divide the dough in half, place each half onto plastic wrap and flatten into disks. Refrigerate for 1 hour or until firm enough to handle.
  2. Preheat oven to 375 degrees F. In a small bowl beat egg with water. Set aside.
  3. Lightly flour your work surface and roll out your dough to 1/8in thick. I like to transfer my dough to a parchment paper lined baking sheet at this point so I can cut out and remove scraps without messing up the shapes. Use a 2in square cookie cutter to cut out an even number of squares. Removed scraps, roll up and wrap in plastic. Refrigerate. Place a scant 1/4tsp preserves and a scant 1/4tsp almond paste on each square. Use a pastry brush to apply a small amount of egg wash around the borders. Set aside.
  4. On a separate work surface, roll out the second dough to 1/8in thickness. Cut out the same number of squares as the first dough. Carefully lift each square (I use a small offset spatula to help with this) and place on top of a square containing apricot/almond. Smooth out the tops so the edges line up with the bottom squares. Crimp the edges closed with a fork. Brush with egg wash (lightly) and dust the tops with pearlized or granulated sugar. Bake in preheated oven for 10-12 minutes. Repeat with scraps.

Leave a Comment · Labels: American/Mediterranean, Dessert Tagged: apricot, dessert, fruit, hand pies, homemade, jam, pastries, pastry pillows, pies, snack

Mexican Chicken Noodle Soup

April 13, 2016

IMG_0006

The first thing I do when someone sneezes in the house, is submerge a chicken in a pot of boiling water to make chicken stock for soup. That’s a normal, knee-jerk reaction, right?

Ok, perhaps I exaggerate. But there’s just something about the thought of clear, warming chicken noodle soup that makes me feel like it will banish all the ickiness of a cold away. And while the classic has a special place, this tomato paste and spice spiked version will carry you over from your sick days to your top o’ the mornin’, heel clickin’ days. Because for some reason, the weather is still dipping below freezing here in NYC in the middle of spring and the kids have caught strep throat while the hubby and I work our way through the common cold. Un-believable.

Back to the soup. It was the perfect dish for my crusty-bread obsessed husband to dip his baguette into. It was the only thing my preschool aged son has ever declared his love for, apart from trains and well, me. And it was one of the few items I did not have to struggle to finish from the fridge as a leftover.

IMG_0005

If I make my own chicken stock, I usually boil away chicken with veggies (onion, garlic, carrot, celery), aromatics (parsley, dill, thyme, bay leaf) and seasoning (salt, whole peppercorns). However, unlike most, I take the chicken out about an hour into the process, strip the meat off the bones, and re-submerge the carcass. That way the bones continue to flavor the stock for about 2 more hours and I don’t have to waste the meat. Does that make me crazy?

If you are using store bought stock, it comes together SO fast. When I don’t have homemade on hand (which is quite often) I use Saffron Road Halal Artisan Chicken Stock. Awesome flavor and deep golden color. You can tell it’s not just one of those salt water in a box chicken stocks. And if you want to make this vegetarian, use vegetable stock and chickpeas in lieu of the chicken. The tomato paste and spices are magical in how they liven up pretty much anything.

Ingredients

  • 2 tbsp olive oil
  • 1 medium yellow onion, diced small
  • 2 carrots, diced small
  • 2 celery stalks, diced small
  • 2 large garlic cloves, minced
  • 1 tsp each of cumin, coriander and paprika
  • 1 1/2 tsp salt plus more to taste
  • 1/4 to 1/2 tsp crushed red chili flakes
  • 14 oz crushed tomatoes (if you have a 15 oz can that’s fine)
  • 8 cups chicken broth
  • 1 cup shredded chicken
  • 1/4 lb spaghetti or noodle of choice
  • 1/2 cup chopped cilantro

Directions

  1. In a large pot, heat the olive oil over medium high heat. Add the onions, carrots and celery. Saute for 4-5 minutes, until the vegetables begin to soften. Add the garlic and spices (cumin, coriander, paprika, salt and pepper). Cook for 2 minutes more, allowing the vegetables to get more tender and the spices to toast up a bit.
  2. Add the tomatoes, broth, chicken and pasta. Cook for 9 to 10 minutes, depending on the package directions of your pasta.
  3. Add the cilantro and taste for seasoning.

Leave a Comment · Labels: American/Mediterranean, Dinner, Main, Side Tagged: broth, chicken, chicken noodle soup, chicken soup, comfort food, healthy, homecooking, homemade, low fat, mexican, noodle, sick days, soup, spices, stock, tomato paste, weeknight, weeknight cooking, weeknight dinner

American, Bangladeshi. Savory, sweet. I don't discriminate and neither should you.

Most recently…

Load More...
Follow on Instagram

Social

Subscribe to Blog via Email

Enter your email address to subscribe to this blog and receive notifications of new posts by email.

Tags

appetizer beef bengali breakfast butter cake caramel chicken chocolate chocolate chips cilantro clean eating coconut comfort food cookies dessert dinner entertaining fall fruit ganache gluten free halal healthy homemade honest chops honest creations iftar italian pasta pastry pistachio quick and easy dinner ramadan recipe side side dish south asian spinach vegan vegetables vegetarian weeknight dinner weeknight meal whipped cream

Theme by 17th Avenue · Powered by WordPress & Genesis