
In my journey of blending the flavors of my ancestral home in the Indian Subcontinent with the desserts I know and love here in America, I pull a lot from you and those around me. In brainstorming dessert ideas, a dear family friend (and ad hoc babysitter – love you Tasfia and Tanifa!) suggested gajer halwa. It’s carrots that’s been cooked down with milk and sugar so that it’s almost a pudding.
Cha Leches Cake

Most of you are familiar with chai – a spiced tea drink, made with some kind of milk. Most Bengalis I know and grew up with, didn’t spice their tea, but steeped some strong black tea and cooked it down with milk, or evaporated milk, and sweetened to taste. This is called dood cha (translation: milk tea). My favorite childhood treat was dunking a piece of Wonder bread in my mother’s milk tea. This dessert, an adaptation of tres leches, rekindles that memory. A sponge cake that is soaked in a steeped black tea milk mixture, and topped with whipped cream, recreates that childhood favorite in dessert form. I made it on a whim at my in law’s place over the weekend so I don’t have many pictures. I tried recreating it with PG Tips pyramid tea bags – and although tasty, did not have a strong enough flavor. Will share more pictures when I recreate it – in the meantime I need to buy up some loose tea of my own, since the tea bags just won’t do in this recipe.
Green Tea Wafer Cake

If it looks like a green tea crepe cake, it smells like a green tea crepe cake, and tastes like a green tea cake, it still may not be a green tea crepe cake.
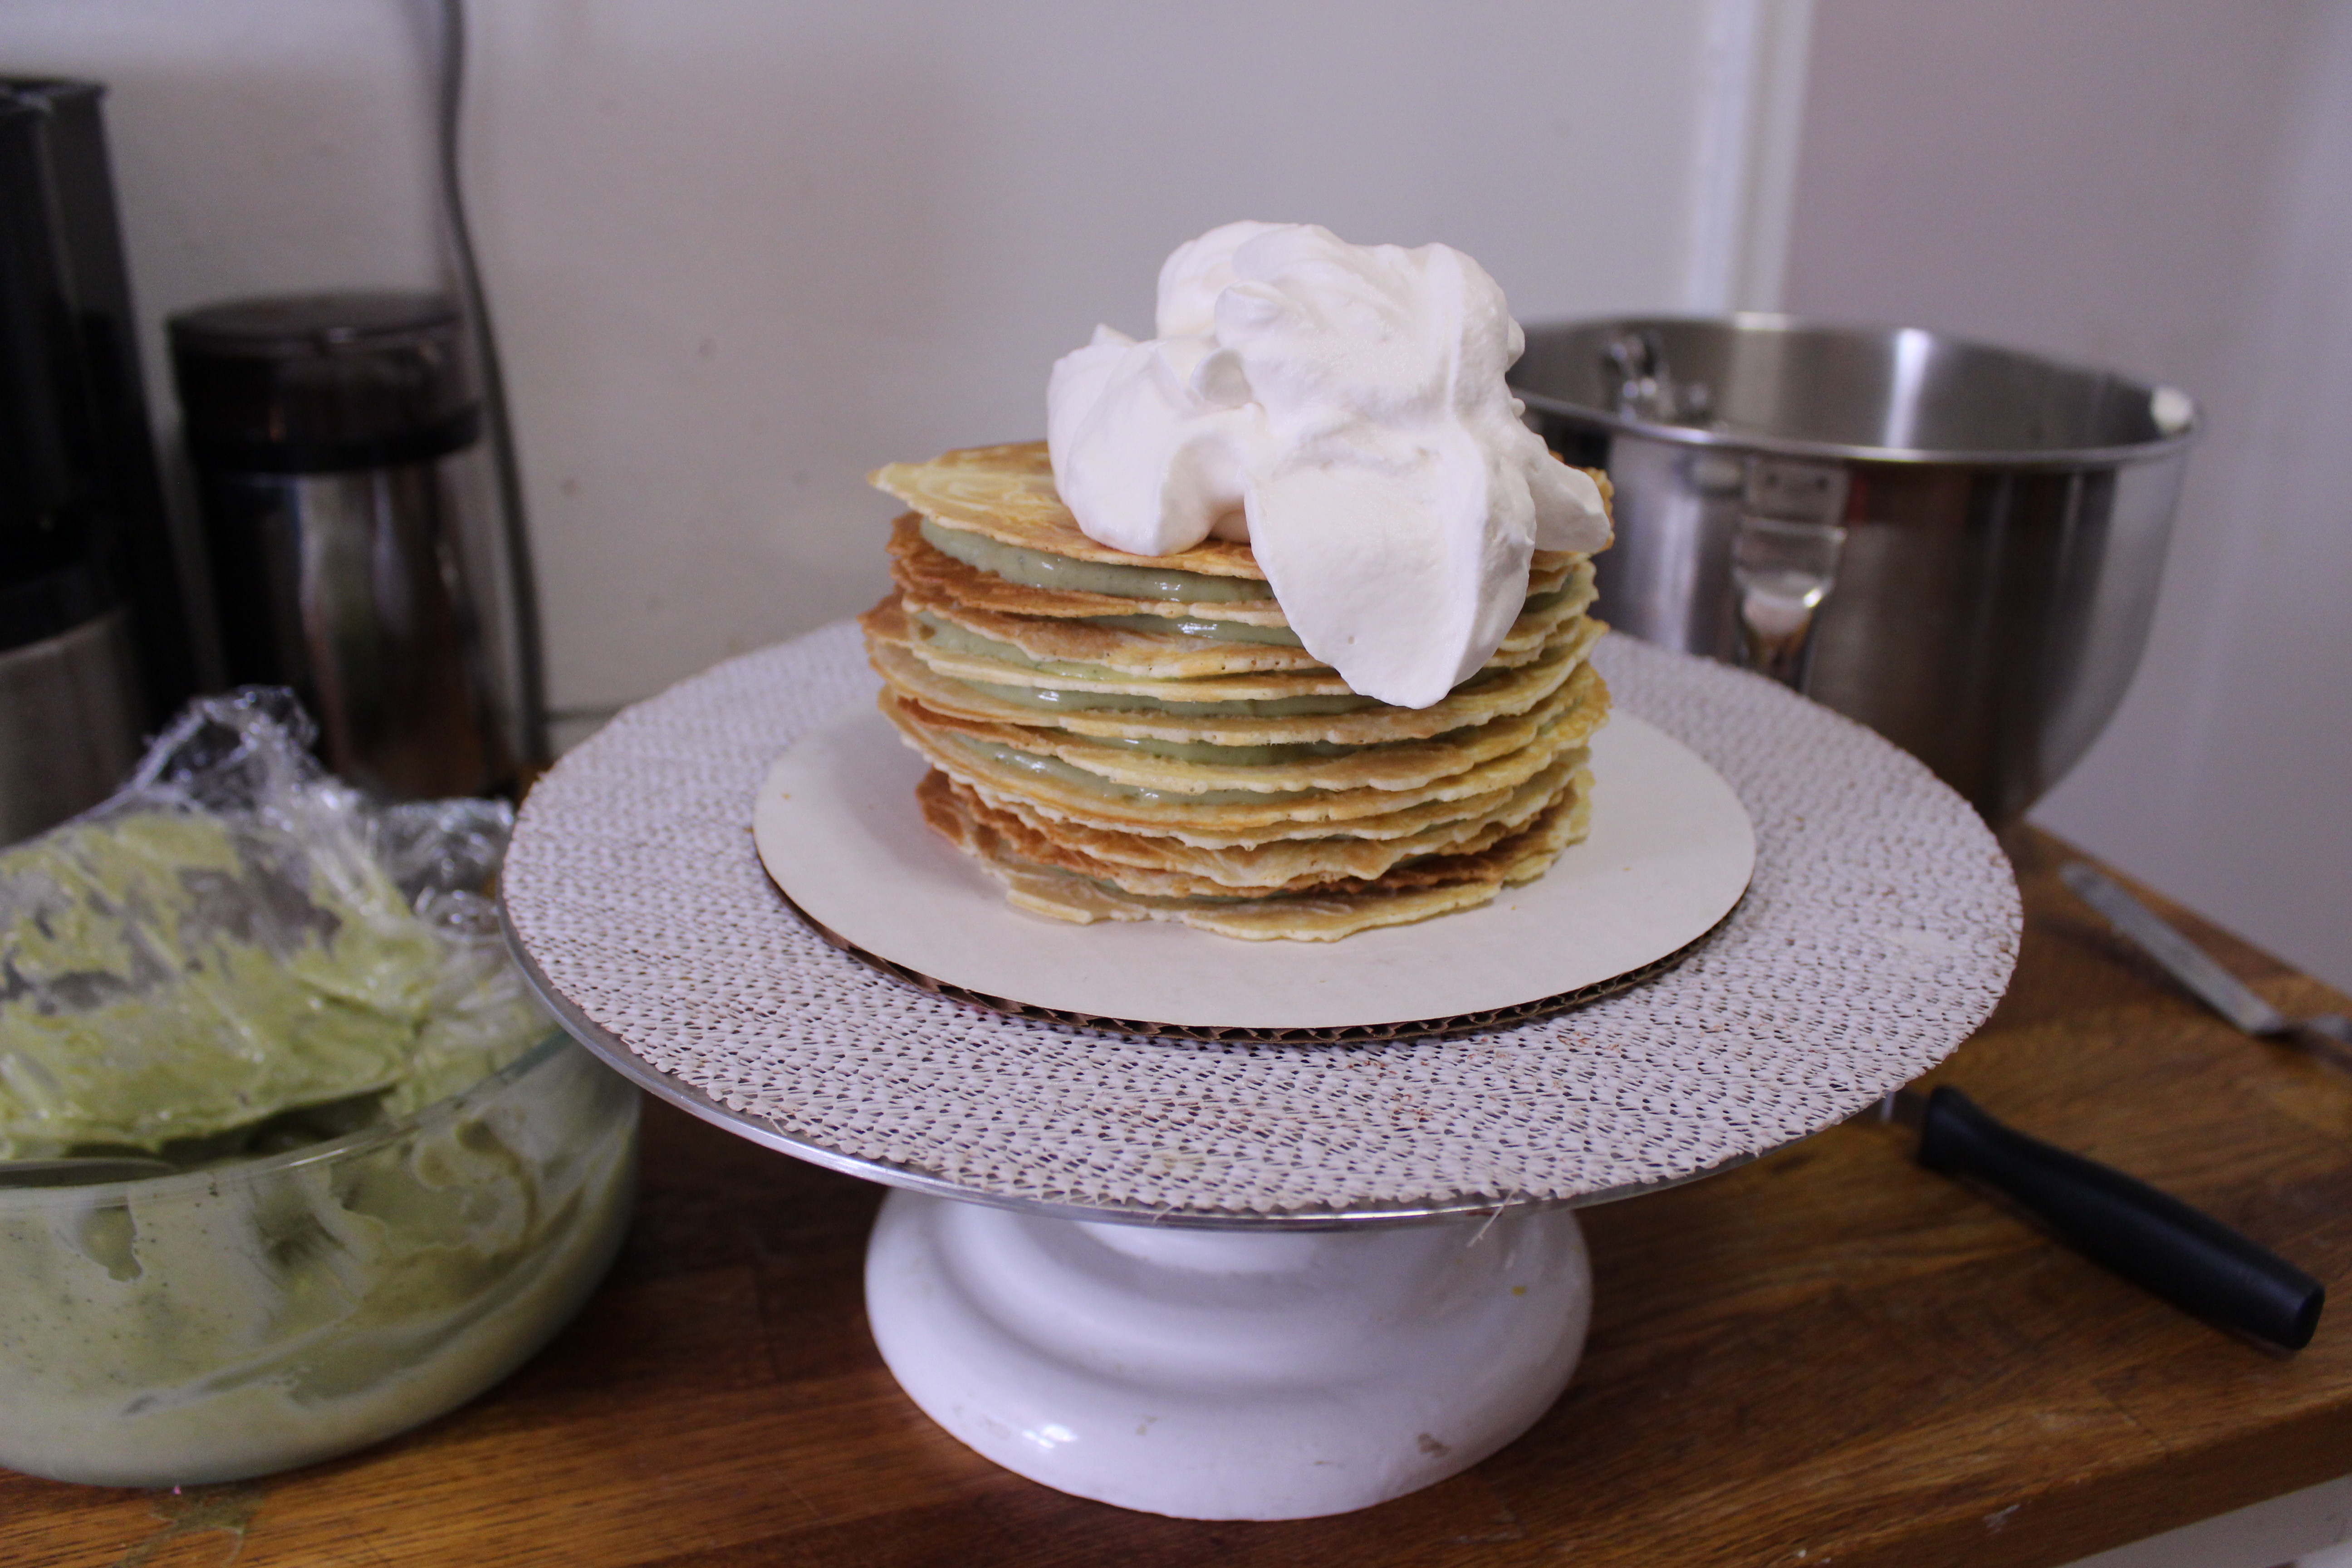
Truth is, I’ve never had a green tea crepe cake. And even though this looks like the famous Lady M green tea crepe cake, there are no crepes here. Just crisp wafers made with my trusty krumkake maker, matcha pastry cream and whipped cream.
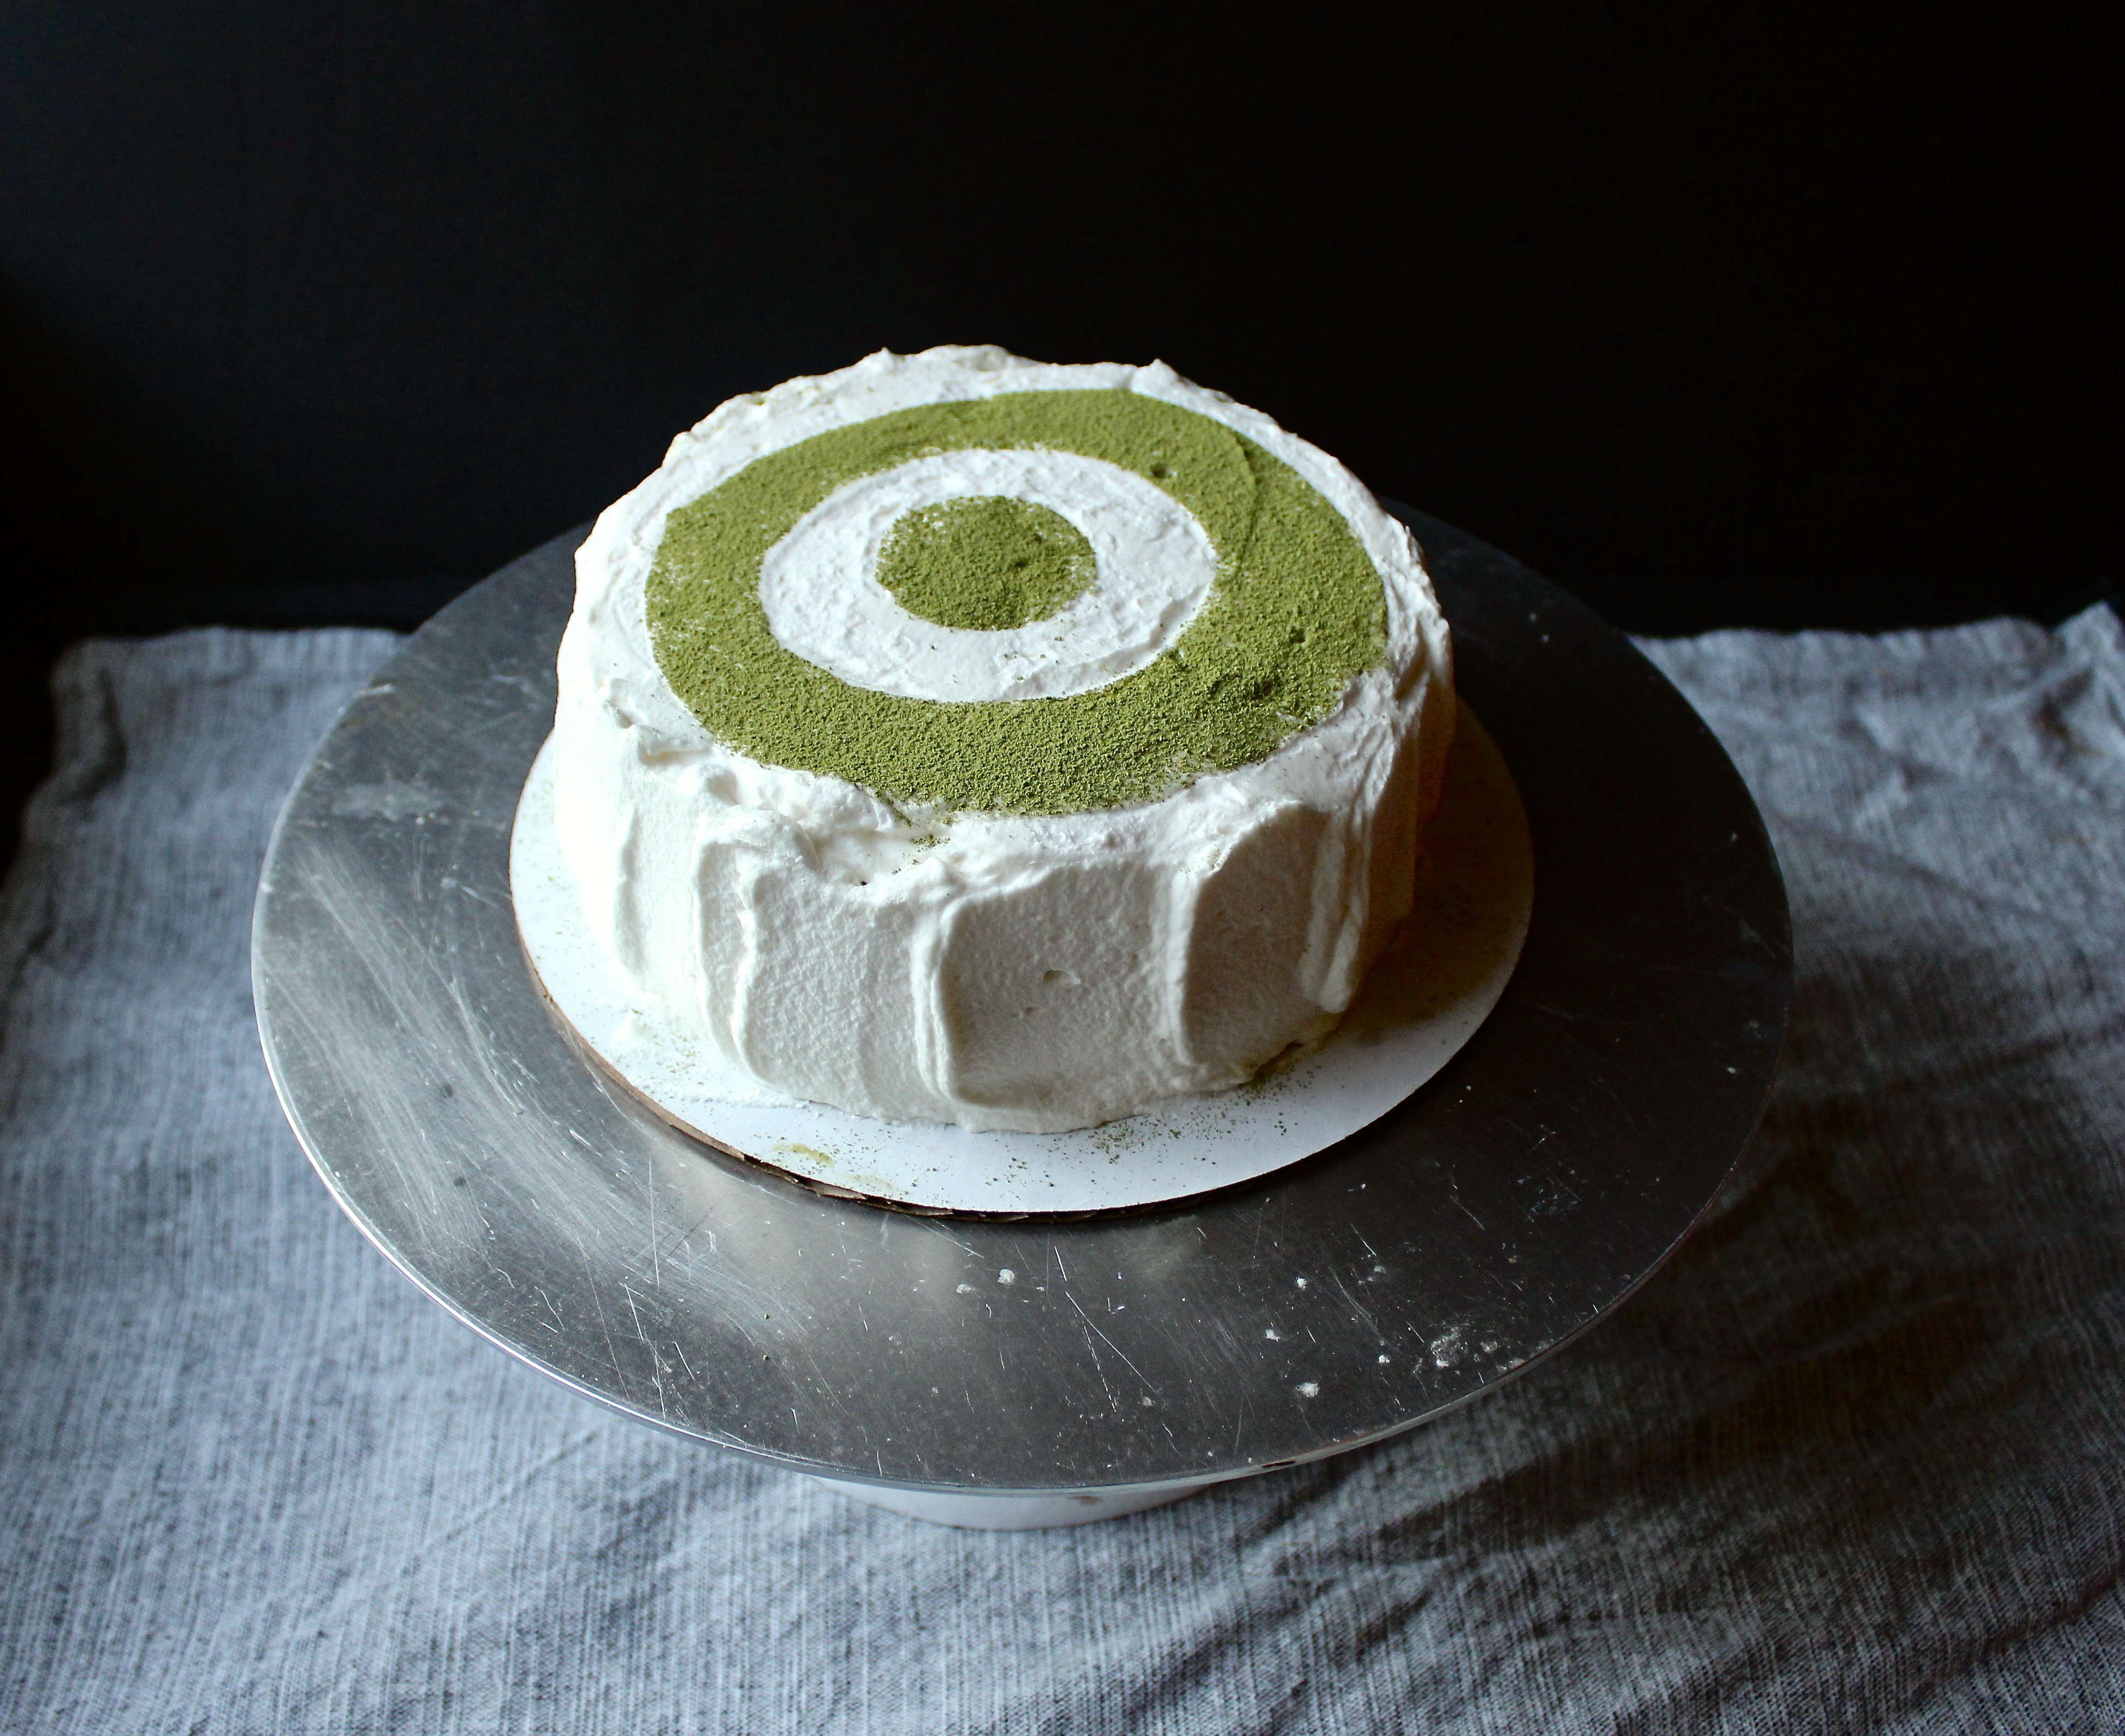
I didn’t use any one recipe for this – I kind of threw things together that I thought might work. And while this worked out beautifully (though I did have a near disaster when the whole thing almost slid off as I was transferring it to the fridge! Pastry cream is slick, yo), I’m already dreaming up alternate versions of this: nutella swiss meringue buttercream filling? Salted caramel mousse?
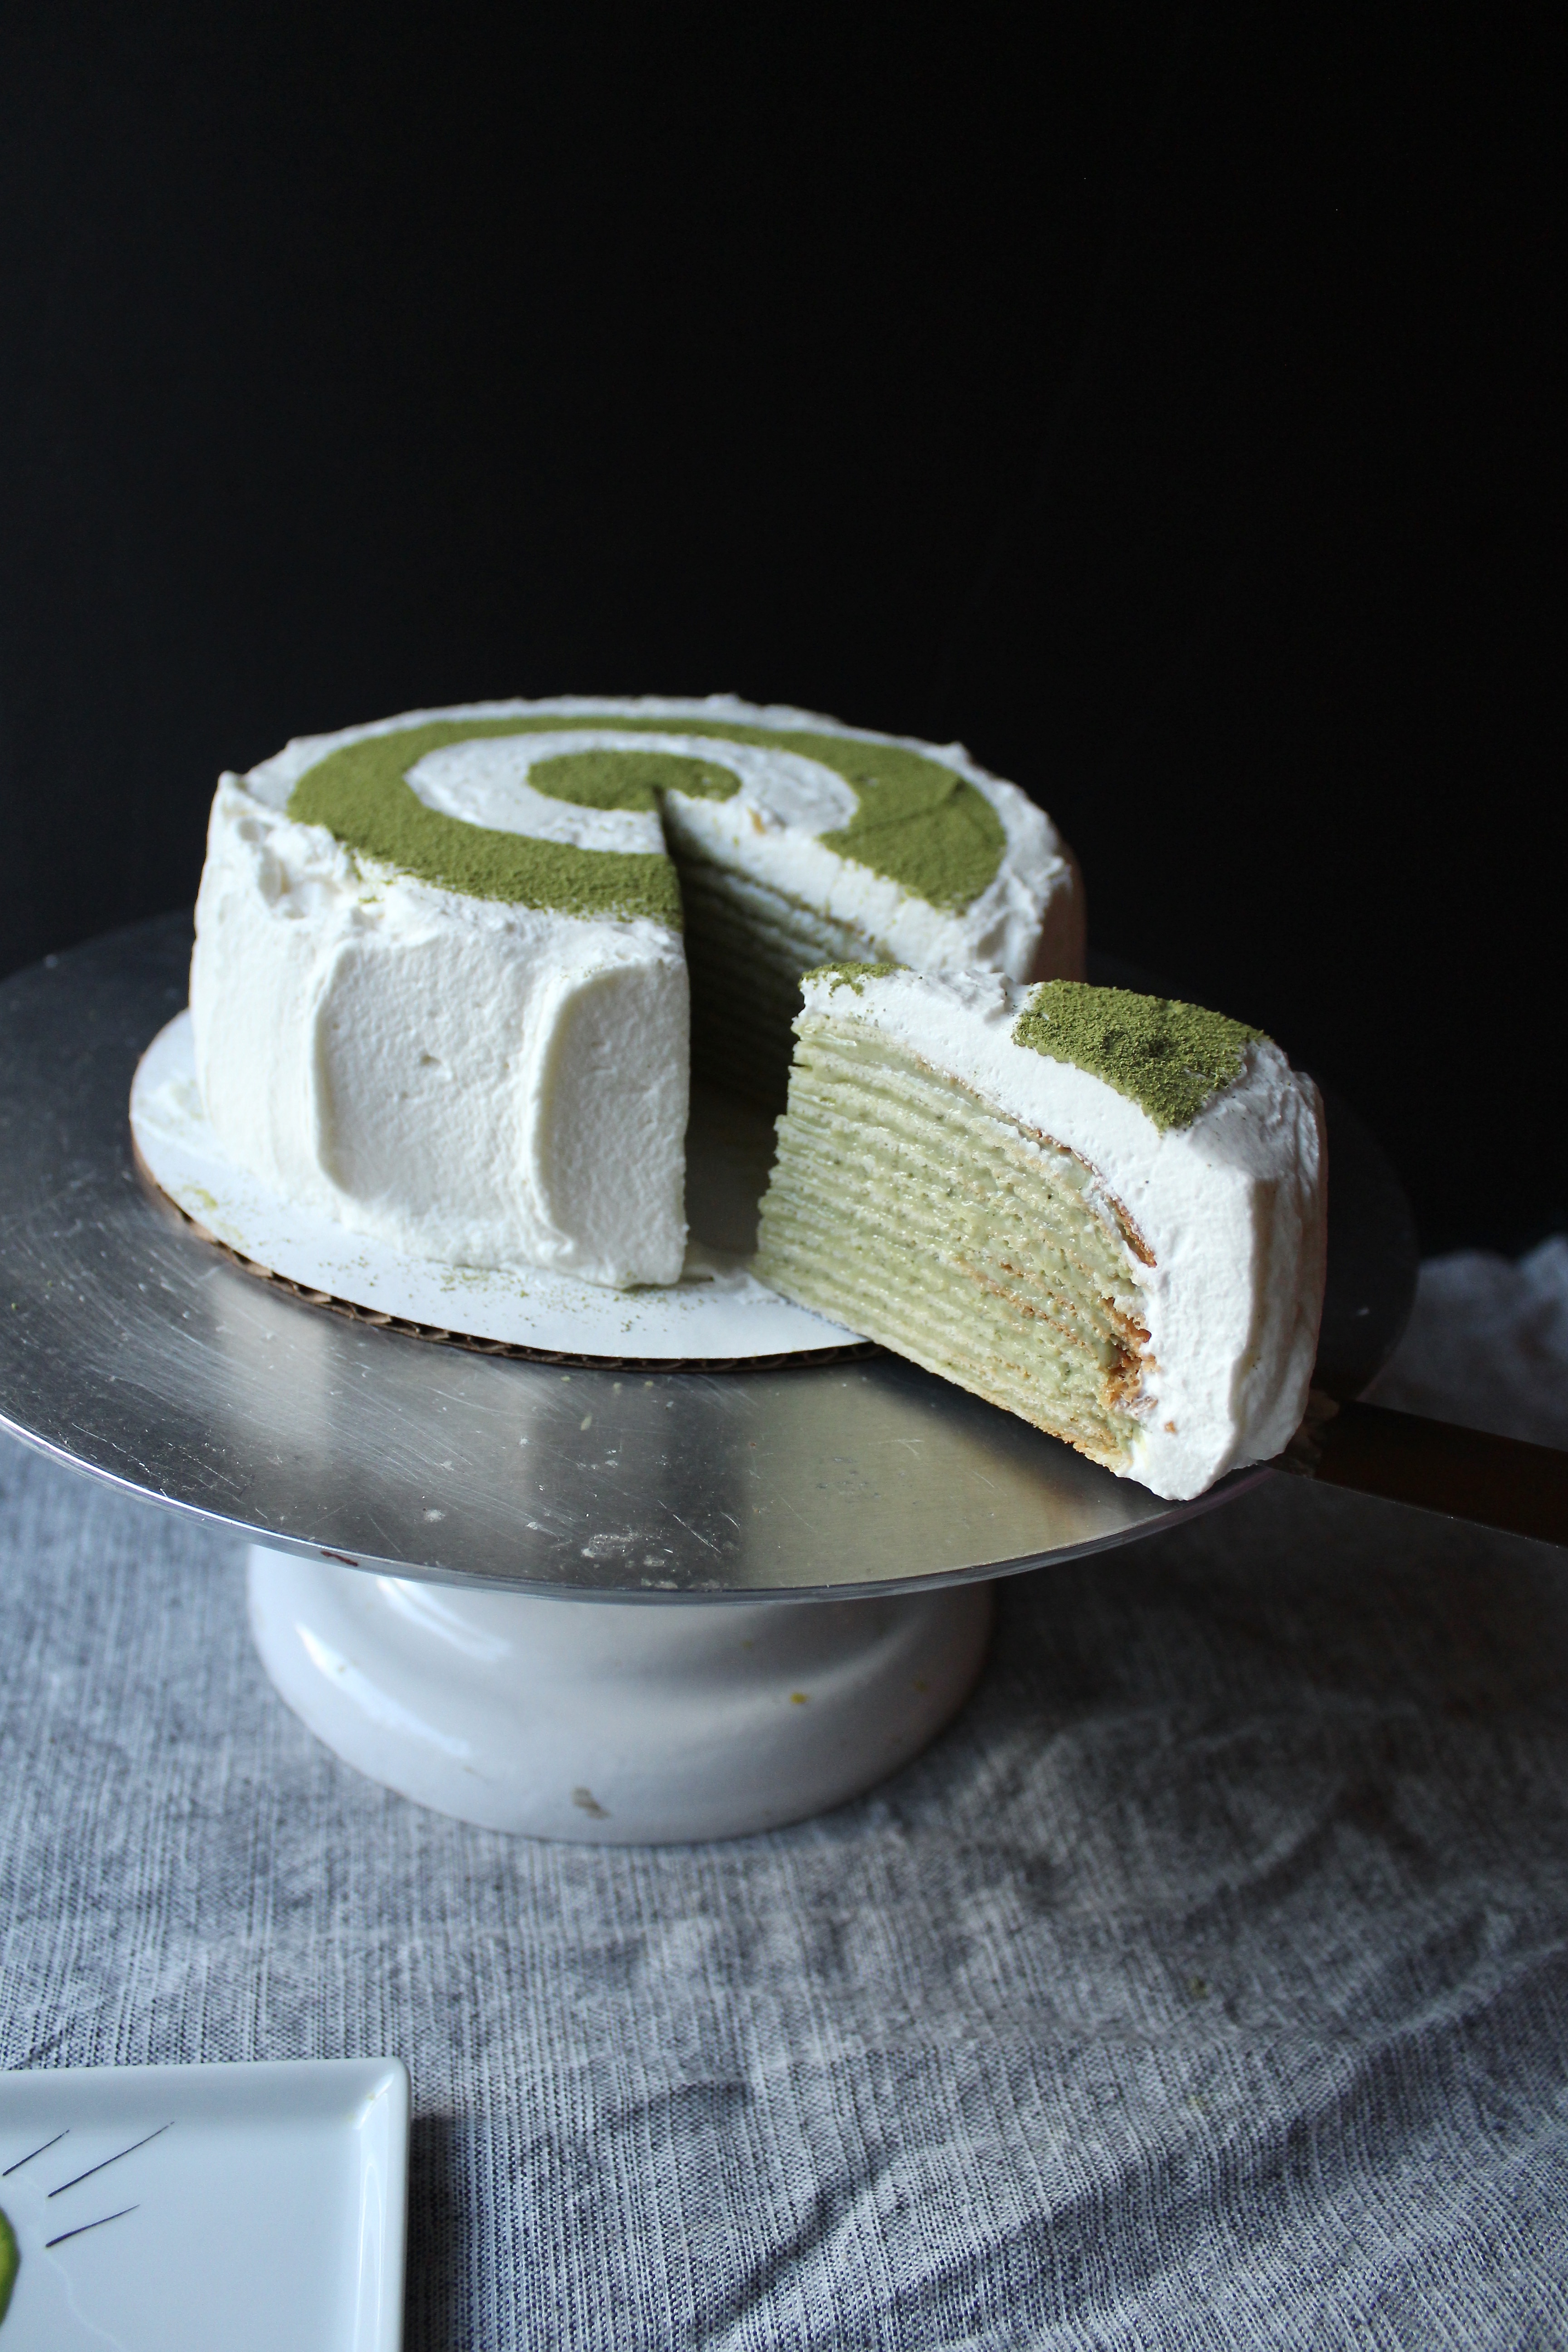
Matcha used to be difficult to find – now you can find it at costco! I don’t use it that frequently so I’m still working off of the batch I bought a while ago.
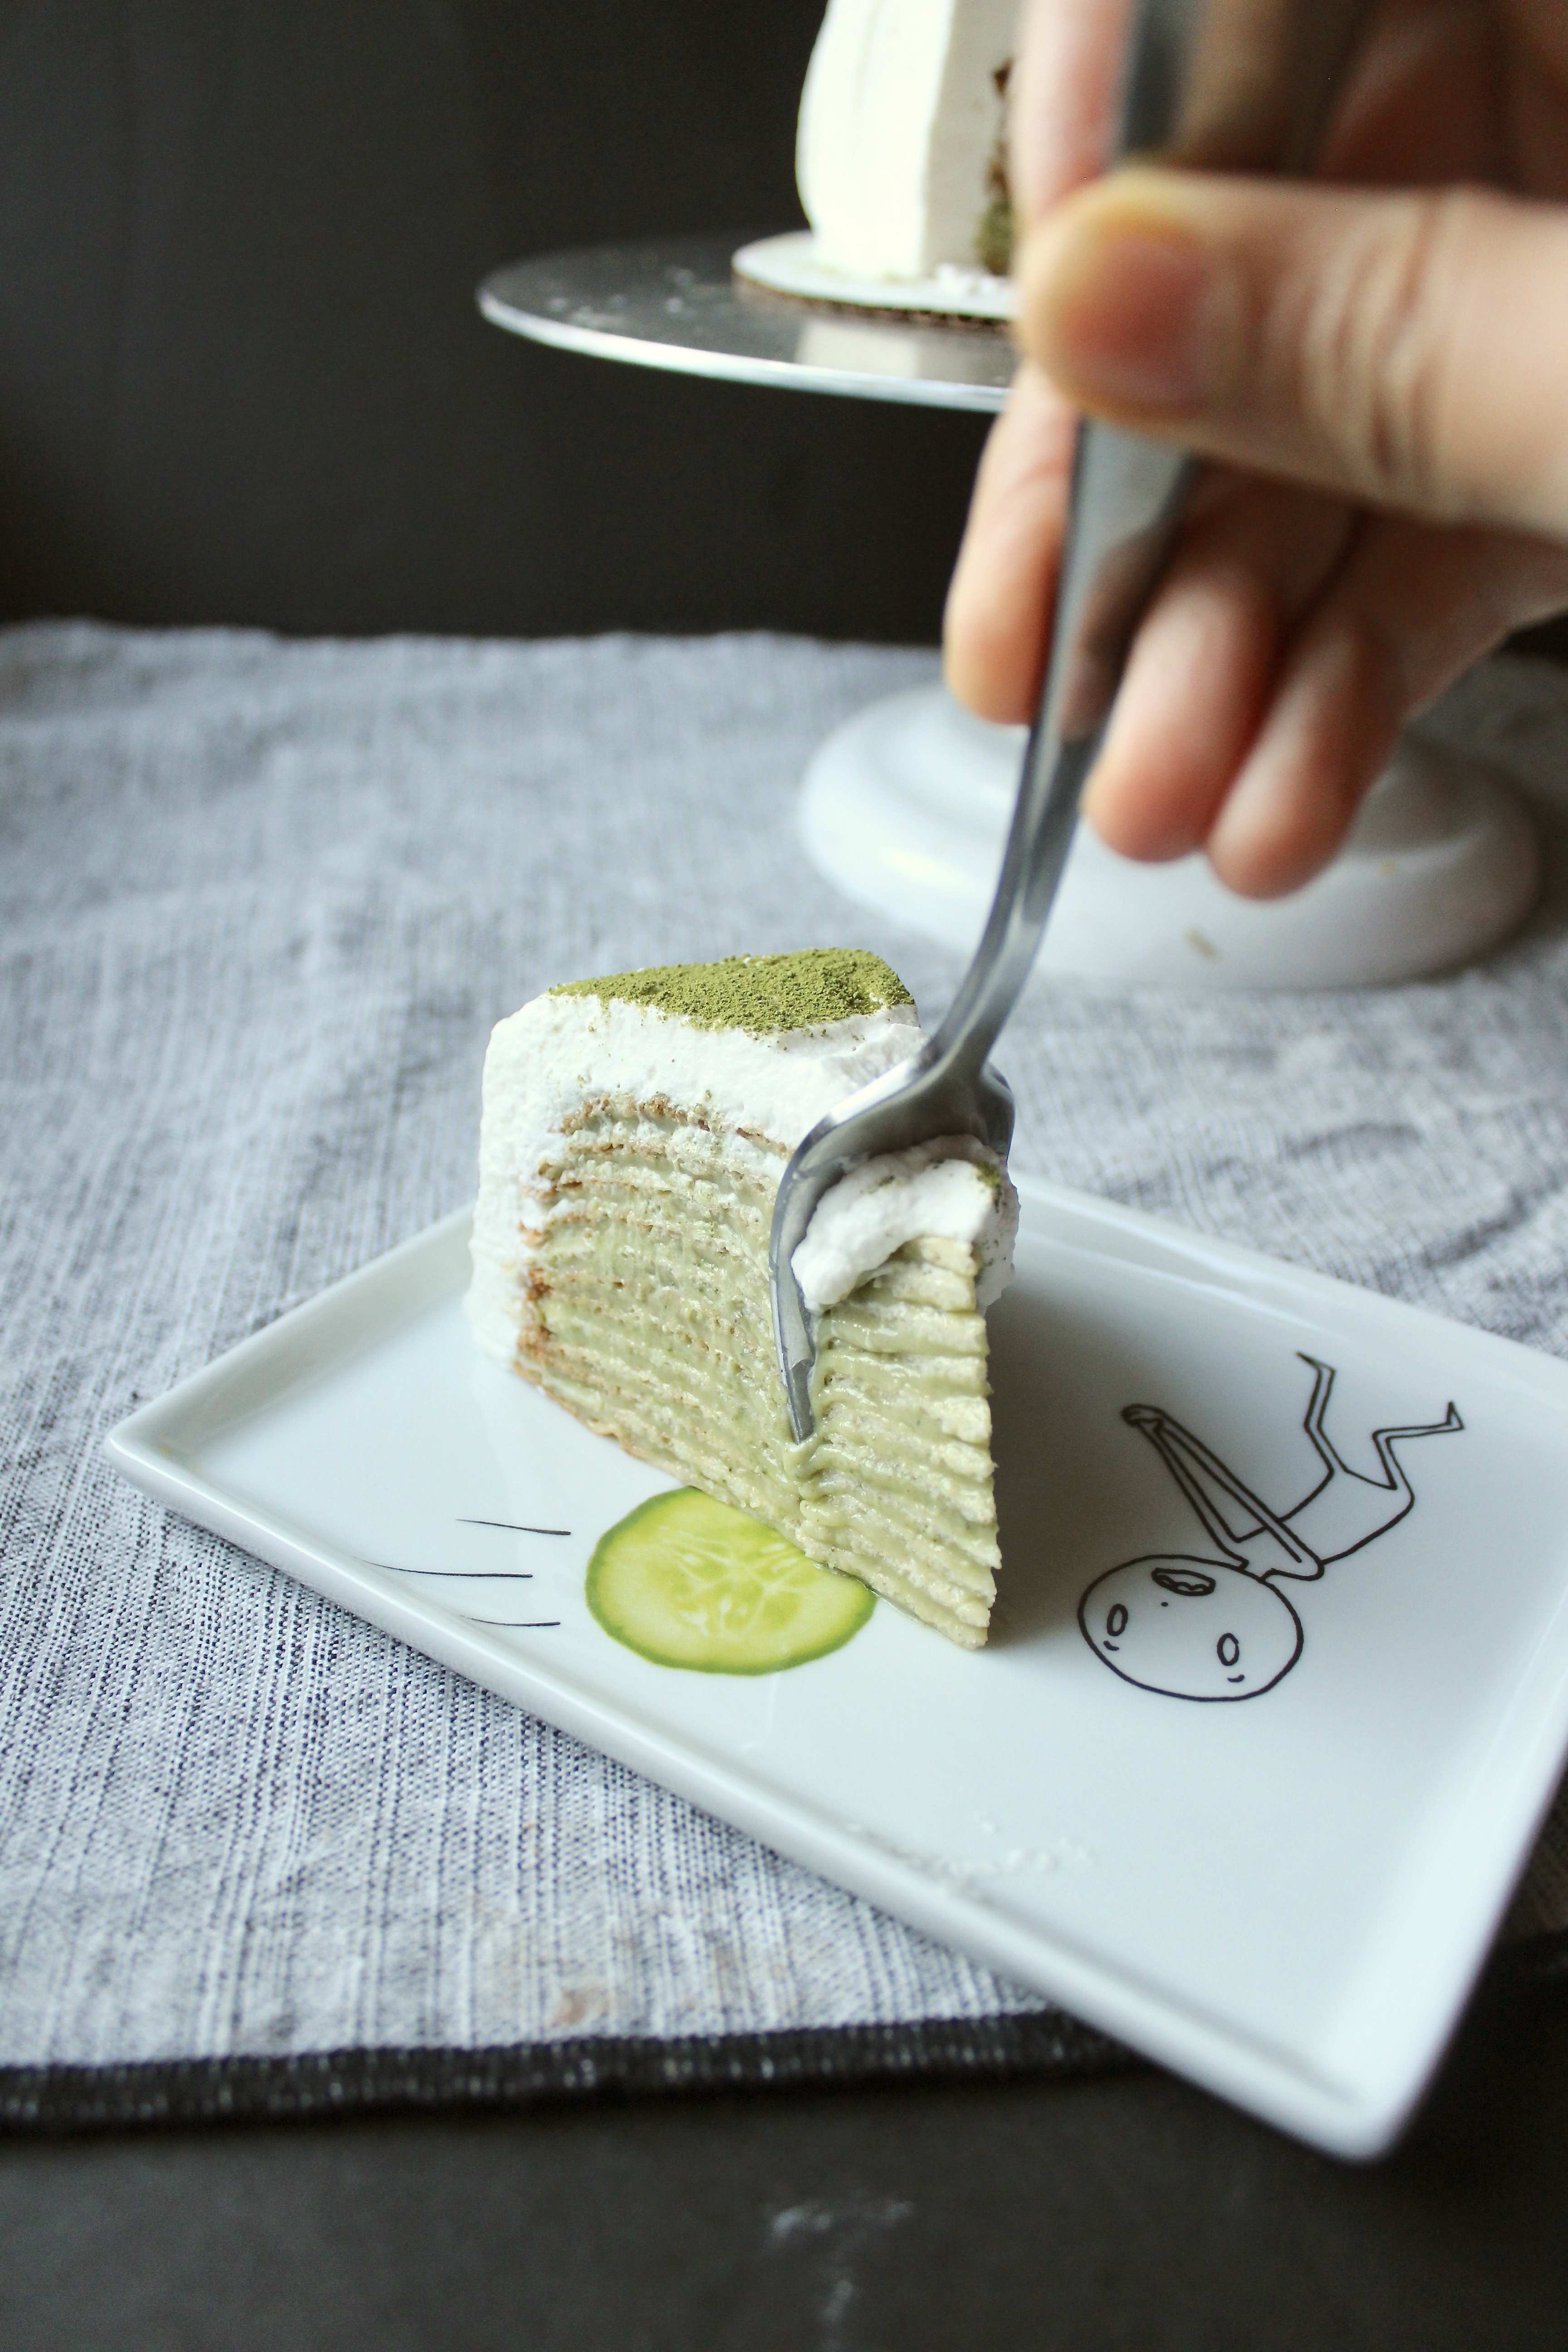
Hope you enjoy! And if you don’t have a krumkake maker and don’t feel like buying one and make it with crepes instead, please let me know!
Pastry cream recipe adapted from King Arthur Flour.
Ingredients
- 12-14 6in round wafers
- 3 cups whole milk
- 3/4 cup sugar plus 3 tbsp
- 1/4 tsp salt
- 2 tsps vanilla extract, divided
- 1/4 cup cornstarch
- 1 tbsp all purpose flour
- 4 egg yolks
- 4 tbsp unsalted butter
- 1 1/2 cups heavy cream
- 1 tbsp matcha plus extra for garnish
Directions
1. Make the pastry cream: heat 2 1/2 cups milk, 3/4 cup sugar and salt in a medium saucepan over medium heat. Stir occasionally until sugar’s dissolved. In a medium bowl, whisk together 1/2 cup milk, egg yolks, corn starch and flour. When the milk is hot and sugar is dissolved, slowly add about a cup of the hot milk mixture to the egg mixture, whisking constantly. Add the tempered egg mixture back to the saucepan. Whisk constantly over medium heat until it starts to thicken. Remove from heat, continue stirring, and add the butter one tablespoon at a time. Add the vanilla and one tablespoon of matcha, sifted. Pour into a heat proof bowl, place a piece of plastic wrap over the surface, touching the cream so it doesn’t form a skin. Refrigerate until cool and set, several hours or overnight.
2. Make the wafers but instead of rolling into a cone shape, leave flat.
3. On an 8in cake board, place a small amount of cream and spread it thin. Place one wafer on the board, then one tablespoon of the pastry cream and spread it across. Repeat until all the pastry cream is used up. Carefully transfer to refrigerator and chill until set – at least 2 hours.
4. In a large bowl whip cream with 3 tbsp sugar until soft peaks form. Add vanilla and whip until combined. Take out cake from refrigerator and dollop generously on cake, spread to the edges, adding more onto the sides until it’s all covered. Garnish with the extra matcha. Cut out concentric circles out of parchment and place atop cake to get the pattern pictured above.
Krumkake
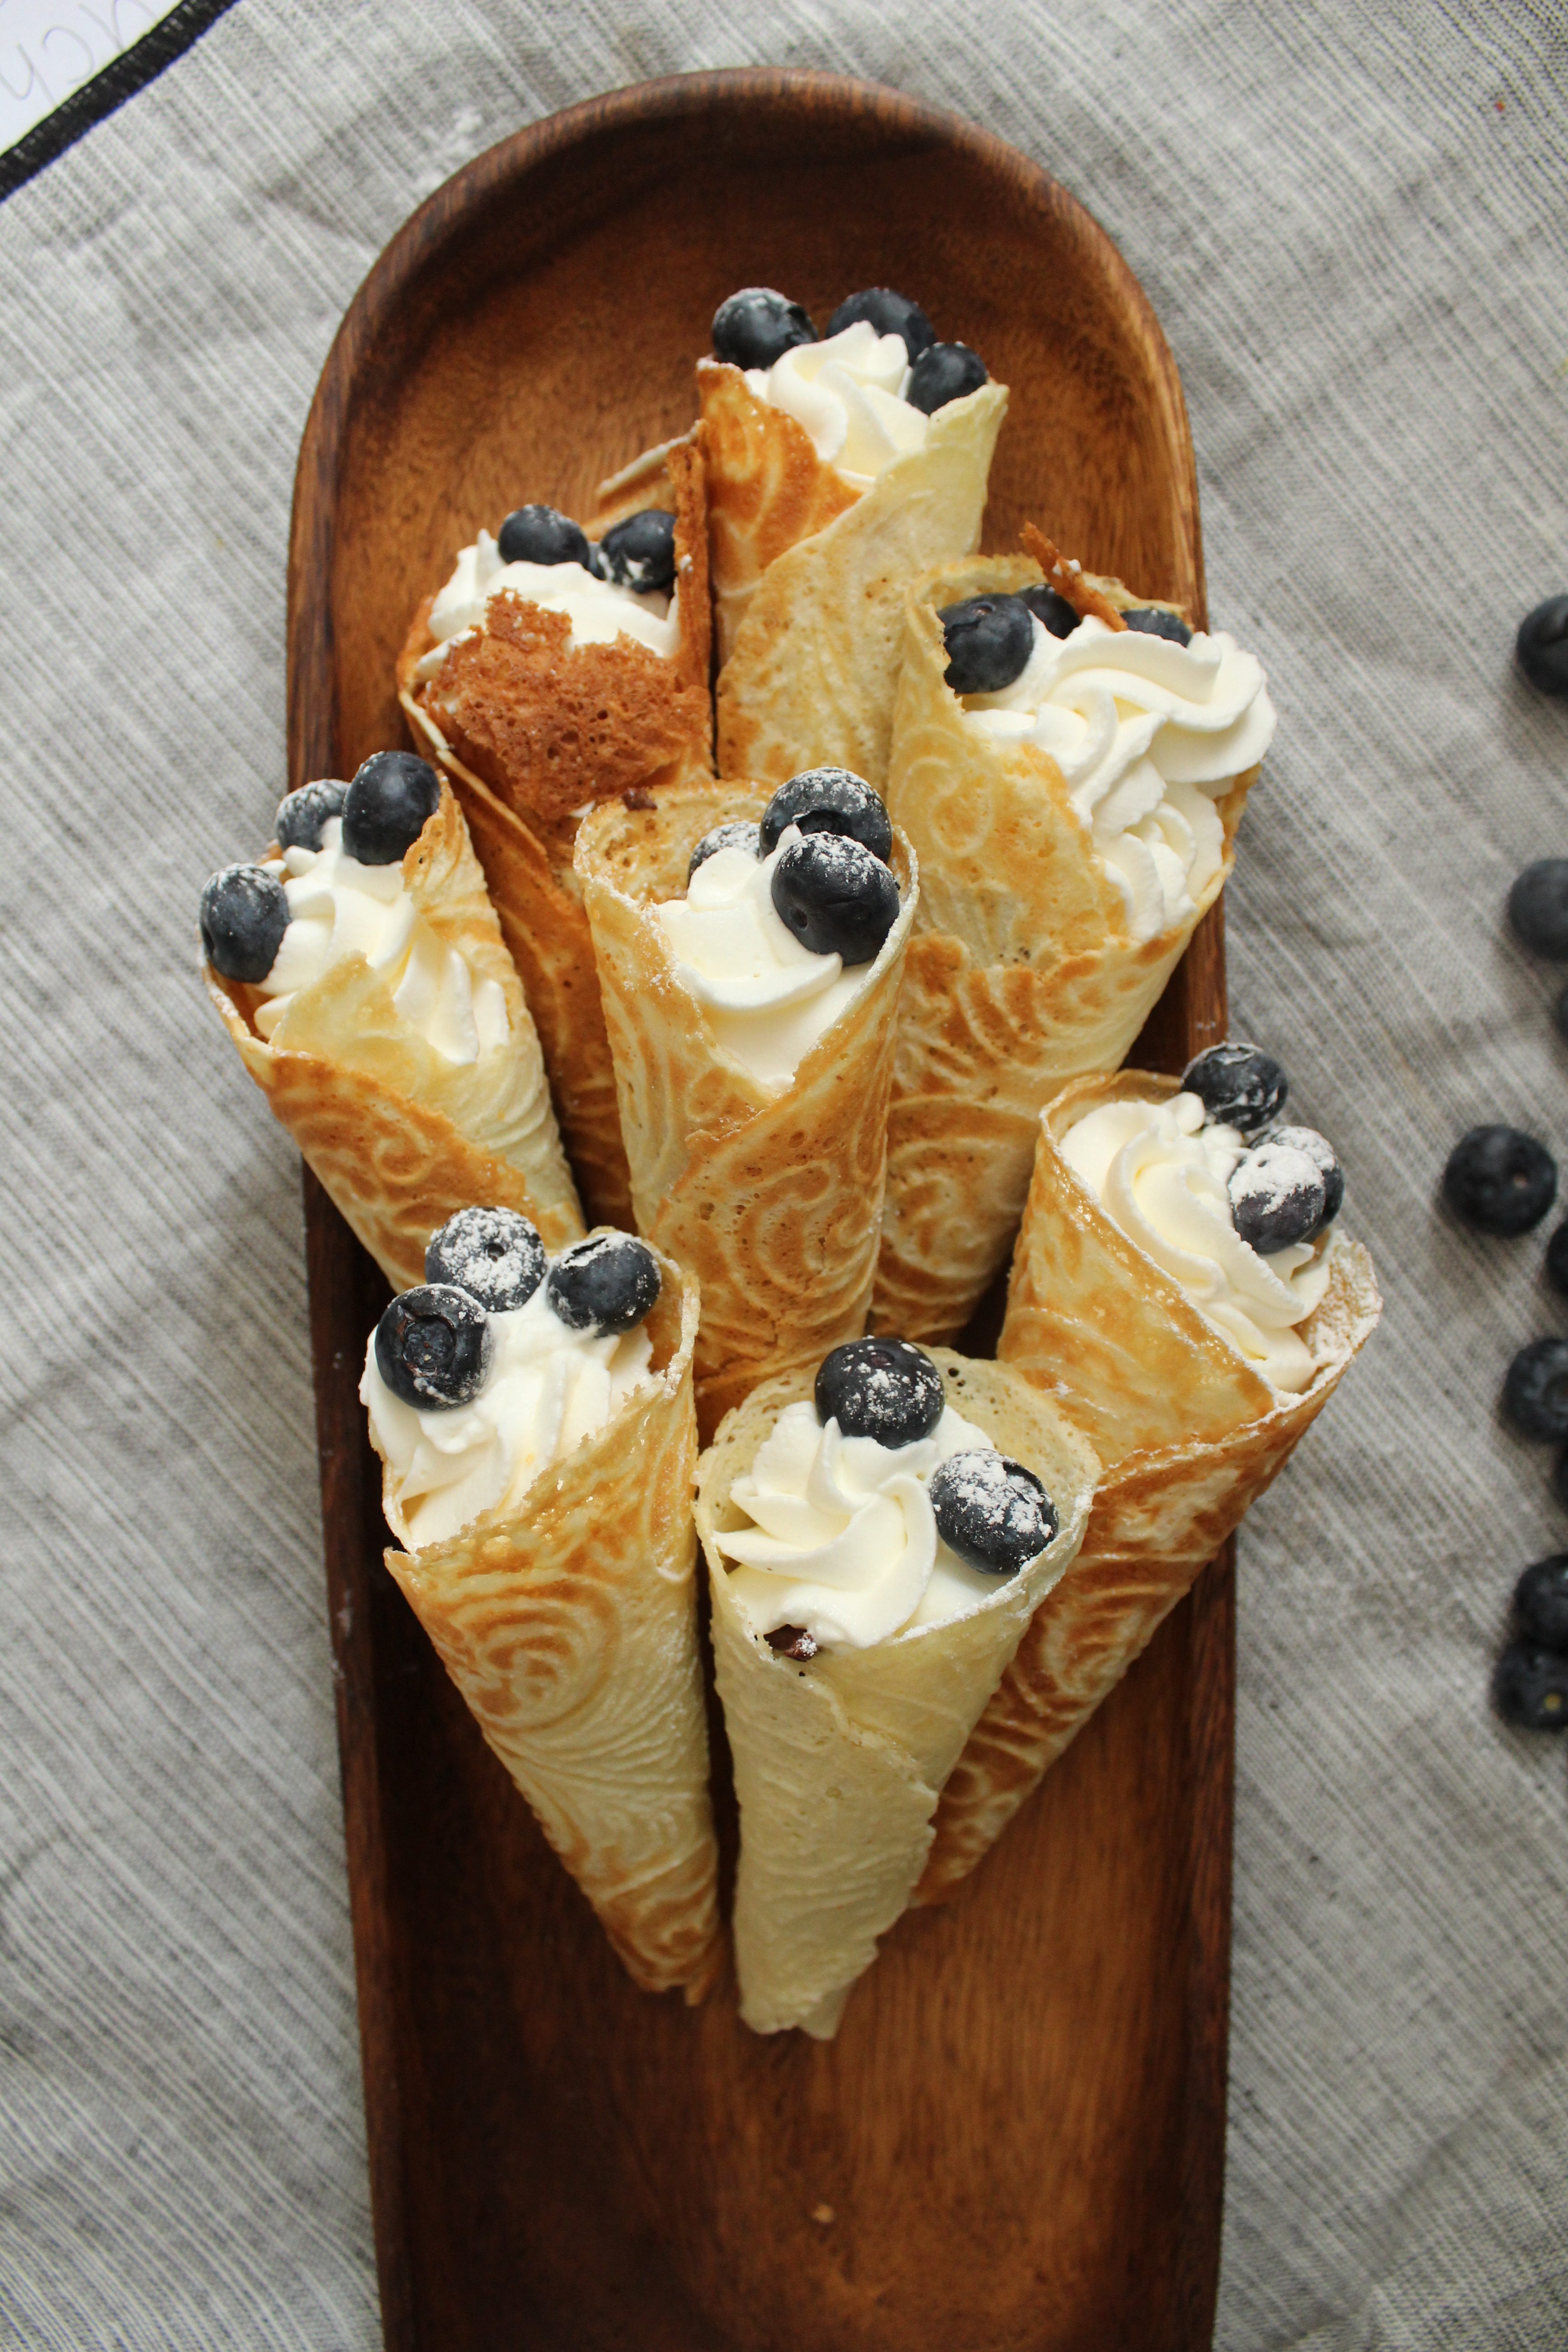
If you’ve been following along on social media (esp Instagram!) you’ll know I’ve had an exciting week: my little girl turned 7, my favorite fashion blogger of all time (Aimee Song!) showed my IG some love, and I discovered a classic Norwegian dessert called Krumkake.

In anticipation of my daughter’s birthday, I got to thinking what kind of cake should I make for her? Chocolate and vanilla can get tiresome when you make them almost every day. I thought, what about a Kit Kat cake? What would I need?

Chocolate, wafers, and more chocolate. I did some research on the filling of KitKat – apparently it’s some trade secret! Rumor has it the filling is made up of crushed KitKat?? That’s kind of dark. Like, candy cannibalism.

Anywho, that’s what got me started on my wafer journey. Looked up a wafer recipe, said recipe directed me to various presses. Instead of a waffle press, I went with this Norwegian Krumkake press, with it’s beautiful design, I couldn’t resist!
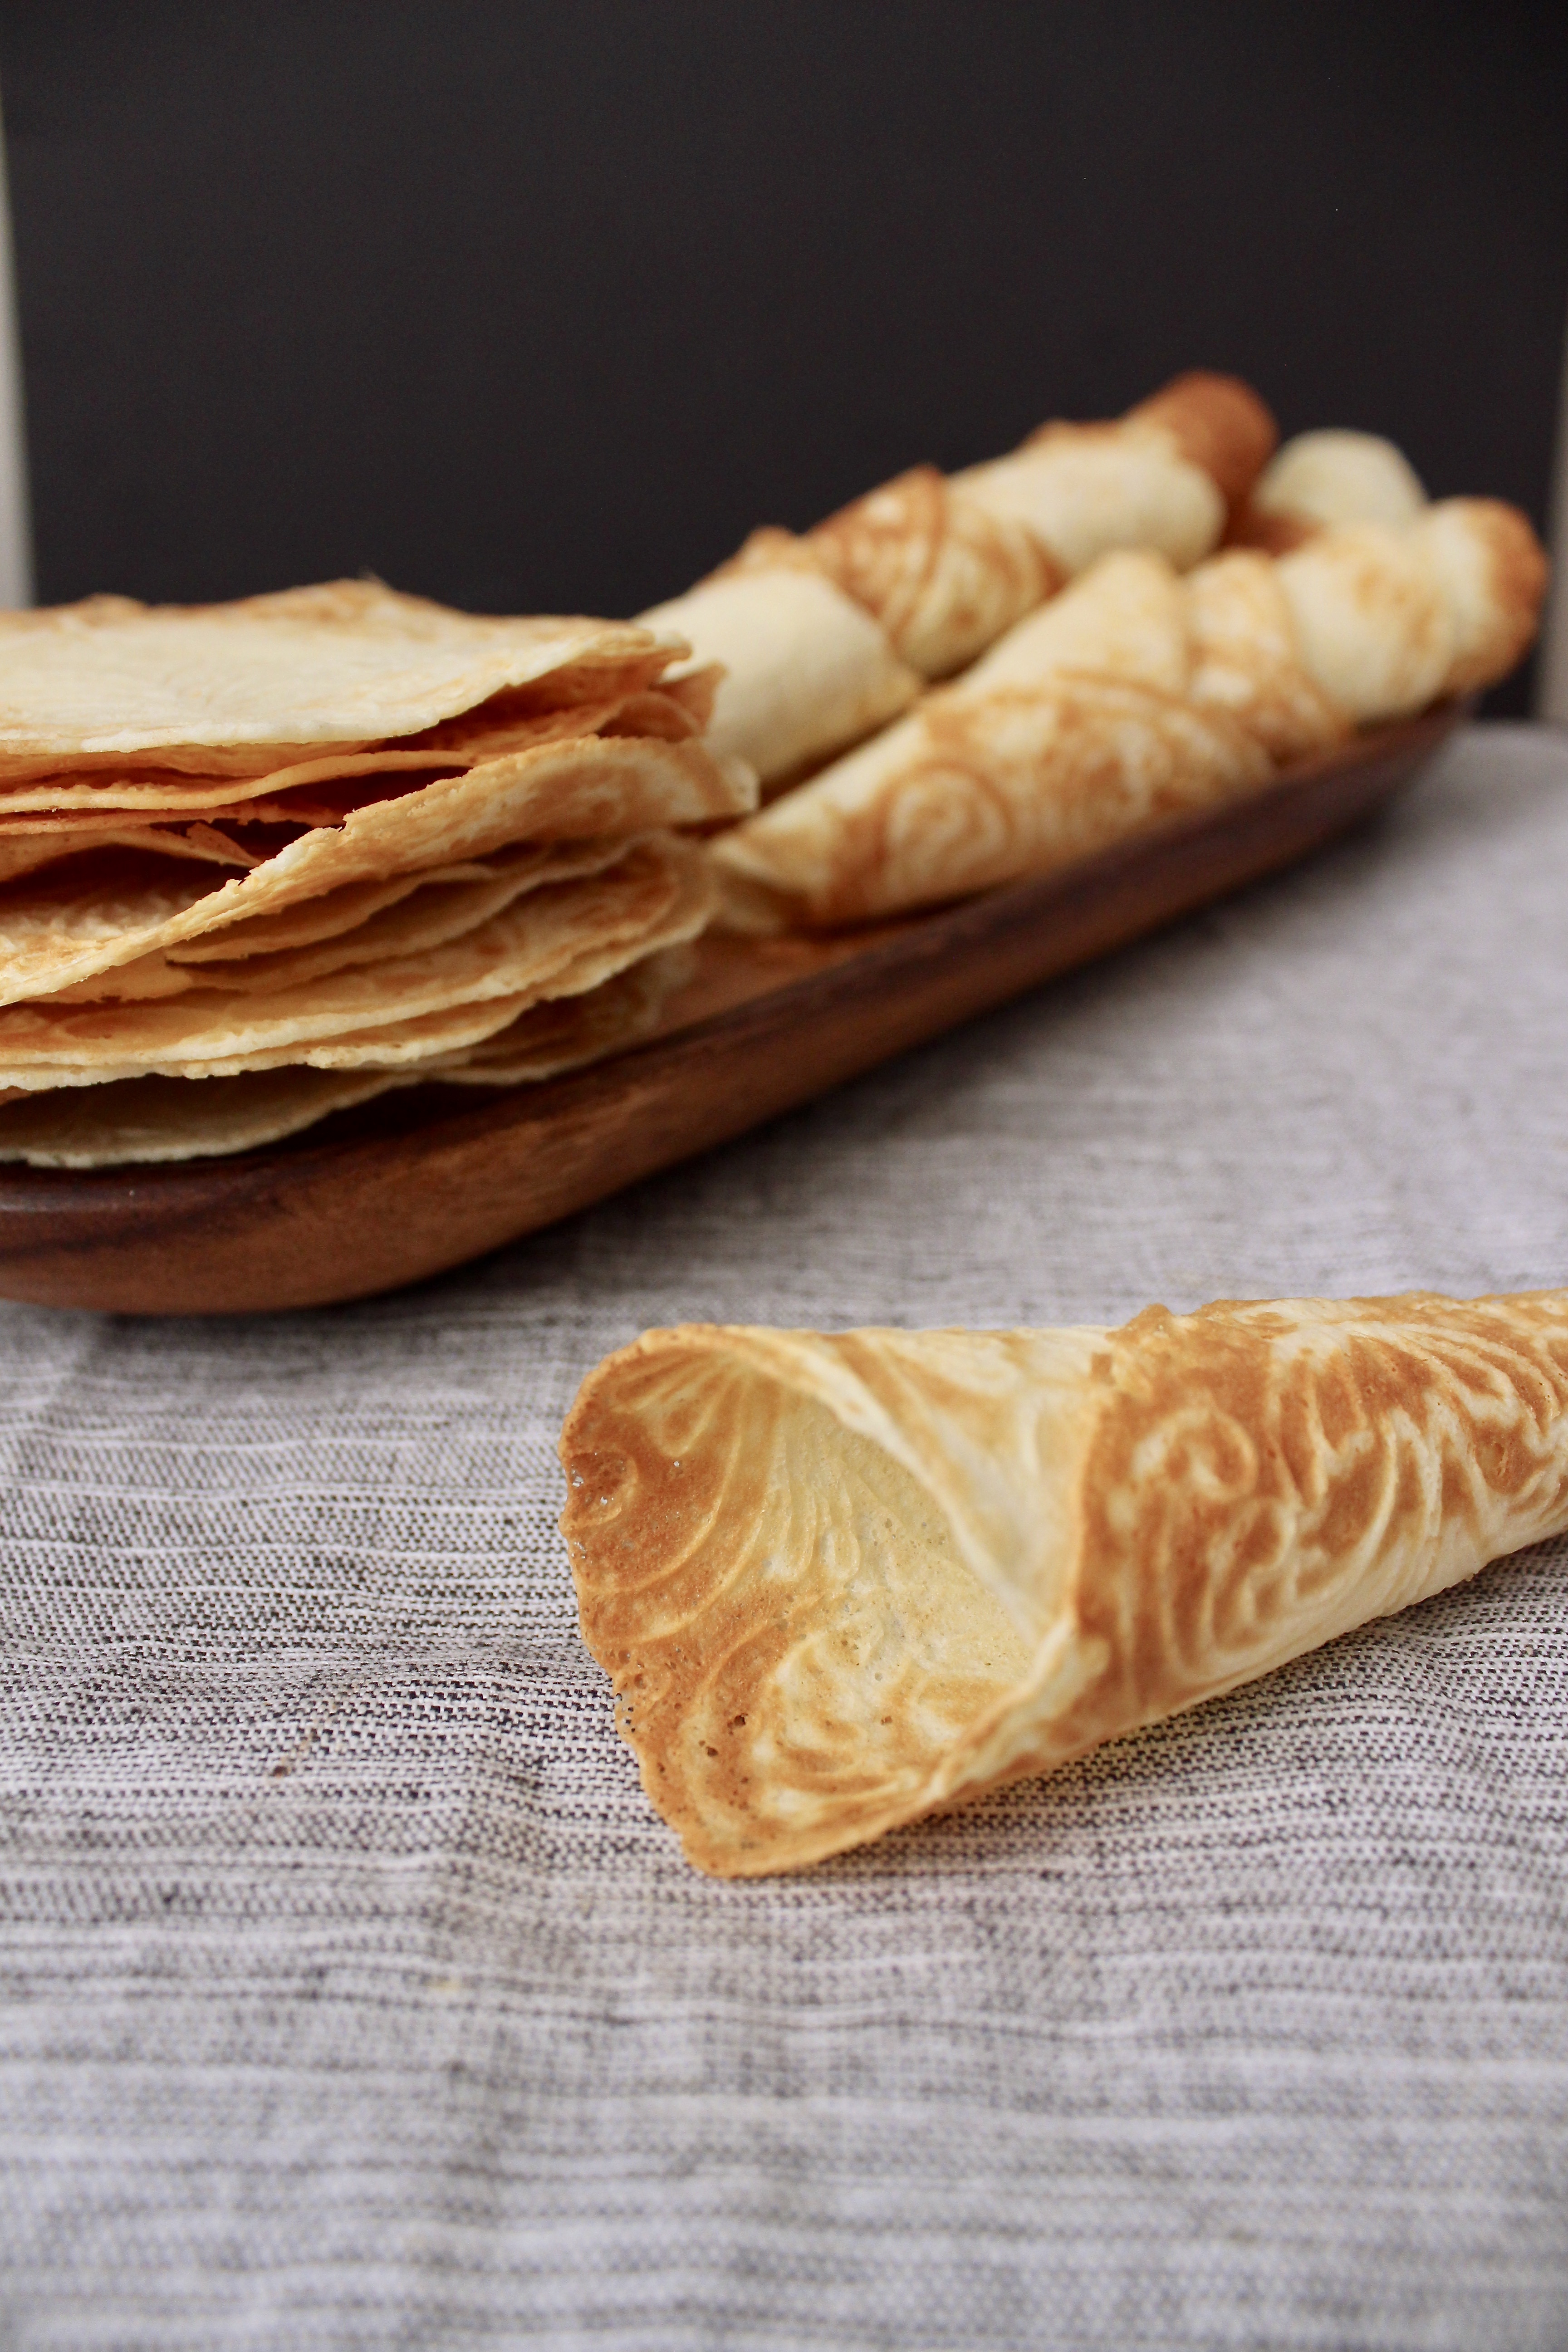
The simplest batter of butter, flour, eggs, sugar and milk gives you excellent wafers. The only thing is you need like 1 hour in the kitchen, baking each one for about 30 seconds each, and rolling them around the cone that the press comes with, or leaving flat if you want to stack them for a cake.
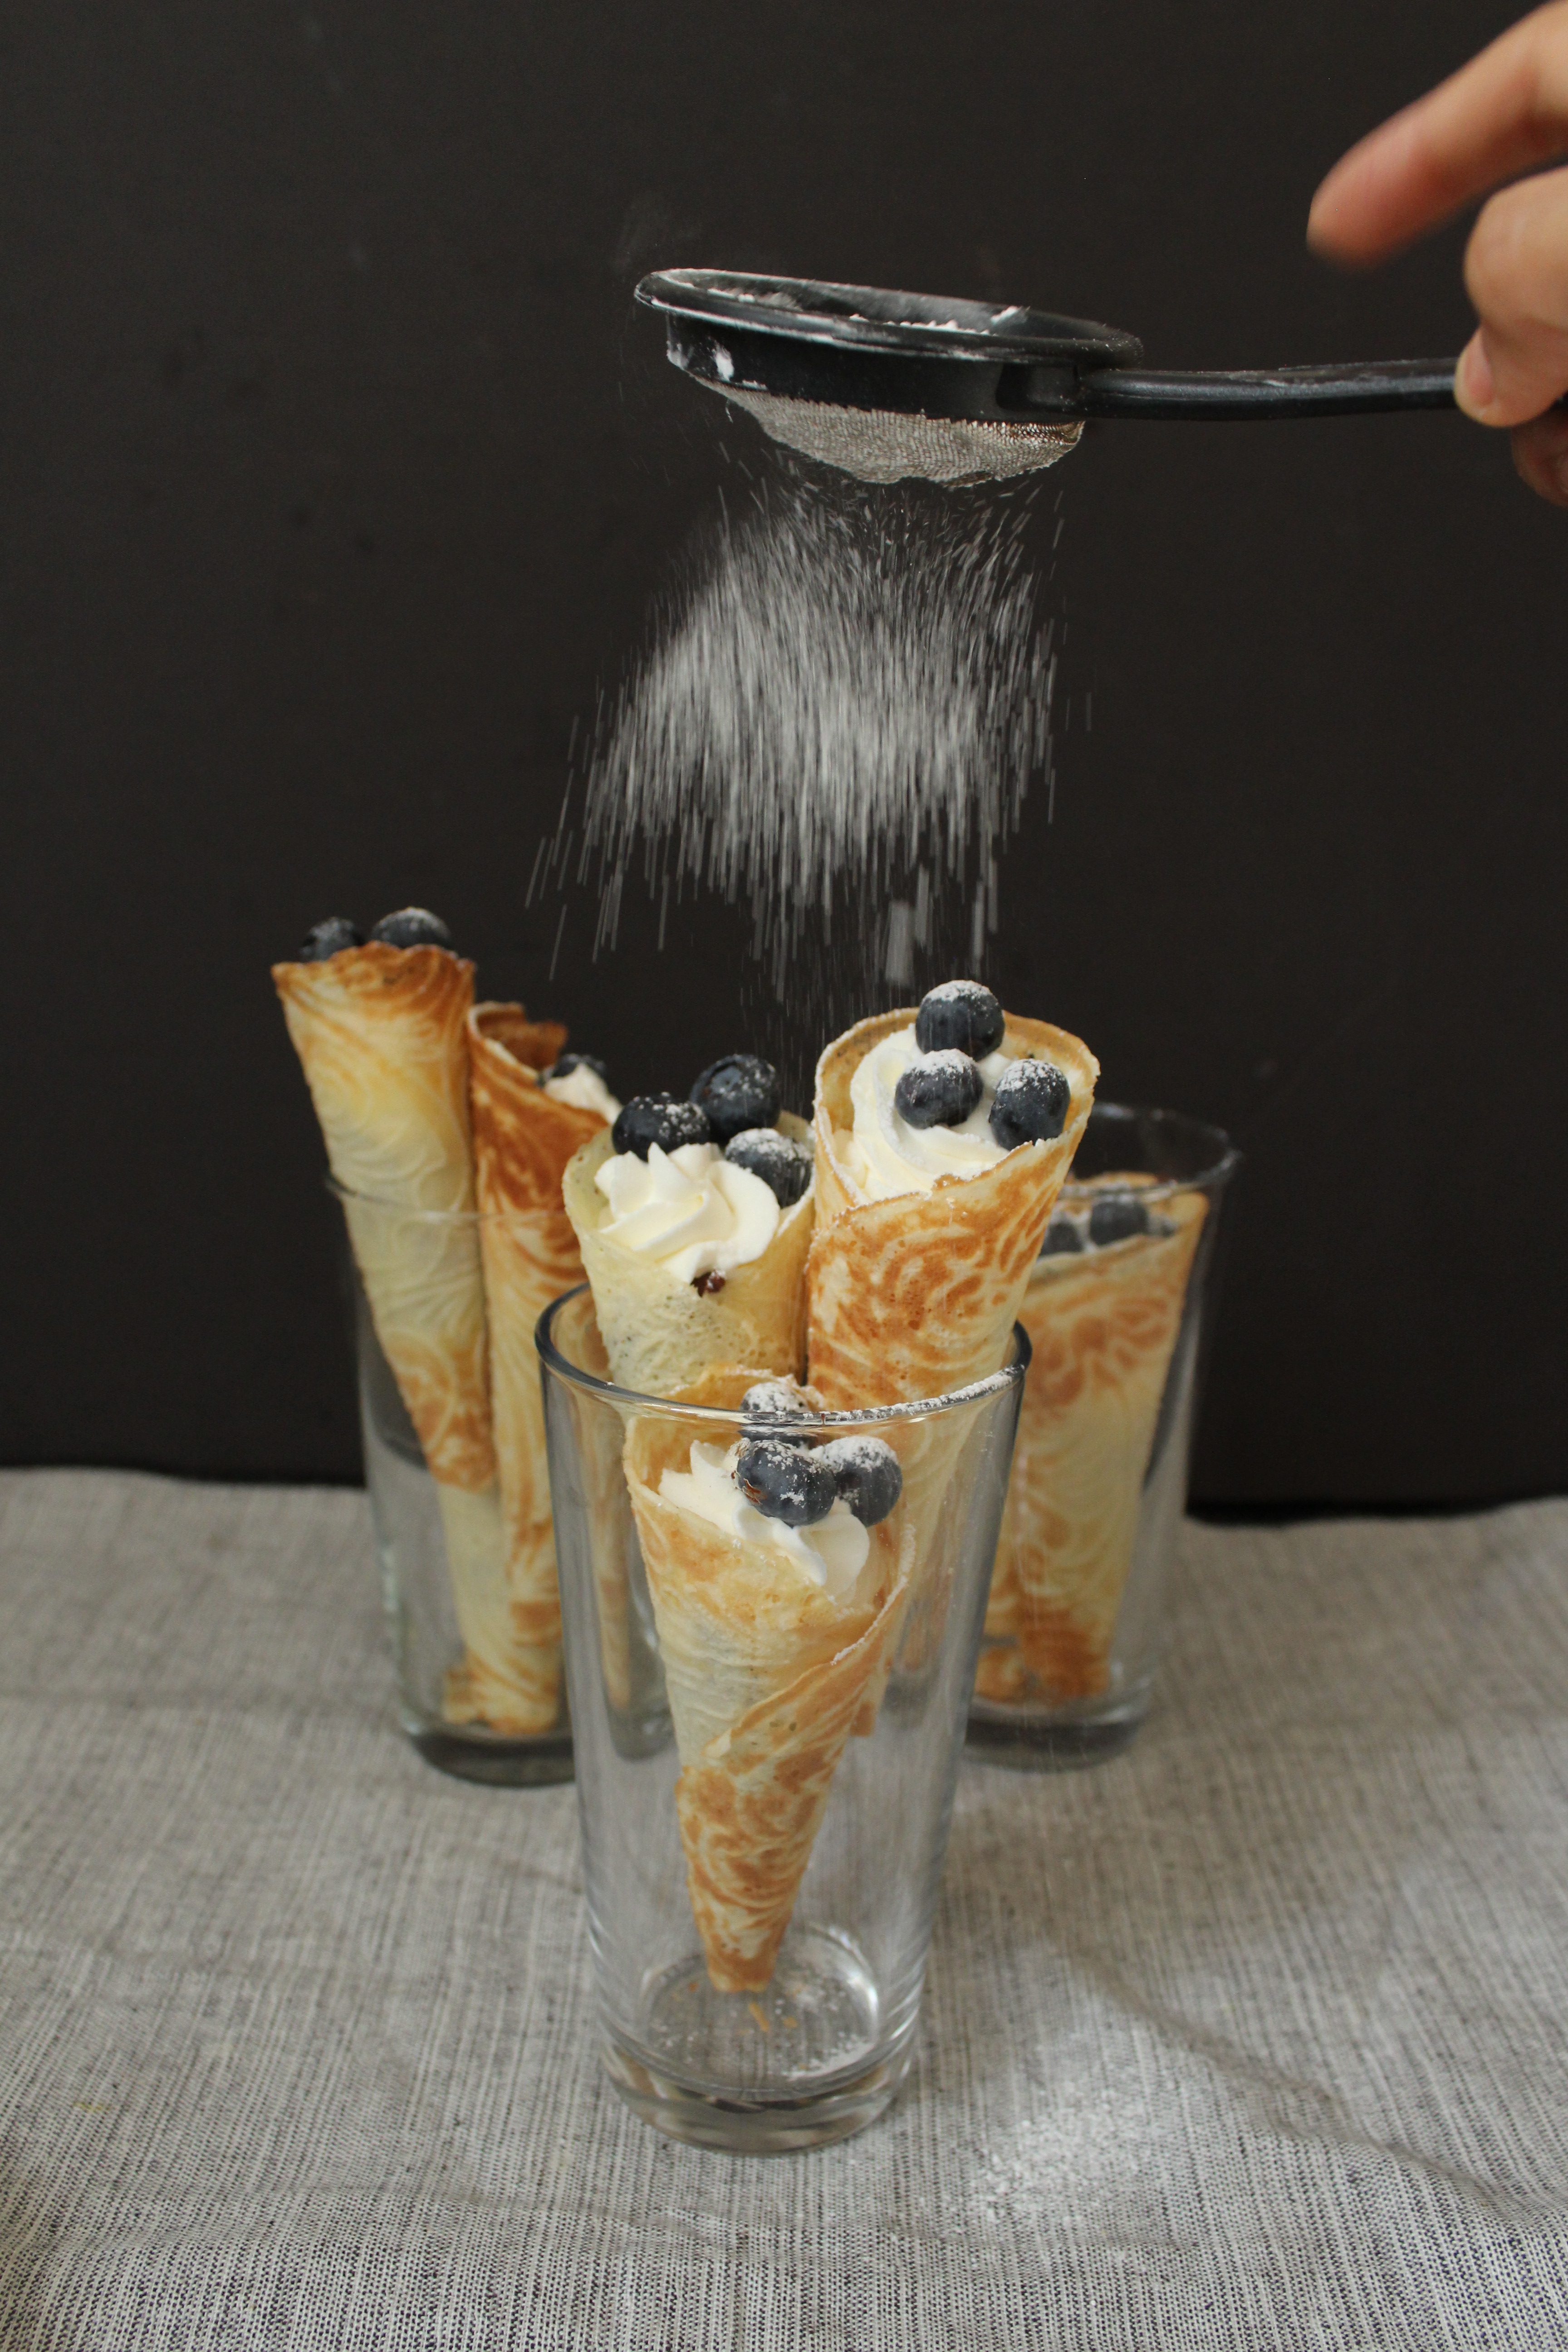
You can fill them with pretty much anything you like! Whipped cream, pastry cream, fresh fruit, ice cream. I opted for a dark chocolate ganache, whipped cream, blueberries and powdered sugar. They are delicious on their own, as well!
They are delicate, so take care handling them after they’ve dried. I found it easier to fill and decorate by placing them in tall glasses. Serve on a nice wooden platter and enjoy immediately!
Ingredients
- 2/3 stick (5 tbsp) unsalted butter
- 2/3 cup granulated sugar
- pinch salt
- 2 eggs
- 2/3 cup milk
- 1 cup all purpose flour
- 1/2 tsp vanilla extract
- chocolate ganache (optional)
- whipped cream (optional)
- blueberries (optional)
Directions
- Melt the butter in a double boiler (a heat proof bowl set over a saucepan of simmering water, not allowing the water to touch the bottom of the bowl), careful not to let it brown or get too hot. Add sugar + salt and beat on high speed with a handheld electric mixer until well combined. Add eggs one at a time and blend until mixture is a pale yellow color. Add milk, alternating with flour until all ingredients are combined. Add vanilla. Batter should be thick but drip off the spoon easily.
- Plug in your krumkake maker and set the color number to 4. Set out a kitchen towel and rolling cone. Spray the inside with non stick cooking spray. The red “baking” light will turn on. When the light changes to green (“ready”), drop 1tbsp of batter in the center. Close the lid and snap the latch shut. The light will switch back to red and when done, green again. Use tongs to carefully remove the krumkake and place over the cone, aligning the center of the krumkake along the length of the cone. Roll to form a cone and allow to set while working on the next one.
- Repeat (no need to spray additional spray) and remove previous krumkake from shaping cone. Adjust the color if you prefer a lighter krumkake*.
- When all the krumkakes have dried and keep their shape, place in tall glasses to fill. Fill with puddings, whipped cream, chocolate ganache and/or fresh fruit for a delicate, wonderful and tasty dessert.
*My manual suggests a setting of 2.5 but I was getting zero color at that setting.
Eton Mess

Eton Mess aka Eat-A-Mess. Named for the school where it was first served – Eton College, presumably in the mess hall. For some reason I am surprised when people aren’t familiar with this dessert. I mean, didn’t everyone watch the episode of Barefoot Contessa when Ina Garten cooked a charity luncheon for Alec Baldwin and the lady from Law and Order?? I mean, she made Alec buy her groceries from a farm stand. CLASSIC INA.

I made this dessert for the first time this week, for a small party I catered for Sukoon Active – a modest athletic wear company. They had their Kickstarter Launch Party and I was there serving up mocktails and small bites. Catering is a lot of work, but so much fun!
Traditionally made with strawberries, Ina adds a twist by making a raspberry compote. I didn’t think I was a fan of raspberry desserts until I tried this. Wow – it is so delicious I sometimes steal a spoonful of the stuff when nobody’s looking. I omitted the Framboise (raspberry liqueur) from the original recipe, and it still came out great. The tartness from the lemon juice, the flavor of the raspberries, and the sweetness of the sugar all play the most amazing balancing act. Add that to whipped cream and crushed meringues, and it’s essentially a play on my pavlova. Nothing beats the textures and flavors of the three ingredients combined. It was definitely a hit at the party!

I copped out when making this dessert a second time. I used the whipped cream from a can because I ran out of heavy cream. Don’t judge!
Recipe adapted from Ina Garten.
Ingredients
- 4 6oz. packages of raspberries
- 1 cup plus 3 tbsp sugar
- 1 tbsp freshly squeezed lemon juice
- 1 1/2 cups cold heavy cream
- 1 tsp vanilla extract
- 1 cup crushed meringues (available at Trader Joe’s and sometimes by the deli section of my local grocery)
Directions
- Combine 2 packages raspberries, 1 cup sugar and 1 tbsp lemon juice in a medium saucepan. Crush the berries lightly with a fork and cook over medium high heat until the mixture comes to a boil. Lower the heat and cook for about 10 minutes until the mixture thickens. Turn off the heat and add the remaining two packages raspberries. Fold into the mixture gently then refrigerate until very cold.
- In the bowl of your stand mixer or in a large bowl with a handheld mixture, beat cream with 3 tbsp sugar and vanilla until stiff peaks form.
- To crush the meringues, place them in a large ziploc bag and close tightly. Bang them with a rolling pin or something similar until you get small pieces.
- Layer about 1 tablespoon of the whipped cream, 1 tbsp raspberry compote and 1 tsp crushed meringues in a dessert cup or glass. Top off with whipped cream and enjoy immediately.
Tiramisu
Tiramisu is the rare dessert that can compete with chocolate anything. And, no, the dusting of cocoa powder on top does not a chocolate dessert make. Fluffy zabaglione – an italian custard composed of raw eggs, sugar and usually some flavoring, layered with espresso or coffee soaked ladyfingers. It is the most delicious no-bake dessert you can whip up. Though, not in a snap. This dessert is best served cold, having spent the previous night in the fridge. The hardest part of this recipe, is the wait. Yes, my husband dug into his birthday tiramisu about 3o minutes after I assembled it. And yes, he enjoyed it. But you can bet when he had it the next day, the MMM! reverberated around the apartment.
For some reason, it’s hard to come by a tiramisu in this country without some sort of liqueur or marsala. Same goes for the top tiramisu recipes online. But I can’t recall having a single tiramisu during my time in Italy that was made with alcohol. Unless my memory serves me wrong. However, my suspicion that traditional tiramisu is not made with alcohol was confirmed with the recipe of the ladyfingers package. Then again, tira-mi-su does mean pick-me-up. Either way – this is an alcohol free recipe for those of you desiring one.
The whipped cream is something I added in lieu of a whipped egg white that the original recipe suggests. When has a cup of cream, whipped, hurt anything (except the needle on the scale?). For tips on whipping cream no matter what kitchen equipment you have, check out this helpful how-to.
I also used regular ol’ brewed coffee. My espresso machine was decommissioned ages ago. My limited NY kitchen counter space could not accommodate it. So regular brewed coffee it is – and trust me, you do not miss a thing.
Ingredients
- 5 egg yolks
- 1/2 cup sugar
- 16 oz mascarpone cheese, at room temp
- 1 cup heavy cream, chilled
- 2 cups brewed coffee
- about 18 ladyfingers, available at Italian groceries, more if you are using a longer pan
- cocoa powder, for dusting
Directions
- Using a stand mixer or hand held electric beater, beat egg yolks and sugar in a large bowl until pale yellow. Add mascarpone and continue beating until well blended.
- In a separate bowl, whip cream until soft peaks form. Add the cream to the egg and mascarpone mixture, by folding gently with a spatula so as not to deflate the whipped cream.
- Carefully pour coffee onto a plate with raised edges. In a square dish, spread 1/3 of the cream mixture along the bottom. Briskly dip a ladyfinger into the coffee, and place it on top of the cream, repeating with more ladyfingers until they are arranged in a single layer (see above pictures). Spread half of the remaining cream on top of the ladyfingers. Continue by soaking the remaining ladyfingers briefly in the coffee and arranging them on top of the second cream layer. Spread the remaining cream on top. Dust the top with cocoa powder. Let chill in the refrigerator for at least 6 hours. It’s best the next day.
Chocolate Pavlova
 This is for my friend Aaisha of BakingPartTime. Last time she was over for a brunch party at our place, I made two pavlovas – one classic and one chocolate. I’ve posted the classic recipe before, but this time around I’m serving up the chocolate version.
  By the way, can you tell we are crazy about pavlovas around here? If you haven’t had one – it’s high time to try. They hail from New Zealand, where my husband spent a good part of his teenage years. I love this man more than anything, but I love him a wee bit more for introducing me to this dessert. A welcome change of pace from cakes or cookies. Much easier to prepare than a pie. They are just the most perfect dessert to have in your arsenal. They are a winner presentation wise, as well. They just have the wow factor, but are deceptively easy to assemble, kind of like a trifle. You just whip up some egg whites with sugar. Bake it low and slow for 45 min to 1 hour. Once cooled, top with whipped cream and fruit (or chocolate).
  The original recipe suggests topping it with strawberries and chocolate sauce. I didn’t have strawberries on hand, or the time to assemble the chocolate sauce, so I just have the bare bones version here. If you haven’t worked with whipped egg whites before, you needn’t worry. Just have patience. They take a while to whip up to the right consistency, unlike whipped cream (which I’ve turned into butter many times just by looking away for a minute).
 If you’ve had plain meringues, then you might not think this dessert would amount to anything. Meringues have a tendency to be cloyingly sweet. But with the topping of just slightly sweetened cream, and the complexity of the chocolate (or in most cases a fruit topping), the combination of textures and flavors is just divine. The outside of the meringue is crisp. The inner part melts in your mouth, kind of like a marshmallow. The cream eases the sweetness and ties all the flavors together.
  The original recipe calls for superfine sugar – something I never have on hand – and for the chocolate in the meringue to be grated – something for which I have no patience. So, I swapped out superfine sugar for granulated sugar and was not in the least bit disappointed. I also finely chopped instead of grated the chocolate, which I think is for the best really. If you’re grating chocolate by hand, it’s going to melt all over your hands (which is probably not the worst problem to have).
  Don’t worry about the crackly appearance. I’ve tried every trick in the book for keeping it from cracking and nothing’s worked. Take comfort in the fact that it gets smothered and mostly concealed by the toppings. Feel free to top it with chopped strawberries, raspberries or even blackberries.
Adapted from Easy Desserts: Deliciously Indulgent Treats
Ingredients
- 4 large egg whites
- 1 cup granulated sugar plus 1 tbsp
- a pinch of salt
- 1 tsp cornstarch
- 1 tablespoon unsweetened cocoa
- 1 tsp vanilla extract
- 1 tsp white wine vinegar (or lemon juice)
- 4 oz. bittersweet chocolate, finely chopped
- 1 1/4 cup heavy cream
- semi sweet chocolate bar, for grating
Directions
- Preheat oven to 275 degrees F. Draw a 9 in circle on a piece of parchment paper. Place it pencil side down on a baking sheet and sprinkle on some cornstarch. Spread the cornstarch over the area of the circle.
- Whisk the egg whites and salt (preferably with your stand mixer or with a hand held electric mixer) until soft peaks form. Gradually add in 1 cup of the sugar. Whisk in the cornstarch, cocoa, vanilla and vinegar.
- Add the chopped chocolate and fold carefully. That is – take a rubber spatula, cut through the eggs whites down the middle, moving to the left, lift spatula from the bottom to the top. Rotate bowl, and repeat until chocolate is incorporated. See demonstration here.
- Bake in preheated oven for 45 minutes. Allow to cool.
- Whip cream until soft peaks form. Add sugar and continue beating, just shy of firm peaks. Top cooled pavlova with whipped cream, and garnish with grated semi sweet chocolate, if desired.
Sticky Toffee Pudding
 This is one of the rare cakes I love as much as a chocolate one. It’s not overly sweet like many caramel cakes I’ve had. It’s a super moist bundt cake that gets most of its flavor (and moisture) from chopped, pitted dates boiled in water. I know – that in itself does not sound appetizing. But it works. It’s not heavy on the butter (there’s only half a stick in the whole cake) so the whipped cream on top adds the right amount of richness. FInally, the nuttiness in the toffee sauce just takes it over the edge.
  Though I’m not sure why it’s called a pudding. It’s a cake, I swear. I was first asked to make this many Thanksgivings ago for dinner at a family friend’s. I’d never had it. Never known about it. I was handed a recipe, so I made it. And it. Was. Just. Divine.
  I remade it recently for a ladies’ luncheon (yeah, I live in the 1950’s). Needless to say, it was a hit. So you can imagine my surprise when I served my husband a piece of the leftovers…only to hear that he didn’t care for it! Just not a fan or caramel/toffee. Oh well. Tomato, tomahto.
  It’s perfect for post Ramadan if you have a ton of dates leftover and have run out of uses for them! I use Medjool dates. They’re nice and plump and sweet.
  I poke a few holes through the top with a toothpick to let the syrup soak through. And let me just say how much I love bundt cakes for entertaining. They always look so beautiful and with half the effort of a layer cake. No layer breaking or leveling or aligning. Just pop it out onto a nice serving plate and drizzle with icing. The cascade over the curves and in between the ridges always makes for a show stopper.
But let me interject here. The popping out part has not been so smooth for me (punnnnn!). I’ve had to stick back parts of the cake that stuck to the top of the bundt pan and try to cover it with icing. I don’t know if you’re in the same boat, but I’ve actually had better luck recently! I don’t know if it’s because of the generous buttering of the pan that I do by hand (and subsequent flouring) or if it’s the fact that I’ve been letting it completely cool (overnight) before turning out. But I’d suggest you try both! 
Recipe from Bon Appetit
Ingredients
For the cake
- 1/4 cup (1/2 stick) unsalted butter, room temp, plus more for greasing the pan
- 1 1/2cups (or 6 oz) chopped, pitted dates
- 1 1/4 cups water
- 1 tsp baking soda
- 1 1/2 cups all purpose flour, sifted, plus more for the pan
- 1 tsp baking powder
- 1/2 tsp sea salt (I suppose the briny flavor complements the toffee better than table or kosher salt, but use whatever you have on hand)
- 1 cup sugar
- 1 tsp vanilla extract
- 2 large eggs
For the sauce
- 1 1/4 cups packed brown sugar
- 1/2 cup heavy cream
- 1/4 cup (1/2 stick) unsalted butter
- 1/2 tsp vanilla extract
Directions
- Preheat oven to 350 degrees Fahrenheit.
- In a medium saucepan, bring water and dates to a boil. Turn off heat and add baking soda. Take off the heat and let cool.
- Butter and grease your bundt pan.
- Whip butter in stand mixer or using an electric mixer. Add the sugar in slowly. Then vanilla. Then add 1 egg. Mix to combine. Add half of the flour mixture and half of the date mixture. Add the second egg. Finally, add the remaining flour mixture and date mixture.
- Bake in preheated oven for 40 to 45 minutes until a toothpick inserted comes out clean.
- For the sauce: bring the sugar, cream, and butter to boil in a small saucepan. Continue to boil while stirring constantly with a wooden spoon for 3 minutes. Turn off heat, add vanilla, and voila.
To serve: top with a dollop of whipped cream and a drizzle of the toffee sauce. Alternately, break off chunks with your hand in your groggy, kids-woke-me-up-too-early daze and eat to comfort yourself, as a sign that the day WILL get better.


