Kitchen3N

Recipes and food fun from Apt 3N

  • About
  • Gallery
  • Recipes

Small Chocolate Cake

December 24, 2017

img_0488
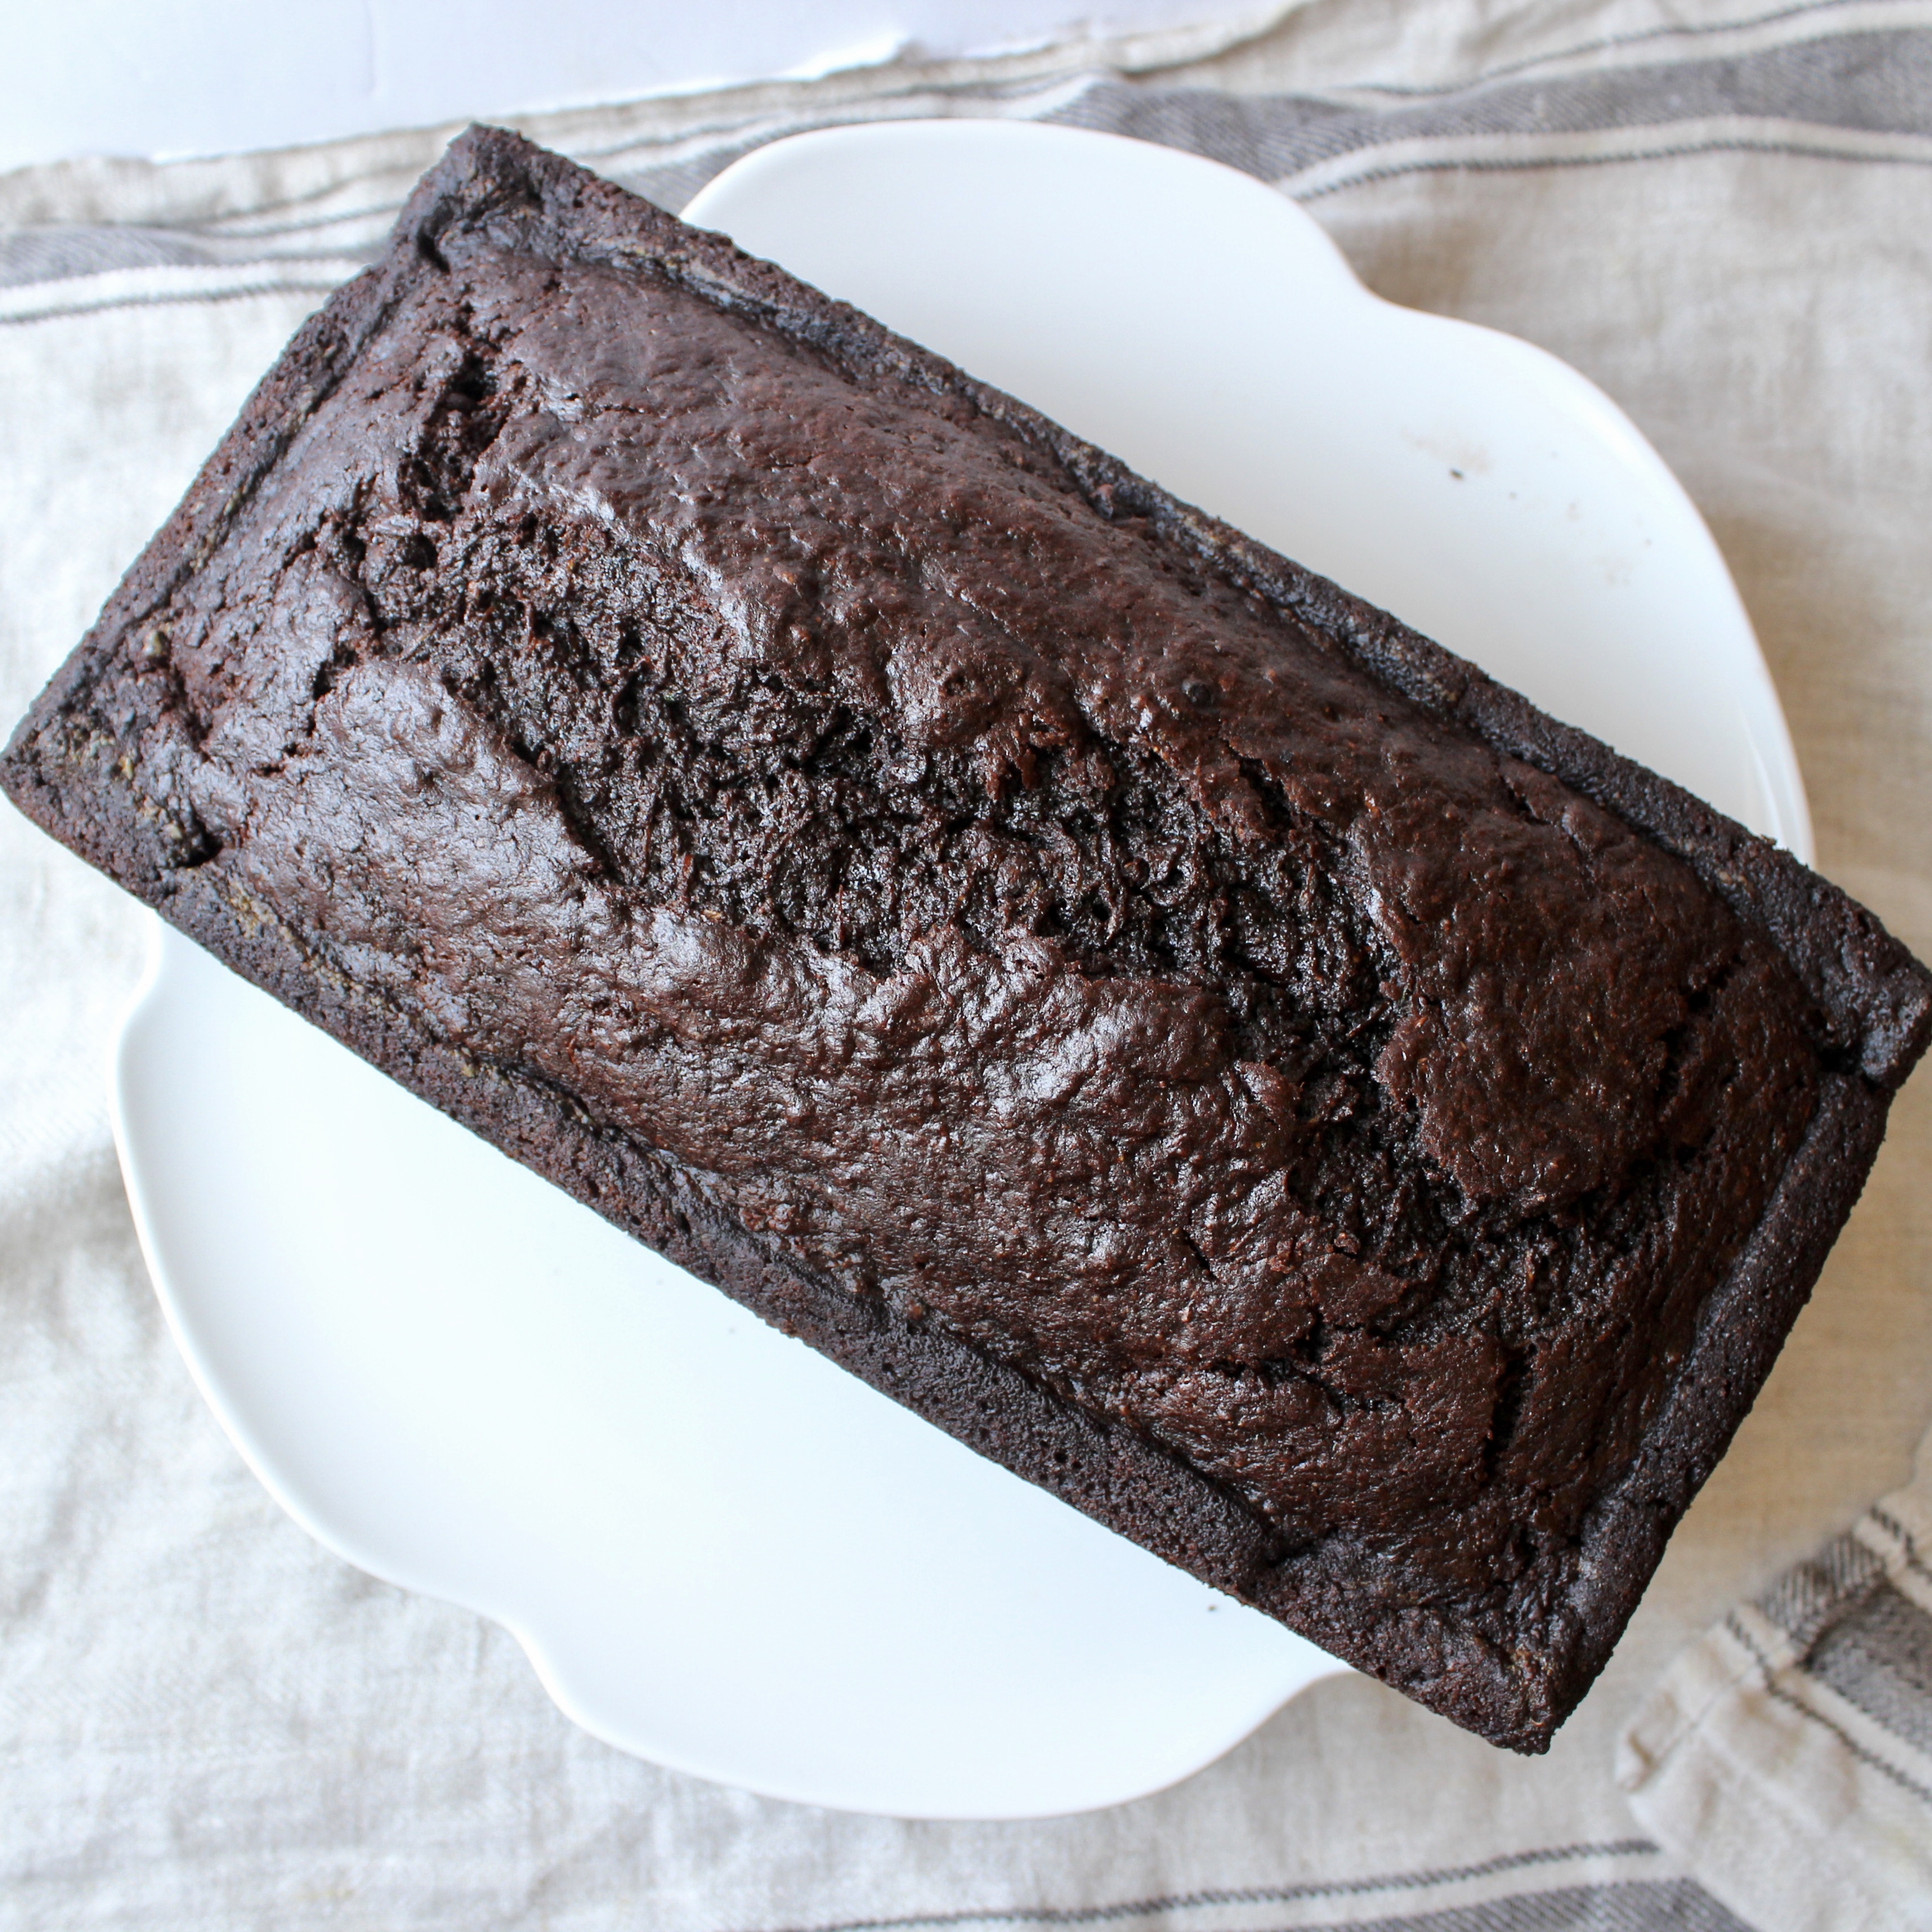
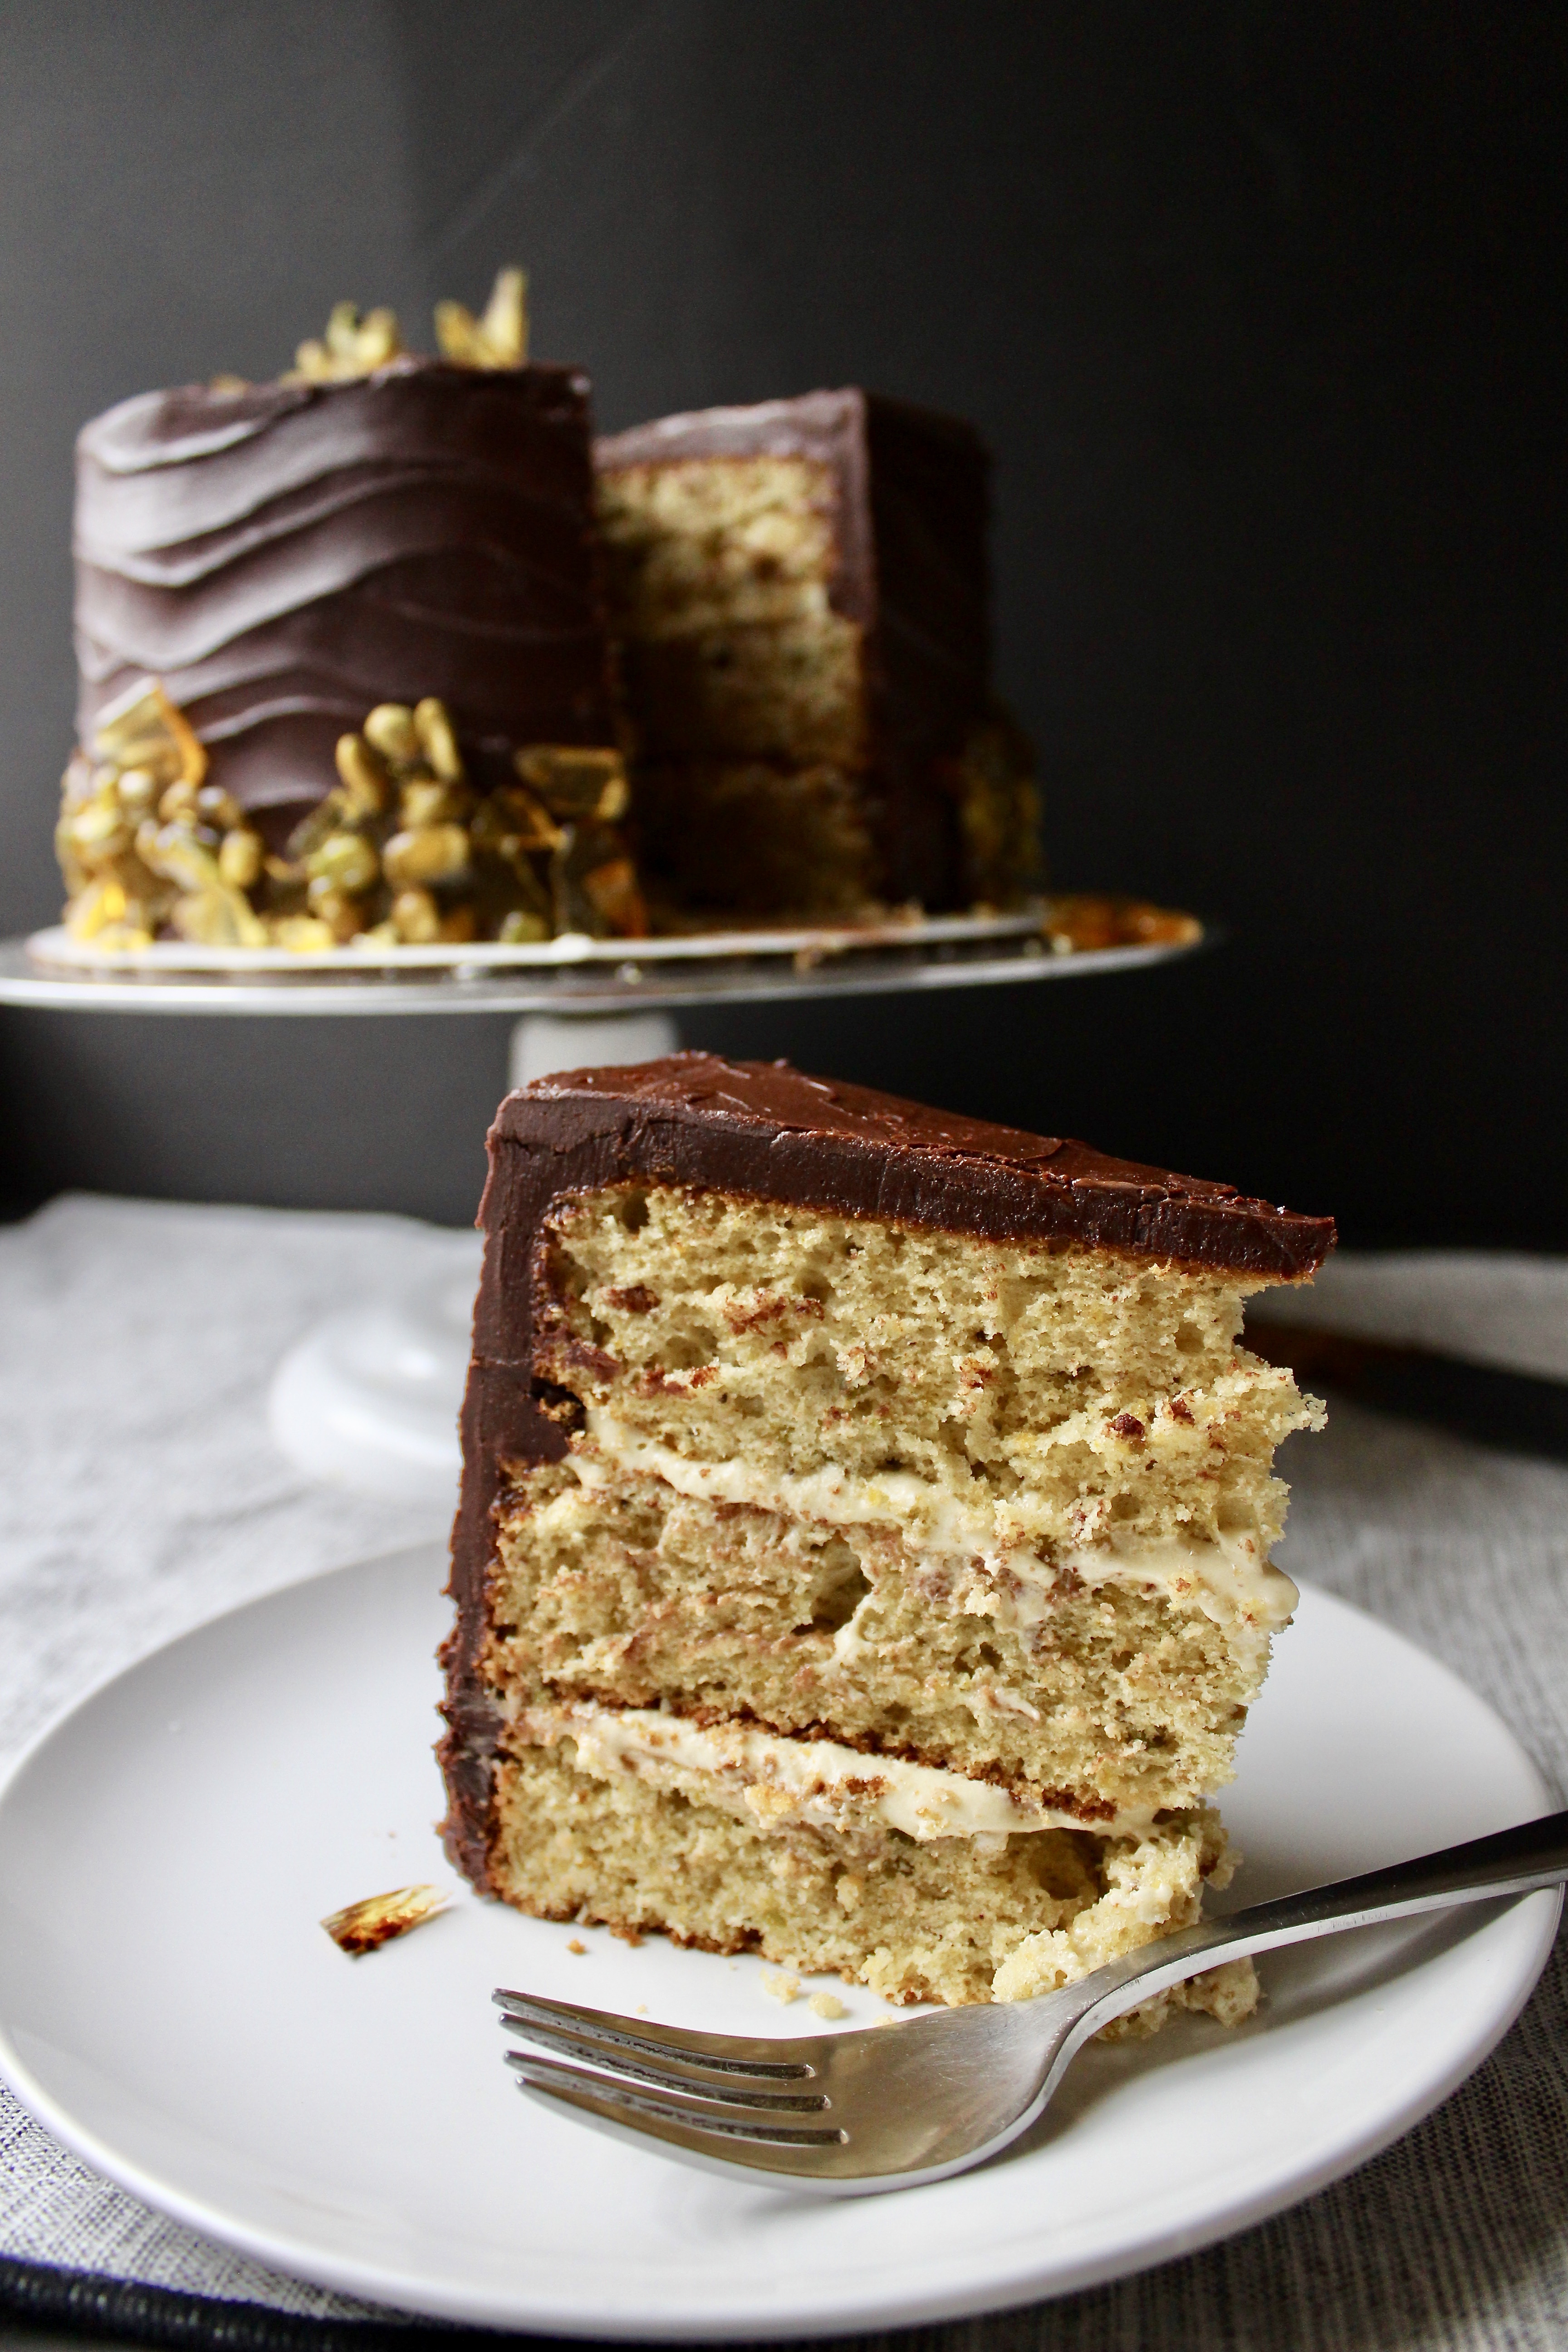
There are many a great chocolate cake recipes out there. Why, say you, post yet another? Take for example the great Beatty’s Chocolate cake recipe that I made for many years. All the elements of a great chocolate cake: good quality cocoa, buttermilk, coffee. The problem is, they’re quite big if you’re making something for an intimate gathering. I’ve learned an 8in cake feeds approximately 20 people, and 9 feeds about 25. So, if you’re looking for a small celebration cake for the family, this is the recipe for you. If you invest (~$20) in 3 6in round pans, you can have small, chic cakes any time. I always freeze my cake layers by inverting onto plastic wrap lined 6in cake board, then wrapping well with the plastic wrap. Small cakes can be kind of wobbly and difficult to decorate unless frozen solid. Then, let come to room temperature before serving.
img_0159
I also recommend using a good quality cocoa powder for your chocolate cakes. You don’t have to break the bank. Rodelle from Amazon is really good quality for a reasonable price. You’ll get 6 to 12 servings, depending on how big you cut each slice.
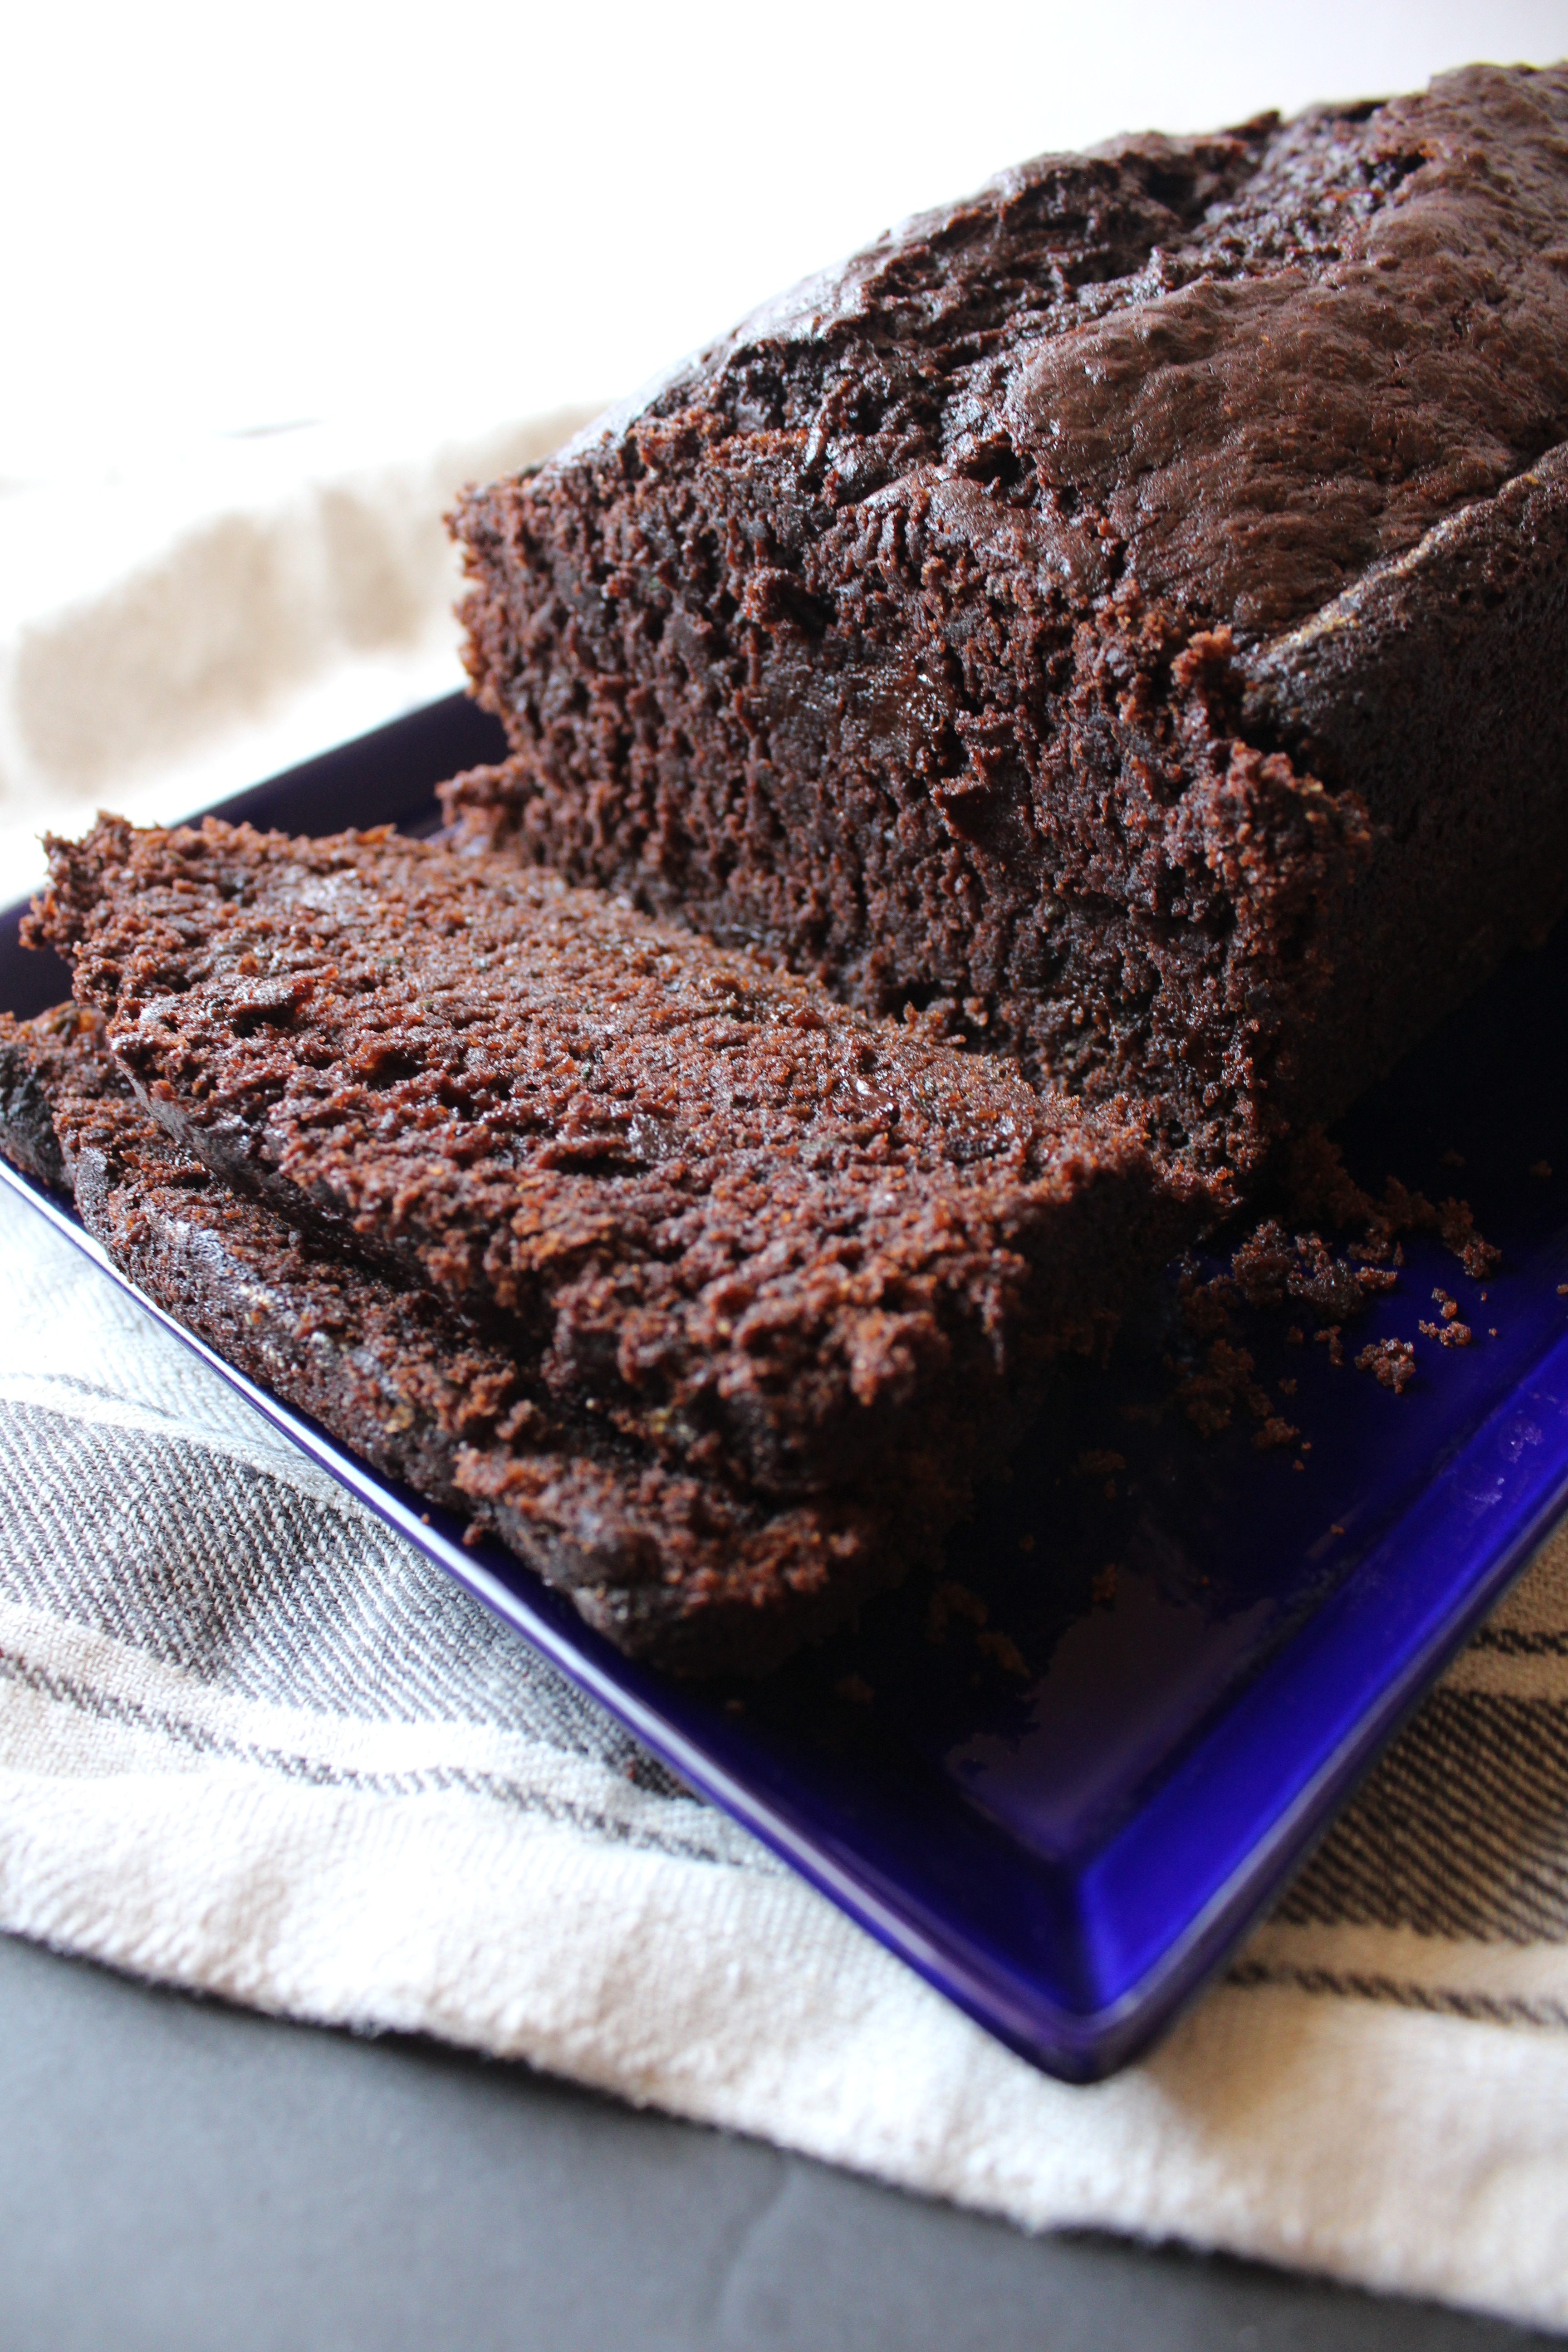
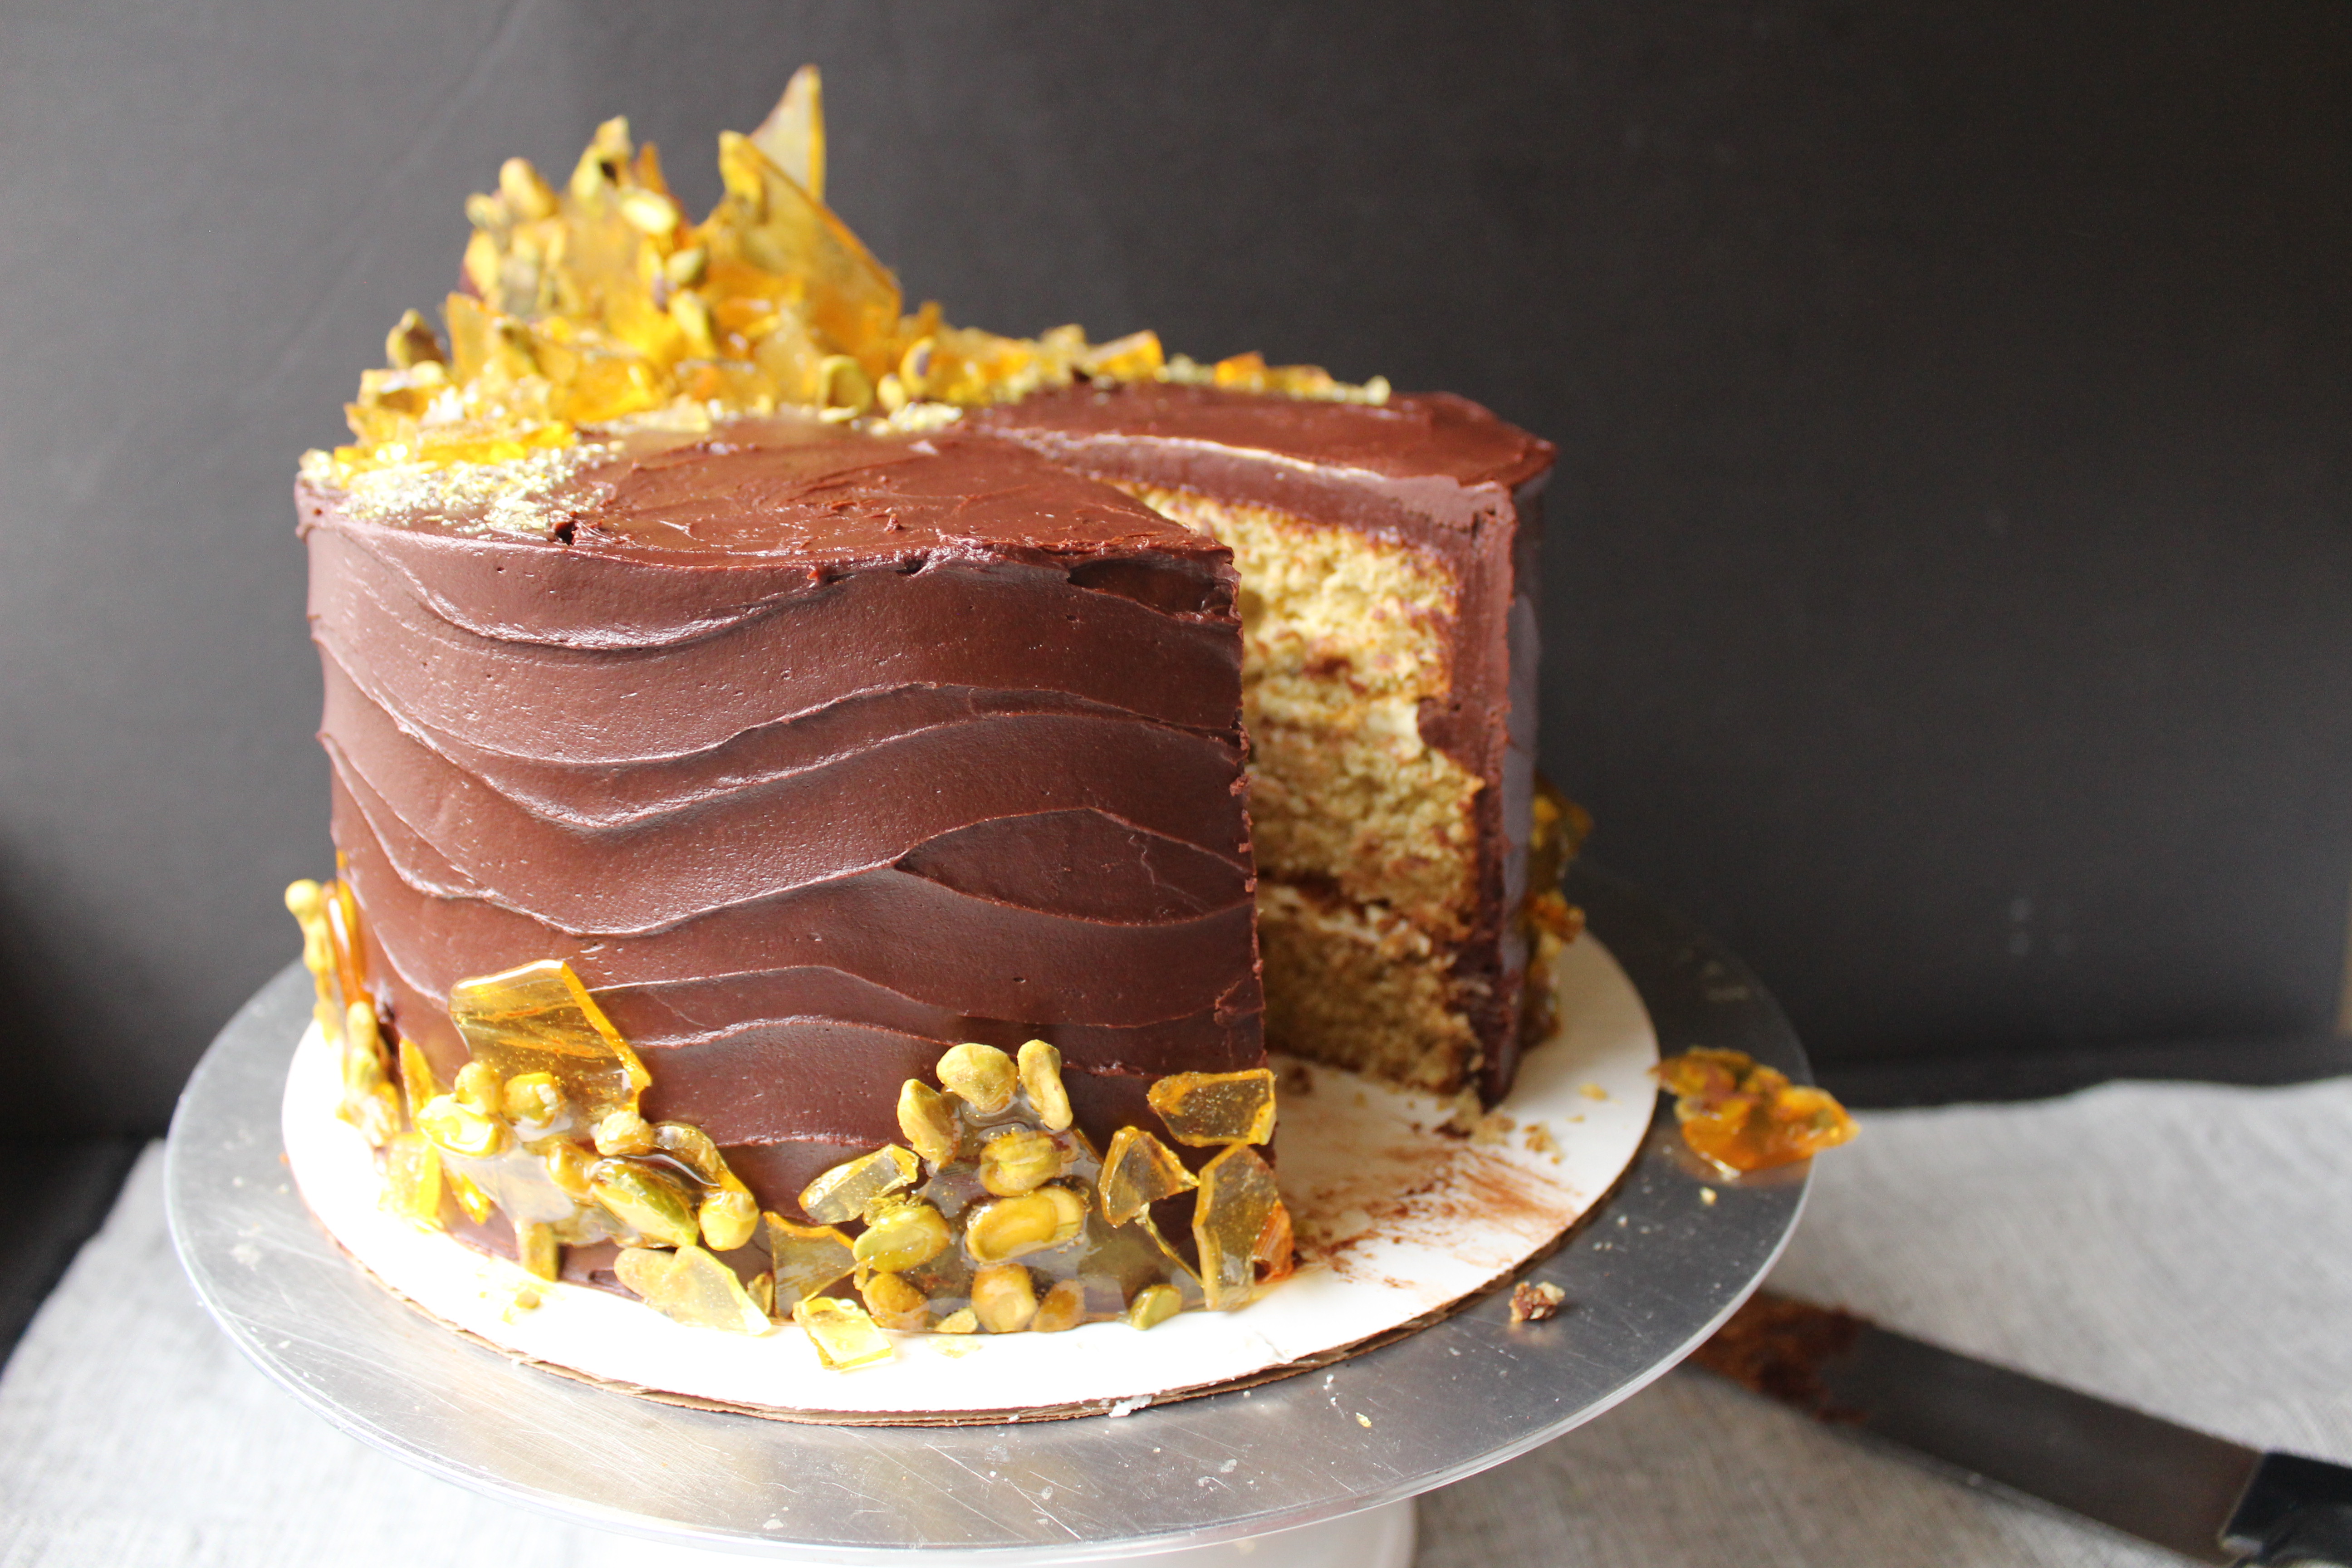
I always find the best chocolate cakes are the ones with coffee in the batter. The batter will be quite thin – don’t let this worry you. It makes for a wonderfully aromatic and moist cake – doesn’t taste like coffee or mocha at all.
fullsizeoutput_6cb5
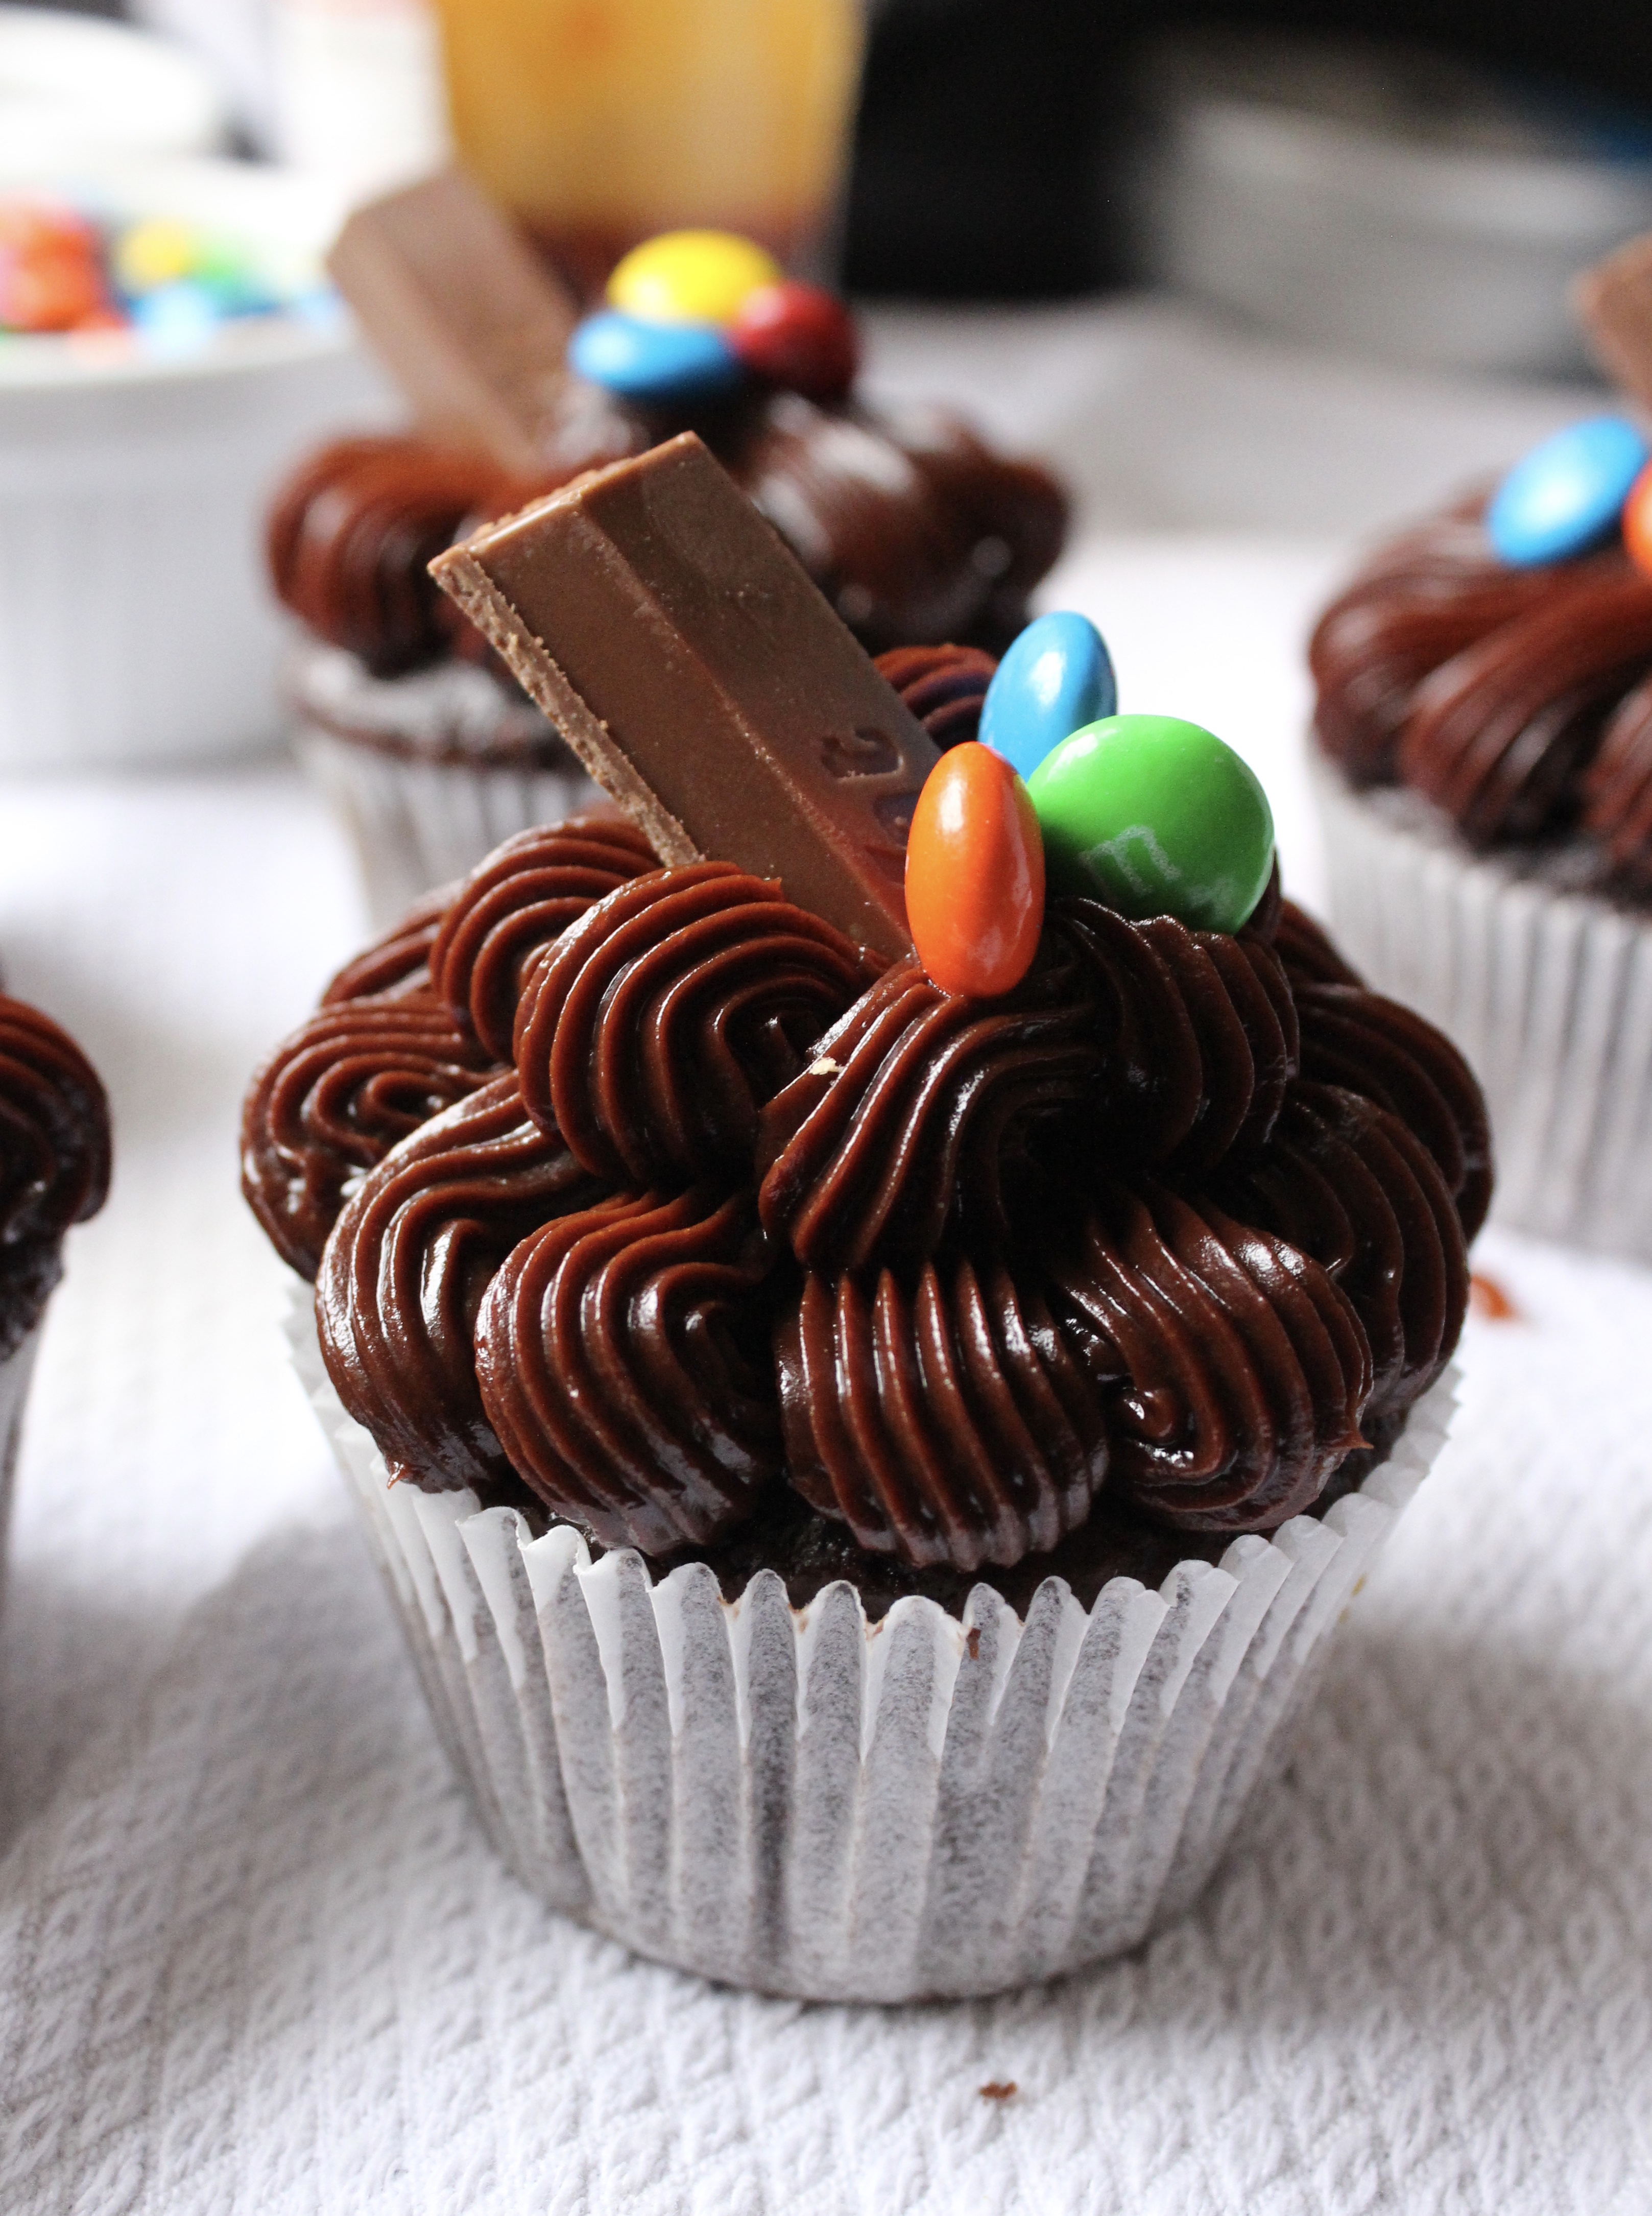
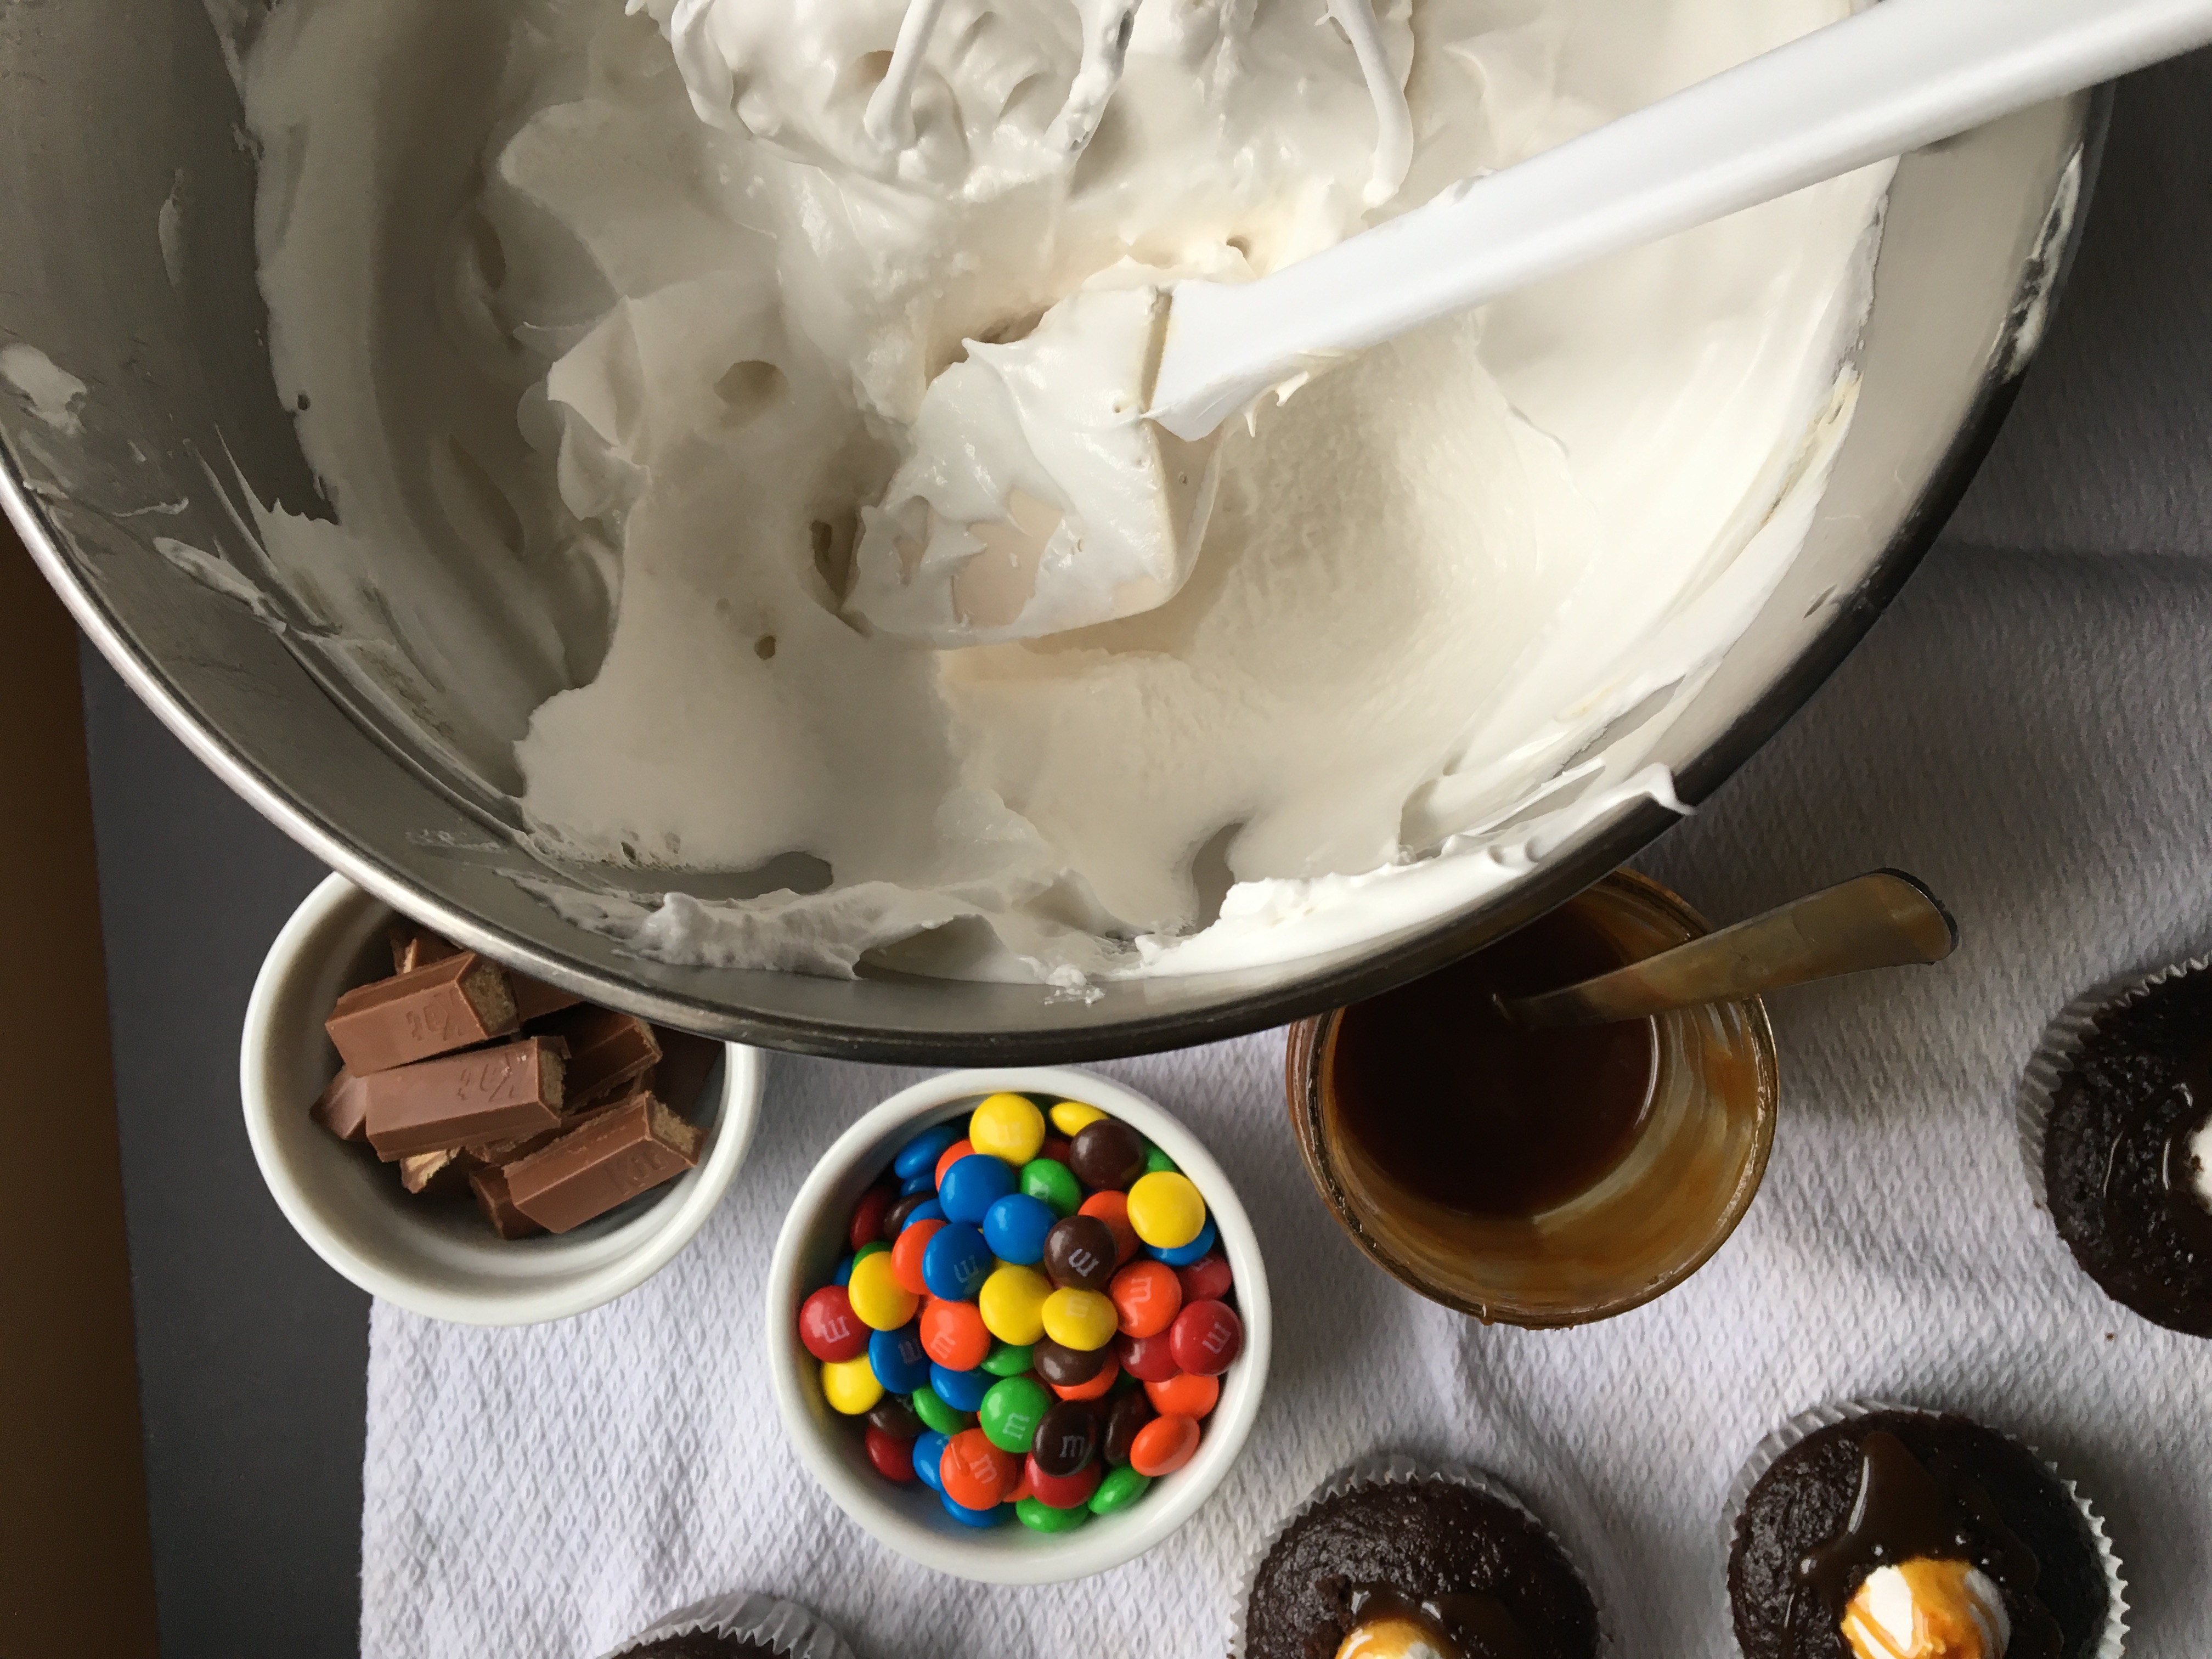
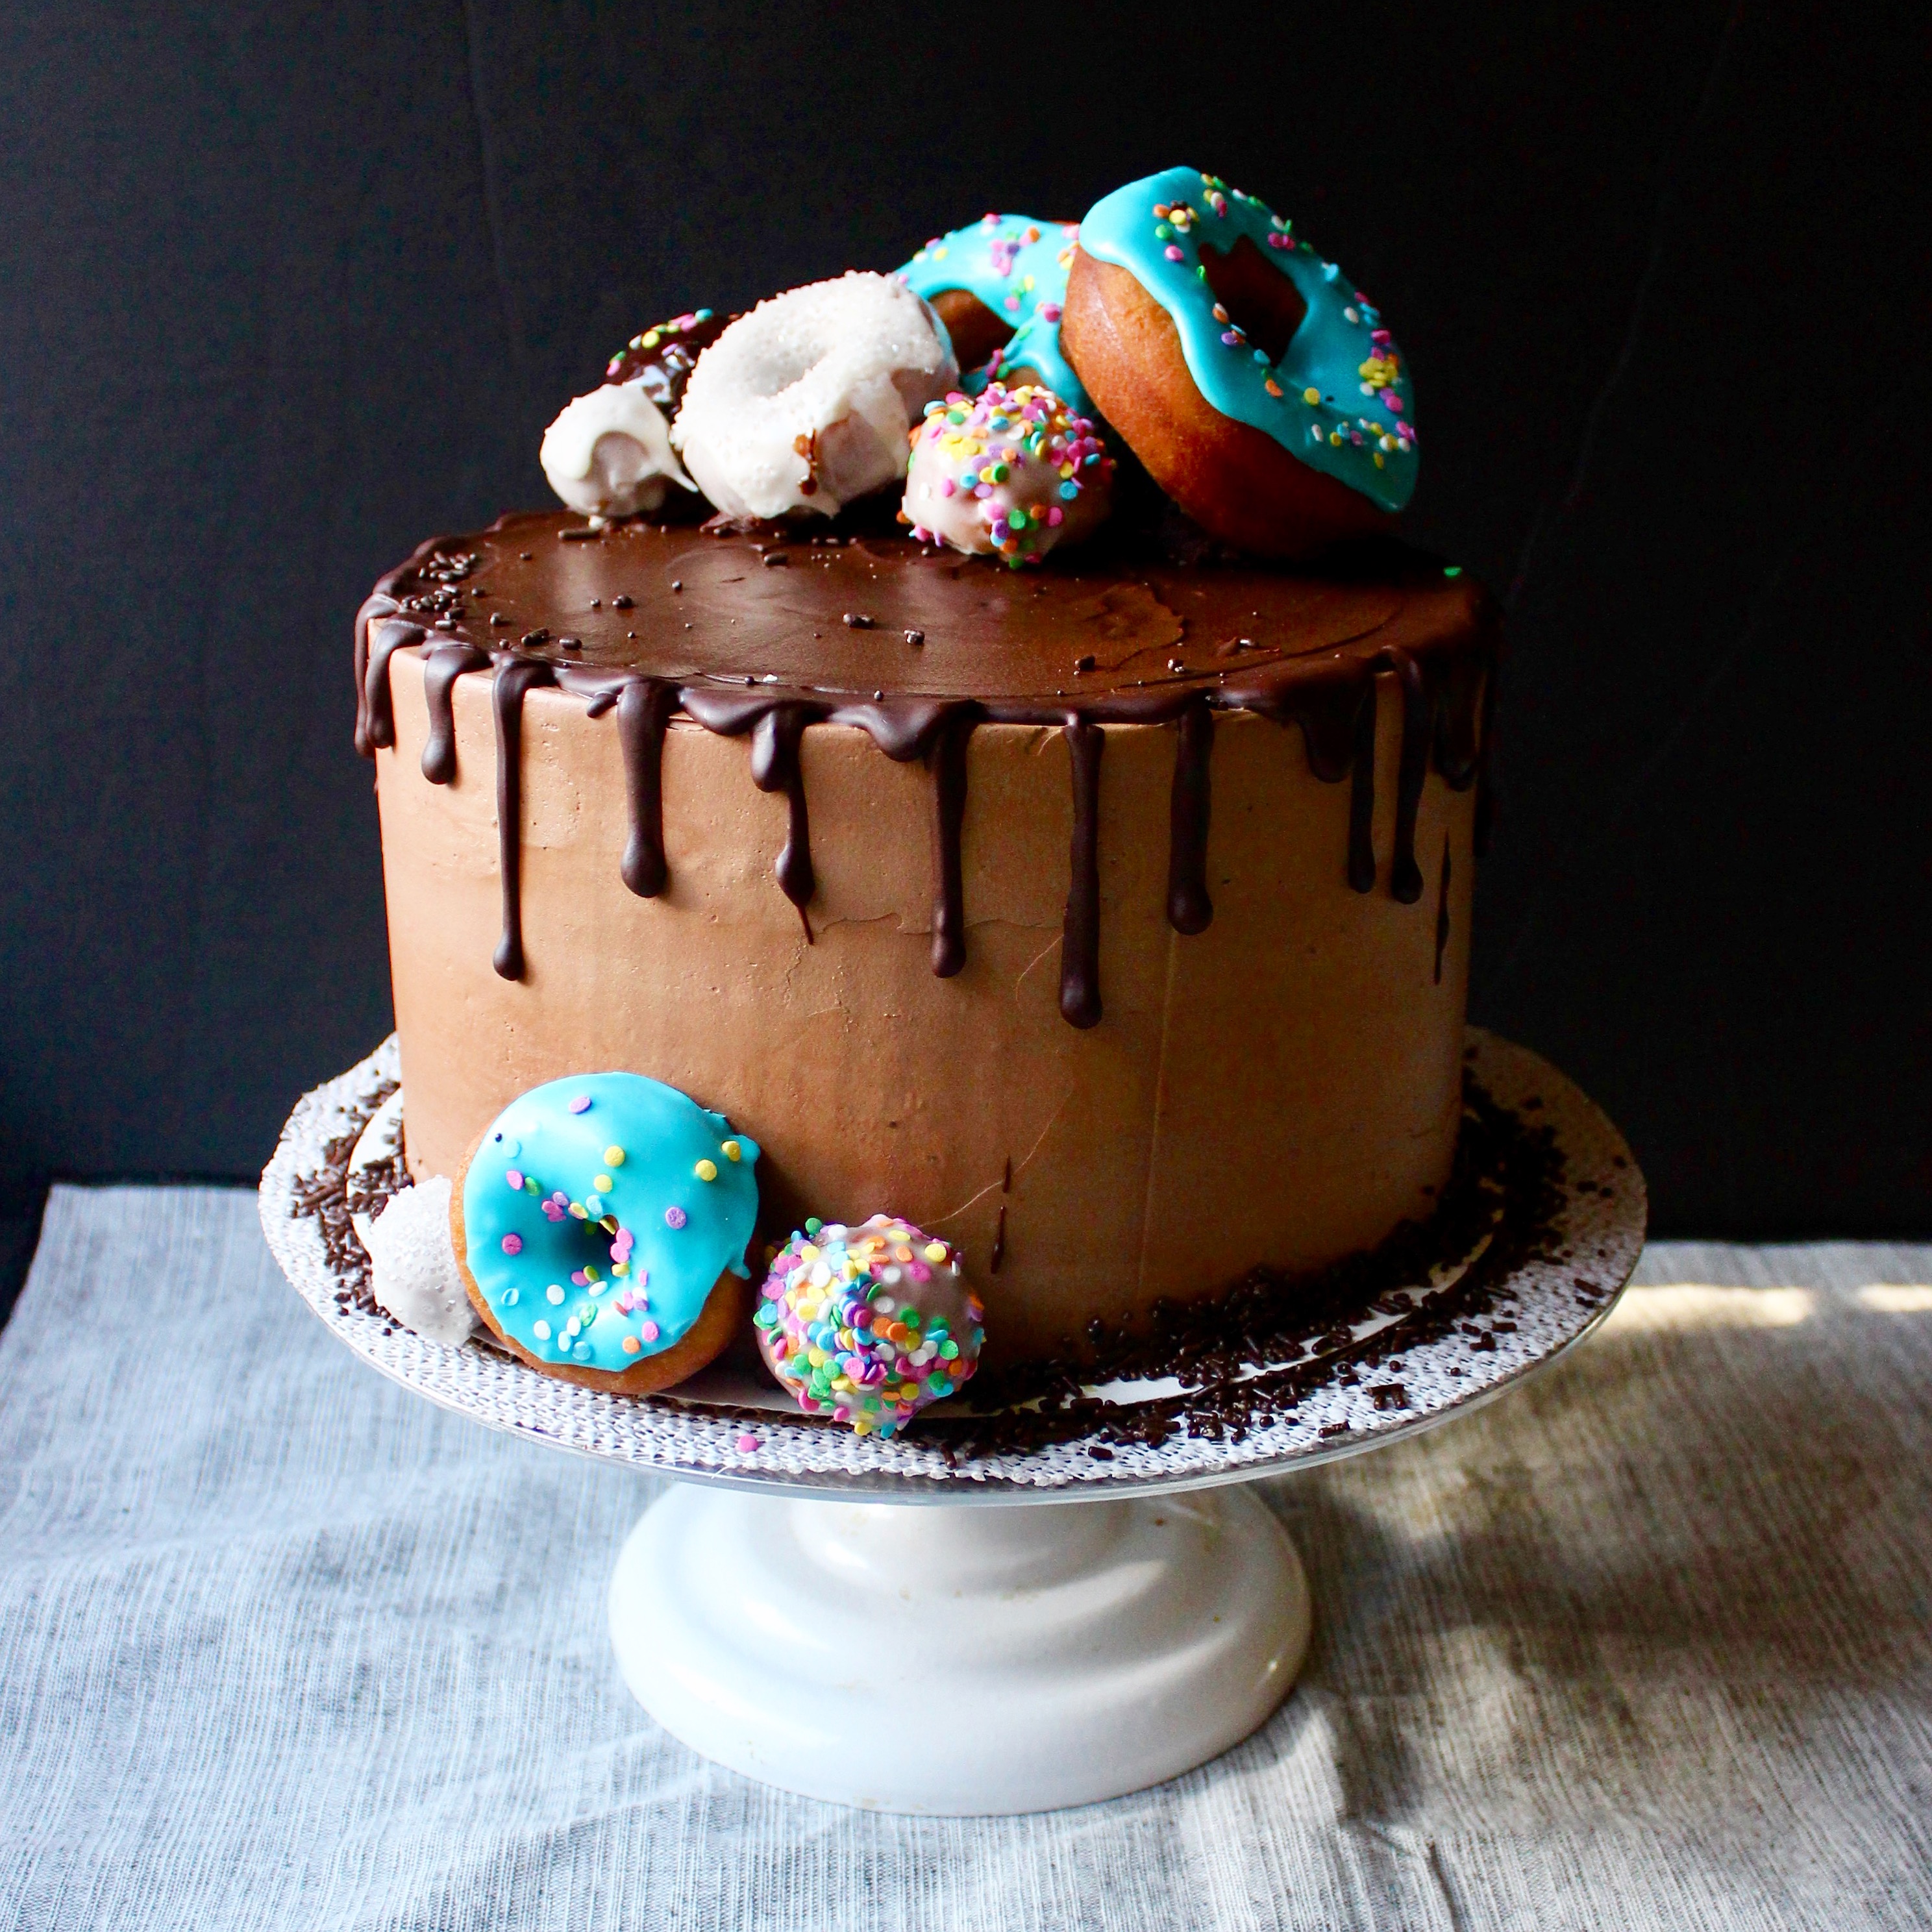
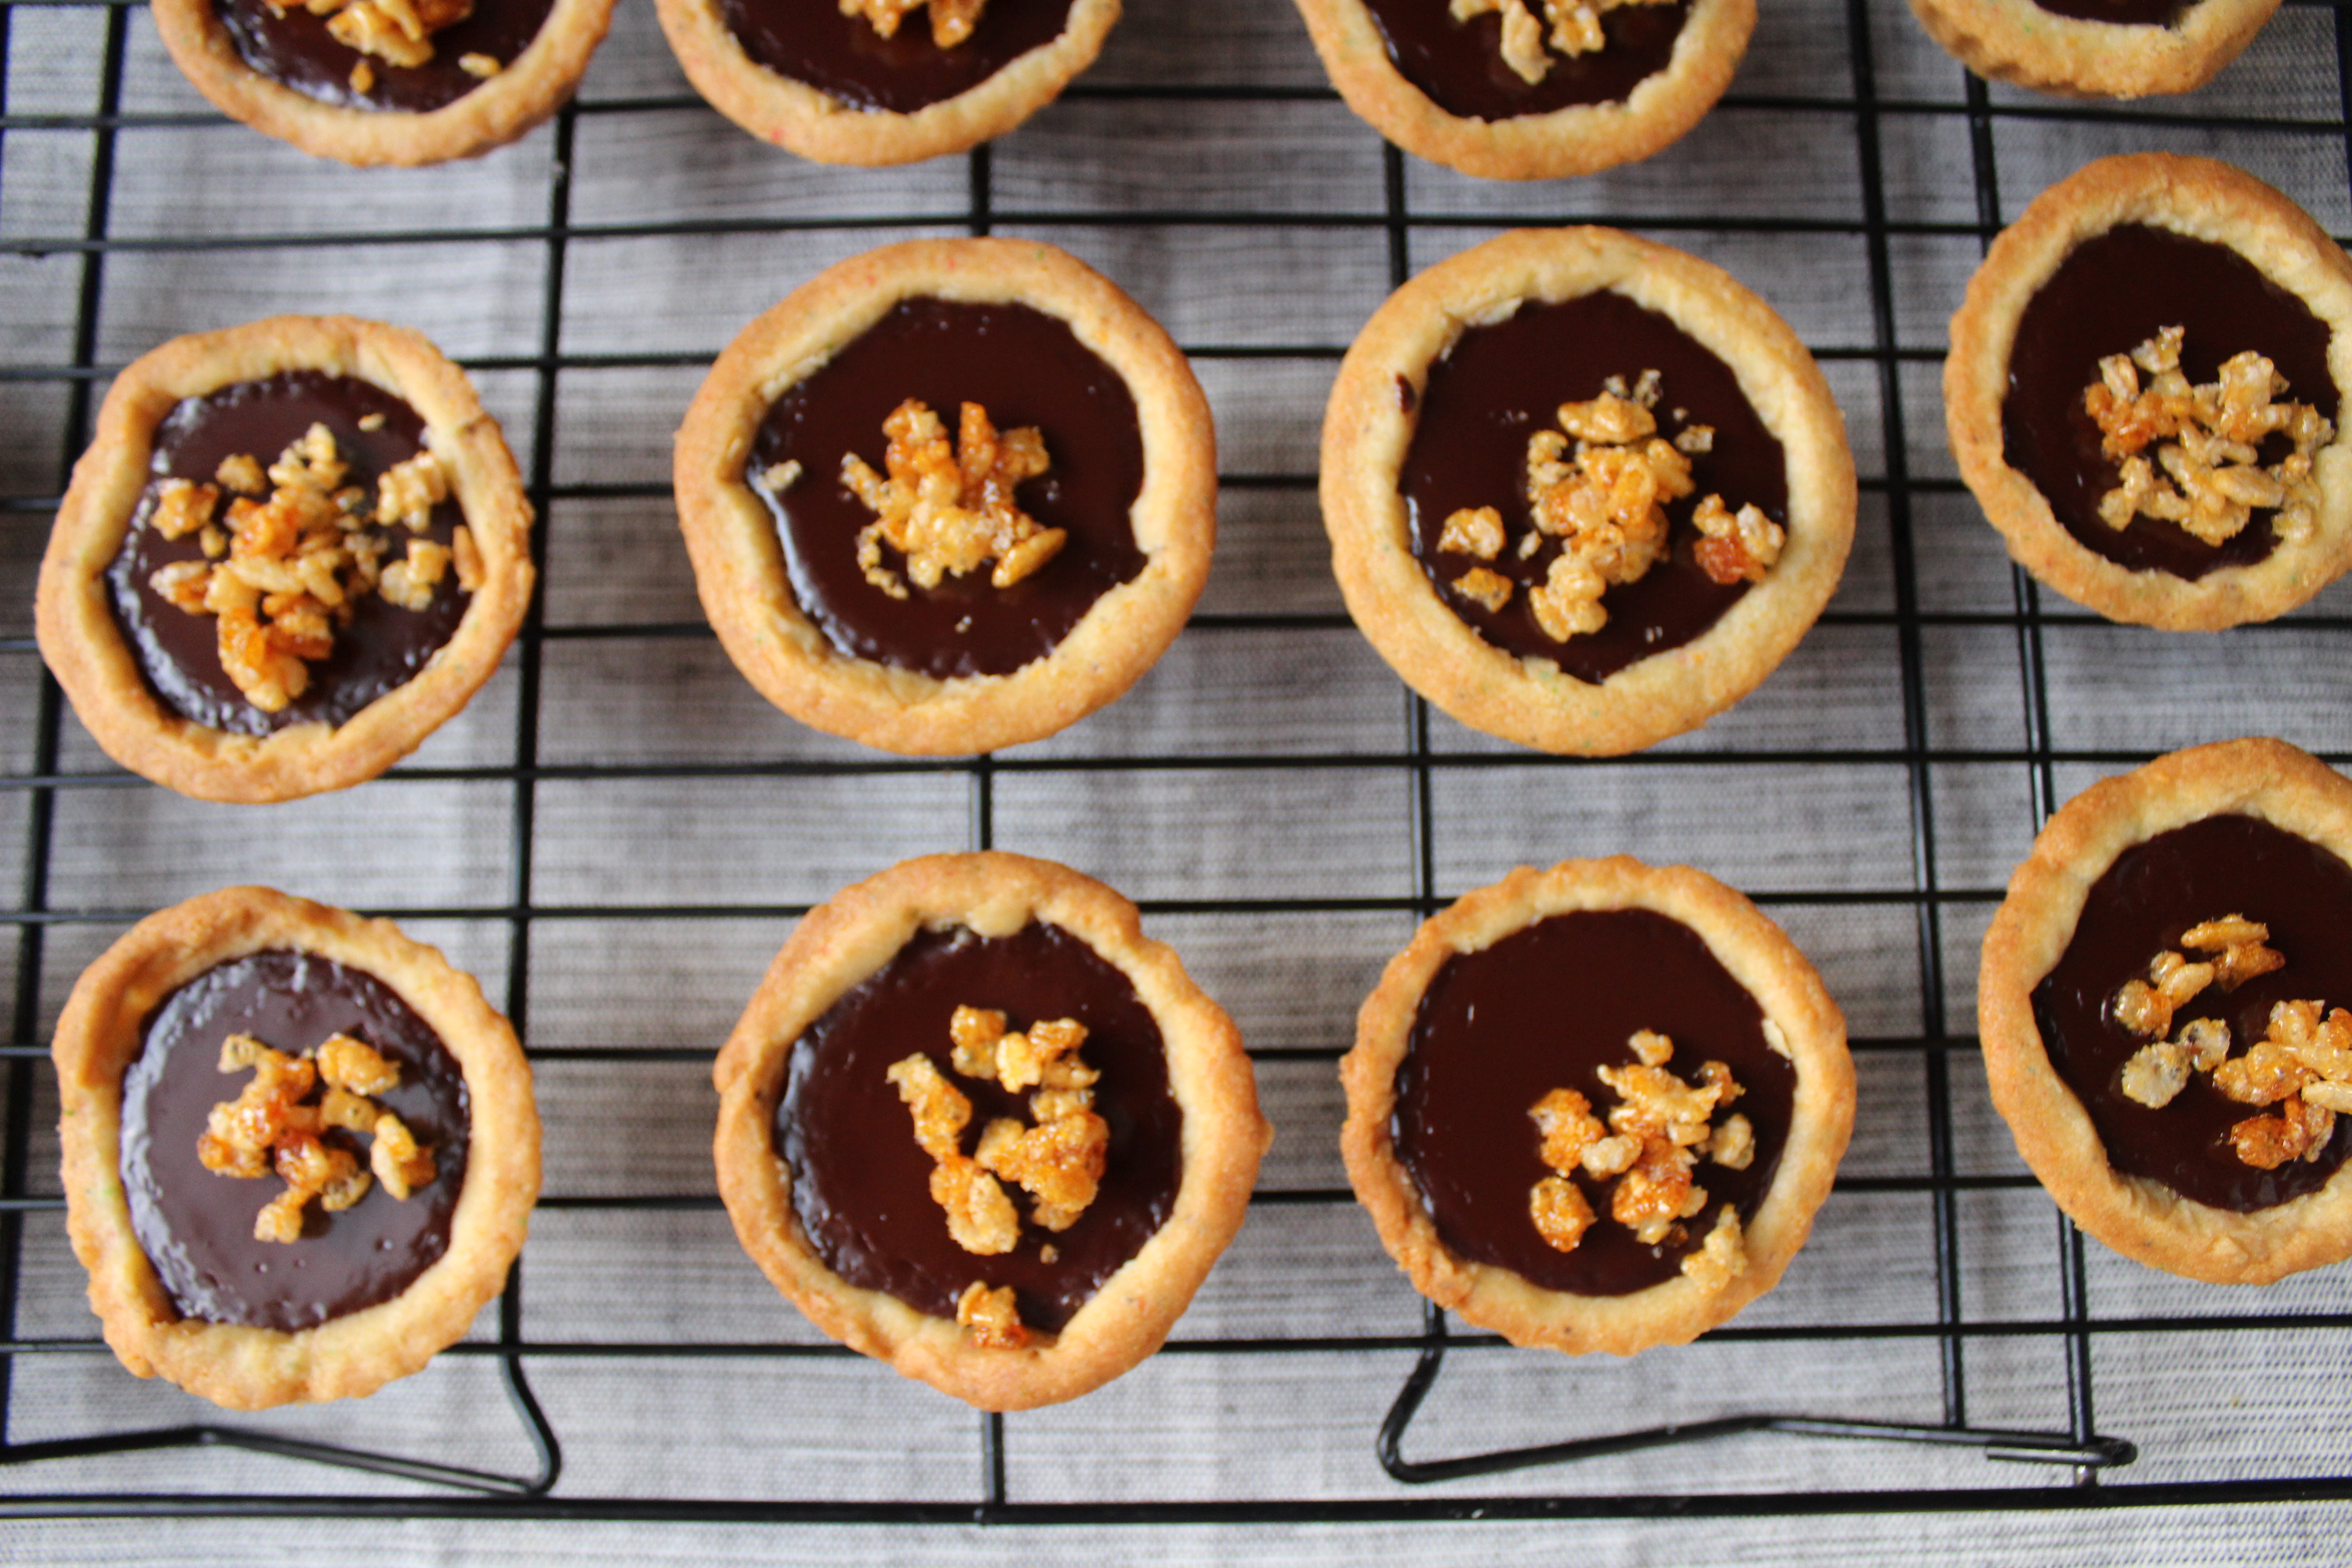
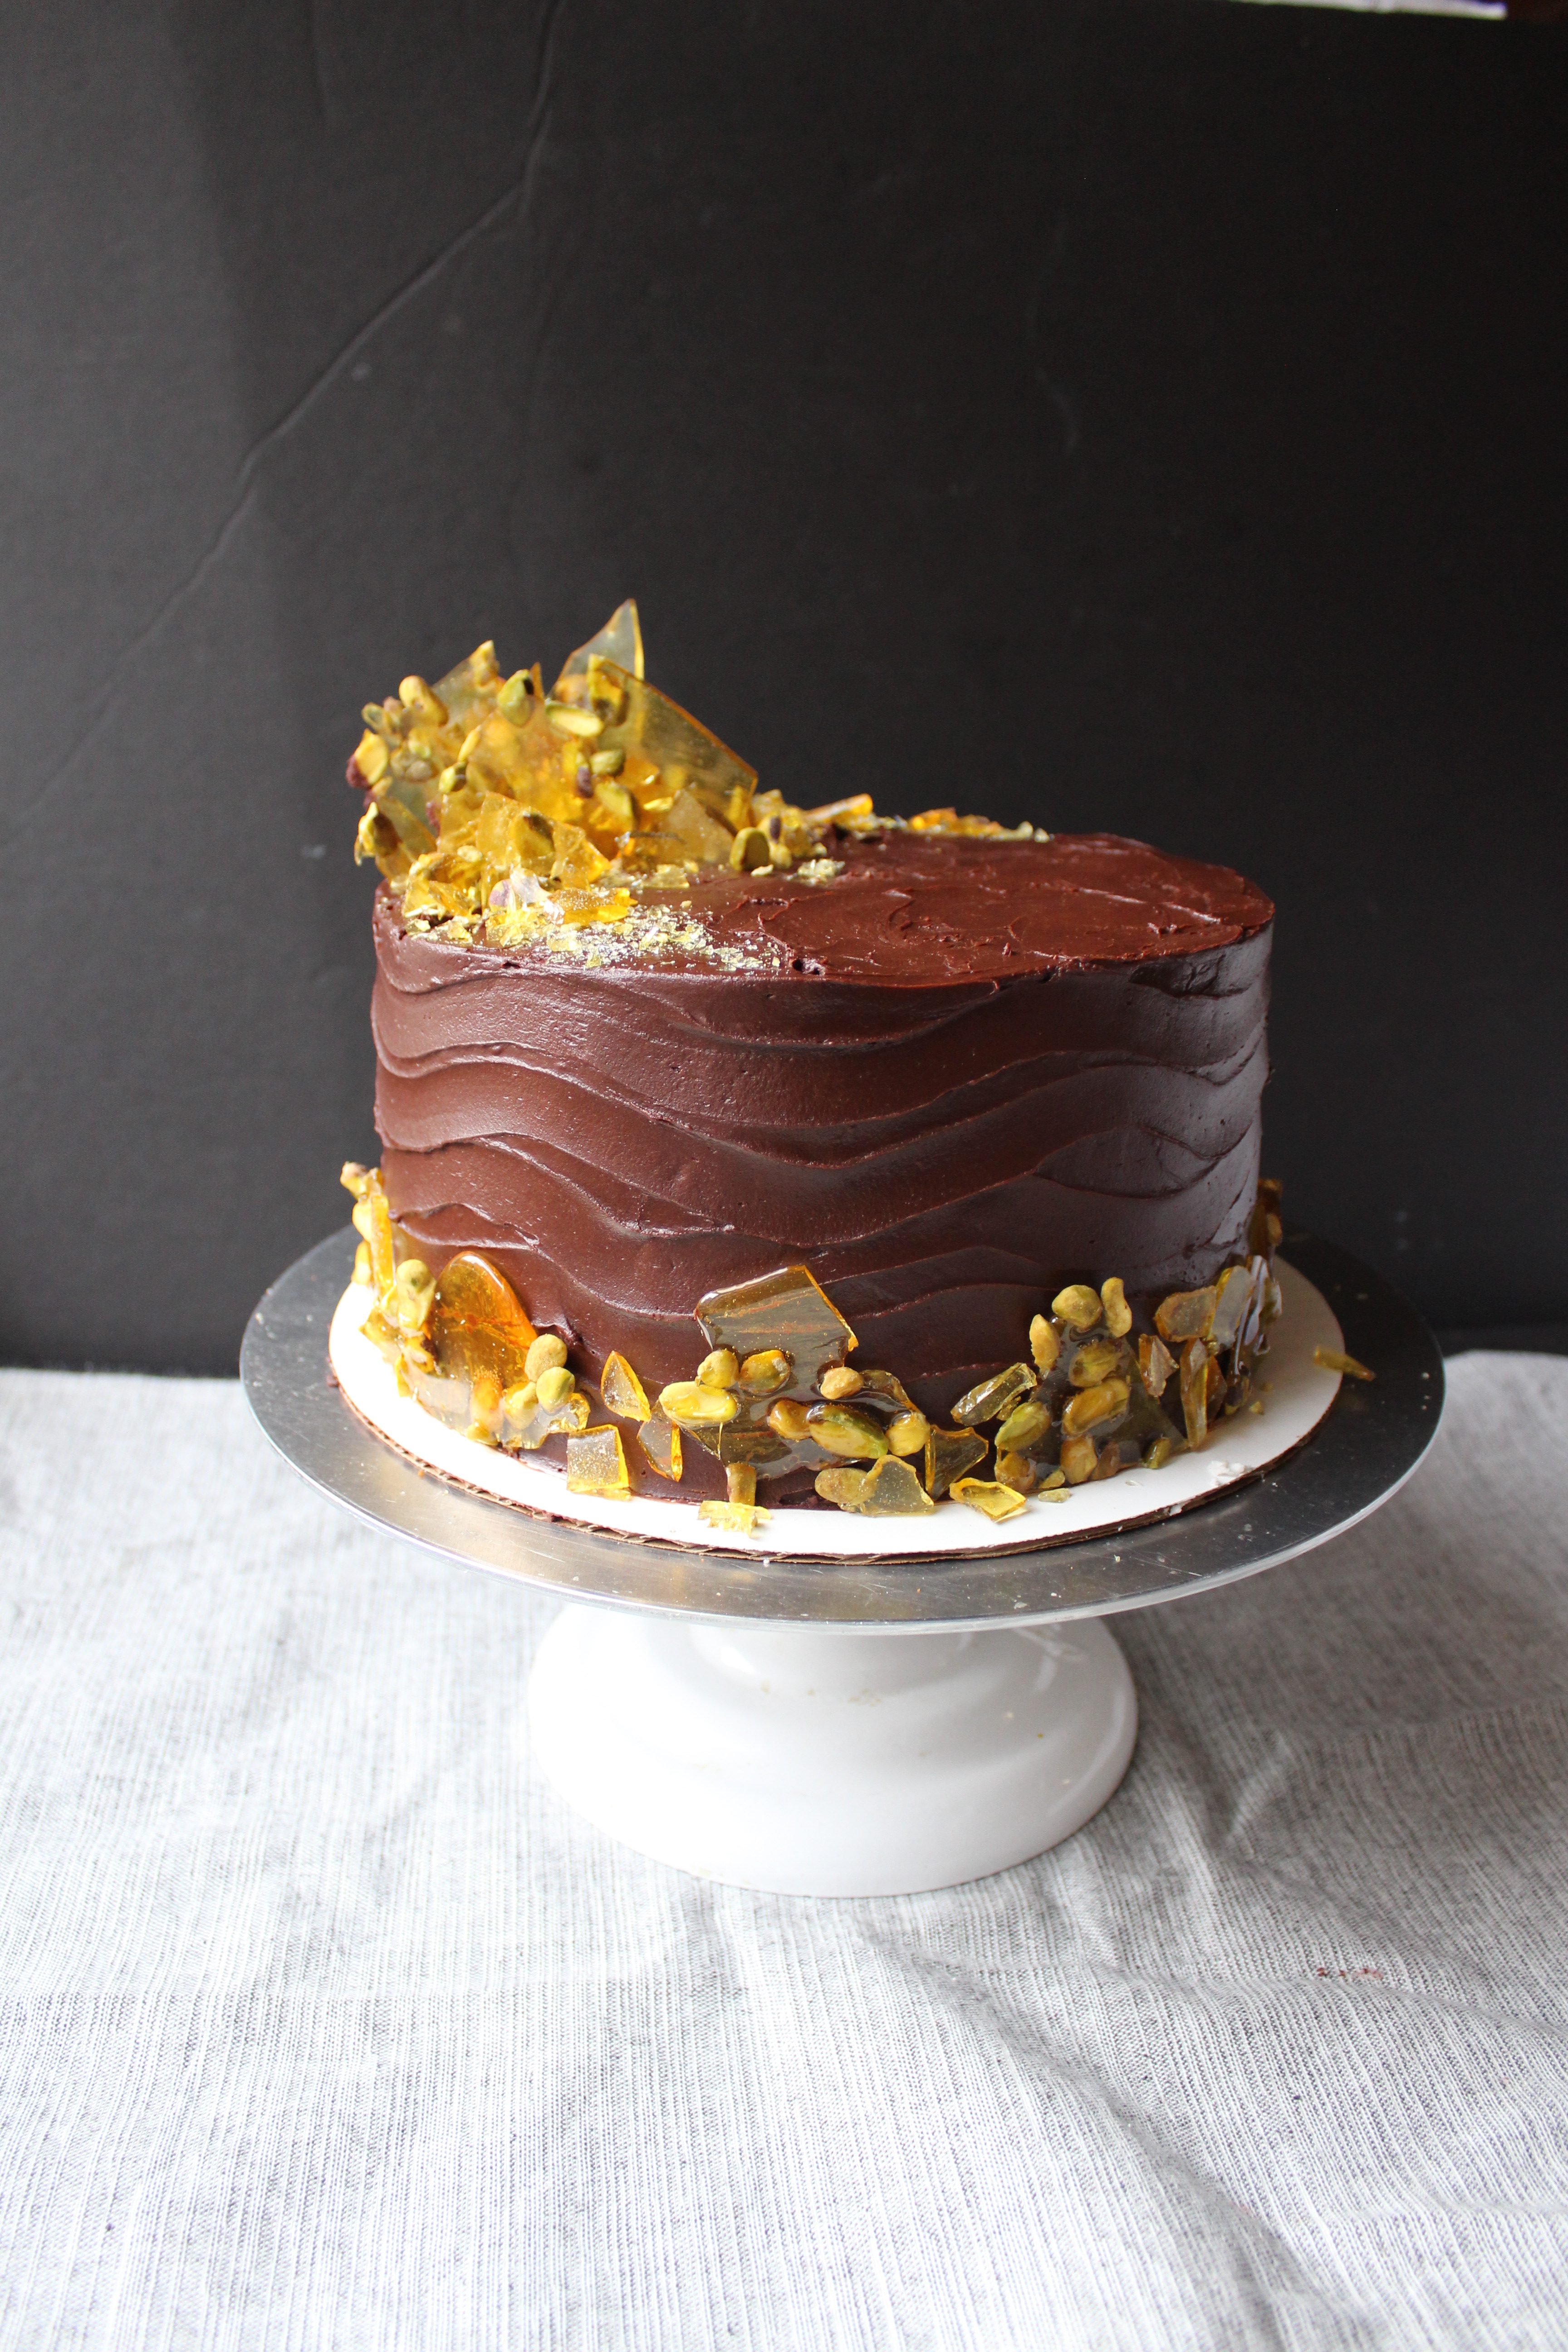
For the biggest chocolate fans, frost with a chocolate ganache, using a 1:1 weight ratio of chocolate to heavy cream. Otherwise this goes great with salted caramel, vanilla, chocolate or raspberry buttercream. Links to each below!

Ingredients

  • 1 1/2 cups granulated sugar
  • 1 3/4 cups plus 2 tbsp all purpose flour
  • 3/4 cup unsweetened cocoa powder
  • 1 1/2 tsp baking powder
  • 1 tsp baking soda
  • 3/4 tsp salt
  • 1/2 cup vegetable oil
  • 3/4 cup whole milk, room temperature
  • 2 large eggs, room temperature
  • 1 tsp vanilla extract
  • 1 cup freshly brewed strong, hot coffee

Directions

1. Spray 3 6in cake pans with nonstick cooking spray. Place the pans on top of a big sheet of parchment paper and draw circles around the bottom of each pan. Cut out each circle and line the bottom of each pan with one. Spray the parchment lined bottoms of the pans with a bit more non stick spray.
2. Brew coffee. Preheat oven to 350 degrees Fahrenheit. Add sugar to the bottom of a large bowl or the mixing bowl of your stand mixer.* Place a sieve over the bowl and add the flour, cocoa, baking powder, baking soda. Sift into the bowl. Add salt. Whisk to combine.
3. In a large measuring cup or bowl, combine oil, milk, eggs and vanilla extract. With the mixer running on low, or by hand, slowly add wet ingredients to dry, stopping occasionally to scrape down the sides of the bowl. Finally, add the coffee, stirring slowly and carefully, until batter is combined.
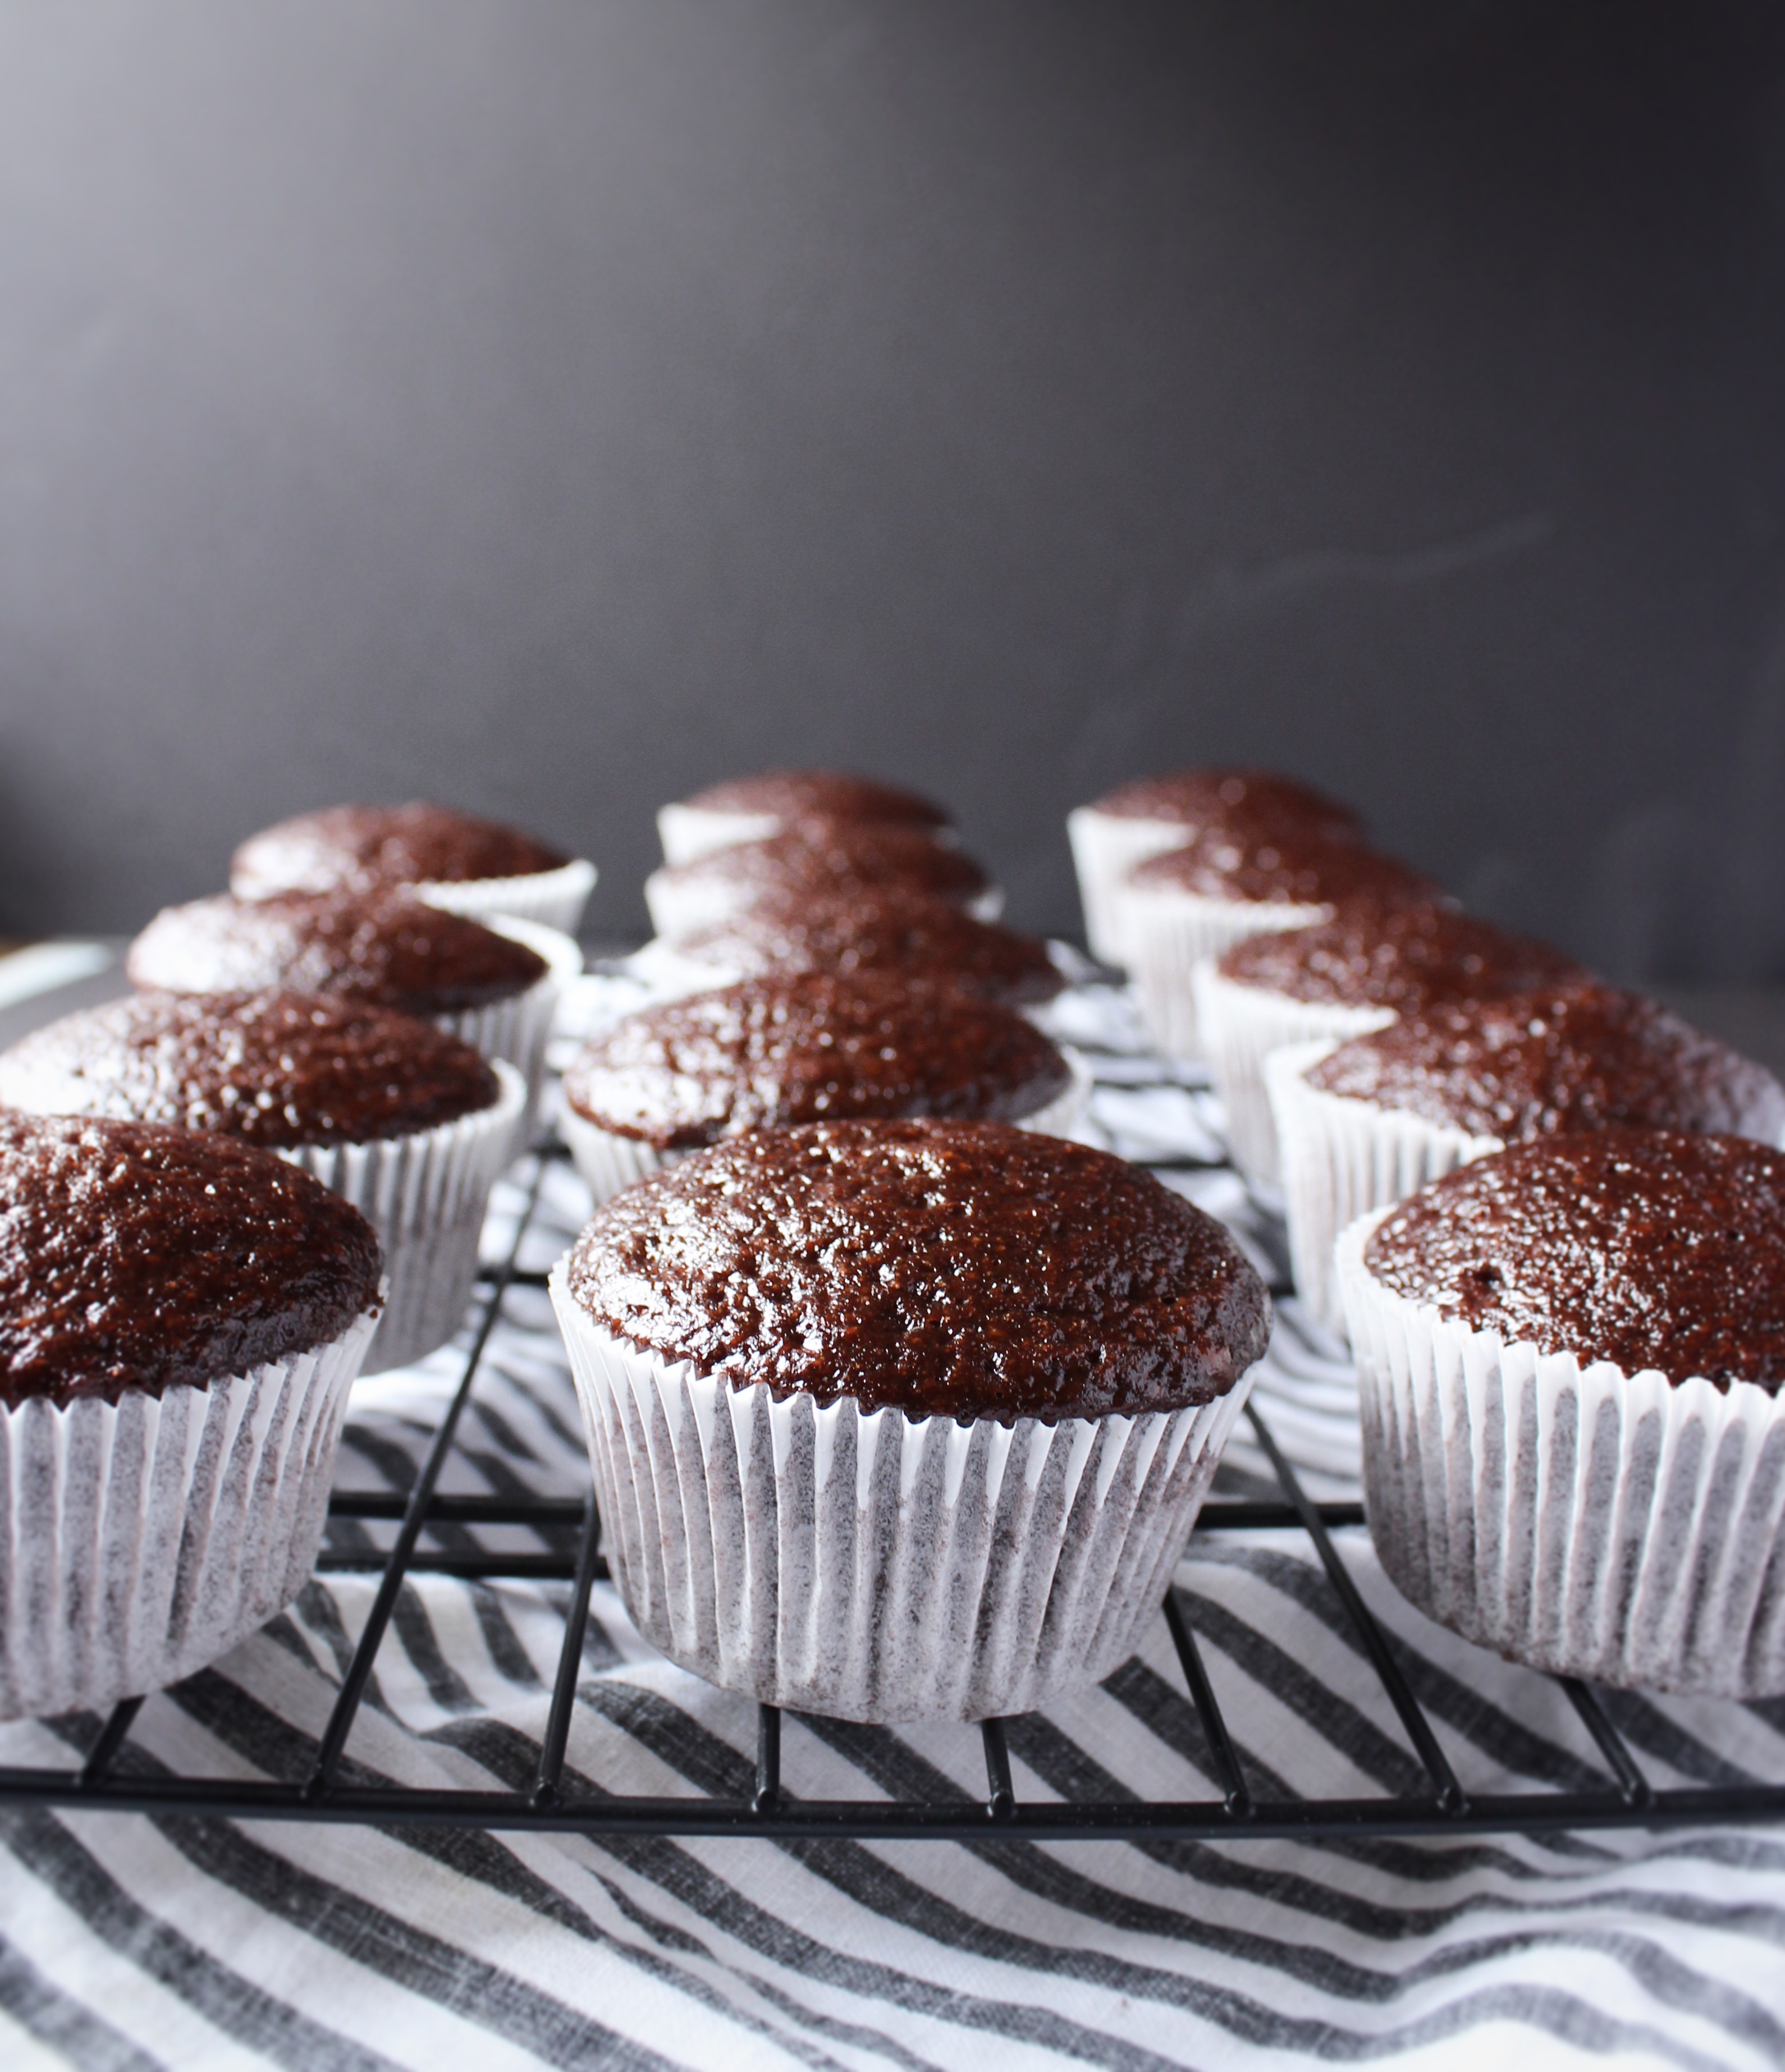
4. Divide evenly between the three cake pans (I use a scale to determine this). Bake for 25-28 minutes in preheated oven or until a toothpick inserted comes out clean. Let cool, then remove from pan and slice off the domes before stacking and frosting. Frost with my raspberry swiss meringue buttercream, american buttercream, vanilla swiss meringue buttercream, chocolate swiss meringue buttercream, chocolate ganache or your choice of frosting.

*I do this step first because I’ve forgotten to add the sugar too many times.

Leave a Comment · Labels: American/Mediterranean, Dessert Tagged: 6in chocolate cake, cake, chocolate, cocoa, coffee, dark chocolate, delicious, dessert, easy, easy recipe, small cake, yum

Linzer Cookies

December 22, 2017

fullsizeoutput_6cb2
I don’t know why I became obsessed with Linzer cookies this week. I probably saw one or two in my Instagram feed because of the holiday baking season, got lured in by the jewel like centers and fluffy snow-like confectioners sugar topping. So the research ensued, and I learned they are an Austrian/Hungarian cookie, traditionally made with some nut flour (almond or hazelnut) and filled with raspberry jam. I saw a few recipes that looked true to form, but when I saw my beloved Ina Garten had her version, and it was no frills, I thought I’d go that route. Big. Mistake.
fullsizeoutput_6cb3
Very minimally flavored and sweetened shortbread dough – OK. That’s fine. It will get sweetness and flavor from the raspberry jam and confectioner’s sugar. No almond flour, or flavorings besides vanilla – all OK to try. But what I couldn’t believe was the bake time. 20-25 minutes?! Of course, in following these instructions, I way over baked my first batch. So I went back to the recipe and watched the video in which she made them…in the video she declares a bake time of 10-15 minutes! How has no one caught such a glaring mistake?! After re-rolling the scraps and baking a second batch (for 10-12 min) the results were much better, but I still had an itch I needed to scratch. I had to try the traditional version – with almond flour and lemon zest.
fullsizeoutput_6cb1
But thank you, internet, for your recommendations. The King Arthur Recipe was the way to go. And although it was a little difficult to handle, the final product was worth it. Delicate cookies with a zesty lemon flavor, crumbly almond texture. It was a cookie to match the aesthetic.
fullsizeoutput_6cb4
I hope you enjoy these cookies during this holiday season and beyond! Wishing everyone a joyous holiday, whatever you’re celebrating, and a happy happy new year!

Recipe from King Arthur Flour.

Ingredients

  • 3/4 cup unsalted butter
  • 1/2 cup granulated sugar
  • zest of 1 lemon
  • 1 large egg yolk
  • 1 tsp vanilla extract
  • 1 cup all purpose flour
  • 3/4 cup almond flour
  • 1/4 tsp fine sea salt
  • raspberry jam for filling
  • confectioner’s sugar for dusting

Directions

  1. Beat butter and sugar together in the bowl of a stand mixer, or in a large bowl using a handheld electric mixer, until well combined and light and fluffy, about 3 minutes at low to medium speed. Add egg yolk, then vanilla. Stop the mixer, scrape down the sides of the bowl, and beat until just combined. Turn mixer off.
  2. Combine flours and salt in a bowl. Whisk to combined. With the mixer on low, slowly add the flour, stopping to scrape down the bowl occasionally. Stop the mixer when all the dry ingredients have been incorporated. Dump onto a large piece of plastic wrap and flatten into a disk.* Refrigerate for 30 minutes or until well chilled.
  3. Remove dough from fridge, unwrap and place on a large piece of parchment paper. Place another large piece of parchment on top and roll out with a large (I use a French) rolling pin to spread dough to 1/4in thickness. Cut out rounds, about 2in diameter, and use a small heart or diamond cutter to cut out the center of half of them.** Slide the parchment paper and dough onto your baking sheet, and refrigerate the whole thing for 30 minutes.
  4. Preheat oven to 350 degrees F. Remove sheet pan and use a small spatula or butterknife to remove scraps and center shapes. Set scraps aside to reuse later and leave center shapes on the pan. Bake for 8-10 minutes in preheated oven until edges just start to brown. Remove from oven, allow to cool, then spread flat side of full circle cookies with jam. Place a cookie with a cutout middle on top. Continue with the rest, including the small shape cookies, and dust the tops with confectioners sugar through a sieve.

*If you have a large 16x22in sheet pan like I do, do this in one batch. If you have anything smaller, like a quarter or half sheet pan, separate into two pieces, refrigerate and roll out separately.
**If you don’t have small shaped cutters, use a small paring knife to cut out a simple shape, like a diamond.

2 Comments · Labels: American/Mediterranean, Dessert Tagged: almond, austrian, baking, christmas, cookies, holiday cookies, holiday season, holidays, linzer cookies, new year, raspberry jam, sandwich cookies, shortbread

Mini Cap’n Crunch Chocolate Tarts

December 12, 2017

img_0605
When my friend Jafreen and I entered a bake off during our undergrad years, we thought we had it in the bag. We were both good bakers, definitely spent more time in the kitchen than our peers, and would put together thoughtful, from scratch baked goods. Needless to say, we lost. Terribly. We were outbaked by Duncan Hines. I don’t remember who was on the judging panel, but this post is for you.
img_0601
This past weekend we got to compete at the Islamic Center Professionals of NYU’s Bake Off. It was so fun. Secret ingredient was revealed 72 hours prior so research and experimenting time was limited. We were split into categories of cake, cookies, pies/tarts and puddings. My partner was the defending champ of the pudding category, with his cranberry creme brulee. This year we were in pies/tarts. So when they revealed the secret ingredient of breakfast cereal, my mind went into overdrive. If the secret ingredient were a single fruit, you’d have a lot less to work with. But there are dozens of cereals to choose from – all with different flavors and textures.
img_0620
I knew I wanted it to be a tart rather than a pie – pies rely on the flaking crust to be considered a pie and are more often than not made with fruit. Tarts can have a little bit more flexibility – can be made with a shortbread crust, or cookie crust. Then in terms of fillings – should I do pastry cream and fruit? Chocolate and peanut butter? Should I incorporate the cereal in the crust? In the filling? On top?
img_0091
My partner pushed me to go the extra mile. After all, when it comes to bake offs, presentation can be just as important as taste. So we thought of recreating the cereal bowl plus milk pour over experience. What is a pourable topping in dessert? Creme anglaise. What goes well with creme anglaise? Chocolate, souffles and cooked fruit desserts.
xlmtin4uto2i6dxo0eoqxg
So the chocolate tart was born. Mini because we’d have to make portions for the audience to try (also they are more elegant). And pourable creme anglaise in mini bottles that I found in the wedding favors section of Michael’s. Cap’n crunch in the shell. Caramelized rice krispies on top so you have some crunch to balance the smooth chocolate filling. And garnished with a little berry.

niqopz6btjazs5b%fcuq5q

We were proud of our entry. And I was proud of my friends who entered, particularly because they were overcoming challenges of their own to be there. My old friend Jafreen, as well as my new friend, Moni of Moni’s Kitchen.

img_0089
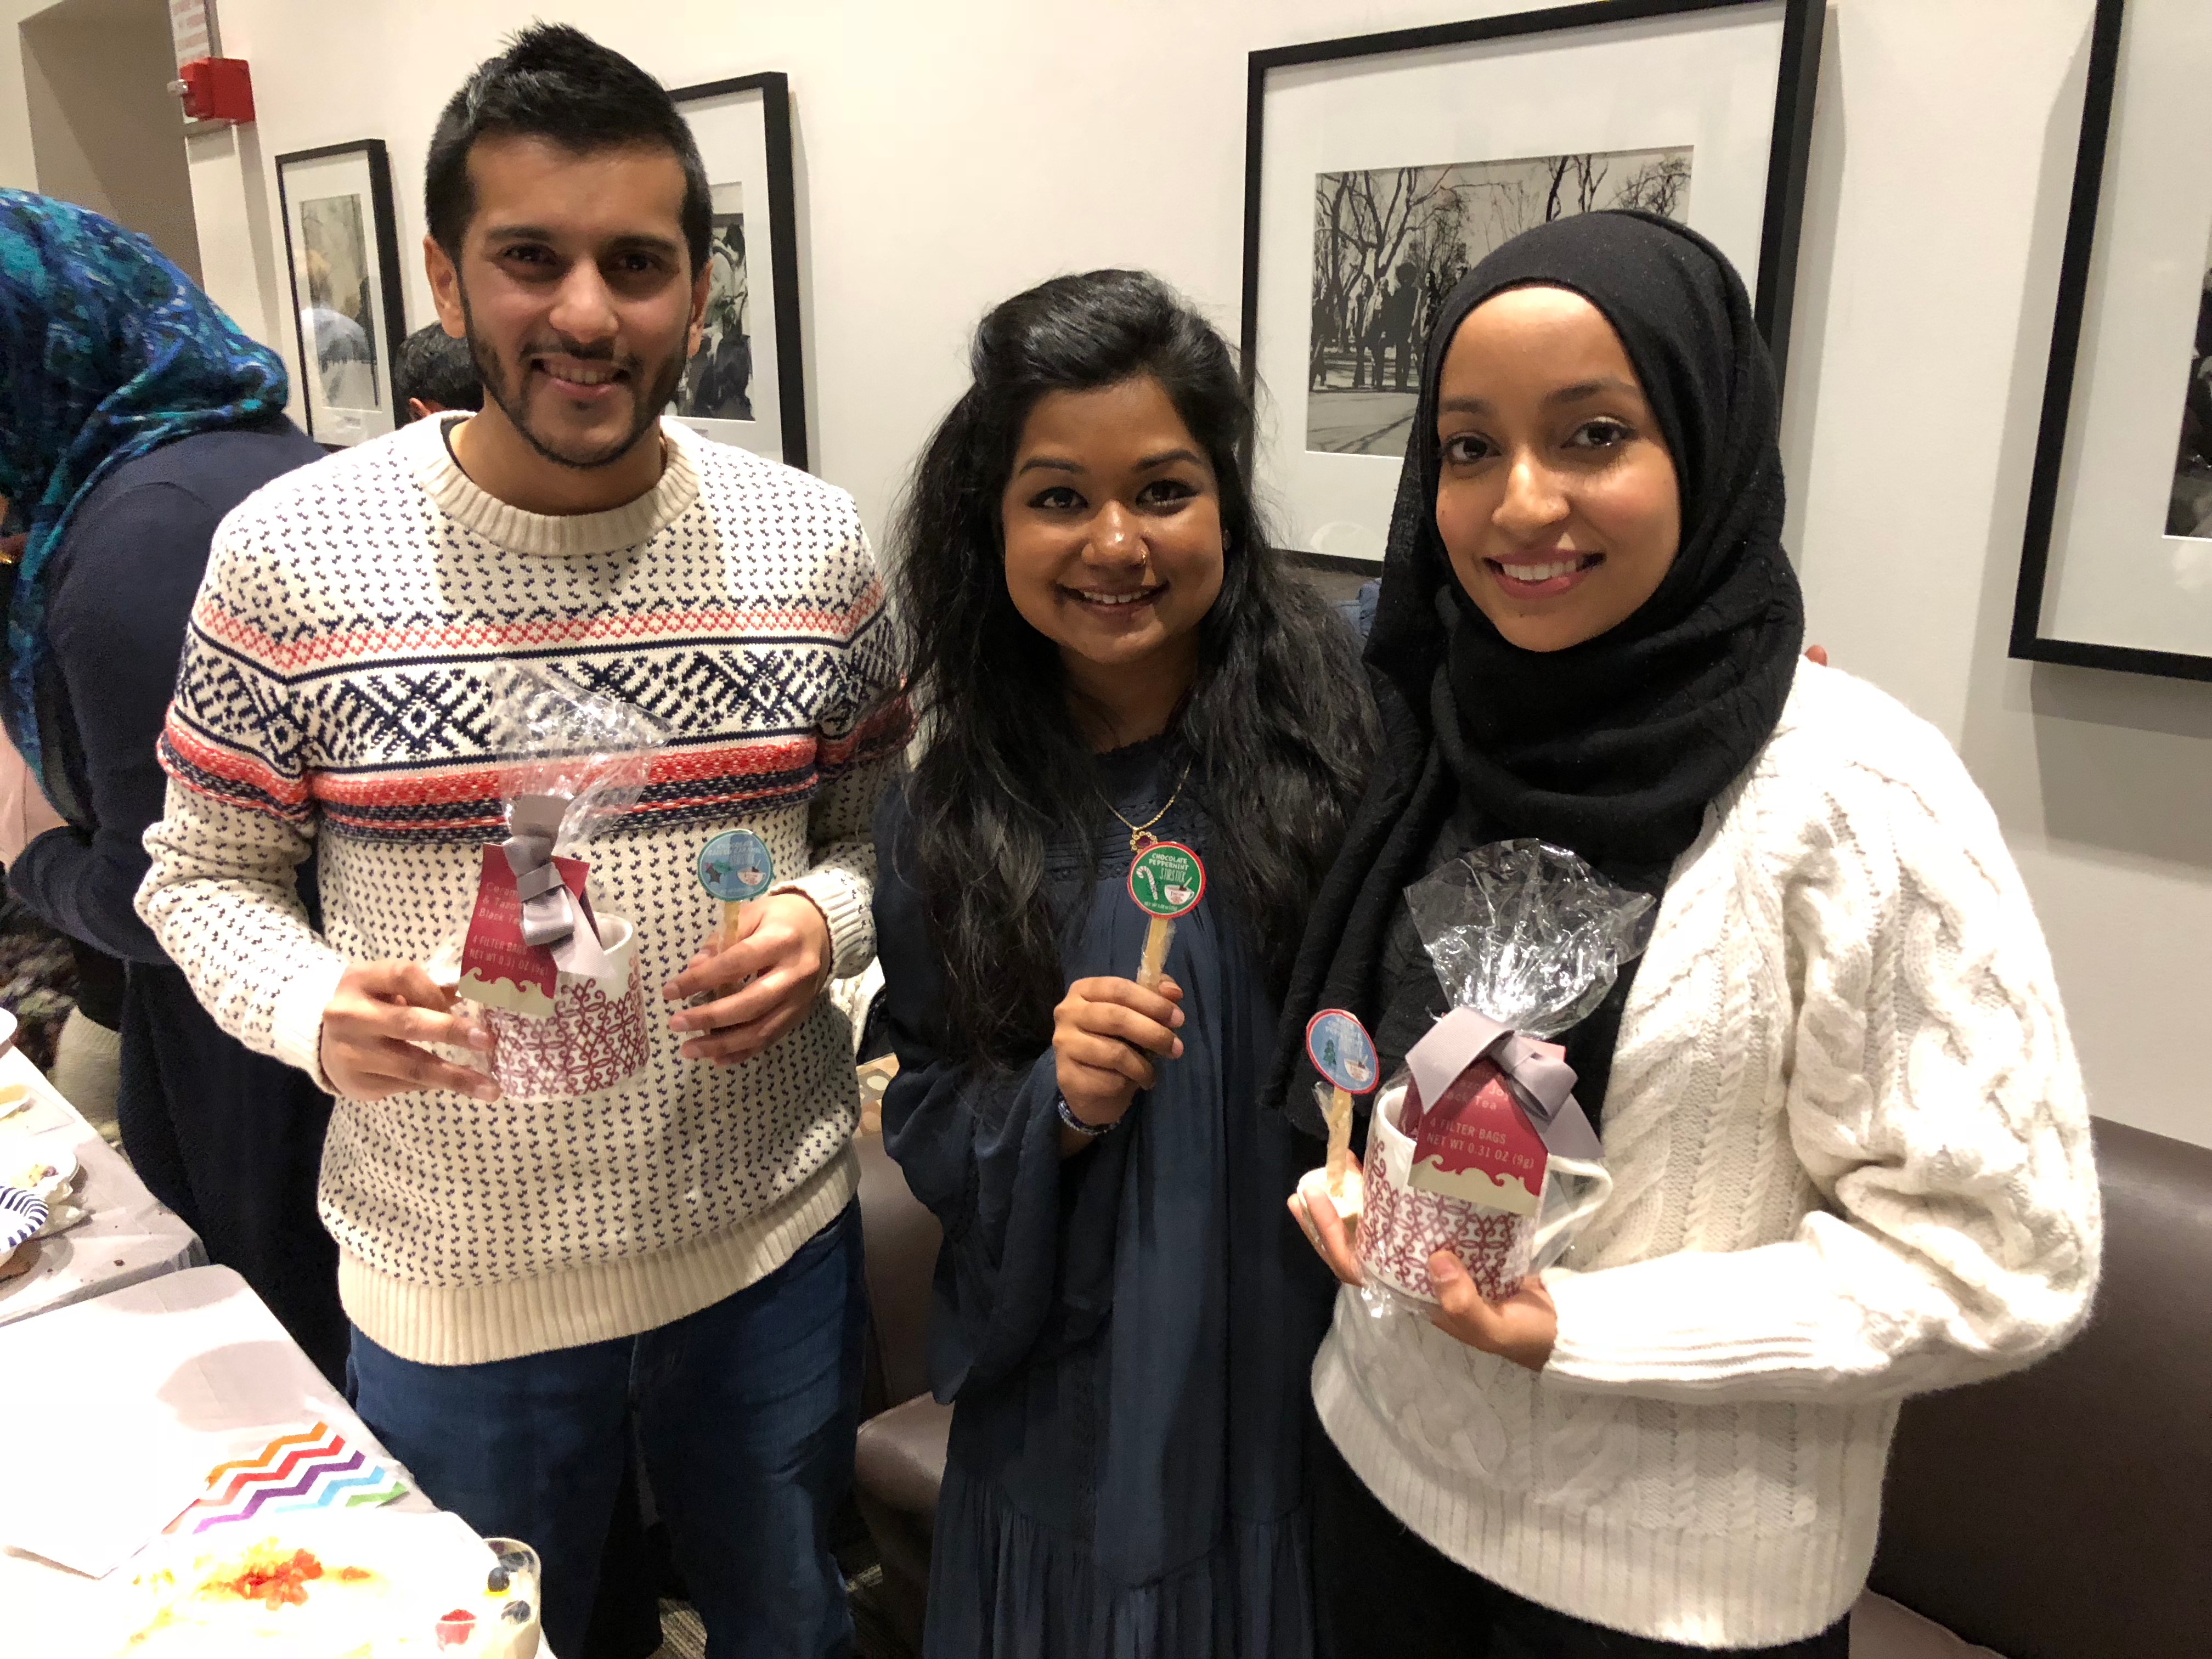
My husband was there for support. Isn’t he cute? OK you can stop looking now.
img_0085
Ultimately, the judges deemed our tart the winning entry for our category, and the audience voted ours the best dessert of the night! Grand prize went to an amazing honey ricotta cheesecake with a Honey Bunches of Oats crust, homemade ricotta and divine salted caramel drizzle. Very well deserved! Can’t wait til next year!

Feel free to make this without the addition of Rice Krispies and Creme Anglaise. If you’d like to make a traditional tart without the cereal, simply swap out the Cap’n Crunch for the same amount of flour. And before anyone else tries to take this idea – Salted Caramel Rice Krispies Cereal. I’m calling it! You heard it here first!

Ingredients

For the tart shell (recipe adapted from Dorie Greenspan’s Around My French Table):

  • 1 cup Cap’n Crunch Berries or regular Cap’n Crunch
  • 2 cups all purpose flour
  • 18 tbsp unsalted butter, cold, diced
  • 2/3 cup powdered sugar
  • pinch salt
  • 2 cold large egg yolks

For the filling (recipe from Epicurious):

  • 9 oz bittersweet chocolate (60% cocoa), in small pieces
  • 1 1/4 cups heavy cream
  • 2 large eggs
  • 1 tsp vanilla extract
  • 1/4 tsp salt

For the topping (recipe from Food52:

  • 1/2 cup sugar
  • 2 tbsp water
  • 2 cups Rice Krispies
  • pinch sea salt or fleur de sel (optional)

For the creme anglaise (recipe from Epicurious):

  • 1/4 cup Cap’n Crunch cereal or cereal of choice (optional)
  • 1/2 cup whole milk
  • 1/2 cup heavy cream
  • 1/4 tsp vanilla extract
  • 3 large egg yolks
  • 3 tbsp sugar

Directions

  1. Make the tart shell: grind the cereal in a food processor until fine (if there are some slightly bigger chunks left, can crush them with fingers, careful to avoid the blade). Add flour, powdered sugar, salt and process until cereal/flour is evenly distributed. Remove the lid, add butter, and pulse 5-6 times to combine. Beat the egg yolks with a fork and with the machine running, drizzle the egg yolk into the dry ingredients. When you see clumps just starting to form, turn the machine off and dump out onto a lightly floured surface. Knead just until it comes together into a ball, divide in two and wrap in plastic wrap. Refrigerate until cool.
  2. Preheat oven to 350 degrees fahrenheit. Grease a mini tart pan with non stick cooking spray. Remove dough from fridge. At this point you can either pull off golf ball sized pieces of dough and press into each of the mini tart molds, or you can roll out onto a floured surface to about 1/4 in thickness and cut out circles. I used a 3in diameter cutter for my tarts that are about 2 1/2 in in diameter. Push dough down and along the side so you get the pattern on the sides.
  3. Cut out little squares of aluminum foil and place in each tart shell. Pour some rice or beans to act as weights and blind bake for 10 minutes. After 10 minutes, remove from oven, remove aluminum and weights, and put back in the oven for 3 minutes. After 3 minutes remove from oven and allow to cool. Repeat with remaining dough. You should have at least 24 mini shells.
  4. Make the chocolate filling: in a medium to large microwave safe bowl, combine chocolate and cream. Heat at 50% power at 1 minute intervals, stirring slightly between intervals until chocolate is mostly melted. Continue stirring until chocolate is fully melted.
  5. Whisk the egg whites with the vanilla and salt. Add a little bit of the chocolate mixture to the eggs to temper them. Then add the eggs to the chocolate mixture and stir or whisk until fully combined. Pour about 1 tbsp of the chocolate mixture into each cooled tart shell, so that it fills it up but doesn’t overflow. I use my 1 3/4in diameter cookie scoop for this. Bake for about 10 minutes until sides are set and middle is still jiggly. Remove from oven and allow to cool. Can serve as is or with caramelized Rice Krispies and creme anglaise.
  6. OPTIONAL Make the caramelized Rice Krispies: combine sugar and water in a small saucepan and heat at medium high. Stir only until the sugar dissolves. After it dissolves, only swirl the pan, never stick a spoon in there. Allow it to boil away until it becomes a light amber color. While the sugar boils, line a large baking sheet with parchment paper. Grease with non stick cooking spray, as well as your spatula.
  7. When the sugar has reached the desired color, add the rice krispies and stir very carefully to coat the cereal in the caramel. Dump onto baking sheet and spread and thinly as possible. Sprinkle on salt. Allow to cool, then break apart with hands.
    To further break them down, pour into a large ziploc bag, and roll a rolling pin over several times. Sprinkle tarts with desired amount of cereal.
  8. OPTIONAL Make the creme anglaise: Add the cereal to the milk/cream and let it sit for 45min to 1 hour. In a small sauce pan, strain the milk/cream and discard (or eat) the cereal. Heat milk/cream over medium heat until it reaches a simmer (bubbles around the perimeter, but not a roaring boil). While that heats up, whisk egg yolks with sugar until pale yellow. Add vanilla and whisk to combine. When milk/cream is ready, add a little bit to the eggs and whisk. Slowly drizzle in the rest of the milk/cream so as not to curdle the eggs. Pour mixture back into saucepan and cook over low heat, whisking constantly, for about 5 minutes, until mixture is thickened. Refrigerate until cool. Serve alongside tarts so folks can poured their desired amount.

Leave a Comment · Labels: American/Mediterranean, Breakfast, Dessert Tagged: award winning, bake off, baking competition, bittersweet chocolate, cap'n crunch, caramel, cereal, chocolate, chocolate custard, creme anglaise, dessert, mini tart, rice krispies, tart, winner

Pistachio Layer Cake

December 7, 2017

fullsizeoutput_6aab
I’ve been making pistachio cakes in various forms since my friend asked me to make one for her wedding last year. The truth is, it’s very difficult to make a strongly pistachio flavored cake. It’s not like ice cream where the nuttiness easily comes through the cream and sugar. In cakes, in its attempt to compete with all the flour, eggs and dairy, it struggles to maintain its flavor while maintaining a light, tender crumb we expect in a cake.
I changed this recipe from the original, to include pistachio paste (which you can get online). I looked at peanut butter cake recipes and saw they utilized peanut butter in lieu or in combination with butter, so I thought I’d apply the same principal here. It provides a rich, creamy pistachio flavor. The cake is then lightened with beaten egg whites to add lightness. The result is a light, nutty cake.
fullsizeoutput_6aa9
I’m not sharing an accompany frosting recipe, because in all honesty, I haven’t got one. I tried making the boiled milk icing from the original recipe, but oh my God did it die on me. It was a runny mess (perhaps my boiled milk/flour/sugar combo was too thin?). I spent all morning trying to salvage it – first by adding some confectioners sugar, then some more cream cheese, then butter, then more confectioners sugar. After removing a small amount to mix with pistachio paste (my last ditch effort to salvage at least some of it), I was able to make a concoction that held up JUST enough to fill the cake. fullsizeoutput_6aa8
For the outside, I went with a tried and true (and quick) recipe: chocolate ganache. Which isn’t much of a recipe at all as it’s just some baking chocolate bars, broken up in chunks, then melted in the microwave at medium power with half its weight in heavy cream (so in this case, 24oz chocolate with 12oz heavy cream). Mixing every once in a while until completely melted and smooth. Not to say it’s straightforward to make ganache.
There are plenty of ways to muck it up. If you mix it before it is warm enough, it will start to get grainy. If you make it too hot, it will get grainy. Basically you need the Goldilocks temperature to get chocolate ganache just right (between 90 and 110 degrees). I recommend using an instant read thermometer to get your ganache just right, but if you don’t, just make sure it’s warm to the touch while you are stirring. fullsizeoutput_6aa7fullsizeoutput_6aaa
I then placed it over a bowl of ice water, whisking with an electric mixer until it was thick and glossy. img_0584
Finally, I decided to try decorating with pistachio sugar shards. I’m not sure if that’s what it’s called, but it’s not quite praline, not quite toffee, not quite caramel either. It’s just 1 cup sugar melted with 1/4 cup water until light golden in color. I then poured it over 1/4 cup shelled pistachios on a parchment paper lined baking sheet and let it cool. Once cool enough to handle, I broke it up into big chunks to decorate, then further crushed the remaining chunks with my rolling pin and a ziploc bag. img_0596
It was surprisingly tasty. Next time, I will definitely add some salt to make them even better!

Recipe adapted from Handle the Heat

Ingredients

  • 1/4 cup pistachio paste
  • 12 tbsp unsalted butter (1 1/2 sticks)
  • 1 3/4 cups granulated sugar
  • 1 cup shelled, raw, unsalted pistachios
  • 3 cups all purpose flour
  • 1 tbsp baking powder
  • 1 tsp baking soda
  • 1/2 tsp salt
  • 1/4 cup cornstarch
  • 1 large egg
  • 1 tsp vanilla extract
  • 1 1/2 cups milk
  • 3 egg whites
  • 1/4 tsp cream of tartar

Directions

  1. Preheat oven to 350 degrees F. Grease 3 8in baking tins with non stick cooking spray and line the bottom with parchment paper (place the pans on top a large sheet of parchment, draw a circle around the circumference with a pencil, and cut out). Set aside.
  2. Pulse the pistachios in a food processor until finely ground. Careful not to let it go for too long, since it will turn into a paste. Pour ground pistachios into a large mixing bowl.
  3. In the bowl of your stand mixer or in a large bowl using an electric hand mixer, cream pistachio paste, butter and sugar for 2 minutes at medium speed.
  4. While that goes, combine the ground pistachios with flour, baking powder, baking soda, salt and cornstarch. Whisk until combined.
  5. Stop the mixer, scrape down the sides and bottom of the bowl, turn mixer back on. Add egg, then vanilla. Then alternately add the dry ingredients with the milk – 1/3 dry ingredients, 1/2 milk, ending in the dry ingredients. Periodically scrape down the sides and bottom of bowl. Stop mixing when dry ingredients are just incorporated in the batter.
  6. In a medium bowl, combine egg whites with cream of tartar. Whisk with an electric mixer at medium speed until stiff peaks form when you pull the beaters up and out of the egg whites. Add a little beat of the beaten egg whites to the batter to thin out the batter. Then add half of the remaining egg white, folding in carefully so as not to deflate them. Add the second half and fold just until you no longer see white streaks.
  7. Divide equally between the three prepared pans and bake for 28-30 minutes until browned on top and a toothpick inserted comes out clean. Cool the cakes and level them before frosting.

Leave a Comment · Labels: American/Mediterranean, Dessert Tagged: cake, candied, chocolate, dessert, ganache, homemade, layer cake, pistachio, recipe

Raspberry Swiss Meringue Buttercream

November 30, 2017

img_0488 
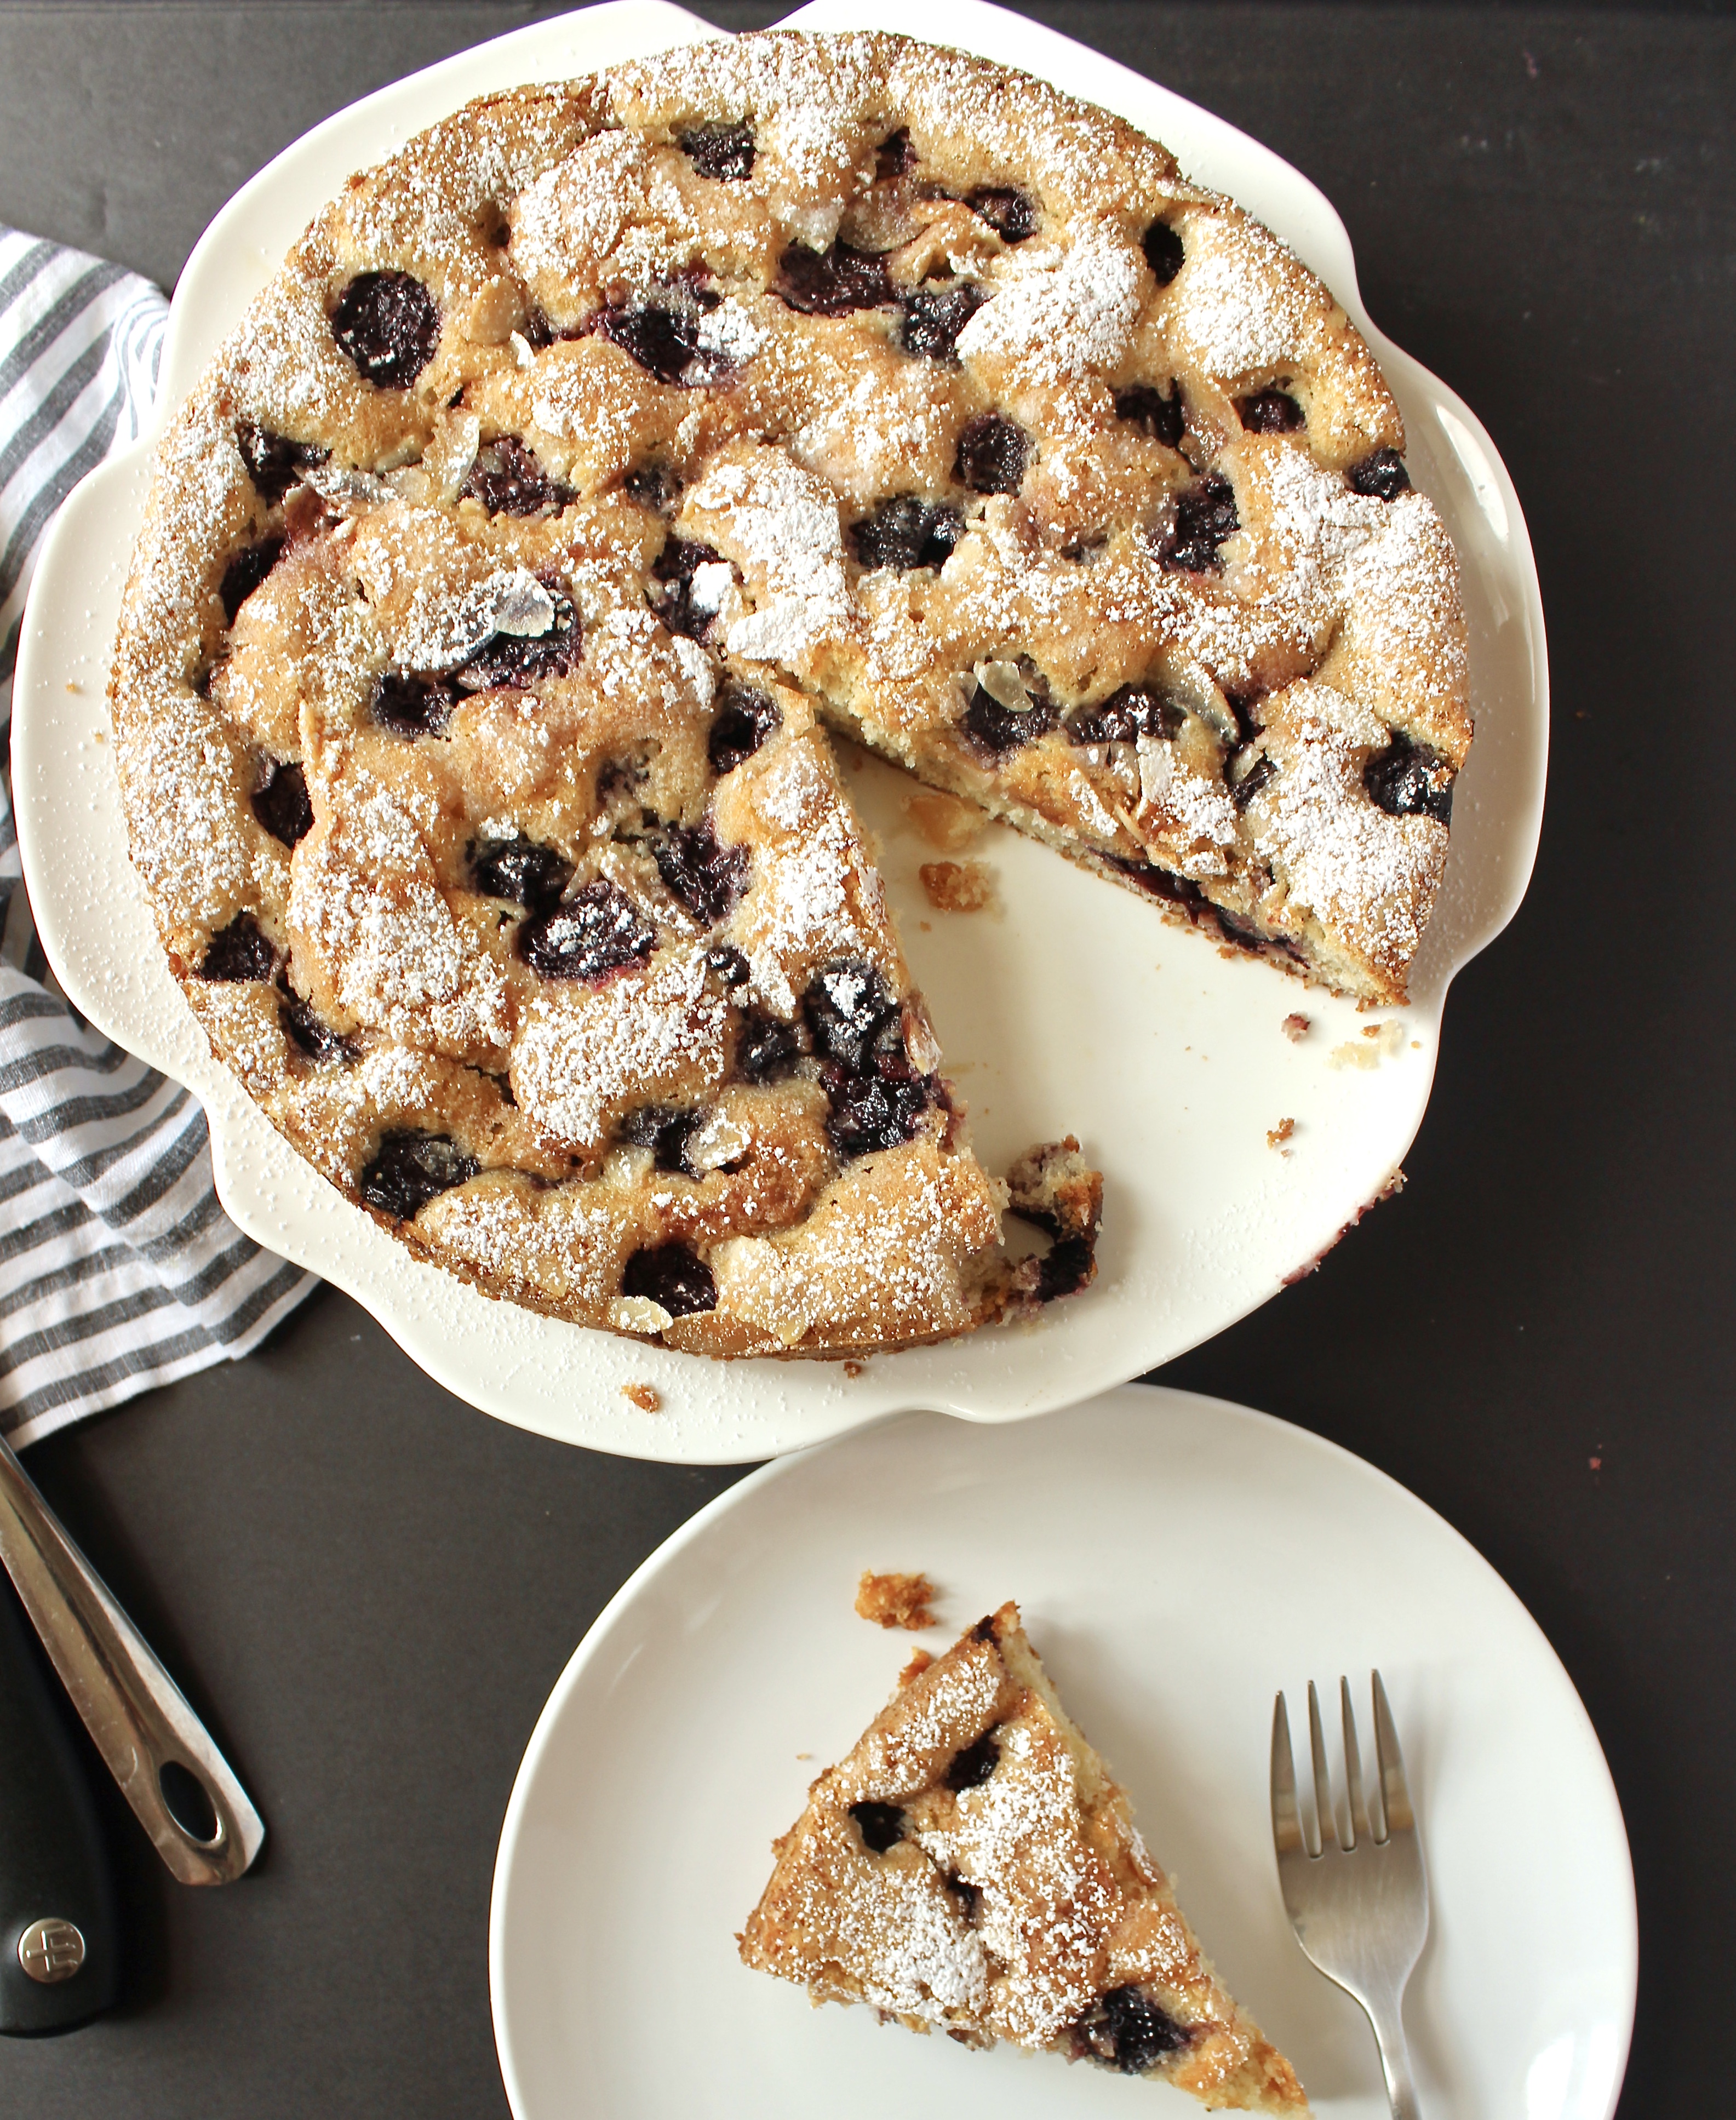
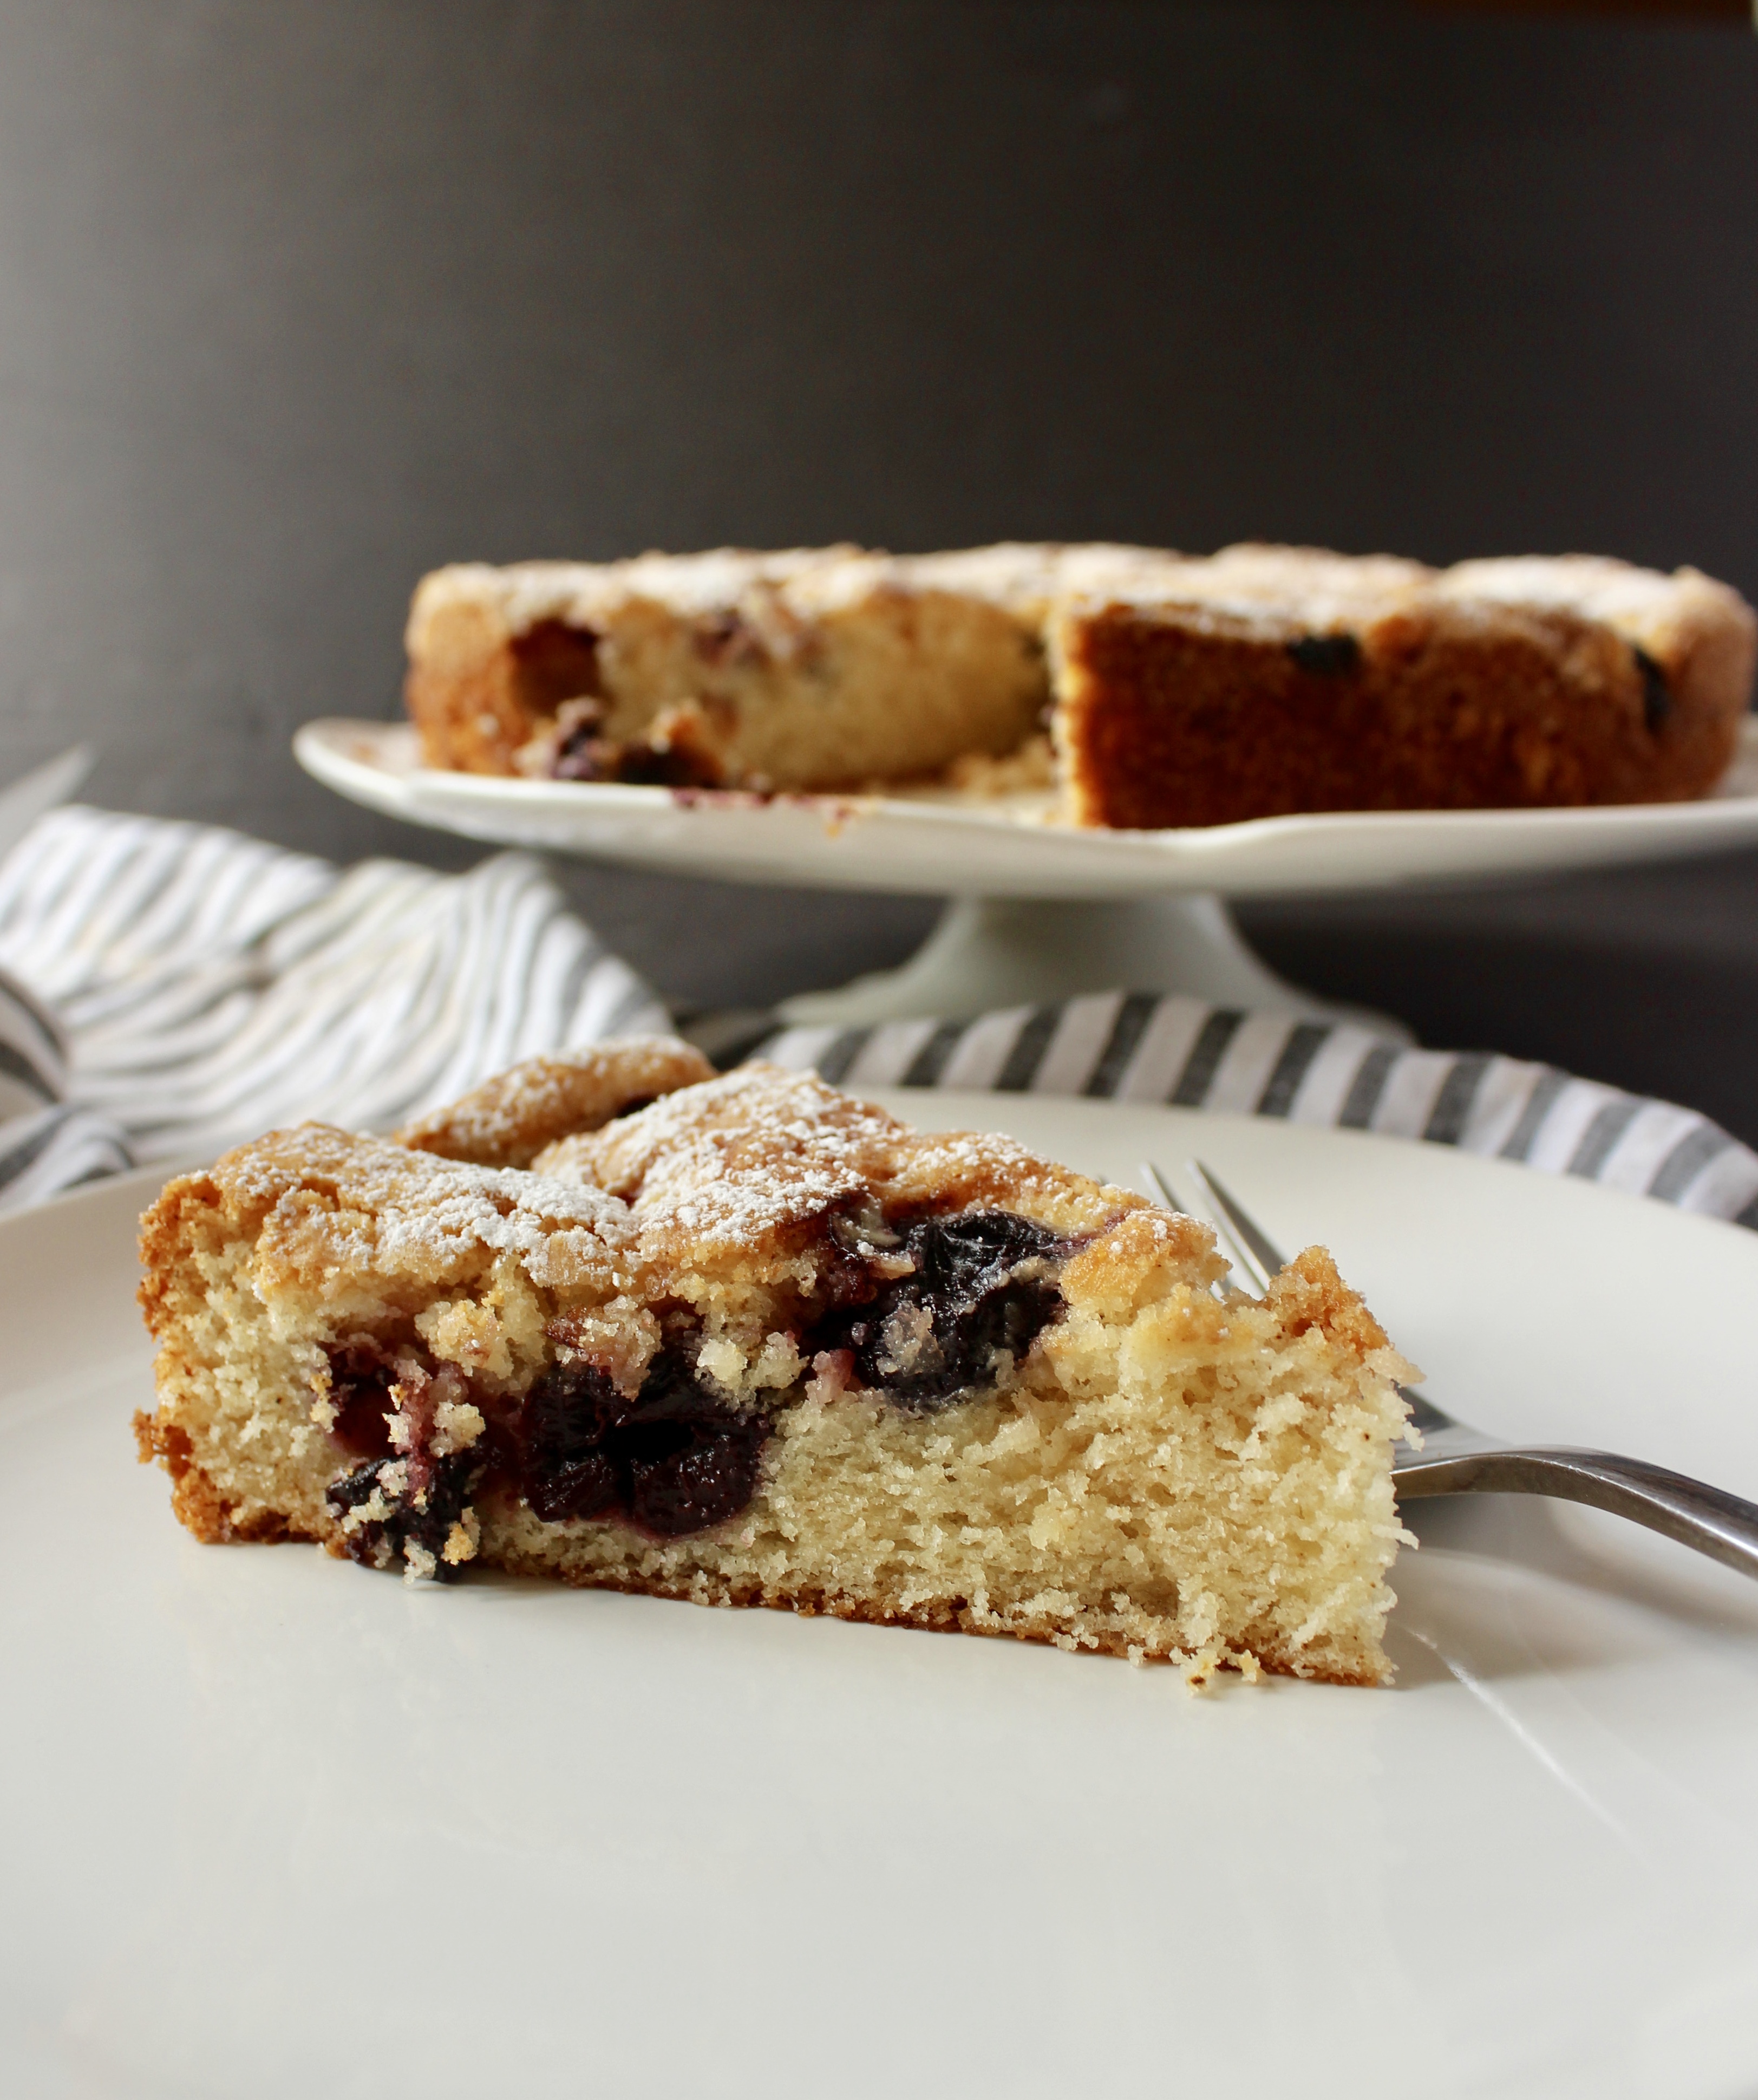
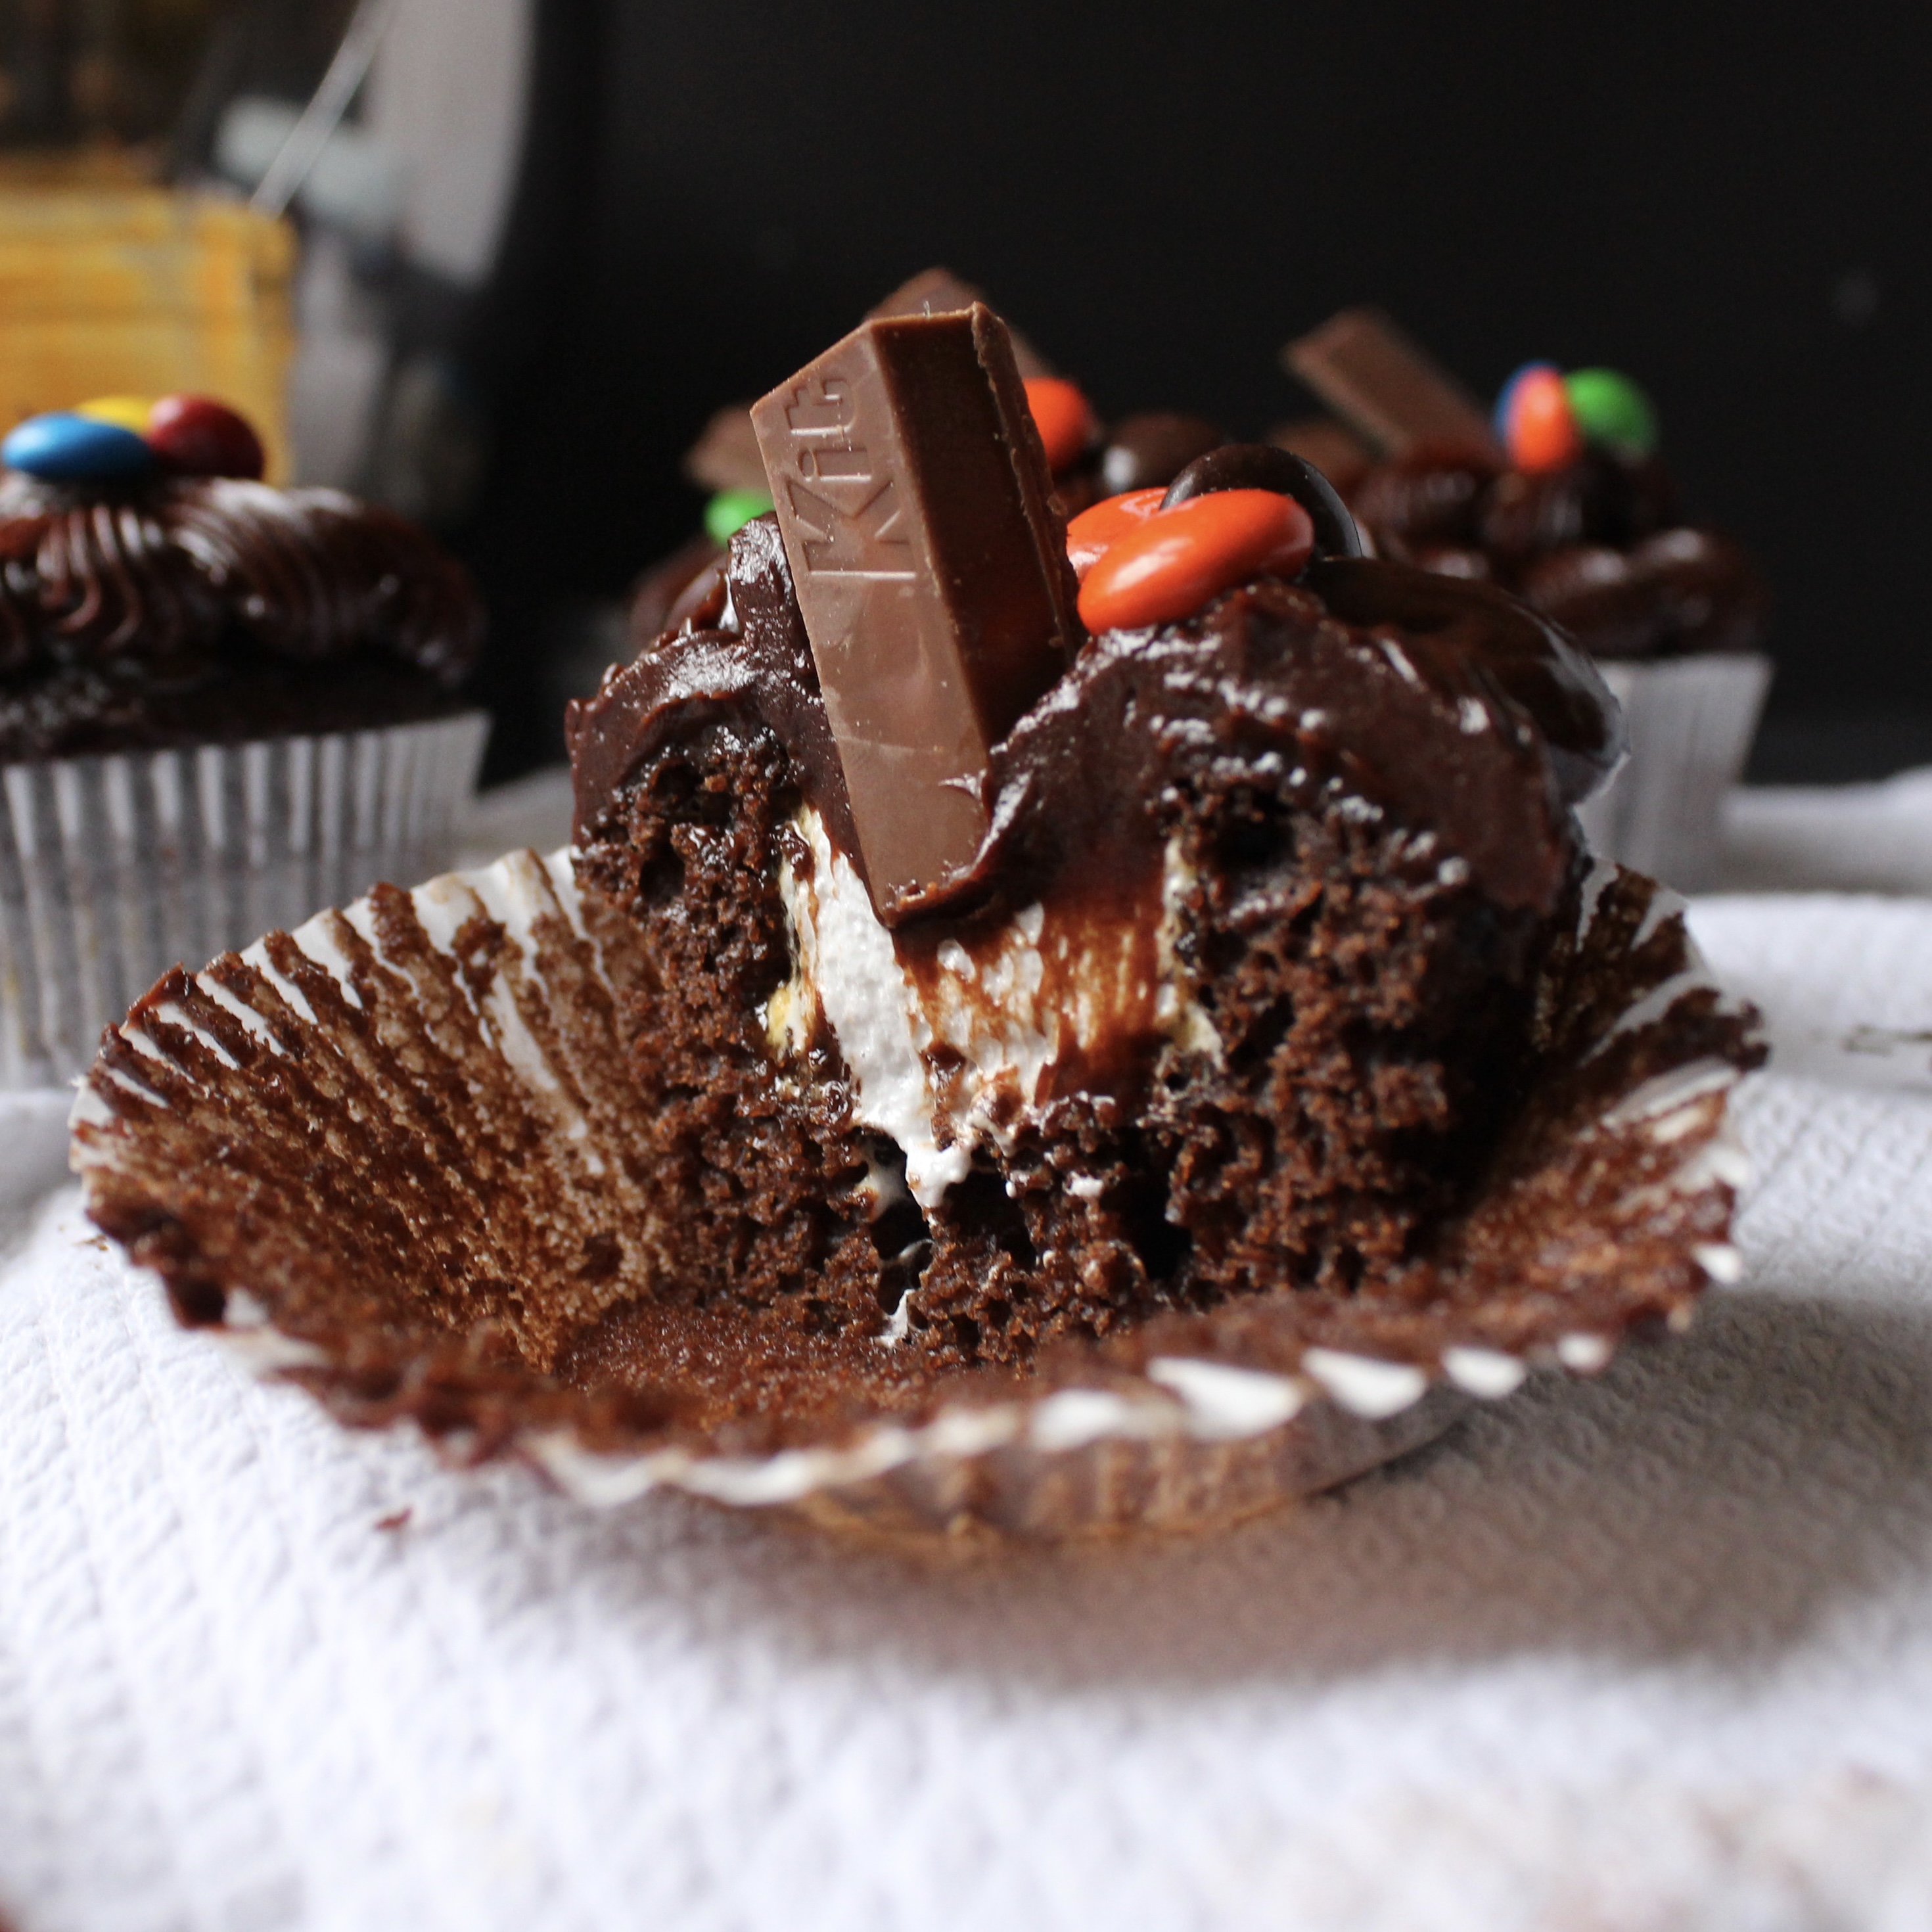
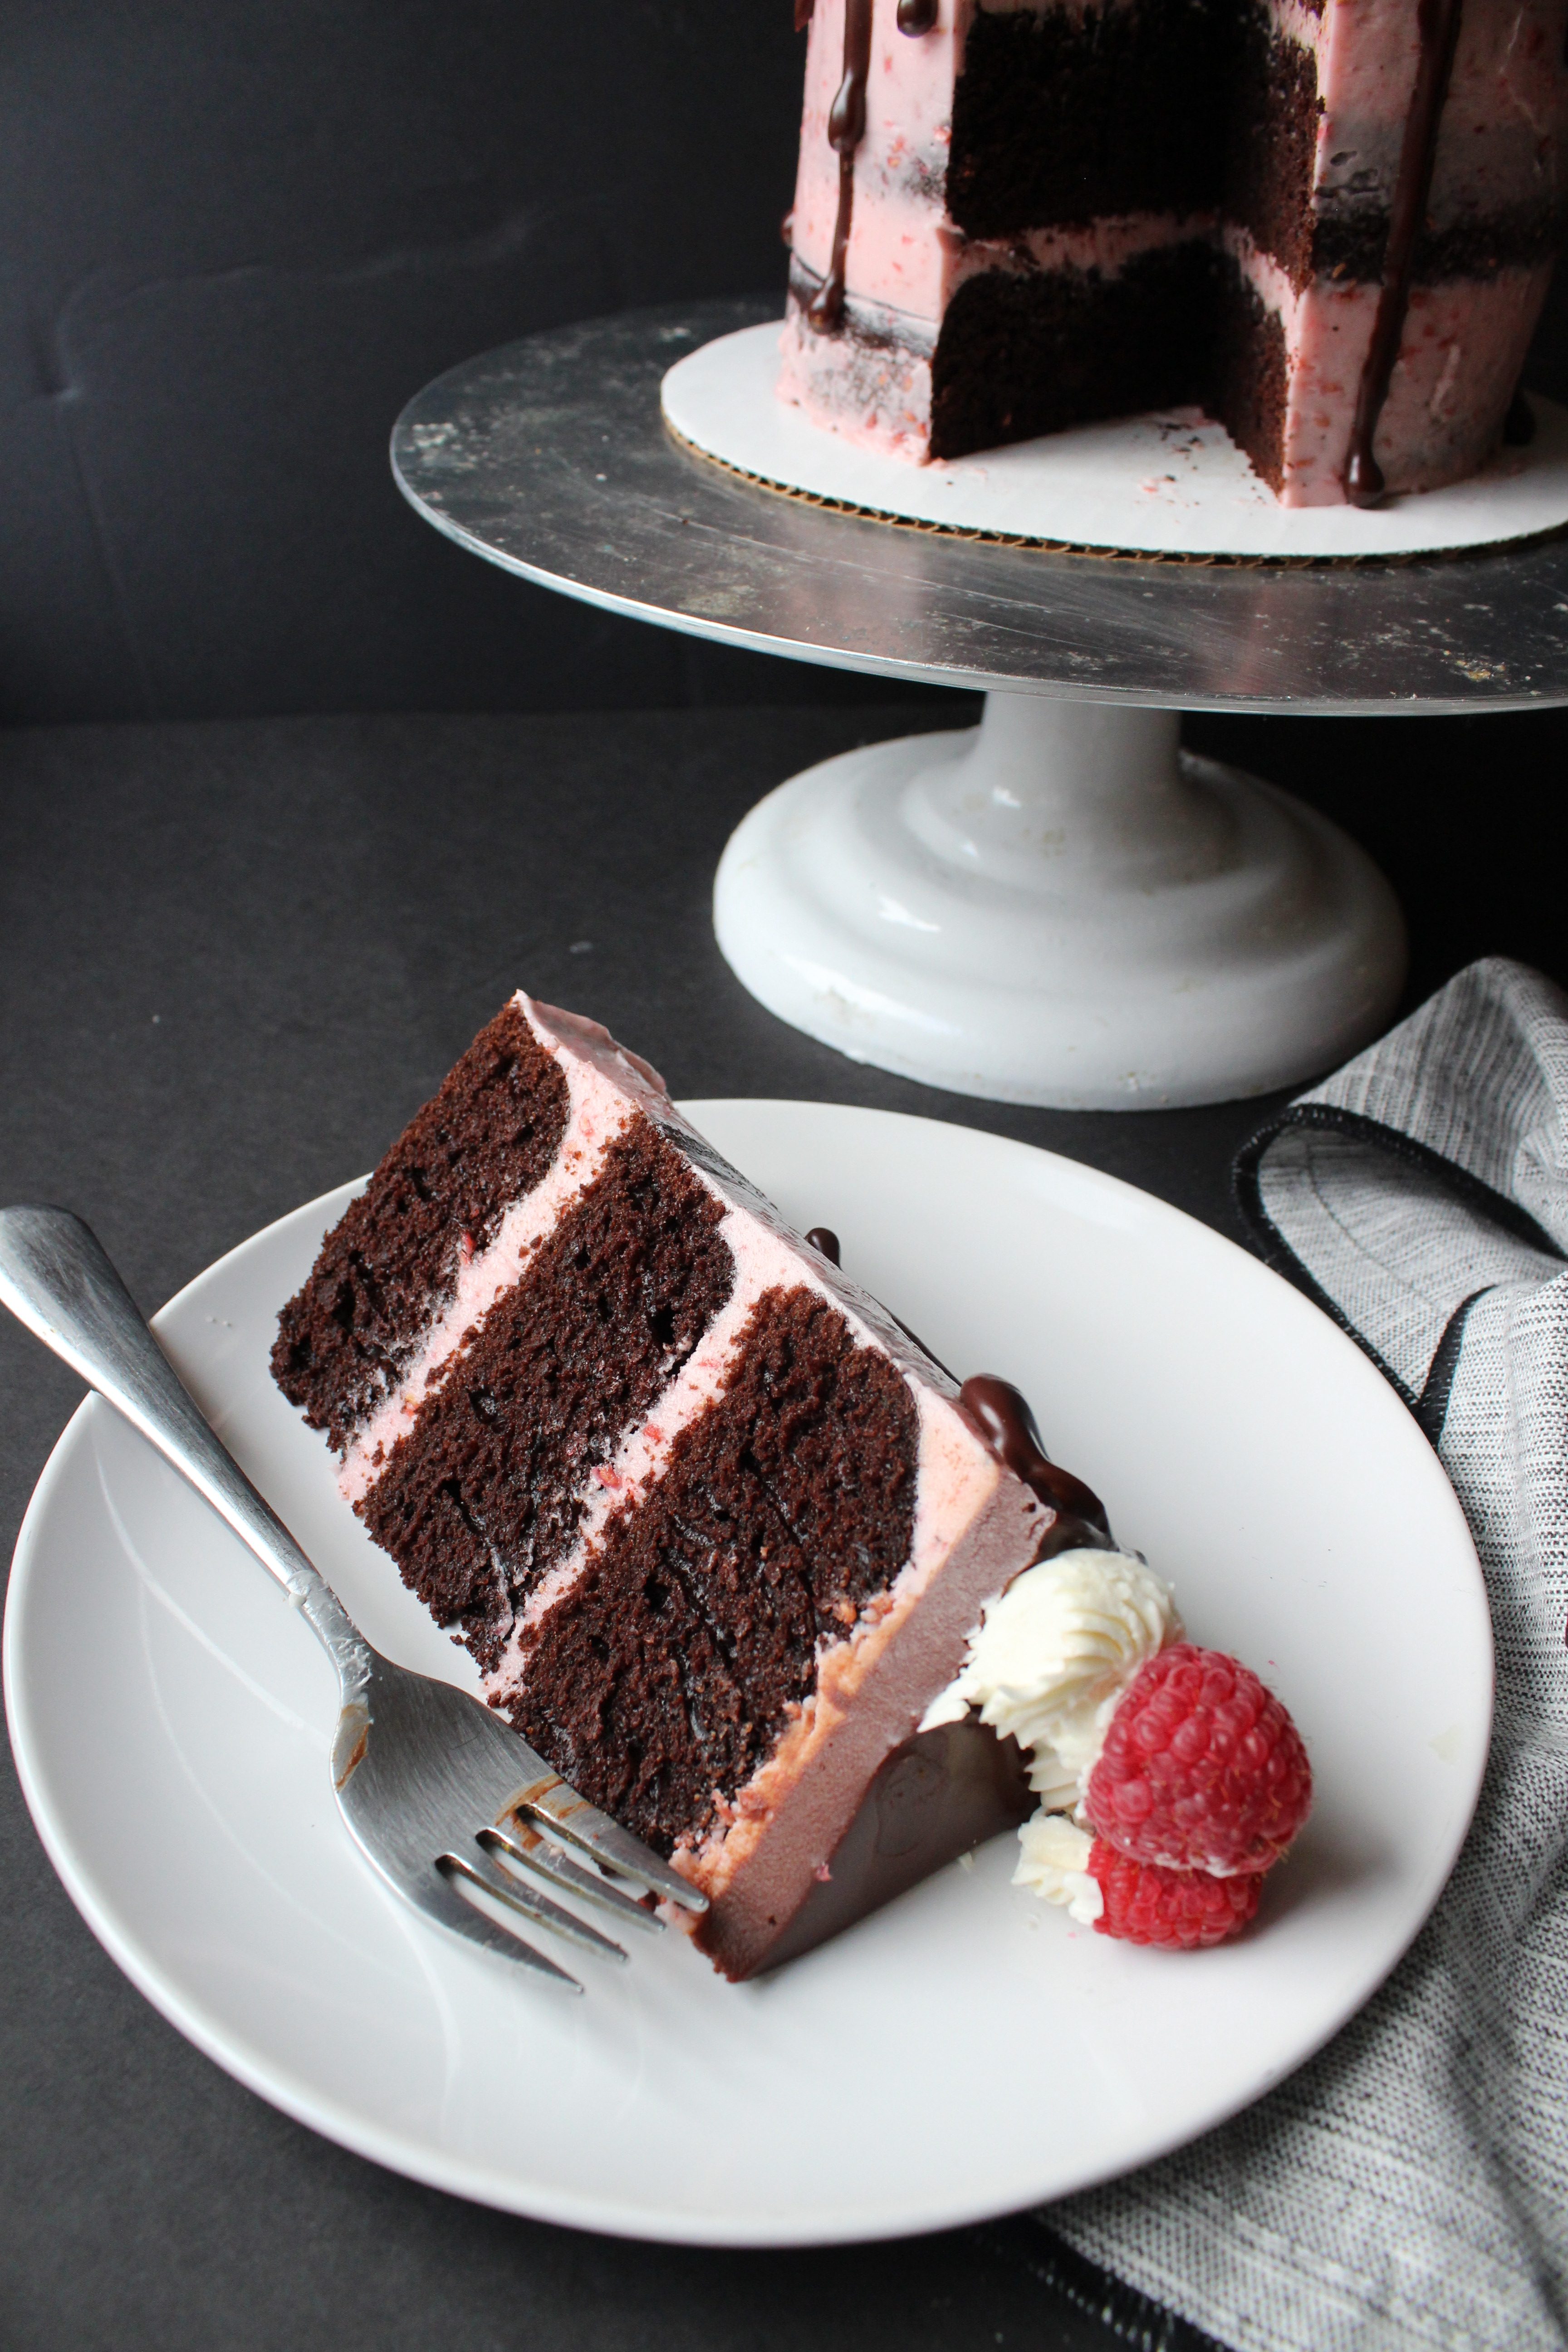
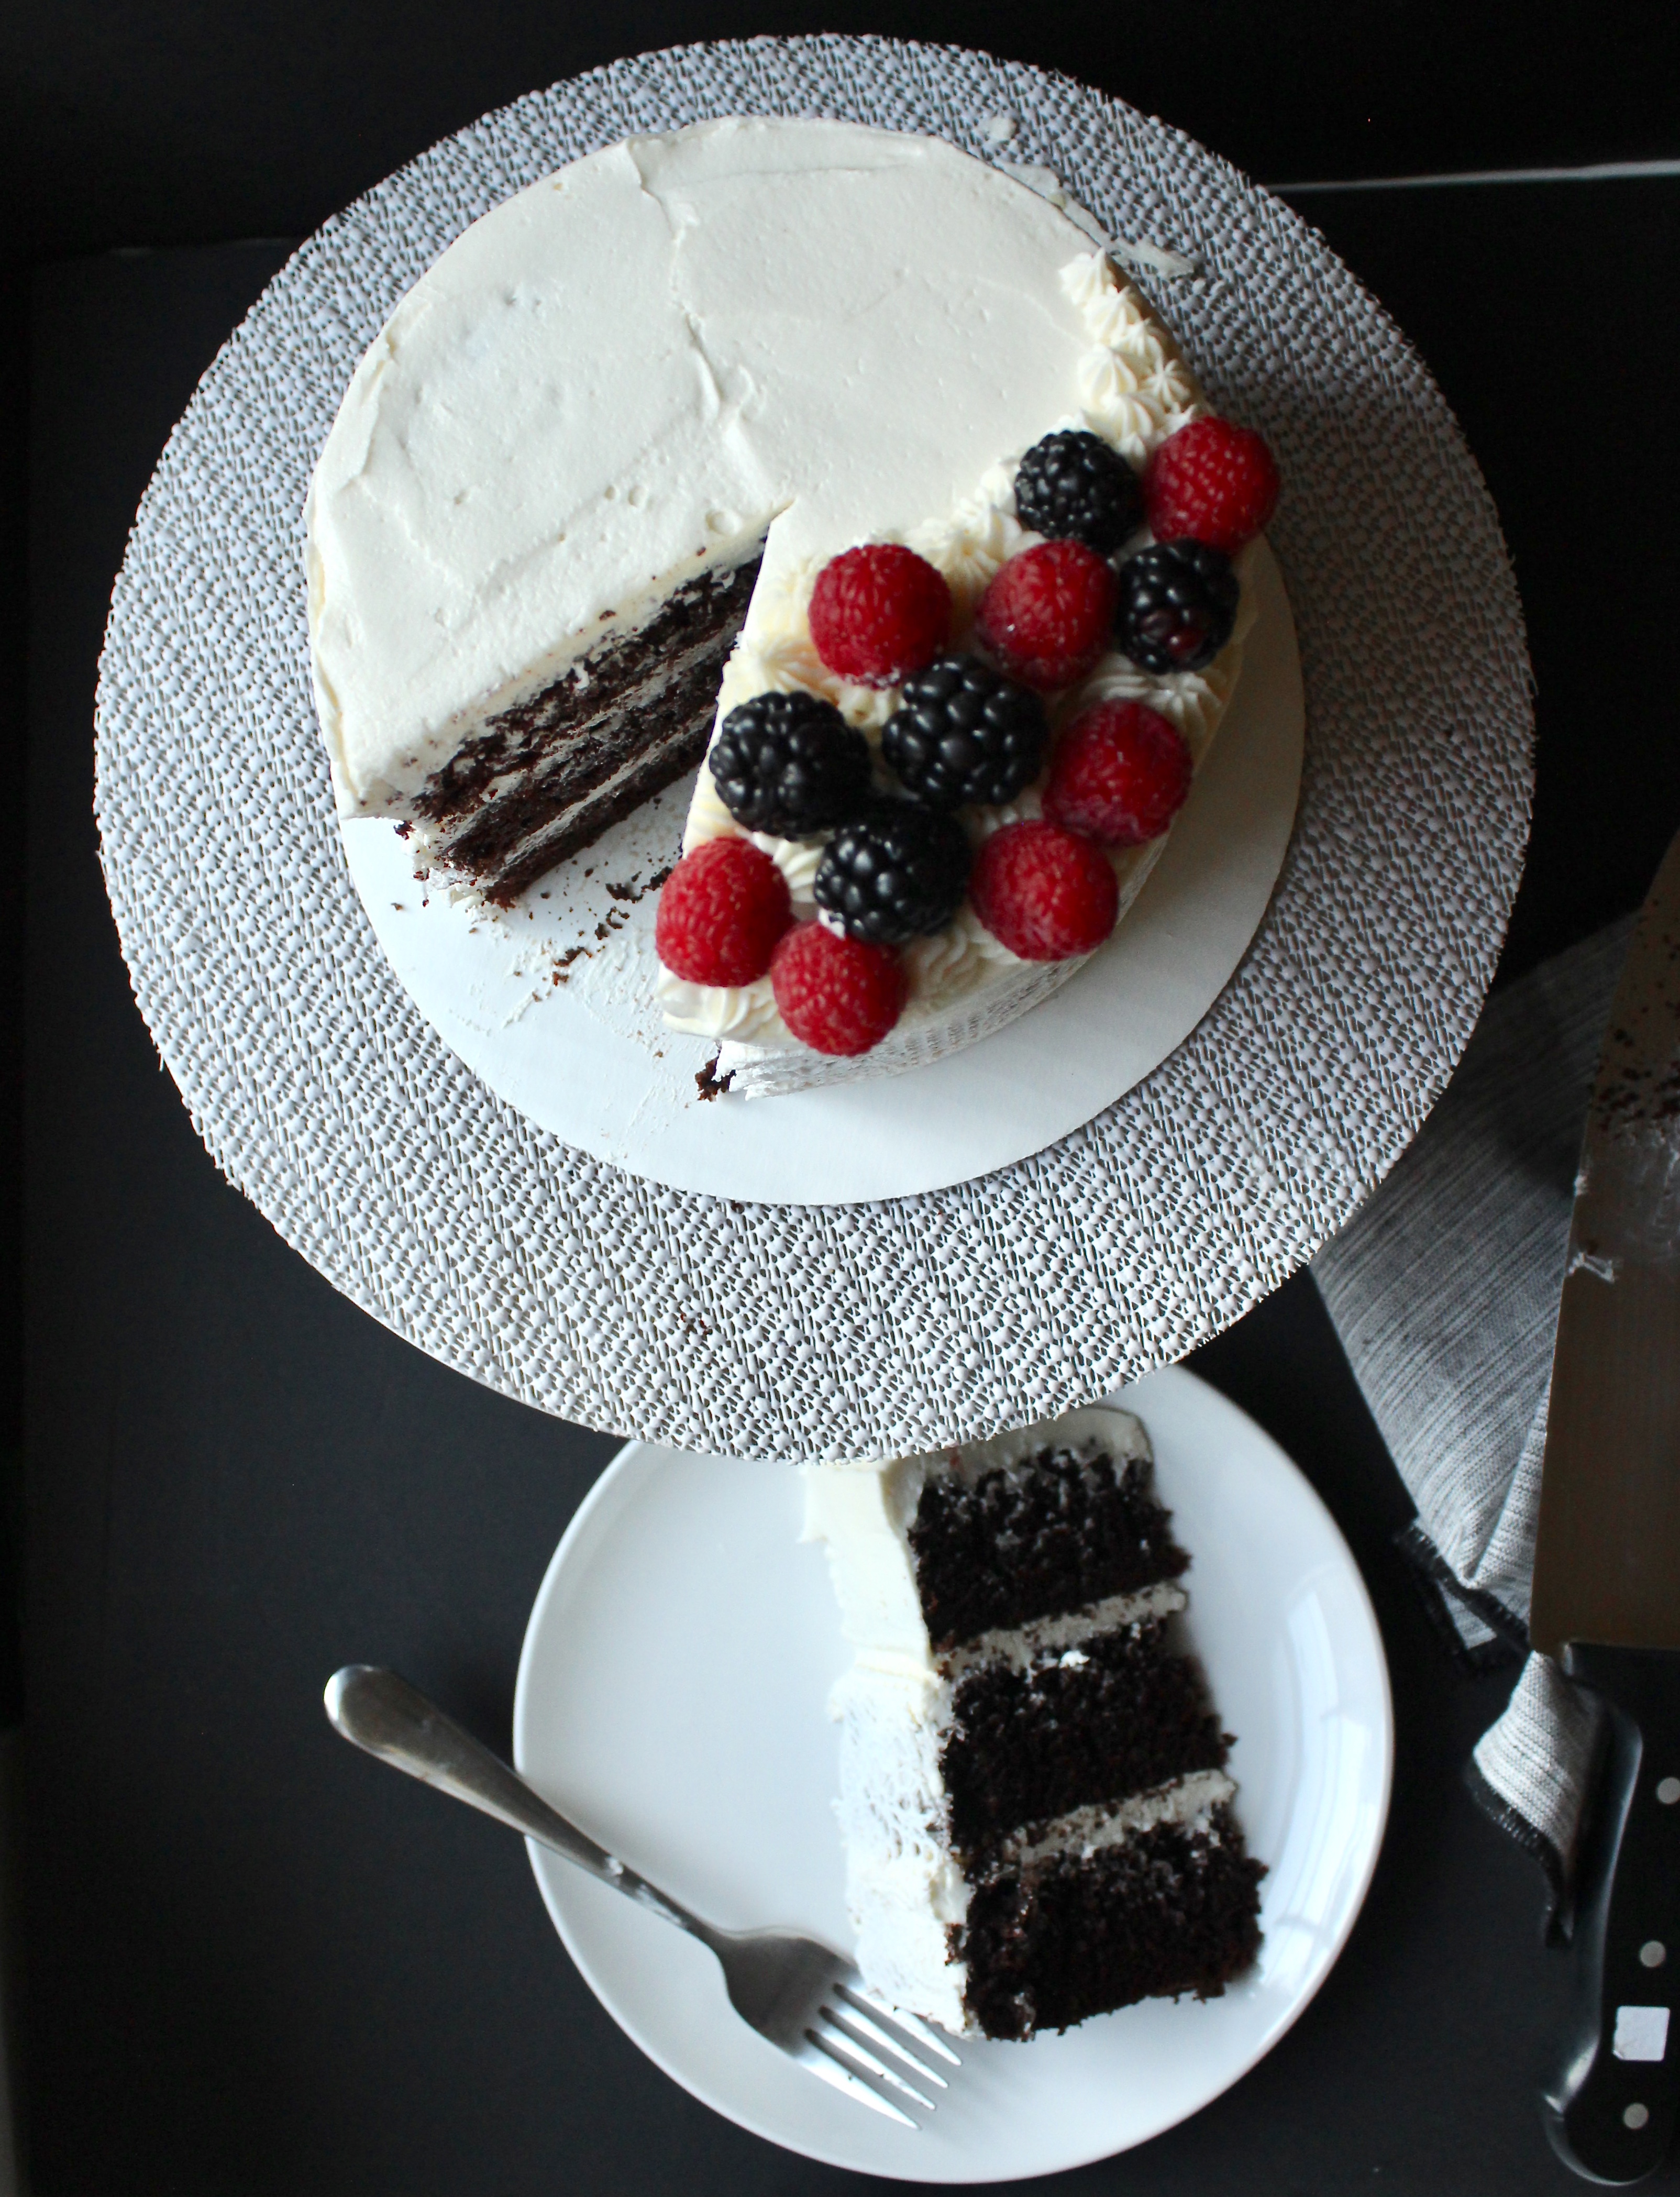
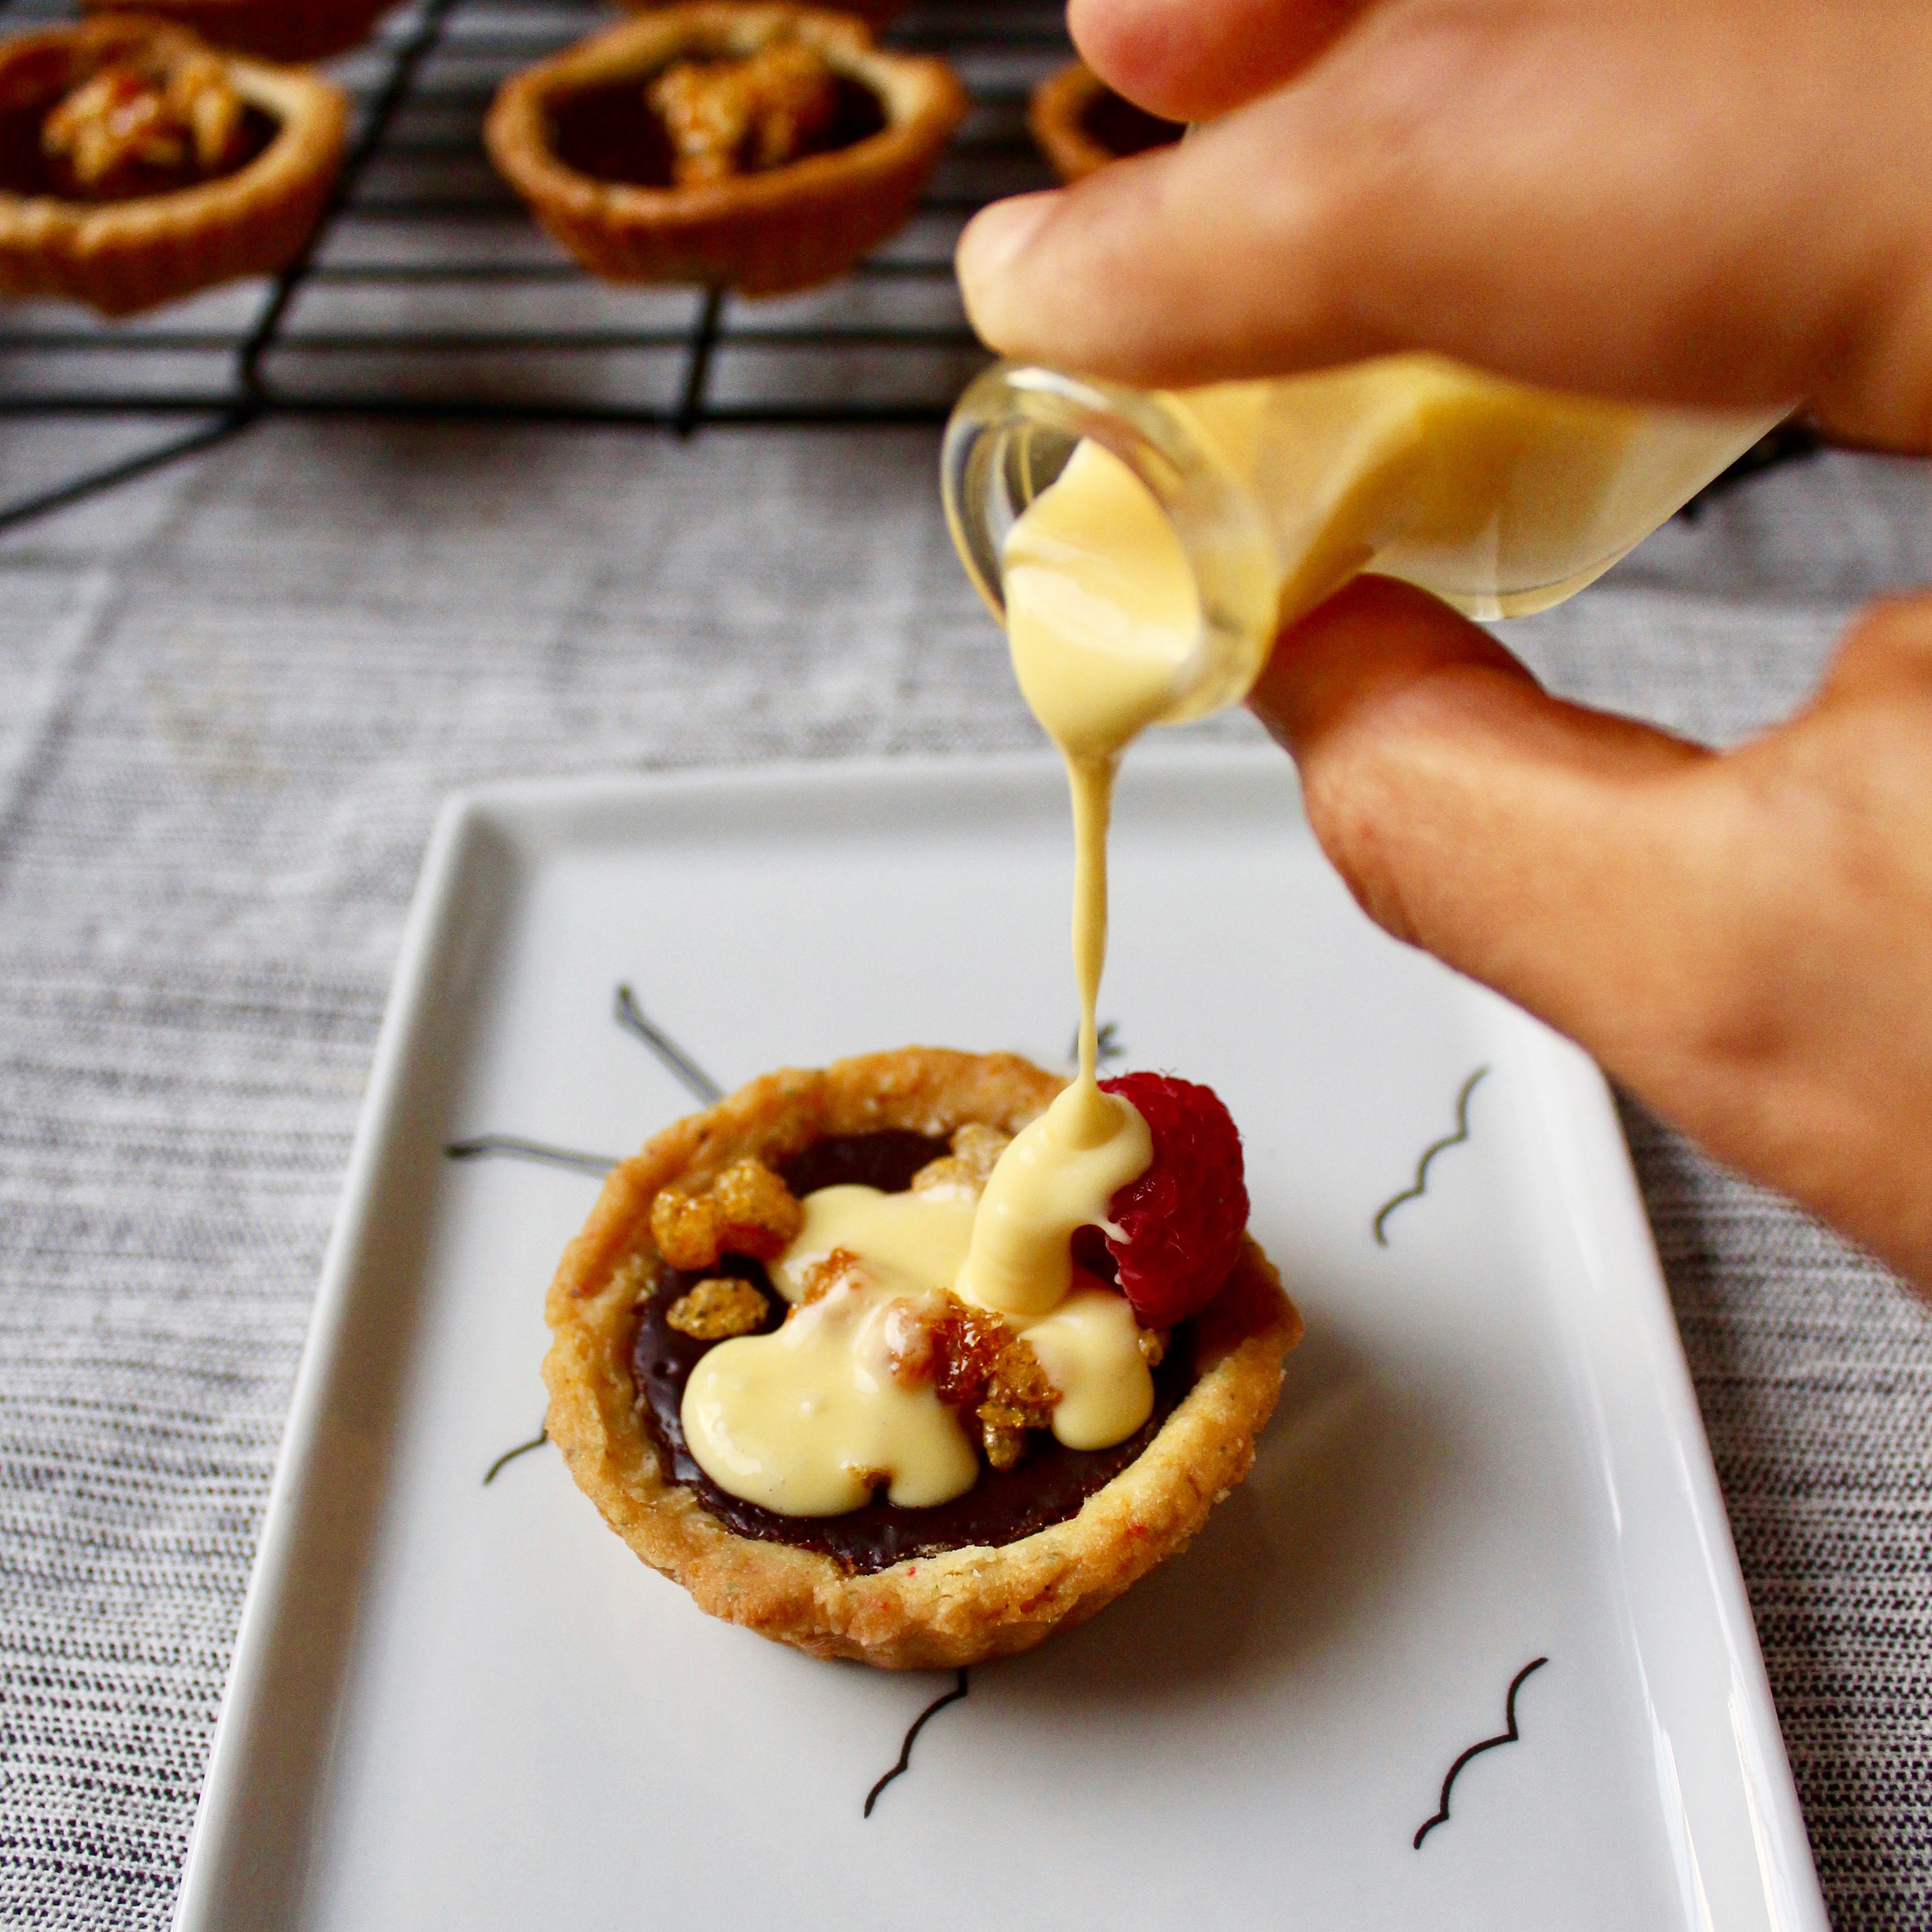
I recall as a kid, I would get visibly angry if upon cutting into a cake at someone’s birthday party, the interior revealed a pale cake with fruit wedged between the layers. I mean c’mon! Save the fruits for the healthy afterschool snack. If I’m dressing up and buying you a present, the least you can do is serve up some decadent chocolately goodness. I mean as I kid I wasn’t on the hunt for swiss chocolate or anything, heck I’d be happy if they served the Entenmann’s double chocolate cake over any of those cakes from my childhood. The one exception I make: raspberries. But only when smothered in chocolate, no less. Chocolate and raspberry will forever be one of my favorite flavor combinations. fullsizeoutput_6a2a
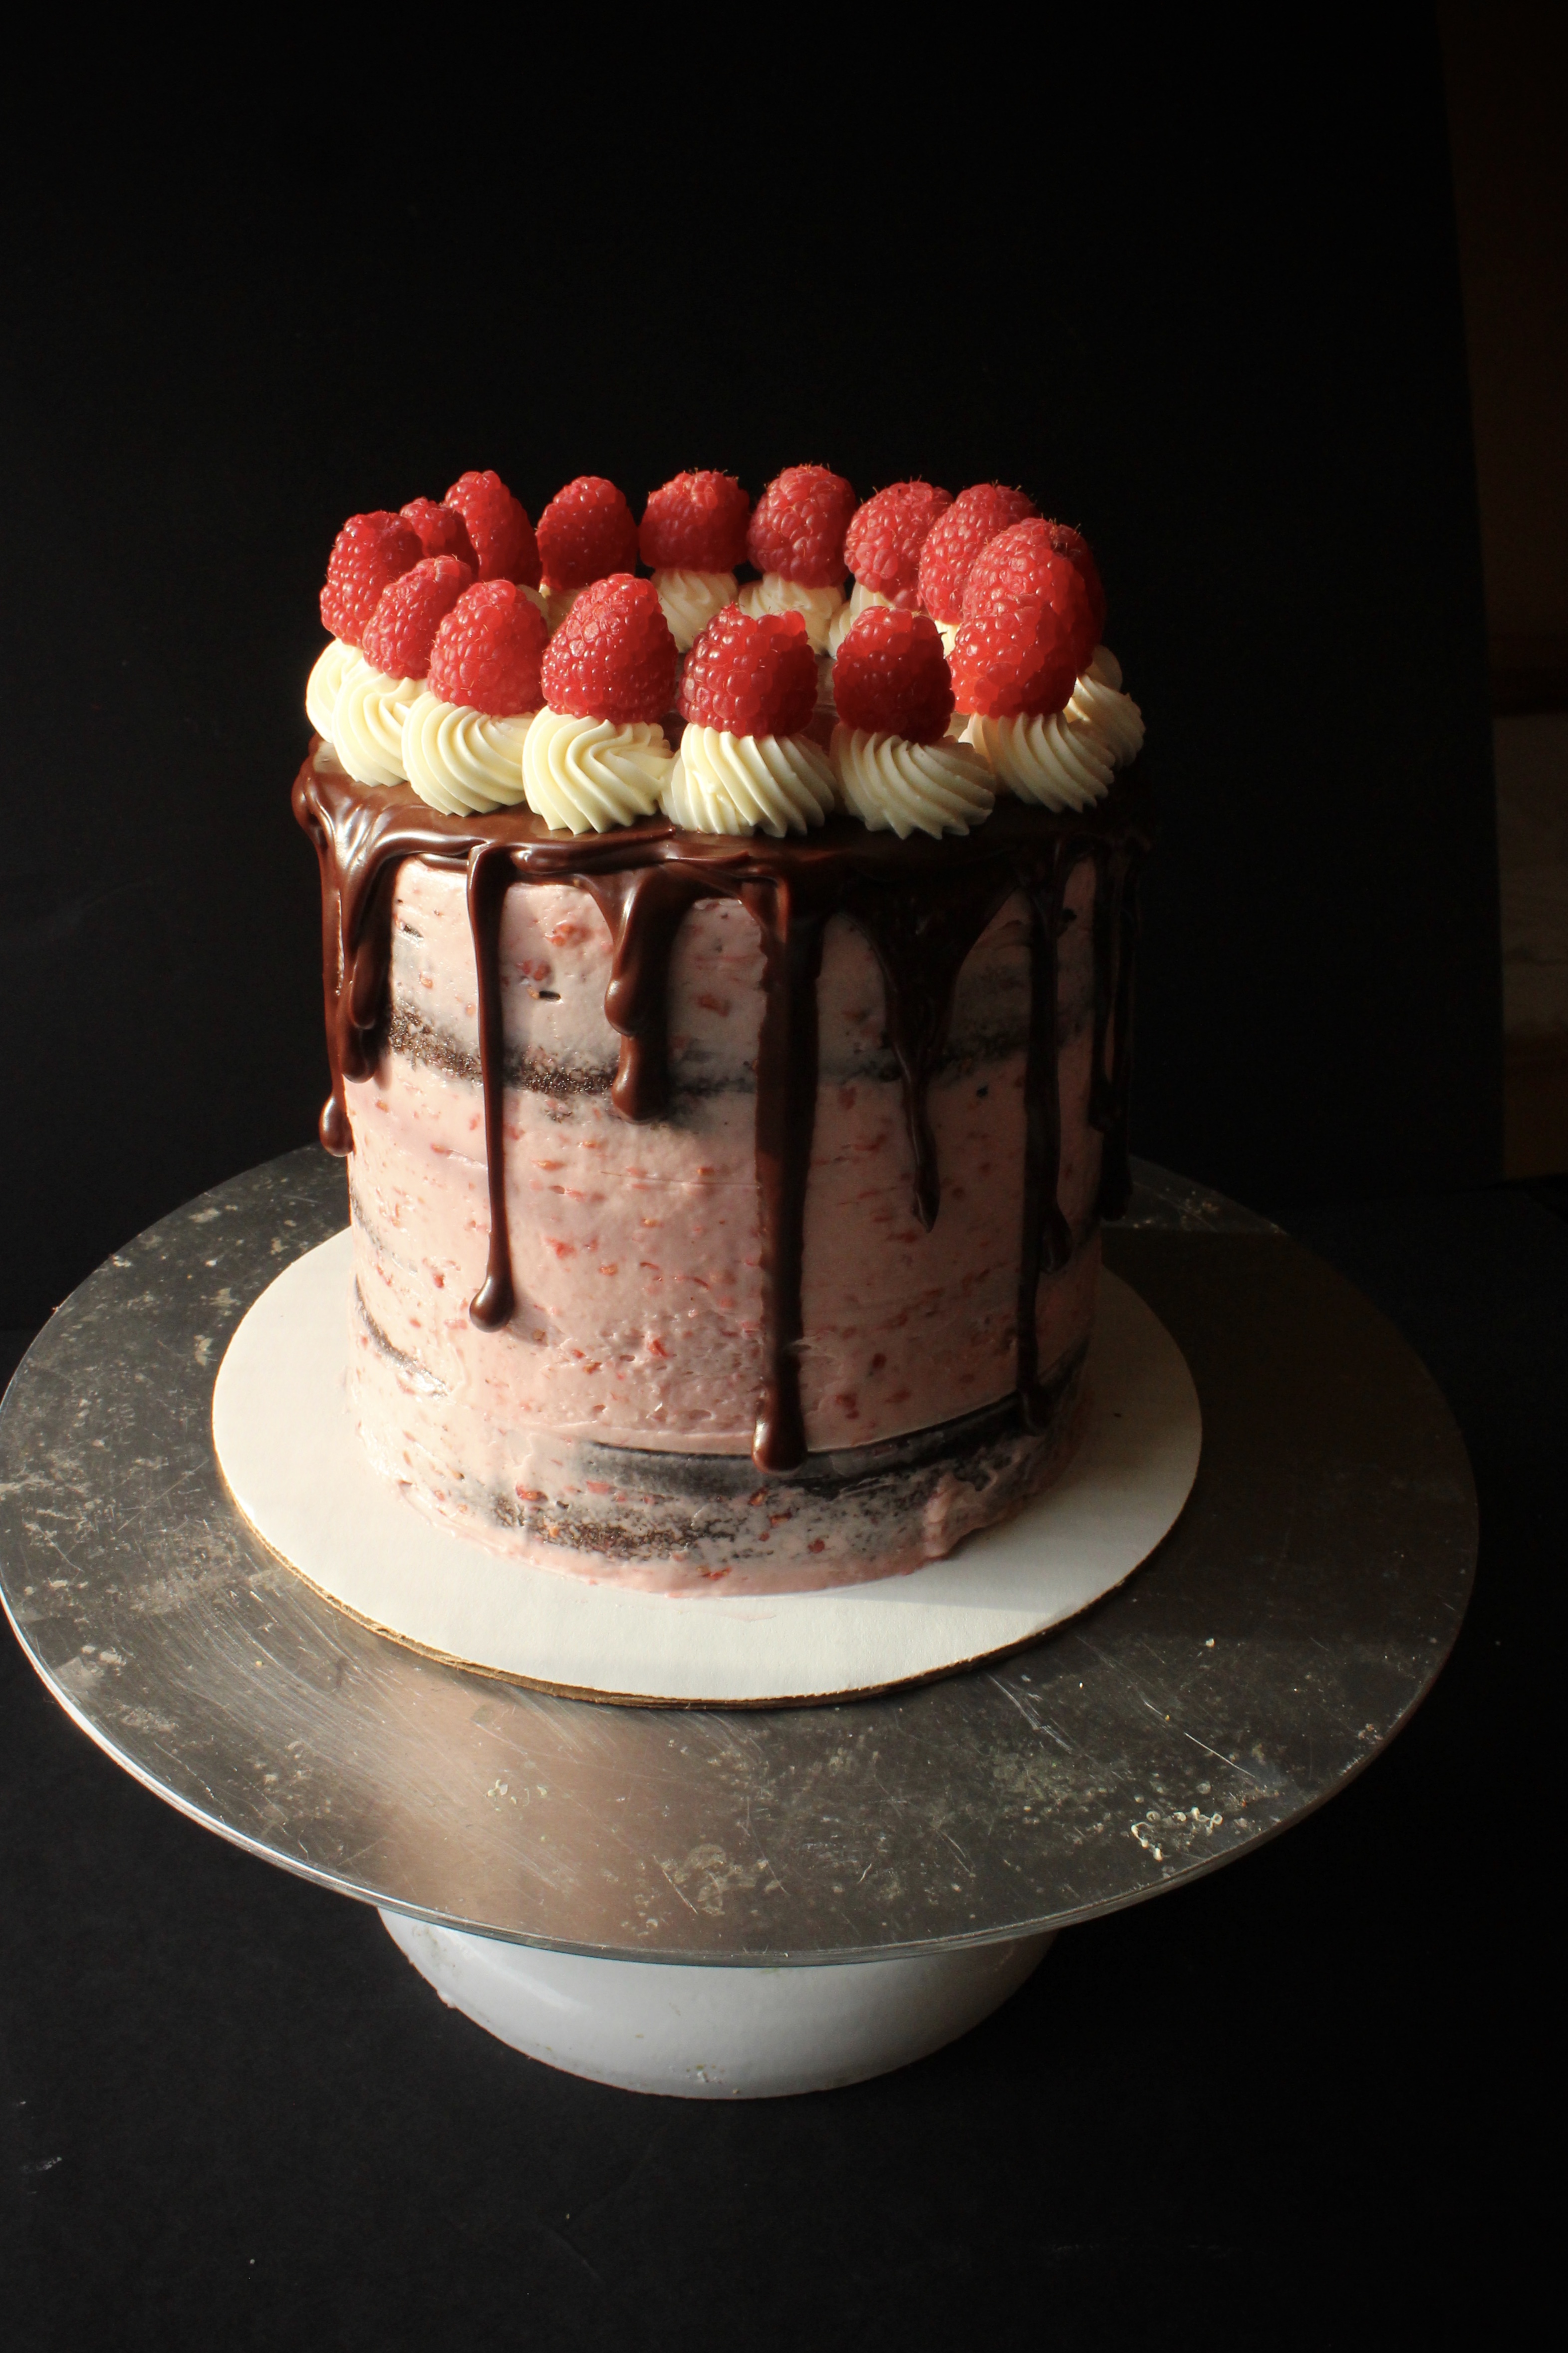
The chocolate/raspberry mousse cake from my local bakery was a long time favorite of mine, until my palette changed and only my homemade chocolate cake will do. So I created this homemade version, using swiss meringue buttercream instead of mousse as they are similar in texture and sweetness. In traditional Naureen style this is chocolate ganache dripping all over the cake, the perfect accent to the raspberry and chocolate layers underneath.

This recipe makes enough to frost a three layer 6 in round cake in the semi naked style.

Ingredients

  • 6oz. fresh raspberries
  • 1 1/4 cups granulated sugar, divided
  • 1 tsp lemon juice
  • 3 egg whites
  • 18 tbsp room temperature unsalted butter, cut into tbsps
  • 1 tsp vanilla extract

Directions

  1. In a small saucepan over medium heat combine raspberries, 1/2 cup sugar and lemon juice. Stir and allow to come to a boil. Once it comes to a boil, lower the heat to low and allow to reduce and thicken, about 10 minutes. Remove from heat and mash with fork. Allow to cool.
  2. In another small saucepan bring a small (about 1in thick) amount of water to simmer. In the bowl of your stand mixer or in a large heat proof mixing bowl, whisk together egg whites with 3/4 cup sugar.
  3. Place over the simmering water and whisk occasionally until the sugar has dissolved and mixture is quite warm to the touch (you shouldn’t feel any granules when you stick your finger in). Remove from heat and start beating with the whisk attachment at medium speed. Beat for a few minutes, until the mixture cools down to room temperature and the mixture is thick and glossy. When the bowl no longer feels warm (test the temperature by placing the back of your hand on the side of the bowl), start adding the butter, 1 tbsp at a time. It will look weird. Feel free to stop and scrape down the bowl.
  4. Continue beating at medium to high speed until the mixture looks curdled. Keep beating until it comes together into a homogenous, smooth buttercream. Lower the mixing speed and add vanilla and cooled raspberry compote. Use immediately, or store in the refrigerator, covered for 2 weeks. To use after thawing, re-beat with a whisk attachment until smooth.

Leave a Comment · Labels: American/Mediterranean, Dessert Tagged: buttercream, chocolate, dessert, fruit, ganache, homemade, raspberry

Pastry Pillows

November 27, 2017

fullsizeoutput_69aa
I’m baaaaaaaack! After recovering from hosting Thanksgiving dinner, I’m back in the kitchen making some of my favorite things: small bites, filled with butter, sugar, then topped with more fat and more sugar. Yeah! Just in time for the holiday season, I’m whippin’ out my trusty old “100 Best Cookies” catalogue from Better Homes and Gardens that I got way back when I used to live Poughkeepsie (2010). I don’t celebrate Christmas, but I love all the holiday baking that comes along with the season.
img_9337
I’ve also been watching a whole lot of The Great British Baking Show so I’m super inspired by all the different creations I see on the screen. What shall I bake next? A Stollen (a German holiday bread studded with dried fruit with a marzipan center)? A chocolate twist bread? Chocolate revel bars? I’m enjoying the down time to explore cakes’ buttery brethren – though I’ll be back in the kitchen baking cakes as of tomorrow =).
fullsizeoutput_69a8

I was fascinated by this recipe. Most pastry dough requires skillful combining of cold butter and flour in order to achieve flaky texture, but this fool proof dough creams together butter and cream cheese and mixes in flour. Somehow they puff up in the oven and look like glorious buttery pillows. The best kind of bedding I’d say! I did something sneaky and subbed mini chocolate chips for the jam in some of my later pillows. Hope you enjoy these as much as my friends and family have!

Recipe adapted from Better Homes and Gardens “100 Best Cookies” 2010.

Ingredients

  • 1 cup butter, at room temp
  • 8oz cream cheese, at room temp
  • 2 cups all purpose flour
  • 1/4 tsp salt
  • 1/4 cup apricot preserves (or any other fruit preserve you like)
  • 1/4 cup almond paste (I used marzipan)
  • 1 egg, lightly beaten
  • 1 tablespoon water
  • Pearlized, coarse or granulated sugar for sprinkling

Directions

  1. In the bowl of your stand mixer, or in a medium bowl using an electric hand mixer, beat the butter and cream cheese on medium speed for 30 seconds. While that mixes, whisk together flour and salt in a small bowl. Reduce speed to low and add flour mixture to the butter/cream cheese mixture. Mix until just combined, scraping the sides of the bowl occasionally. Divide the dough in half, place each half onto plastic wrap and flatten into disks. Refrigerate for 1 hour or until firm enough to handle.
  2. Preheat oven to 375 degrees F. In a small bowl beat egg with water. Set aside.
  3. Lightly flour your work surface and roll out your dough to 1/8in thick. I like to transfer my dough to a parchment paper lined baking sheet at this point so I can cut out and remove scraps without messing up the shapes. Use a 2in square cookie cutter to cut out an even number of squares. Removed scraps, roll up and wrap in plastic. Refrigerate. Place a scant 1/4tsp preserves and a scant 1/4tsp almond paste on each square. Use a pastry brush to apply a small amount of egg wash around the borders. Set aside.
  4. On a separate work surface, roll out the second dough to 1/8in thickness. Cut out the same number of squares as the first dough. Carefully lift each square (I use a small offset spatula to help with this) and place on top of a square containing apricot/almond. Smooth out the tops so the edges line up with the bottom squares. Crimp the edges closed with a fork. Brush with egg wash (lightly) and dust the tops with pearlized or granulated sugar. Bake in preheated oven for 10-12 minutes. Repeat with scraps.

Leave a Comment · Labels: American/Mediterranean, Dessert Tagged: apricot, dessert, fruit, hand pies, homemade, jam, pastries, pastry pillows, pies, snack

Cherry Almond Cake

August 2, 2017

fullsizeoutput_6170
I know, I know. I’m actually posting a non-chocolate recipe. There are few things that I enjoy as much as I enjoy chocolate. Vacations. Lobster truffle mac and cheese (just discovered at cute Sunnyside spot Côté Soleil while out to dinner with the talented and endearing Moni Begum of Moni’s Kitchen). Moroccan almond cookies made by La Rose Kitchen. Actually, any almond dessert is fabulous. Rainbow cookies. Marzipan (yup, straight up). Stollen (German holiday sweet bread with marzipan filling).

So cherry almond cake was a no-brainer. Last week I had made a cherry frangipane (fancy word for almond filling) tart. Recipe from NYTimes. It was SO good, but since there’s already a perfectly good recipe out there, I wanted to share a less-fussy version of the dessert for those who may not have the time or desire to make pâte sucrée, chill it, roll it out, fit it, trim it, blind bake it, then fill and bake once more.

fullsizeoutput_6171
The answer is this single layer cherry almond cake. A standard beginning of creamed butter and sugar with the addition of 2 tbsp of almond paste that has been sitting in my cupboard FOREVER. Thickened with an egg, flavored with almond extract. Finally beefed up with a cup of flour, leavener and salt. I greased and lined a 9 in cake pan with parchment. Then I poured in the batter, smoothed out to the edges, dotted the cherries throughout for an even distribution, topped with slivered almonds and sugar, then baked for about 45 minutes.
fullsizeoutput_616f
I used defrosted, drained frozen pitted cherries for this. Fresh cherries would have been out of this world, but I wasn’t about to try to pit 14oz of cherries! Fresh or frozen, it’s a delicious cake, but I would decrease the sweetness next time around. I adapted it from a Cooking Light recipe (I increased the fat content so could use a lower sugar content). Feel free to try it either way!

Ingredients

  • 6 tbsp unsalted butter
  • 2 tbsp almond paste
  • 2/3 cup granulated sugar (would decrease to 1/2 cup next time)
  • 1/4 tsp almond extract (might increase this to 1/2 tsp next time)
  • 1 egg
  • 1 cup flour
  • 1 tsp baking powder
  • 1/8 tsp salt
  • 1/8 tsp cloves
  • 1/3 cup milk
  • 2 tbsp slivered almonds
  • 2 tbsp granulated sugar
  • 14 oz pitted cherries
  • powdered sugar for sprinkling

Directions

  1. Preheat oven to 350 degrees F. Spray the bottom and sides of a 9in cake pan with cooking spray, Cut out a 9in round piece of parchment and line the bottom of the pan with it. Spray with more cooking spray.
  2. In a medium bowl, sift together the flour, baking powder and clove. Add salt and stir to combine.
  3. In the bowl of a stand mixer or in a medium bowl using an electric hand mixer, cream butter, sugar and almond paste until light and fluffy, about 2 minutes at medium low speed. Stop to scrape down the sides of the bowl. Add egg and almond extract, continue beating until the egg is incorporated, then scraped down the sides of the bowl again. Add half o the flour mixture, then the milk, then the remaining flour. Mix until incorporated, then pour into the prepared cake pan. Dot the top with cherries, almonds and an even sprinkling of the remaining granulated sugar.
  4. Bake in preheated oven for 45-50 minutes until top is golden brown.
  5. After cooling, sprinkle with powdered sugar to serve.

2 Comments · Labels: American/Mediterranean, Dessert Tagged: almond, cake, cherry, dessert, easy dessert, easy recipe, entertaining, home baking, home cooking, seasonal, summer, sweets

Chocolate Zucchini Bread

July 18, 2017

fullsizeoutput_6048

There is no rhyme or reason to this cake. It is neither healthy, nor a proper dessert. It is simply for chocolate lovers. It is a glorious use of a bland, high water content vegetable that lends it’s moisture to the crumb of this perfect snack cake. It’s blandness acts as a perfect palette for all the wonderful cocoa and brown sugar flavor to absorb.
img_9542
I’ve posted about chocolate zucchini cake before. This bread version is a bit heartier with whole wheat flour and almond flour – a little more substance to justify my classification of it as a snacking cake! I wasn’t happy with any of the recipes I found online for chocolate zucchini loaf, so I made my tweaks, including adding chocolate chips, and voila! Perfection.

Ingredients

  • 2 1/2 cups all purpose flour (or 1 cup AP flour/1 cup whole wheat flour, 1/2 cup almond flour)
  • 1/2 cup dutch processed cocoa plus extra for coating chocolate chips(if using natural cocoa, swap the amounts of baking soda and baking powder)
  • 1 tsp baking soda
  • 1 1/2 tsp baking powder
  • 1/2 tsp salt
  • 1/2 cup sugar
  • 1 cup brown sugar
  • 2 eggs
  • 12 tbsp melted butter
  • 1 lb zucchini, grated
  • 1/2 cup semisweet chocolate chips

Directions

  1. Preheat oven to 350 degrees F. Butter and lightly dust a 9inx5in loaf pan with cocoa powder. Stick in the freezer while preparing your ingredients.
  2. Melt butter in a saucepan over medium heat. Turn off heat and allow to cool down.
  3. Wash and cut off one end of zucchini. Grate, not completely finely, but not in huge slivers either. Place a large sieve over a bowl and place grated zucchini there to drain while you prepare the rest of the ingredients.
  4. Combine all the dry ingredients in a large bowl (everything except the eggs, butter and chocolate chips). Whisk to combine, breaking up any large clumps. Make a well in the center and add eggs and butter. Mix with a wooden spoon (Bengali alert: I used my hands to mix this batter!). Add all of the zucchini and stir until combined. In a small bowl combine the chocolate chips with sprinkling of cocoa (maybe 1/4tsp).  Toss to coat the chocolate chips with the cocoa. Add to the batter, gently folding in. Take the loaf pan out of the freezer and add the batter, spreading evenly across the loaf pan. Bake in preheated oven for 1 hour 10 minutes or until a toothpick comes out relatively clean.*
  5. Allow to cool completely before attempting to remove it from the pan.

*It won’t come out completely clean due to the moisture of this loaf. A few crumbs are ok. You just don’t want it to come out with wet batter.

Leave a Comment · Labels: American/Mediterranean, Carb, Dessert, Snacks Tagged: bread, chocolate, loaf, snack cake, zucchini

Chocolate Candy Cupcakes

January 16, 2017

fullsizeoutput_48ea

After a startling reading on the weight scale towards the end of December, I swore off sugar. Just two years prior I worked so hard to lose my baby weight. Inspired by beach body coaches in my network, I vastly cut down sweets, decreased portion sizes, drank tons more water, swapped quinoa for rice in many of my meals, and began to regularly exercise using Fitnessblender, the only exercise I’ve been able to stick to thanks to the fact that I can choose from workouts of different durations and can do it from the convenience of my home. So I lost the 9 pounds of lingering weight, and 8 pounds on top of that.

img_4672

And then I fell off the wagon. Slowly but surely I downward spiraled, picking back up my sweets habits and eating rice and curry without restraint. I kept up with the exercise more or less but it wasn’t enough with my slowing metabolism.

So I decided to stop eating foods with added sugar. It’s just one step, but surely it should help. But of course the universe has to align to make this impossible for me. Shortly after making my resolution, I attended a gingerbread house making playdate where I was SURROUNDED by candy and cake and all kinds of good stuff. Soon after that my daughter’s birthday rolled around and somebody’s gotta do QC and make sure things taste right. Amiright?

img_4685

I did a good job holding off on tasting these, but then I needed a cross section for the blog, so guess where the other half went.

Yup.

fullsizeoutput_48e9

This is a really magical combination for the chocolate lover in your life. It’s reminiscent of the creme filled hostess cupcakes, but made even better with quality cocoa in the cupcake and chocolate in the ganache, homemade salted caramel sauce and delicious candy toppings. Remember we eat with our eyes first, and kids moreso than us. So if they see m&ms, they automatically think it’s a superb cupcake.

Enjoy the quick video tutorial below!

This is an adaptation of Hershey’s Perfectly Chocolate Chocolate cake. Because I used Dutch-process cocoa (which is alkalized, or less acidic than natural cocoa), I upped the amount of baking powder and decreased the amount of baking soda from the original recipe. I also used boiling water instead of hot coffee as many chocolate cake recipes call for, as it made for a way too tender a crumb. Perfect in layer cakes, but for cupcakes, you need something with structure.

Ingredients

  • 2 cups sugar
  • 1 3/4 cups all purpose flour
  • 3/4 cup dutch process cocoa (I use Rodelle)
  • 2 1/2 tsp baking powder
  • 1/2 tsp baking soda
  • 1 tsp salt
  • 2 eggs
  • 1 cup whole milk
  • 1/2 cup vegetable oil
  • 2 tsp vanilla extract
  • 1 cup boiling water

Directions

  1. Preheat oven to 350 degrees F. Line a muffin/cupcake pan with paper liners. You will need 15 in total. My cupcake pan only has room for 12, so I need to make these in 2 batches.
  2. In a large bowl or in the bowl of your stand mixer add the sugar. Place a sifter over the top of the bowl and add flour, cocoa, baking powder and soda. Sift the ingredients into the sugar. Add salt. Stir to combine using the paddle attachment.
  3. In a 4 cup measuring cup or in a medium bowl, measure out the milk and vegetable oil. Add eggs and vanilla and mix well using a fork. With the mixer running on low, slowly drizzle in the wet ingredients into the dry. Stop occasionally to scrape down the sides and bottom of the bowl. Turn the mixer back onto low and slowly drizzle in boiling water. Stop the mixer and scrape down with a spatula to ensure the batter is homogenous.
  4. Using an ice scream scoop, scoop batter into the cupcake liners 2/3 of the way to the top. Bake for 15 to 18 minutes or until a toothpick inserted in the middle comes out clean.
  5. After they cool, hollow out the middle using a small circular cookie cutter. I used the smallest one from this set. I filled it with marshmallow creme using a piping bag and wide tip. I drizzled some salted caramel sauce over them. Then frosted them with chocolate ganache and garnished with chocolate candies.

Leave a Comment · Labels: American/Mediterranean, Carb, Dessert, Food Fun, Recipes Tagged: candy, caramel, chocolate, cupcakes, ganache, marshamallow creme, marshmallow fluff

Chocolate Wafer Cookies

January 5, 2017

fullsizeoutput_47ec
If ever you’ve craved a cookie so intensely chocolately, with little to meddle with it pure chocolate flavor (no nuts, no eggs, and a high cocoa to flour ratio), then this cookie is it.

I first made these about 1 year ago when I made my first ice box cake…for 50 people. I must have made 4 batches. Probably could have made less if I hadn’t been snacking on them along the way.

These cookies mimic the famous Nabisco Chocolate Wafers that most icebox cake recipes call for. For some reason, they’ve been discontinued in store, and are only available online. Every time I attempt to purchase some, that little voice in my head goes “hydrogenated oils…preservatives” then I head to the kitchen to make my own. They are easy to make, hard to mess up, and I always have the ingredients on hand.fullsizeoutput_480c
It’s hard to tell when these cookies are done, since they are so dark. I usually just go by 10 minutes, as the recipe indicates. Since the cocoa is the predominant flavor, quality really matters. And unfortunately, it is one of those slightly fussy recipes in that it requires dutch-processed cocoa (cocoa powder that’s been alkalized, making it less acidic than natural cocoa powder). You could try to use a natural cocoa powder, such as Ghirardelli (I wouldn’t recommend Hershey’s for these), but you may need to increase the baking soda. I haven’t tried it yet, but if you do, please let me know!
img_8480
As these cookies cool, they become crisp, which is why they work so well in icebox cakes, and in this week’s case, ice cream cake. More on that coming soon!

They absorb the moisture from the surrounding medium without getting too soggy. They aren’t as heavy as say a brownie or a chocolate chip cookie, so you can satisfy your chocolate craving with a fraction of the guilt.

Recipe from Cooking Channel.

Ingredients

  • 1/2 cup or 1 stick unsalted butter
  • 3/4 cup granulated sugar
  • 1/2 cup dark brown sugar*
  • 1 tsp vanilla
  • 1 cup flour
  • 3/4 cup Dutch processed cocoa (such as Rodelle)
  • 1/2 tsp baking soda
  • 1/4 tsp salt
  • 1/4 cup whole milk

Directions

  1. In the bowl of your stand mixer, or in a large bowl using a handheld electric mixer, cream together the butter and both sugars for 2 minutes at medium speed. Add vanilla and beat until combined.
  2. In a medium bowl, sift the flour, cocoa, baking soda. Add salt and stir to combine.
    With the mixer running on low, slowly add the dry ingredients to the butter/sugar mixture. Stop to scrape down the sides of the bowl occasionally. Once all the flour’s been added, add the milk and mix until combined.
  3. Lay a piece of plastic wrap on a flat surface. Dump cookie dough directly onto the plastic wrap, in a log-like shape. Wrap up the dough with the plastic wrap and continue to shape into an even-width log. Refrigerate for at least 1 hour.
  4. Preheat oven to 350 degrees F. Score cookie dough with a ruler 1/4in apart. Slice the log into 1/4in thick disks and place disks on a cookie sheet lined with parchment paper. Bake for 7 to 8 minutes. Refrigerate the remaining cookie dough. Then rotate baking sheet and bake for 2 minutes more. Allow to cool for a few minutes before transferring to a wire rack to cool completely.
  5. Continue with remaining cookie dough. Wrap well and store at room temperature.

*I only had light brown sugar in stock, so I added half a tablespoon of molasses to substitute for the dark brown sugar.

Leave a Comment · Labels: American/Mediterranean, Dessert, Recipes Tagged: chocolate, cookie crumbles, cookies, dark chocolate, dessert, easy, egg free, ice cream cake, icebox cake, wafers

  • Newer Entries
  • 1
  • 2
  • 3
  • 4
  • …
  • 11
  • Previous Entries
American, Bangladeshi. Savory, sweet. I don't discriminate and neither should you.

Most recently…

Load More...
Follow on Instagram

Social

Subscribe to Blog via Email

Enter your email address to subscribe to this blog and receive notifications of new posts by email.

Tags

appetizer beef bengali breakfast butter cake caramel chicken chocolate chocolate chips cilantro clean eating coconut comfort food cookies dessert dinner entertaining fall fruit ganache gluten free halal healthy homemade honest chops honest creations iftar italian pasta pastry pistachio quick and easy dinner ramadan recipe side side dish south asian spinach vegan vegetables vegetarian weeknight dinner weeknight meal whipped cream

Theme by 17th Avenue · Powered by WordPress & Genesis