Kitchen3N

Recipes and food fun from Apt 3N

  • About
  • Gallery
  • Recipes

Pumpkin Cupcakes

October 29, 2015

img_7429

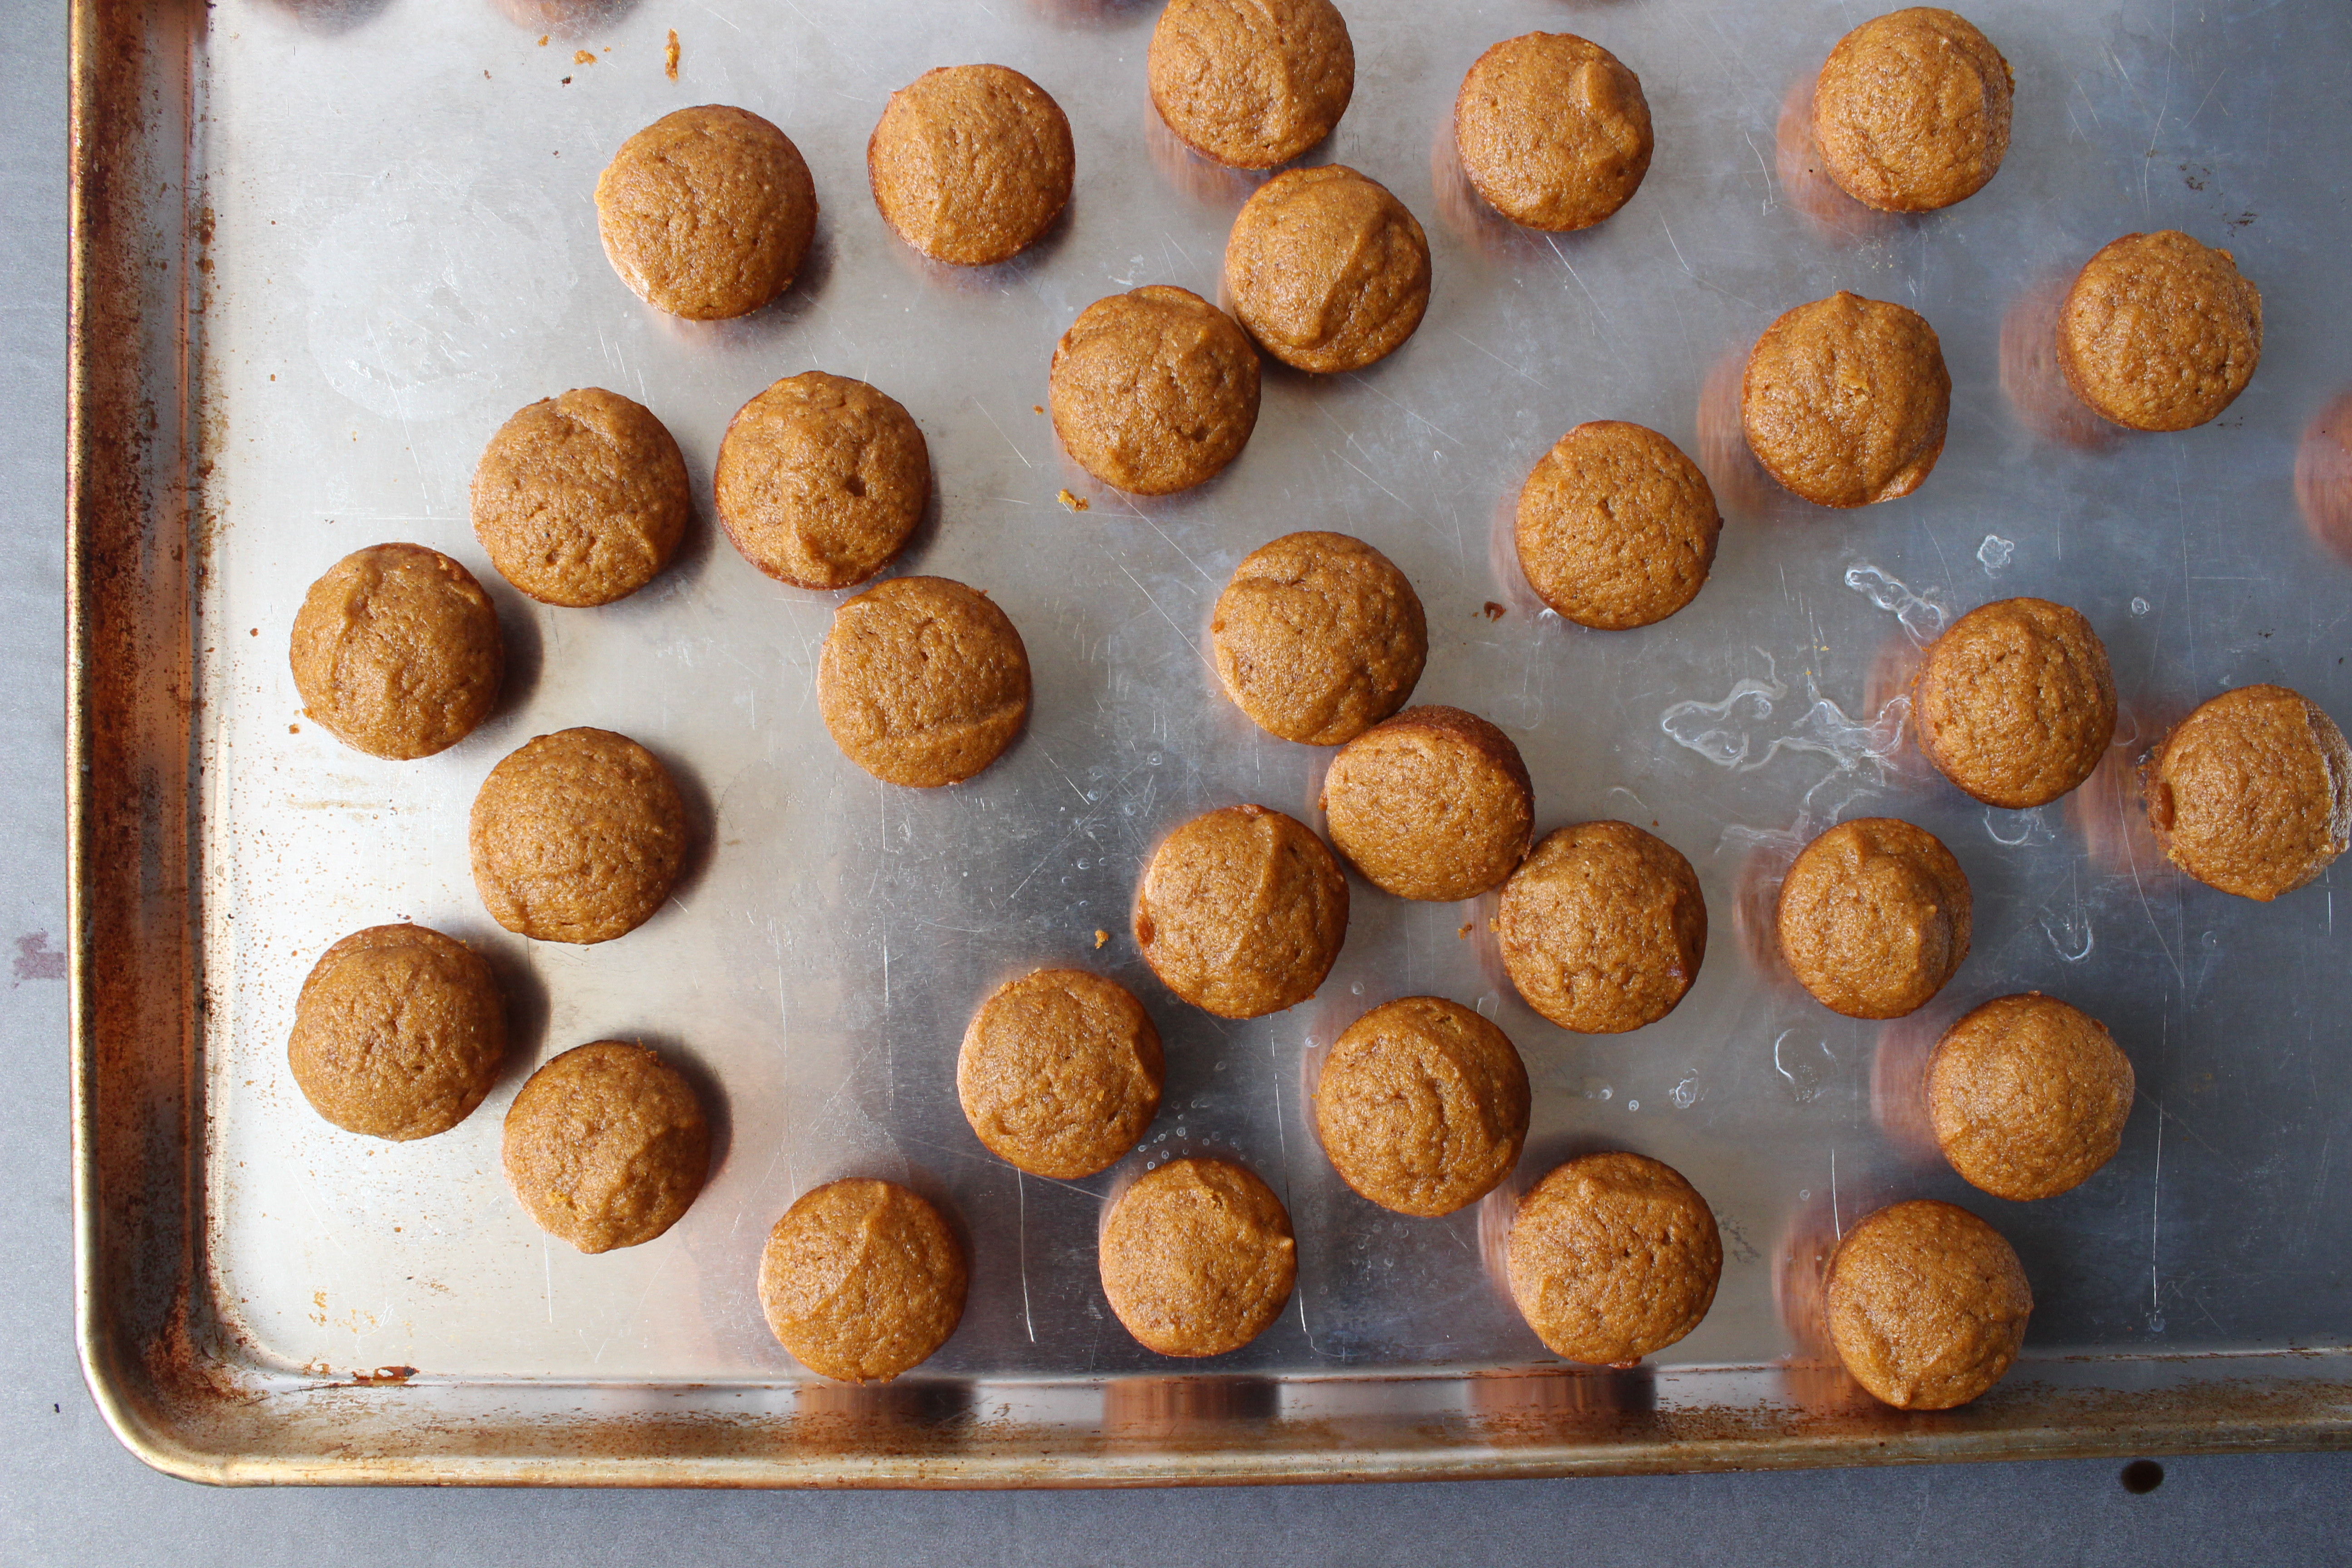
I usually shy away from pumpkin spice anything. It’s just not my cup of tea. But a few weeks ago our family went to Wightman Farms in New Jersey, where they attempt to ameliorate the hurt inflicted on your wallet from overpriced hay rides with complimentary pumpkins. Thus, I had 4 pumpkins and a whole lotta cooking to do. I made a pumpkin bread which was a bust (recipe said to bake in two 8×4 loaf pans; I brazenly baked it in a single 10×5 in pan and sadly watched through the oven door as it never rose), a pumpkin pasta which was delish, and finally, these fabulous little bites. Important to note that my homemade pumpkin puree is thinner than the canned ones, but I think since this recipe uses vegetable oil and not butter, you should be fine. IMG_5142I whipped these up without a recipe to refer to (hence most of the amounts are 1, 1, 1 [1 cup sugar, 1 cup flour, 1 cup pumpkin, etc.] but hey, it works!) and without even being sure if the end result would be a cupcake or a muffin. Since I wanted to practice my piping, I frosted them with a cream cheese frosting – so I guess they are officially in Camp Cupcake! They are so moist you can serve as a snack without the frosting.

Ingredients

  • 1/2 cup brown sugar
  • 1/2 cup granulated sugar
  • 1/2 cup vegetable oil
  • 1 egg
  • 1 cup pumpkin puree*
  • 1/2 cup all purpose flour
  • 1/2 cup whole wheat flour (could omit this and use all all-purpose flour)
  • 1/4 tsp cinnamon (can increase to 1/2 tsp if you prefer)
  • 1/8 tsp ground clove
  • 1/4 tsp kosher salt
  • 1/2 tsp baking powder (make sure it’s fresh! i.e. not older than 3 months)
  • 1/4 tsp baking soda (same)

Directions

  1. Preheat oven to 325 degrees F. Spray either a mini muffin pan or a standard muffin pan with non-stick spray.
  2. In the bowl of a stand mixer (or in a large bowl using a handheld electric mixer), combine both sugars with vegetable oil and beat for a minute. Add egg and continue beating. Add pumpkin puree and continue beating for another minute.
  3. In a separate bowl, combine flours, spices, salt and leavening. Whisk a few times.
  4. With the mixer on low speed, slowly add the dry ingredients just until combined. Scoop batter into prepared pans to about 3/4 way up. If using the mini muffin pan, bake for 15-17 minutes until a toothpick inserted in the center comes out clean. For a standard muffin pan, bake 18 to 20 minutes.
  5. If you choose to frost them, allow them to cool to room temperature. Frost with a cream cheese frosting.

*To make the pumpkin puree, I peel a pumpkin similar to how you would peel a butternut squash – with a big knife, going from top to bottom, around on all sides. Scoop out seeds, chop, then place in a large wok or pot with 1/2 inch of water. Bring to a boil then reduce heat. Simmer until tender. Blend in a food processor.


Leave a Comment · Labels: American/Mediterranean, Dessert, Recipes, Veg Tagged: autumn, cupcakes, dairy free, dairy free dessert, dessert, easy dessert, fall, pumpkin, seasonal cooking

Coconut Sheet Cake

October 19, 2015

IMG_5099I feel like I just completed a marathon. Not the running kind, though there was a lot of physical activity involved. Running to/from the store. Planning, baking, cleaning, putting away, assembling, decorating on top of the usual taking care of 2 small children and managing a household. Before this past weekend, my cake orders were usually 2-3 layer 9 in cakes. Now I had to prepare 2 full sheet cakes to feed 200 people over two consecutive days. Luckily the other cake was an icebox cake that required lots and lots of chocolate wafers that I was able to store in the fridge. I was pretty much at capacity when I baked the first layer of this cake and froze earlier in the week.       IMG_5057I had previously made this as 3 layered cake. But the recipe needed tweaking in order to make it more sturdy and stand up to the demands of a sheet cake! IMG_5058The customer requested pineapple filling in lieu of the cream cheese frosting, so if you like pina coladas then this cake is for you! I made two batches using the recipe found here. It was just perfect. IMG_5064The groom to be, after taking a bite could only say “wow”. That’s right. I don’t strive to make the most over the top decorative cakes that look like your favorite handbags. I strive to make the best cake you have ever tasted, every time.  IMG_5069I should probably mention this was for a Bengali pre-wedding party called a Gai Holud. The writing on the cake reads “Jamil’s Gai Holud”. It’s a tradition wherein the bride or groom is rubbed all over with turmeric paste and then bathed publicly (with the Bengali equivalent of a bathing suit on).  Here in America, we do a more symbolic version. Bride/groom sits on some decorated platform with an array of sweets in front of him/her. There is a bowl of turmeric paste that is rubbed on a small portion of his or her face, then wiped off. IMG_5070 IMG_5077IMG_5088This is how I prepped the board for my 16×22 in cake. Because apparently they make pans in that size, but not cake boards or cake boxes. Lame.IMG_5091IMG_5092IMG_5093I don’t usually do crumb coatings, but because I made the amount listed in the original recipe, it wasn’t enough to properly frost a cake of this size, so I used it just to cover the surface. This cake is very tender, very moist, so it needed the crumb coating. IMG_5094The real challenge was in getting the second layer onto the first. The first layer was just inverted by placing the cake board on top of the sheet pan and flipping. But the second layer was not as trivial. I stood over the first layer, second layer in hand for like 5 minutes taking deep breaths before going for it. And it didn’t align evenly! Although I held the cake in place by the bits of parchment sticking out of the edges, I couldn’t fully control how it flipped out of the cake pan so it came out slightly rotated down (by like 10 degrees). I sawed off the parts that stuck out on either side and sort of glued it onto the barren sides with frosting. IMG_5098It worked. The guests were none the wiser. Til now, of course.IMG_5103Traditional henna patterns as decoration and toasted coconut flakes all around for that extra oomph.

Coconut Sheet Cake

Recipe adapted from A Taste of Home. Please note I made two batches of the recipe below for my 2 layer sheet cake. I used the frosting from the link above (also 2 batches).

Ingredients

  • 6 eggs, separated, at room temperature
  • 2 1/4 cups sugar
  • 3/4 cup butter, softened
  • 3/4 cup vegetable oil
  • 1 tsp coconut extract
  • 1 tsp vanilla extract
  • 1/2 tsp almond extract
  • 3 cups cake flour
  • 1 1/2 tsp baking powder
  • 1 tsp baking soda
  • 1/2 tsp salt
  • 1 1/3 cup buttermilk at room temperature
  • 2 heaping cups sweetened coconut flakes
  • 1/4 tsp cream of tartar

Directions

  1. Preheat oven to 325 degrees F. Prepare 16x22in sheet pan by lining with parchment paper, spraying with non stick spray or butter, and sprinkling a bit of flour.
  2. Beat butter at low speed, gradually increasing to medium until light and aerated, 1 1/2 to 2 minutes. Gradually add 1 1/2 cups of sugar. Beat until light and fluffy – about another minute. Decrease speed to low and add oil. Gradually add the remaining sugar so as not to deflate the butter. Add the six egg yolks, one at a time, scraping down the bowl halfway through. Add the extracts and beat until combined. Stop mixer.
  3. Sift cake flour, baking powder and baking soda into a medium bowl. Add salt and give a gentle stir with a wooden spoon. Turn the mixer on low and add the dry ingredients in 3 batches, alternating with with buttermilk. Turn off mixer when dry ingredients are just incorporated.
  4. In a large bowl, beat egg whites with cream of tartar with a handheld electric mixer starting at low speed and increasing to high speed. Beat until peaks are stiff, 5 to 7 minutes. Add 1/4 of the egg whites to the batter to loosen it up. Add remaining egg whites by gently folding with a rubber spatula, cutting down the middle of the batter, then turning the bowl 1/4 of the way and bringing the spatula up and over. Repeat until you can just barely see the streaks of egg white.
  5. Pour batter evenly over sheet pan and bake in preheated oven for about 23 minutes. Start checking with a toothpick inserted in the center to make sure it’s done at about 21 min. There should be minimal crumbs on the toothpick.


Leave a Comment · Labels: American/Mediterranean, Dessert, Recipes Tagged: cake, celebration cake, coconut, coconut cake, dessert, full sheet pan, pina colada, pineapple, sheet cake, toasted coconut, tropical

Spice Rubbed Chicken Cutlets

October 8, 2015

IMG_5035My first born starting school has opened up a world of culinary challenges: what can I make and pack for her that a) she’ll eat b) is nutritious (most of the time) and c) not too messy? The top two contenders so far as been a chicken “salad” sandwich made from leftover chicken curry, mayo and provolone cheese. First choice though, banana nutella sandwich. That’s my cop out sandwich. Something I’m sure Park Slope moms would be aghast at finding out was given to a child. You’ve heard about that, right? The parents who wanted to ban the ice cream truck coming ’round the block so they wouldn’t have to deal with their kids ice cream wanting tantrums. IMG_5026While I empathize with the tantrum dealing – I wonder how many parents in my generation reflect on the food they grew up versus the food they feed their kids. Sometimes I get so hung up on, “Are my kids eating enough greens?” “Are they getting enough fiber?” “Is it too late in the evening for chocolate?”. While it’s definitely good to be thinking of these things, some of us go off the deep end when it comes to this stuff. A certain parent comes to mind who flipped out when her daughter was given a rice biscuit or whatever too close to her dinner time.  IMG_5027Do you know what my after-school snacks consisted of? Double chocolate chip muffins laden with all kinds of artificial flavorings and preservatives with a can of pepsi. Or entenmann’s chocolate cake. Or chips ahoy cookies with milk. My gourmet touch was microwaving the chips ahoy cookies to give ’em that just baked quality. Right.IMG_5037So, over the years, I’ve given myself a break. Not all their fruits and veggies are organic anymore. Sometimes they have nutella toast for dinner. And lollipops or ice cream in the evening? One heck of a reward for cleaning up their toys! Not to say I’ve thrown all caution to the wind. I snuck some baby kale leaves into my daughter’s wrap this morning. Usually I make her sandwiches with soft whole wheat bread. Pictured below is Malaysian style paratha which, if you were with me during my semester in Rome, you know it is crazy good. It’s a flaky flatbread that makes anything taste good (not that this chicken needs any help!!). IMG_5043My favorite part of this chicken is the wonderful caramelization from cooking it in the butter. Why didn’t we eat more butter growing up? It is so glorious when treated well. Buttered toast in our household usually meant Country Crock vegetable spread on lightly toasted Wonder Bread.IMG_5036So enjoy these chicken cutlets all throughout the week:

  • Sliced across the grain and over salad
  • Diced and mixed with a mayo dressing for chicken salad sandwiches
  • Sliced and inside wraps with lettuce and tomato
  • Diced and tossed with buttered pasta and peas
  • Or as is, with a side of quinoa and leafy greens!

Ingredients

  • 2 large chicken breasts, each sliced in half widthwise to make 4 cutlets
  • 1/4 tsp cumin
  • 1/4 tsp paprika
  • 1/4 tsp ground black pepper
  • 1/2 tsp garlic powder
  • 1 tsp salt
  • pinch of cayenne pepper
  • 2 tbsp olive oil, divided
  • 1 tbsp butter, divided

Directions

  1. Combine spices in a small bowl and sprinkle all or most of it evenly over both sides of each chicken cutlet.
  2. In a large fry pan over medium high heat, heat 1 tbsp oil and 1/2 tbsp butter. When the bubbling of the butter dies down, add two pieces of the chicken cutlets. Cook for 2-3 minutes on each side. You’ll know when to flip when the bottom side is golden brown and the white (cooked) part of the chicken creeps up to the middle. Flip and cook for an additional 2-3 minutes.
  3. When the first two are done, remove from heat and let them rest on a plate (not a cutting board as the juices will run). Clean the pan with a rubber spatula to get the overly brown bits and oil off and into a ramekin or bowl. Add the remaining tablespoon oil and half tablespoon butter. Cook the remaining two cutlets the same way. Remove to plate and let rest 5 minutes before slicing.

Leave a Comment · Labels: American/Mediterranean, Dinner, Main, Protein, Recipes Tagged: butter, chicken, chicken breast, chicken cutlets, meal planning, olive oil, salads, sandwiches, school lunch, spices, weeknight cooking, wraps

Bottle Gourd or Calabash Sauté (Lau Bhaji)

September 22, 2015

IMG_4922I don’t get Bengalis’ obsession with gourds. If you have no idea what a gourd is, you are not alone. Similar to squash, they are mild tasting vegetables with high water content, fleshy interiors and seeds. They’ve got a tough exterior, depending on the type of gourd you are dealing with. These are called bottle gourds, because you can apparently hollow out the interior, dry it out, and use it as a bottle (hello, cousin jack-o-lantern?). IMG_4902But Bengalis swear by these veggies!! You will not find a Bangladeshi homeowner without this growing in their garden! They are ubiquitous. And I don’t get why. They are essentially flavorless. Sauteed, with mustard seeds and turmeric, is one way to prepare them. Simmered in a light broth with shrimp is another. I prefer to mix in large chunks with my daal.IMG_4906I don’t know why I have the knife facing me like that.  IMG_4907Despite my ambivalence towards bottle gourd, when your mother in law hands you a fresh one from her garden, you take it. And you cook it. And you feed it to your family with love and gratitude because for once you know they’re eating something that was cultivated with care, that is not GMO, and has no toxic pesticides on it (as a result, though, my poor mother and father in law have had to suffer losses at the hands [or should I say mouths] of deer, rabbits and groundhogs).  IMG_4908Ambivalence best describes my feelings toward bottle gourd. Bitter gourd is whole other story. I abhor it. True to it’s name, it’s bitter as heck. Highly nutritious – but that’s not even why my family eats it. They actually enjoy the taste. I guess similar to how Italians enjoy radicchio.   IMG_4912Finally, there’s snake gourd – which is actually pretty good. Slightly sweeter than the bottle gourd, but still quite mild and fleshy.

And there you go! All you never wanted to know about these little consumed (at least in the West) veggies. Perhaps now, you will walk by your Asian grocer with a bit more clarity.

Ingredients

  • 3 tbsp olive or vegetable oil
  • 1/4 tsp whole mustard seeds
  • 1/4 tsp whole cumin seeds
  • 3 cloves of garlic, smashed with the side of your knife
  • 4 dried red chilis
  • 1 medium sized bottle gourd (I used 2/3 of a large one)
  • 1/2 tsp ground turmeric
  • 1 tsp salt, or to taste
  • 1/2 cup of cilantro, roughly chopped

Directions

  1. Peel the gourd (I didn’t and I deeply regret it). Cut off both ends and halve it so it’s easier to manage. Take one half and stand it up and cut down the middle. Slice into thin (1/8 in thick) slices.
  2. In a large non-stick wok or sauté pan, heat oil over medium high heat. Add mustard seeds, cumin seeds, garlic and dried chilis. Cook until fragrant (about 30 seconds – you don’t want it to burn). Open up your windows, too. Toasted chilis make you cough up a storm! Add the sliced gourd, turmeric and salt. Cook over medium high heat, stirring frequently, until cooked through: about 15 minutes. If the veggies start to brown, reduce heat to medium and keep stir-frying. Check for seasoning (salt). Top with chopped cilantro. Serve alongside rice and daal.

Leave a Comment · Labels: Bengali, Recipes, Side, Veg

Meyer Lemon Strawberry Lemonade

August 27, 2015

IMG_4823I’ve come a long way from the days of squeezing limes into a tall pitcher of water, and stirring in sugar until it dissolves. And stirring and stirring and stirring…

Lemon/limeades were usually reserved for Ramadan in my household. That meant we whipped up batches of the stuff without being able to taste it (since we were fasting) and without sticking to any sort of recipe (my mother never owned a recipe book). The results ran the gamut from mouth puckeringly tart to gaggingly sweet.

That won’t happen with this recipe. I won’t forget the looks on my guests’ faces when they broke their fast with this drink earlier this summer. Their eyes widened as they could not believe the incredible reward their taste buds received after a long day without food or drink.  IMG_4726This is an adaptation of a pretty straightforward Pioneer Woman recipe. I stuck to her proportions, but jazzed it up with some floral scented Meyer lemons, a simple syrup for easy dissolving, and ice for a quick cool down. I had never thought to puree strawberries in a food processor with sugar to get the strawberry part of a strawberry lemonade but it was so easy and so perfect. I think when you cook it down in a saucepan it has the tendency to thicken. This way it was perfectly smooth and pourable. IMG_4816 If you don’t have Meyer lemons in your grocery store, please proceed with regular lemons! If you do have Meyer lemons handy, you won’t regret it. They have such an amazing bouquet – floral, sweet. I’m not sure if you’ve ever noticed, but when you squeeze citrus, the essential oils mist up and out from the rind like a natural air freshener. When the oils of the Meyer lemons gets into the air, it perfumes the whole kitchen. Almost makes you want to take a bite out of it!

Summer’s not over as long as you’re making this drink! It HAS the power to keep summer going. Also, summer is not over until it’s my birthday. Seriously – last day of summer this year and I turn…twenty…I’ll leave the rest to your imagination.

Adapted from Pioneer Woman.

Ingredients

  • 1 pound strawberries, hulled
  • 3 cups sugar
  • 8 to 10 Meyer lemons
  • 9 cups water
  • 2 heaping cups ice

Directions

  1. In a medium saucepan, dissolve 2 cups sugar with 2 cups of water and the peel of 1 Meyer lemon* over medium heat. Stir occasionally. When dissolved, remove from heat and let cool.
  2. Meanwhile, blend the strawberries in a food processor with 1 cup of sugar until well blended. Set aside.
  3. Using a citrus juicer, or by hand (over a sieve to catch seeds and pulp), juice 8 to 10 Meyer lemons until you have 2 cups of lemon juice. Set aside.
  4. Remove lemon peel from simple syrup. In a large pitcher or drink dispenser combine lemon scented simple syrup, strawberry puree, lemon juice, remaining 7 cups of water and 2 cups of ice. Stir to combine. Add more water/sugar to taste.

*When peeling, take care not to get too much of the white part (pith) as that will make the simple syrup bitter.

2 Comments · Labels: American/Mediterranean, Drinks, Recipes Tagged: drink, lemonade, meyer lemons, non alcoholic beverages, refreshing drink, strawberry, strawberry lemonade, summer

Chocolate Zucchini Cake

August 18, 2015

IMG_4847I was incredulous the first time I heard the words “Zucchini Bread” at my adopted Jewish grandmother’s apartment some 15 years ago. Her name is Sophie and she was my mother’s confidant, advisor, protector and friend for many years. She taught her the value of saving. She raised two children during the Depression. She told my mother, every week she set aside $0.50. She grew such a small sum into stake in a multi-million dollar company and a condo in a luxury apartment building in downtown Manhattan. IMG_4854So when she talked, we listened:

  • “Eat Romaine lettuce, not iceberg. It’s all water.”
  • “Ya ever tried zucchini bread? It’s delicious.”
  • “Take care of ya mother. She works hard.”

Right on all counts. Take it one step further with chocolate zucchini cake. I was skeptical when a mom brought zucchini brownies to a play date. But it had such deep chocolate flavor! And it was moist! And magical! I realize that zucchini’s blandness kind of works in its favor in baked goods. Between that and the water content, it’s the perfect vessel for delivering a rich, moist, chocolate crumb. I was nervous as I folded the 3 cups into the batter, that those eating the cake would see slivers of green running throughout, but it melted right into the cake. And with that much veg content, you don’t feel like the world’s worst parent when your kid (and husband) reaches for it throughout the day.

Adapted barely from King Arthur Flour.

Ingredients

  • 1/2 cup unsalted butter (1 stick) at room temperature
  • 1/2 cup vegetable oil
  • 1 3/4 cups sugar
  • 1 tsp vanilla extract
  • 2 large eggs
  • 1 tsp baking soda
  • 1/2 tsp baking powder
  • 1/2 tsp salt (next time I would try increasing this to 1 tsp!)
  • 1/2 cup buttermilk, sour cream, or yogurt (I used buttermilk)
  • 2 1/2  cups all purpose flour
  • 3/4 cup Dutch process cocoa*
  • 3 cups shredded zucchini
  • 1 cup chocolate chips
  • 1 cup heavy cream

Directions

  1. Preheat oven to 325 degrees F. Grease a 9″x13″ baking pan.
  2. Sift flour, cocoa, baking soda, baking powder and salt into a large bowl. Stir gently to combine.
  3. In a stand mixer or in a large bowl with a handheld electric mixer, beat butter at medium high speed until light and airy – about 1 minute. Lower the speed to medium low and gradually add half the sugar, then oil, then remaining sugar. Add vanilla, then eggs, one at a time, until incorporated fully. Stop to scrape down the bowl. Turn on the mixer briefly once more to incorporate everything.
  4. At low speed, add half of the flour/cocoa mixture. Then slowly pour in the buttermilk (or sour cream or yogurt). Add the rest of the dry ingredients.
  5. Remove bowl from stand mixer and fold in the zucchini with a rubber spatula or wooden spoon. When fully incorporated, pour into greased pan and bake for 40-45 minutes, until a toothpick inserted comes out clean. Let cool.
  6. Heat heavy cream in a saucepan until scalding hot (bubbles appear around the perimeter). Pour over the chocolate chips and stir until it becomes a spreadable ganache. Pour and spread evenly over cooled cake.

*Dutch process cocoa, though harder to find, is essential for that deep chocolate flavor. When you use a quality cocoa powder, it makes all the difference between a standard chocolate cake and a gourmet one. Can be purchased online.

Leave a Comment · Labels: American/Mediterranean, Dessert, Recipes Tagged: chocolate cake, cocoa, dutch process cocoa, ganache, seasonal baking, seasonal cooking, snack cake, squash, summer squash, zucchini

Caprese Salad with Roasted Tomatoes and Burrata

July 26, 2015

IMG_4809When I went to Capri in April of 2008, I trekked up the steep hills to a trattoria for lunch after a morning of taking in the vistas. I was so excited to have a Caprese Salad in the birthplace of Caprese Salads. Imagine my disappointment when the waiter brought us green, far from ripe tomatoes, mozzarella and basil. Then it hit me. The seasons.  IMG_4788Seasonal eating was such a novel concept to me as an American – everything’s available all year round, and the whole conscious foodie thing hadn’t really come into full swing at that time. So, what I had imagined was a plate of luscious, bursting at the seams red tomatoes with buttery mozzarella and verdant basil. What I got was lackluster citrus with less than memorable accompaniments. If I had only come in the summer!IMG_4792Fast forward a few years and now I know that even the most lame tomatoes can be made dynamite by a long, sweet roast in the oven. It’s precisely what’s required of the tomatoes I’ve seen so far this season. Mild summer temperatures means mediocre sweetness and acidity (I think). So I topped regular grocery store tomatoes with sugar, salt, black pepper, olive oil and balsamic vinegar. They reach a flavor complexity that rivals the most pungent pickles. Sweet, tangy and savory, it balances the mild, creamy addition of burrata.  IMG_4798Burrata, if you’ve never had it, is cream filled mozzarella. On top of pizza, it makes for the creamiest cheese topping. I wanted to try it on this salad, but freaked out once I tried picking it up from its solution and found it to be so soft, it immediately started running all over the board. And then when you cut into it, it’s even more of a mess! I grabbed a bunch of paper towels and started wiping up the mess and I thought this dish was doomed for sure. But when I started picking up the squares (or blobs) I had cut from the ball of burrata, I appreciated the rustic appearance. It certainly wouldn’t work with raw slices of tomatoes. The whole aesthetic of the traditional Caprese Salad relies on the symmetry of the tomatoes and mozzarella. But with the warped form of the tomatoes from the heat of the oven, it worked well. IMG_4800I didn’t drizzle additional olive oil atop since I felt the burrata had plenty fat content. A sprinkling of cracked pepper and hand torn basil was the perfect adornment. Hopefully your basil is fresh and not the last scraps you could salvage from your (read: my) week-old bunch.

Ingredients

  • 3-4 beefsteak tomatoes, depending on the size (I used 3 in the pictures above)
  • 1-2 tsps sugar
  • 3-4 tbsps olive oil
  • 2 tbsps balsamic vinegar
  • salt and pepper
  • 1 8 oz ball of burrata
  • 4 to 6 basil leaves, torn

Directions

  1. Preheat oven to 400 degrees F. Line a baking sheet with parchment paper.
  2. Slice 2 tomatoes between 1/4 and 1/2 inch in thickness (see pictures). Arrange slices on baking sheet lined with parchment and season liberally with salt and pepper (about 3/4 tsp salt and 1/4 tsp pepper). Lightly sprinkle tops with 1 tsp sugar, 2 tbsps olive oil and 1 tbsp balsamic vinegar*. Use a pastry brush or your hands to smooth out all the seasonings. Bake in preheated oven for 40-45 minutes.
  3. Remove from oven and let cool for 5 minutes before removing to serving platter. Repeat Step 2 with fresh parchment paper and second batch of tomato(es).
  4. Arrange tomatoes on platter, overlapping them slightly. Remove burrata from solution and place on cutting board. With a SHARP knife, slice the burrata into 1/2 cubes (as shown above). Top the roasted tomato slices with the burrata pieces. Sprinkle the tops with black pepper and torn basil.

*Cook’s note: I ran out of balsamic vinegar and instead used a balsamic reduction that you can see me brushing onto the tomatoes in one of the pictures. If you find yourself in the same conundrum, simply leave out the balsamic in the initial seasoning. Forty minutes in to the cooking process, brush your balsamic reduction onto the tomatoes and stick back in the oven for 5 minutes.

Leave a Comment · Labels: American/Mediterranean, Recipes, Salad, Side Tagged: balsamic vinegar, basil, burrata, caprese, caprese salad, caramelized, cheese, cream, mozzarella, oven roasted, roasted tomatoes, salad, seasonal cooking, seasonal eating, summer salad, tricolore

Pistachio and Spice Roasted Rack of Lamb

July 12, 2015

IMG_4736Ramadan, the Islamic month during which Muslims around the world fast from sun up to sun down, is winding down. The last ten days is a time of great spiritual importance. Extra prayers, remembrance and mindfulness of acts of worship are highly stressed. My interpretation is that it’s a way to encourage keeping up the momentum, since Ramadan is 30 days long, and many start off the month with a lot of vigor, but find themselves struggling to keep up with the extra prayers and fasts as the days go by. IMG_4723Another important part of Ramadan for me is the communal iftar (evening, break-fast meal). One of the things that drew me to Islam as a child and again as a college student, is the community. When I attended my first ICNA convention as an almost 10 year old, I wore the headscarf for the weekend, per etiquette. And I recall descending on the escalator to the main convention hall and being amazed at seeing so many Muslims in the same room. For the first time I felt like I was part of something larger. Growing up in Queens, my childhood was characterized by my otherness. I was always one of two Bengali Muslim kids (no black, white, arab, SE asian or any other muslim kids in my neighborhood). We were all a rag tag team of immigrant kids – the only cohesive element being our physical classroom or schoolyard. IMG_4726So when I first felt that sense of community, it was exhilarating. I kept the headscarf on (with its ups and downs) since then. This was reinforced as a student at Barnard. The iftars hosted by Columbia Muslim Students Association was another reinforcement. A group to whom I didn’t have to explain my evening ritual of breaking the fast. A group that actually shared the values I was brought up with. IMG_4730I know we live in a society that in name celebrates individuality and uniqueness. But growing up in a society that is so different from your native one, is exhausting. How many times have I had to answer the question

  • Can your husband or father see your hair?
  • Do you sleep with the scarf of your head?
  • Do you shower with it? (admittedly this was a much rarer question, asked by the not-so-high scorers in my junior high class)
  • You can’t even have water while fasting?

IMG_4731So while I celebrate multiculturalism and pluralism as much as the next person, and in fact I think I’m the better for my experiences, it is really fortifying to be with members of one’s own group. That’s why I love hosting iftar. Why I love ending a long day of fasting with people I love. With food I love. In remembrance of our common purpose of pleasing our Creator. IMG_4732On to the food! This was actually the first time I’ve made rack of lamb. I took a risk by making something for the first time for a group and not even sticking to a recipe, but using a spice rub recipe by Deb Perelman and a cooking technique by Ina Garten. The spice rub recipe is from the Smitten Kitchen cookbook. She uses it to encrust individual lamb chops and after an initial sear on the stove top, then finishes it in the oven (I’ve made it before here). As for Ina’s rack of lamb recipe, she does a traditional rosemary/garlic combo, then roasts the whole thing in the oven at 450 degrees F for 20-25 min. IMG_4733I smeared the spice rub on and let it sit at room temperature for about an hour before sticking it in the hot oven to allow the flavors of the spices to get into the lamb. I then roasted it covered for 15 minutes. After 15 min, I removed the foil, drizzled some olive oil and allowed to cook for 15 minutes longer. This got it to medium rare. If you’d like it done further, insert a meat thermometer into a good meaty portion of the meat and cook until internal temperature reaches 160 degrees F for medium or 170 for well done. IMG_4734The lamb was from Honest Chops over in East Village. Perfect flavor every single time. IMG_4737I made Kabuli palau for the first time – and Afghani chicken and rice pilaf with carrots, raisins and nuts. Homemade naan. Roasted tomato and burrata Caprese salad (why aren’t there good tomatoes in the farmers markets yet?? Perhaps because it hasn’t been hot enough). Mashed potatoes. Watermelon/mint salad because Ramadan and watermelon go together like two peas in a pod. Pioneer Woman’s Kale Citrus Salad and Strawberry Lemonade. My only edit to the lemonade was that I made a Meyer lemon infused simple syrup with two cups of the sugar, 2 cups water, and the peel of 1 large Meyer lemon. Divine. IMG_4740My mom made cumber raita (yogurt, grated cucumber, smoked salt) and savory pancakes. My good friend Nargis made delicious boulani, a potato stuffed turnover. And because iftar is an evening meal, this was the best lighting I could capture for my photos. Wishing a blessed last few days of Ramadan to those observing!

Recipe adapted from Smitten Kitchen and Ina Garten.

Ingredients

  • 1/2 cup shelled pistachios
  • 3 tsps chaat masala
  • 2 tsp cumin
  • 2 tsp paprika
  • 4-5 dashes of cayenne pepper (stick to 2 dashes if you can’t handle heat!)
  • 5-6 pounds rack of lamb
  • salt and pepper
  • olive oil

Directions

  1. Add first 5 ingredients to the food processor and process until pistachios are ground and spices are well blended.
  2. Line a baking sheet with aluminum. Take lamb out of fridge and remove any impurities from the surface, rinsing under running water if necessary. Place on baking sheet, fat side up, and pat dry. Liberally sprinkle salt and pepper all over the meat. Rub spice mixture onto the fat side and let sit for 1 hour.
  3. After 45 minutes, preheat the oven to 450 degrees F.
  4. Once the oven is hot, drizzle lamb with olive oil and cover meat with foil and bake for 15 minutes. After 15 minutes, remove the foil  and bake for an additional 15 minutes. Cook longer, if desired, with a meat thermometer inserted into the meat reads 160 for medium or 170 for well done.
  5. Take out of oven and let rest for 15 minutes. Slice and serve with yogurt dipping sauce.

2 Comments · Labels: American/Mediterranean, Dinner, Main, Protein, Recipes Tagged: cooking for a crowd, dinner party, entertaining, halal, hormone free, iftar, islam, lamb, medium rare, muslim, organic meat, pasture raised, pistachio, rack of lamb, ramadan, roasted meat, roasting, spice rub

A Red Velvet and A Double Chocolate Cake

June 7, 2015

IMG_4601IMG_4548Marriage is a most beautiful thing. Take for example the marriage of a hot dog to its bun. Mustard to a knish. Or in this case, the best cake recipe with the most glorious frosting.IMG_4549Oh, you thought I was referring to the marriage between two people? No, no, no – that’s a completely different story. It’s tumultuous. A dichotomy of opposing egos – it’s as generous as it is demanding. Like a cake studded with ghost peppers. You can figure out ways to maneuver around them, develop techniques over the years to handle them, but you’re inevitably going to chomp down one and when you do, you might find yourself questioning the decision to go for that slice of cake.IMG_4556But you go on anyway, running around with your head ablaze because darn it you committed to this slice of cake! And the heat dies down and you’re left with a smear of frosting on your plate that you scoop up and wonder, “Gosh this is so delightful, whatever was all that fuss about?”. That’s married life for ya.

IMG_4558 IMG_4559

People go bananas for red velvet, and personally, I’ve never understood why. Always made with a smidge of chocolate – the base cake isn’t strongly flavored enough. I opted for a recipe that has more cocoa than the usual red velvet recipe (3 tbsp vs 1 tsp) but not so much that it’s more of a chocolate cake (one recipe called for 1/3 cup cocoa!). It’s often topped with a tangy/sweet cream cheese frosting, though delicious, is better served with a sweeter cake, like banana or carrot cake. I feel like it’s striking, contrasting colors that people fall for. Also, a very tender cake made by the addition of buttermilk AND vinegar.

I wanted to try the original cooked milk/flour frosting recipe that accompanies red velvet. But as my hectic week dwindled down, all I had the energy for was whipping up two bars of Philly with a healthy stick of butter and calling it a day. I also experimented with the food coloring – since I used a gel food coloring, which is typically more pigmented than the usual food coloring. I used a rounded teaspoon rather than the tablespoon of food coloring that the recipe called for. In hindsight, I probably could have used more to offset the cocoa. Taste-wise – no complaints. IMG_4564

The second cake was for an acquaintance’s farewell party. I used my all time favorite chocolate cake recipe (Beatty’s) but with a no fuss frosting (Hershey’s perfectly chocolate frosting). I came upon this particular frosting recipe after looking for an alternative to the buttercream Ina Garten uses to accompany this cake (it has a raw egg yolk and I have two young’ns). What I love about this recipe is

  1. It uses cocoa powder rather than chocolate baking bars. Those can be so fussy. Semi-sweet vs bittersweet. Melt, then cool. Ugh.
  2. It’s made in a saucepan on a stovetop, with just a whisk. No fancy equipment necessary.
  3. It’s got a glossy sheen like that of a ganache.

That being said, it is a bit high maintenance in one respect: you’ve got to use it right away, and do not dilly dally with the application. It dries fairly quickly and as soon as it does, it becomes difficult to spread. Unlike buttercream which you can spread and tweak all the livelong day.IMG_4569 IMG_4573 IMG_4587

IMG_4590IMG_4593IMG_4591

It’s also reminiscent of the Entenmann’s chocolate fudge cake I used to have as an afterschool snack – pretty much every day of my childhood. Yup. Silky texture, rich chocolate flavor. If you’re making dessert for chocoholics, there’s no going wrong with this combo.IMG_4595 IMG_4597  IMG_4604

For the decorations I stuck to my handy dandy ziploc bags with a hole cut at the end. Really fancy equipment over here at Kitchen3N!

Red Velvet Cake recipe barely adapted from NYT Cooking.

Ingredients

  • 1/2 cup (1 stick) butter, softened
  • 3 tbsp cocoa powder (I used natural cocoa powder since it’s more acidic and would react well with the buttermilk/vinegar)
  • 1 1/2 cups sugar
  • 2 eggs
  • 2 tsp vanilla extract
  • 1 1/2 tsp red food coloring (if using the gel, traditional food coloring use 2 tbsps)
  • 1 tsp salt
  • 1 tsp baking soda
  • 2 1/2 cups flour
  • 1 cup buttermilk
  • 1 tbsp white vinegar
  • 2 8 oz packages cream cheese at room temperature
  • 1/2 cup (1 stick) softened butter
  • 1 tsp vanilla extract
  • 5 cups confectioners sugar

Directions

  1. Preheat oven to 350 degrees F. Butter and flour, or butter and apply parchment paper to two 9 in round cake pans. Set aside.
  2. Sift flour, cocoa, salt and baking soda into a bowl.
  3. Beat butter with the paddle attachment of your stand mixer for about 2 minutes on medium-low speed. Add sugar and beat for 1 minute more. Scrape down the sides of the bowl with a spatula. Reduce speed on mixer to low and add eggs, one at a time, then vanilla extract and food coloring. Next add 1/3 of the dry ingredients. Then add 1/2 cup buttermilk. Add another 1/3 of the dry ingredients. Then add vinegar to the buttermilk and add to the batter. Add final 1/3 of dry ingredients. Use a spatula to give it one final mix.
  4. Divide evenly between the two cake pans and cook until a toothpick inserted into the center comes out clean (20 to 25 min).
  5. After taking it out of the oven, let it cool until the pans are ready to handle. Loosen the sides with a spatula or knife, going under the cake a bit on all sides to loosen. Then place one hand on top of the cake, flip it out onto your hand, then set it down on the wire rack to cool completely (one of my first baking follies as a kid was to apply frosting to a cake I just pulled out of the oven…). Remove parchment paper.
  6. Make the frosting: whip cream cheese and butter on medium speed until light and fluffy (3 to 5 minutes). Add vanilla. Decrease speed to low and add confectioners sugar one at time. Taste for desired sweetness/flavor. Adjust as necessary.

Leave a Comment · Labels: American/Mediterranean, Dessert, Recipes Tagged: cacao di pernigotti, cake, chocolate, chocolate icing, cream cheese icing, dessert, double chocolate, ermine icing, frosting, fudge, hersheys, layer cake, red velvet

Mustard and Chili Mashed Potatoes and a Giveaway!

May 19, 2015

IMG_4482There’s a lot going on in today’s post. IMG_4449Firstly, we’re talking vegetable peelers and a giveaway! My good friend’s husband has started a company selling premium kitchen products, with their first being this awesome curved Japanese blade vegetable peeler! Using mine was a breeze – the sharp blade made for smooth cuts and the design definitely required less pressure from the hand doing the peeling. The sprout remover on either side helped get those little “eyes” out. I tackled these buds in no time. I will say, though, if you are used to the vertical peelers, it may take some getting used to. But as with any sharp edge, take care to curl the fingers of your supporting hand away while using!IMG_4453Because this is such a great product and think you guys would love it, too, we are giving one away! To enter, simply comment on my FB page responding to this question: What’s the first thing you would use ChefBasix Vegetable Peeler for? Good luck!IMG_4448IMG_4454IMG_4459Secondly, we’re talking about ghee – clarified butter that South Asians use to cook (some dishes) with. It doesn’t have the milk solids of butter, so it has a higher burning temperature. This picture shows how it happens. After melting the butter over low heat, you keep it on until it attains this golden color, not the amber color you would look for while making browned butter. We are just looking for the milk solids in the butter to toast up to give the ghee a nice nutty flavor. You don’t want to get to that light brown stage, otherwise you will lose too much moisture. Once you’ve gotten the right color, take it off the heat. You can let it cool in the pot, but I poured it into this bowl to show you what was going on. The milk solids sink to the bottom so you only spoon off the fluid on top. Left to cool long enough it will congeal and resemble the store bought ghee. This last step is not totally necessary in today’s dish, as we are not cooking with the ghee. It’s more for aesthetic purposes so you don’t have bits of brown running through the mashed potatoes (don’t toss it, though! spoon it over toast for a snack!).   IMG_4460 IMG_4465Finally, we are talking about aloo bhorta (mashed potatoes)! It seems like potatoes are a universal comfort food. When coming back from a family trip, or on days when we were low on groceries, dinner looked like this: steamed rice, aloo bhorta, an omelette and daal. South Asian immigrant parents have an almost militant attitude toward eating out. Take out was a non-existent concept. As newcomers, our parents had to reign with frugality. Though we were brats about it and whined about wanting pizza or burgers, our parents did the hard work of making every single meal from scratch. The aloo bhorta and omelette were studded with pieces of raw onion and slivers of green chilis. Most of my time during those meals were spent picking out the aforementioned bits to get to the good stuff. I was never a part of the set-my-mouth-ablaze-to-enjoy-my-meal set. IMG_4466So now, since I’m in charge of my kitchen, I’ve started to substitute scallion for the raw onion and dried red chili for the fruity spice of the green chili (or Thai chili as it’s known to some). The dried red chili still has some heat – just not as explosive as its green counterpart.

Traditionally, the potatoes are mixed by hand with mustard oil, salt, the onions and chilis. Individuals will later add as much or as little ghee atop the potatoes as they like to their portion. However, my many years of making and eating American style mashed potatoes would not allow me to serve a butter-barren bowl of spuds. It just needs the silkiness that butter imparts! IMG_4470Definitely mix by hands to achieve the full effect. I wore gloves, though, to protect my eczema prone hands from the heat. Though these are mustard and chili mashed potatoes, the mustard that’s used is in the form of oil, rather than the paste. I’ve never made it with the paste, but if you have trouble locating mustard oil, definitely feel free to use the powder or paste (starting with a 1/2 tsp and working your way up).

Ingredients

  • 2 lbs Russet potatoes, peeled and quartered
  • 1/2 cup (1 stick) unsalted butter
  • 2 1/2 tbsps mustard oil
  • 1 tsp salt (plus more to taste)
  • 3 scallions, sliced thinly
  • 2 dried chilis (3 if you like it HOT)

Directions

  1. Bring a large pot of water to boil. Carefully lower the potatoes in and let cook for about 20 minutes. Drain in a colander and set aside.
  2. While the potatoes cook, add the butter to a small saucepan and cook over low heat until melted and the butter becomes golden and fragrant. Turn off the heat and let cool.
  3. In a dry non stick skillet or cast iron skillet, toast the chilis over medium high heat for 2-3 minutes. You should see the oil on the surface and the aroma emerge. Set aside.
  4. Add the cooked potatoes to a large bowl. Season with mustard oil and salt. Mash together with a potato masher. Add the scallions, chilis, and 4 tbsps of the clarified butter. Mix by hand, using your fingertips to break apart the chilis, until everything is uniformly distributed. Taste to see if the seasoning is just right. Serve with an extra dollop of the clarified butter.

1 Comment · Labels: Bengali, Carb, Recipes, Side, Veg Tagged: aloo bhorta, bangladeshi, bengali, budget friendly, clarified butter, comfort food, desi, easy on the wallet, low cost food, mashed potatoes, milk solids, mustard oil, side, spuds, vegetable, weeknight meal

  • Newer Entries
  • 1
  • 2
  • 3
  • 4
  • 5
  • 6
  • …
  • 12
  • Previous Entries
American, Bangladeshi. Savory, sweet. I don't discriminate and neither should you.

Most recently…

Load More...
Follow on Instagram

Social

Subscribe to Blog via Email

Enter your email address to subscribe to this blog and receive notifications of new posts by email.

Tags

appetizer beef bengali breakfast butter cake caramel chicken chocolate chocolate chips cilantro clean eating coconut comfort food cookies dessert dinner entertaining fall fruit ganache gluten free halal healthy homemade honest chops honest creations iftar italian pasta pastry pistachio quick and easy dinner ramadan recipe side side dish south asian spinach vegan vegetables vegetarian weeknight dinner weeknight meal whipped cream

Theme by 17th Avenue · Powered by WordPress & Genesis