Kitchen3N

Recipes and food fun from Apt 3N

  • About
  • Gallery
  • Recipes

Chocolate Chip Banana Pancakes

February 12, 2014

IMG_2303 Were the first year or two out of college a big smack in the face for anyone else? I remember sitting around  my freshman year sociology class discussing Durkheim, or learning about the Coriolis effect in Intro Mechanics, or even listening to Bashir Abu Manneh’s impassioned lectures on Fanon, thinking, “I’m good enough to get this far, I can do pretty much whatever I want to do.” Well, I couldn’t. Not for a long time. For many of us who graduate from Liberal Arts schools without ultra competitive job offers, Teach For America gigs, or grad school acceptances, life after college is a bitch.  IMG_2271One of my peers in Physics had a nanny gig lined up after graduation. Mindy Kaling, even with her Dartmouth education, nannied for a while when she first moved to the city. I got a part time job pushing paper at a consulting firm (that led to better opportunities later on). I searched for jobs for over a year and a half, whereas I believed with my degree, landing one would be a cinch. It was a humbling experience. I realized that as while you’re dishing out the dough, you can be fooled into a false sense of entitlement. But when it comes to earning a few of those dollars back, intelligence is rarely enough. You need to be practical. Don’t fall into the same millenials boat.IMG_2282 Moral of the story is this: don’t go to a liberal arts school. Of, if you do, do incredibly well, so that you graduate at the top of your class. Become a pharmacist. Or learn to code. Make sure you have a decent internship lined up before your senior year. Harass people to get a decent job offer – persistence pays. I wish someone had told me any one of these.  IMG_2285 What does all this have to do with chocolate chip banana pancakes? Well, I have a lot of time to think while babysitting these guys on the stove. I make these like once a week and they are so incredibly good. I rarely have enough overripe bananas for banana bread, but often have one or two. The perfect amount for providing a hint of sweetness and banana flavor to regular pancakes. They are so light and fluffly…not like these ricotta pancakes I had at brunch a few weeks ago at a pretty popular Greenpoint spot (could NOT finish those dense giants).
I make them “reduced guilt” by incorporating whole wheat. You can even go the full 9 yards by subbing unsweetened applesauce for butter, and blueberries for chocolate chips. I sometimes have blueberries and hand and ALWAYS have chocolate chips. So, here you go.IMG_2305

Ingredients

  • 2 overripe bananas
  • 1 egg
  • 1 1/2 cups whole or reduced fat milk
  • 3 tbsp butter, melted
  • 3/4 cup all purpose flour
  • 3/4 cup whole wheat flour
  • 2 1/2 tsps baking powder
  • 1 tsp baking soda
  • 1 tsp salt
  • 1 tbsp sugar
  • 1/4 cup chocolate chips

Directions

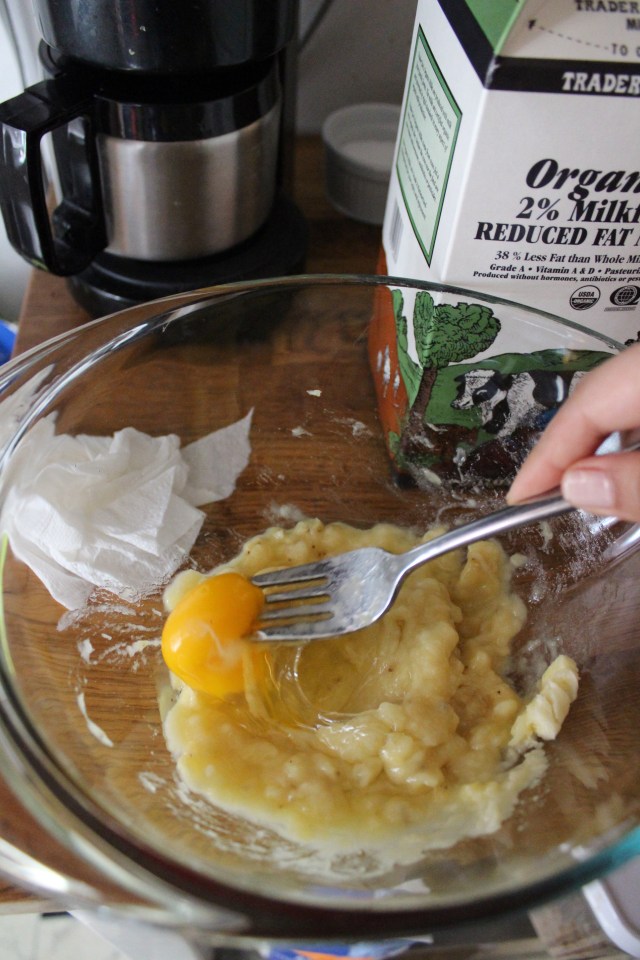
  1. Mash bananas in a medium bowl with fork. Add egg and whisk together. Add milk and stir to combine. I like to melt the butter in the frying pan that I’m using to cook the pancakes in. Add to the banana/egg/milk mixture.
  2. Add both flours, baking powder, baking soda, salt and sugar to the mix. Stir to combine without over beating (few lumps are ok). Add chocolate chips.
  3. Heat up your griddle or non stick pan over low heat.
  4. Scoop 1/4 cup of batter onto the pan. Cook until bubbles come through, about 1 min. Flip and cook for an additional 30 seconds or until  you achieve a golden brown color.

I prefer this method rather than adding pads of butter to the pan for each pancake, as the coloring is much more even.

Leave a Comment · Labels: American/Mediterranean, Breakfast, Recipes Tagged: banana, banana pancakes, breakfast, chocolate chip, chocolate chip pancakes, chocolate chips, flapjacks, pancakes

Fruit Chaat

February 5, 2014

IMG_2249 I remember having fruit chaat for the first time at my cousin Lima Apa’s house. I was flabbergasted at how bright and flavorful a simple yogurt dressing made otherwise pretty boring fruit (green apples, red grapes). Since then, I use the dressing as a way to eat more fruits during the winter months. When the mangos are tart and the berries are lackluster. A quick toss, and you’ll be surprised at how quickly the fruit disappears!

The key ingredient in this South Asian fruit salad is Chaat Masala. A tangy/savory/spicy combination of spices that includes salt, chili powder, black pepper, citric acid and green mango. On it’s own, it’s a bit too spicy for me. So a little bit of it, along with a little bit of salt and the yogurt is uh-mazing. It’s available in any South Asian grocery.

IMG_2255I’ve left this deconstructed since it’s not so pretty mixed up. This makes for a great appetizer if you’re hosting a party, or even as a hostess gift. Just leave some toothpicks on the side for people to pierce the fruit with.

It’s so versatile, you can alter it any which way to accommodate most dietary restrictions. Dairy allergy? Use soy yogurt. Counting calories? Substitute lowfat yogurt in the dressing (though I am a big proponent of eating full fat foods in moderation). Allergic to a specific fruit? Just leave everything in their own compartments. Cover well with plastic wrap if transporting or consuming later in the day.

Ingredients

  • 1 cup full fat yogurt
  • 3/4 tsp chaat masala (or you could use a mix of equal parts chili powder, black pepper, coriander, and cumin)
  • 3/4 tsp salt (or to taste)

Directions

1. Mix the ingredients for the dressing in a bowl. You only need a small amount for each cup of fruit – approximately 1 tbsp per cup.

1 Comment · Labels: Appetizers, Bengali, Dessert, Recipes, Snacks Tagged: appetizer, desi appetizer, desi snack, fruit chaat, fruit chat, fruits, gluten free, healthy, out of season, palate cleanser, sweet and savory, sweet and spicy, vegetarian, yogurt dressing, yogurt sauce, zesty dressing

Sambar

January 29, 2014

IMG_2157 Is anyone else desperately searching for flights out of this frozen tundra?? I know I am. And as much as I’d love a quick getaway, schedules and money are just slightly getting in the way. So if you can’t get away to the heat…bring it!

Let me start off by issuing an apology to any of my South Indian readers: I am sorry. This is not an authentic Sambar. For those who are less familiar, sambar is a traditional South Indian lentil and vegetable soup and is an accompaniment to pretty much any South Indian meal. You can dip your idli (rice cake) or dosa (rice flour crepe) in the spicy/tangy/savory broth. Or you can have it over rice, or the way I do: straight out of the bowl. This version came about after some extensive online searches for sambar recipes, as well as some deep soul searching into what ingredients I can make do with thus saving myself a trip to the store. I did not use Tur daal, as is traditionally used in sambars. No coconut or curry leaves. This is basically my usual daal, but with the addition of:

  1. mixed vegetables – so I can sneak some more veggies into my kids
  2. tamarind – to provide that distinctly tart taste
  3. cumin, coriander and chili powder – for a well rounded and spicy flavor profile
  4. and ketchup…because I was out of tomatoes.

I know, I know! Ketchup! But things changed when I got a bottle of REAL ketchup. Like organic ketchup, with no high fructose corn syrup. It’s not overpoweringly sweet. It tastes like…tomatoes. So it was really a wonderful substitute in this dish. I actually think I’m going to add it to more dishes (e.g. like my mother in law’s sweet chicken curry…the whole sauce is ketchup based!).

You can add as few or as many red chilis as you like. Just keep in mind, the longer you cook the chilis and sambar together, the spicier it will be. I prefer to just smush the chilis into the broth as I’m eating, little by little. But that’s only if you can handle the heat.

IMG_2197

Ingredients

  • 1/2 cup masoor daal, rinsed with water and picked through for any impurities
  • 8 cups of water
  • 3 large cloves of garlic, peeled
  • 4 dried red chilis
  • 1 cup mixed vegetables (I used an assortment of frozen peas, corn, edamame and peppers)
  • 2 tsps salt (or to taste)
  • 1/2 tsp turmeric
  • 1/2 tsp coriander
  • 1/2 tsp cumin
  • pinch of chili powder (or a 1/4 tsp depending on how spicy you like it)
  • 2 tbsp olive oil
  • 1/2 large yellow onion, thinly sliced
  • 1 pinch pach forom
  • 1 large clove garlic, minced
  • 1 tsp tamarind paste
  • 2 heaping tbsps good ketchup
  • a handful of cilantro

Directions

  1. Rinse the lentils in a medium saucepan and add the 8 cups of water. Add garlic and 2 of the chilis and bring to a boil over high heat. Watch carefully as it might overflow.
  2. Reduce heat to medium high and skim off the foam on top. Add the vegetables, salt, turmeric, coriander, cumin and chili powder and cook until lentils are cooked through (about 10 to 12 minutes).
  3. While that is going, heat the olive oil in a small to medium fry pan over medium heat. Add the onions and stir occasionally. When starting to brown around the edges, lower the heat and add the pach forom, minced garlic and remaining two chilis. Stir until fragrant, about 30 seconds.
  4. In a small bowl, dissolve the tamarind with some of the liquid from the sauce pan. Add back into the saucepan, along with ketchup and fried onion mixture. Add the cilantro and check for seasonings. It should have a slightly salty bite.

Leave a Comment · Labels: Bengali, Protein, Recipes, Side, Veg Tagged: daal, gluten free, healthy, ketchup, lentil soup, lentils, low fat, sambar, side dish, south indian, spices, tamarind, vegetables

Rocket Cake

January 20, 2014

IMG_2127

Photo credit: my dear sister in law, Sabika Mustafa. Ethics Bowl Champ of NJ!!

My daughter wants to be an astronaut…for now. For the sole purpose of being able to board a rocket and go to the mysterious presence in the night sky. I remember wanting to as well. Then I learned you have to pass a swim test. And psych testing. And you  need a PhD in math/science/engineering (the bachelors did me in).

And the job market doesn’t seem to be too promising for astronauts, since they’re outsourcing it to the machines [insert techno slur]. But she doesn’t know all this just yet. So for now, [CLICHÉ ALERT] she will just have her rocket cake and eat it, too. IMG_2071Planet earth(ish) sugar cookies, pop rocks, and little green men all helped make the space party special!IMG_2066For the inside, I used the classic chocolate cake recipe from Ina Garten (Beatty’s Chocolate Cake), baked in an 11×15 pan for 27 min. Except I did the usual substitution for buttermilk (1 tbsp white vinegar + 1 tbsp less than 1 cup of milk). And since the kids were going to be hopped up on sugar, I used decaf coffee. I’ve been doing  A LOT of reading up on cakes. And there’s no wonder why this recipe has over 1700 rave reviews and counting. There’s:

  • vegetable oil, which is a liquid at room temp, which makes it moist
  • coffee, which compliments the cocoa flavor and also adds moisture
  • acidity from the buttermilk: which tenderizes the flour

And yet with all these liquids, the cake holds up well enough to decorate. I used the guide from Spoonful on how to create a rocket cake. Just remember when you are attaching the “thrusters”, you have to flip cut parts down, and then over, so that the curve faces away from the cake. I added a little extra “flair”  with the leftover scraps (I could have eaten all of them myself, but my pants would hate me for it).

IMG_2037I also made two other cakes: banana cake with dark chocolate ganache for my daughter for the day of her birthday and perfect yellow cake with chocolate buttercream for a friend from college on her 30th (can you tell I’m a big smitten kitchen fan?)!IMG_2010

For the frosting, I used a concoction of my own:

Ingredients

  • 12 oz white chocolate (Ghirardelli)
  • 3 sticks (12 oz) butter, room temp
  • 4 tbsp milk (or as needed)

Directions

  1. Break the chocolate up and add to a  bowl and microwave at 30 second intervals, stirring between each interval, until melted. Do not overheat! Remaining bits of chocolate will melt with the residual heat of the melted chocolate. Just keep stirring! Mine took 90 seconds. Set aside and let cool for 10 minutes.
  2. Whip butter at medium speed for 1 minute. Add cooled chocolate and continue whipping for 2 minutes. Lower the speed and add milk until it reaches spreadable consistency. Tint TINY dabs of food gels to decorate.

1 Comment · Labels: American/Mediterranean, Dessert, Food Fun, Recipes Tagged: banana cake, beauty's chocolate cake, best birthday cake, cake, chocolate buttercream, chocolate cake, chocolate ganache, moist chocolate cake, monkey cake, rocket cake, smitten kitchen, space theme, white chocolate, white chocolate frosting, yellow cake

Shrimp & Green Bean Purée (Chingri ar Beans Bhorta)

December 31, 2013

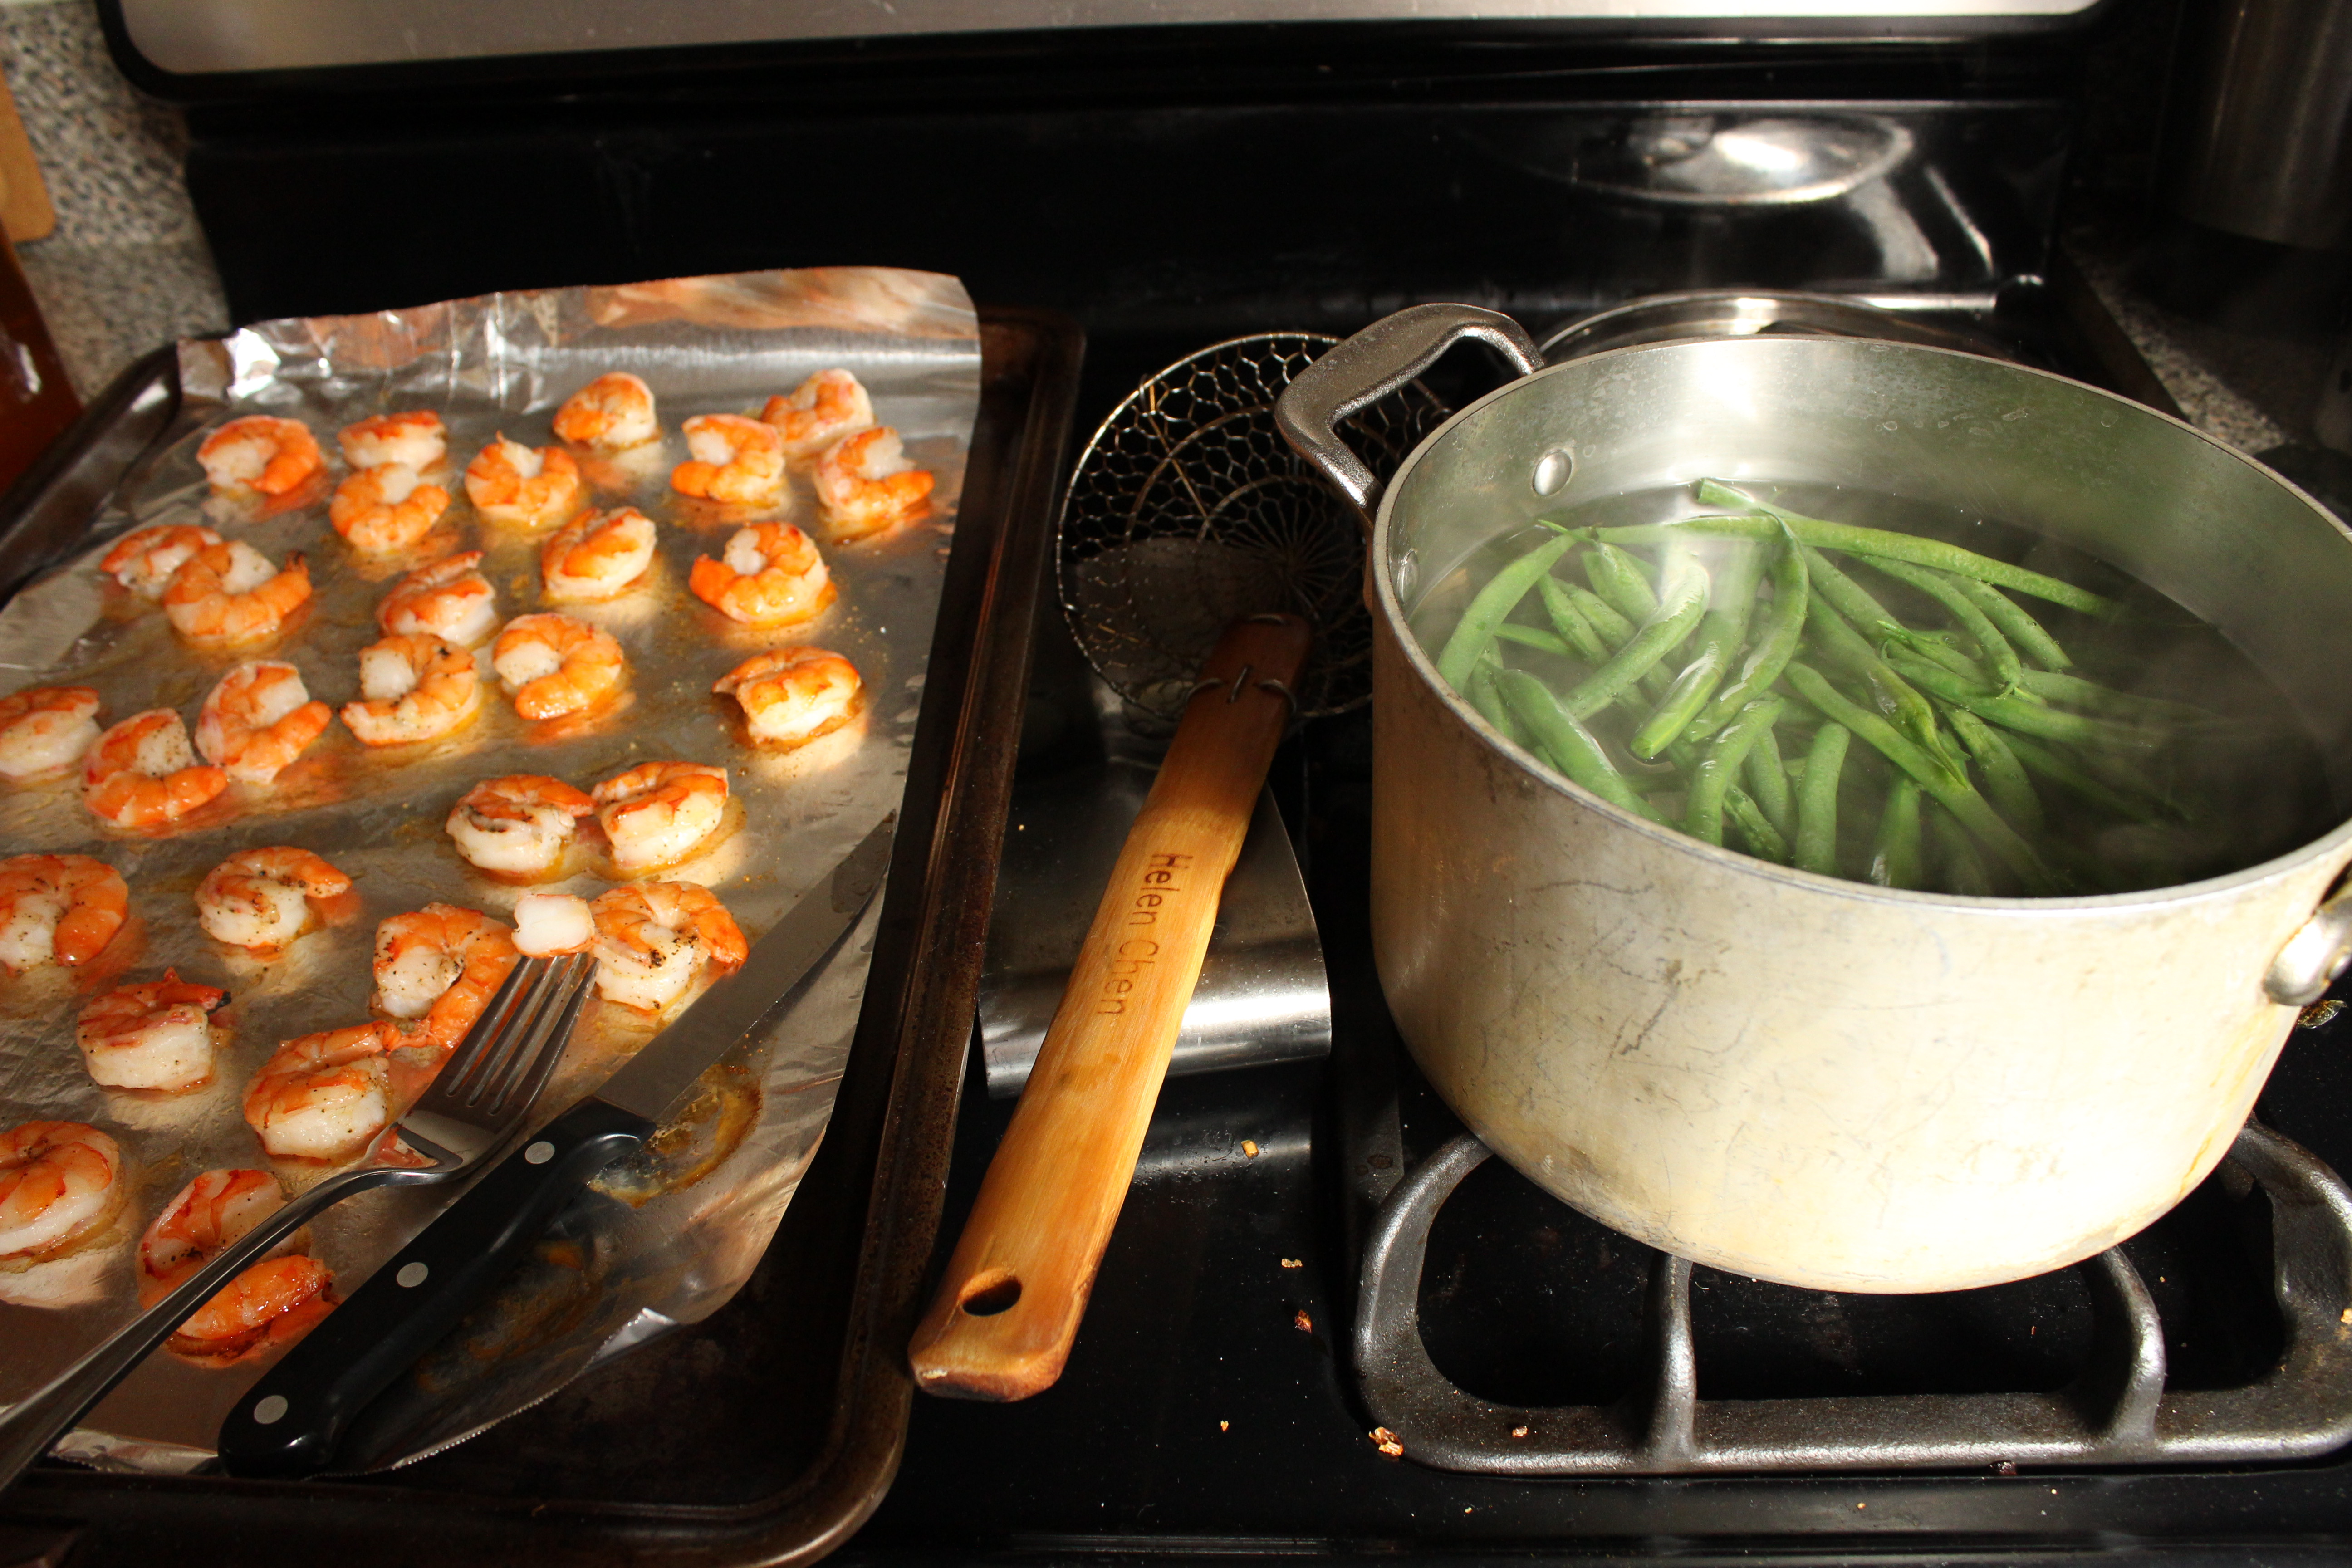
ImageI don’t really give a lot of thought to New Years resolutions. Calendars are such a man made construct – how is tomorrow more or less relevant than today? I know I seem like Buzz Killington here, while everyone is hastily getting ready for their NYE parties (and hey, I am, too). But I just got this email from wordpress reviewing the year in stats that made me reflect a bit. Although it is nowhere where I’d like to be, I’ve come a long way from the early days of dinky pictures in low lit spaces. I’ve learned a lot and have put a lot of work into sharing content that I think will be meaningful you guys. And as I make my way through my late twenties, I definitely feel the pressure to do something I am proud of, improve and grow, and do right by my kids.ImageSome of my favorite posts from this past year was Julia Child’s glorious ratatouille, the traditional Bengali Rice Pilaf that was actually approved for submission into Foodgawker, and the Sticky Toffee Pudding that I thought photographed so beautifully. I am proud though, of the progress I’ve made. Starting out with some not so relevant recipes to some pretty handy dandy ones for newbies to the [especially Bengali] kitchen. And though I haven’t garnered nearly enough traffic to consider myself a success, I’ve thoroughly enjoyed hearing anecdotes from you guys about the different recipes you’ve tried and your personal success stories in the kitchen. ImageA friend of mine posted on my Facebook page saying, “You inspire me to cook!” and I thought to myself, that is the whole reason I started this blog in the first place. To share some recipes or insights with people who don’t have the time or resources to spend in the kitchen. So to them, and to anyone else reading this, THANK YOU for making 2013 such a great year for Kitchen3N. I look forward to sharing more goodies with you guys in the years to come. ImageNow, what is a bhorta? They are usually made from boiled/steamed vegetables or dried fish, then ground to a pulp using a shil pata (stone slab, kind of like mortar and pestle), along with raw onions, green chilis, salt and mustard oil. Sometimes dried red chilis. They are CRAZY good. My mom’s experimented with the preserved fish readily available in this country: anchovies, sardines, etc. But this one is the best. Some permutations include lime leaves (which can be hard to find, which is why I improvised with lemon zest and lemon juice). These aren’t traditional ingredients but they help brighten up the flavor without using way too much salt. It’s a great low fat side. Be warned though: it is spicy! Of course you can adjust it to your taste, but for an authentic Bengali experience, crank up the heat! Image

Ingredients

  • 1/2 lb large shrimp, peeled, deveined and tails off
  • salt, pepper and olive oil
  • 3/4 lb string beans, stems off
  • zest of 1 lemon
  • 1 tsp lemon juice
  • 1/2 cup cilantro, roughly chopped
  • 1/4 chopped yellow onion
  • 1 tbsp mustard oil (could probably substitute regular ol’ mustard)
  • 1/2 tsp salt (or to taste)
  • 2 green chilis, roughly chopped (add just one if you are a heat lightweight! and wear gloves if necessary…just don’t stick  your fingers in your eyes afterward!)

Directions

  1. This is unconventional, but it’s the only way I cook shrimp: toss shrimp with 1/4 tsp salt, 1/8 tsp pepper and 2 tbsp extra virgin olive oil. Spread onto a baking sheet and roast in a 400 degree F oven for 7 minutes (more or less depending on the size of the shrimp. Once cool enough to handle, chop roughly and transfer into a food processor.
  2. Next boil some water in a large pot. Once it comes to a full boil, add 1 tsp salt and add the green beans (do it in batches if necessary). It should take 5 minutes to cook through. Drain, chop roughly and add to food processor.
  3. Add the remaining ingredients to the food processor and blend to combine. Serve with rice and daal.

4 Comments · Labels: Bengali, Recipes, Side, Veg Tagged: bengali, bhorta, gluten free, healthy, puree, side, spicy, vegetables, veggies

Chicken Noodle Soup with Mushrooms and Swiss Chard

December 23, 2013

IMG_1961 This is what happens when you’re too lazy to properly defrost a chicken. So, I stuck this baby (read: chicken) into a stock pot with 4 quarts of water, and whatever aromatics or root vegetables I had on hand. In this case it was carrots, half an onion, an inch and a half of ginger root, thyme and a bay leaf. I didn’t even half enough garlic (just a few cloves) so I saved it for the mushrooms and swiss chard. And I just let it simmer away during our morning routine.  IMG_1938

The whole process was organic. I’m sure we’ve all been there. Just make do with the ingredients you have on hand and pray that it is edible…which explains why my soup is brimming with pappardelle instead of a more sensible noodle.  Sometimes it works and sometimes, it just falls flat. Well this one was a winner! I kind of despise traditional chicken soup that is so full of salt that you would just float if thrown into the Atlantic after eating it…without even trying. So I looked for all kinds of ways to add flavor. The mushrooms. The swiss chard. The lemon juice. The soy sauce (to enhance the umami taste of the mushrooms, duh). The result was a refreshing, healthy and FILLING chicken noodle soup (no soda on the side).

Ingredients

  • 2 tbsps olive oil
  • 1/2 yellow onion
  • 3 cloves of garlic, minced
  • 1 3.5 oz package shiitake mushrooms, stems removed and sliced
  • 1 10 oz package kaleidoscope chard, or 1 bunch of your favorite dark greens (kale, spinach), rinsed, chopped and ready to go
  • 1/2 tsp salt
  • 1/2 tsp pepper
  • juice from 2 lemons (do NOT let any of the seeds in!)
  • 1/4 cup soy sauce
  • 3 quarts low sodium chicken stock (see recipe below)
  • 1/2 lb egg noodles
  • 2 cups shredded chicken
  • salt and pepper to taste

Directions

  1. In a large pot, heat the oil over medium high heat. Add the onions and cook until tender (about 5 minutes). Add the garlic and cook until fragrant (about 30 seconds). Add the mushrooms and allow them to brown slightly before stirring (this helps develop the flavor). After a few minutes, add the swiss chard, salt, pepper, lemon juice and soy sauce. Give it all a stir and add the chicken stock. Bring to a boil and set your timer. Then reduce to a simmer (medium/medium low heat).
  2. The chard will take 10 minutes to cook. The noodles, in my case, took 4 minutes. So, at T-4 minutes, I added my pasta. If  your pasta take 8 or 9 minutes, well, I’ll let you do the math.
  3. Finally, add the chicken and let it warm through.
  4. Adjust for seasonings and serve. I like to add some crushed red chili flakes.

Chicken stock

When possible, I like to make chicken stock the Ina way. Just like her, I add everything (no need for peeling or chopping the vegetables) to a large stockpot, bring to a boil and let it cook (not at a raging boil, partially covered). Except I don’t let it boil away for 4 hours. I let it boil for 1 hour with the chicken, take the bird out and salvage what I can of the meat, and let the rest of the liquid reduce for another hour. Anyway, I made do with what I had on hand, which was the following:

  • a handful of baby carrots
  • 1 1/2 in ginger root
  • 1/2 yellow onion
  • 6-8 sprigs of thyme
  • 2 bay leaves
  • 1 tbsp salt
  • 1/2 tsp black pepper (4-5 peppercorns work better)
  • 1 3-4lb chicken
  • 4 quarts of water

Take the chicken out with a pair of poultry lifters very carefully letting the excess water drip back into the pot. Place on a cutting board until cool enough to handle. Shred the chicken by hand.

The stock works better when you have a full head of garlic you can throw in (cut in half) as well as parsley and dill. I’d love to try a tomato/cilantro/spicy version in the future. Will keep you guys posted!

Leave a Comment · Labels: American/Mediterranean, Carb, Main, Protein, Recipes

Sweet and Smoky Butternut Squash

December 12, 2013

IMG_1916I’ve been eating bad lately. Like oreos bad. Like soup from a can bad. Now keep in mind, I’m not exactly a health nut. I don’t do juice cleanses or quinoa. Kale rarely makes an appearance at our dinner table (I prefer swiss chard). But, I tell myself I’m eating ok as long as I get plenty of veggies, minimize the processed foods and eat only sweets I bake myself. Butter and oil are ok, in my book, since I don’t eat fried foods on the regular. But something happened after Thanksgiving. Burnout, perhaps? Winter weather? I guess I’ve been entertaining and cooking a lot recently. So combine that with two kids, NYC’s first snow storm, homeschooling stuff and going back to work (part time), and less frequent help from grandma. Yes – that spells burnout. IMG_1905So much so that I’ve been neglecting this poor butternut squash for like a week and a half. It really was a testament to this vegetable’s shelf life. But, today was the day. Both kids napped (simultaneously)! The sun came out! I had a wrap for lunch while this was in the oven! Hallelujah.

I was definitely thinking about barbecue sauce when I made this. I saw Ina’s recipe for Caramelized Butternut Squash as well as this recipe for Southwestern Roasted Butternut Squash and thought, “Hey now, I think I’m on to something.” Kind of like the guy who first discovered the food warming capability of microwave radiation (when the chocolate in his pocket melted…what a fatty. I don’t even keep chocolate in my pocket. Ok ok I have way too much chocolate to store in a single pocket.). Or whoever discovered chocolate and peanut butter. Or sea salt and caramel. IMG_1917Everyone complains about how difficult it is to peel butternut squash, but after cutting my own poultry (don’t ask) this felt like a breeze! Anywho, tis the season for butternut squash. I’d love to hear what you think of this!

Ingredients

  • 1 2-3 lb butternut squash
  • 2 tbsp brown sugar
  • 1/2 tsp paprika
  • 1/4 tsp ginger
  • 1/4 tsp or a pinch chili powder
  • 1/2 tsp salt
  • 1/4 tsp black pepper
  • 2 tbsp olive oil

Directions

  1. Preheat oven to 400 degrees F. Line a baking sheet with aluminum foil and spray with grease.
  2. Peel squash and dice into 1 inch cubes. Lay them evenly on the sheet. Season with the remaining ingredients and using your hands, combine well.
  3. Bake in preheated oven for about 40 minutes. At 15 and 30 minutes, flip the pieces over using a spatula to ensure even browning. Check for seasoning. Enjoy while it’s still warm.

3 Comments · Labels: American/Mediterranean, Recipes, Side, Veg Tagged: butternut squash, easy side, eating healthy, gluten free, quick and easy side, roasted vegetable, side, sweet and savory, sweet and spicy

Homemade Hot Fudge

December 3, 2013

IMG_1890It’s bad enough that hot fudge you get from the ice cream spot around the corner is crack. But when you make it at home with good quality ingredients, Ghirardelli (like I did) or even better…Callebaut or Valrhona? This happens:

 (Image courtesy of Tumblr, katty-mee) 

We were entertaining some old friends and so I thought I’d set up a little sundae bar with some of my favorite toppings: this hot fudge sauce, walnuts, and sprinkles (the ROUND kind, not those silly cylindrical ones. hmmph. who came up with those?? i’ll tell you who, someone with kids because they know once these sprinkles make landfall, they get scattered EVERYWHERE.) Get fancy with bananas, gummy bears, whatever you like. Just not whipped cream. I just don’t get whipped cream over ice cream. The latter is so much more rich and flavorful, what is the point of the whipped cream?? If your opinions on this are as strong as mine, please comment below.IMG_1794This is the first thing I made from my copy of Rose Levy Berenbaum’s The Cake Bible. Ok second. First was Swedish pancakes, which were a disaster. Anywho, she says to use dutch processed cocoa, but honestly, I have such a hard time finding dutch processed cocoa (in fact most of her chocolate cake recipes call for it. I’m going to have to experiment with subbing natural cocoa and making the appropriate leavening adjustments) and never get around to ordering it online, so I just went ahead and made it with good old fashioned natural cocoa. As many of you know, dutch processed cocoa is less acidic than natural and usually has a darker color, but I can tell you I did not miss a thing. And for the solid chocolate, I am sure she finely chopped 3 ounces of THE BEST CHOCOLATE IN THE WORLD, but I just used my semi sweet chips from Costco. They are already flavored with vanilla, so I did not add any, as the original recipe calls for. Make this for your next lunch/dinner party!

Adapted from Rose Levy Berenbaum’s The Cake Bible.

Ingredients

  • 3 oz semisweet chocolate chips
  • 2 tablespoons unsweetened cocoa
  • 1/3 cup water
  • 3 tbsp unsalted butter
  • 1/3 cup sugar
  • 2 tbsp corn syrup
  • pinch salt
  • 1/2 tsp vanilla (if your chocolate isn’t already flavored with vanilla)

Directions

  1. Combine the chocolate chips, cocoa and water in a small saucepan (she suggests nonstick, but I used my usual stainless steel All Clad saucepan). Heat over medium heat, stirring constantly, until chocolate is melted and everything is combined. Add the butter, sugar, corn syrup, and salt. Stir until the sugar melts. Then let it cook away, boiling moderately, for 5 to 10 minutes, until the mixture reduces to 2/3 cup (I stopped at 5 minutes, weary of overcooking it). If you want to measure: coat a heatproof glass measuring cup with oil, then pour in the sauce.
  2. Cool slightly before adding the vanilla. Can be reheated in a microwave. Keeps in the fridge for 1 month.

Leave a Comment · Labels: American/Mediterranean, Dessert, Recipes Tagged: burnt sugar, chocolate, chocolate chips, cocoa, dessert, hot fudge, ice cream, ice cream sundaes, semisweet chocolate chips, sprinkles, vanilla

Rice Pilaf (Palau)

November 25, 2013

IMG_1777Begin rant: I’ve got social media fatigue. I even convinced myself at one point that it was a productive use of my time, because wasn’t I mainly reading news articles and stuff? Recently, that answer became a glaring NO. Buzzfeed compilations, vine videos, 20 ways to know you’re from this city or that farm or truly ghetto. And my feed is just filled with shares of blog posts from self declared intellectuals who think they have such pearls of wisdom. I learn more from my moments of quiet reflection, when I’m running or washing dishes, than I have after reading a dozen of said articles. The handful of books I’ve read on marriage and relationships have given me important tools – many of which I’ve seen recycled time and again in those pieces. I can probably count on one hand articles of merit I’ve found through social media: Anne-Marie Slaughter’s famous article Why Women Still Can’t Have It All, NY Times’ The ‘Busy’ Trap, Nicholas Carr’s How the Internet is Making us Stupid, and The Extraordinary Science of Junk Food. So, my resolution is this: read more books. Reflect more. Check-in less. With this as an exception. IMG_1757End rant. On to the food. I know a lot of my (handful) of readers are on their own for the first time, either newly married, or going to med school (ok, that probably covers all of my readers). That’s why it’s important for me to cover all the bases of Bengali cuisine. And this rice pilaf (palau) is the quintessential dish for entertaining. Any time you have company, the main decision  you have to make is: biryani or palau + curries? Plain rice isn’t considered special enough, even though some of the best meals I’ve had consisted of plain rice, served with a plethora of spicy/tangy bhortas, curries and daal. Actually, ask any Bengali and they will probably prefer the homey meals to these elevated, reserved-for-guests spreads.IMG_1758Even apart from the traditional spread, this pilaf would make a fine accompaniment to any roast poultry dish. Which is why I was eager to share it with you in advance of Thanksgiving, in hopes that you might give it a try in lieu of your usual rice or carb. IMG_1759Onions get caramelized and lend a sweet component.  Toasted rice and browned butter give it depth. The whole thing gets hit with a wonderful concoction of aromatics: garlic, ginger, cardamom, cinnamon and bay leaf, providing the warmth and flavor. IMG_1761And the whole thing comes together pretty quickly, as long as you let the rice soak in some water while you get the onions going. The peas are optional, and often not included in Bengali rice pilafs (more common in North Indian cuisine). But I like to add them in to convince myself I’m feeding the kids something healthy. IMG_1774I served this alongside another classic for-entertaining-only dish: chicken korma, a sweet and savory chicken cooked in a curry/cream sauce, and spicy shrimp bhuna. And of course, salad! You definitely need a side salad to cut the richness. Followed by ice cream sundaes with homemade hot fudge (the recipe for that coming soon!).  Pretty darn good if I do say so myself.

Ingredients

  • 4 cups long grain basmati rice
  • 1 tbsp olive oil or vegetable oil
  • 1/2 stick butter (1/4 cup)
  • 1/2 large Spanish onion, thinly sliced
  • 2 garlic cloves, minced
  • 1/2 tsp ground ginger (alternately you can use 1 heaping tsp of garlic/ginger paste)
  • 3-4 cardamom pods (or 1/2 tsp ground cardamom)
  • 1 cinnamon stick (or 1/2 tsp ground cinnamon)
  • 2 bay leaves
  • 1 tsp salt (or to taste)
  • 1 cup peas (optional)

Directions

  1. Pour the rice into a bowl and rinse the rice 3 times in cold water to get rid of excess starch. I know a lot of people say not to do it, since you lose some of the nutrients, but this is the way it’s been done for ages, so just do it. Add enough water to come up to the top of the rice, and let it sit. Set aside.
  2. In a large pot, add the oil and butter and heat over a medium high heat. Once the bubbles subside, add the onions. Stir occasionally and let brown. This will take at least 10 minutes. Once brown, add garlic and ginger. Stir. Then, working quickly, drain the excess water from the rice and add the rice to the pot. Stir constantly, to toast the rice in the butter and to redistribute the onions and garlic throughout the rice. Once everything is nice and toasty (about 5 minutes), add 6 cups of water (rice should be submerged in the water, with the water coming up about 1 in over the rice). Add the cardamom, cinnamon, bay leaves and salt. Bring to a boil, then reduce to a simmer over low heat. Cover.
  3. After letting it simmer for 10 minutes, check for doneness and seasoning. If the rice is just about cooked through, add the peas, if desired. Stir gently (or fluff with a fork if not using peas) and cover, turning off the heat. The rice will continue to steam off the heat.

4 Comments · Labels: Bengali, Carb, Recipes, Side Tagged: basmati, bengali entertaining, bengali food, bengali party, entertaining, gluten free, long grain rice, palau, peas, rice, rice pilaf, side dish

Cranberry Relish (Achar)

November 20, 2013

IMG_1740I’m not a pickle/relish/chutney person. My husband is not a turkey-with-all-the-fixin’s kind of guy. So this is how I strive to compromise. You see, I am hosting Thanksgiving dinner this year. It will be pretty small, just my family and his. But there are a few characters in this production who absolutely do not enjoy anything outside the rice and curry/biryani paradigm. So, my spread will look something like this: roast turkey (brined in buttermilk, stuffed with orange, garlic, thyme and sage flavorings), my mother in law’s khichuri, mashed potatoes, salad, either a green bean casserole or sweet potato dish, and this relish. I love cranberry sauce, but in order to make it more palatable for my husband, his brother, and my dad, I thought I’d prepare it according to the traditional Bengali method for achar (non vinegar based relish). It’s sweet, spicy, and tart all at the same time. Obviously cranberries aren’t available in Bangladesh, but they remind me of this other berry like fruit that they do use for achar. The result was pretty good!IMG_1725Mustard oil is not so common in American grocery stores, but if you’ve made the trip to an Asian grocery to get any of the other ingredients required in this (dried red peppers, pach forom), you’ll definitely find the mustard oil. The second it hits the heat, a wonderful aroma fills the whole house. If you can’t find it – don’t fret. Make it with vegetable or olive oil. The result will be a much more mellow relish. Then come all the other aromatics: pach forom, garlic, and red pepper. The seeds will start to pop once they get heated through…time to quickly add the other ingredients!IMG_1726When working with the red peppers, simply snap them in two with your fingers and dump all the seeds out onto the cutting board. Then, when you add them to the hot oil, stand back and prepare for a pepper onslaught on your sinuses! Make sure your vent is going and windows are open, otherwise you’ll find yourself and the rest of your family members in a coughing fit. At this point, I know what you’re thinking: this is really, really weird. And I’ll admit – it’s not for everybody. But if occasionally you find yourself longing for the sweet and spicy relishes of your childhood, this will definitely hit the spot! IMG_1738We would normally serve this with rice or luchi, but I’m sure it would be great on toast. You can make this with pach forom (which I’ve discussed before here) or with anise or fennel seed (which I actually prefer, since the black seeds in pach forom are a bit strong for me). Hope you try this if you’re looking to spice up the usual cranberry sauce! I would love to hear about your Thanksgiving traditions!

Ingredients

  • 12 oz fresh cranberries
  • 1 cup water or orange juice
  • 1 tbsp mustard oil (or olive oil)
  • 1 pinch pach forom or anise seeds or fennel seeds
  • 2 cloves garlic, minced
  • 3 dried red peppers, cut in half, de-seeded
  • 2 tsp salt (or to taste)
  • 5 tbsp sugar or molasses (or to taste)
  • 1 pinch chili powder

Directions

  1. Place the cranberries and juice/water in a medium saucepan and bring to a boil. As soon as the cranberries start to pop, remove from heat.
  2. In a medium (9 or 10in) nonstick skillet, heat the msutard oil over medium high heat. Add the pach form or anise/fennel seeds. Once they start to pop, add garlic and chili. Heat through, until fragrant (about 30 seconds). Add all of the cranberries, along with the juices to the skillet. Season with salt, sugar, and chili powder. Give it all a stir and lower the heat to medium. Let it cook through, until liquid reduces and mixture thickens (not completely: it will continue to thicken off the heat), about 5-7 minutes. Check for seasoning.
  3. Remove from heat. Let it cool. Store in a glass jar or other container. Refrigerate. Consume within two weeks.

3 Comments · Labels: Bengali, Recipes, Side, Snacks Tagged: accompaniment, achar, chutney, cranberries, cranberry sauce, mustard oil, pickle, red peppers, relish, sauce, sweet and savory, sweet and spicy

  • Newer Entries
  • 1
  • …
  • 10
  • 11
  • 12
  • 13
  • 14
  • …
  • 17
  • Previous Entries
American, Bangladeshi. Savory, sweet. I don't discriminate and neither should you.

Most recently…

Load More...
Follow on Instagram

Social

Subscribe to Blog via Email

Enter your email address to subscribe to this blog and receive notifications of new posts by email.

Tags

appetizer beef bengali breakfast butter cake caramel chicken chocolate chocolate chips cilantro clean eating coconut comfort food cookies dessert dinner entertaining fall fruit ganache gluten free halal healthy homemade honest chops honest creations iftar italian pasta pastry pistachio quick and easy dinner ramadan recipe side side dish south asian spinach vegan vegetables vegetarian weeknight dinner weeknight meal whipped cream

Theme by 17th Avenue · Powered by WordPress & Genesis