Kitchen3N

Recipes and food fun from Apt 3N

  • About
  • Gallery
  • Recipes

Cauliflower Stir Fry

January 10, 2017

fullsizeoutput_4831

I had to make something vegetarian after my husband made me watch HBO’s Vice the other day. This particular episode was on the industrialization of the meat industry and man was it terrifying. The ghastly amounts of meat we eat day in day out. How the farm-to-table movement is essentially our savior if we want to reap the rewards of our earth in any sort of sustainable fashion. Scary stuff! But we can do our part by 1) supporting businesses like Honest Chops and local farmers market vendors that only source from sustainable farms and 2) eating less meat. There’s a world of protein out there (eggs! chickpeas! tofu!) explore!
fullsizeoutput_4834

If you’ve been trying to to eat less meat, or just eat/cook more vegetables at home, I’ve summarized some pointers for cooking veggies below. Luckily for you I’ve made so many mistakes when cooking veggies throughout the years I have some words of wisdom to impart, especially when dealing with cauliflower:

  • Don’t waste. I use the outer leaves as well as the florets. It’s often discarded in American cooking shows, but why the heck wouldn’t you eat it?I just toss the tough inner core, and finely chop the rest. Time consuming, but a worthwhile endeavor.
  • Dicing it into tiny tiny pieces is major key. Cauliflower can be bland, so the best way to ensure it absorbs as much flavor as possible, is by dicing it super small, increasing its surface area.
  • Sequence is also key. Once you start cooking vegetables regularly, you get a sense for which ones take longer to cook than others. Root vegetables like carrots, potatoes and turnips always take longest. Then onions, peppers and cruciferous veggies (broccoli, cabbage, cauliflower, collard greens, kale, etc.). Finally, your tender greens (zucchini, spinach, peas).
  • Garlic is your best friend. With some veggie dishes like spinach or broccoli/mushroom stir fry, I’ll fry the garlic in the oil so it the flavor of the garlic diffuses through the dish. I only do this for quick cooking vegetables. If you try to do this in a dish like this, or potato hash, the garlic will simply burn. Thus I add it after the vegetables have had an initial cooking period.
  • anchovy paste is also a fun way to flavor your vegetables. It’s salty and nutty when dissolved in oil. A fun trick I learned in Italy.

img_8551

The same guidance I gave for the garlic goes for the mustard seeds. Many recipes will say to first heat mustard seeds or pach phoron (Bengali 5 spice) in oil until they start to pop. Once again, because the total cook time for a stir fry with veggies in this quantity can go over 20 minutes, I wanted to avoid burning any of the elements.
img_8555
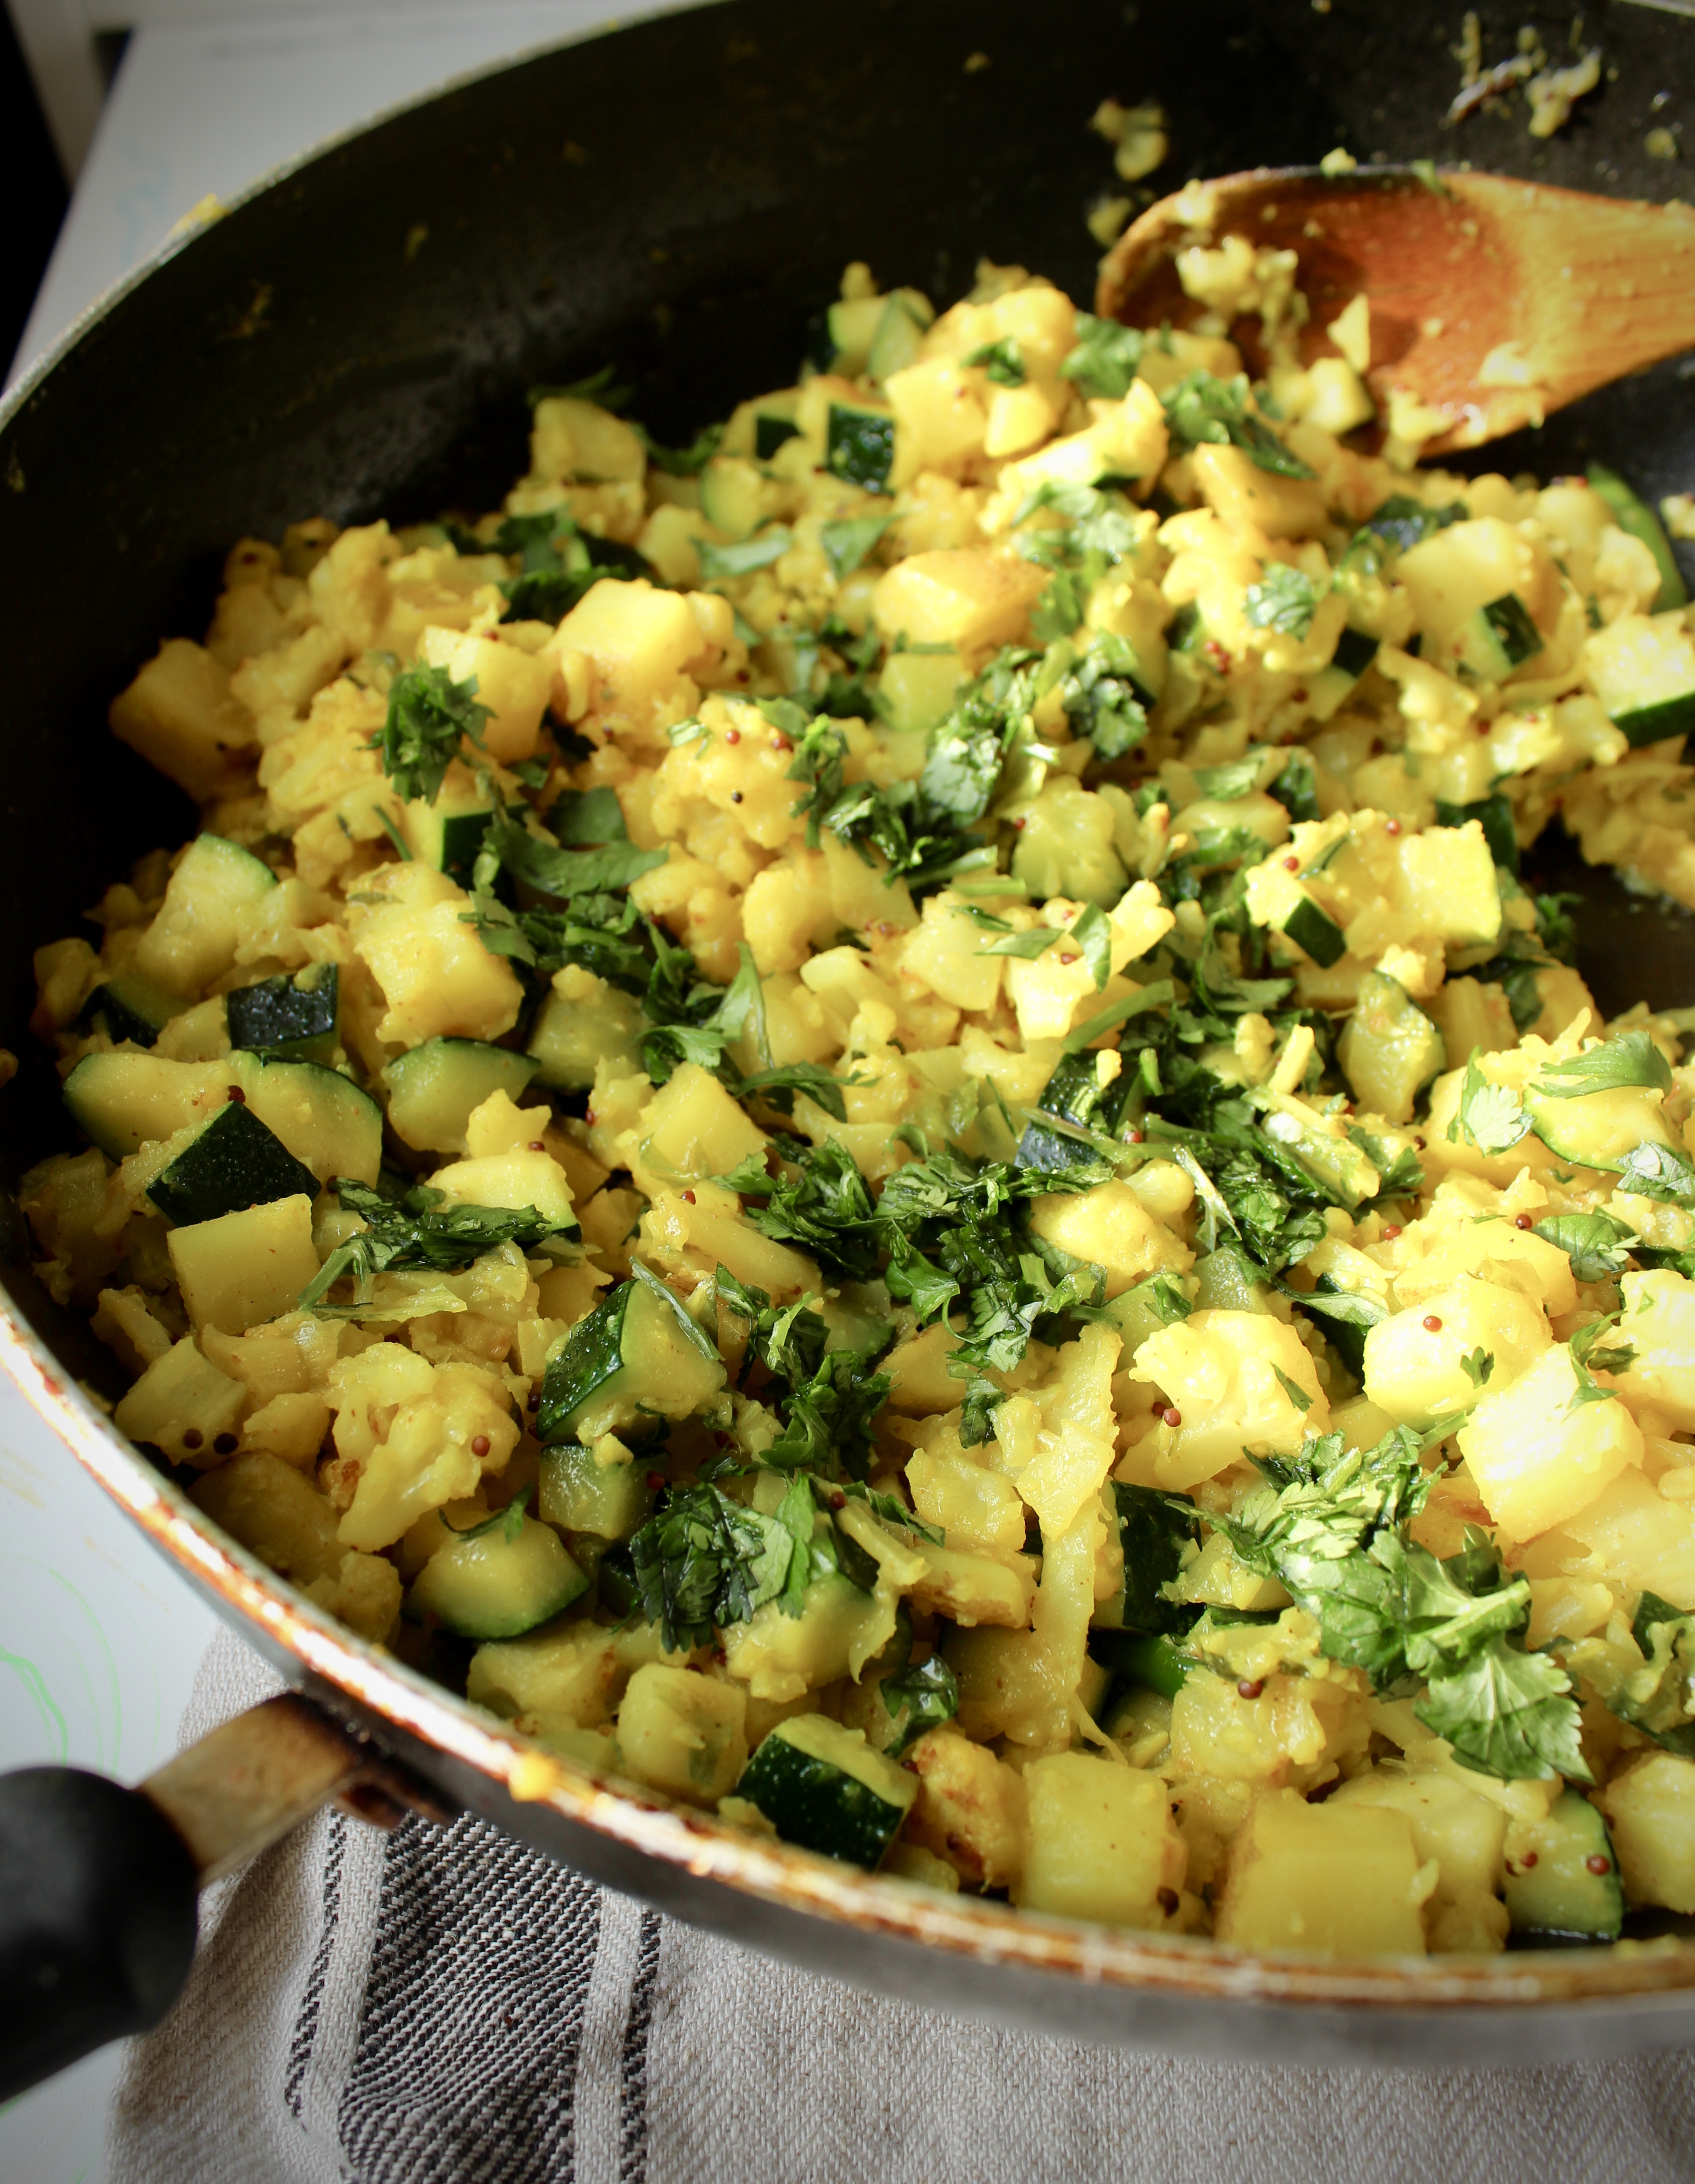
Hope you enjoy this Bengali staple and add it to your Meatless Monday menu. The zucchini at the end can be swapped out for many other vegetables. Growing up my mom would always keep a bag of frozen mixed vegetables, to add to a stir fry like this and really stretch a buck.
fullsizeoutput_4832

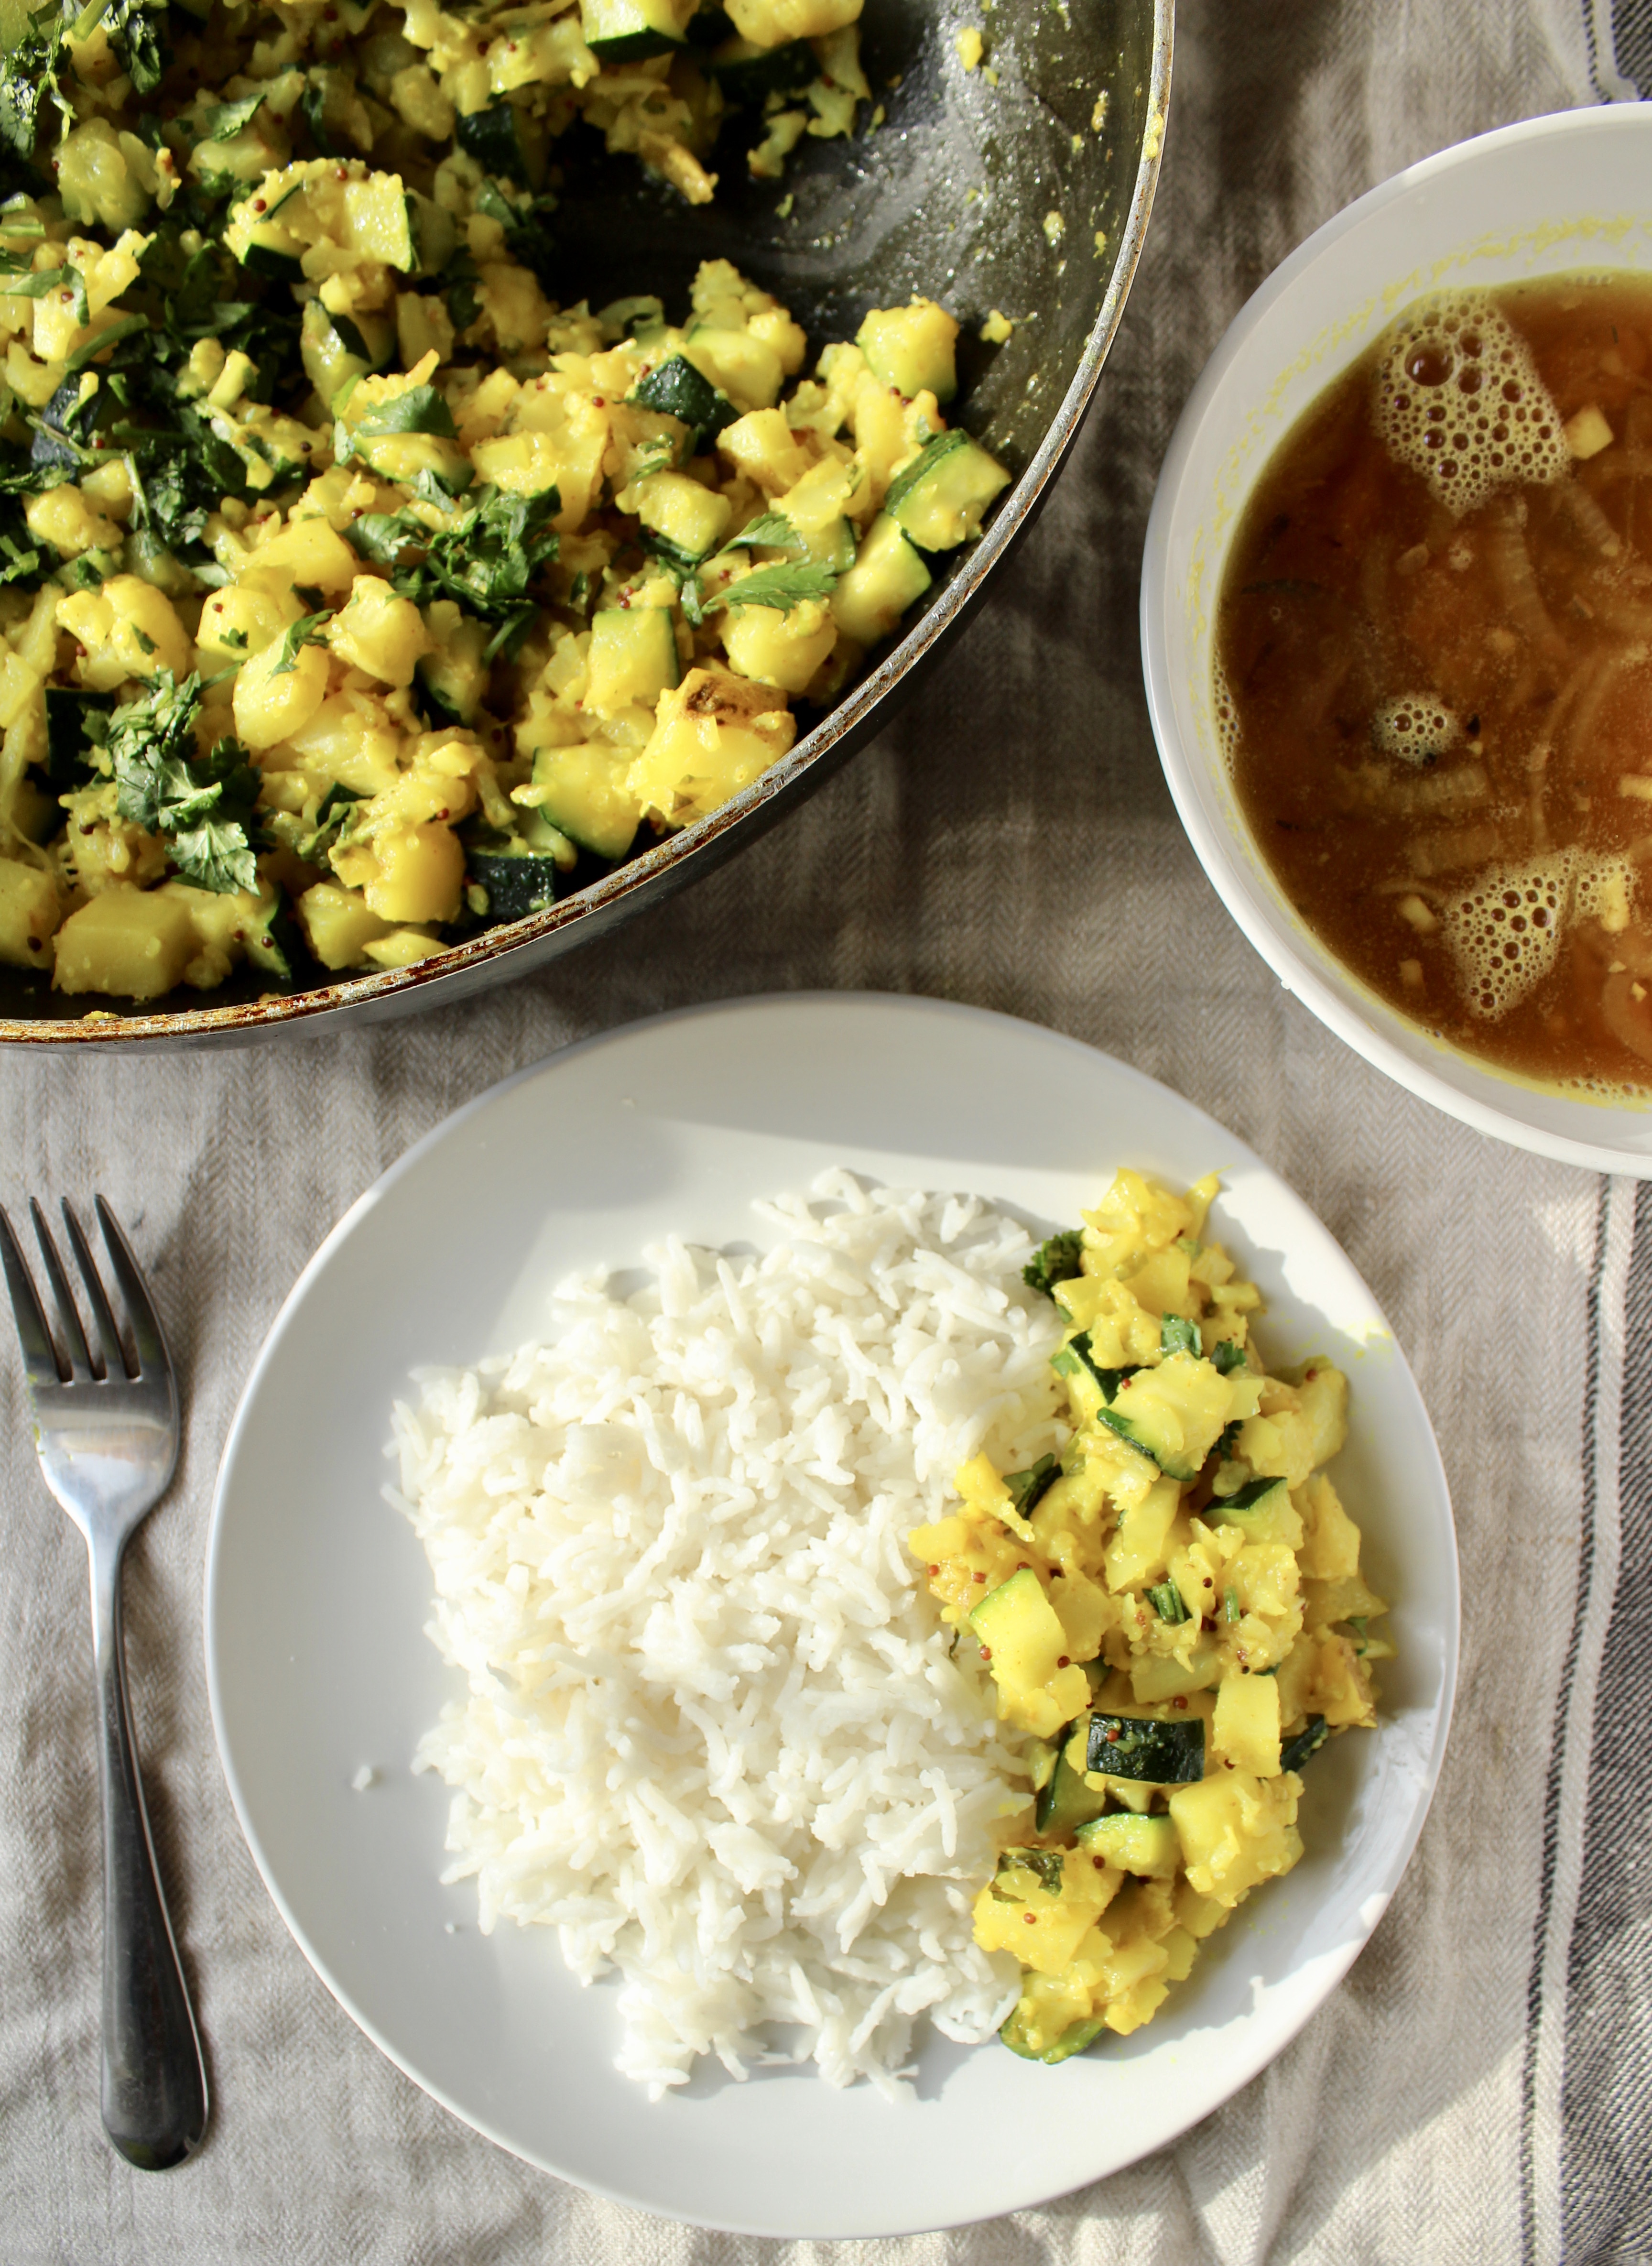
Serve with rice, daal, and any other protein of choice.

Ingredients

  • 1/4 cup olive oil
  • 1 large potato, diced small
  • 1 head cauliflower, diced small
  • 1 tsp mustard seeds
  • 4 cloves garlic, minced
  • 2 tsp salt
  • 1 tsp turmeric
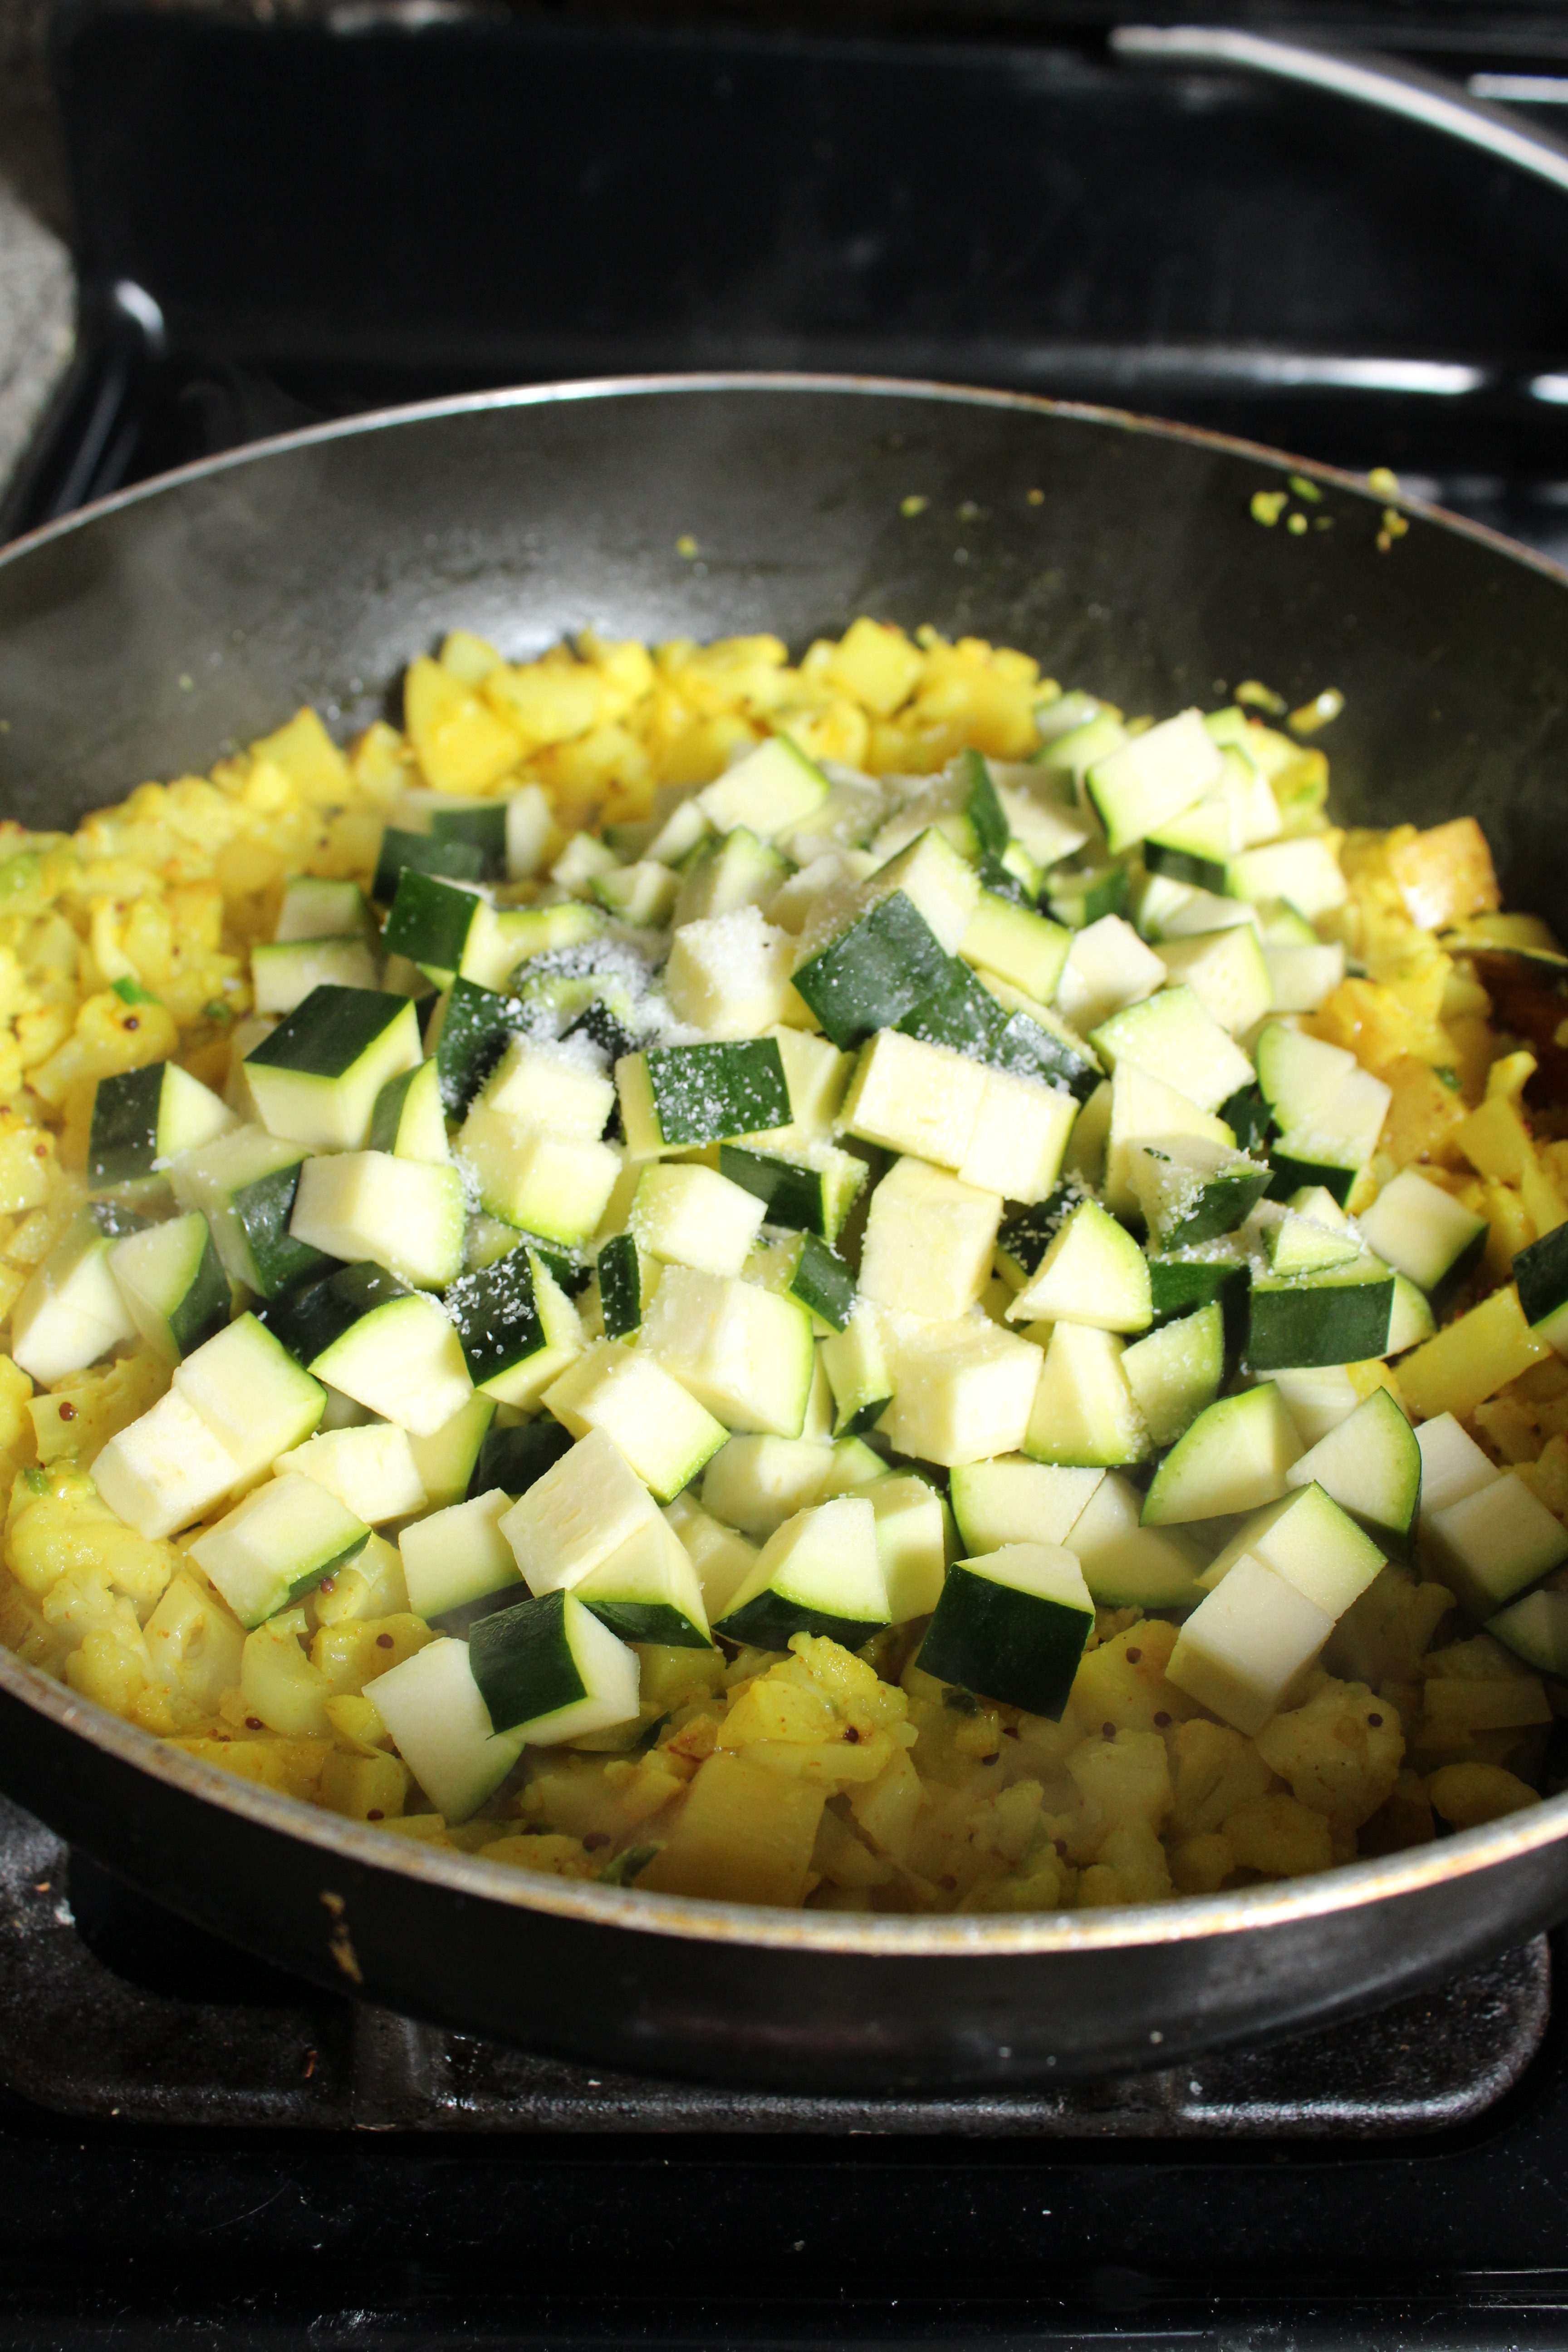
  • 2 zucchini, diced small
  • 2-4 green chilis, split down the middle
  • 1/2 cup chopped cilantro, finely chopped

Directions

  1. In a large wok, heat oil over medium high heat. Add the potatoes in a single layer, then the cauliflower on top of them. Allow to cook for 2-3 minutes without stirring.
  2. After the potatoes have started to cook, stir to evenly distribute the cauliflower and potato, and add the mustard seeds, garlic, salt and turmeric. Depending on whether you like it spicy or not, add the chilis at this stage as well. Stir to combine and cook for 10-12 minutes, stirring occasionally.
  3. Add the zucchini and continue to cook. If you like your feed less spicy, add your chilis now. Cook for an additional 7-8 minutes or until all the vegetables are tender. Take care to moderate the heat, and move the vegetables from the bottom of the wok to the top, so nothing browns excessively and all the veggies cook slowly.
  4. Add the cilantro in the last minute of cooking. Taste for seasoning. I used a total of 2 3/4 tsp salt when I made this dish. Serve with white or brown rice.

Leave a Comment · Labels: Recipes, Side, Veg Tagged: bengali, bhaji, cauliflower, healthy, meatless monday, side dish, vegan, vegetarian

Roasted Brussel Sprouts with Pomegranate

October 31, 2016

img_7559

The first time my husband had brussel sprouts, he boiled them, and ate them without any seasoning. This demonstrates the extent of his culinary abilities.

Since then, he’s swore he would never eat them.

Except one Thanksgiving when I roasted them til they were crisp outside, tender inside, and had a salty bite. That year, the brussel sprouts were cleaned up!! There wasn’t a single one left. As with most foods, proper preparation is key. Add some pomegranate arils and reduced pomegranate juice to the mix, and you get a perfect balance of salty/acidic/crispy/creamy.

I love the NY Times recipe, except I found cooking them at such a high temperature burned my tiny brussel sprouts! It may be because I roasted them on a rack placed on the lower third of the oven (I find that level works best for my cakes). I suggest cooking them at 375 degrees, then checking them at 30 minutes. If they look like they could use a bit more char, leave them in for 5 min longer.

img_7578

These taste best when they have a salty bite, but if you’re watching sodium levels, start at 1/2 teaspoon salt and increase to taste.

Recipe adapted from NYT cooking.

Ingredients

  • 1 lb brussel sprouts
  • 1/2 to 3/4 tsp salt
  • 2-3 tbsp extra virgin olive oil
  • 1 cup pomegranate juice
  • 1/3 cup granulated sugar
  • 3 tbsp pomegranate arils

Directions

1. Preheat oven to 375 degrees F. Wash and dry brussel sprouts well. With a small paring knife, trim off the bottom of each brussel sprout and slice them in half. Arrange them all on a large sheet pan lined with parchment paper and dress with the salt and oil. Mix to combine and spread out on sheet so they don’t steam, rather roast in the dry heat of the oven. Bake for 30-35 minutes.
2. In a small to medium sauce pan combined pomegranate juice with sugar. Bring to a boil over medium heat and turn the heat down to low. Simmer for about 25 minutes or until you have 1/4 cup of liquid left. Keep an eye as it might burn in the last few minutes.
3. Transfer roasted brussel sprouts to serving tray and add the pomegranate arils and drizzle some of the pomegranate reduction over the top. Taste for seasoning and adjust as necessary.

Leave a Comment · Labels: American/Mediterranean, Side, Veg Tagged: arils, brussel sprouts, eat your greens, eating clean, healthy, pomegranate, reduction, side dish, thanksgiving, vegetables, vegetarian

Braised Green Beans

October 22, 2014

IMG_2800 When it comes to vegetables, I find myself oscillating between tradition (oh, hello soggy vegetables swimming in grease and spices) and modernity (steamed, then tossed with garlic infused oil or vinaigrette). Even though I felt pretty good about myself cooking it until just cooked through, and going easy with the fat, I would always second guess myself when I’d go to my mom’s and find myself thoroughly enjoying her sides. Until I recently read about braising vegetables in Julia Child’s Mastering the Art of French Cooking. The idea is, you combine everything in a pot or saute pan: vegetable, fat, cooking liquid, seasonings, and you cook it through until the liquid evaporates and the veggies just finish cooking in the fat. PERFECT. IMG_2793Once you have the technique down, the possibilities are endless! Of course it takes some trial and error with each vegetable. They vary in cooking times, moisture levels, and sizes (of course it’s up to you how big or small to make your pieces). A few tips to recall are:

  1. Root vegetables take longer to cook. Account for that.
  2. I added a few smashed garlic cloves to the pot. You can feel free to add any seasonings you like with your vegetables: soy sauce, ginger, crushed red pepper flakes, garam masala, lemon zest whatever!
  3. When trimming the beans, take a small paring knife, cut just below the woody stem and pull down along the rib of the bean. That way you take off some of the fibrous part that runs along the middle. You can continue this motion when cutting the beans into thirds.IMG_2797

Slivered almonds also go well green beans. The only words of caution I have are stay away from chicken or vegetable stocks for this dish. The flavors concentrate and it just overpowers the vegetable (speaking from experience). Hope this helps for your upcoming holiday (or weeknight!) cooking.

Ingredients

  • 1 lb green beans, trimmed, cut into thirds
  • 1/4 cup water
  • 1 1/2 tbsp butter
  • 2 garlic cloves, smashed
  • 1/2 tsp salt (plus more to taste)
  • 1/4 tsp black pepper (plus more to taste

 Directions

  1. Combine all the ingredients in a large saute pan with a lid. Turn heat up to medium high and cook for about 5 minutes, covered. After 5 minutes, check for seasoning and consistency. If you like your beans with a bite, turn off the heat. If you like them tender (like I do), let it cook for an additional 2 minutes.

Leave a Comment · Labels: American/Mediterranean, Recipes, Veg Tagged: braised, braising, butter, french cooking, green beans, Julia Child, side dish, vegetable

Sambar

January 29, 2014

IMG_2157 Is anyone else desperately searching for flights out of this frozen tundra?? I know I am. And as much as I’d love a quick getaway, schedules and money are just slightly getting in the way. So if you can’t get away to the heat…bring it!

Let me start off by issuing an apology to any of my South Indian readers: I am sorry. This is not an authentic Sambar. For those who are less familiar, sambar is a traditional South Indian lentil and vegetable soup and is an accompaniment to pretty much any South Indian meal. You can dip your idli (rice cake) or dosa (rice flour crepe) in the spicy/tangy/savory broth. Or you can have it over rice, or the way I do: straight out of the bowl. This version came about after some extensive online searches for sambar recipes, as well as some deep soul searching into what ingredients I can make do with thus saving myself a trip to the store. I did not use Tur daal, as is traditionally used in sambars. No coconut or curry leaves. This is basically my usual daal, but with the addition of:

  1. mixed vegetables – so I can sneak some more veggies into my kids
  2. tamarind – to provide that distinctly tart taste
  3. cumin, coriander and chili powder – for a well rounded and spicy flavor profile
  4. and ketchup…because I was out of tomatoes.

I know, I know! Ketchup! But things changed when I got a bottle of REAL ketchup. Like organic ketchup, with no high fructose corn syrup. It’s not overpoweringly sweet. It tastes like…tomatoes. So it was really a wonderful substitute in this dish. I actually think I’m going to add it to more dishes (e.g. like my mother in law’s sweet chicken curry…the whole sauce is ketchup based!).

You can add as few or as many red chilis as you like. Just keep in mind, the longer you cook the chilis and sambar together, the spicier it will be. I prefer to just smush the chilis into the broth as I’m eating, little by little. But that’s only if you can handle the heat.

IMG_2197

Ingredients

  • 1/2 cup masoor daal, rinsed with water and picked through for any impurities
  • 8 cups of water
  • 3 large cloves of garlic, peeled
  • 4 dried red chilis
  • 1 cup mixed vegetables (I used an assortment of frozen peas, corn, edamame and peppers)
  • 2 tsps salt (or to taste)
  • 1/2 tsp turmeric
  • 1/2 tsp coriander
  • 1/2 tsp cumin
  • pinch of chili powder (or a 1/4 tsp depending on how spicy you like it)
  • 2 tbsp olive oil
  • 1/2 large yellow onion, thinly sliced
  • 1 pinch pach forom
  • 1 large clove garlic, minced
  • 1 tsp tamarind paste
  • 2 heaping tbsps good ketchup
  • a handful of cilantro

Directions

  1. Rinse the lentils in a medium saucepan and add the 8 cups of water. Add garlic and 2 of the chilis and bring to a boil over high heat. Watch carefully as it might overflow.
  2. Reduce heat to medium high and skim off the foam on top. Add the vegetables, salt, turmeric, coriander, cumin and chili powder and cook until lentils are cooked through (about 10 to 12 minutes).
  3. While that is going, heat the olive oil in a small to medium fry pan over medium heat. Add the onions and stir occasionally. When starting to brown around the edges, lower the heat and add the pach forom, minced garlic and remaining two chilis. Stir until fragrant, about 30 seconds.
  4. In a small bowl, dissolve the tamarind with some of the liquid from the sauce pan. Add back into the saucepan, along with ketchup and fried onion mixture. Add the cilantro and check for seasonings. It should have a slightly salty bite.

Leave a Comment · Labels: Bengali, Protein, Recipes, Side, Veg Tagged: daal, gluten free, healthy, ketchup, lentil soup, lentils, low fat, sambar, side dish, south indian, spices, tamarind, vegetables

Rice Pilaf (Palau)

November 25, 2013

IMG_1777Begin rant: I’ve got social media fatigue. I even convinced myself at one point that it was a productive use of my time, because wasn’t I mainly reading news articles and stuff? Recently, that answer became a glaring NO. Buzzfeed compilations, vine videos, 20 ways to know you’re from this city or that farm or truly ghetto. And my feed is just filled with shares of blog posts from self declared intellectuals who think they have such pearls of wisdom. I learn more from my moments of quiet reflection, when I’m running or washing dishes, than I have after reading a dozen of said articles. The handful of books I’ve read on marriage and relationships have given me important tools – many of which I’ve seen recycled time and again in those pieces. I can probably count on one hand articles of merit I’ve found through social media: Anne-Marie Slaughter’s famous article Why Women Still Can’t Have It All, NY Times’ The ‘Busy’ Trap, Nicholas Carr’s How the Internet is Making us Stupid, and The Extraordinary Science of Junk Food. So, my resolution is this: read more books. Reflect more. Check-in less. With this as an exception. IMG_1757End rant. On to the food. I know a lot of my (handful) of readers are on their own for the first time, either newly married, or going to med school (ok, that probably covers all of my readers). That’s why it’s important for me to cover all the bases of Bengali cuisine. And this rice pilaf (palau) is the quintessential dish for entertaining. Any time you have company, the main decision  you have to make is: biryani or palau + curries? Plain rice isn’t considered special enough, even though some of the best meals I’ve had consisted of plain rice, served with a plethora of spicy/tangy bhortas, curries and daal. Actually, ask any Bengali and they will probably prefer the homey meals to these elevated, reserved-for-guests spreads.IMG_1758Even apart from the traditional spread, this pilaf would make a fine accompaniment to any roast poultry dish. Which is why I was eager to share it with you in advance of Thanksgiving, in hopes that you might give it a try in lieu of your usual rice or carb. IMG_1759Onions get caramelized and lend a sweet component.  Toasted rice and browned butter give it depth. The whole thing gets hit with a wonderful concoction of aromatics: garlic, ginger, cardamom, cinnamon and bay leaf, providing the warmth and flavor. IMG_1761And the whole thing comes together pretty quickly, as long as you let the rice soak in some water while you get the onions going. The peas are optional, and often not included in Bengali rice pilafs (more common in North Indian cuisine). But I like to add them in to convince myself I’m feeding the kids something healthy. IMG_1774I served this alongside another classic for-entertaining-only dish: chicken korma, a sweet and savory chicken cooked in a curry/cream sauce, and spicy shrimp bhuna. And of course, salad! You definitely need a side salad to cut the richness. Followed by ice cream sundaes with homemade hot fudge (the recipe for that coming soon!).  Pretty darn good if I do say so myself.

Ingredients

  • 4 cups long grain basmati rice
  • 1 tbsp olive oil or vegetable oil
  • 1/2 stick butter (1/4 cup)
  • 1/2 large Spanish onion, thinly sliced
  • 2 garlic cloves, minced
  • 1/2 tsp ground ginger (alternately you can use 1 heaping tsp of garlic/ginger paste)
  • 3-4 cardamom pods (or 1/2 tsp ground cardamom)
  • 1 cinnamon stick (or 1/2 tsp ground cinnamon)
  • 2 bay leaves
  • 1 tsp salt (or to taste)
  • 1 cup peas (optional)

Directions

  1. Pour the rice into a bowl and rinse the rice 3 times in cold water to get rid of excess starch. I know a lot of people say not to do it, since you lose some of the nutrients, but this is the way it’s been done for ages, so just do it. Add enough water to come up to the top of the rice, and let it sit. Set aside.
  2. In a large pot, add the oil and butter and heat over a medium high heat. Once the bubbles subside, add the onions. Stir occasionally and let brown. This will take at least 10 minutes. Once brown, add garlic and ginger. Stir. Then, working quickly, drain the excess water from the rice and add the rice to the pot. Stir constantly, to toast the rice in the butter and to redistribute the onions and garlic throughout the rice. Once everything is nice and toasty (about 5 minutes), add 6 cups of water (rice should be submerged in the water, with the water coming up about 1 in over the rice). Add the cardamom, cinnamon, bay leaves and salt. Bring to a boil, then reduce to a simmer over low heat. Cover.
  3. After letting it simmer for 10 minutes, check for doneness and seasoning. If the rice is just about cooked through, add the peas, if desired. Stir gently (or fluff with a fork if not using peas) and cover, turning off the heat. The rice will continue to steam off the heat.

4 Comments · Labels: Bengali, Carb, Recipes, Side Tagged: basmati, bengali entertaining, bengali food, bengali party, entertaining, gluten free, long grain rice, palau, peas, rice, rice pilaf, side dish

Mixed Vegetable Stir Fry (Bhaji)

October 28, 2013

IMG_1625When I go to a Bengali restaurant for takeout, I usually overlook the greasy curried meat dishes or the fish floundering in murky masala waters and the bhortas that usually fall short of the homemade version. At most Bengali places, these dishes are laid out buffet style so you know exactly what you’re getting. I usually opt for one of the Biryanis (chicken or goat) and a side of some sort of mixed vegetable stir fry. These things always get me salivating. I guess it’s because they strike a fabulous balance of spice and sweetness. I’m not the type of person who goes gaga for sweet and spicy, but the sweetness in this dish is brought out by the slow caramelization of the vegetables (rather than sugar or honey) and just rounds out the flavor from the usual round up of spices, plus the extra Bengali zinger: pach phorom. IMG_1630Pach phorom is a combination of five aromatic seeds: black mustard, cumin, black cumin (also known as nigella), fenugreek (methi) and fennel. It can be found at any Indian grocery alongside all the usual spices. They have a licorice flavor, which adds an extra dimension to the dish’s flavor profile. This is important for vegetable dishes that have to compete with a follow up course of a rich meat or curried fish dish. IMG_1637This is something my mom made at the beginning of the week to just last the course of the whole week. It starts out with a base of softened onions, spices and garlic/ginger paste. You can play around with the vegetables to add your favorites, but to start, I used the two vegetables I found consistent in most Bengali mixed vegetable dishes: cauliflower and cabbage. Now, the two put together makes A LOT, so make sure your wok or pot is large enough to accommodate everything. I had to add the vegetables slowly, allowing some of the cabbage at the bottom to wilt and decrease in volume before adding more, and mixing to combine.  IMG_1641While that goes, you’ll want to work on the second batch of veggies in a separate pan. I used just 2 cups of plain old frozen mixed vegetables. You can use the equivalent amount of zucchini, pumpkin, butternut squash, peas, string beans, whatever you like as long as you have a balance of green, orange, and white veggies.  IMG_1643The cauliflower and cabbage steam in the wok for about 20 minutes. They get all tender and sweet. I ended up needing a shocking amount of salt but feel free to start out small and gradually increase to taste. Top with fresh cilantro. Serve alongside rice or naan or stuff inside a pita for a delicious wrap!IMG_1657IMG_1649

Ingredients

  • 1/4 cup light olive oil or veg oil
  • half a spanish onion, diced small
  • 1 tsp cumin
  • 1 tsp coriander
  • 1 tsp turmeric
  • 1 tsp pach phorom
  • 1/4 tsp chili powder (or more if you like it hotter)
  • 2 tsp garlic/ginger paste (or 2 tsp minced garlic and/or ginger)
  • 1 head of cabbage, cut into half inch strips
  • 1 head of cauliflower, stalks and florets cut into half inch pieces
  • about 5 green chilis (optional) with slits cut into them (also optional)
  • 2 tsp salt, plus more to taste
  • 1 tsp ground black pepper
  • 1/4 cup water
  • 1 tbsp light olive oil or veg oil
  • 2 cups frozen mixed vegetables
  • 1/2 tsp cumin
  • 1/2 tsp coriander
  • 1/2 tsp turmeric
  • 3 handfuls of cilantro

Directions

  1. Heat the oil over medium high heat. Add the onions and let soften for 4 to 5 minutes. Add the cumin, coriander, turmeric, pach phorom, chili powder and garlic/ginger paste. Stir to combine. Add the cabbage in batches, allowing the bottom most wilt a bit before adding the next batch. Continue until all the cabbage is in the pot. Stir to combine. Next add the cauliflower, one batch at a time, ensuring everything gets an even coating of the oil/onion/spice mixture.
  2. Add the green chilis, salt, pepper, and water and stir to combine. Put the lid on and let it steam. It will take approximately 15 to 20 minutes for all the vegetables to cook through. Occasionally lift up the lid, and stir the vegetables, bringing the bottom vegetables to the top so everything gets an even cooking. Take care towards the end not to break apart the cauliflower florets.
  3. In a separate shallow fry pan, heat 1 tbsp oil over medium high heat. Add the frozen vegetables and remaining cumin, coriander and turmeric. Season to taste. Break apart with a wooden spoon and stir to make sure everything gets seasoned and cooked evenly. When heated through, turn off the heat.
  4. When the cauliflower and cabbage are cooked through, add the mixed vegetables and cilantro and stir to combine. Add a teaspoon or two more salt, according to taste.

5 Comments · Labels: Bengali, Recipes, Side, Veg Tagged: bengali, bhaji, cabbage, cauliflower, gluten free, make ahead, mixed vegetables, panch phorom, side, side dish, stir fry, vegan, vegetarian

Julia Child’s Ratatouille

October 9, 2013

IMG_1558So, I’ve renamed my blog! Kitchen3n.com is now your source for traditional Bangladeshi as well as updated American and Mediterranean recipes. Please spread the word!IMG_1549Also, we have a winner for our giveaway! Congratulations to @DistractedDebra on winning the $50 gift card to Sur La Table! Happy shopping!IMG_1550It wasn’t going to be long before I posted something from my copy of Julia Child’s Mastering the Art of French Cooking (thanks to the hubby for the perfect birthday present!). My first attempts were some of the omelettes, the techniques for which she describes in painstaking detail. I had always heard that eggs were to be cooked low and slow…but she cooks them over very high heat for just a few seconds. And with all kinds of jerking, shaking and flipping action. All of which I failed at, miserably. So, I tried my hand at the ratatouille. Mainly because I had most of the ingredients on hand (a little short on the green pepper so I subbed red pepper). Also, I’d never had ratatouille before and seeing as how I LOVE eggplant, didn’t mind trying it a new way. IMG_1571And yes, that is a ruler you see in the previous picture. She is very specific about cutting the eggplant and zucchini into 3/8 inch slices (if my zucchini looks funny, it’s because TJ’s ran out of regular zucchini and only had baby zucchini left). The total cooking time was 1.5 hrs (active). I’ve never spent that amount of time on a vegetable casserole. But I wanted to do something by the book, and I wanted to make sure I did it just right. I didn’t by the way. In the final cooking, after the vegetables are layered and are set over a low heat to mellow out for ~20 minutes, she says to take care not to scorch the vegetables on the bottom. I scorched the vegetables on the bottom. Like many others, I will probably be making my ratatouille in the oven from here on out. The main flavorings come from the slow stewing with the tomatoes, a little bit of parsley and garlic. I would probably remake in the summer, when the tomatoes are at their ripest and have a lot to offer to the dish.

Not to say that it wasn’t tasty. You can definitely taste all the TLC (tender loving care) that went into its preparation. I would probably add a bit more seasoning next time (increased salt and pepper, perhaps some herbs de provence, more garlic). I’m not sure how it’s traditionally eaten in France, but it was fabulous alongside a piece of baguette and yes, you guessed it, even rice.

From Julia Child’s Mastering the Art of French Cooking

Ingredients

  • 1 lb. eggplant
  • 1 lb. zucchini
  • 1 tsp salt
  • 4 tbsp olive oil
  • 1/2 lb thinly sliced yellow onions
  • 2 sliced green peppers or 1 red, 1 green pepper
  • 2 to 3 tbsp olive oil
  • 2 cloves mashed garlic
  • salt and pepper to taste
  • 1 lb. firm, ripe, red tomatoes, peeled, seeded, and juiced (you can also use whole, peeled tomatoes in a can, just cut them across and squeeze gently to dispose of seeds and excess juice)
  • salt and pepper
  • 3 tbsp minced parsley
  • salt and pepper to taste

Directions

  1. Peel the eggplant and cut into lengthwise slices 3/8in thick, 3in long, and 1in wide. Prepare the zucchini similarly. Sprinkle the vegetables with salt and arrange on a wire rack over a baking sheet to let the excess moisture out (about 30 minutes).
  2. Heat up the olive oil in a 10 to 12in skillet over high heat. Fry the zucchini and eggplant, one batch at a time, for about 1 minute on each side until golden brown. Set aside.
  3. Add more oil to the pan and sauté the peppers and onion until soft (about 10 min). Add the garlic, salt and pepper to taste.
  4. Slice the tomatoes into 3/8in strips. Place them atop the peppers and onion. Salt and pepper to taste. Cover and cook over low heat for about 5 minutes. Then, uncover and baste the vegetables with the juices rendered. I turned off the heat at this point, which is why my ratatouille was saucy, but the original recipe directs to cook until all the liquid has evaporated.
  5. Layer the casserole in a cast iron or other fire proof casserole dish (2.5 qt): 1/3 tomato/pepper/onion mixture and 1 tbsp parsley, then half the zucchini/eggplant. Followed by another 1/3 tomato mixture and 1 tbsp parsley. Then the rest of the zucchini/eggplant. Finish with the last third of the tomato mixture and last tbsp of minced parsley.
  6. Cover and cook at low heat for 10 minutes. Uncover and cook for an additional 15 min, basting occasionally with the juices rendered. Adjust salt and pepper to taste.

3 Comments · Labels: American/Mediterranean, Dinner, Recipes, Veg Tagged: casserole, eggplant, french, gluten free, onions, parsley, peppers, provencal, ratatouille, side, side dish, stewed, tomatoes, vegan, vegetable, vegetable casserole, vegetarian, zucchini

Spinach and Tuna Sauté

August 30, 2013

IMG_1428

Try to do a better job than I did with the onions.

This  recipe is based off of one that my mom learned from our first hosts in American, way back in 1989 (listen up kiddos, fireside chat time). Of course, that one included all the usual spices found in Bengali curries (cumin, coriander, turmeric, chili powder). It was the perfect hybrid between American pantry basics and desi cooking. Props to Majumder Aunty for coming up with it! It’s great for so many reasons. Surprisingly flavorful for a straight-out-of-the-pantry dish. Really low budget. And quick. IMG_1436Frozen spinach is just such an all around winner. Always keep some in your freezer. So much easier to prepare than to rinse, cut, and cook fresh spinach, only for it to wilt down to nothing. And as per the tuna, I like the italian tuna packed in olive oil. So much more flavorful than the watered down chicken of the sea we used to have growing up. It’s amazing how much flavor tuna can impart on a dish when it’s not drowning in mayo and hiding in between slices of bread. I like to swap out the medley of spices for some freshly squeezed lemon juice and lemon zest. “Brightens up the flavor” as Giada would say. And because I made it kid friendly, I dialed back on the amount of chili flakes. My mom tosses in whole green chilis, but I rarely have those on hand. I did keep the coriander in there because I think it complements the lemon. But if you’re truly making something from the pantry, this dish would still taste great with just the garlic, salt and pepper. IMG_1443You can serve this with rice and daal. It would also be great on some crusty bread with a little bit of grated cheese (gruyere, fontina), pressed and served as a panini. It’s super versatile. Hope you try it out soon!

Ingredients:

  • 1 tbsp olive oil
  • 1/2 medium onion
  • 2 cloves garlic
  • 1 16 oz package of frozen spinach
  • 1 7oz can of tuna
  • 1/2 tsp coriander powder
  • 1/2 tsp salt (or to taste)
  • a pinch of red pepper flakes
  • zest from 1 lemon
  • a light squeeze of lemon (I despise too much acidity in my food, but if you don’t, then by all means, go to town on that thing!)

Directions:

  1. Dice onion. Heat up oil over medium high heat in a woke or large fry pan.
  2. Add onions to oil. While onions cook, mince garlic. Add to pan.
  3. Add frozen spinach, breaking it up with a wooden spoon. Add tuna, including the oil it was packed it.
  4. Season with coriander, salt, chili flakes. Stir over medium high heat until spinach and tuna are fully heated through and flavors combine (4 to 5 minutes).
  5. Off the heat, add lemon zest, juice, and extra chili flakes, if desired.

3 Comments · Labels: American/Mediterranean, Dinner, Recipes, Side, Veg Tagged: cheap, low budget, quick, quick and easy dinner, side dish, spinach, tuna, weeknight dinner

Mashed Eggplant (Begun Bhorta)

March 28, 2013

IMG_0824

I feel like most people, when asked what their favorite vegetable is, would say corn or butternut squash or potatoes (though I bet they actually like the salt and fat that comes with the potatoes). Or perhaps mushrooms. But not me. I. Love. Eggplant. Stewed with tomatoes (imam biyaldi). Simply fried with salt and turmeric (chaak bhaji). In a curry with the insanely boney hilsa fish. In the Sicilian sweet/savory relish known as caponata. In every way except babaghanoush (sorry, haters gon hate). Or this way: charred over an open flame, peeled then mashed with simmering onions, tomatoes, garlic and spices.

IMG_0816Now, I know traditionally a bhorta consists of some boiled or steamed vegetable (or dried fish) mashed or really well mixed with raw onion, Thai chilli, mustard oil, salt and cilantro. But one fine day my mom made this and said hey, this is begun bhorta. And even though the cooking process more closely resembles a mishti kumro ghonto (think: spiced, simmered pumpkin mush), it stuck.

IMG_0809 Charring it is a bit of a pain. The juices get all over the burner. Peeling the charred pieces of skin is a pain. But the payoff is well worth it. You could perhaps do it under the broiler. I haven’t given it a go. Right now I am sticking to tried and true methods of prep. So, here it is:

Ingredients:

1 medium eggplant, poked all around with a knife or fork
1 tbsp olive oil
1 small onion, diced (yellow or red)
2 cloves garlic, minced (or 1tsp garlic paste)
1 tomato, diced
1/4 tsp cumin
1/4 tsp turmeric
1/4 tsp coriander
A pinch of chilli powder
1/2 tsp salt, plus more to taste
A handful of fresh cilantro

Directions:

Over a medium flame, start charring the eggplant by placing directly onto heat and rotating using a pair of tongs every two minutes or so (or with your fingers if you’re hardcore like my mom). It should be cooked all the way through in about 10 to 12 minutes. Prep the rest of the ingredients in the meantime.

When the eggplant is done, remove from heat and allow to cool. Then peel off the skin using your fingers or tongs, doing the best you can to get as much of it off as you can. Cut off the top and set aside.

Heat oil over medium high heat in a wok or fry pan. Add onions and tomatoes. Allow to soften a few minutes, then add garlic and the rest of the spices/seasonings (if you only have garlic/ginger paste on hand, use that). Add the eggplant and break up any chunks using a wooden spoon. Lower the heat to medium/medium low. Mix it all together and let the flavors combine while prepping the cilantro.

Off the heat, add the cilantro and check for seasoning. Serve with basmati rice or roti.

Note: as with most bengali cooking, you do not need to follow a recipe to a T to get fantastic results. Feel free to use chopped Thai chili in lieu of the chili powder. Or a dash of mustard oil for more of a kick. For example, I had some extra red pepper on hand so I added it. Made it look a ton prettier. Just don’t skimp on the charring because it really makes this dish.

2 Comments · Labels: Appetizers, Bengali, Recipes, Side, Veg Tagged: bengali, bhorta, dinner, eggplant, puree, side dish, vegetable, vegetarian

American, Bangladeshi. Savory, sweet. I don't discriminate and neither should you.

Most recently…

Load More...
Follow on Instagram

Social

Subscribe to Blog via Email

Enter your email address to subscribe to this blog and receive notifications of new posts by email.

Tags

appetizer beef bengali breakfast butter cake caramel chicken chocolate chocolate chips cilantro clean eating coconut comfort food cookies dessert dinner entertaining fall fruit ganache gluten free halal healthy homemade honest chops honest creations iftar italian pasta pastry pistachio quick and easy dinner ramadan recipe side side dish south asian spinach vegan vegetables vegetarian weeknight dinner weeknight meal whipped cream

Theme by 17th Avenue · Powered by WordPress & Genesis